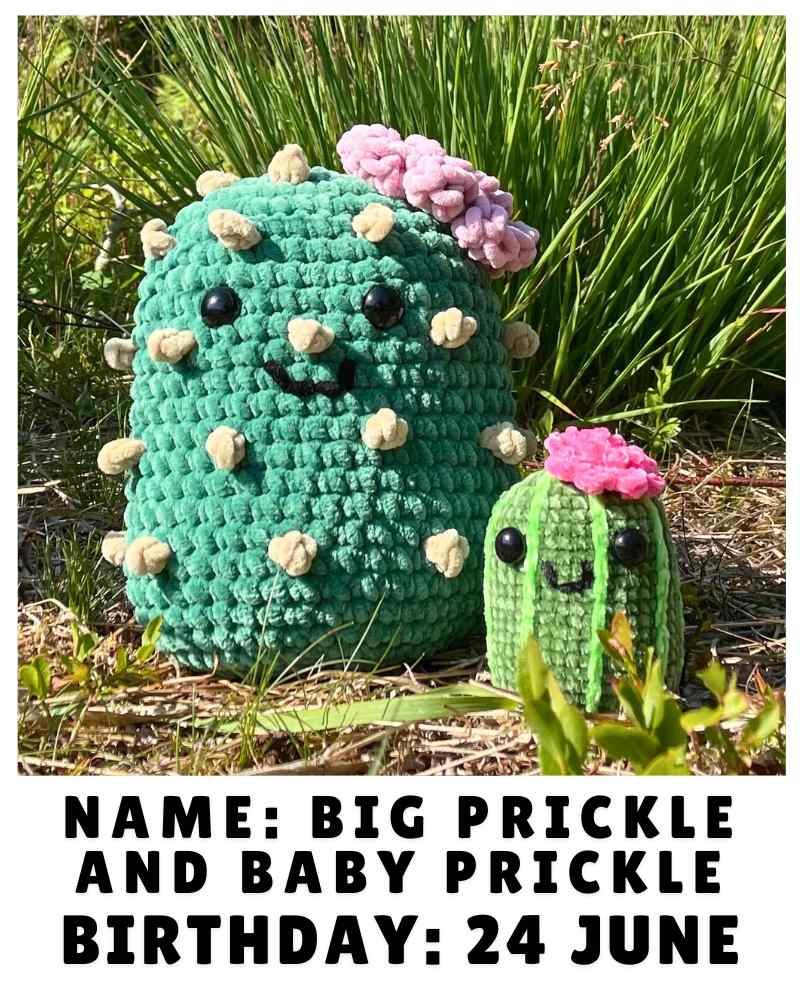
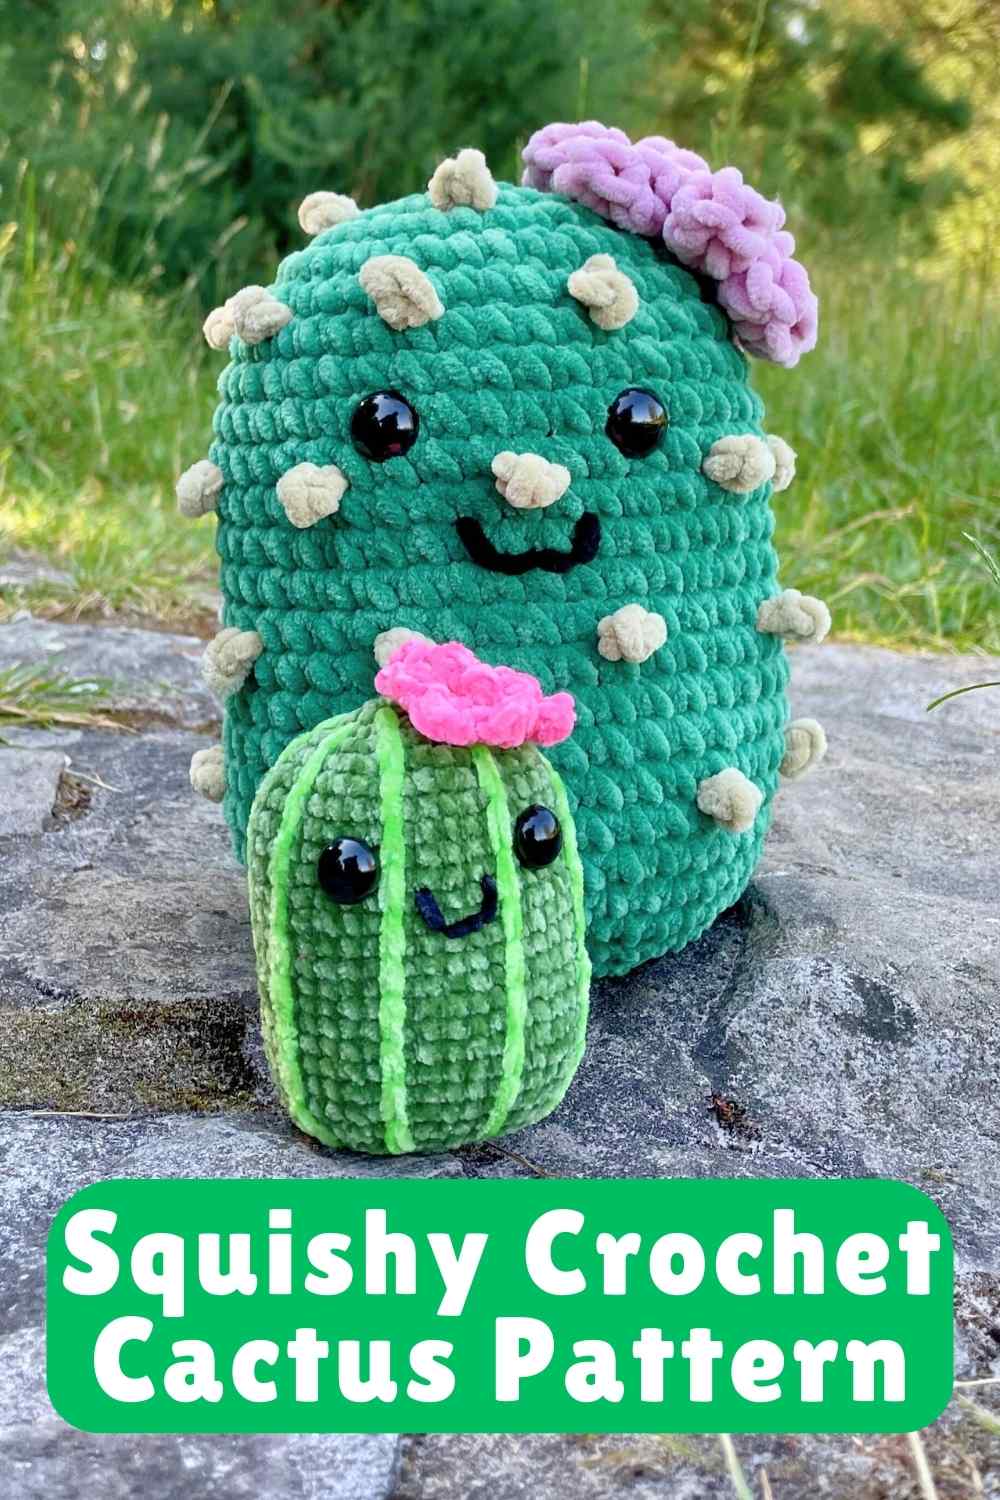
Squishy Crochet Cactus Pattern

Howdy! Welcome to my free squishy crochet cactus pattern. I’m really pleased that this pattern finally exists and is ready to share!
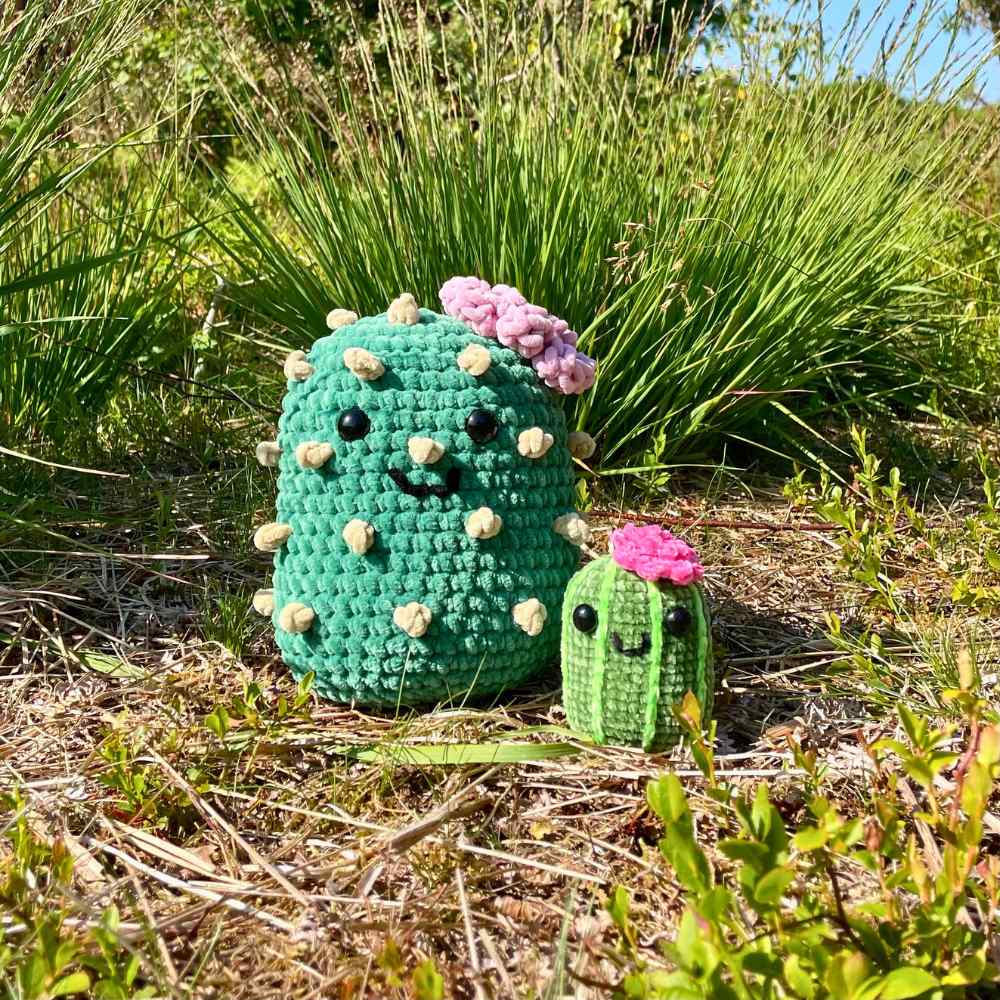
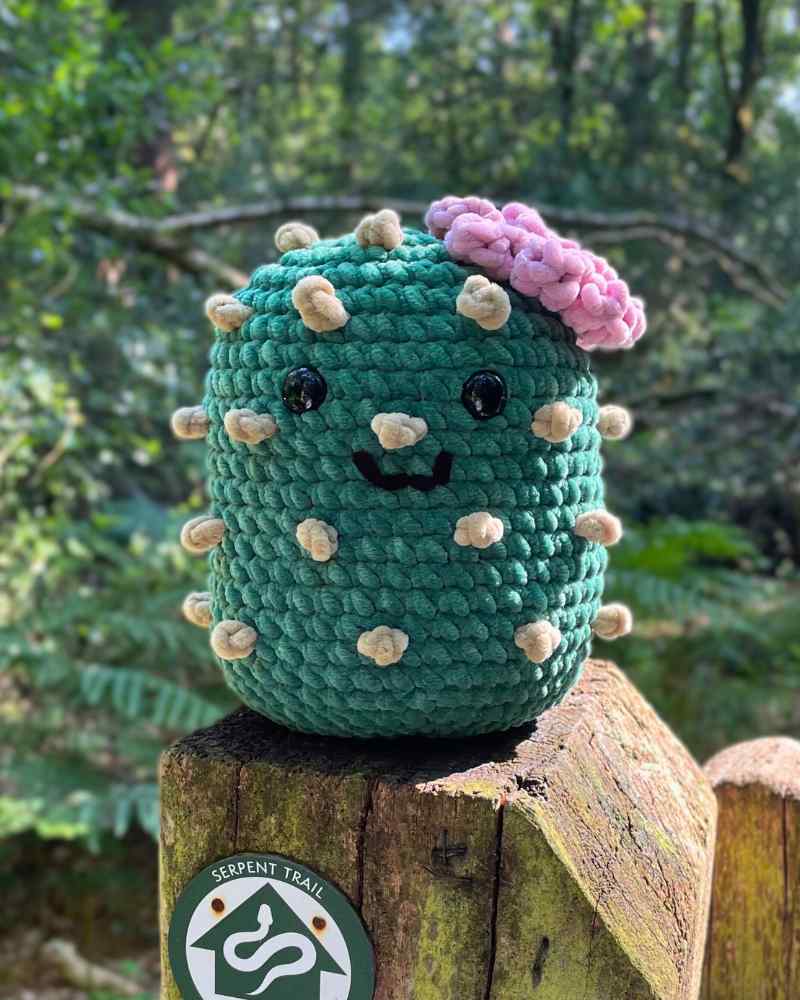
I’ve been making lots of squishies to the same basic body template recently, from a rabbit and a bear, to an ice pop, eggplant and even a wedge of watermelon. A cactus pattern has been on my list of ideas from early on, because my daughter is obsessed, and tends to a whole windowsill of them in our bathroom. But for ages, I just could not see how I was going to make the spikes. Of course not all cacti are spikey, but without something prickly going on, I was worried that it wouldn’t be obvious what the squishy is supposed to be.

So the idea was just parked in the back of my mind, and occasionally I’d revisit it, and abandon it again in frustration. Until recently when I finally had my eureka moment! And these cacti are the results. I’ve come up with a few different design elements, and you can mix and match them for a totally one-off result.
Designing your own squishy crochet cactus
Here are the five design choices you’ll need to make for your cactus:
1. Size
Have you ever considered cuddling a cactus? I’m pretty sure my daughter has, despite how inadvisable it is. Well, make this pattern using a bulky yarn or thicker, and you can! Or make it small enough to sit on a shelf as an adorable ornament. The height of your cactus will be determined by the weight of yarn you use.
- DK yarn – 4 inches (pictured right)
- Worsted yarn – 5 inches
- Bulky yarn – 6 inches
- Super bulky yarn – 7 inches (pictured left)
- Jumbo yarn – 8+ inches
These are a rough guide – the size of your squishy will also vary by the fiber of the yarn, how tighly you crochet, and what size hook you settle for (I’ve got a note on that in a moment).
2. Spikes or stripes?
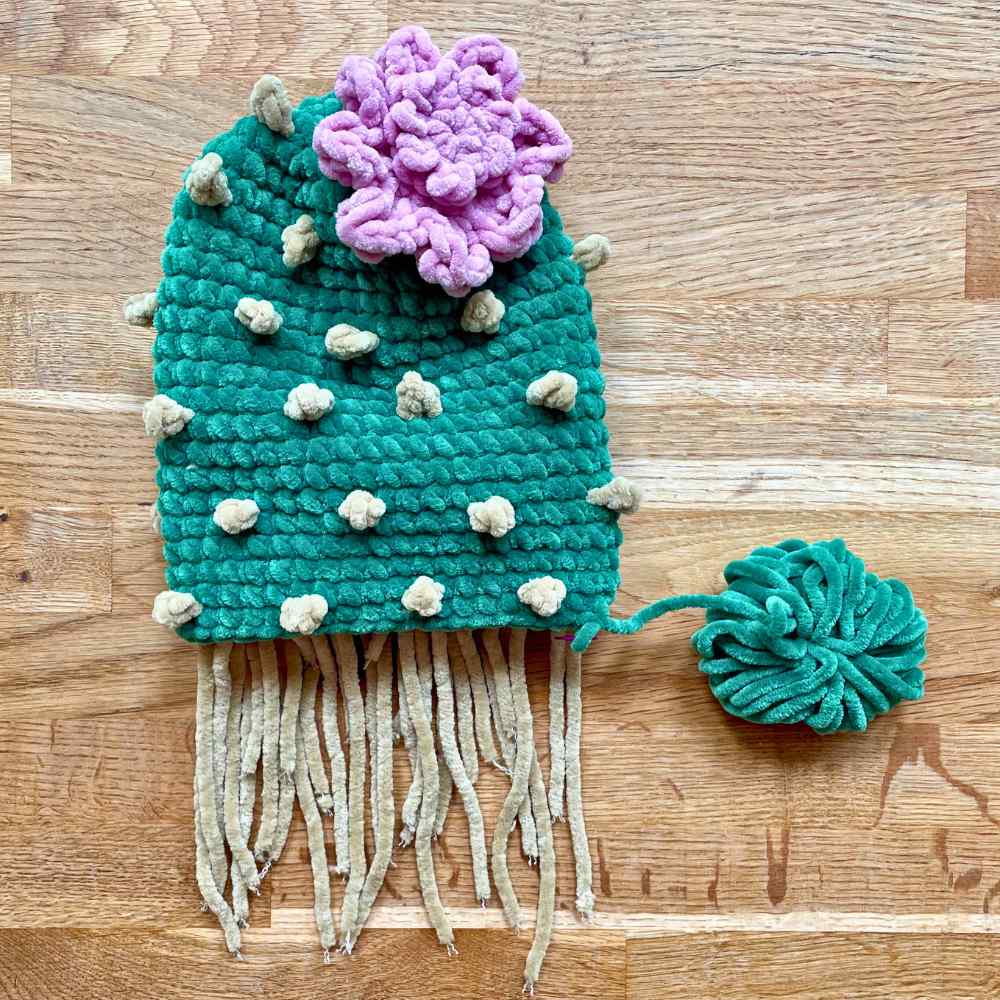
After all my uncertainty about how to incorporate spines, I was finally inspired by domino cacti and bunny ears cacti, neither of which have long spines. They both have very short spines arranged in almost flat bobbles. My squishy spines stick out a bit more than that, but I stopped worrying about making them long and sharp looking. And I couldn’t be happier with the results – although when you notice the similarity with Bowser’s shell in the Mario games, you can’t unsee it!
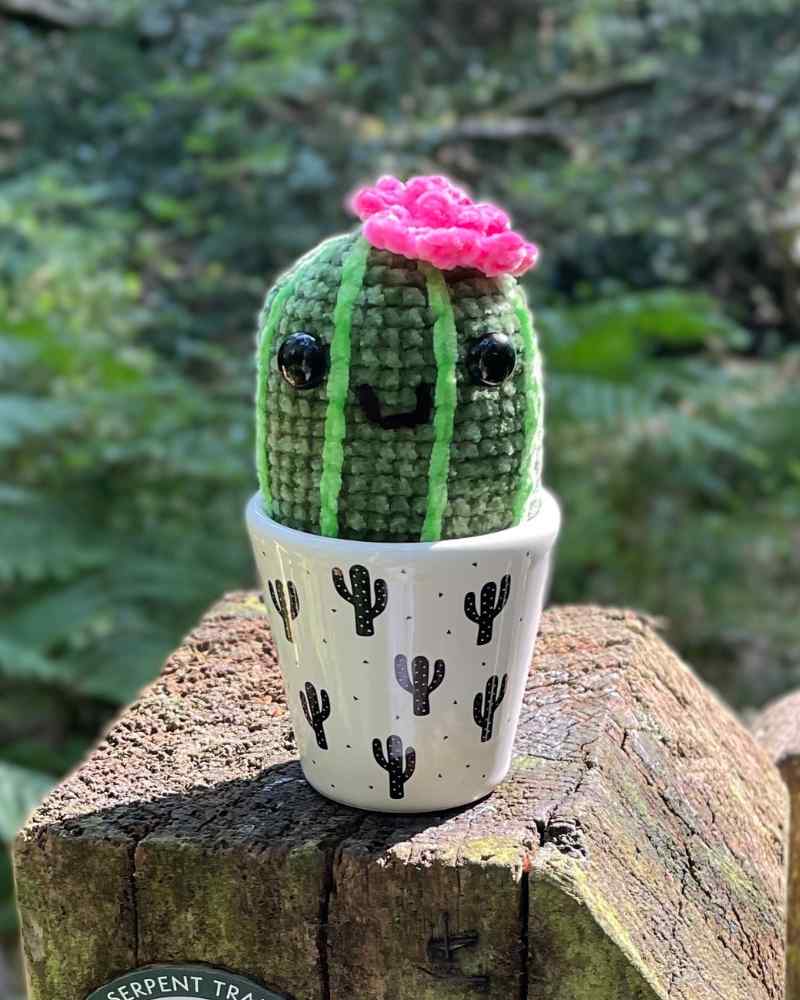
If you don’t want spines at all, the other option is to chain stitch vertical stripes up the sides of your squishy. This gives the impression of the ridges many cacti have for storing water. I’m not sure this option is as immediately recognisable as cactus-like on it’s own though. I think it can also be read as a cucumber or a pickle! But if you combine it with a flower or a pot, then I’m confident the visual cues do click into place.
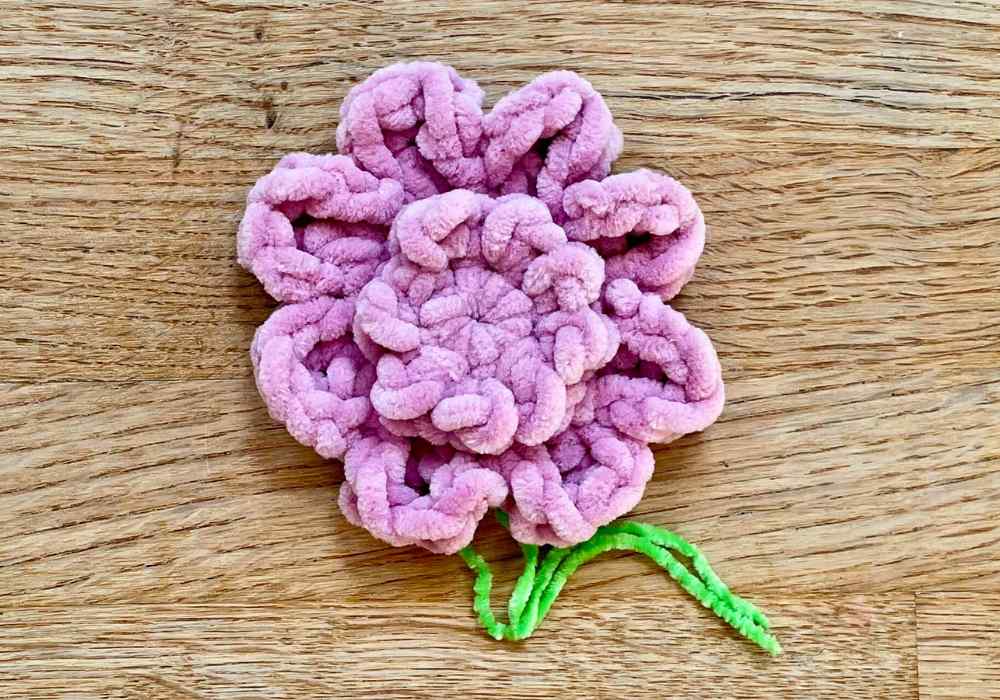
3. Flower power
We manage to coax my daughter’s cacti into flowering once in a blue moon. But cactus blooms are extraordinary in their diversity and beauty. I’ve come up with one option for capturing some of the classic features of cactus flowers. You can add one (or more!) to your squishy if you like, but it’s optional.
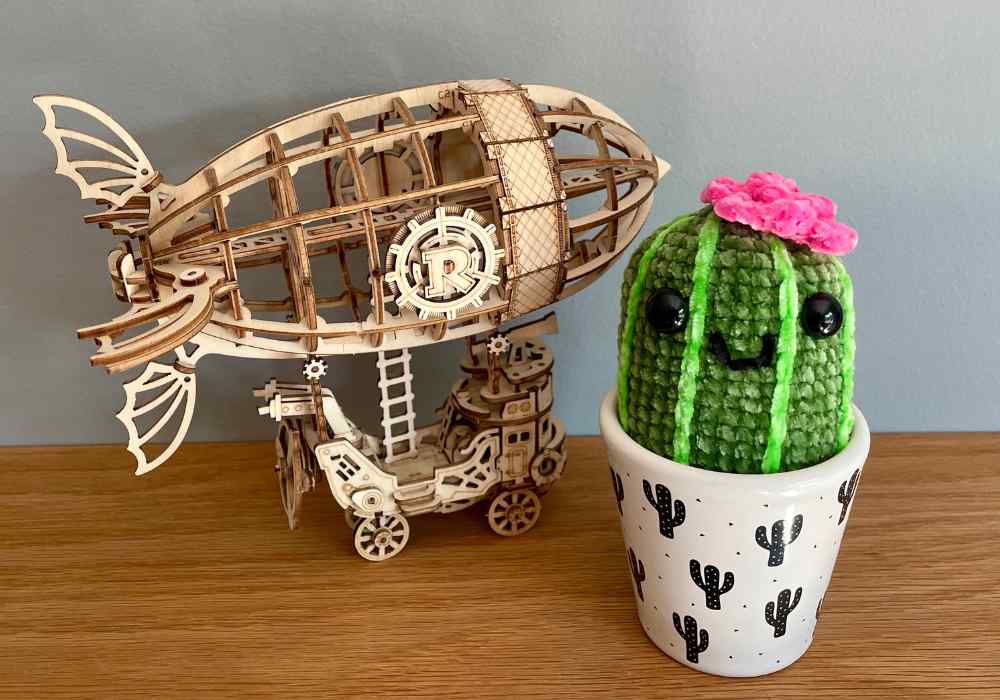
4. Potting up
Most of the squishies I make are destined to be played with and cuddled by my daughter. And this one was no exception – after all it’s inspired by one of her biggest passions! So obviously I won’t be stuffing my big cactus into a pot. But I couldn’t resist seeing how the little one would look, and it didn’t disappoint. This option is a fun gift to make any plant lover.
5. Adding a face
I love amigurumi, and my daughter is a connoisseur of kawaii, the Japanese culture of cuteness. So I couldn’t resist giving my cacti faces. But if you just want to make a kitsch, hassle free houseplant, then you can leave the eyes and mouth off.
Pattern notes
I’ve already covered how to adapt the size of your cactus. And I’ll cover making the flower and adding stripes or spines when we get to the relevant stage of the pattern. If you’d like to pot your cactus, I recommend making the squishy first, then finding a pot to fit.
The pattern is written in standard American crochet terms. The stitches I’ve used are:
Ch chain stitch
Sl st slip stitch
Sc single crochet
Inc increase (make 2 sc in the same space)
Dec decrease
For the flower, you’ll also need to know:
Hdc half double crochet
Tr treble crochet
For the decrease, I can’t recommend enough the invisible decrease technique. It’s a favorite among amigurumi makers because as the name suggests it’s almost imperceptible and gap-free from the right side.
- Insert the hook into the front loop only of the next two stitches (left, below).
- Yarn over and draw through both loops (two loops remaining on hook).
- Yarn over and draw through both loop (right, below).

Materials
To follow my squishy crochet cactus pattern you’ll need:
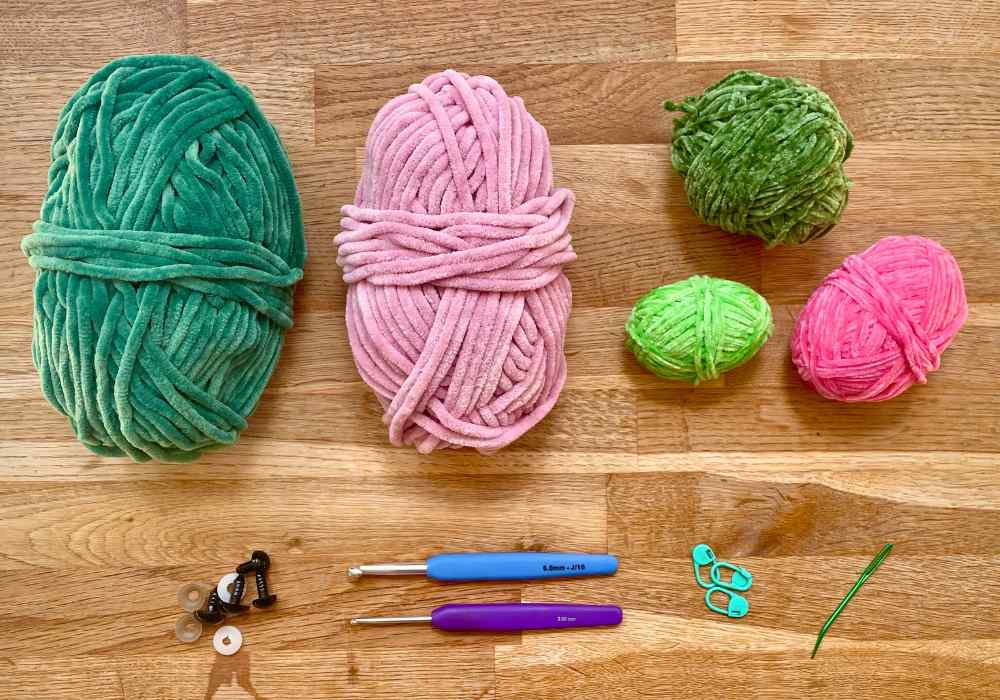
- Green yarn for the cactus’ body. It can be any shade of green and any weight or type of fiber you like. I’ve used Hobbii’s toucan yarn in sage for my big cactus, and Rico Ricorumi’s nilli nilli yarn in green for my little cactus.
- Contrasting yarns in the same weight for the details. Stripes and spines can be any shade of green, yellow or brown. I’ve used Paintbox chenille yarn in latte to make spines on the bigger cactus, and Rico Ricorumi’s nilli nilli yarn in neon green for stripes on the smaller one. Cactus flowers are usually warm colors such as yellow, orange, red or pink, but I’m not here to tell you you can’t use blue if you fancy it. Your project, your rules! My flowers are Hobbii toucan yarn in lavender, and Rico Ricorumi nilli nilli yarn in neon pink.
- Crochet hook. Use a hook one size smaller than the yarn wrapper recommends, to achieve a dense fabric that doesn’t let the stuffing show through. I use a 6mm hook with super chunky yarn, and a 3mm hook with DK yarn.
- Safety eyes. I’ve used 16mm eyes for my super chunky cactus, and they would also work on a chunky cactus. I used 12mm eyes on my DK cactus, and they would also work on a worsted cactus. Try 20mm eyes for a jumbo cactus.
- Stitch markers.
- Toy stuffing.
- Darning needle.
Squishy crochet cactus pattern
Whatever details you choose to add later, your cactus always starts with the same body shape. To start, either make a magic circle, or chain 4, and slip stitch into the furthest chain from the hook to make a loop.
- Make a magic circle, or ch 4 and sl st to join.
- 1st round: Ch 1, sc 8 into the magic circle or 4-ch loop (8 sts)
- 2nd round: 8 inc (16 sts)
- 3rd round: *1 sc, inc* 8 times (24 sts)
- 4th round: *2 sc, inc* 8 times (32 sts)
- 5th round: *3 sc, inc* 8 times (40 sts)
- Rounds 6 – 23: Sc all the way round
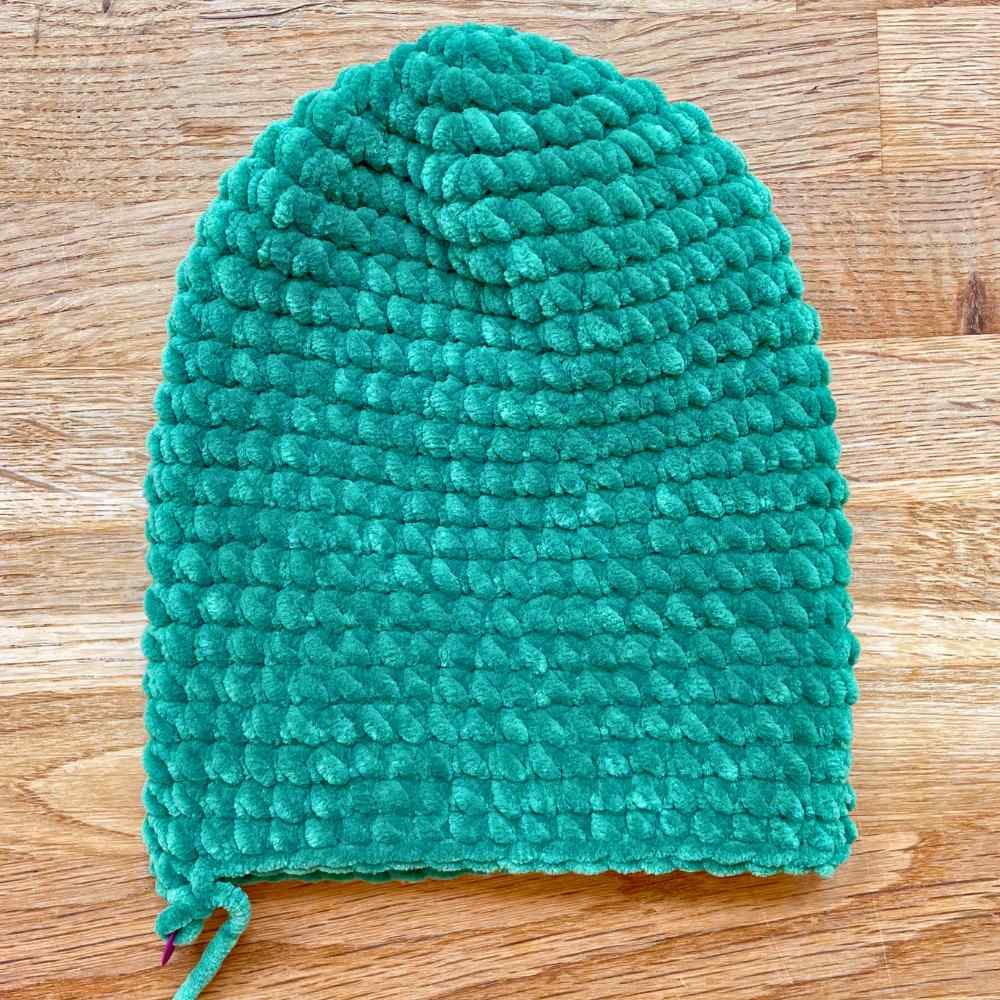
If you’re adding spines, do it now. If you’re doing stripes, skip to round 24, and add the stripes after round 25.
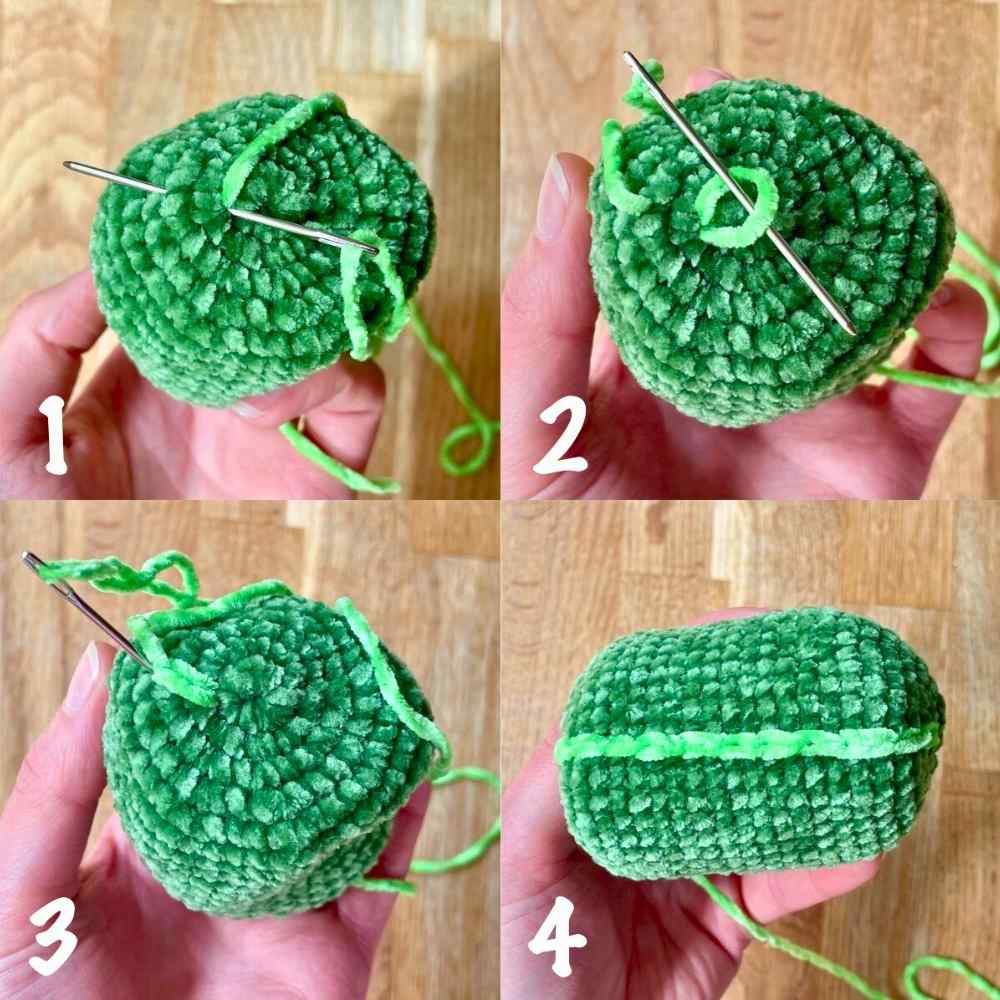
To add spines
The spines are all made individually, then tied onto the body. It’s a pretty repetitive task, but the kind I find really satisfying to do in front of an episode of a good TV show. To make each spine:
- Leave a tail of about 3 inches before your slip knot, then chain 2.
- Slip stitch into the front loop of the furthest chain from the hook (indicated by the arrow below).
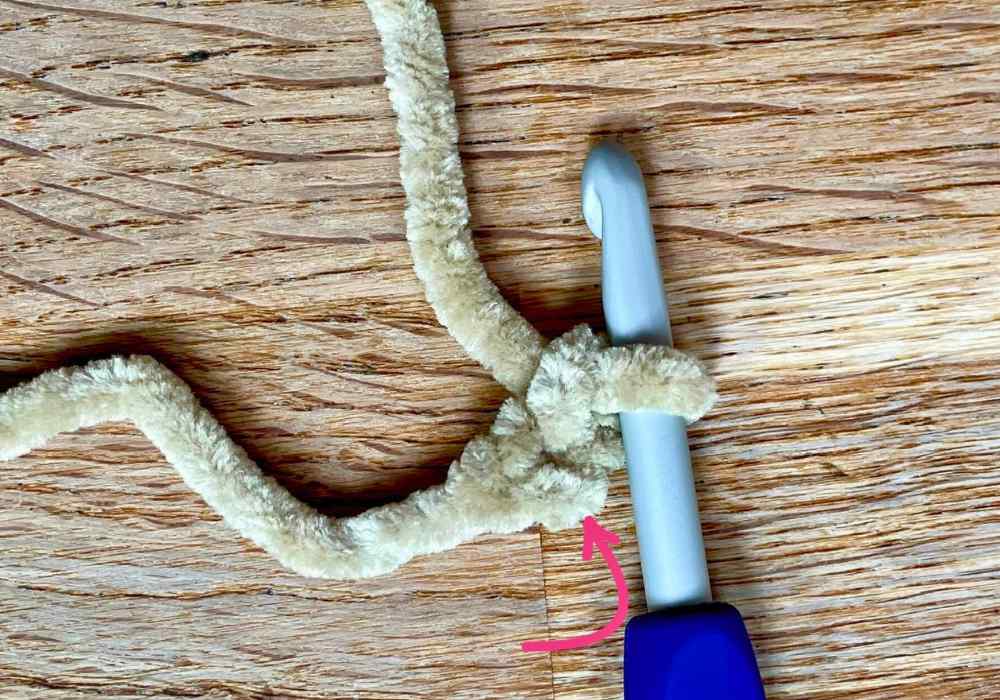
- Cut the yarn leaving a 3 inch tail.
- Pull the tail all the way through the slip stitch.
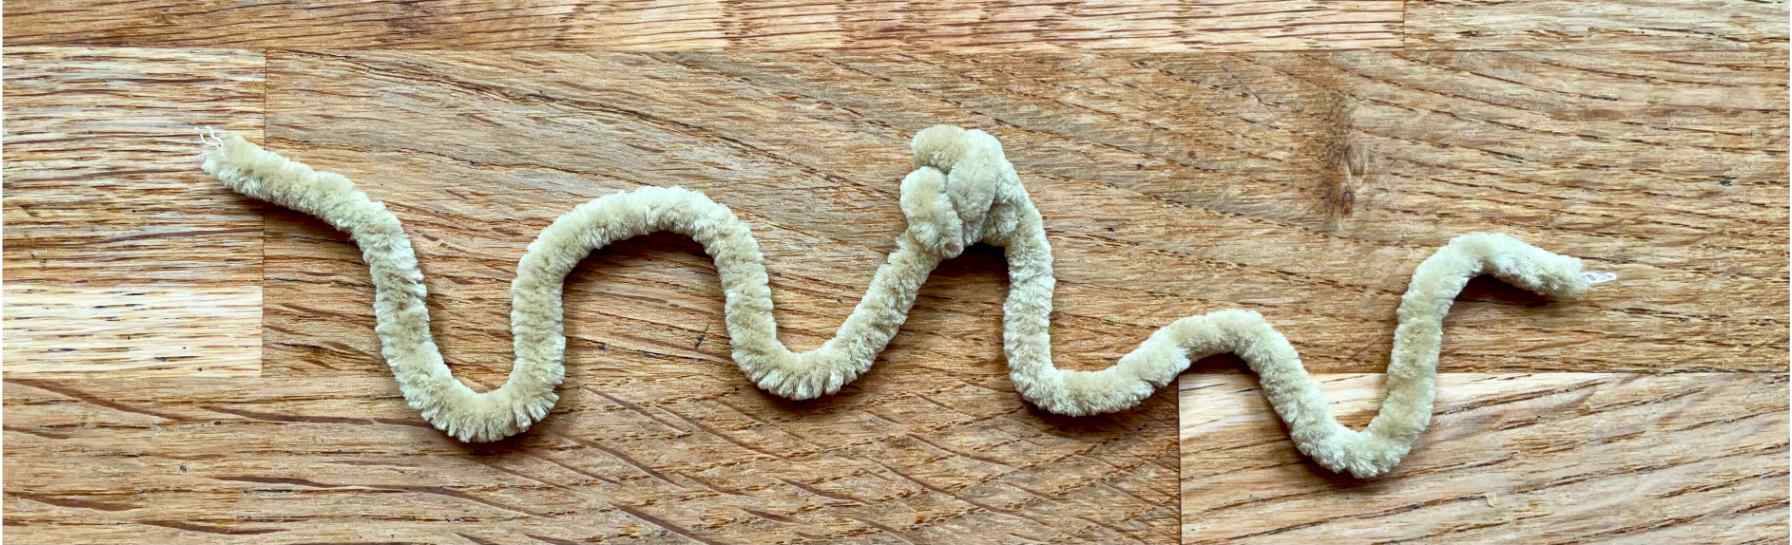
At this stage, I actually unpicked the stitches again, measured how long the piece of yarn was, and cut 40 pieces of yarn the same length. Then I fashioned each piece into a spine. I really like this assembly line approach, but you could also continue to cut them from the ball of yarn as you go. Make 30 – 40.
Attaching the spines
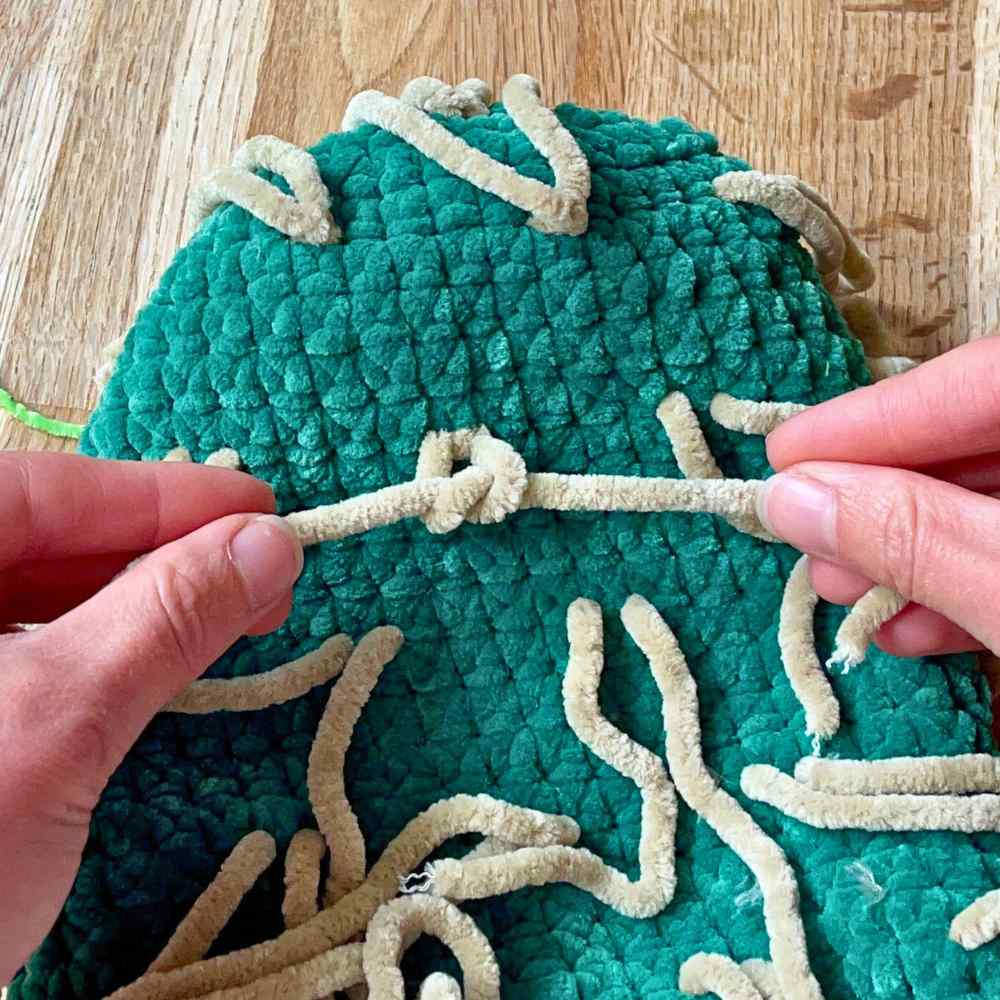
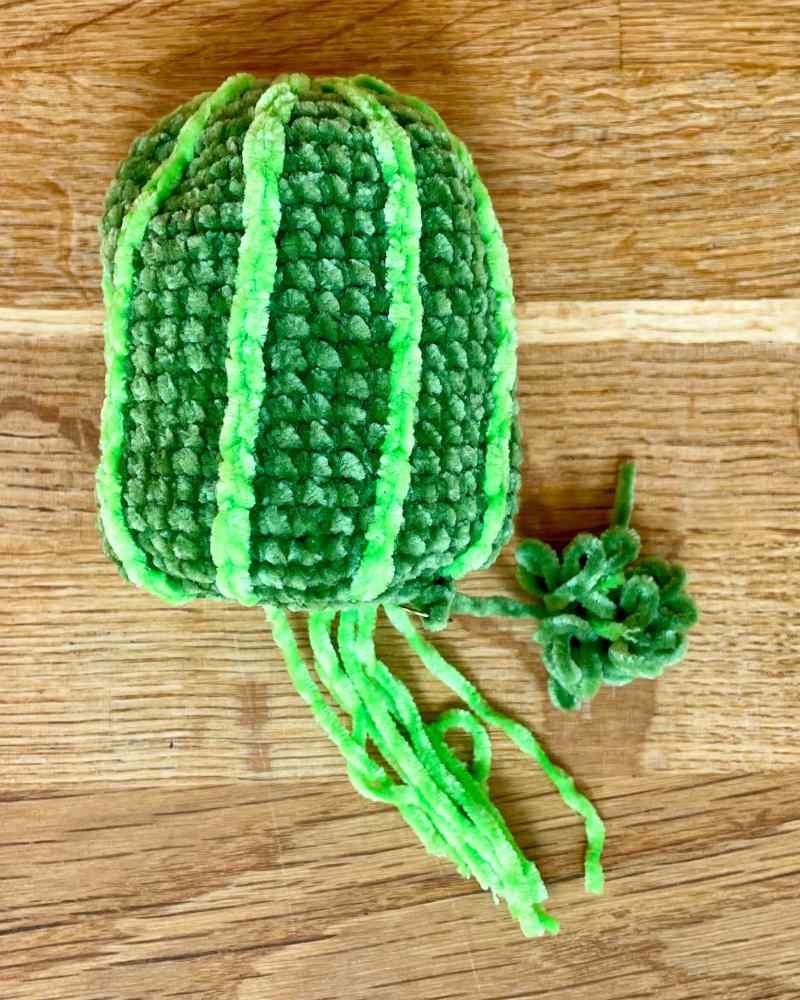
To attach the spines to the body, use a crochet hook to pull the yarn tails inside the body, either side of a stitch. I arranged my spines every 4 rows, and 5 stitches apart (so that 8 spines fit evenly into a round). At the top, they’re a little bit closer together – you just need to eyeball what looks right. If you’re adding a flower as well, remember to leave space for it (it’s a good idea to make it and loosely tie it in place).
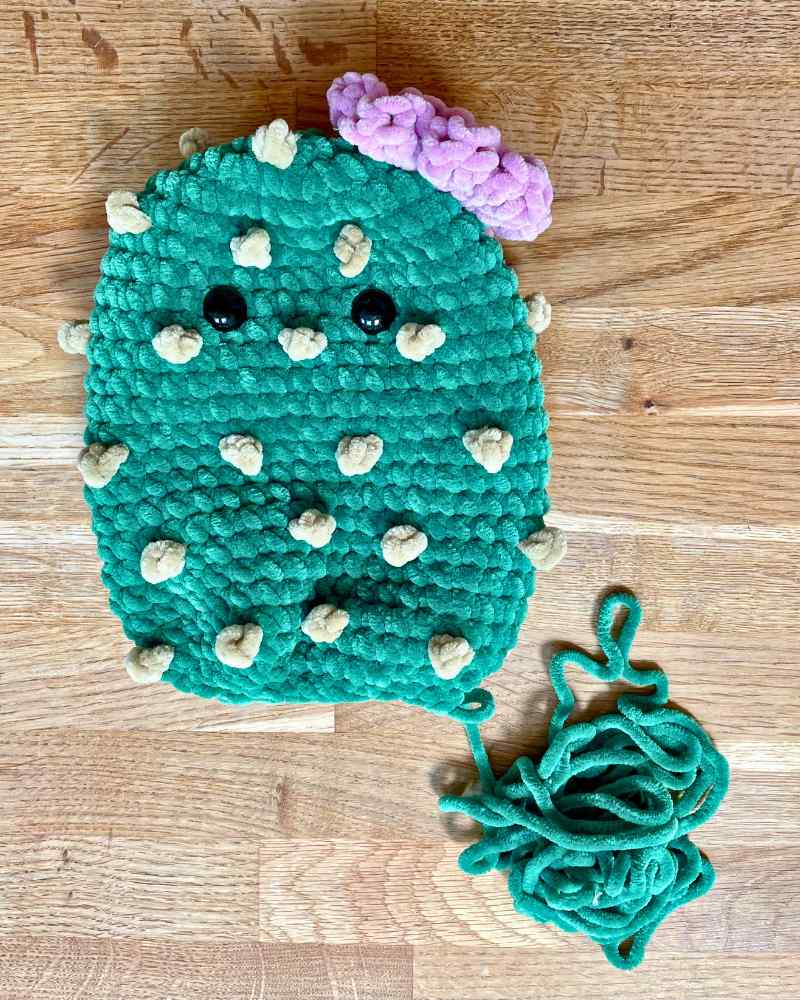
It looks like a cactus-turned-jellyfish right now! Later on, I actually remove the bottom row of spines in this picture, but not in time to retake the photo, alas. Next turn the body inside out and tie the yarn tails for each spine in a secure double or triple knot.
It’s also as good a time as any to tie the flower in place. Then flip the body the right way out again and make these rounds:
- 24th round: 3 dec, sc 8, 6 dec, 8 sc, 3 dec (28 sts)
- 25th round: 3 dec, sc 2, 6 dec, 2 sc, 3 dec (16 sts)
Put a stitch marker into the loop on your hook, and cut your yarn leaving a 24 inch tail.
Adding stripes
If you’re making stripes instead of spikes, your body will look like this at the end of round 25:
Thread your contrasting yarn onto a darning needle, and use chain stitch embroidery to make stripes running from the top of your cactus to the bottom.
- Start by threading the yarn from the inside of the body through to the outside, between rows 1 and 2. The easiest way to space the stripes evenly is to make 8 – one below each stitch in the first row. Push the needle back inside the body at the same spot, and pull the yarn through until there’s a small loop left.
- Bring the needle back through to the outside of the body, two rows down, and thread it through the loop. Gently pull to tighten the first stitch.
- Insert the needle into the first chain stitch and back into the body in the same place it last came out, to start the next chain.
- Keep going until you reach the bottom of the body. Tie off.
Repeat to make 8 stripes.
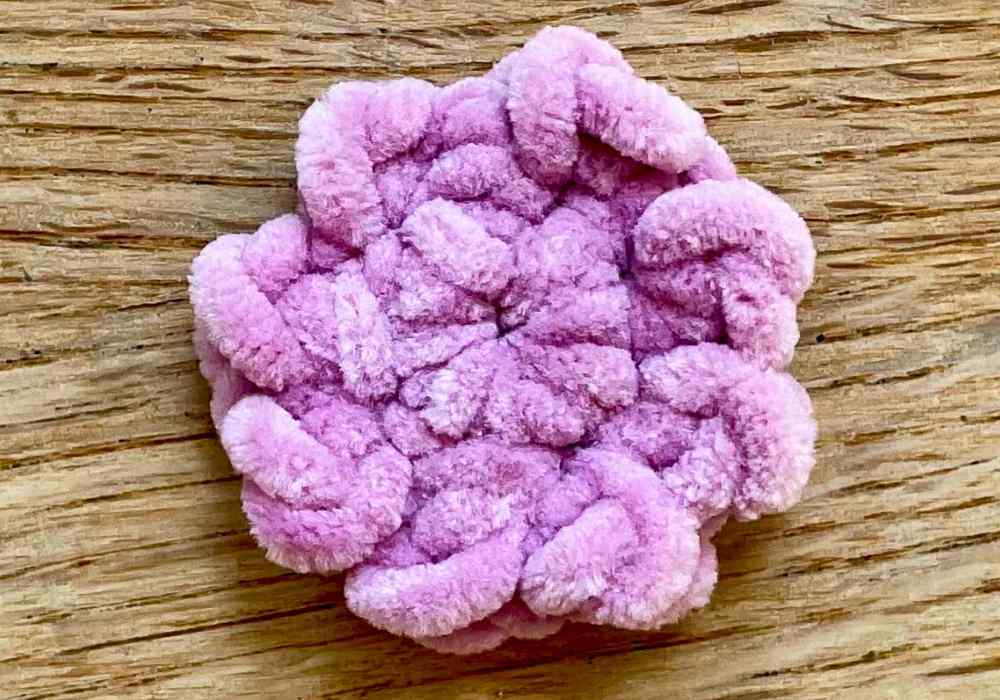
Making a flower
Cactus flowers often have several layers of long, narrow petals. My cactus flower is made in two layers, top and bottom.
Top layer
For this layer, the back of your work will become the right side. So don’t weave in the yarn tails until you see what I mean!
- Magic circle or ch 4 and sl st into furthest ch from hook to start.
- 1st round: Ch 1, sc 8 into magic circle or 4-ch loop (8 sts)
- 2nd round: (sl st, hdc, sl st) 8 times.
Cut the yarn, leaving enough tail to weave in neatly. The hdc will have popped out backwards, so when you flip your work over, they stick out towards you. This is the side you want facing you when you assemble your flower. Weave in the ends on the other side.
Bottom layer
- Magic circle or ch 4 and sl st into furthest ch from hook to start.
- 1st round: Ch 1, sc 8 into magic circle or 4-ch loop (8 sts)
- 2nd round: 8 inc (16 sts)
- 3rd round: *sl st, ch 2, tr, ch 2* 8 times.
- Sl st, cut yarn leaving enough tail for weaving in, pull the tail right through the sl st, and weave it in.
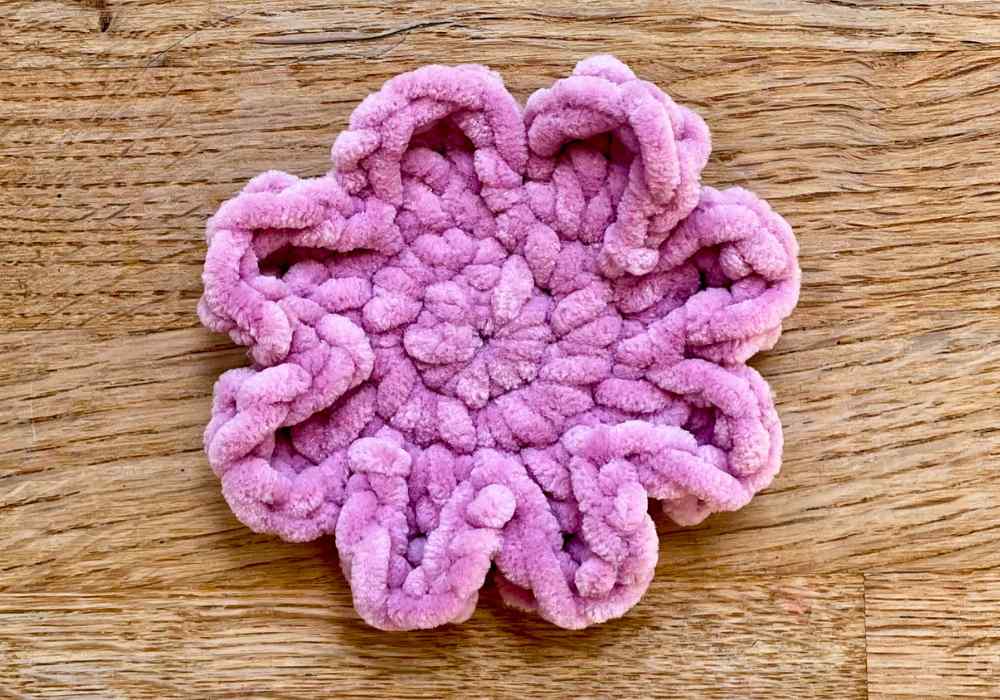
Joining them together
Thread 6 inches of strong yarn onto a darning needle. It won’t be seen, so strong is more important than matching. Feed it up through the center of the bottom layer, under a few stitches of round 1 on the underside of the top layer, and back down through the center of the bottom layer. The two ends can then be used to tie it to the body. For a more secure join (eg. on a large cuddly toy) use more yarn to stitch the base of the flower onto top of the body.
Finishing steps
You’re nearly there! It’s just time for some finishing touches to bring your cactus to life, and then to stuff and close the body. Of course, you could skip some of these, if you’d prefer your squishy to be a quirky ornament, but not a character.
First, add eyes, if using. On my bigger cactus I’ve added the eyes 6 stitches apart, between rows 9 and 10. On my smaller cactus, they’re 9 stitches apart, between rows 8 and 9 – they’re high so that I can put the squishy in a pot later.
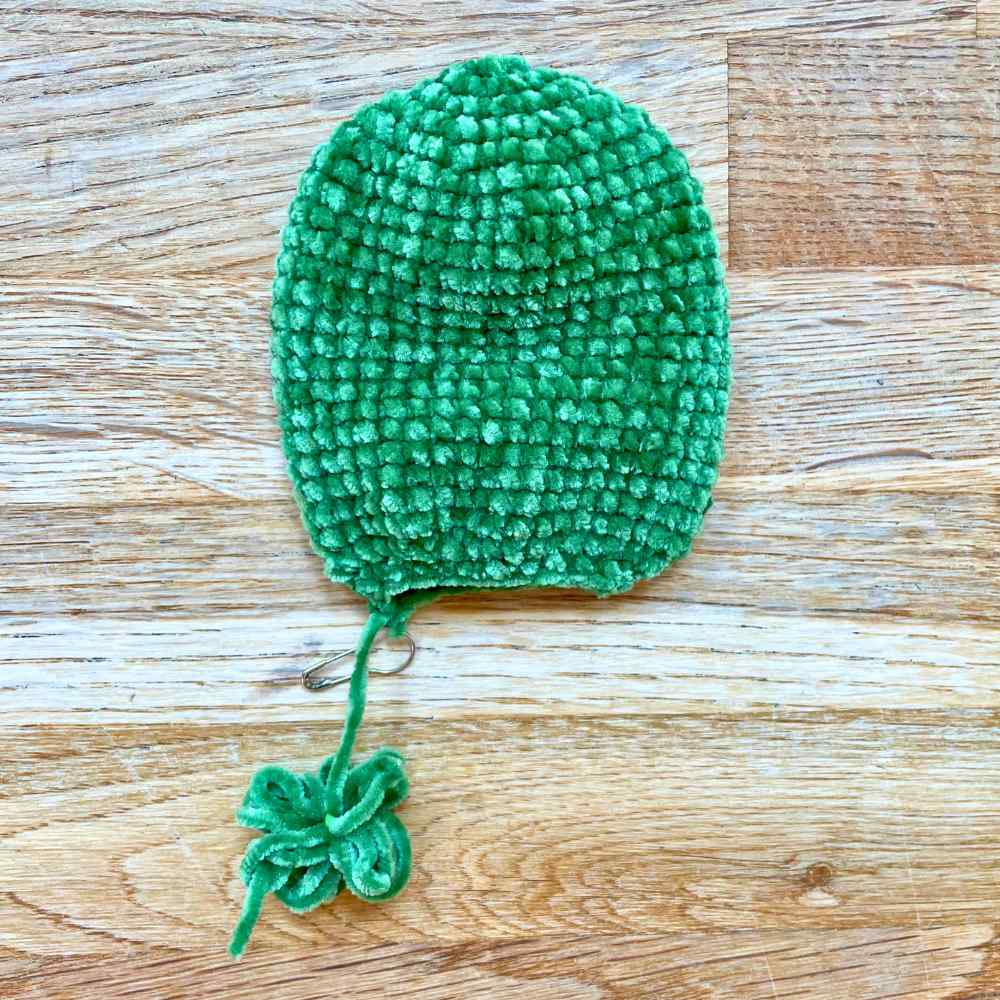
Stuff the body firmly with toy stuffing, then crochet the last round of the body:
- 26th round: 8 dec (8 sts remaining)
Sl st and pull the yarn all the way through the stitch. Thread it onto a darning needle and close the remaining hole with mattress stitch through the front stitch only.
Here’s how my bigger cactus looked at this point – you can see why I decided to remove the bottom row of prickles. My husband saw it and cheerfully asked if I was making a cuddly virus!
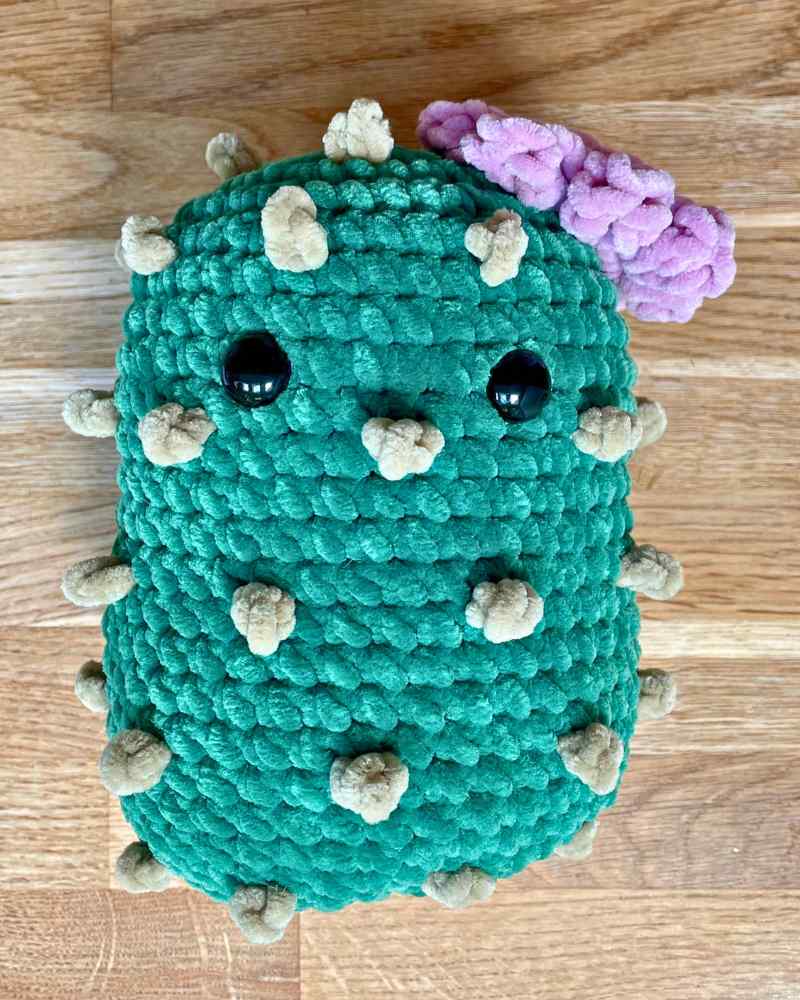
Finally, embroider a smile in contrasting yarn. Start by threading the yarn through from the center of the back of the body to the front. Embroider the smile using back stitch, then thread the yarn back out through the same place on the back of the body. Knot the yarn tails together, and poke them inside the body – the stuffing will anchor them in place.
Squishy crochet cactus pattern – summary
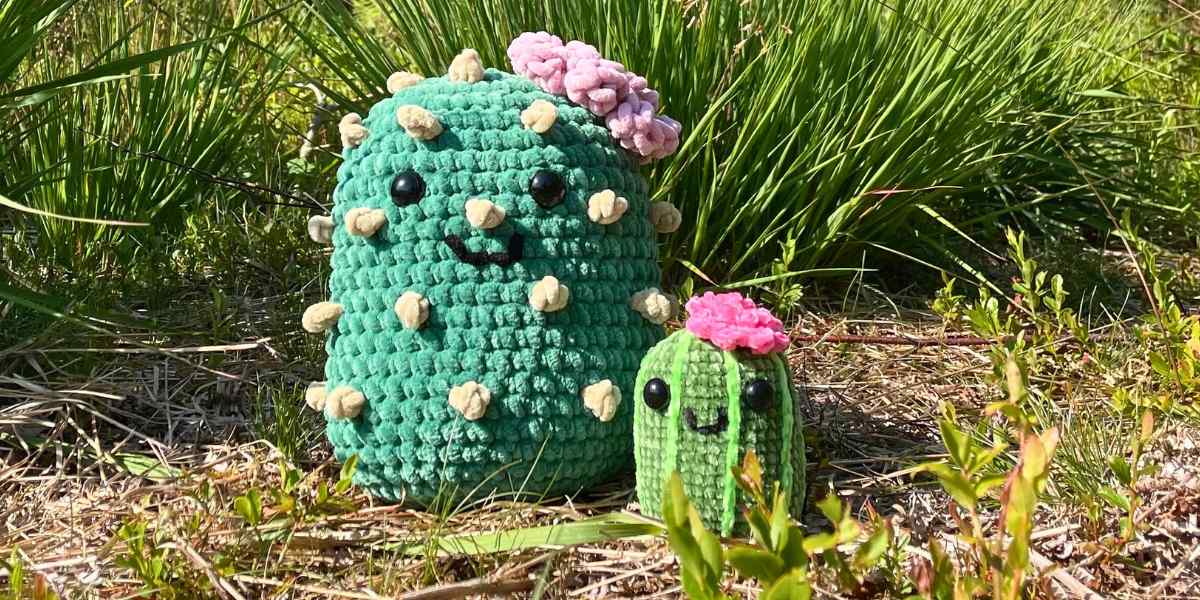
Hopefully you can see now why I’m so happy this design finally exists. The little cactus in its pot is one of my favorite things I’ve made in recent months. Just look at it! And I’m happy to report that my daughter is delighted to finally have a cactus she can cuddle. Obviously when you make yours, your little plant could be spikey, and the big one could have ridges. Maybe you’ll even be bold and combine both! The elements of this pattern are designed to be mixed and matched, and I hope you’ll have fun with it. I’d love to see how your project turns out, so if you’re on social media please tag Lucy in a photo on Facebook or Instagram. Happy crocheting!