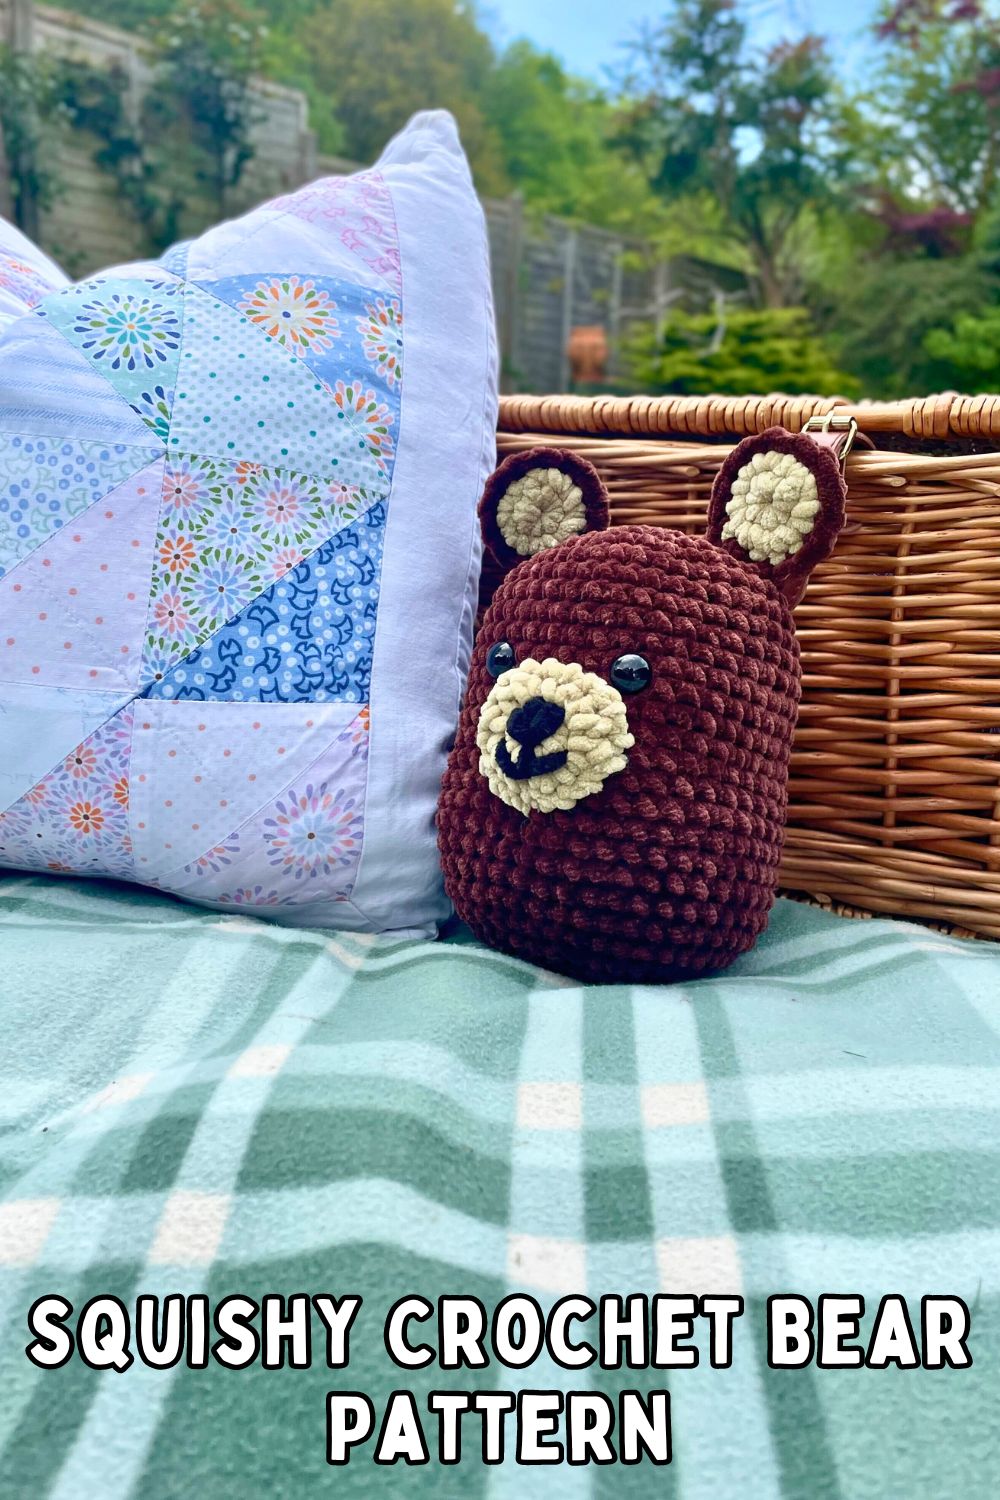
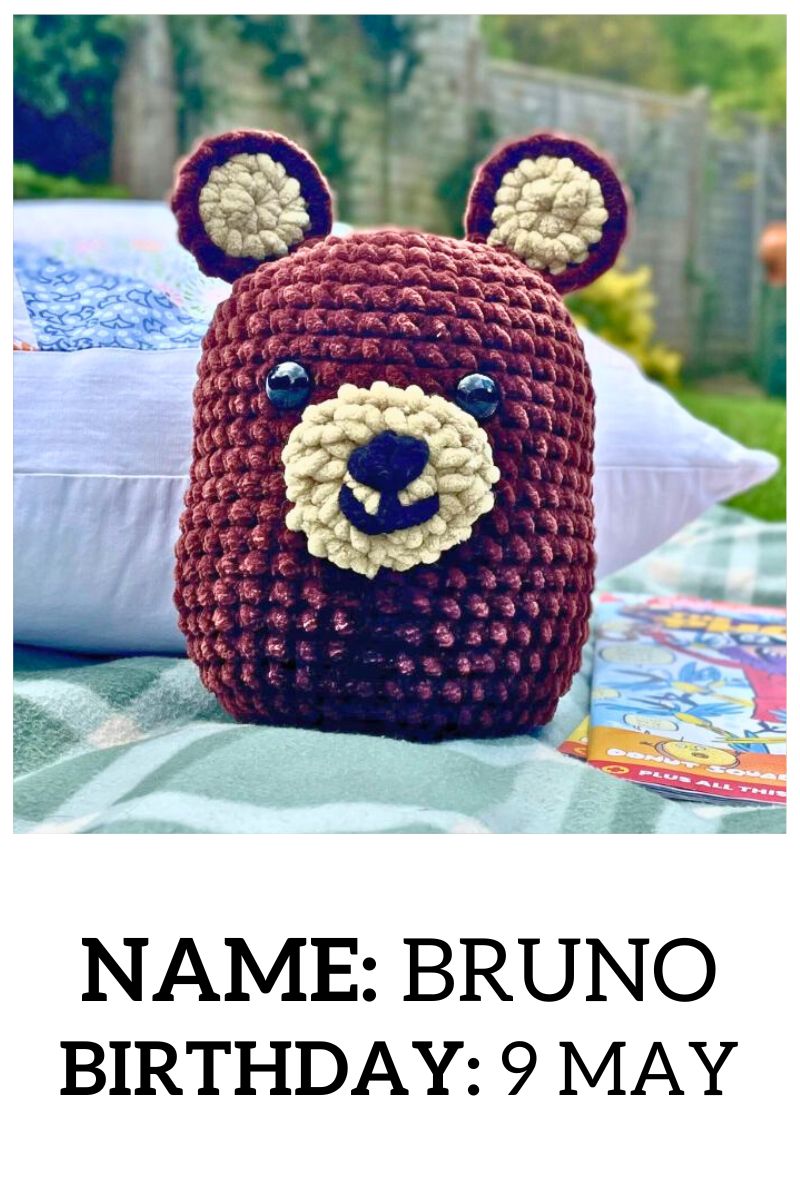
Squishy Crochet Bear Pattern
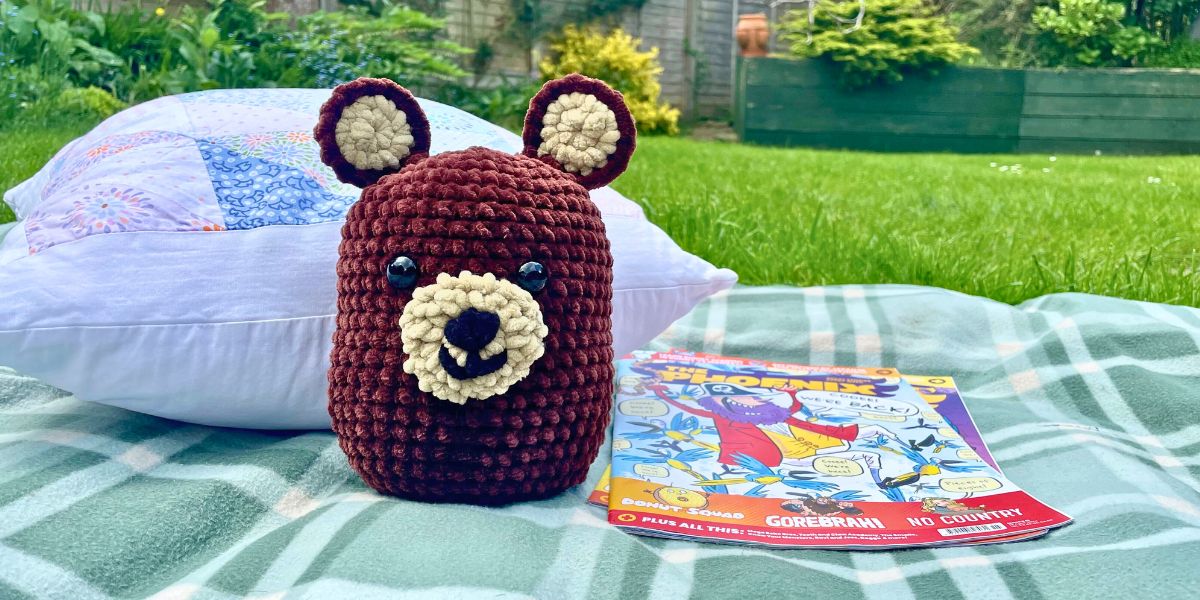
Well hello! This is Bruno, my squishy crochet bear pattern. He is the perfect gift for any child: charmingly homespun, and irresistible to touch and cuddle. And best of all, he’s very straightforward, quick, and beginner-friendly to make.
So if more sophisticated amigurumi bear patterns feel out of reach for you, or you simply don’t have time left to make one, then Bruno will come to the rescue!
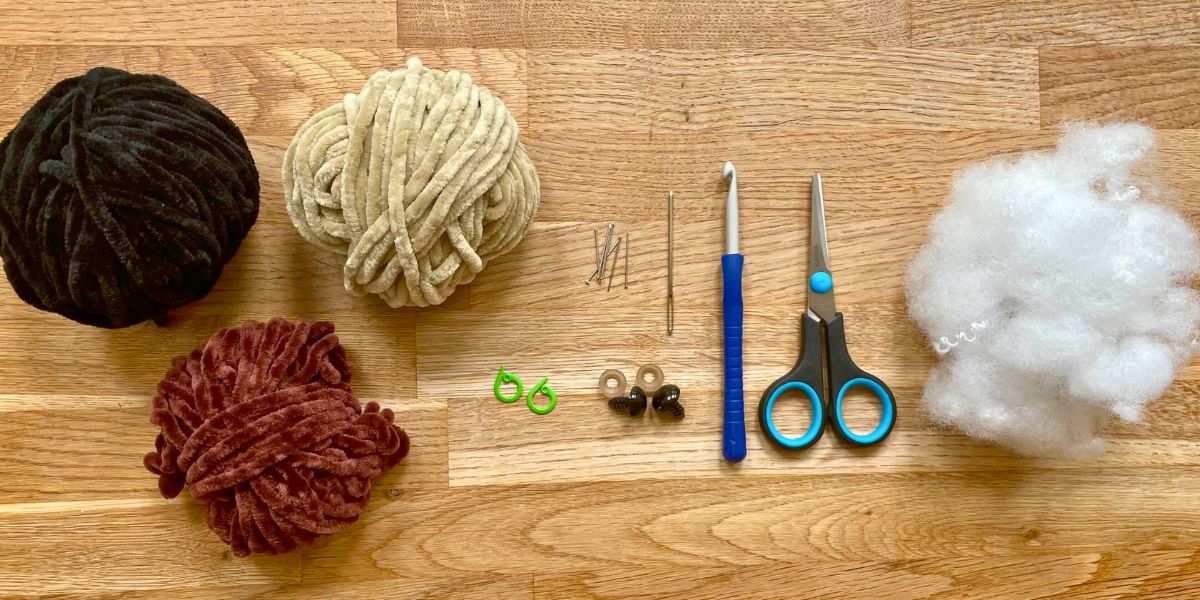
You will need
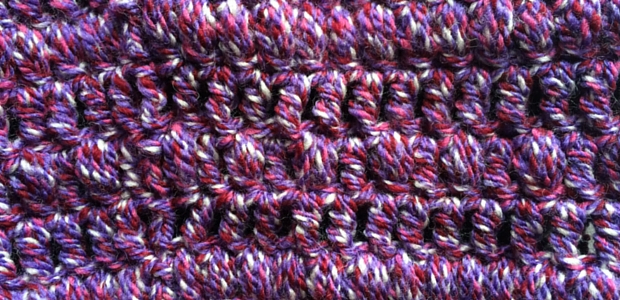
It doesn’t take much to crochet your own squishy bear. I love using chenille and velvet yarns to make amigurumi plushies because they really enhance the tactile appeal of the finished toy. Teddy bears exist to be cuddled, after all! But you can make your own bear in any yarn you have to hand – flecked and tweed yarns look especially cozy and effective. I’ve included notes about how your choice of yarn will affect your completed bear as I’ve gone along.
To make Bruno I used:
- Approximately ⅔ of a ball of Paintbox Chenille yarn* in chocolate for the body.
- Smaller quantities of Paintbox Chenille* in latte for the inner ears, and King Cole Yummy yarn* in black for the embroidery.
- Size J (6mm) crochet hook
- Stitch markers
- Pins
- Safety eyes*
- Scissors
- Darning needle
- Hi-loft polyester toy stuffing* (eg. Polyfil)
NOTES ON MATERIALS:
- Choose three yarns all the same weight. Mine are all super bulky yarns.
- I took this picture after I had finished designing and refining the pattern, so the brown chenille is what I had left, not how much I used!
- If you crochet loosely, use a crochet hook one size smaller than the yarn wrapper recommends so that you can stuff your bear firmly without the stuffing poking out between the stitches. Paintbox recommend using a size K (7mm) hook with their Chenille yarn, so I use a size J.
- My safety eyes are ⅝” (16mm). I’ve included notes in the next section about what size eyes to use with different yarns.
How big is my squishy crochet bear?
Bruno is approximately 7” tall (not including his ears). He’s how he’d look if you chose a different yarn weight, and what size safety eyes to use.
Bulky – 6” tall, use ⅝” (16mm) eyes
Worsted – 5” tall, use ½” (12mm) eyes.
DK – 4” tall, use ⅜” (10mm eyes).
I haven’t tried going any smaller yet, or even going bigger with a jumbo yarn! If you give it a go, please please let me know how you get on in the comments box!
Whatever size yarn you choose, the pattern remains the same.
Squishy crochet bear pattern
Bruno’s body is made to the exact same template as my cat, owl, and ice pop patterns. His ears and muzzle are made separately and added last. The pattern uses standard American crochet terms and the stitches you’ll need to use are:
Ch chain
Sl st slip stitch
Sc single crochet
Hdc half double crochet
Dc double crochet
Inc increase (make 2 sc in the same place)
Dec decrease
I like to use an invisible decrease for amigurumi toys, because it leaves smaller gaps between the stitches. If you’re unfamiliar with it, simply:
- Insert your hook through the first loop only of the first stitch and the front loop only of the second stitch (fig. 1).
- Yarn over and draw through a loop.
- Yarn over and draw through both loops on hook (fig. 2).

To make the muzzle you’ll also need to follow stitch instructions in round brackets. If you haven’t encountered them before, I’ll explain what they mean when we get there. But for now, let’s get started!
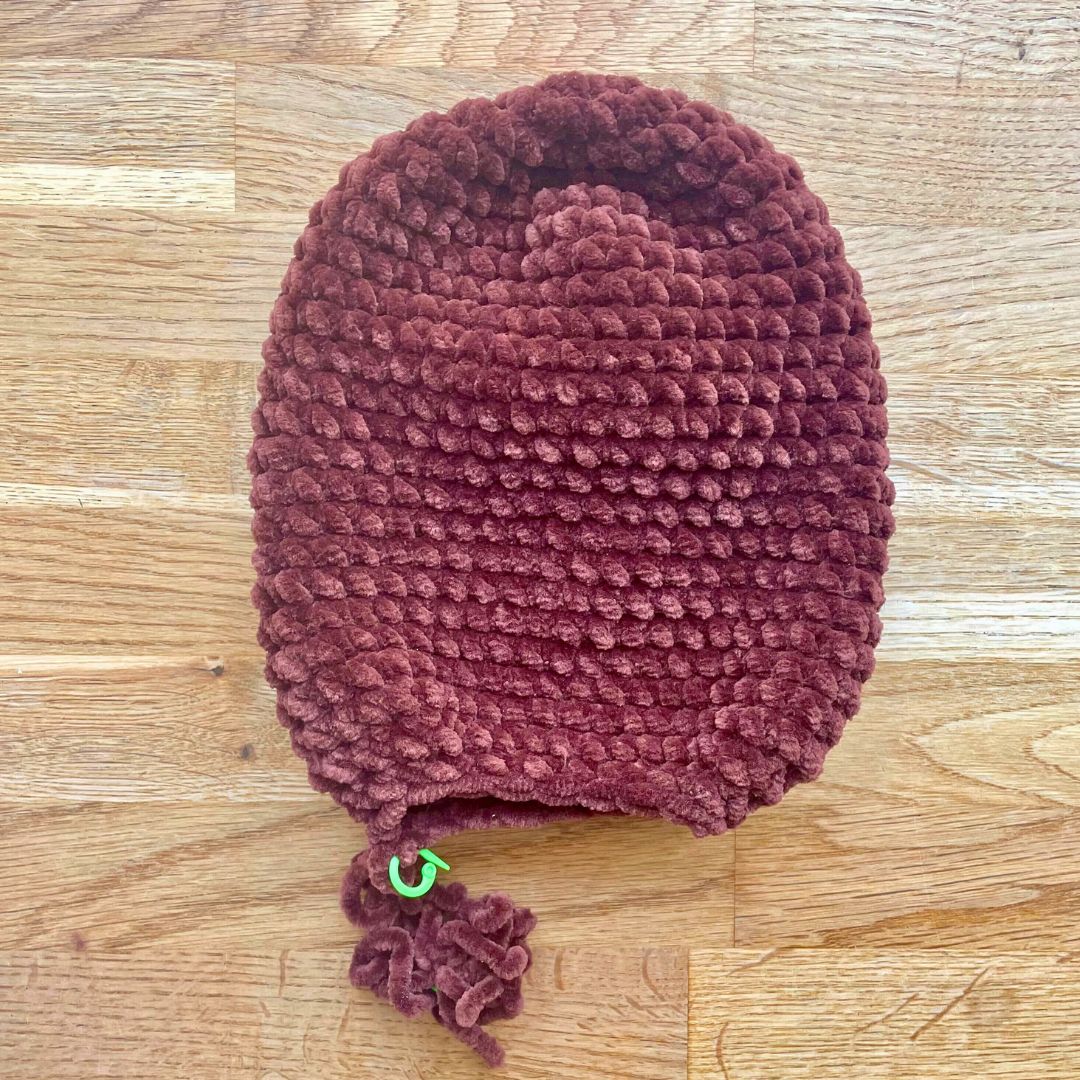
The body
To begin you can either make a magic circle, or chain 4 and slip stitch into the 4th chain to join. I prefer a magic circle when I’m using smooth yarns, and a 4-chain loop when I’m using fluffy yarns like these.
- 1st round: Ch 1, sc 8 into the center of the magic circle or 4-chain loop (8 sts)
- 2nd round: 8 inc (16 sts)
- 3rd round: *1 sc, inc* 8 times (24 sts)
- 4th round: *2 sc, inc* 8 times (32 sts)
- 5th round: *3 sc, inc* 8 times (40 sts)
- 6th – 23rd rounds: Sc all the way round
- 24th round: 3 dec, sc 8, 6 dec, 8 sc, 3 dec (28 sts)
- 25th round: 3 dec, sc 2, 6 dec, 2 sc, 3 dec (16 sts)
Put a stitch marker into the loop on your hook, and cut your yarn leaving a 24 inch tail.
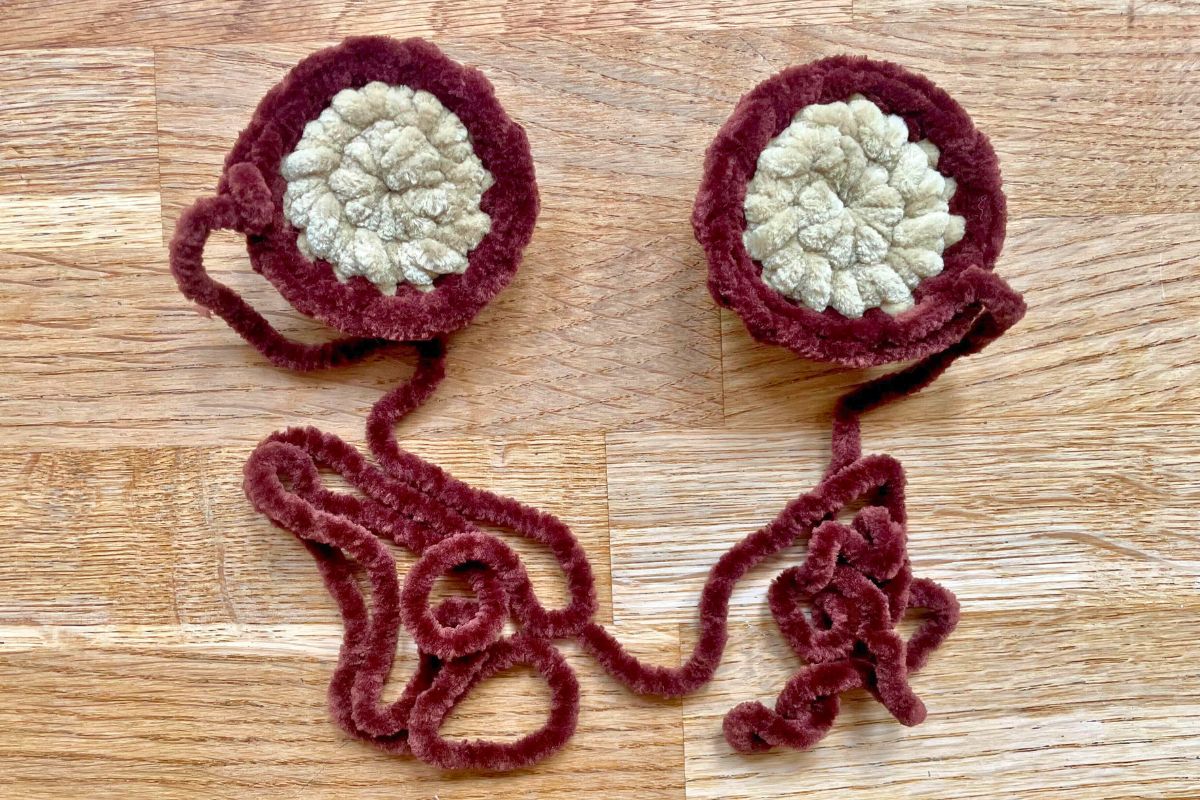
The ears
Bruno’s ears are one of his cutest features, and each ear is made in two parts. You’ll need the same yarn you’ve used for the body, and a contrasting yarn for the inner ear. Start with the contrasting yarn and make two inner ear pieces:
- Magic circle or 4-chain loop to start.
- 1st round: Ch 1, sc 7 into the center of the magic circle or 4-chain loop (7 sts)
- 2nd round: 7 inc (14 sts), sl st into the next stitch, cut the yarn with a 3” tail. Pull the yarn all the way through the sl st, and make sure you can still make out 14 clear stitches around the edge of the circle. Weave in the yarn tails a little, then trim them short.
Making and joining the backs of the ears
The backs of the ears start in the same way as the fronts. In the third round you join the fronts and backs together:
- Magic circle or 4-chain loop to start.
- 1st round: Ch 1, sc 7 into the center of the magic circle or 4-chain loop (7 sts)
- 2nd round: 7 inc (14 sts)
- Free your hook, hold the back of the ear against the inner ear, with the wrong sides facing each other, and the inner ear closest to your hand.
- Insert the hook through both loops of one of the stitches at the edge of the inner ear, and return it into the same loop you freed it from on the back of the ear (fig. 1). If your crochet hook doesn’t have a handle, you can simply thread the inner ear piece on from the other end of the needle, without unhooking your work!
- Draw the loop on your hook through the stitch of the inner ear (fig. 2).
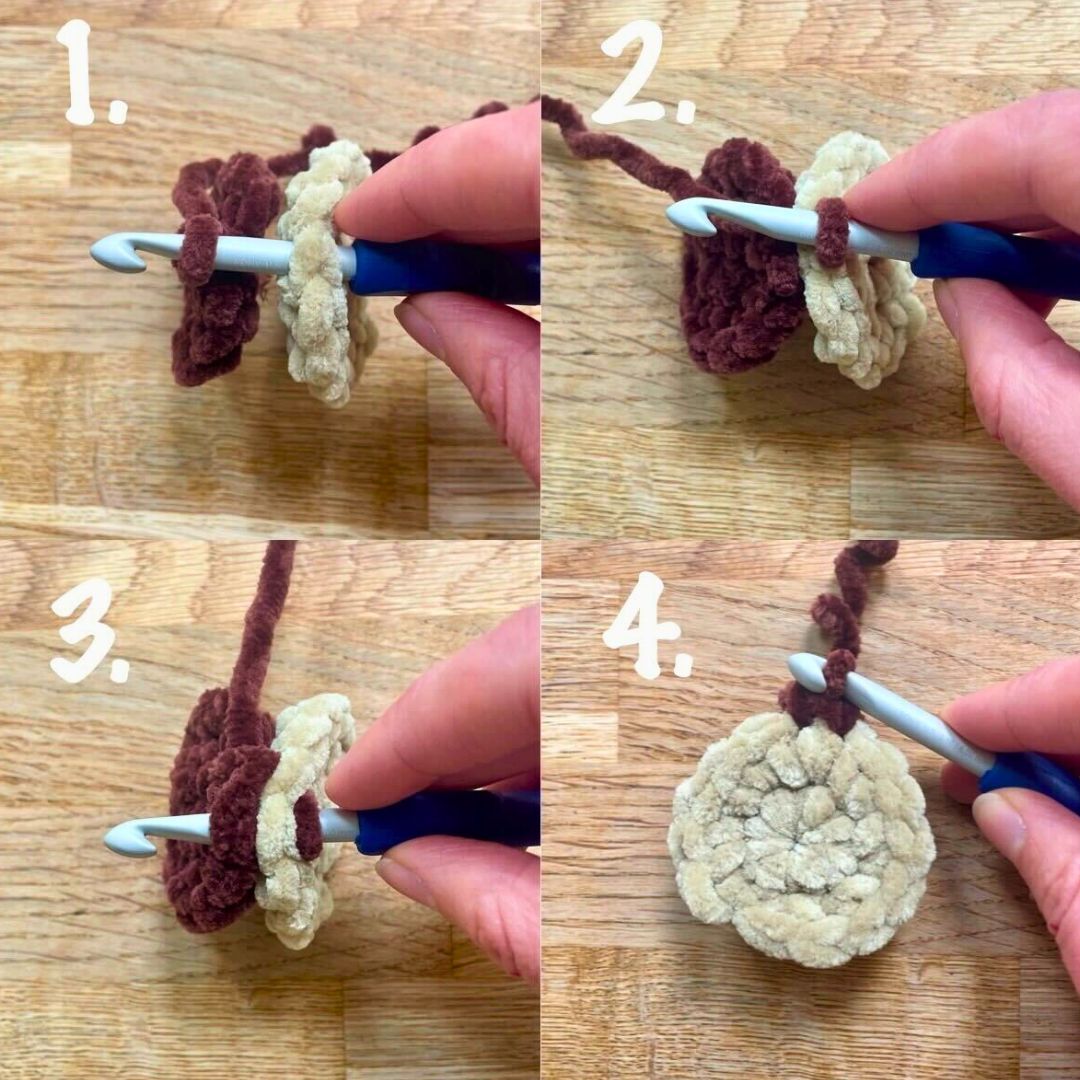
- 3rd round: Starting at the next stitch along anticlockwise (clockwise if you’re left handed), single crochet into both loops of both ear pieces (Fig. 3 & 4). Continue all the way round (14 sts).
- NOTE: You’ll be changing direction on the back piece – this is correct!
- Sl st once into the next st along, cut the yarn with a long tail for sewing and pull the yarn tail all the way through the slip stitch.
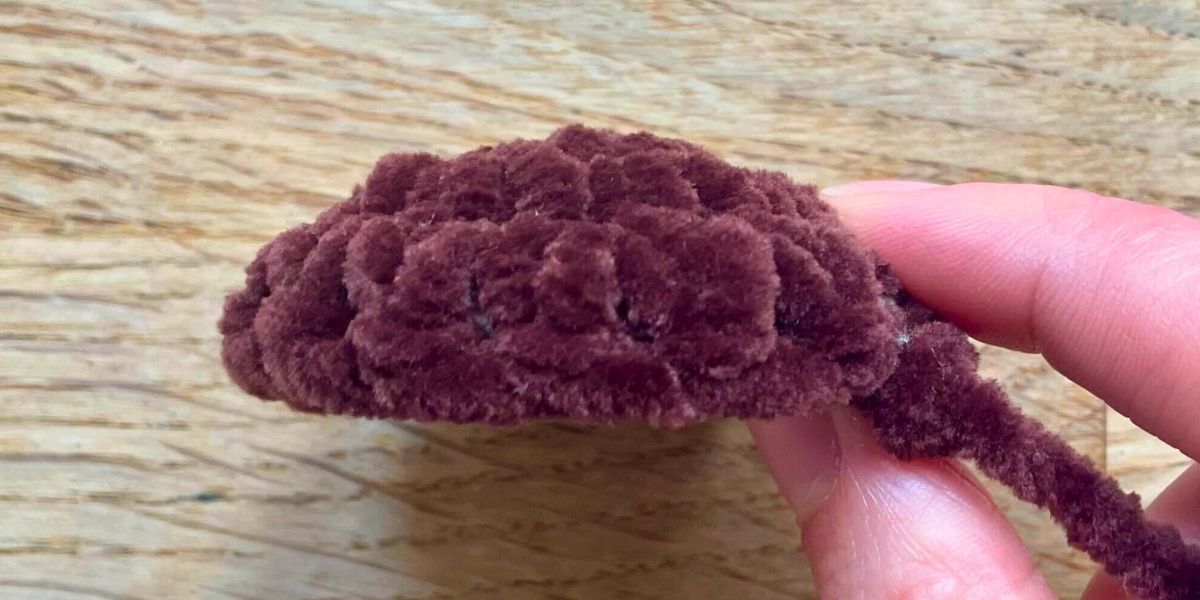
Here you can see how the ear forms a sturdy, 3-dimensional saucer shape, without needing any stuffing:
Repeat for the other ear.
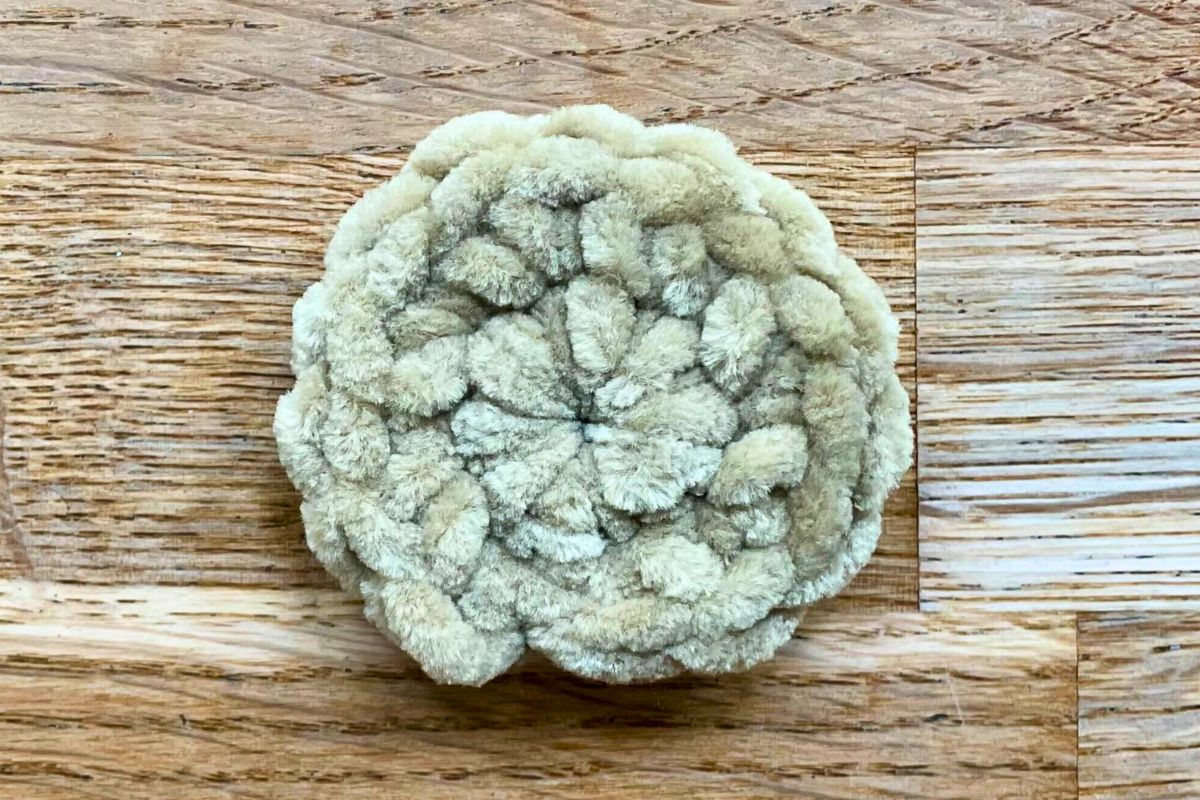
Muzzle
The muzzle is also worked in rounds, but with a mix of longer and shorter stitches, to give it it’s distinctive shape. This is where instructions in round brackets come in. Round brackets mean ‘make all the stitches inside the round brackets in the same place’. For example, (sc, hdc) means make a single crochet and a half double crochet into the same stitch.
To make the muzzle:
- Magic circle or 4-chain loop to start.
- 1st round: Ch 1, sc 8 into the center of the magic circle or 4-chain loop (8 sts).
- 2nd round: Inc, (sc, hdc), (2 dc), (hdc, sc), (sc, hdc), (2 dc), (hdc, sc), inc (16 sts). Here’s an illustrtation of how that looks:
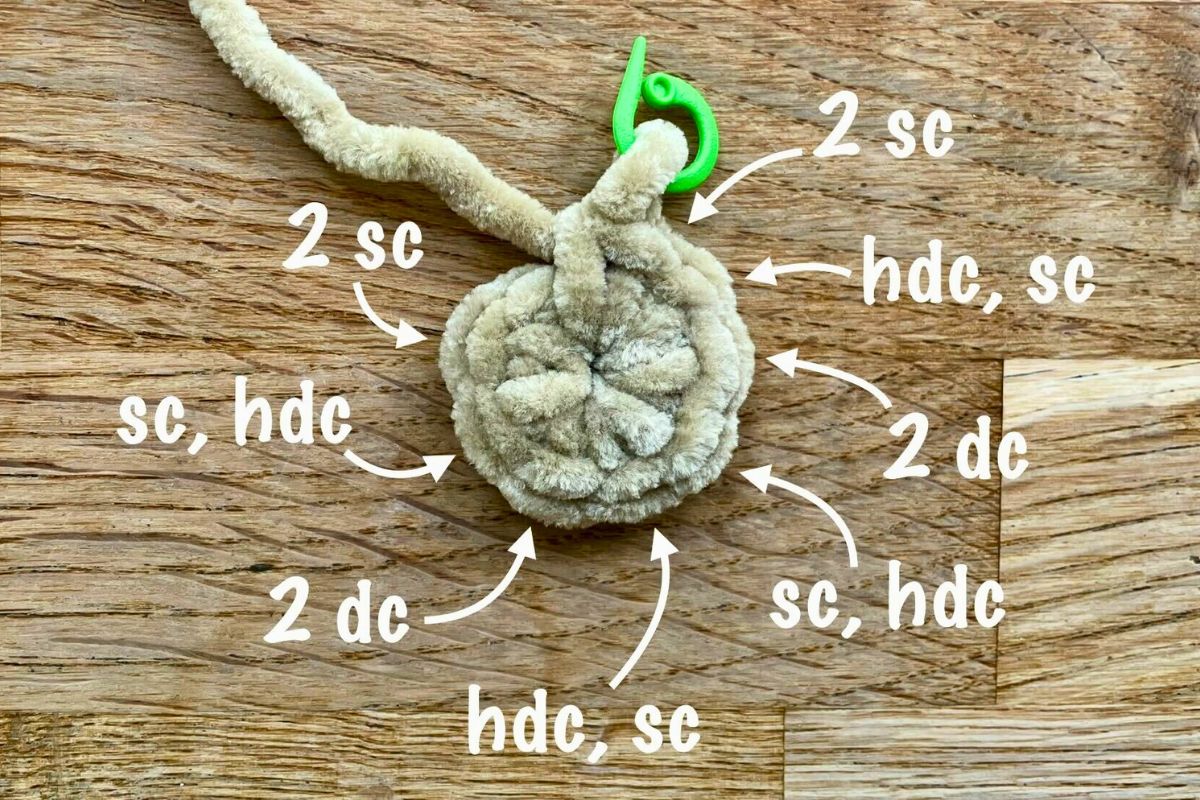
- Sl st into the next st, cut the yarn with a long tail for sewing, and pull the yarn tail all the way through the sl st.
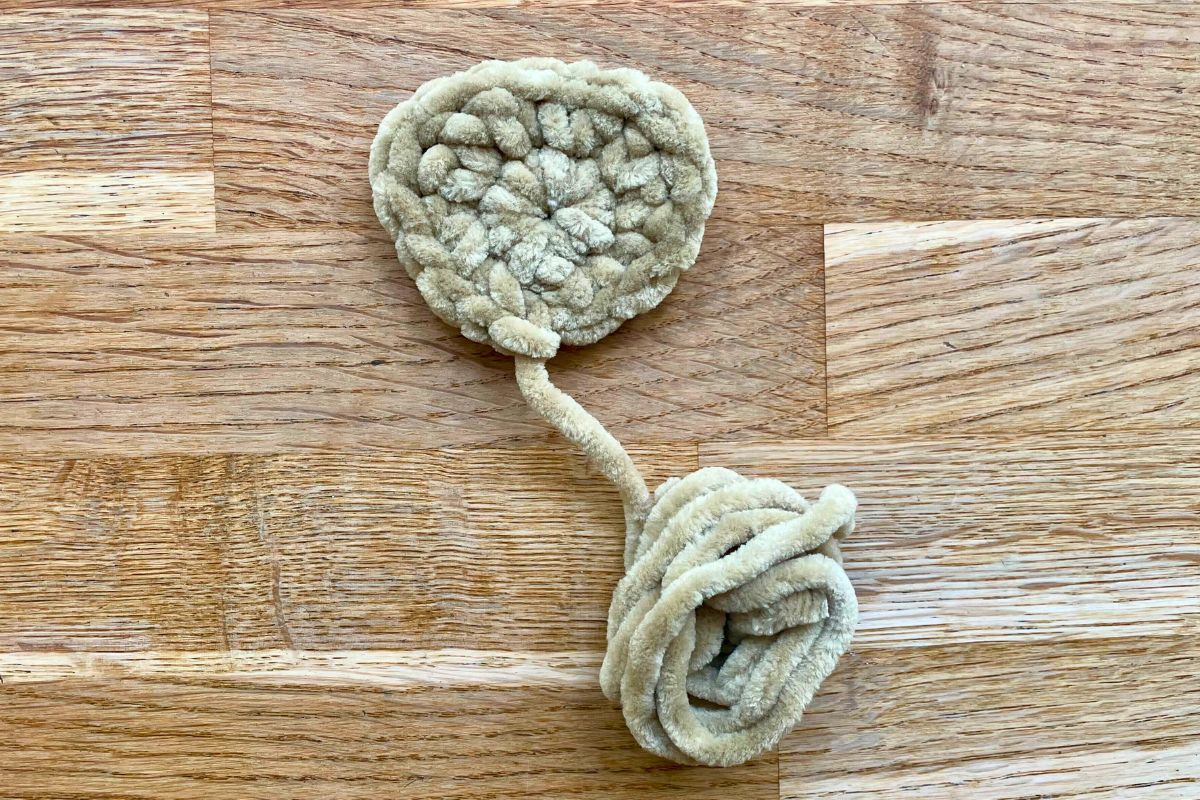
You should be left with a trapezoid shape. It’s in the nature of crochet stitches to slant slightly, which can distort the shape. If you like, you can steam the muzzle gently with an iron, and give the edges a little tug to straighten them out. Just be careful not to melt a polyester yarn!
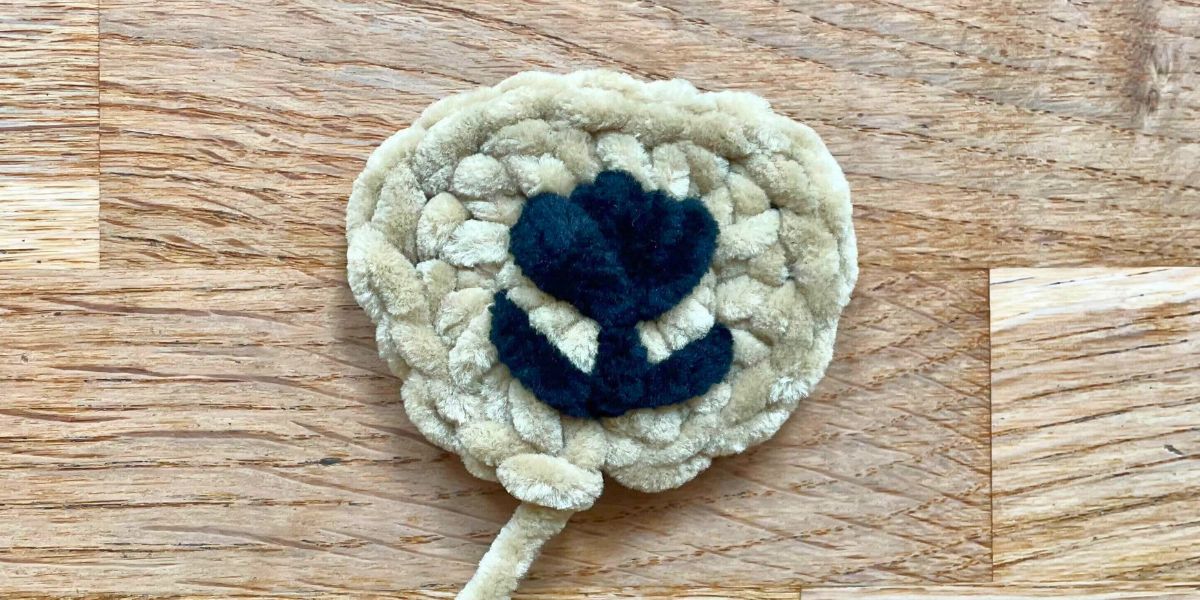
Embroidering the nose and mouth
Embroidering features onto amigurumi is usually the most nerve wracking part for me – what if all my work so far ends up ruined with a scowling expression?? But luckily, embroidering this little guy’s face could hardly be any easier or more foolproof. It simply follows the stitch pattern in the muzzle. In this photo, each pink line is one stitch:
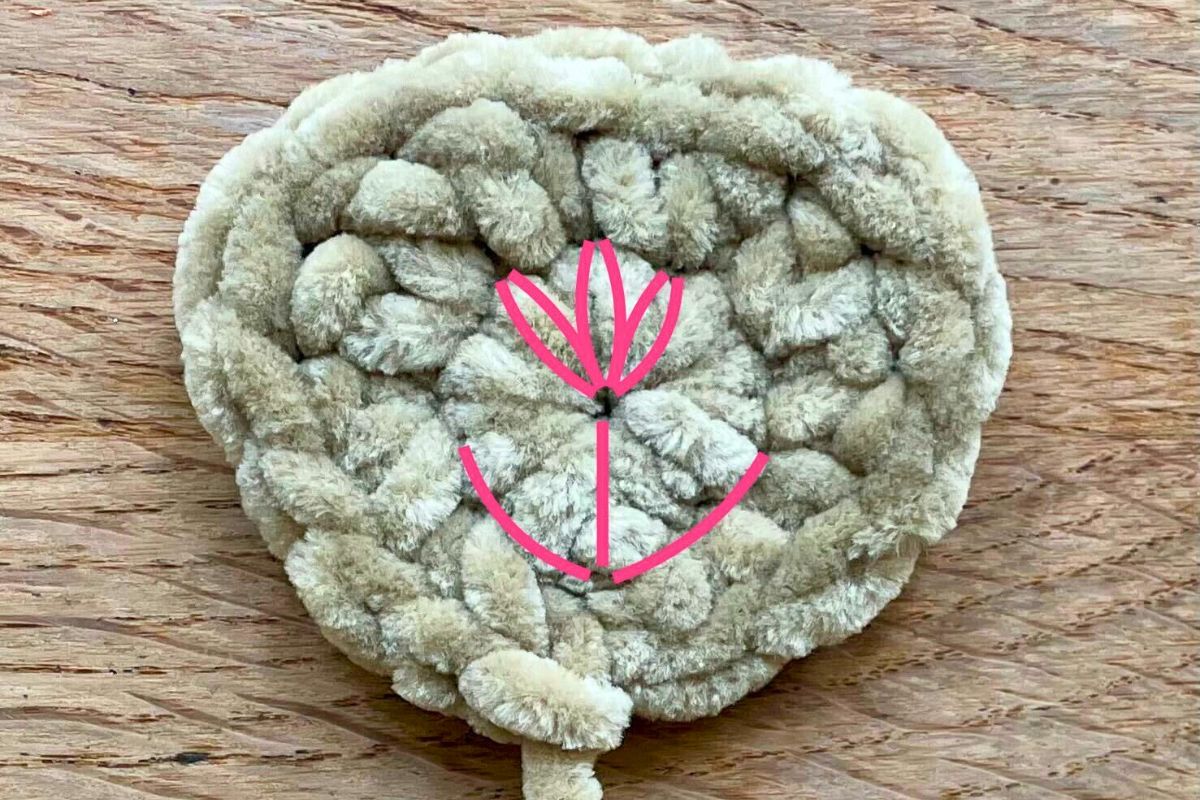
Begin with the nose. Bring the yarn up through the center of the muzzle, leaving a short tail at the back for tying off. Make the middle two stitches to the top of the nose first, then the two pairs of stitches on either side.
Next make the mouth. You can make his smile smaller or wider by making shorter or longer stitches. Or even give him a wry lopsided smile by making one stitch longer than the other! Finally, make a stitch joining the center of the mouth to the bottom of the nose. Then tie the two yarn tails together, and trim them short.
Assembling your squishy crochet bear
Now all the parts are made, so it’s time to assemble your bear. You’ll need to attach the eyes before stuffing and closing the body, but it’s up to you whether you sew on the ears and muzzle as well, or do it afterwards. I prefer to stuff and close the body first, so that’s what I’ll describe here. But just jump up and down through the instructions to follow them in a different order if you wish.
The eyes go between rows 11 and 12, and 6 sts apart. Stuff the bear firmly, and close the base:
- Round 26: 8 dec (8 sts)
Picture the remaining 8 stitches as two parallel rows of 4 stitches, and join them using mattress stitch though the outside loops only. Picture 1 shows the darning needle already making the first stitch, and where to put the following stitches. If you’re using fluffy yarn like me, it’s sometimes easier to tighten them as you go. But for smooth yarns you can make all the stitches loosely (picture 2), then pinch the place where you started firmly, and pull the yarn in the opposite direction (picture 3).
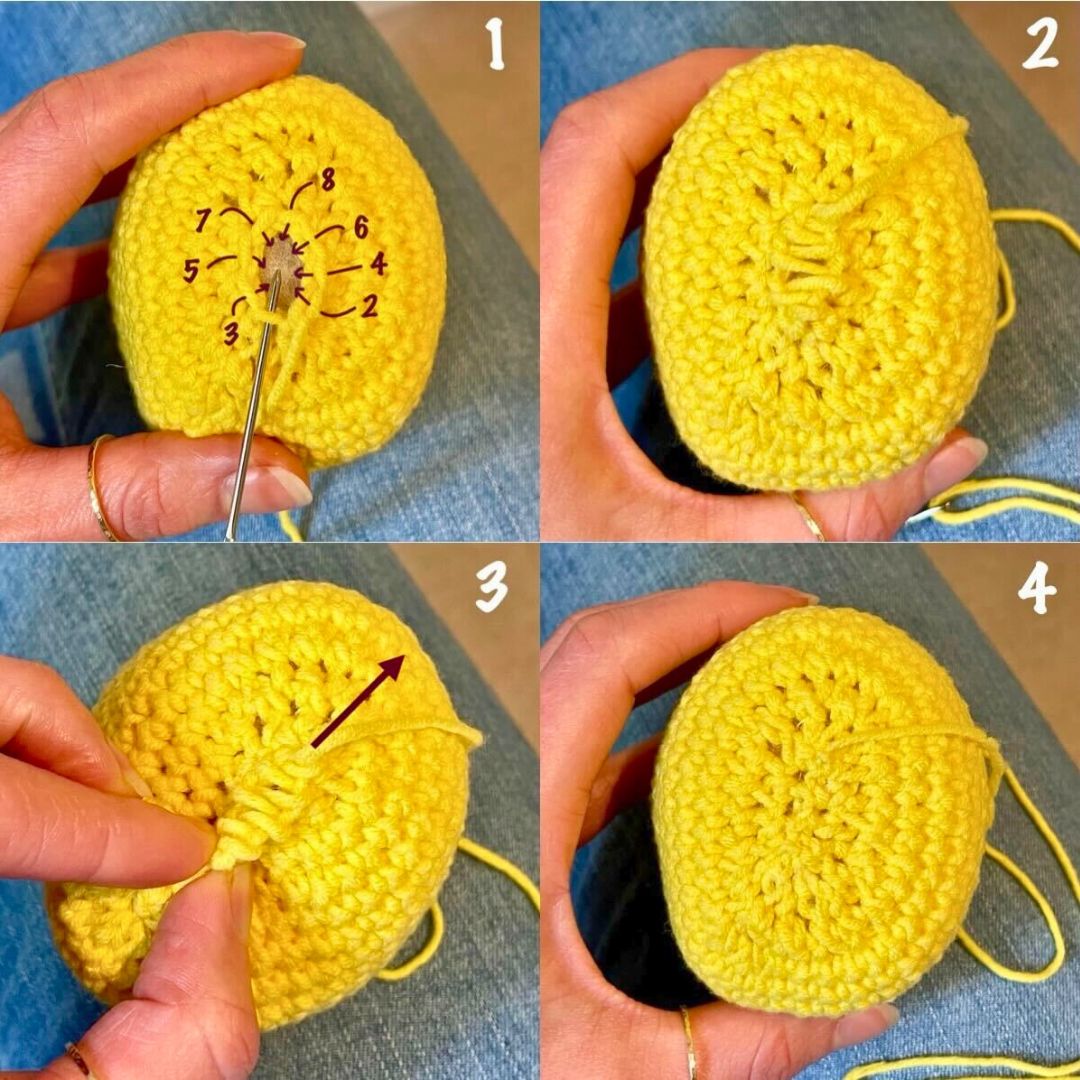
Tie off the yarn tail, and poke it inside the body.
Sewing on the ears and muzzle
We’re on the home straight now. Use the yarn tail on the muzzle to whip stitch it onto the body, just below the eyes. Tie off the end, and poke it inside the body. Join the ears onto the head with whip stitch. Position them three rows to each side of center on top of the head and half way back. It’s a good idea to pin them down and look at them from all angle before you commit to stitching.
And then, hey presto! Your super cute squishy crochet bear is done!
Squishy crochet bear pattern – summary
There’s something really special and sentimental about making a teddy bear for a child. Lucy also has a beautiful amigurumi pattern for the quintessential childhood teddy. It’s very beginner-friendly too, but what I hope I’ve created here is something even more accessible, for people just starting to find their feet in crochet. My 10 year old is delighted with her new cuddly toy, and I hope you will be too. I’d love to see a photo on Lucy’s Facebook or Instagram. Happy crocheting!
*The products linked in this pattern were carefully selected by Lucy Kate Crochet. If you decide to purchase using the links provided, we may earn a small commission on that sale. This is at no extra cost to you.


