Basic Crochet Techniques and Stitches
Every crochet project starts with a single stitch. If you’re learning to crochet for the first time, you’re going to need to know the basic crochet techniques and stitches, including how to cast on, make chain stitches, and work one of the most simple crochet stitches: either single, half double, double, or treble crochet.
But with one of those under your belt, you might be surprised just how far it can take you. I’m an anxious learner, and I think I made two blankets, a scarf and some wrist warmers using only double crochet, before I starting experimenting with the other basic stitches.
And the silliest thing is, once you’ve learned one basic stitch, all the others follow easily from it – so I don’t even know what I was afraid of!
In order to get you off to a more confident start in crochet than mine, I’m going to take you step-by-step through all the foundation techniques, starting with casting on, holding your hook and yarn, and making the basic crochet stitches. Then we’ll finish with a look at tension made simple, and how the basic stitches can be combined to achieve more advanced results.
To skip ahead to any one of those techniques, you can click on these links:
The basic crochet stitches
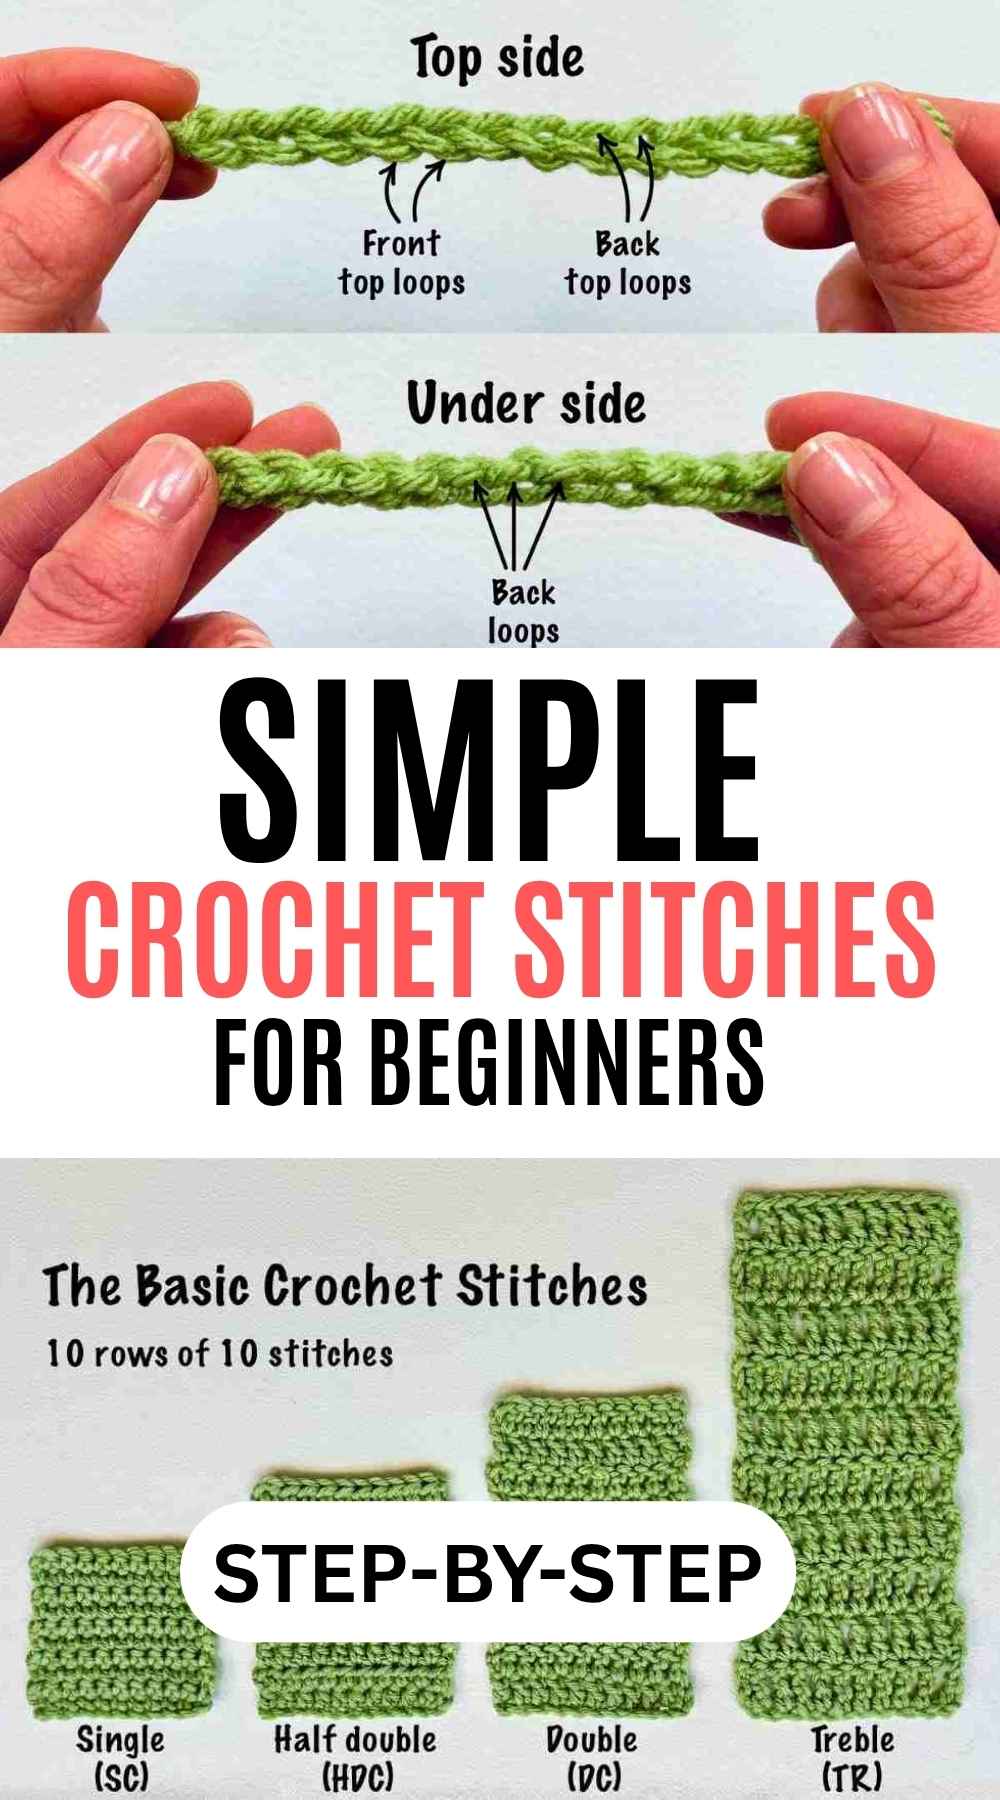
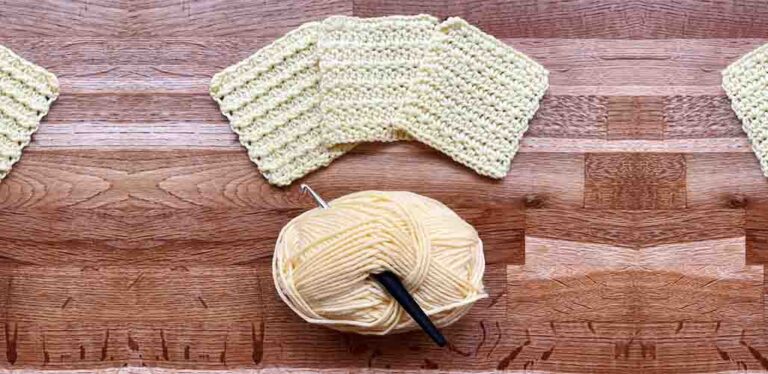
If you’re not sure where you want to start, here’s how 10 rows of 10 stitches looks in the 4 main crochet stitches:
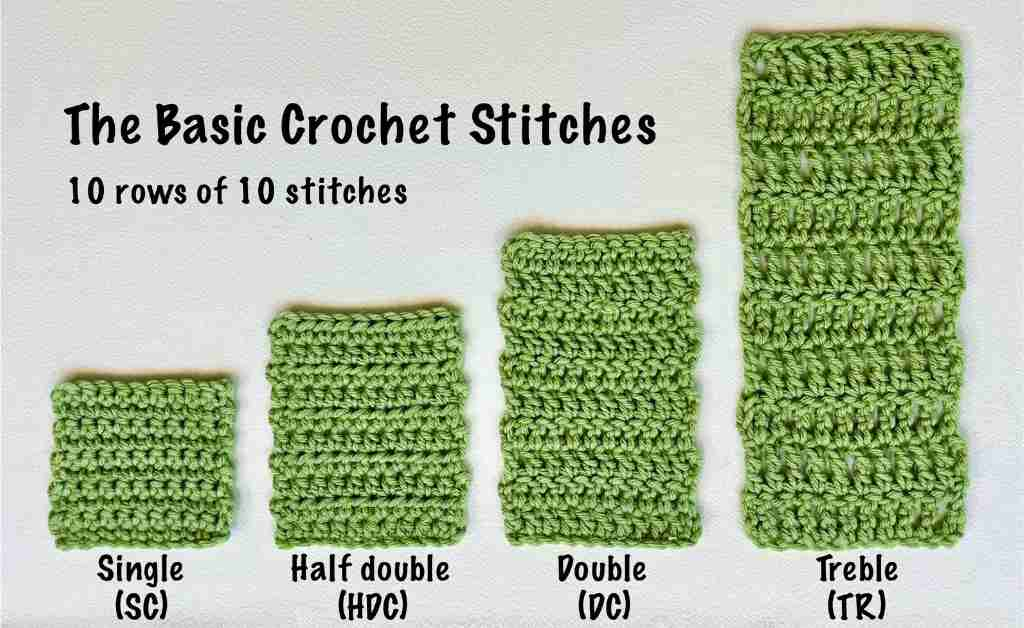
As you can see, the stitches get taller as you progress from single to treble crochet. Since all four types of stitch are only joined to their neighbors at the top and bottom, fabric crocheted with tall stitches is lighter and more open. Short stitches have smaller spaces between them, so they’re warm, but fabric made from them is also stiffer and less drapey.
Casting on (attaching your yarn to the hook)
Casting on in crochet is as simple as making a slip stitch and putting it on your hook. If you’ve already got a preferred method for making a slip knot, that’s great. If not, here are two easy ways to do it:
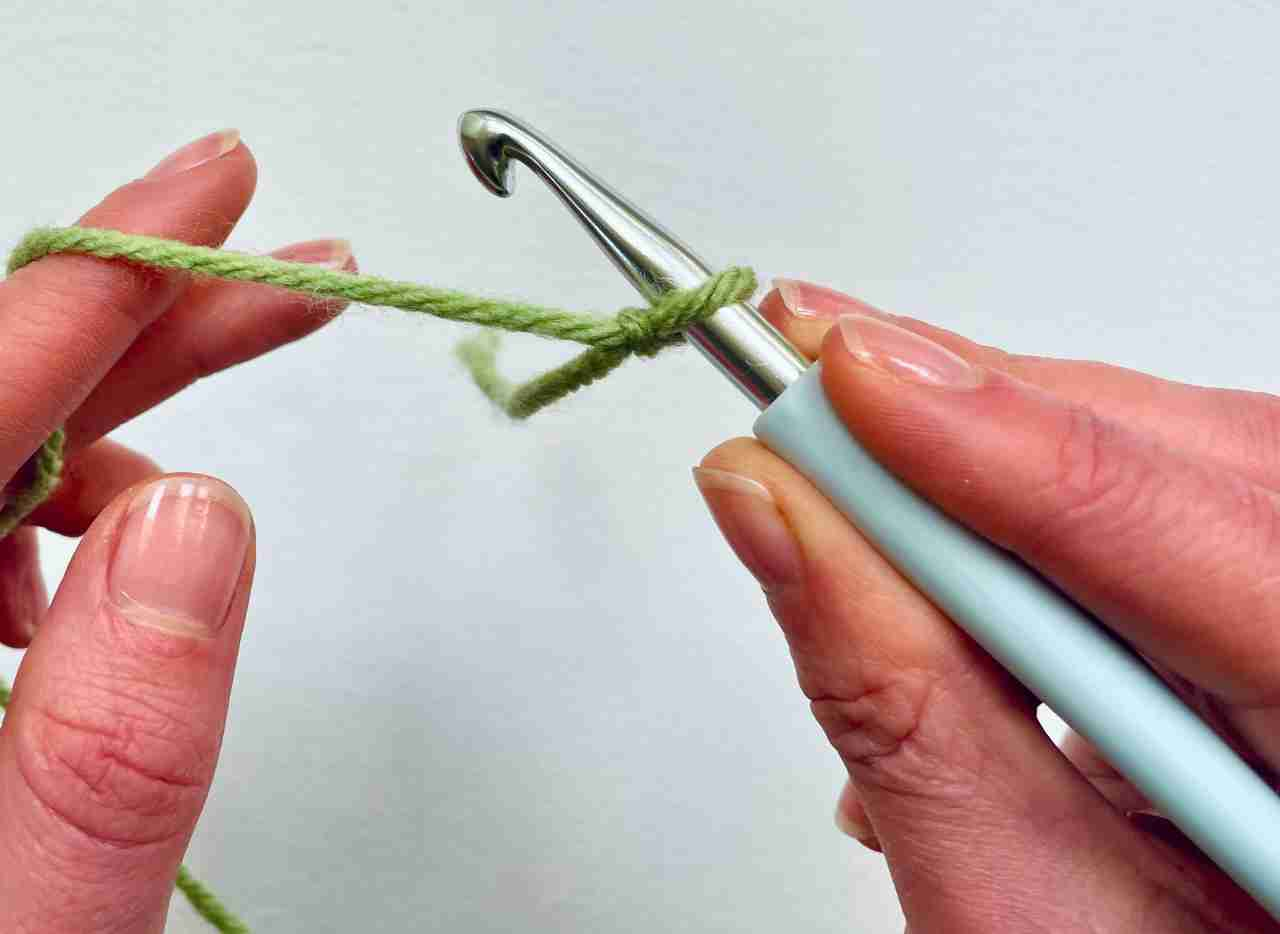
1. Using your hook (the method I was taught)
- Using your dominant (writing) hand, hold the yarn in front of the first two fingers of your other hand, so the yarn end dangles down towards your lap.
- Hold the yarn in place with the thumb of your non-dominant hand, and wrap the yarn around your fingers once, so it makes two parallel lines on the backs of your fingers, and criss-crosses in front of them.
- Flip your hand over, so the backs of your fingers face upwards, and use your crochet hook to pull the loop of yarn nearest your wrist underneath the loop of yarn nearest your fingertips.
- Keep pulling, and a slip knot will form on your hook.
2. On your finger (the way Lucy uses)
- Wrap the yarn twice around the index finger of your non-dominant hand.
- Lift the inside loop (nearest your wrist) over the outside loop (nearest your finger tip), and put it down on your finger.
- Lift the new inside loop (previously the outside loop) over the new outside loop (previously the inside loop) and over the end of your finger.
- Pull the slip knot tight, remove your finger, and place the loop on your hook.
Different ways to grip your hook
Crochet hooks come in all shapes, sizes, and materials, including metal, plastic, wood and bamboo. Some of them have an ergonomic handle, and some just have a flattened section near the hooked end to give your thumb some traction. You’ll hold your hook in your dominant hand – the one you use to write with. There are a few ways to hold your hook, and it’s just a matter of experimenting to find the one that’s comfortable for you. Don’t worry if it all feels a bit awkward at first. Persevere and it will all come together!
The two most common ways people hold their crochet hook are the pencil grip and the knife grip. Don’t get stressed about choosing between them: have a go holding the hook both ways, and press ahead with whatever feels the least weird. You’ll find that your fingers unconsciously find their own way into a position that works for you, and don’t worry if it’s not an exact replica of the pictures coming up. As long as it suits you, that’s all that matters!
The pencil grip
The pencil grip (and the knife grip come to that) looks exactly how it sounds. Assuming you hold your pen or pencil in a fairly orthodox fashion, grab your crochet hook and hold it in the same way. Your thumb should be on the inside of the hook (the same side as the inner edge of the hooked end). Your index finger should be on the outside (the same side as the outer edge of the hooked end), just about opposite from your thumb. The tip or side of your middle finger also rests on the hook to stabilize and maneuver it, and your ring finger might rest on the hook too, if it usually does when you hold a pencil.
The knife grip
You’re never going to believe this, but the knife grip means holding your crochet hook… like a knife! The thumb and middle finger are in a similar position to the pen grip, but the forefinger is extended towards the hook end of the hook. As you can see, the main difference from pencil grip is that the hook’s handle is under my fingers, rather than poking out between my thumb and forefinger. Incidentally, this is how you’ll see me holding my hook in the videos coming up.
Holding the yarn
You’re going to hold your yarn in your non-dominant hand. This next action is going to become muscle memory really quickly, but it will probably feel a bit clumsy at first:
- Hold the hook in front of you in your dominant hand, so the yarn leading to the ball hangs down in front of you.
- Hook the pinky finger of your non-dominant hand behind the yarn and loop the yarn under the pinky, up in front of your ring and middle fingers, then behind your index finger.
Your hands should only be an inch or two apart. But just like holding the hook, it doesn’t matter if you hold the yarn slightly unconventionally, or have your hands a little wide, as long as you can move them in a smooth and even motion.
How to crochet chain stitch
Abbreviation: Ch or ch
Lots of crochet projects start with a foundation chain, so that’s where we’re going to start too. A foundation chain is simply lots of chain stitches made in a row, into which the first row of crochet stitches will be made. Chain stitch is about as simple as crochet gets too, so it’s the perfect place to get to grips with controlling your yarn and hook.
Here’s a video showing how it’s done, with written instructions and step-by-step photos after:
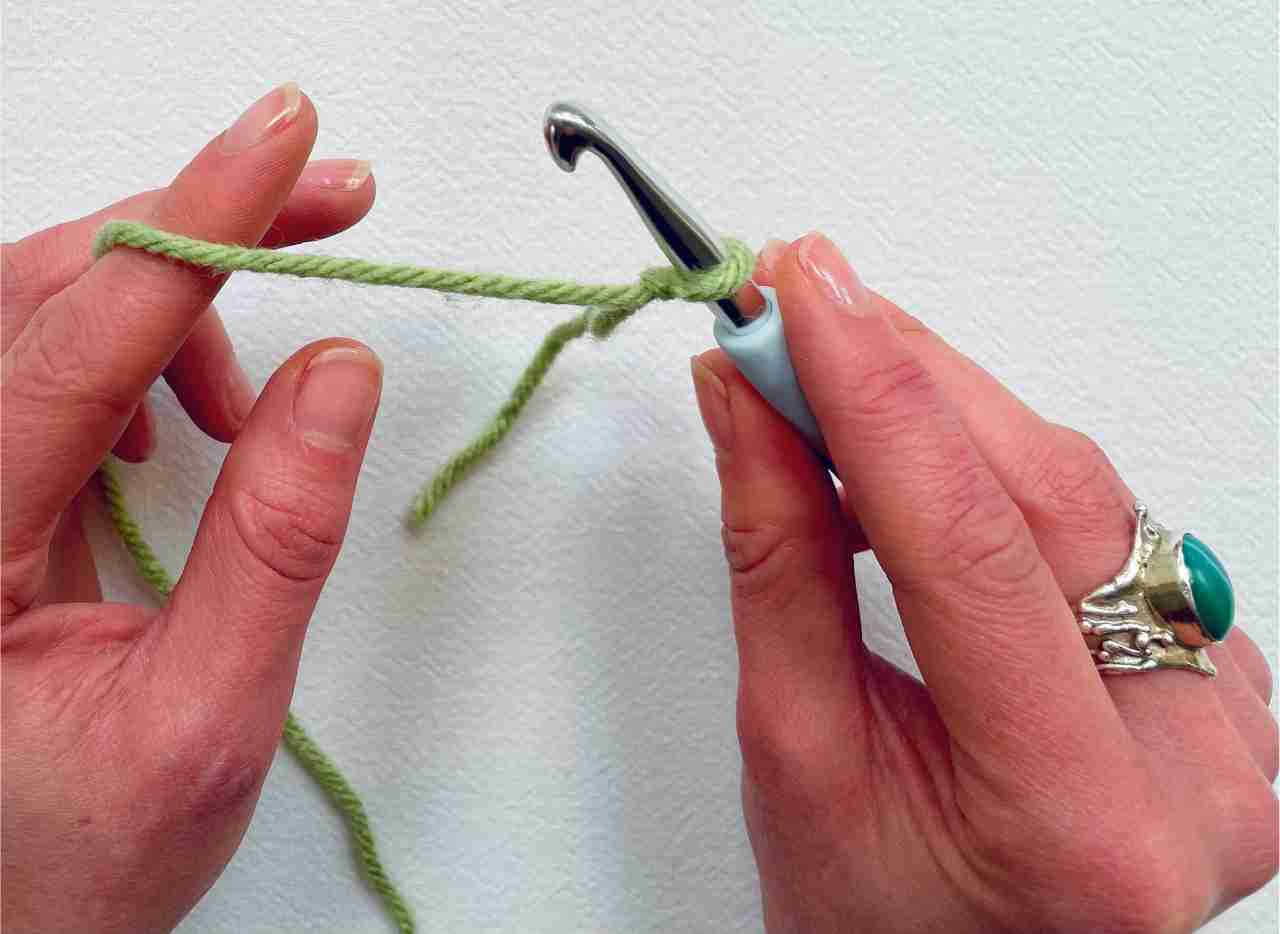
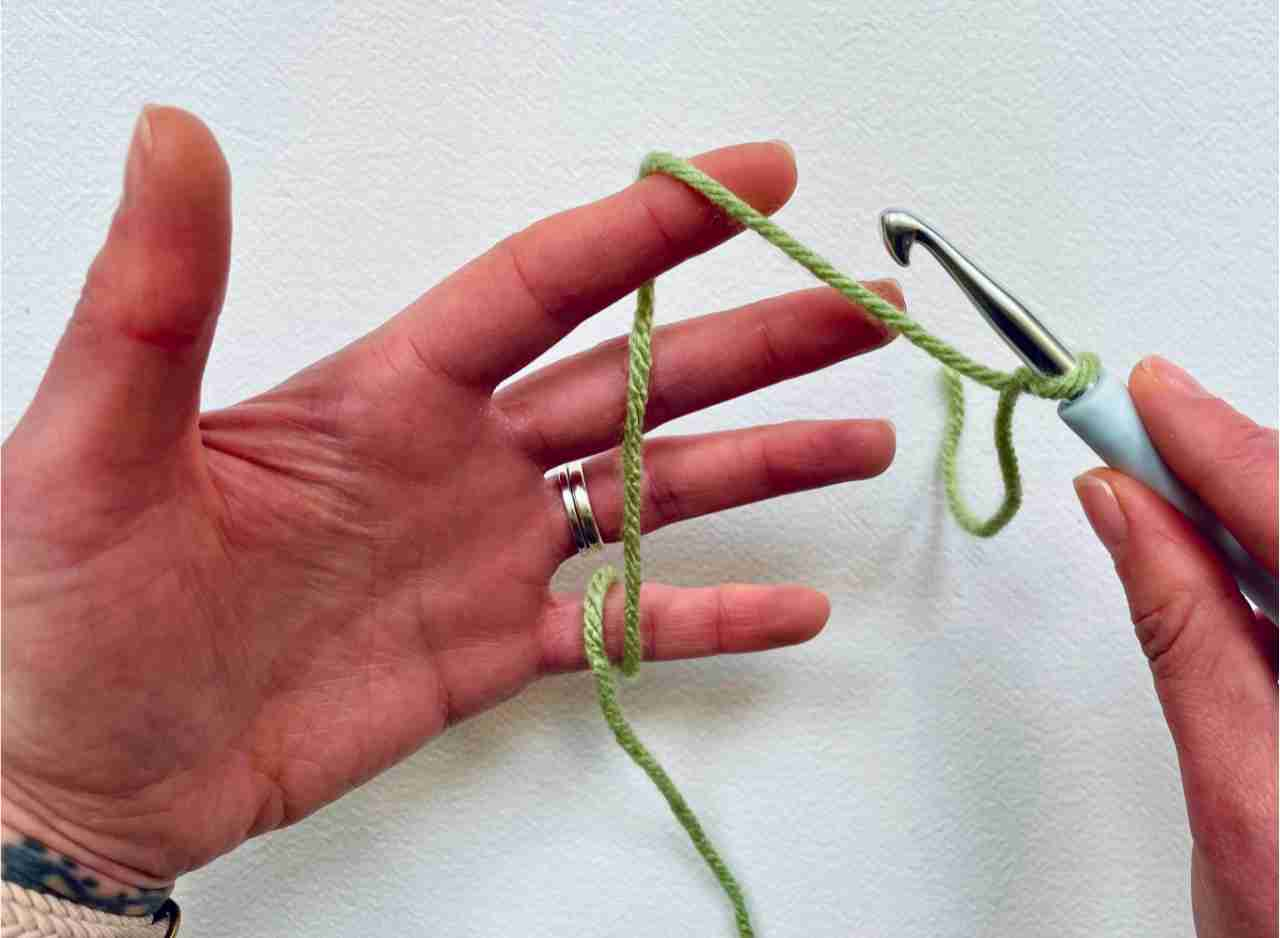
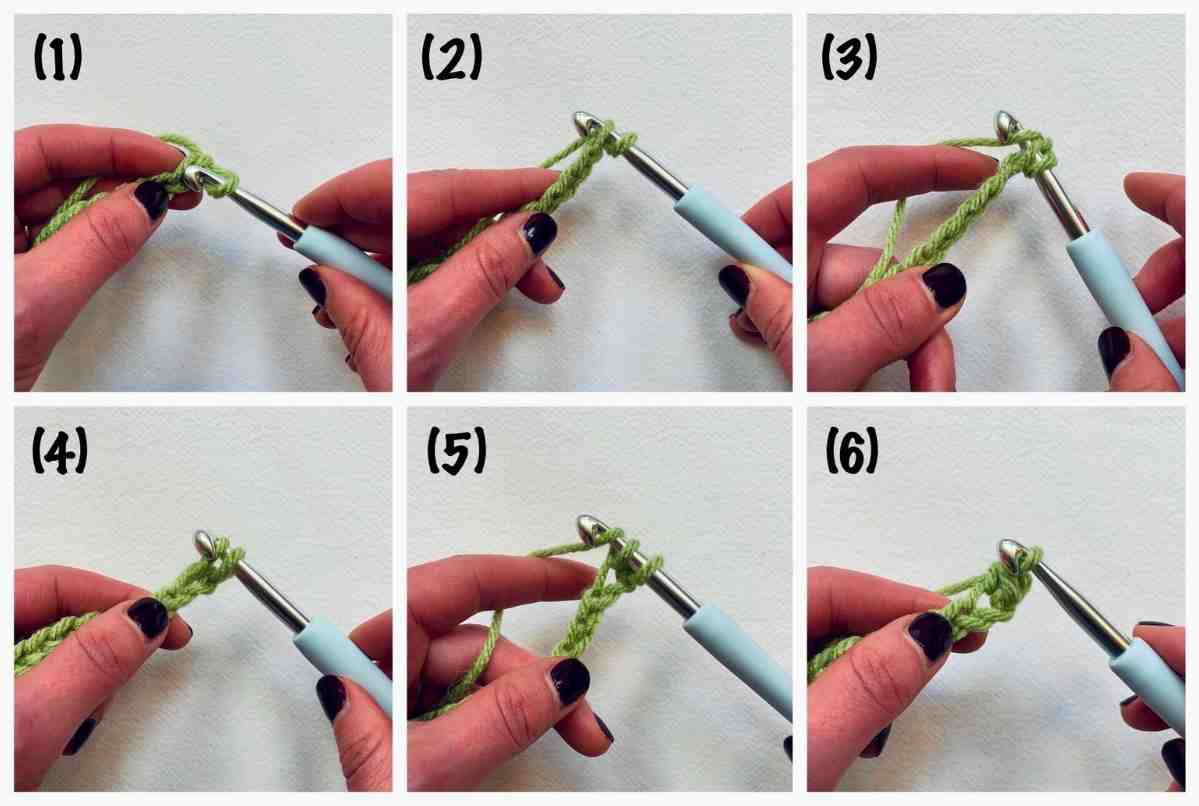
- Cast on with a slip knot, and get your hook and yarn in position.
- Use the middle finger and thumb of your yarn-holding-hand to pinch the slip knot or the yarn tail, and hold it steady.
- Loop the yarn over your hook, from back to front. Once you’re making this movement confidently, you’ll probably find you’re moving the yarn up and over a bit, and the hook down and under a bit (1). But don’t overthink how you get there at the moment – fluidity will come with repetition!
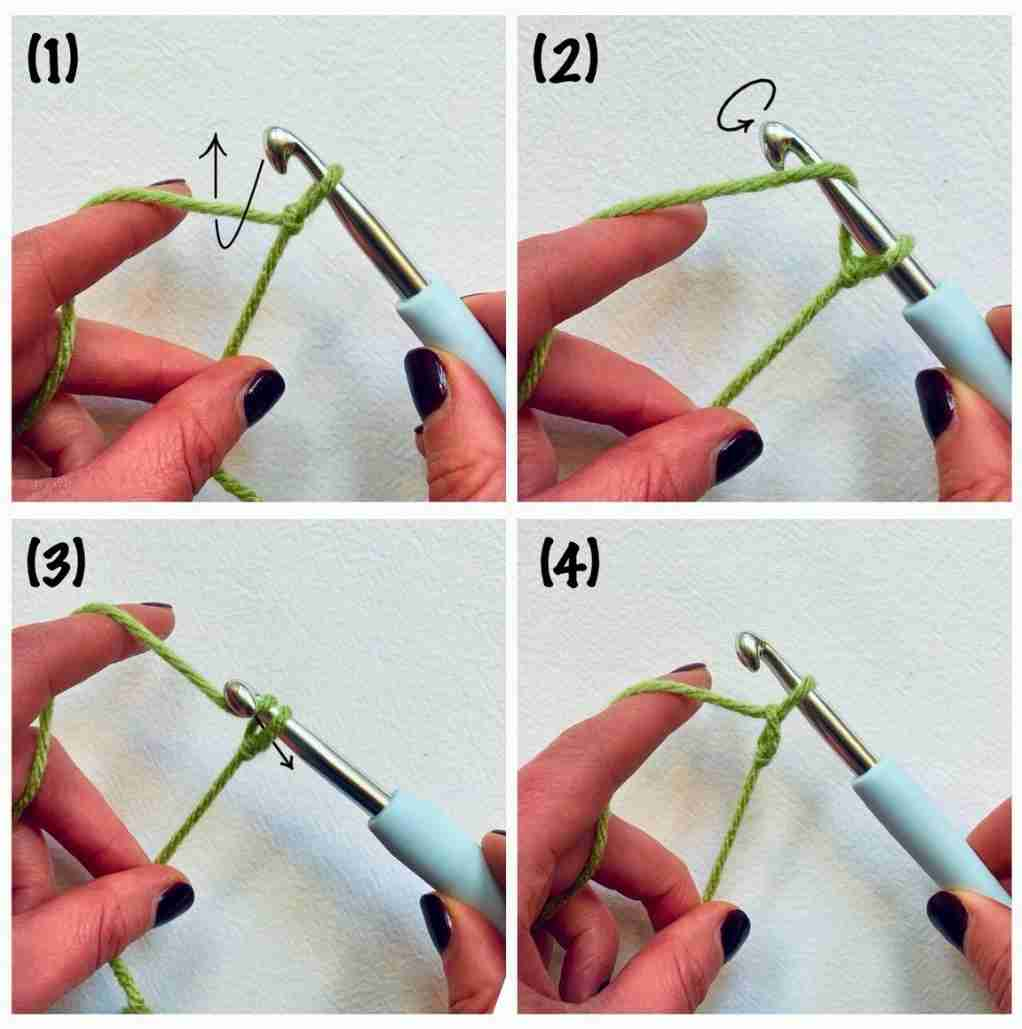
- Line up the hooked end of your crochet hook ready to catch the yarn (2).
- Pull the yarn through your slip knot (3). And that’s it – chain stitch complete (4).
- Put the yarn over the hook from front to back again, and pull another loop through the loop already on your hook. That’s two chain stitches.
- Keep practising, until you can make lots of evenly sized chain stitches in a steady motion.
Anatomy of a chain stitch
Before we forge ahead with putting some crochet stitches in our foundation chain, let’s examine her a bit more closely. I bet you think she looks boring, huh? Well you won’t be saying that when you’re trying to work out where your first stitch goes.
Each chain has three parts: a top front loop, a top back loop, and a back loop underneath.

For the majority of projects, you’ll work the first row of crochet into the top back loops only. That leaves the top front loops free for joining the bottom edge to another piece of crochet later. But some people like to make their first row of stitches into the back loops. It’s a bit fiddly, but it leaves both of the top loops free an extra-strong join later. Have a go at both and see what you prefer – for the rest of the examples here, I’m going to use the top back loops only, because I prefer that.
Turning chains
The next thing to get to grips with are turning chains. Turning chains are little groups of chain stitches at the beginning of every row. They create height for the crochet stitches that follow them.
- Single crochet needs 1 turning chain at the start of the row.
- Half double crochet needs 2 turning chains at the start of a row.
- Double crochet needs 2 or 3 turning chains. Three is traditional, but it’s increasingly common to find patterns which only call for two. All I can say is, experiment, and find what works for you! If your tension is naturally on the loose side, two might be enough, and three might look baggy. If your tension is tight, you might need three to get enough height.
- Treble crochet needs 3 or 4 turning chains. As for double crochet, either follow the instructions in the pattern, or experiment to see which gives the tidiest edges for you – it might vary according to the yarn and hook you’re using.
You’ll also need to add turning chains to the end of your foundation chain, before you make your first row. So if you want to make a double crochet scarf 30 stitches wide, you’ll need to start with a foundation chain of 32 or 33 stitches. If you’re following a pattern, the pattern writer will usually include the turning chains for the first row in the number of foundation chains they tell you to make.
How to single crochet
Abbreviation: Sc or sc
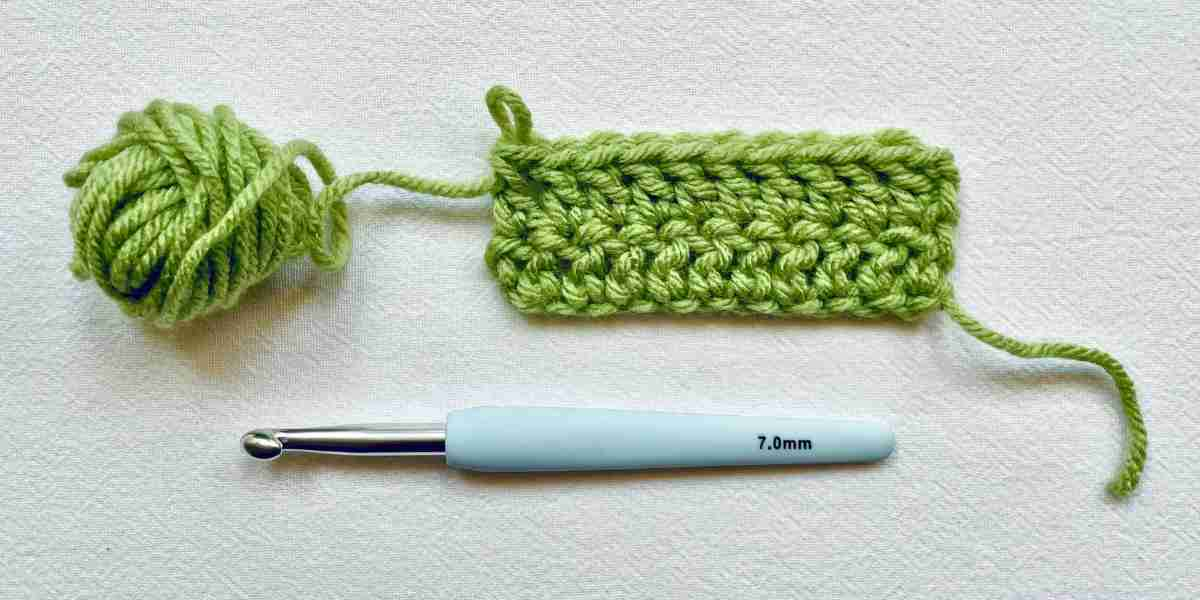
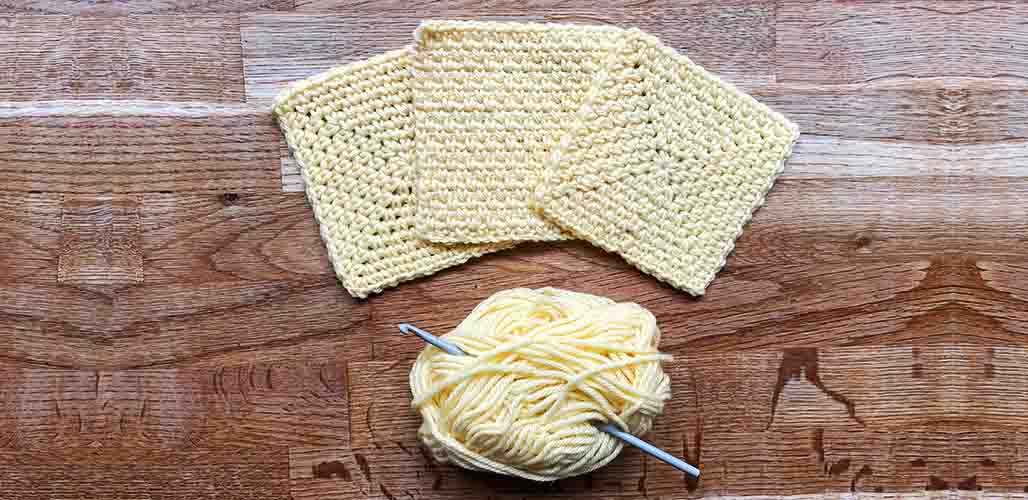
At last, it’s time for some actual crochet! Single crochet is the simplest crochet stitch, and the smallest. It’s the building block for amigurumi toys, and heavily employed for projects that need strong, dense fabric, like dish cloths, coasters and reusable face scrubbies. To make a little sample of single crochet:
- Make a foundation chain 11 stitches long (10 spaces for single crochet stitches + 1 turning chain).
- Skip the first chain stitch and insert the hook through the 2nd chain stitch from the hook (1 & 2). If you skipped ahead to get here, and now you’re not quite sure which bit of the chain stitch to insert the hook through, go back to anatomy of a chain stitch!
- Loop your yarn over the hook from back to front (3).
- Use the hook to pull that loop of yarn through the chain stitch. Keep it on the hook! You have two loops on your hook now (4).
- Loop your yarn over the hook from back to front again (5).
- Use the hook to pull that loop through both of the other loops (6). Your first single crochet is complete!
Here’s that process in video form (by the way, none of these videos have sound – don’t adjust your volume control!)
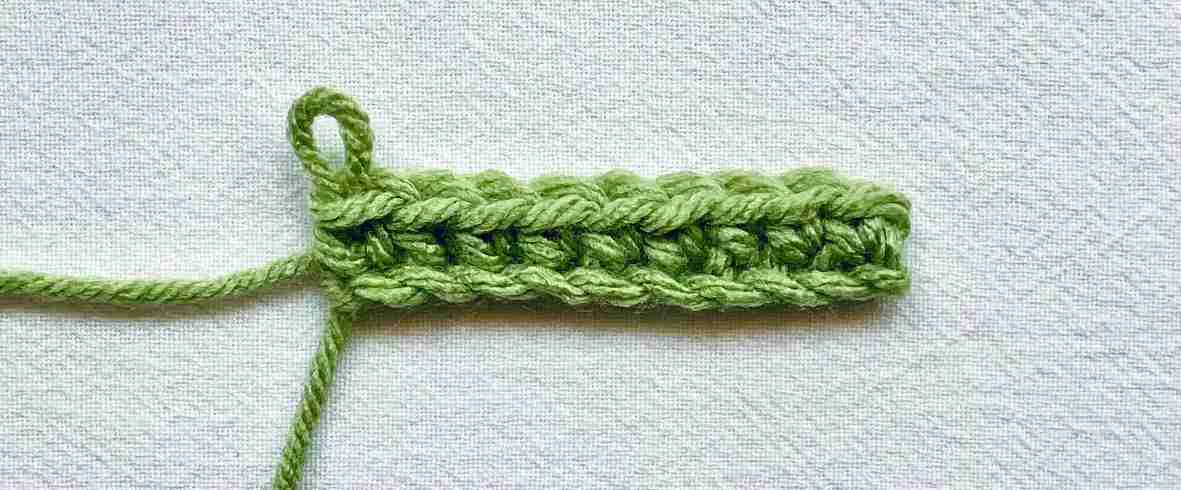
Make another single crochet into each of the 9 stitches remaining on your foundation chain. This first row will probably curl up in a corkscrew as you go, but don’t worry, it will straighten out when you make the second row. In fact making a single twisty row is a popular technique in amigurumi for adding details like hair or sheep wool! When you get to the end of the foundation chain, count your stitches to make sure you have as many as you expected – the last space on your foundation chain can be easy to miss!
Turning your work
Congratulations, you’ve made your first row of crochet stitches – you’re officially a crocheter! Next you’re going to turn your work, and make another row going back in the other direction.
- First, make a turning chain of one chain stitch.
- Turn the first row 180° counterclockwise. The working yarn should come down in front of your work you’ve done so far.
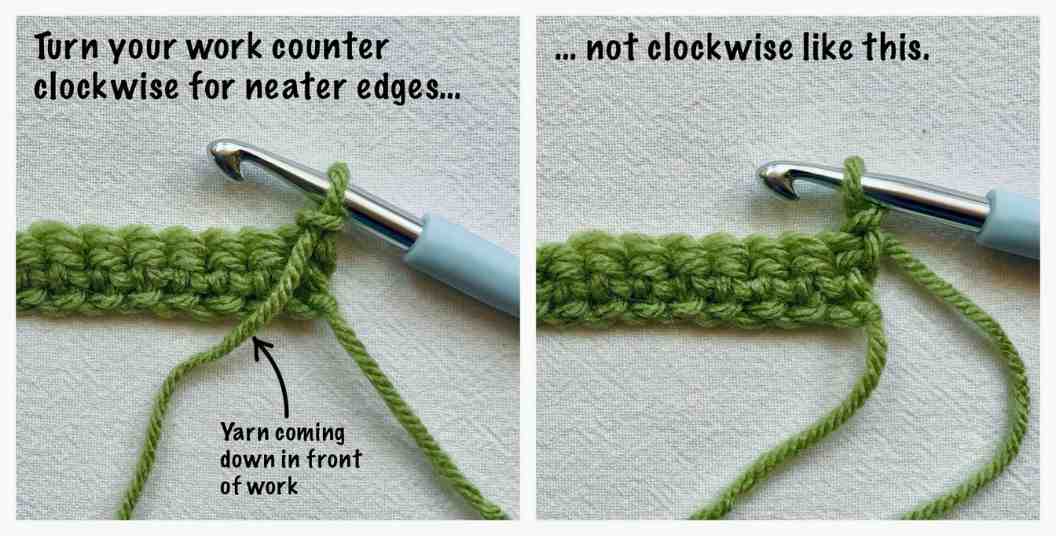
Which way you turn your work isn’t actually as important as being consistent and turning it the same way every time, but I’m adamant that turning it counterclockwise produces neater sides. To begin a new row, insert the hook under both top loops of the last stitch from the previous row, and then follow the steps to make a single crochet.
Don’t forget to make another turning chain at the end of the row before starting row 3!
Moving on
Now you’ve mastered the single crochet stitch, all the other stitches you’ll ever need are really easy to pick up! The basic stitch mechanics – putting the yarn over the hook, and drawing through loops – are the same for all crochet stitches. All that changes is how many yarn overs and drawing through loops you do, and in what order.
Half double crochet
Abbreviation: Hdc or hdc
Half double crochet is a little taller, and a fraction wider than single crochet. On its own it makes a soft, dense fabric that’s popular for hats and sweaters. To make a sample:
- Chain 12 (10 spaces for stitches, and 2 turning chains).
- Put the yarn over the hook from back to front.
- Insert the hook into the 3rd chain from the hook.
- Put the yarn over the hook again.
- Grab the yarn with the hook and draw a loop through the chain stitch. You’ll have 3 loops on your hook.
- Put the yarn over the hook again, and draw it through all 3 loops. Stitch complete!
- Repeat in the remaining 9 chains.
- Make 2 turning chains, and turn your work counterclockwise.
- To begin the next row, skip the 2 turning chains, and insert the hook under both top loops of the last stitch from the previous row. Complete the row as before.
Here’s a video of half double crochet in action:
You might have noticed in these videos that I use the forefinger of my hook-holding hand to pinch the yarn against the side of the hook during motions. This isn’t necessary, and I’m pretty sure it’s even considered bad form by some crocheters. But it’s how I’ve always done it! You don’t have to do it if you can manipulate the yarn confidently without doing it. It’s all about finding what works for you, so that crochet is fun for you.
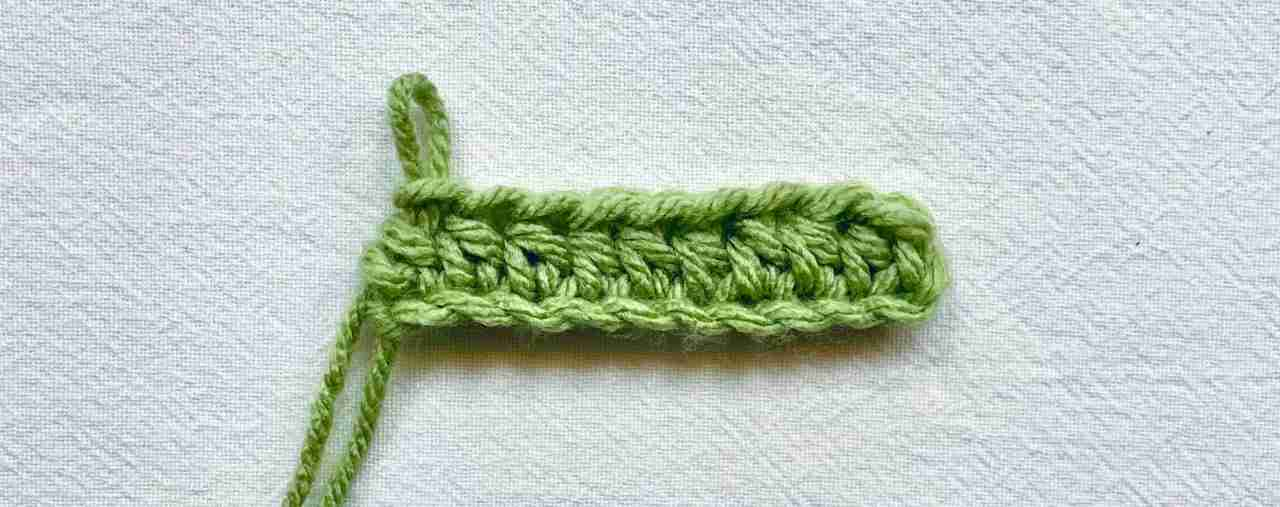
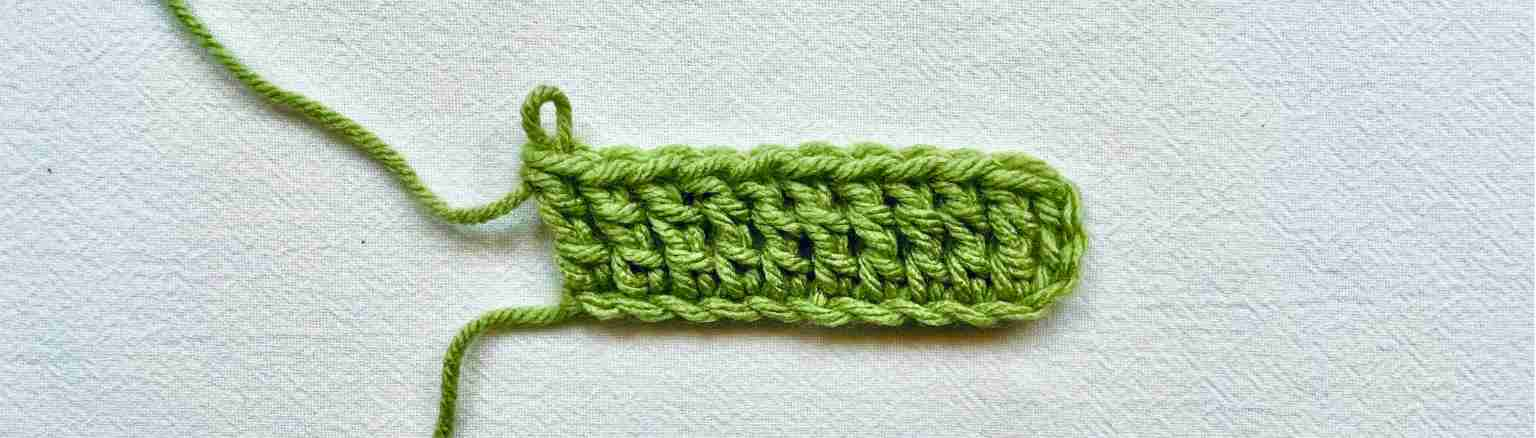
Double crochet (dc)
Abbreviation: Dc or dc
Double crochet is an absolute workhorse of a crochet stitch. It’s what traditional granny squares are made out of, not to mention countless decorative stitches like ripple stitch and waffle stitch. It’s a stalwart of blankets, scarves, and clothes. Double crochet is roughly twice the height of single crochet, and the same width. Which is what makes it so popular – you’ll cover the same area in half as many stitches as would need to make using single crochet!
To make a swatch:
- Chain 12 or 13 (10 spaces for stitches, and 2 or 3 turning chains). I’m using two turning chains.
- Bring the yarn over the hook from back to front.
- Insert the hook into the 3rd chain from the hook (4th if you’re using 3 turning chains).
- Yarn over, and draw a loop through the chain stitch. Now you’ll have 3 loops on your hook in total.
- Yarn over, and draw it through 2 of the loops on your hook. 2 loops remaining on your hook.
- Yarn over, and draw it through both remaining loops.
Here’s a video of that in action:
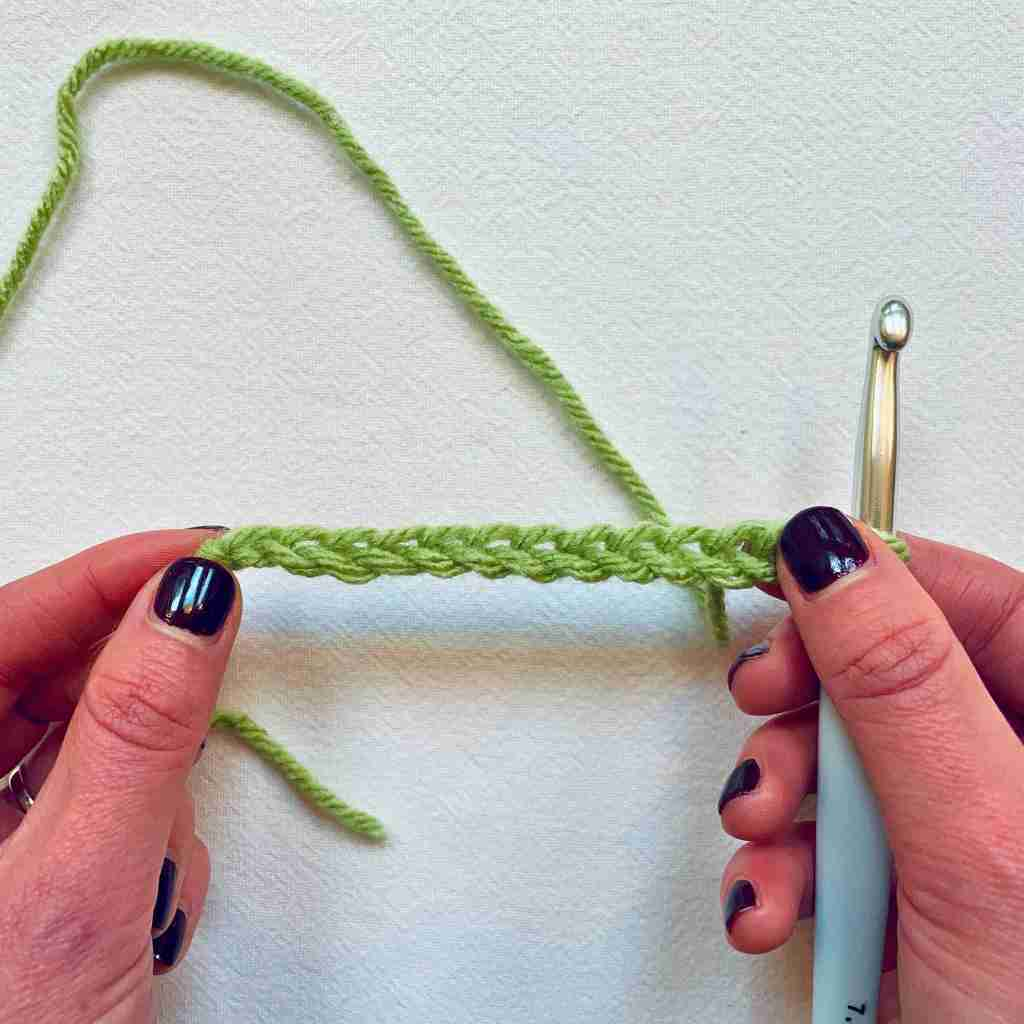
And here’s how the first finished row will look:
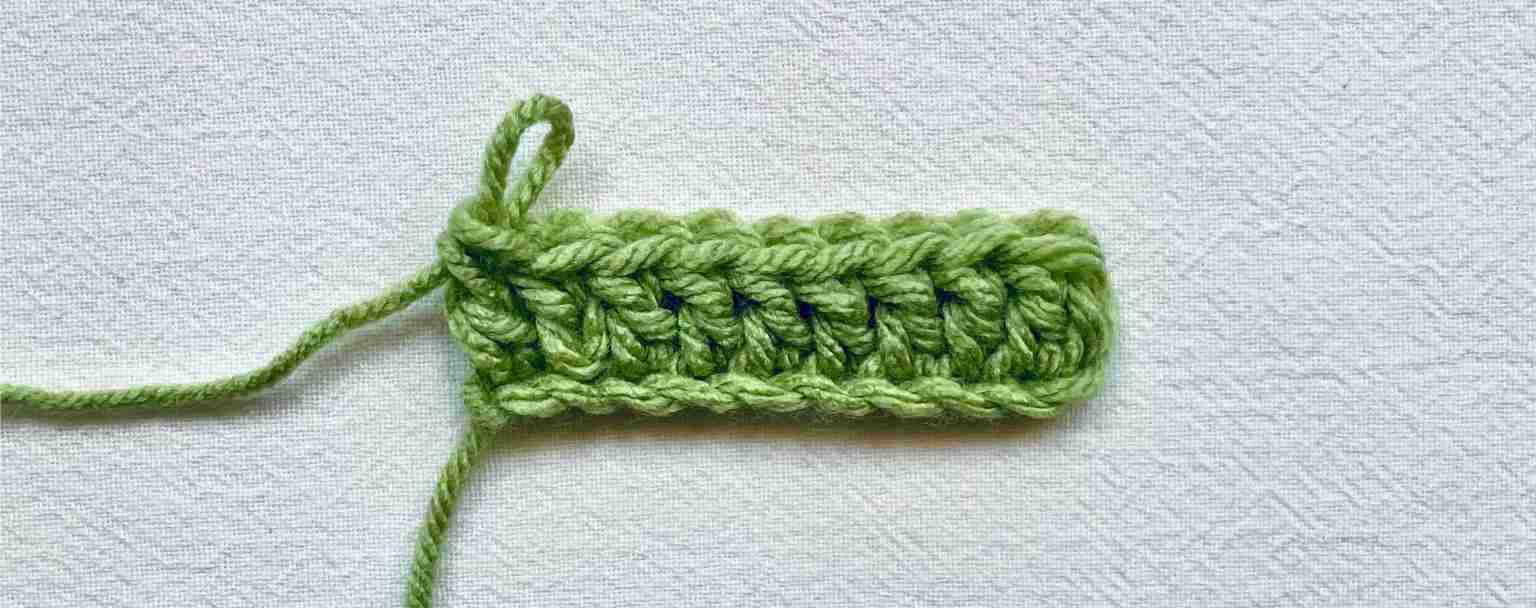
To start the next row, make 2 or 3 turning chains, and turn your work 180° counterclockwise. Skip the turning chains, put the yarn over the hook, and insert the hook under the top loops of the last stitch from the previous row to begin your first stitch.
Treble crochet
Also known as: Triple crochet
Abbreviation: Tr or tr
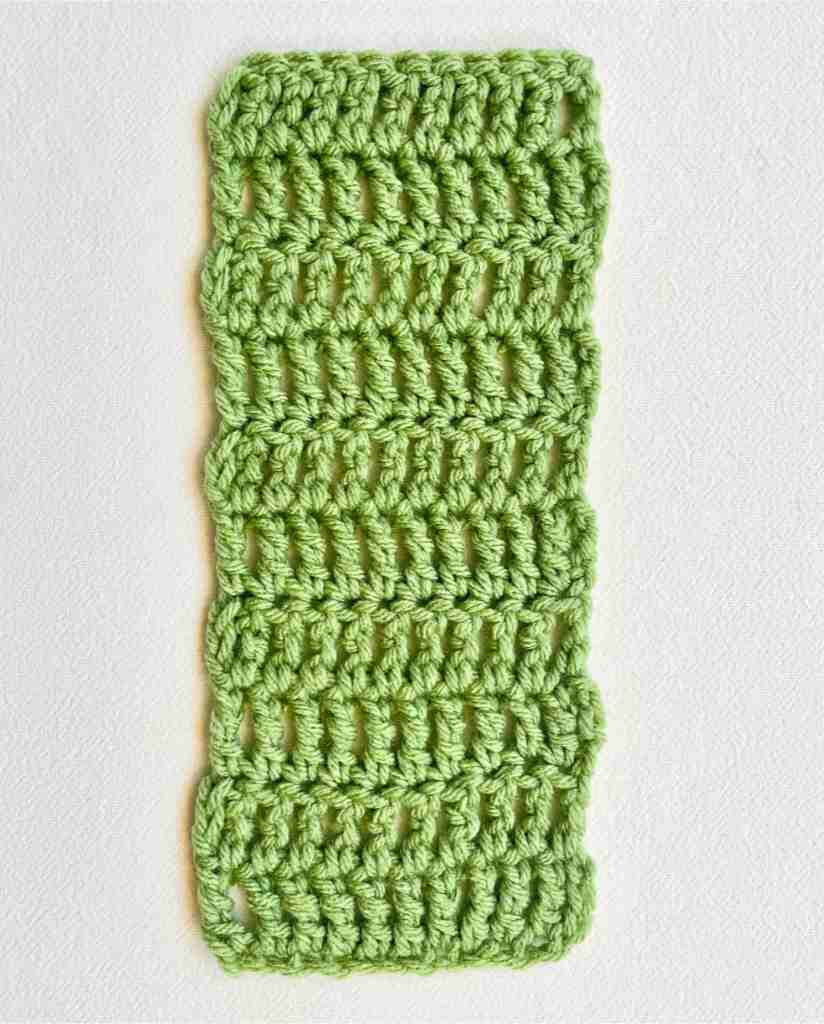
Since double crochet is twice the height of single crochet, it’s going to come as no surprise to you that treble crochet is three times the height of single crochet. It’s a talllllll stitch! And as it’s so tall – and bearing in mind it’s only attached to its neighbors at the top and bottom – it’s also noticeably gappy between the stitches. The gaps make it a little less versatile than the other stitches we’ve looked at so far, but it’s vital for creating space in lacy crochet patterns.
Here’s how to make a sample. I’m going to mix things up and show you the video first this time!
- Chain 13 or 14 (10 spaces for stitches, and 3 or 4 turning chains). I’m using three turning chains.
- Put the yarn over the hook twice.
- Insert the hook into the 4th chain from the hook (5th if you’re using 4 turning chains).
- Yarn over the hook, and draw a loop through the chain stitch. Now you have 4 loops on your hook in total.
- Yarn over the hook again, and draw it through 2 of the loops on your hook. 3 loops remaining on your hook.
- Put the yarn over again, and draw it through the next 2 loops. 2 loops remaining on the hook.
- Yarn over the hook one last time, and draw it through those last two loops.
To add another row, make 3 or 4 turning chains, and turn your work 180° counterclockwise. Skip the turning chains, put the yarn over the hook twice, and insert the hook under the top loops of the last stitch from the previous row to begin your first stitch.
Slip stitching
We’ve looked at all the main stitches for building crochet now, but there’s one more nifty little stitch you ought to know about, and that’s slip stitch. Slip stitches are important for making little joins and connections in crochet patterns. For example, granny squares are worked outwards from the center, and the start and end of each round are joined with a slip stitch. You can also use a slip stitch to cast off and finish a piece of crochet.
To make a slip stitch:
- Insert the hook under both top loops of the stitch indicated by the pattern.
- Put the yarn over the hook.
- Draw the yarn through the stitch, and through the loop that was already on your hook at the start of the stitch.
To cast off and finish a piece of crochet with a slip stitch:
- Cut the yarn leaving a 4-6″ tail for weaving in later.
- Put the yarn tail over the hook from back to front.
- Pull the yarn tail through the loop that was already on the hook, and keep pulling until the loose end comes right through.
- Give everything a wiggle to tighten it up, and use a darning needle to hide the yarn tail inside some of the crochet stitches (not all 6″ of it! Just 2 – 3″, then trim away the rest).
Since slip stitches have barely any height or elasticity, it’s almost unheard of to use them in rows for making fabric. One notable exception is back loop only slip stitch ribbing.
Tension and gauge made easy
The chances are you won’t get far in your crochet journey before you start seeing references to tension and gauge. Put simply, gauge is how big your stitches are, usually described as how many rows and how many stitches fit into a 4″ x 4″ square. Things which affect gauge are:
- the thickness of the yarn,
- the size of the crochet hook,
- and your tension.
Your tension is how tightly you work. If your tension is tight, your stitches will come up small, and if you’ll need more stitches and rows to make a 4″ square. If your tension is loose, your stitches will come up big, and you’ll need fewer stitches to make a 4″ square. Most importantly, tension is very personal, and variable. I tend to crochet loose, but my tension gets tighter if I’m stressed!
For lots of beginner patterns like blankets, bags, scarves and stretchy hats, tension and gauge aren’t a big deal, and your pattern might not even mention them. But for garments like sweaters, achieving the gauge specified by the pattern is vital for getting the size right! To achieve that, make a swatch using the same number of stitches and rows as the pattern say should fit in a 4″ square. If it comes up bigger than 4×4″, try again with a smaller hook. If it comes up smaller, try again with a larger hook. Simple!
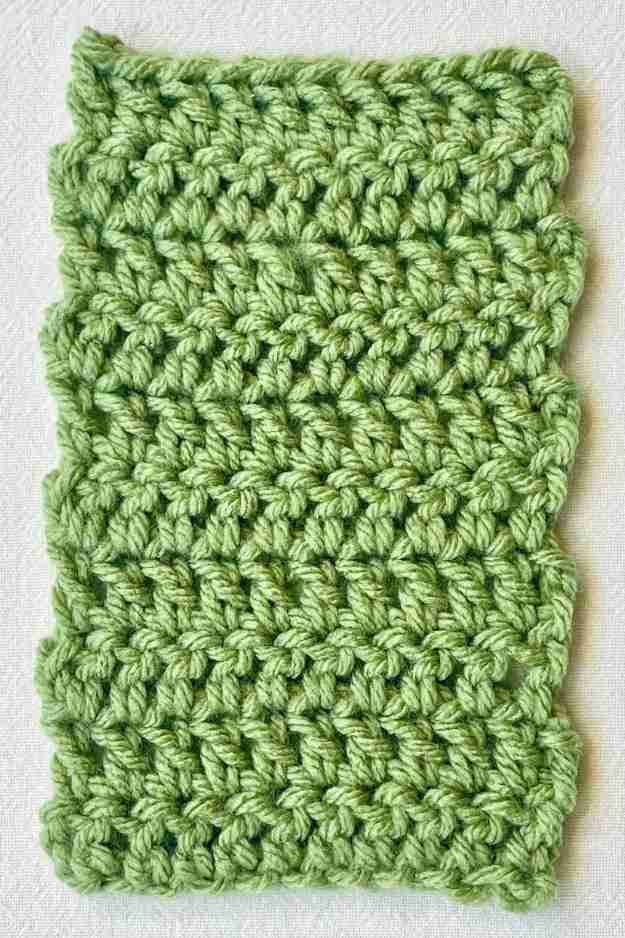
What to try next
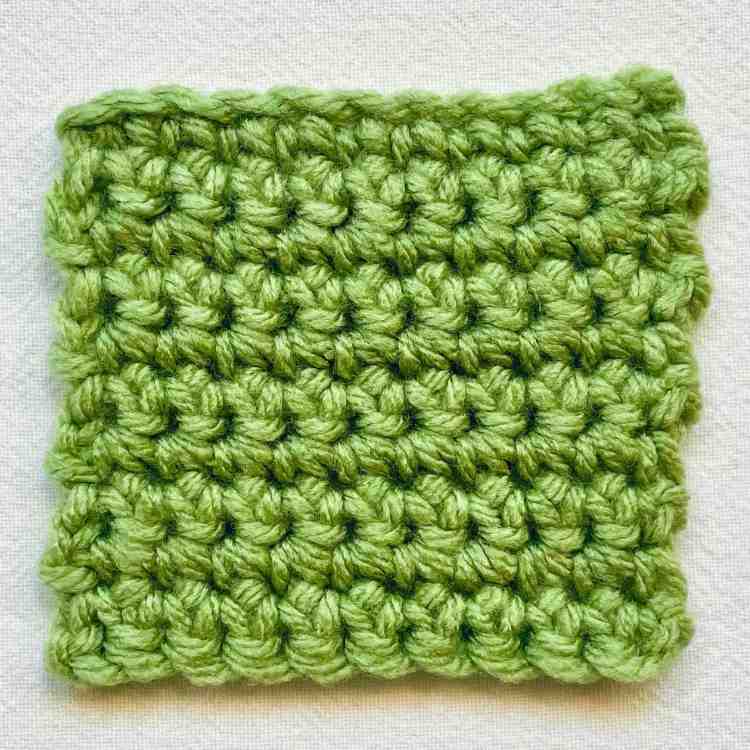
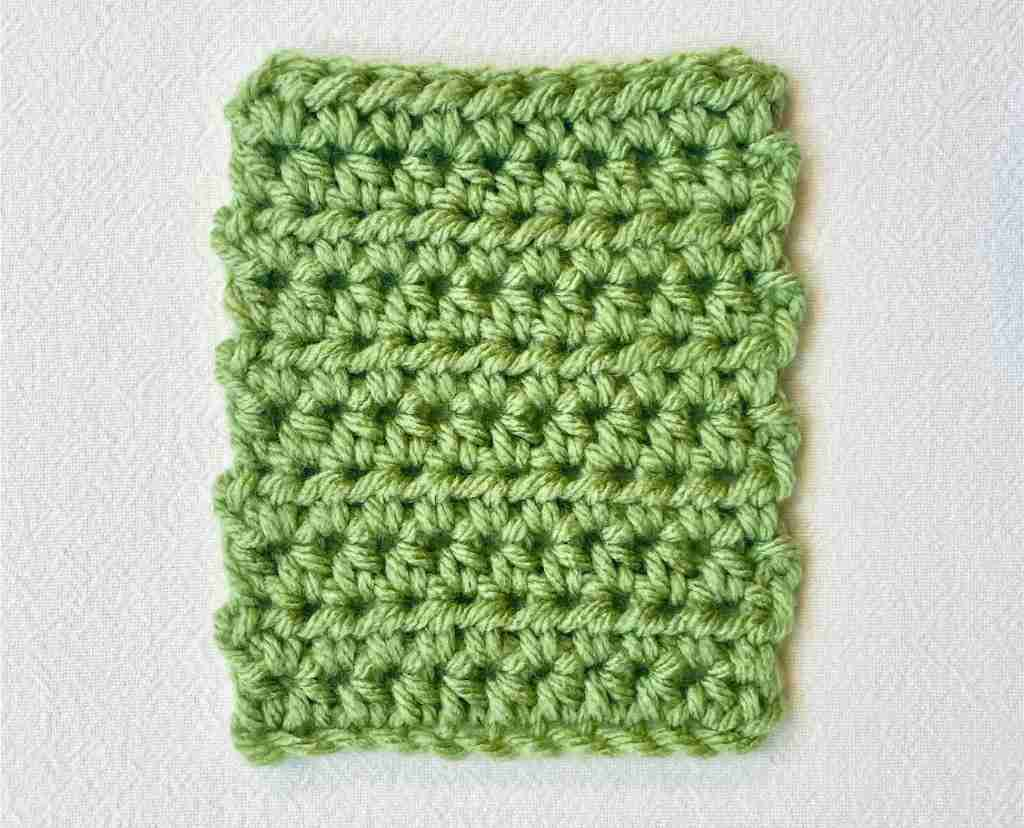
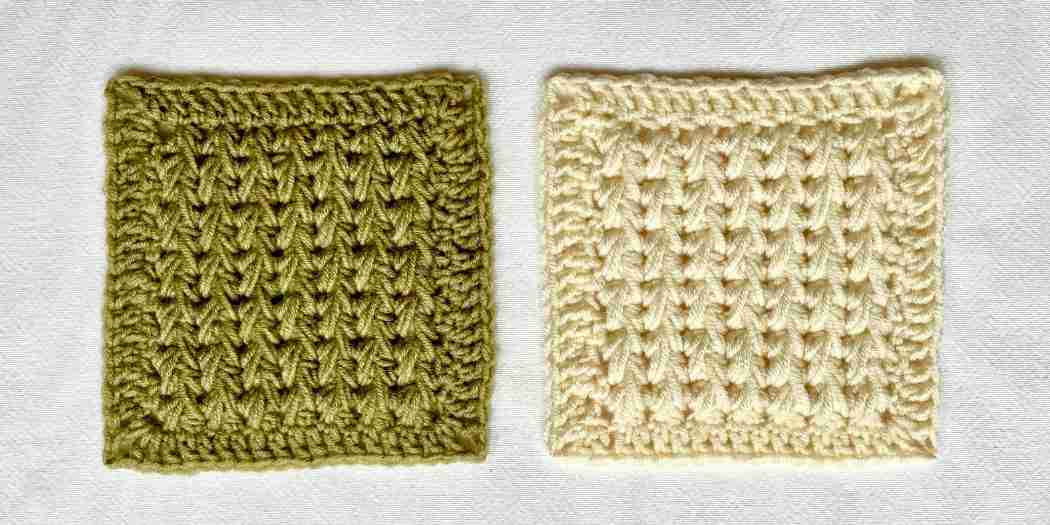
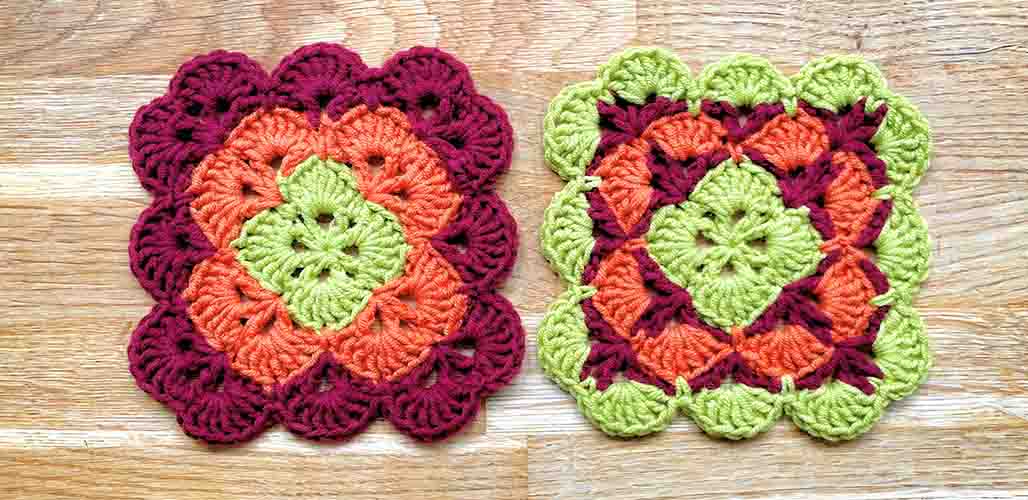
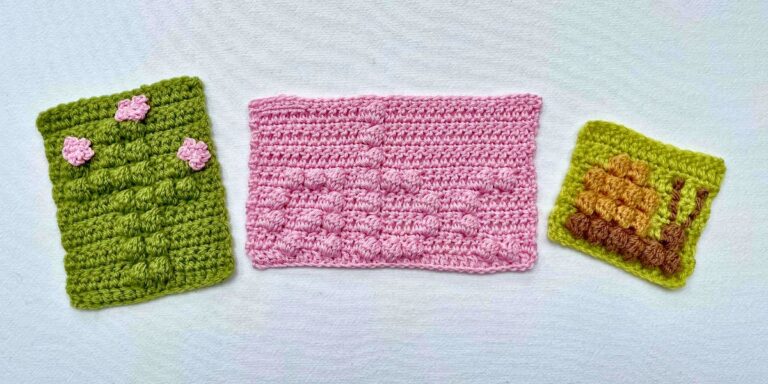
The simple stitches we’ve covered here today don’t just have to be used on their own. They can be combined in infinite ways to make produce decorative textures like:

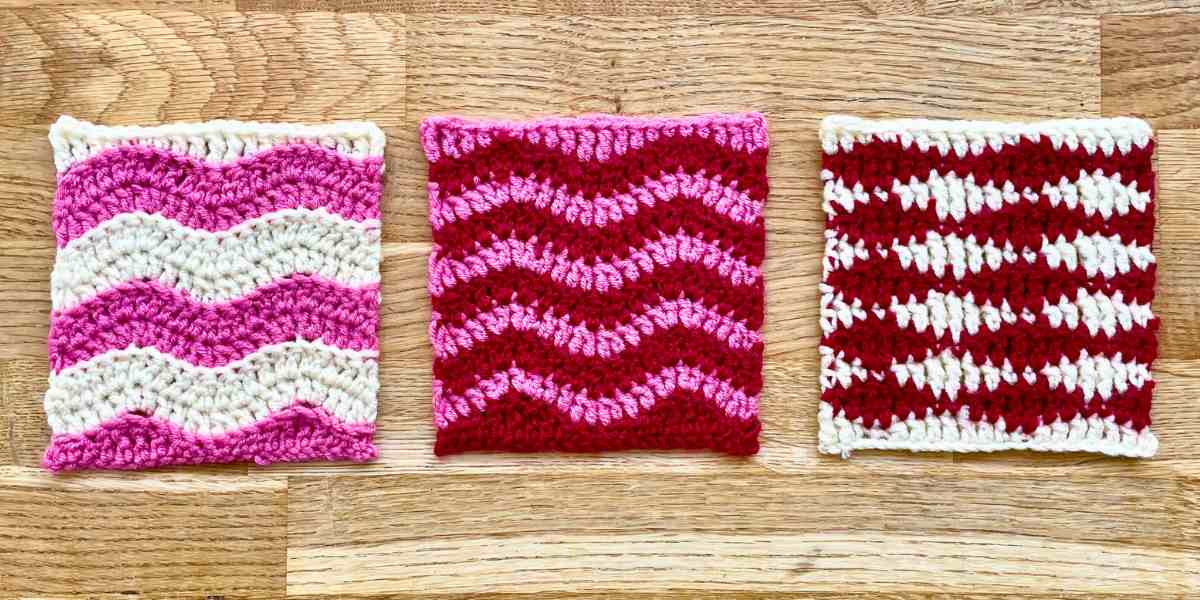
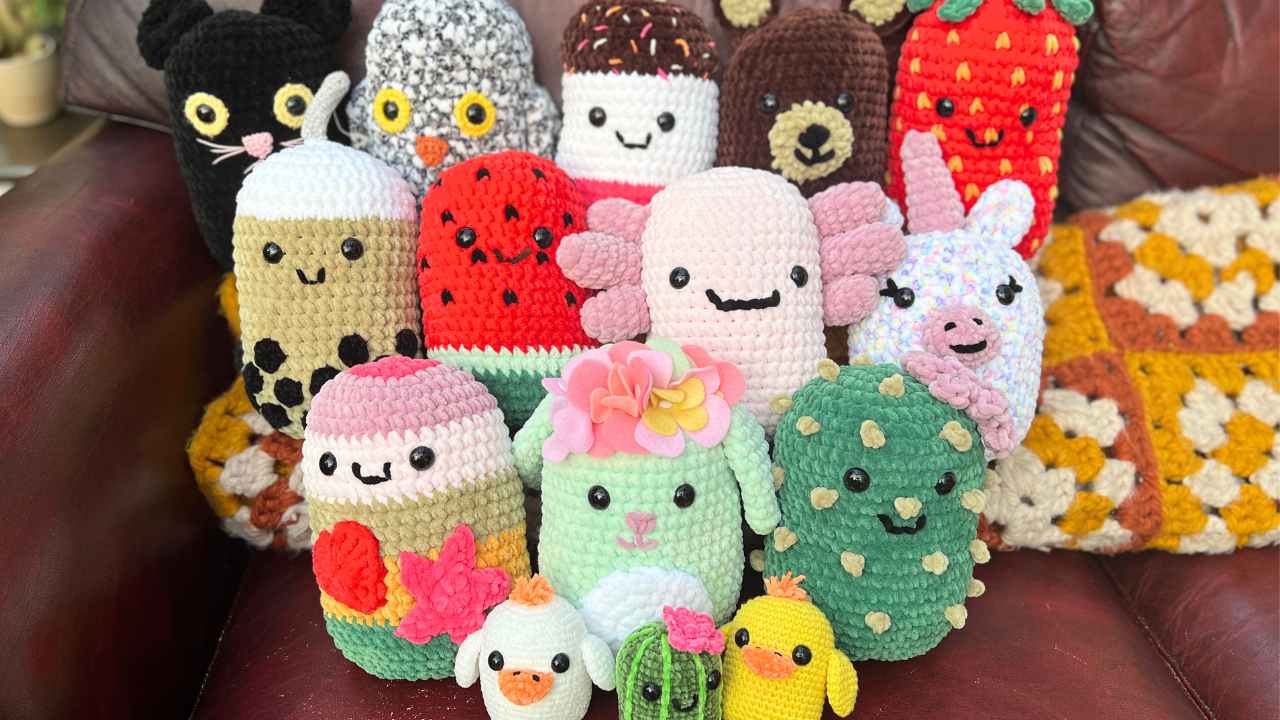
Not to mention cute amigurumi critters!
In other words, the crochet world is your oyster now, so get stuck in and have fun!


Very helpful very clear thank you
Thanks Maggie, I am pleased to hear that you found it useful 🙂
That’s brilliant Lucy. You may have persuaded me to give it another go!
Thank you very much, it’s very helpful for me to learn how to crochet.
I like your website. You are very straight forth in both your written instructions and the pictures. Glad I found you.
My question – is there any way to find out how much more yarn I’ll need switching from a K hook to an I hook. I will be using the same yarn called out in the pattern (fingerling). I would like to make it the same size the pattern calls out so realize that I’ll need to increase the stitches. Using a K hook the pattern calls out for 1256 yards of yarn. Is there any way to determine the yardage using an I hook?
I’m novice enough to be dangerous but am not new to crocheting.
I’m afraid I don’t know off the top of my head. What I’d do is work up a swatch with each hook, and see what percentage difference between the two is, and use it to estimate the change in yarn quantity. But I’m not sure how accurate that method would be, I’m afraid! Hopefully of some help though
Oh I was reading through this article and was wondering how do I do a turning chain? Is it just a normal sc at the end of the foundation? If I need more (for example the Treble Crotchet) do I just do sc vertically? I’m not sure because there’s no video or pictures showing what a turning chain is exactly.
A turning chain is traditionally just chain stitches, in the number that fits with the stitch it’s replacing. So if I’m making rows of single crochets, when i’ve made my final single crochet of the row, I make a chain of two, then turn my work. This chain acts as a replacement for your first single crochet of this new row. Hope that makes sense!
this was very helpful. all of the help you have done for me on the art of crocheting. thank you