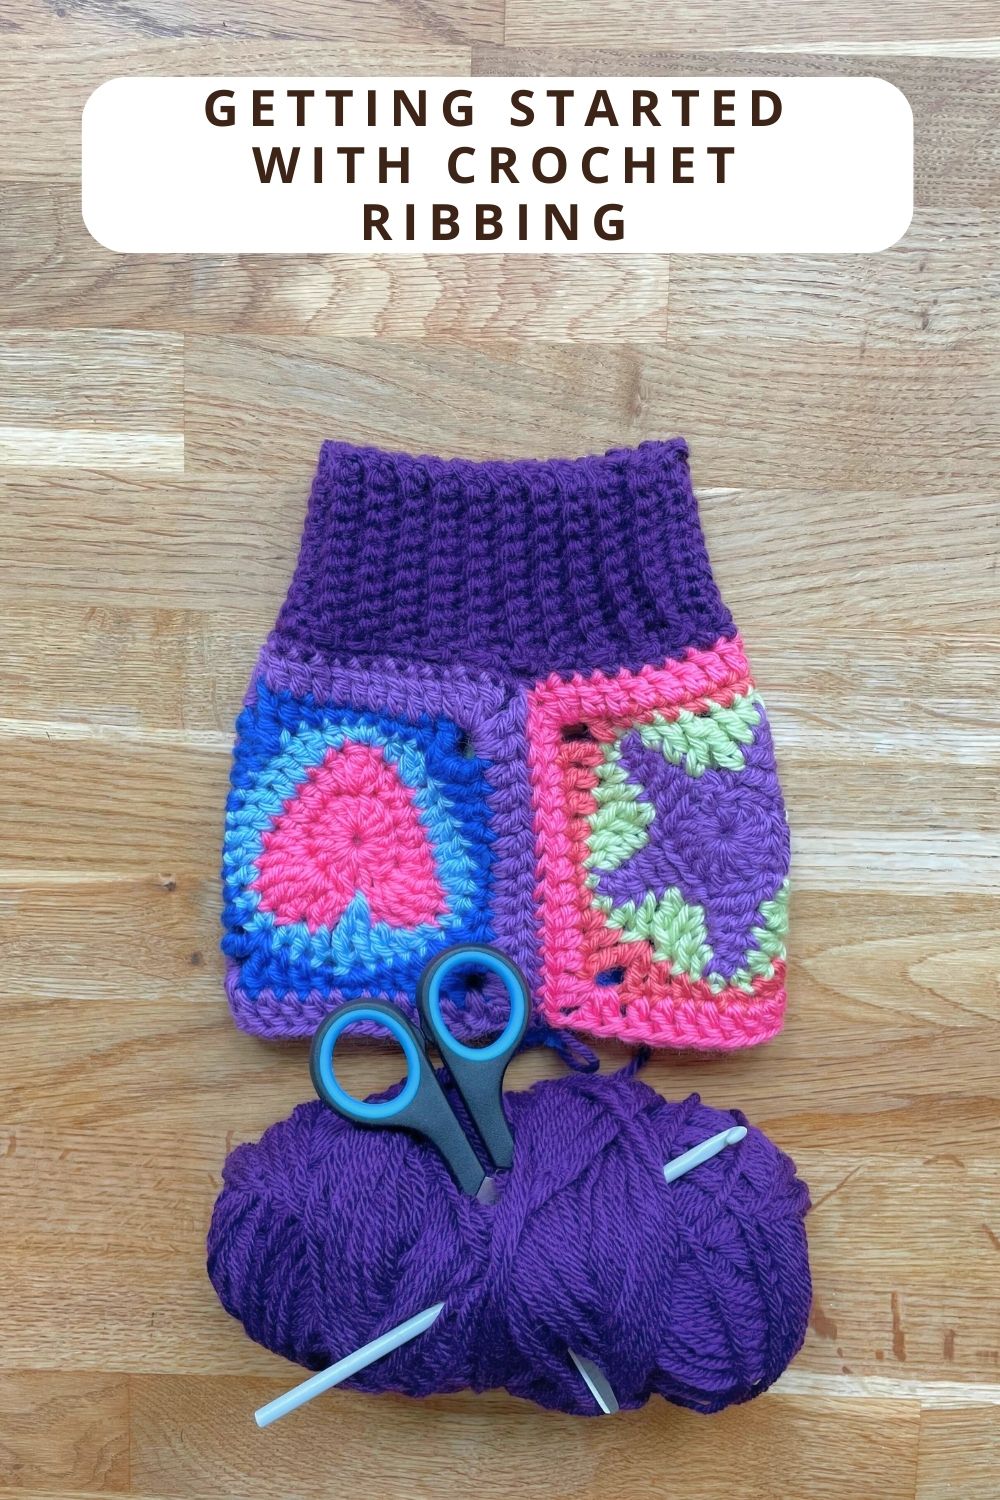
Getting Started With Crochet Ribbing
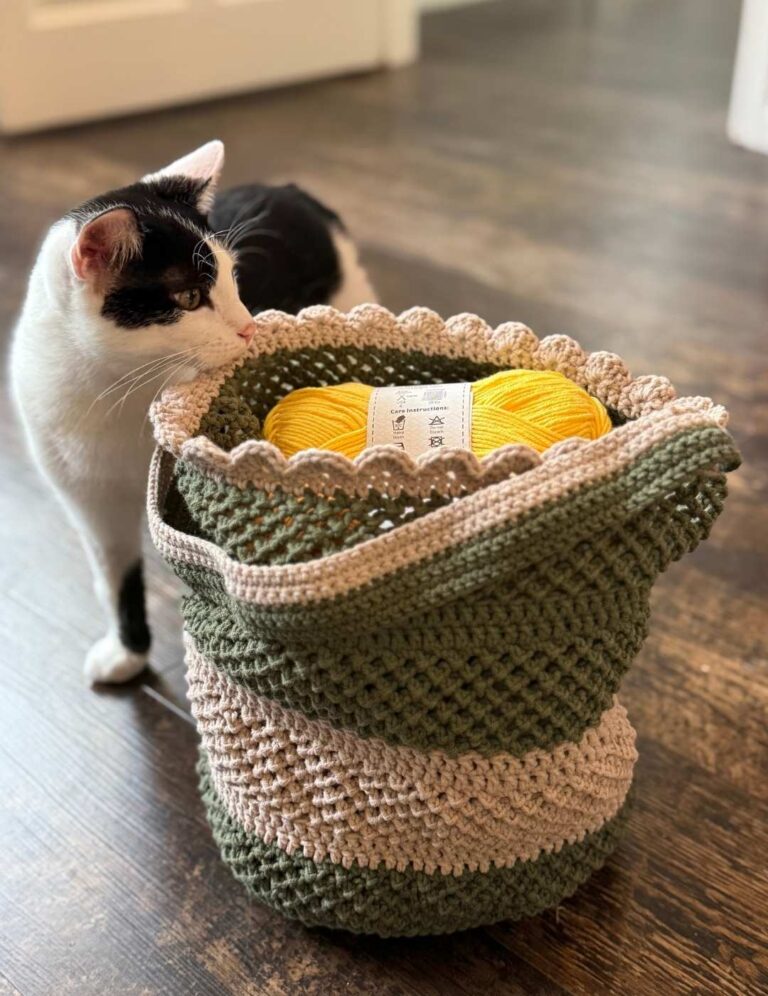
Do you always approach crochet projects in a strictly linear way? It’s something I definitely lack discipline for! At the moment, I’m working on a granny square cardigan, and to achieve the length I want, I’m going to need something in the region of 90 squares. I’ve made about 40 so far, and my thoughts have started wandering onto what kind of ribbing might look best at the cuffs and waistband to tie them all together. So while I have the subject on my mind, here’s a quick introduction to the five most versatile types of crochet ribbing, and how to join them to clothes.
- Crochet ribbing 101
- Crochet ribbing vs knitted ribbing
- 5 types of crochet ribbing for any occasion
- Ribbing first, or ribbing second?
- How to join crochet ribbing as you go
Crochet ribbing 101
Crochet ribbing is an integral part of garments like cardigans and sweaters. It’s also widely seen on beanie hats, gloves, and wrist warmers. Besides having functional properties – like making cuffs and headbands fit snugly against the skin – ribbed stitches can also be highly decorative. In fact lots of beautiful beanie and sweater patterns are made entirely in ribbed crochet. But despite all its applications, using ribbing in crochet can be intimidating at first.
Crochet ribbing vs knitted ribbing
Crochet ribbing behaves differently to the knitted ribbing you see on the cuffs and waistband of store bought clothes. Knitted ribbing is made of interlocked loops of yarn that stretch and spring back into position when pulled and released. It has a high degree of elasticity. Most crochet stitches are constructed from knots – every time you put the yarn over your hook, you’re effectively putting a knot in it. Knots are not a stretchy kind of construction, so the elasticity of crochet ribbing is can be limited to the elasticity of the yarn. ‘Bouncy’ yarns like wool and acrylic have a bit of built-in elasticity. Cotton, silk and bamboo yarns have virtually none.
That doesn’t mean there’s no point making crochet ribbing though! You just need to work with the properties it actually has (some elasticity, amazing textures), rather than the properties it sounds like it should have (lots of elasticity).
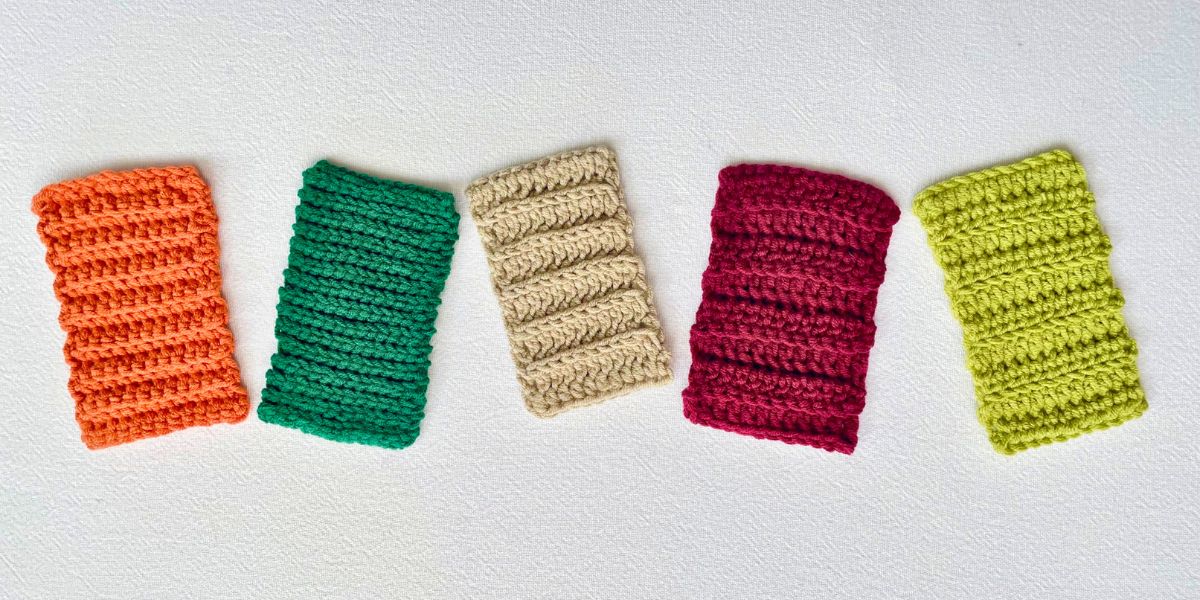
My 5 favorite crochet ribbing techniques
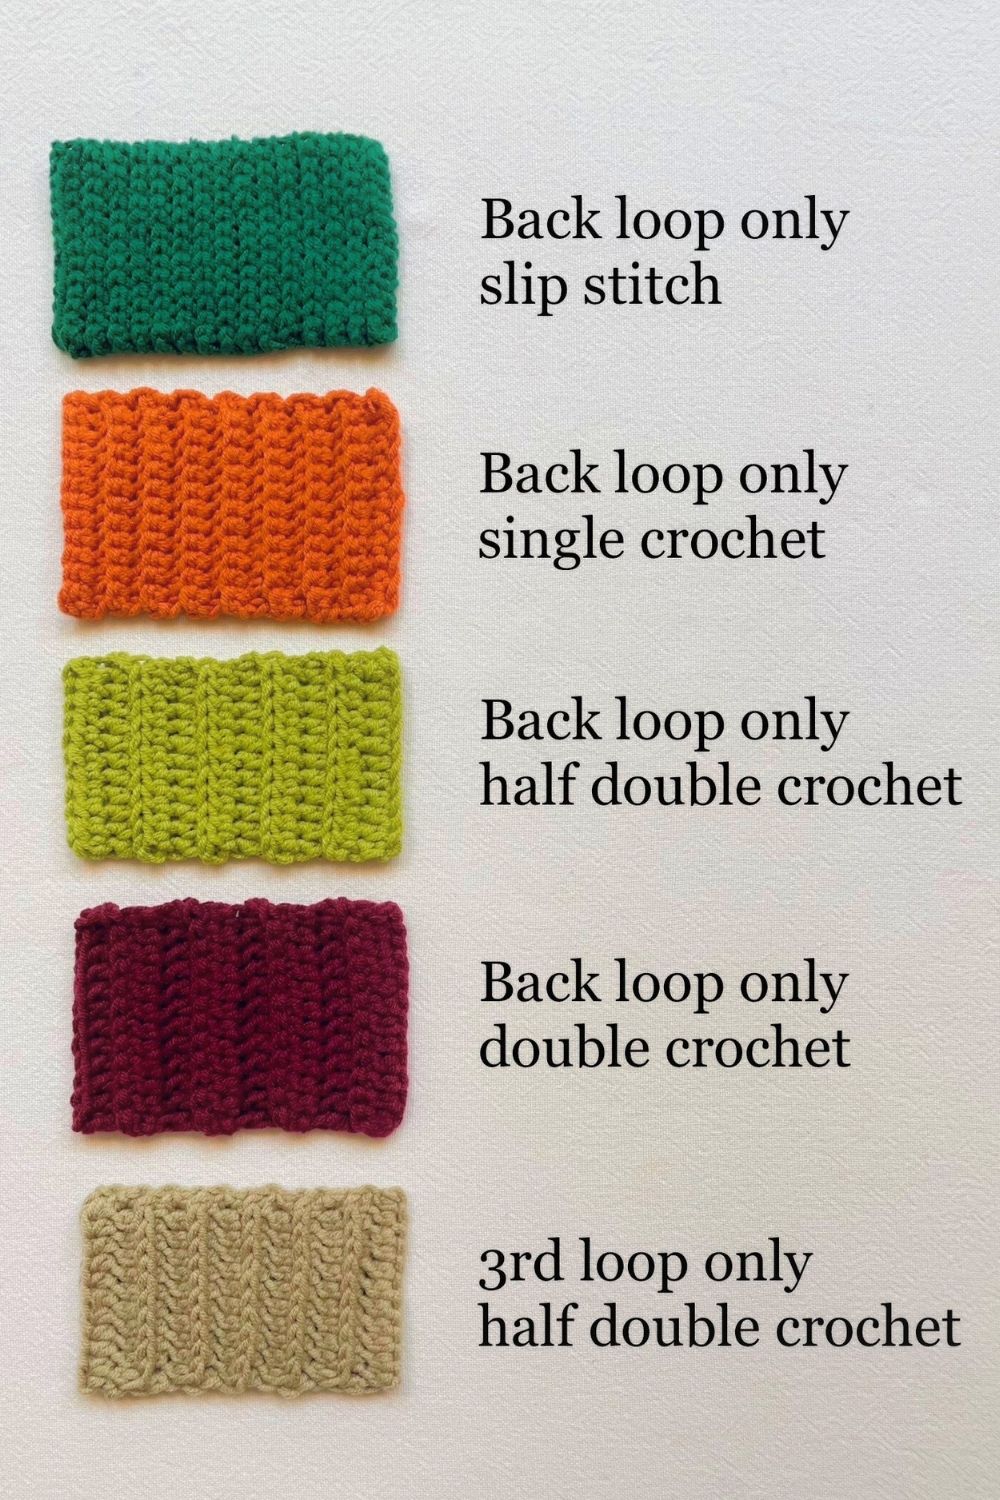
Here are five essential rib stitches which will see you through any project.
NB. These following notes all use American crochet terms. All the swatches are made with DK yarn on a size 6 (4mm) hook. I’ve included details of the number of stitches and rows in each swatch, so you can see how stitch density changes and that affect the time it takes to make them.
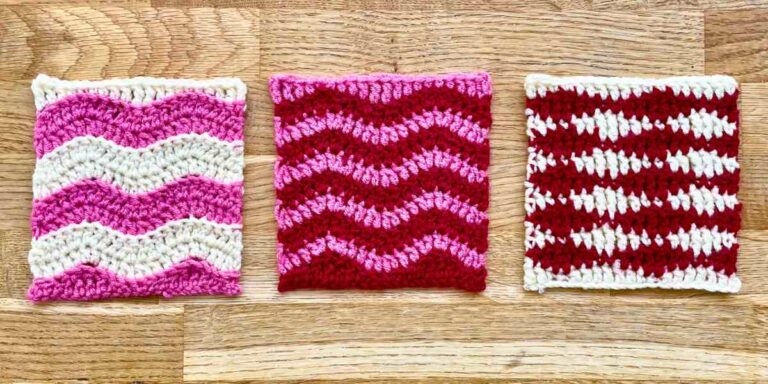
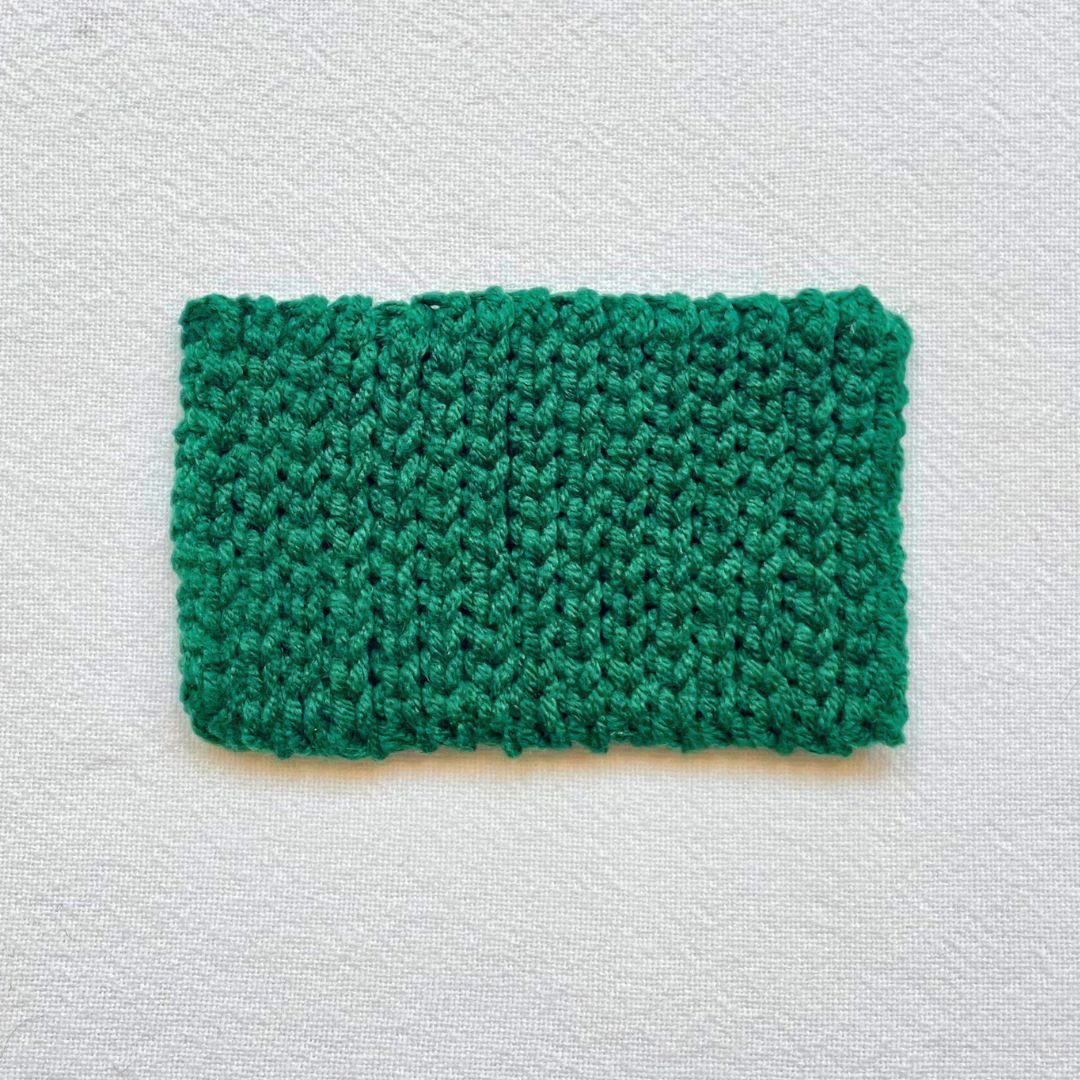
1. Back loop only slip stitch
Back loop only slip stitch is the closest crochet alternative to knitted ribbing. In fact, the construction is very similar indeed – all interlocked loops of yarn, and no knots. Which means it even looks a lot like stockinette stitch in knitting. Except this swatch was worked from left to right, rather than top to bottom.
If you’re not familiar with back loop only crochet, it could hardly be simpler. When you look directly down on the working edge of your crochet, the top of each stitch has a front loop, and a back loop. Here the back loops are indicated by the red arrows.
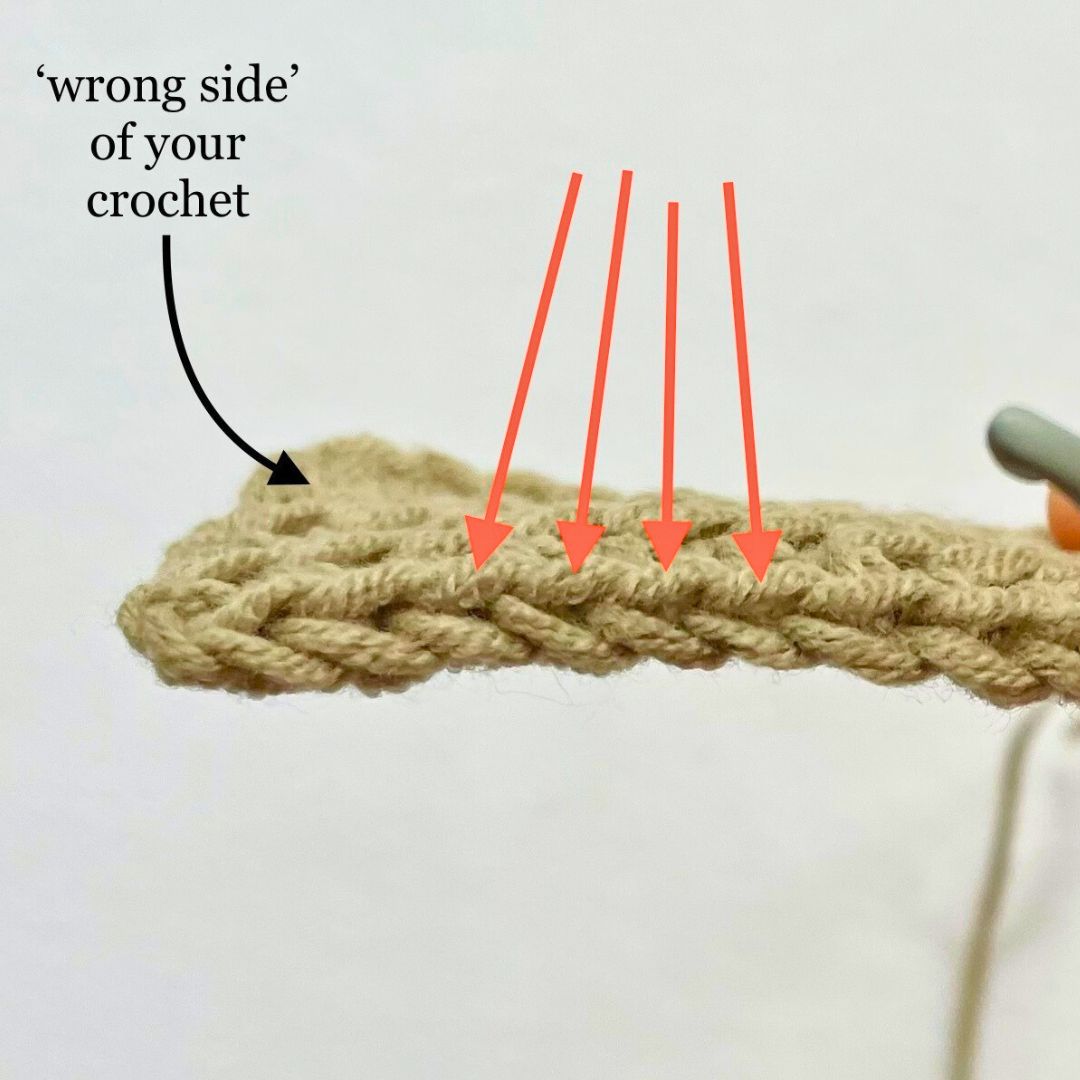
Normally, we insert our hooks under both loops of a stitch to make new stitch on top of it. To make a back loop only stitch, insert your crochet hook under the back loop only. In patterns this is usually abbreviated to BLO.
To make a swatch of back loop only slip stitch ribbing:
- Make a foundation chain of any length, plus one turning chain.
- Starting in the second chain from the hook, slip stitch into every chain.
- At the end of the row, make a turning chain of one, and slip stitch into the back loop only of every stitch from the previous row.
Repeat step 3 as many times as desired.
Notes
- The swatch pictured above measures 2” x 3.5”. It is 13 stitches high and 32 rows wide.
- It is very stitch-dense and warm.
- It stretches out to nearly 60% wider than its original width and springs straight back when released. You can stretch and release it over and over again, and it retains its elasticity really well.
- The scale of the stitches is small, so it’s perfect for projects like amigurumi clothes.
- But unless you have a realistic expectation of living forever, think hard about using this technique for adult size clothes – it is slow work!
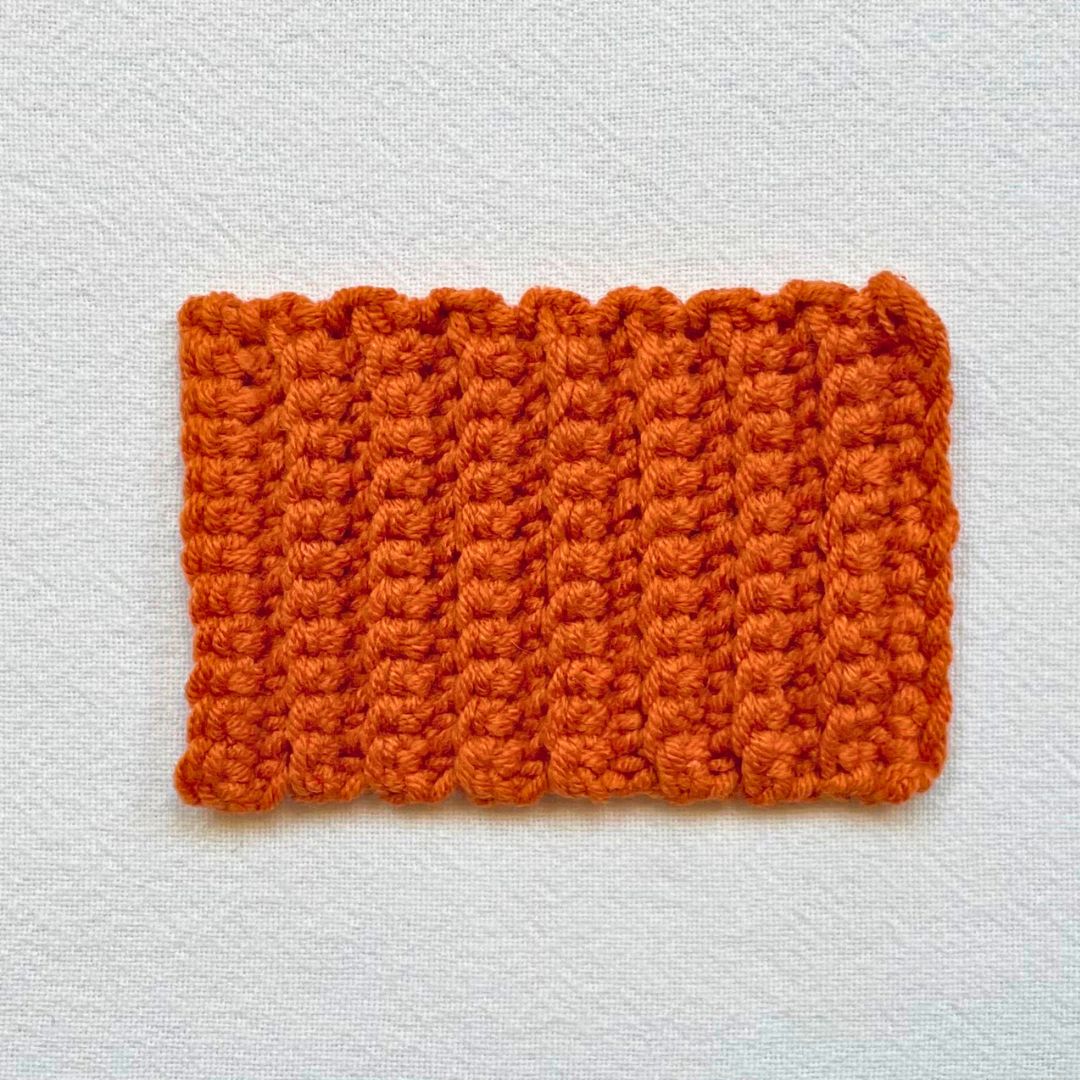
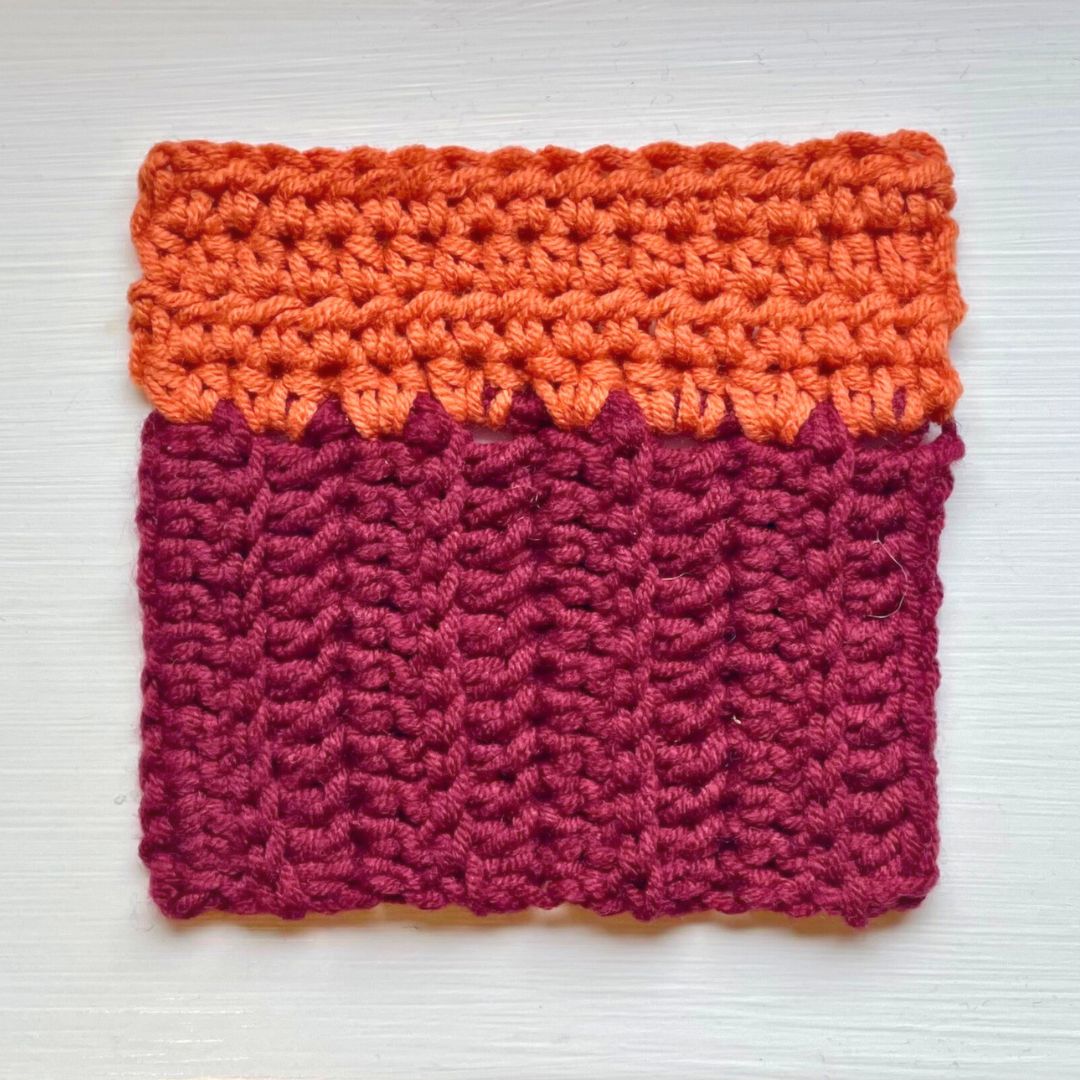
2. Back loop only single crochet
Back loop only single crochet is probably the best known and most widely used kind of crochet ribbing for cuffs and waistbands on sweaters. A casual observer probably wouldn’t even give it a second glance – it has a very pronounced ‘corrugated’ appearance that looks the part. But the texture is very different to knitted ribbing when you take a close look.
To make a swatch of back post only single crochet ribbing:
- Make a foundation chain of any length, plus one turning chain.
- Starting in the second chain from the hook, single crochet into every chain.
- At the end of the row, make a turning chain of one, and single crochet into the back loop only of every stitch from the previous row.
Repeat step 3 as many times as needed.
Notes
- The swatch pictured measures 2” x 3.5”. It is 12 stitches high and 16 rows wide.
- This ribbing has moderate elasticity – it stretches to about 25% wider than its original width.
- It has a great three-dimensional texture.
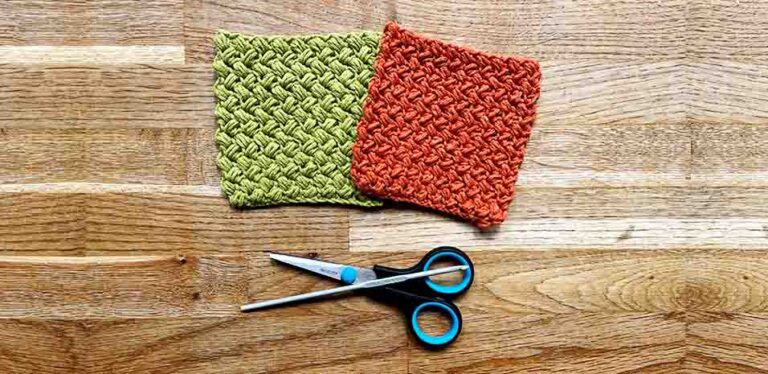
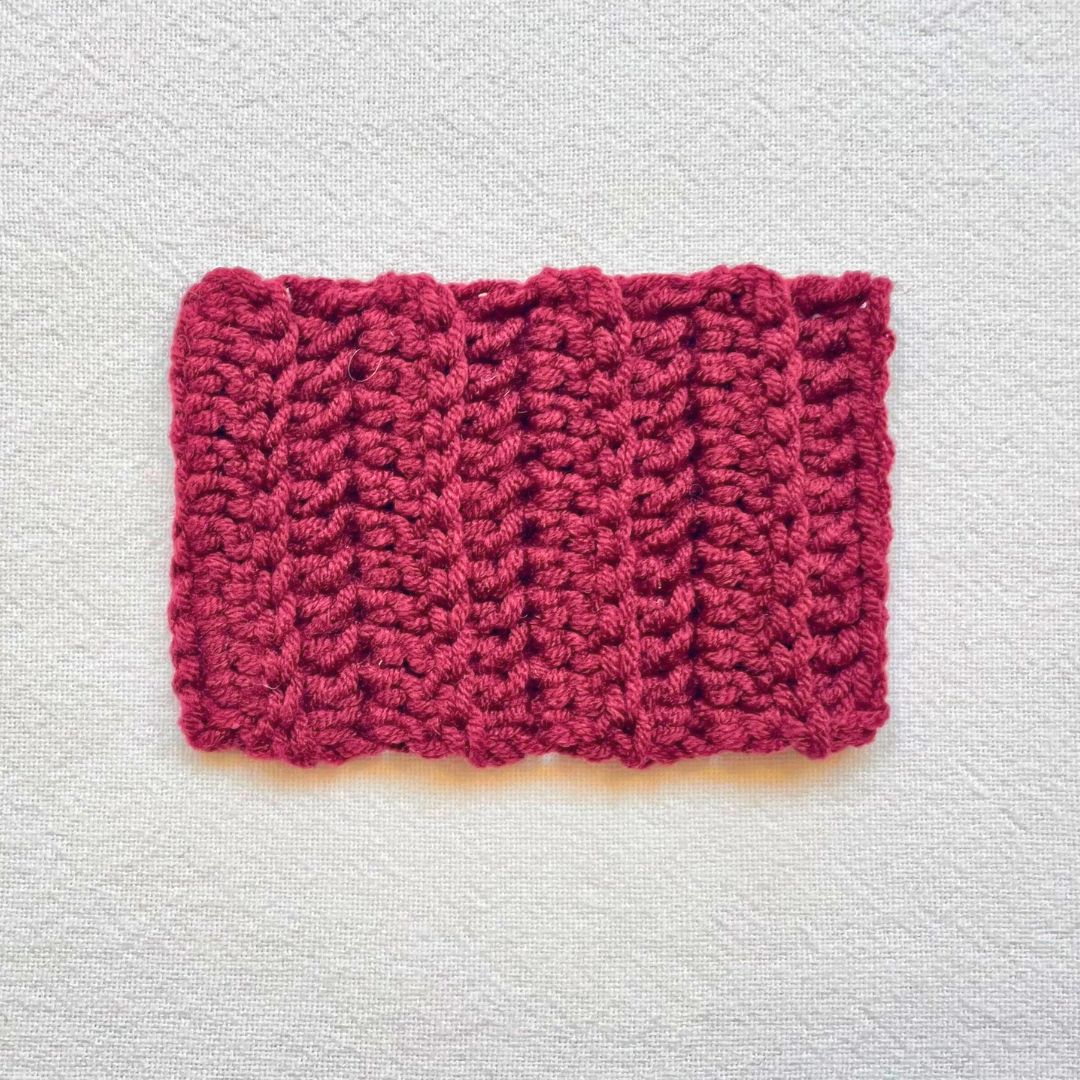
3. Back loop only half double crochet
Once you’ve mastered back loop only single crochet, back loop only crochet with other stitches isn’t going to spring you any surprises. Back loop only half double crochet is exactly how it sounds. But since the stitches are wider and taller than single crochets, it only takes two thirds as many stitches to cover the same area.
To make a swatch of back post only half double crochet ribbing:
- Make a foundation chain of any length, plus two turning chains.
- Starting in the third chain from the hook, half double crochet into every chain.
- At the end of the row, make a turning chain of two, and half double crochet into the back loop only of every stitch from the previous row.
Repeat step 3 as many times as needed.
Notes
- The swatch pictured measures 2” x 3.5”. It is 11 stitches high and 10 rows wide.
- This ribbing has moderate elasticity – it stretches to about 25% wider than its original width.
- If you stretch it out repeatedly, it gets sluggish returning to its original shape.
- It’s best suited to making cuffs and waistbands on boxy cardigans and sweaters. Basically anywhere that it only needs to look the part, and not actually do any work!
- It’s also a lovely choice for headbands on beanie hats.
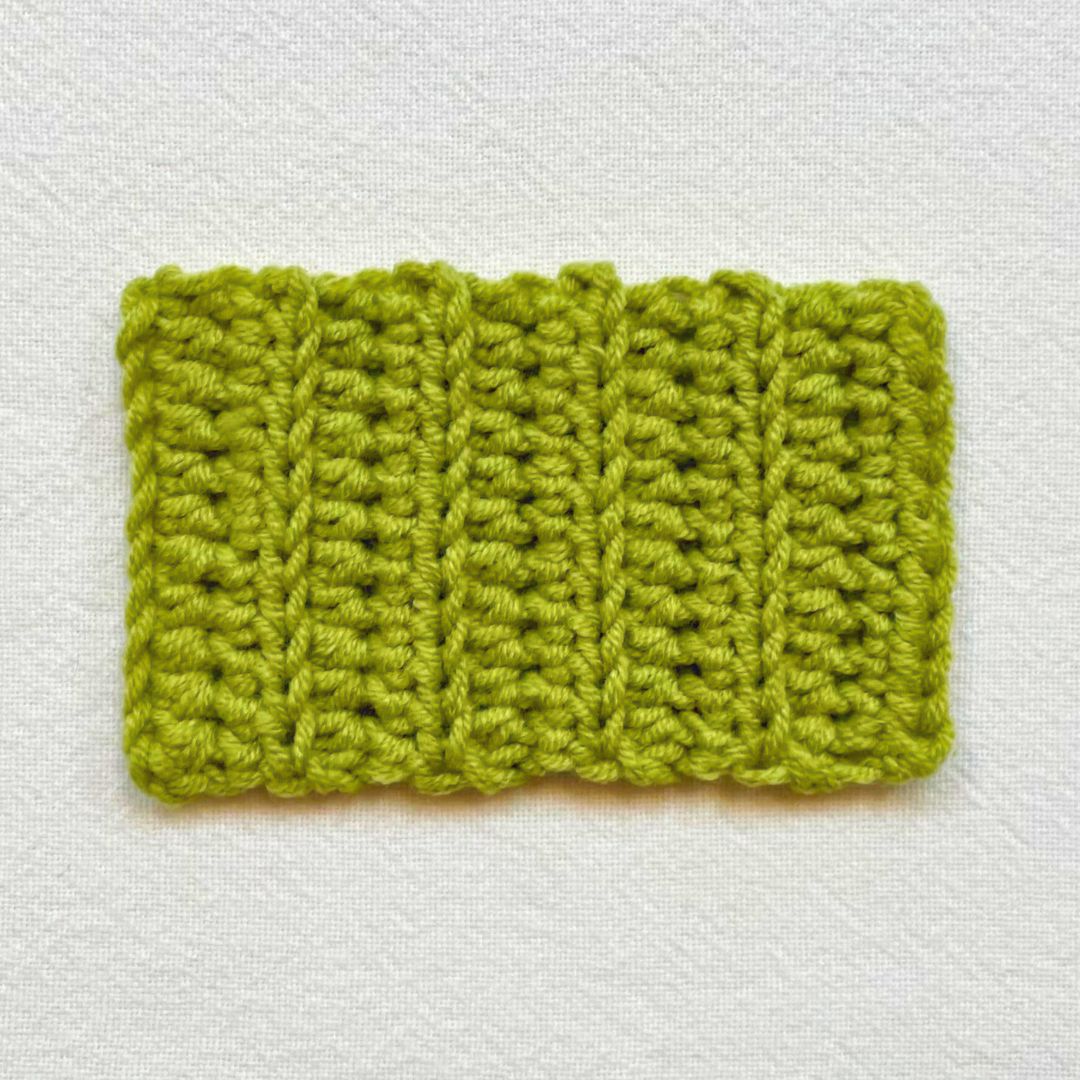
4. Back loop only double crochet
Once you start using double crochet for ribbing, it stops having a pronounced corrugated feel. So it’s not very convincing or functional for cuffs or waistbands. But it does still have a neat and distinct visual stripe, so it’s a stylish choice for sweaters and hats that are ribbed all over.
To make your own swatch of back loop only double crochet:
- Make a foundation chain of any length, plus two turning chains.
- Starting in the third chain from the hook, double crochet into every chain.
- At the end of the row, make a turning chain of two, and double crochet into the back loop only of every stitch from the previous row.
Repeat step 3 as many times as needed.
Notes
- The swatch pictured measures 2” x 3.5”. It is 12 stitches high and 8 rows wide.
- It will stretch to 30 or 40% wider than its original width.
- But due to the length of the stitches, it does look significantly more ‘gappy’ than the other swatches when stretched right out.
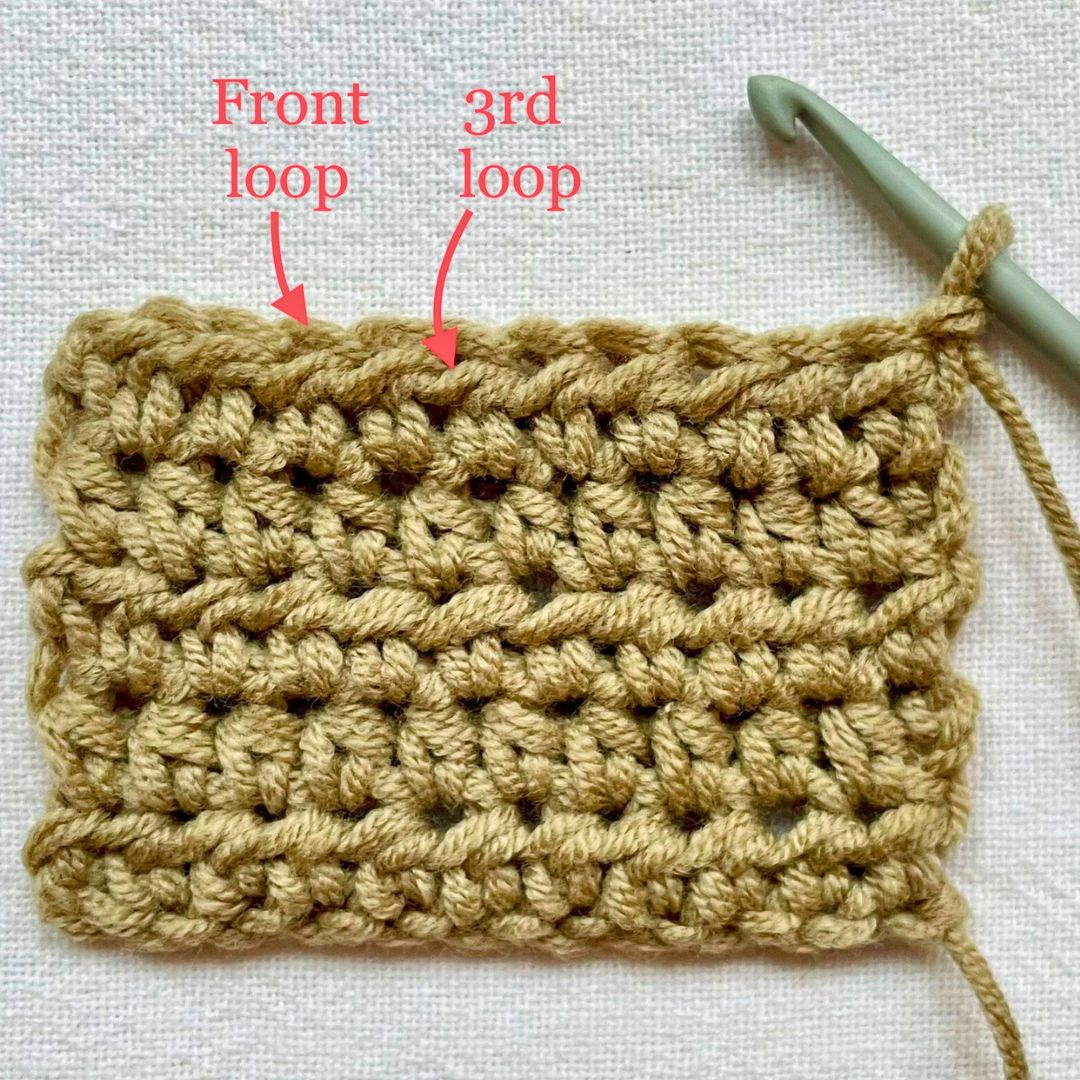
5. 3rd loop only half double crochet
One more approach to ribbing that I think you ought to know about is third loop only half double crochet. It’s a stunner:
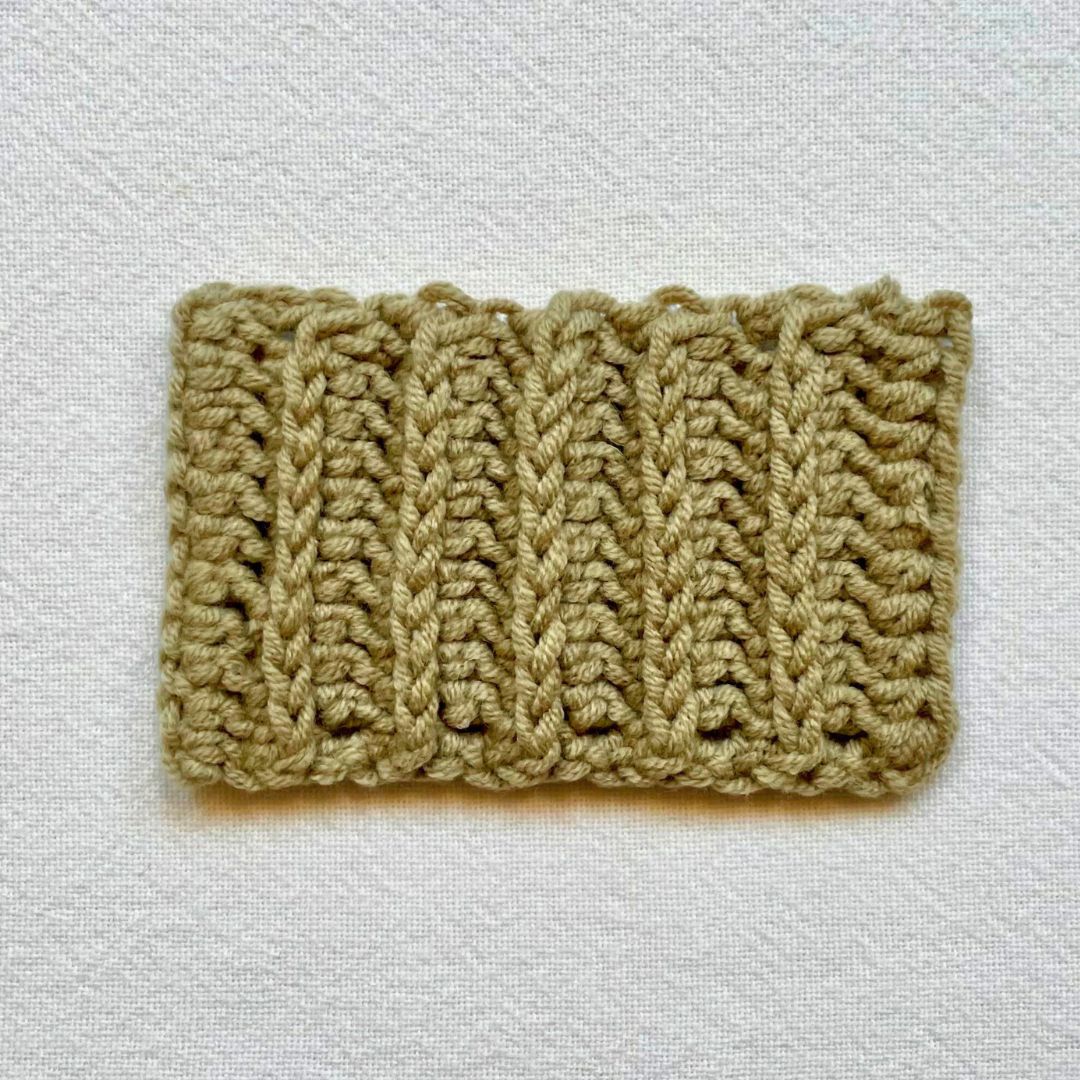
The third loop of a half double crochet stitch is the loop below the front loop. When you make your next row into the the third loops of the previous row, your new row will overlap the top edge of the previous row. It creates fantastic three-dimensional texture with deep grooves and sharp ridges.
To make a swatch of your own:
- Make a foundation chain of any length, plus two turning chains.
- Starting in the third chain from the hook, half double crochet into every chain.
- At the end of the row, make a turning chain of one, and half double crochet into the third loop only of every stitch from the previous row.
Repeat step 3 as many times as needed.
Notes
- The swatch pictured measures 2” x 3.5”. It is 11 stitches high and 12 rows wide.
- But it has the least elasticity of these five options – it only stretches about 15 or 20% wider than its original width.
- It’s easy to miss the last stitch of each row when you’re making this stitch. This row looks finished but the the third loop of the final stitch is indicated by the red arrow and hasn’t been worked into yet. Don’t forget it!
Ribbing first, or ribbing second?
For garments that include crochet ribbing, you can start with the ribbing, or finish with the ribbing. When you’re following a pattern, there will be instructions about which way round to do it. For projects you’re designing yourself or freestyling as you go (like my granny square cardigan!) you’ll need to make your own choice.
Ribbing first
It’s usual to make the ribbing first in lots of beanie hat patterns, and sweater patterns where the front and back panels are made from the bottom up. Since ribbing is worked from left to right, you make the ribbed section up to the width required, then turn your work 90° and join a new row of stitches to the posts of the stitches on the long edge of your ribbing.
Ribbing second
With sweaters and cardigans, adding ribbing to the cuffs last is pretty much inevitable. It’s also the last step for adding a waistband to a top-down sweater. And it’s a very traditional way of adding a button band along the opening of a cardigan. When the ribbing is the last part of your project, you can:
- Make it in a long strip, and sew it onto the edge of your project.
- Or join it as you go.
Joining it as you go is simpler in most cases, because you don’t have the extra step of sewing it on. Here’s how it’s done.
How to join crochet ribbing as you go
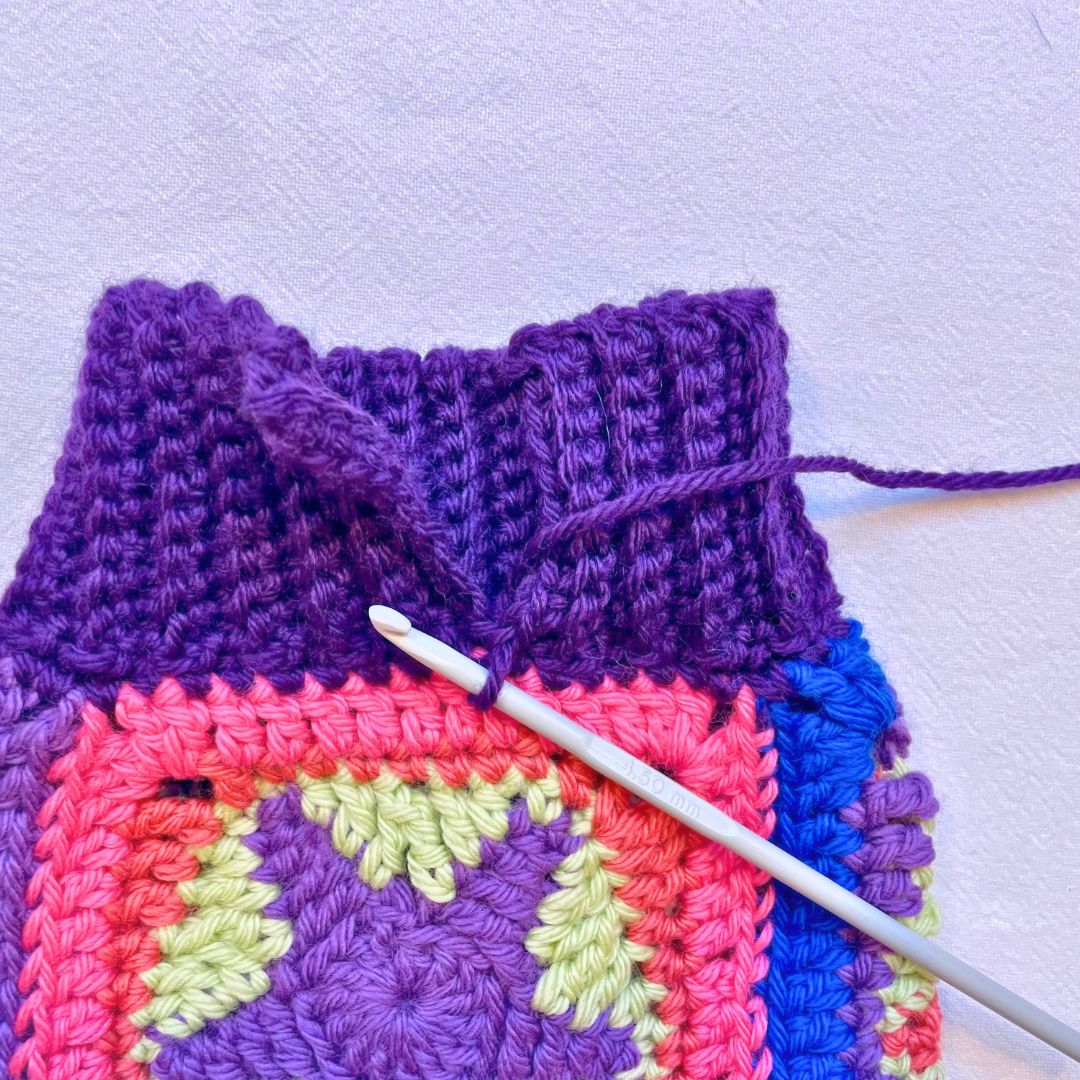
I don’t have enough squares to construct my granny square cardigan yet, but I’ve joined three of them here to make the end of a sleeve, and demonstrate how I’ll join a ribbed cuff to it.
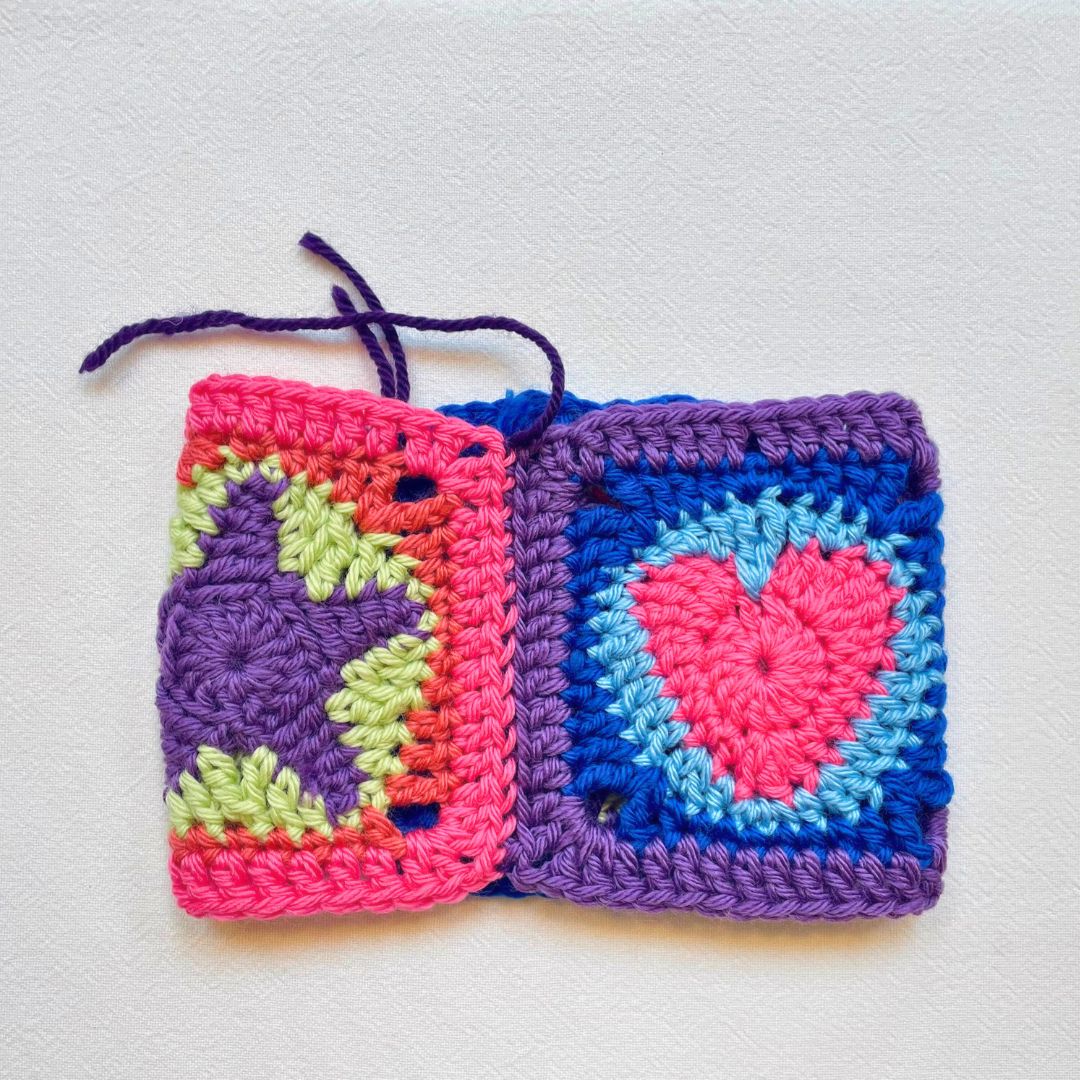
The squares are joined with mattress stitch, and I’m also going to add a foundation row of single crochet. The foundation row is optional, but I think it will really help tie the granny square sleeve and ribbed cuff together. I’ve also decided I want a simple back post only single crochet rib for my cuff. The brightly colored granny squares are already quite a flamboyant choice, so I don’t think the ribbing needs to make a design statement too.
Starting the cuff
Step 1: Make a chain the length depth you want your cuff to be. I’ve chosen 10 stitches.
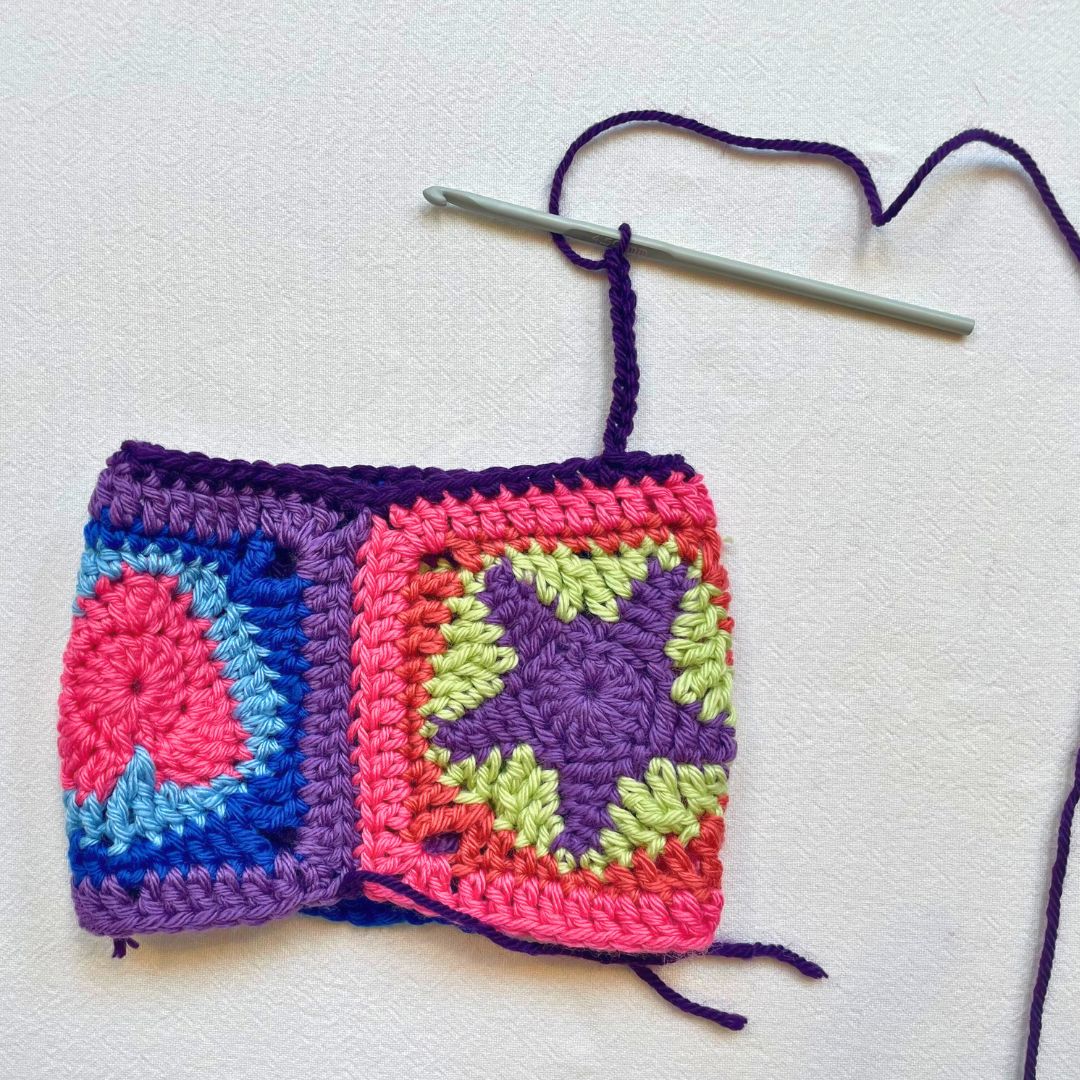
Step 2: Make 1 turning chain, and single crochet into each of the chain stitches.
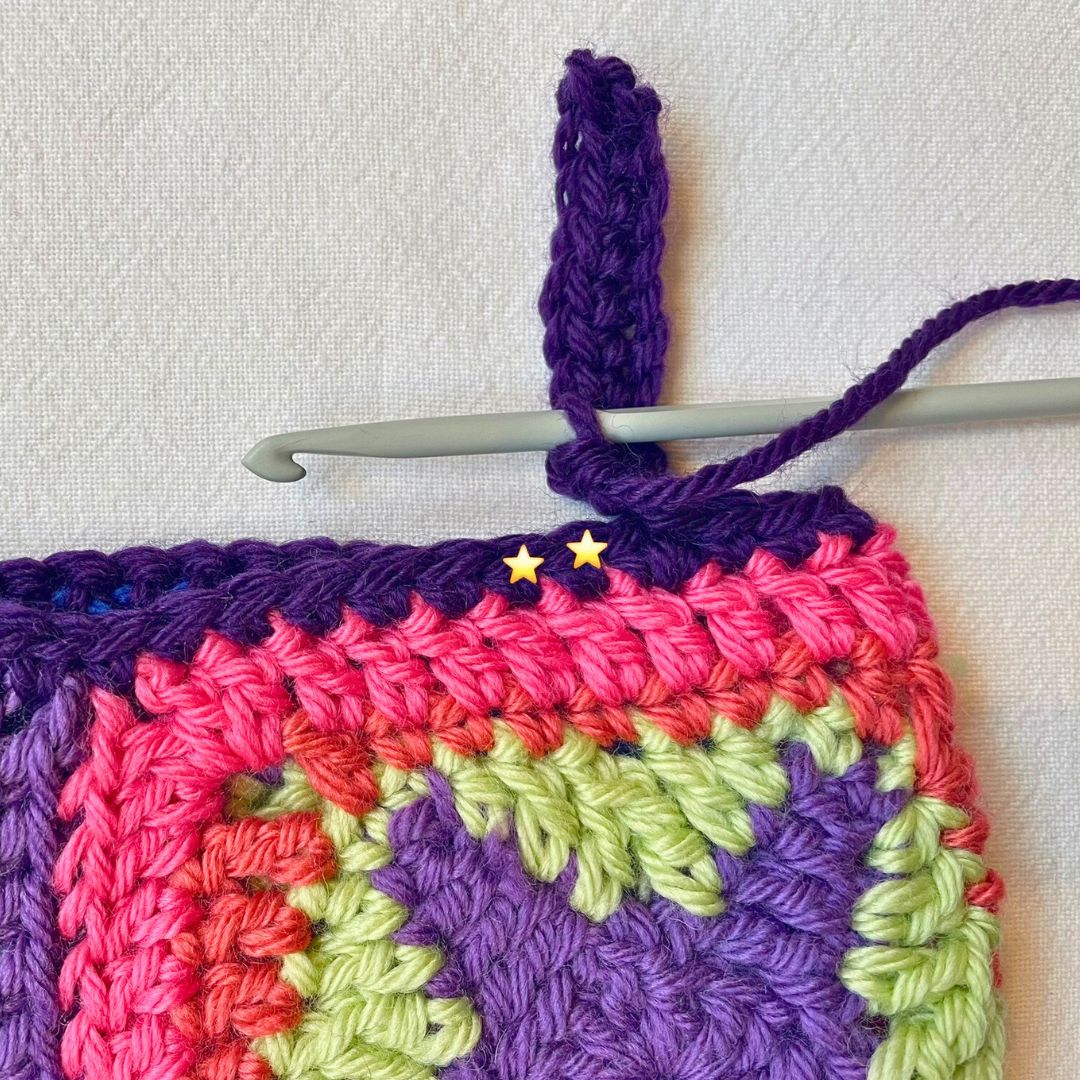
Step 3: Slip stitch into the next two stitches at the end of your sleeve, as indicated by the yellow stars.
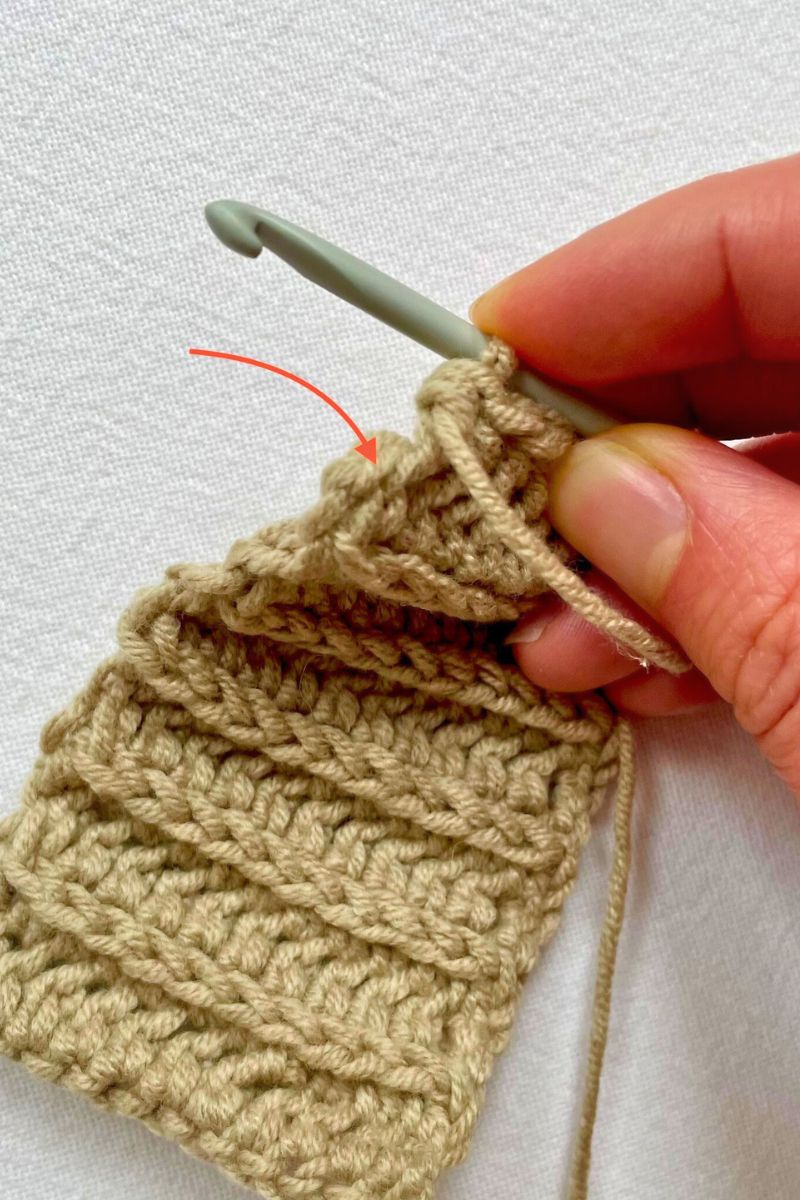
Before starting the next row, you’ll need to bring the yarn around in front of your hook like this, so it’s behind your work again:
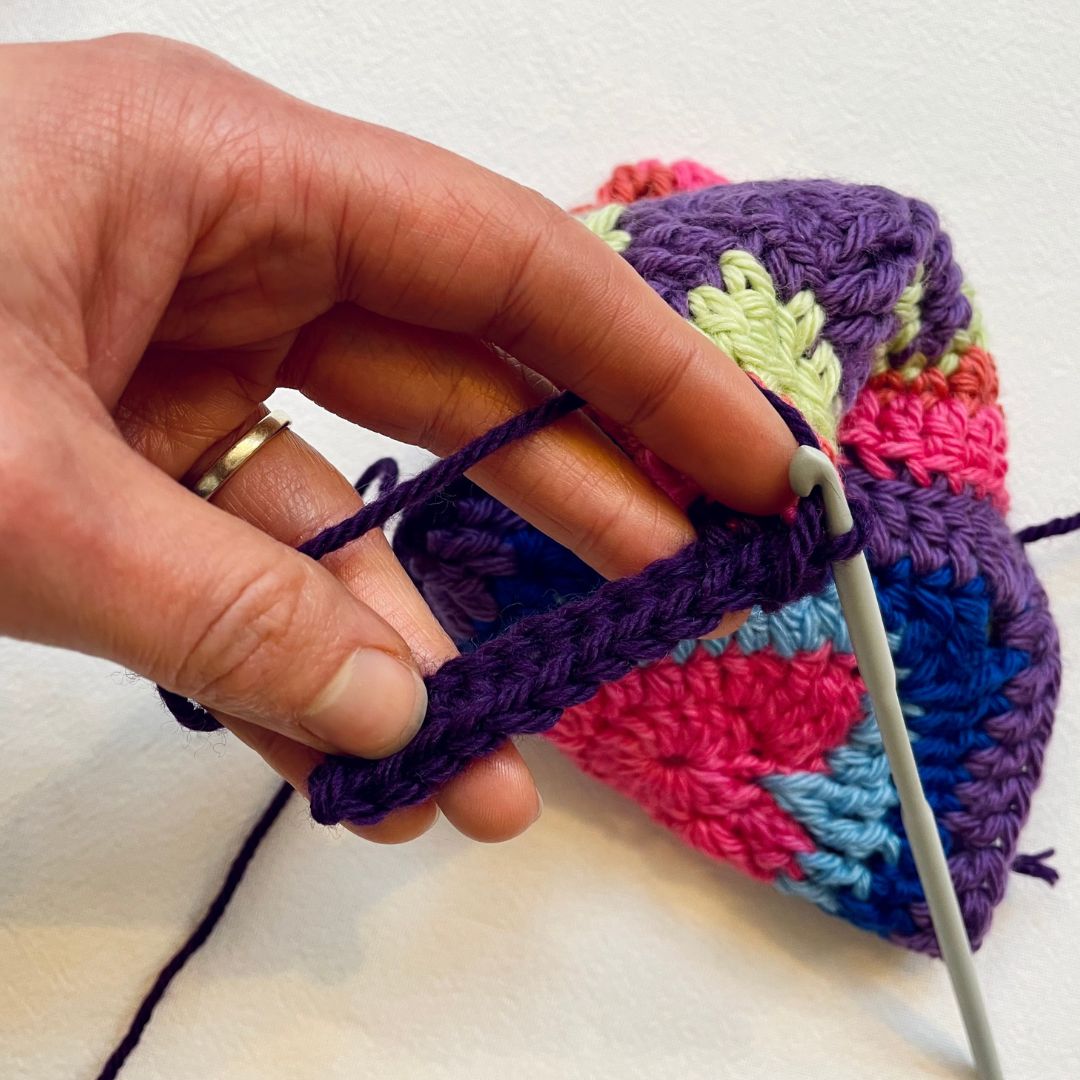
It feels clumsy, and a bit wrong, but don’t worry, it’s going to work!
Step 4: Single crochet into the back loop only of the single crochet stitches from the previous row. Take care not to mistake either of the slip stitches for the first single crochet.
Repeat steps 2 – 4 all the way around the edge of your sleeve, finishing at the end of step 2.
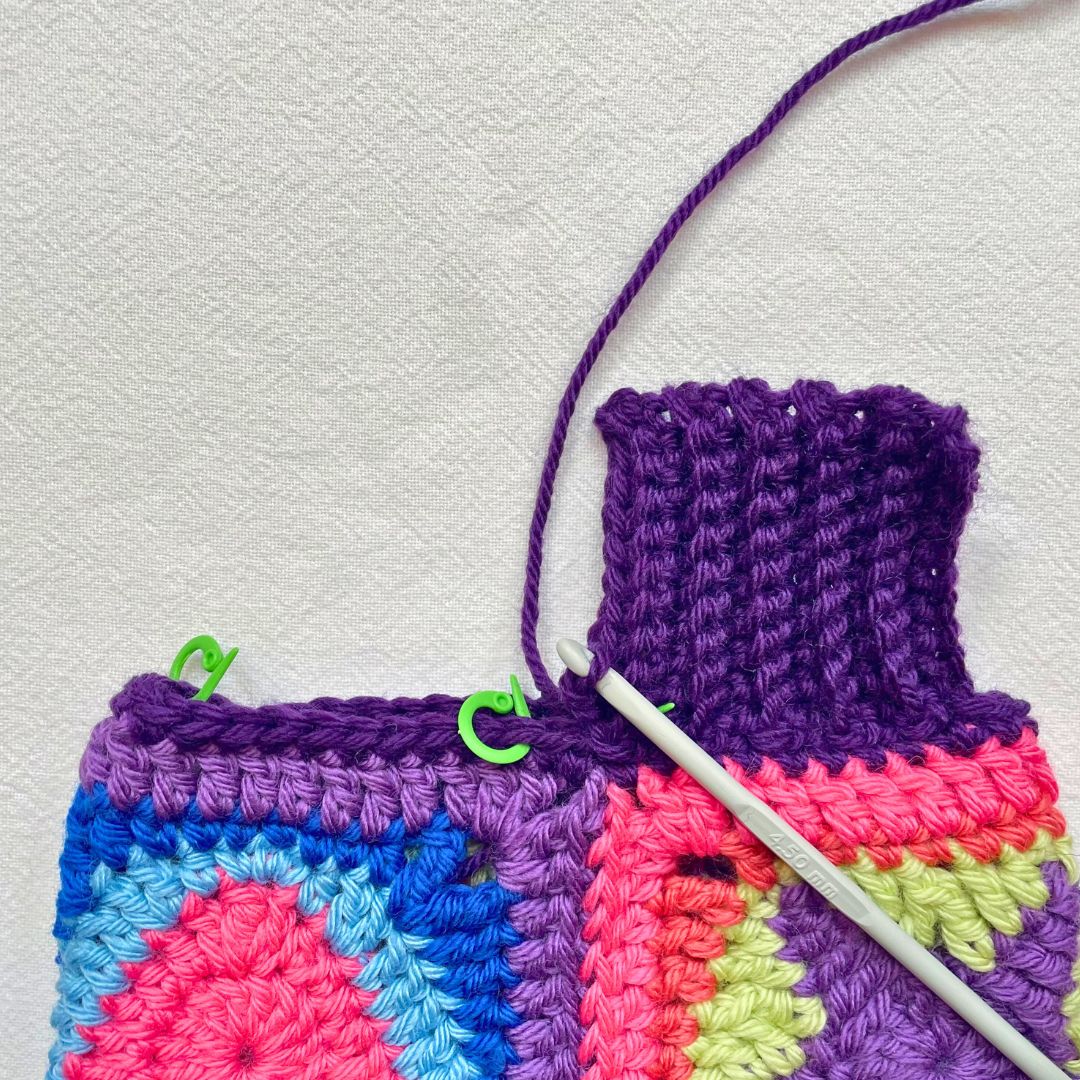
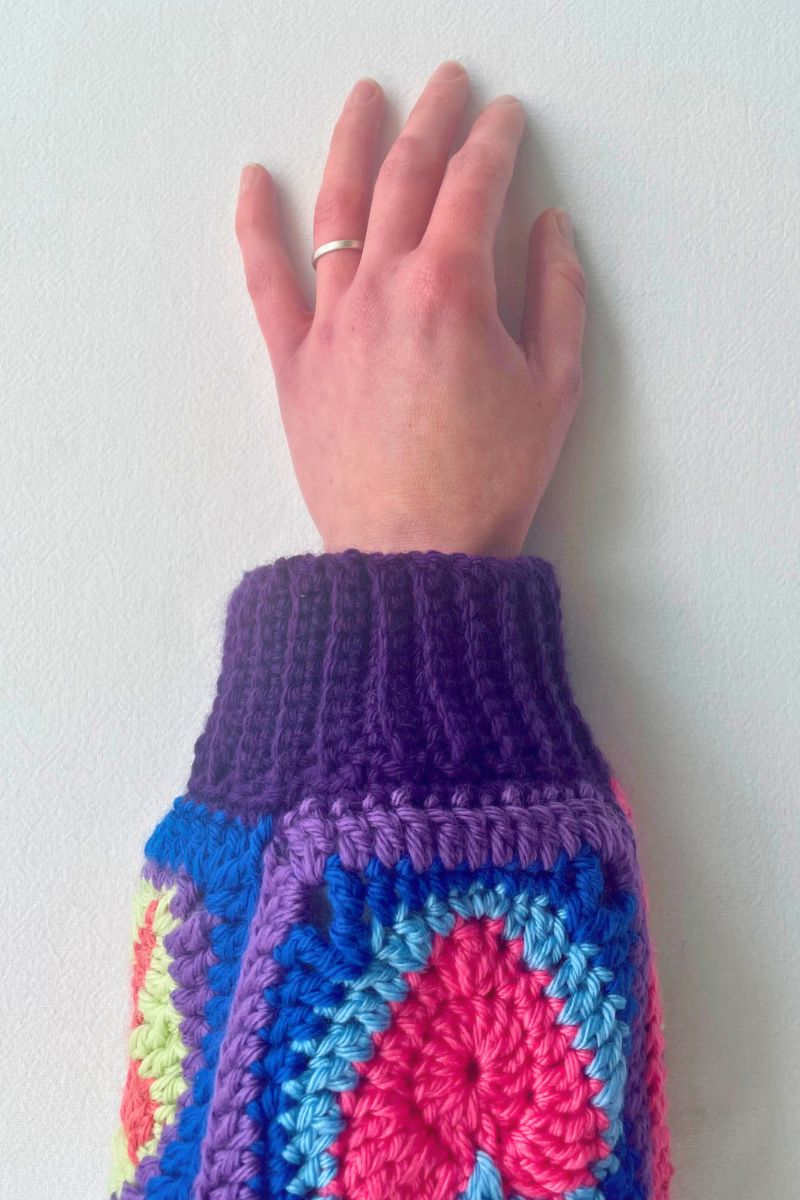
Adjusting fit
The slip stitches in step 3 serve to gather up the end of your sleeve so that the cuff has to stretch out and fit snugly around your wrist. You can use two slip stitches at a time, or three to make your cuff even narrower. Or you can use a mix of both! I’ve decided to make two slip stitches in most instances, but in four places I’m going to make three. I’ve placed the stitch markers by eye to spread those places out evenly. Honestly, I made this decision based on a hunch, but I’m pleased with how it turns out in the end. If I hadn’t been I would have unravelled the cuff, and tried again with a different sequence of making 2 or 3 slip stitches at a time. Sometimes a bit of experimenting is unavoidable!
When you’ve worked all the way around the end of your sleeve, cut the yarn and pull the end all the way through the final stitch. Use it to join the seam in your cuff using mattress stitch.
And job done! All I need is the rest of a cardigan to graft it onto now!
Getting started with crochet ribbing – summary
Crochet ribbing behaves differently to the knitted ribbing we’re used to on store bought clothes, and because if that it takes some getting used to. But there are lots of versatile, beautiful, and functional ways to apply it to garments add other crochet projects. Once you’ve used it a few times and you’re starting to feel familiar with it, you’re sure to find your own favorite technique. Have fun, and let us know if this article has been helpful in the comments box down below!