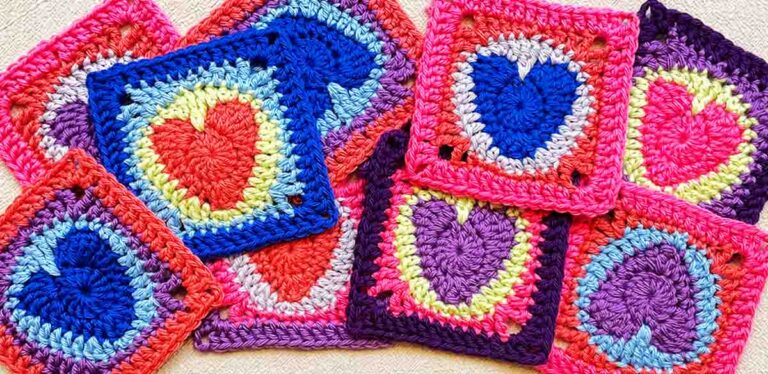
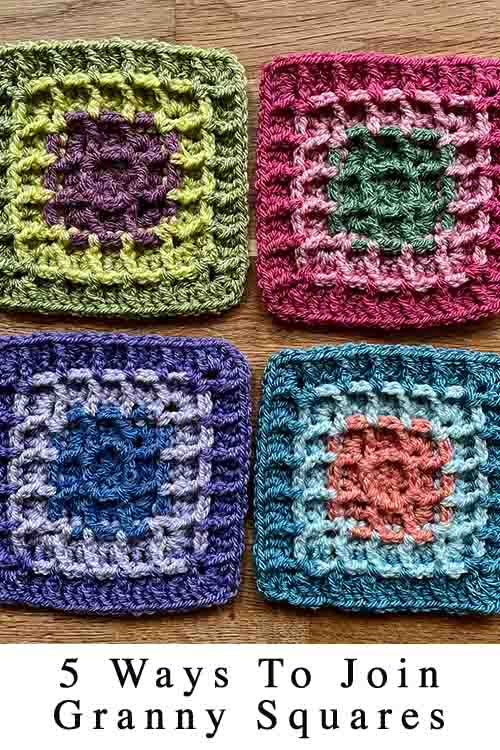
5 Methods For Joining Granny Squares
Joining granny squares tends to provoke mixed emotions and coping strategies! Do you love it or hate it? And do you start joining your squares in stages as soon as you have enough to make a start, or wait until they’re all finished and do all your joining at once?
I’m usually an all-at-once kind of gal. I get a big rush of excitement when my granny square projects make a clean transition from square-making to square-joining! But whenever you start, here are five of the most commonly used joining techniques to choose from, and how to match them to different projects.
- Whip stitch join with a tapestry needle
- Mattress stitch join with a tapestry needle
- Slip stitch join with a crochet hook
- Single crochet join with a crochet hook
- Join-as-you-go
First things first – tools
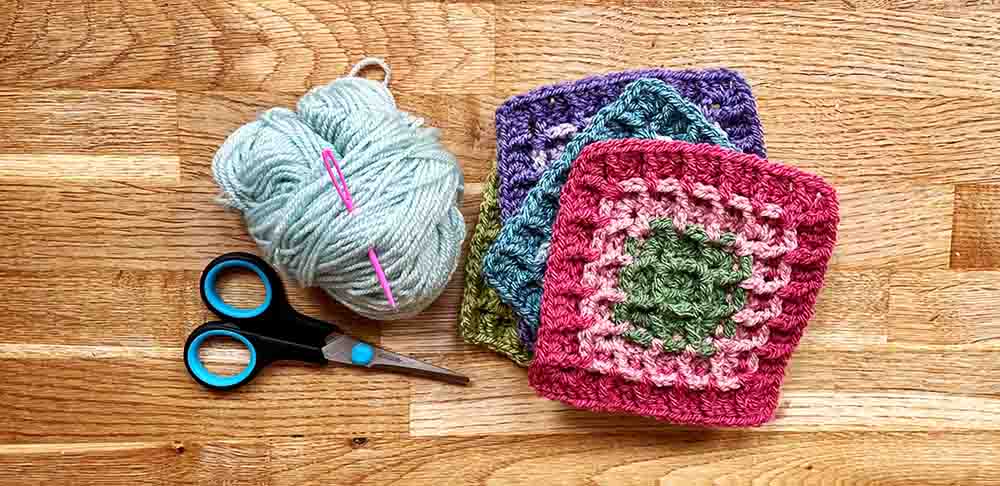
Before settling down in front of your favorite TV series and a pile of granny squares to join, gather your tools:
- Yarn. Most crocheters join granny squares with one of the same yarns used to make the squares. But if you’re stash-busting and you don’t have enough, then anything in the same fiber and weight will work.
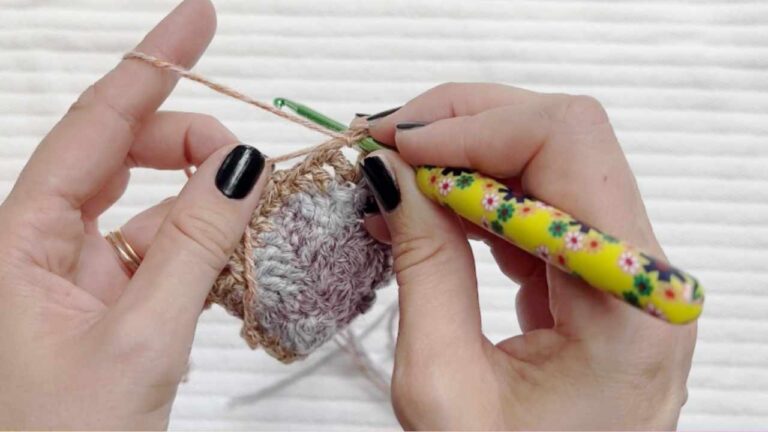
- Tapestry needle. Also known as a wool needle or darning needle. Tapestry needles have a large eye for threading yarn through, and a slightly dull point, so it’s easier to feed it between your stitches. I’m using a plastic one which came in a children’s craft kit, but you can get metal ones with a specially curved tip that makes stitching seams even easier.
- Crochet hook. Not all joining methods require a crochet hook, but you’ll need one for the slip stich, single crochet, and join-as-you-go techniques.
- Scissors. So obvious, and yet always the thing I realize I’ve started without.
- Optional – stitch markers or clips. Some people like to use stitch markers or clips to hold the edges of their granny squares together as they work. But your squares will line up in the end whether you do or don’t.
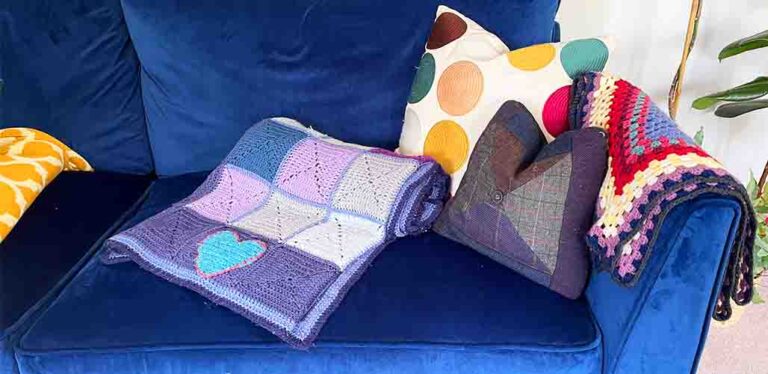
What order to join your grannies in?
Usually, for granny square blankets the squares are joined in a single height row (as if you were making a scarf) and then those rows are joined along their long edges. For smaller projects, like granny square crochet bags, you could lay out your squares and make all the horizontal seams first, followed by all the vertical seams. This means fewer ends to weave in later, but you’ll need to either finish in one go, or have space to leave the squares undisturbed while you take breaks. Finally, for join-as-you-go grannies, you add one square at a time, in zigzag rows. But we’ll come back to that in a minute.
Now let’s dive into the five most common joins!
1. Whip stitch join
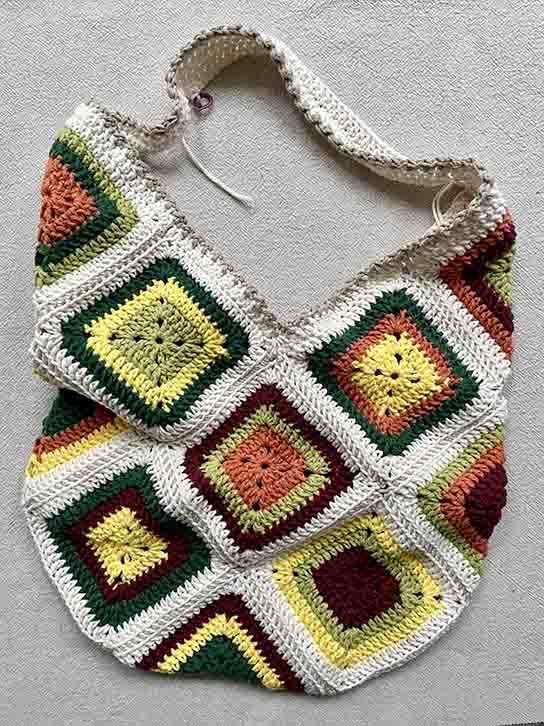
Arguably the quickest and simplest way to join granny squares is using whip stitch. It’s so easy that it hardly needs to be learned! You can work whip stitch through both loops at the edge of a granny square, or just the back loops. But working through the back loops only is more usual, as catching four loops (two from each side) makes for a bulky, inflexible seam. If you use a non-matching yarn, your whip stitch will show as a row of visible dashes on the front of your work. I don’t dislike that look, but it’s not for everyone. It looks best on items with a bit of a boho aesthetic, like this bag I’ve been working on:
Method
To whip stitch two granny squares together:
- Place them side by side on a flat surface, or hold them upright, with the wrong sides together.
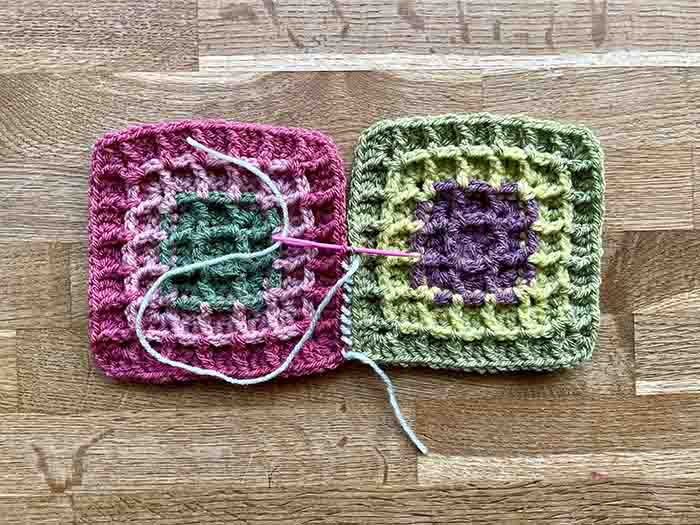
- Secure your yarn through one corner space of each square with a simple overhand knot.
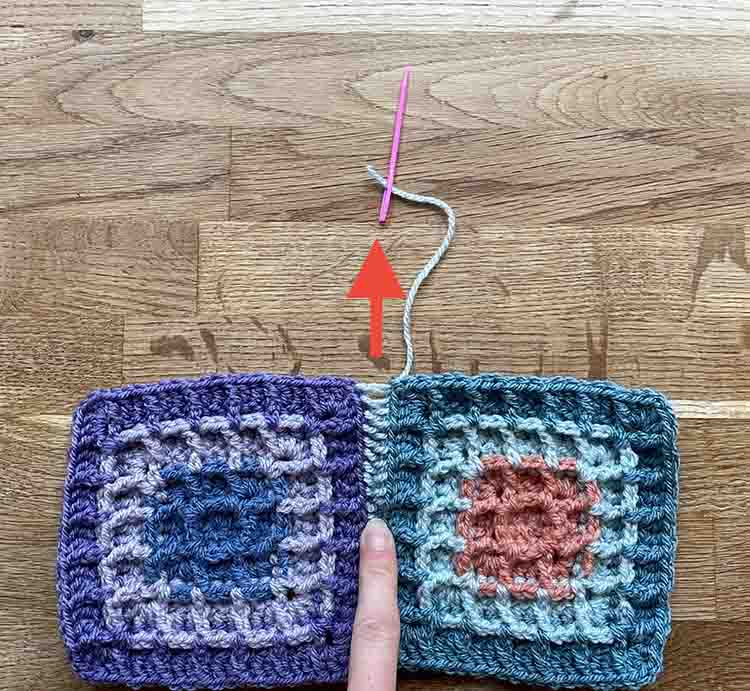
- Thread the yarn from front to back through the back loop of one square, and from back to front through the back loop of the corresponding stitch on the other square.
- Repeat with the next pair of stitches, and so on.
- When you reach the next corner, check your tension by giving everything a little squish, stretch, and a jiggle.
- Secure with a half hitch around the corner chains of both squares, and weave in your ends.
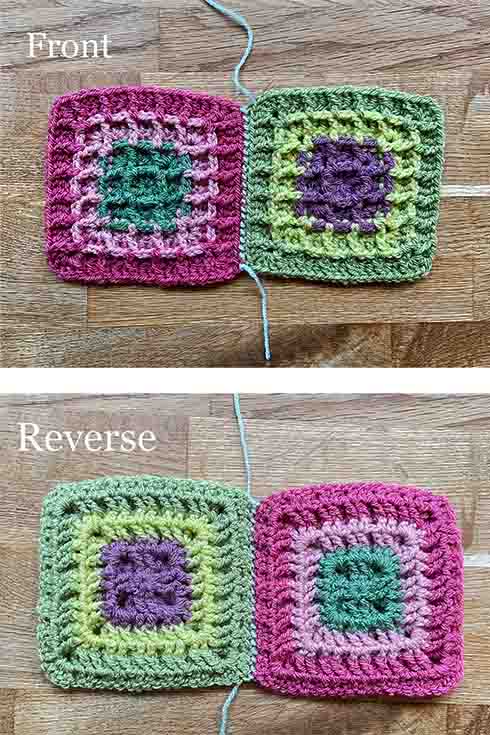
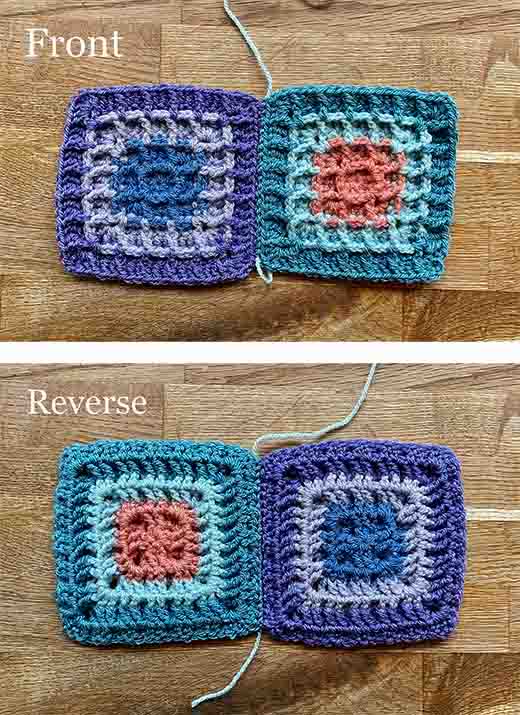
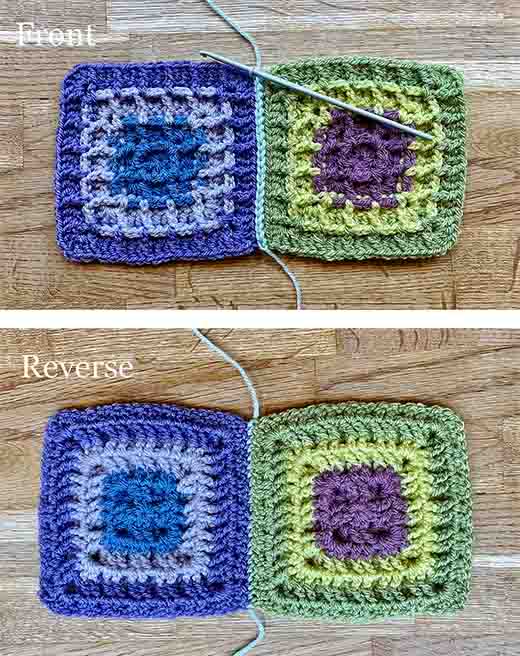
Here’s how the front and back will look when you’re done:
2. Mattress stitch join
Mattress stitch is a little slower to work than whip stitch, but hardly any more difficult. It’s worked through the back loops at the edge of your square only. And once you’ve threaded the yarn back and forth, you pull it completely taut, so that it interlocks the loops from each square like a zip. In fact it zips them together so effectively that if you pull the yarn all the way through and out again, you squares probably won’t immediately detach from one another! Mattress stitch joins are also very well hidden from both the front and the back, so they’re ideal for joining granny squares in two different colors, and for blankets without a right side, e.g. linen stitch granny square blankets.
Method
To join two granny squares with mattress stitch:
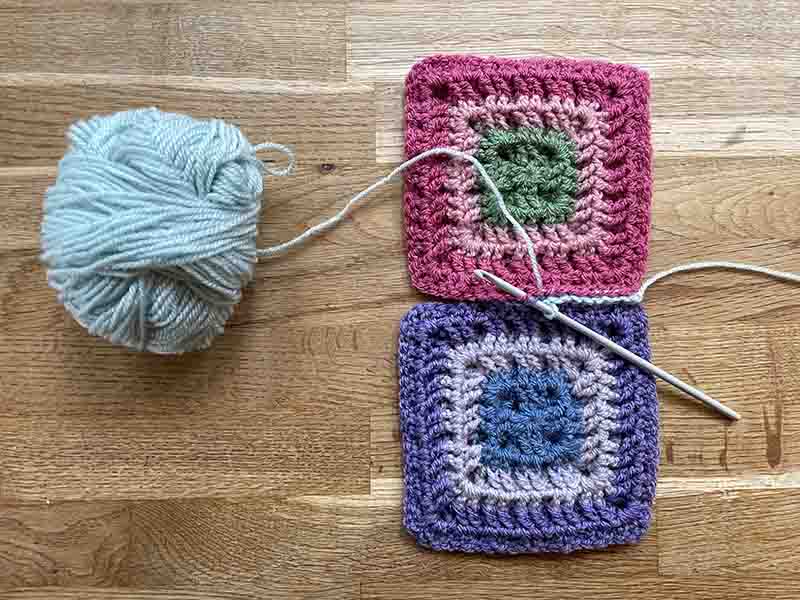
- Place them side by side on a flat surface, or hold them upright, with the wrong sides together.
- Secure your yarn through a corner space of both squares with a simple overhand knot.
- Thread the yarn from front to back through the back loop of one square, then from front to back through the corresponding loop on the other square. It’s a similar motion to threading shoelaces!
- Every couple of inches, hold the yarn firmly and pull the stitches taut. Ziiiiiiiiiiiipp!
- Secure at the next corner with a half hitch, and weave in your ends.
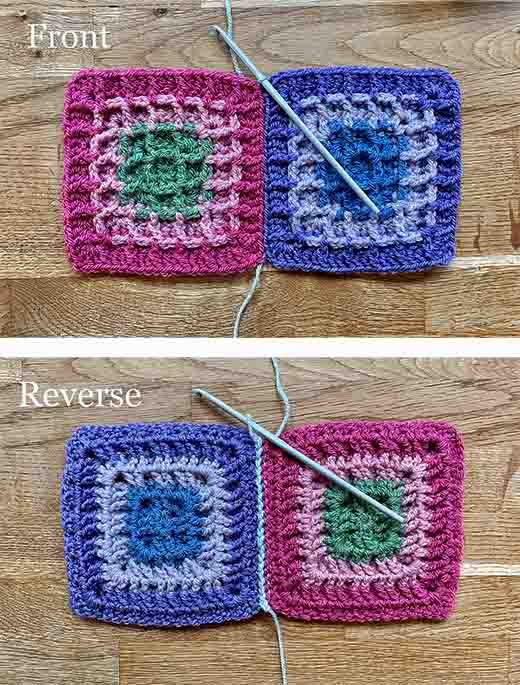
Your finished seam should look like this:
Which is to say, be practically invisible!
3. Slip stitch join
If the prospect of picking up a tapestry needle or doing any kind of sewing makes your blood run cold, then joining granny squares with a crochet hook might be more within your comfort zone. Crochet seams are a bit bulkier than sewn seams, but since they’re constructed in a similar way to the granny squares themselves, there’s a visual harmony which means it works anyway.
A slip stitch join is barely visible on the front of your blanket, but leaves a clear line of stitch-tops on the back of your work. So it works best on blankets with a distinct right and wrong side, like waffle granny square blankets.
Method
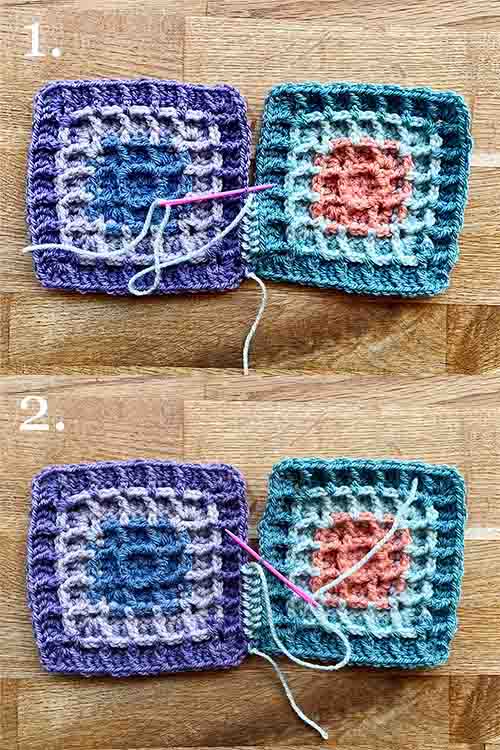
- Make a slip knot on your crochet hook, and hold your squares right sides together.
- Insert your hook through the back loops only of each stitch – the ones at the outer edge of your ‘sandwich’.
- Start with the back loops of the corner turning chain adjacent to your edge – insert your hook through both, yarn over, then draw through both back loops and the slip knot. Wiggle your yarn a fraction looser than you usually would for a slip stitch, so that you can comfortably cover the distance to the next stitch.
- Then move on to the next pair of back loops – insert your hook through both, yarn over, then draw through both back loops and the loop on your hook.
- Repeat to the next corner, make a slip stitch into the back loops of the first turning chains, cut the yarn and pull the tail all the way through. Weave it in.
Here’s the end result:
Single crochet join
This join makes a statement out of seaming! Unlike a slip stitch join, it’s made into the front loops of the stitches at the edge of your granny square. It’s intentionally slightly raised and very visible. There’s not much point making it in the same color as your squares – choose a complementing color or even a contrasting one!
Method
- Make a slip knot on your crochet hook, and hold your squares wrong sides together.
- Insert your hook through the front loops only of each stitch – the ones at the outer edge of your ‘sandwich’.
- Start with the front loops of the turning chain at the end the side you’re seaming. Insert your hook through both loops, yarn over and draw through both front loops, yarn over and draw through both remaining loops on the hook (one is the slip knot).
- Then move on to the next pair of front loops – insert your hook through both, yarn over and draw through both, yarn over and draw through both remaining loops on the hook.
- Repeat to the next corner, including the front loops of the first turning chain, cut the yarn and pull the tail all the way through. Weave it in.
Here’s how it will look:
Join-as-you-go
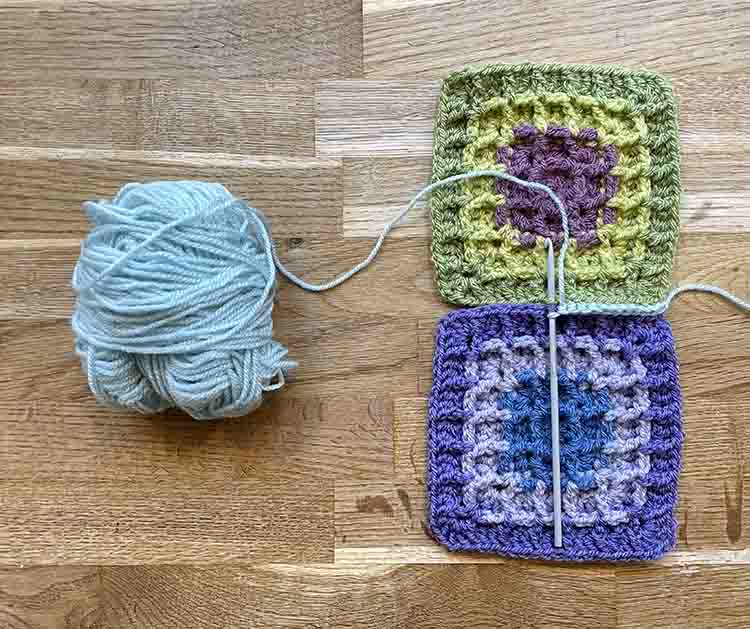
Finally, the join as you go technique. This method for joining granny squares takes a bit of forward-planning, but it’s worth it, because it completely does away with seaming your squares together. To start you’ll need one finished square, and another square (or all the rest of your squares) worked up to the second-to-last round.
You’ll use the last round to join the incomplete squares to the already finished one. This is where the forward planning comes in – if you’re using lots of colours, you’ll need to try and picture how the squares are going to look with their final round, before you’ve actually made it.
Method
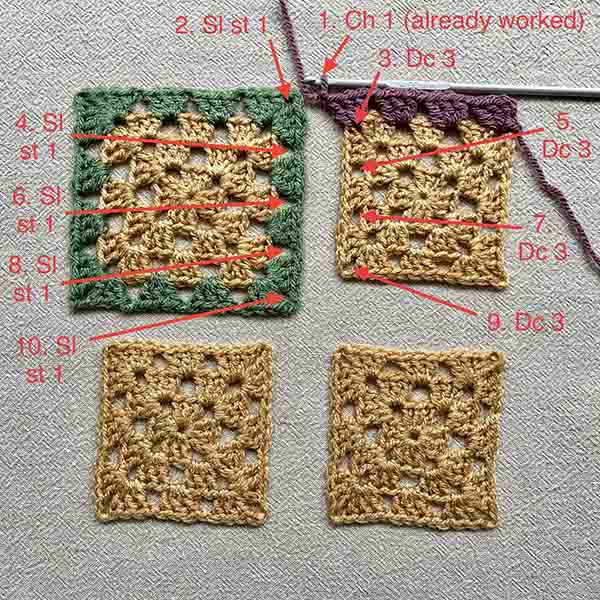
To join as you go you’ll complete the final round of your granny square, substituting some of the chain stitches for slip stitches into the neighboring square.
- Join the yarn at a corner of the incomplete square and work along the first edge in the usual way.
- In the next corner space, dc 3, ch 1, then sl st 1 into a corner chain space of the complete square. Dc 3 into the corner space of the incomplete square to complete that corner.
- Sl st in to the next chain space on the neighboring square.
- Continue working dc 3 into the chain spaces on the incomplete square, followed by 1 sl st into the next chain space on the complete square. Here’s a diagram of where your stitches are going. The steps are labeled 1 – 10, and start after you’ve made the first dc 3 into the corner space of the incomplete square.
- To continue, ch 1, dc 3 into the the corner space of the incomplete square to complete that corner, then work along the final two edge in the normal way (not joining any other squares at this stage).
Handling corners
Granny square corners usually have 2 chain stitches. When you join as you go, you replace one or both with a slip stitch into the corner(s) of the neighboring square(s).
- When you’re only joining to one other square, replace one corner chain with a slip stitch, and make the other chain as usual.
- When you’re joining to two other square, replace both corner chains with a slip stitch – one into each neighboring granny square. Like this:
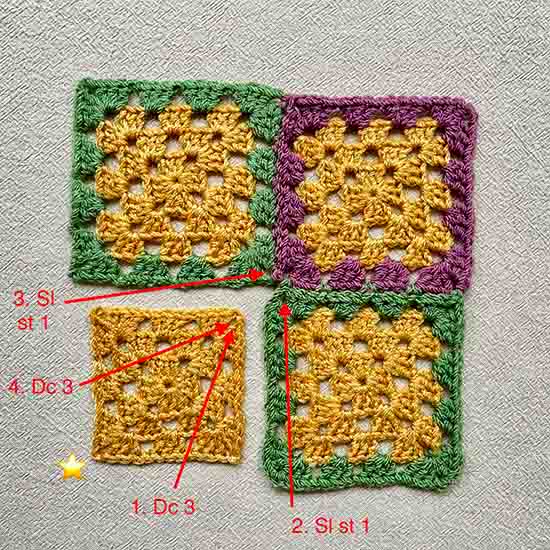
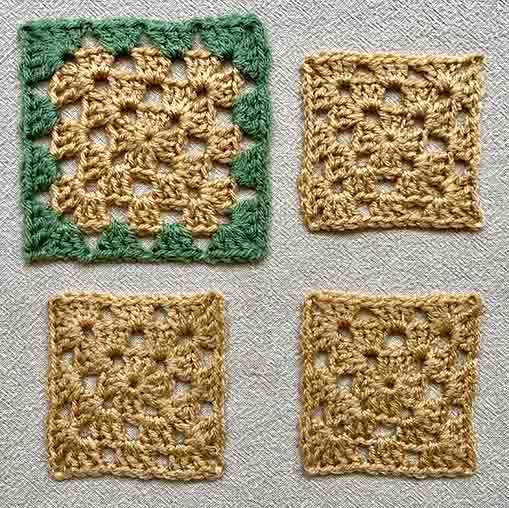
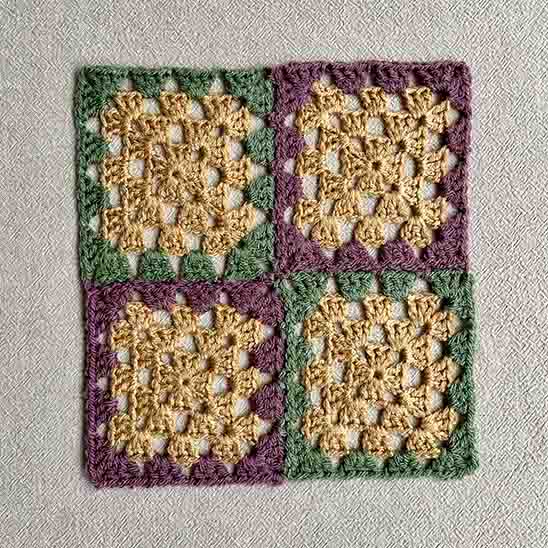
The gold star represents where I would start working to join this square. Here’s how they look when all four squares have been joined:
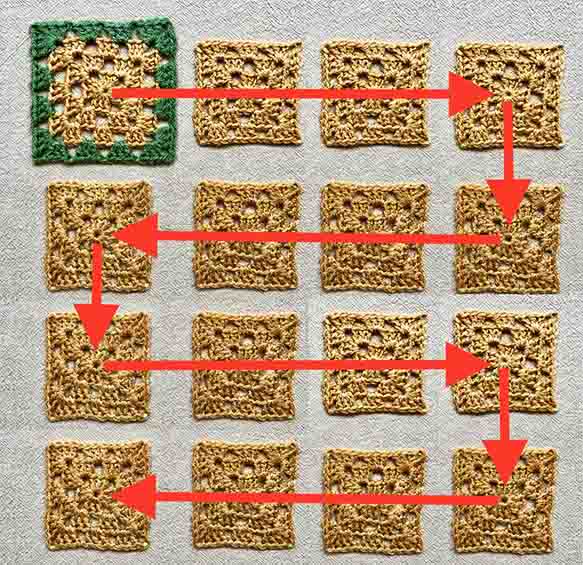
I only made four squares to demonstrate the join-as-you-go technique here, but if I had more I would join them in the following order:
Summary
Joining granny squares tends to provoke mixed emotions. For some people it’s a bit of a chore. But finding a method you enjoy (or at least don’t hate) can ease the tedium. Switching techniques from one project to the next can also make the process feel fresh each time. Let us know which method for joining granny squares you’re going try on your next project in the comments box down below.