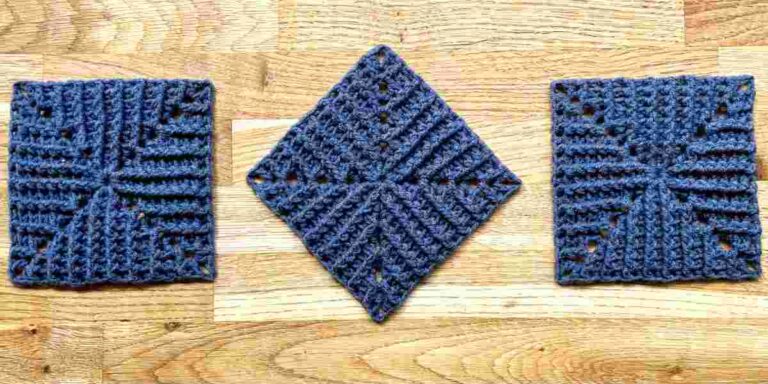
How To Make A Diagonal Granny Square

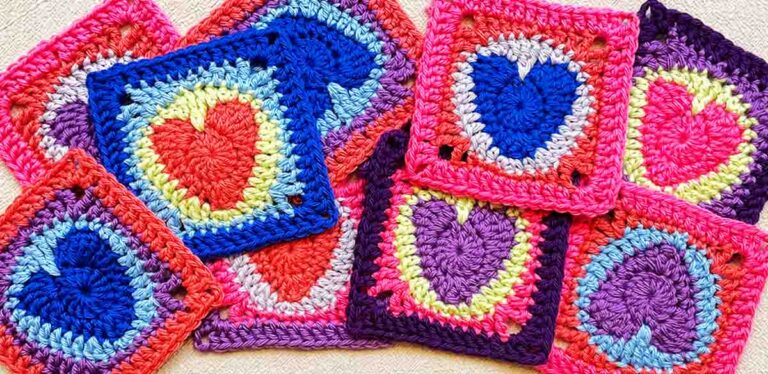
How would you describe a granny square that’s split in half diagonally, and one color on each side of that line? A two-triangle granny square? A diagonal granny square? Perhaps you’d even recognize that the color changes have been achieved using tapestry crochet?
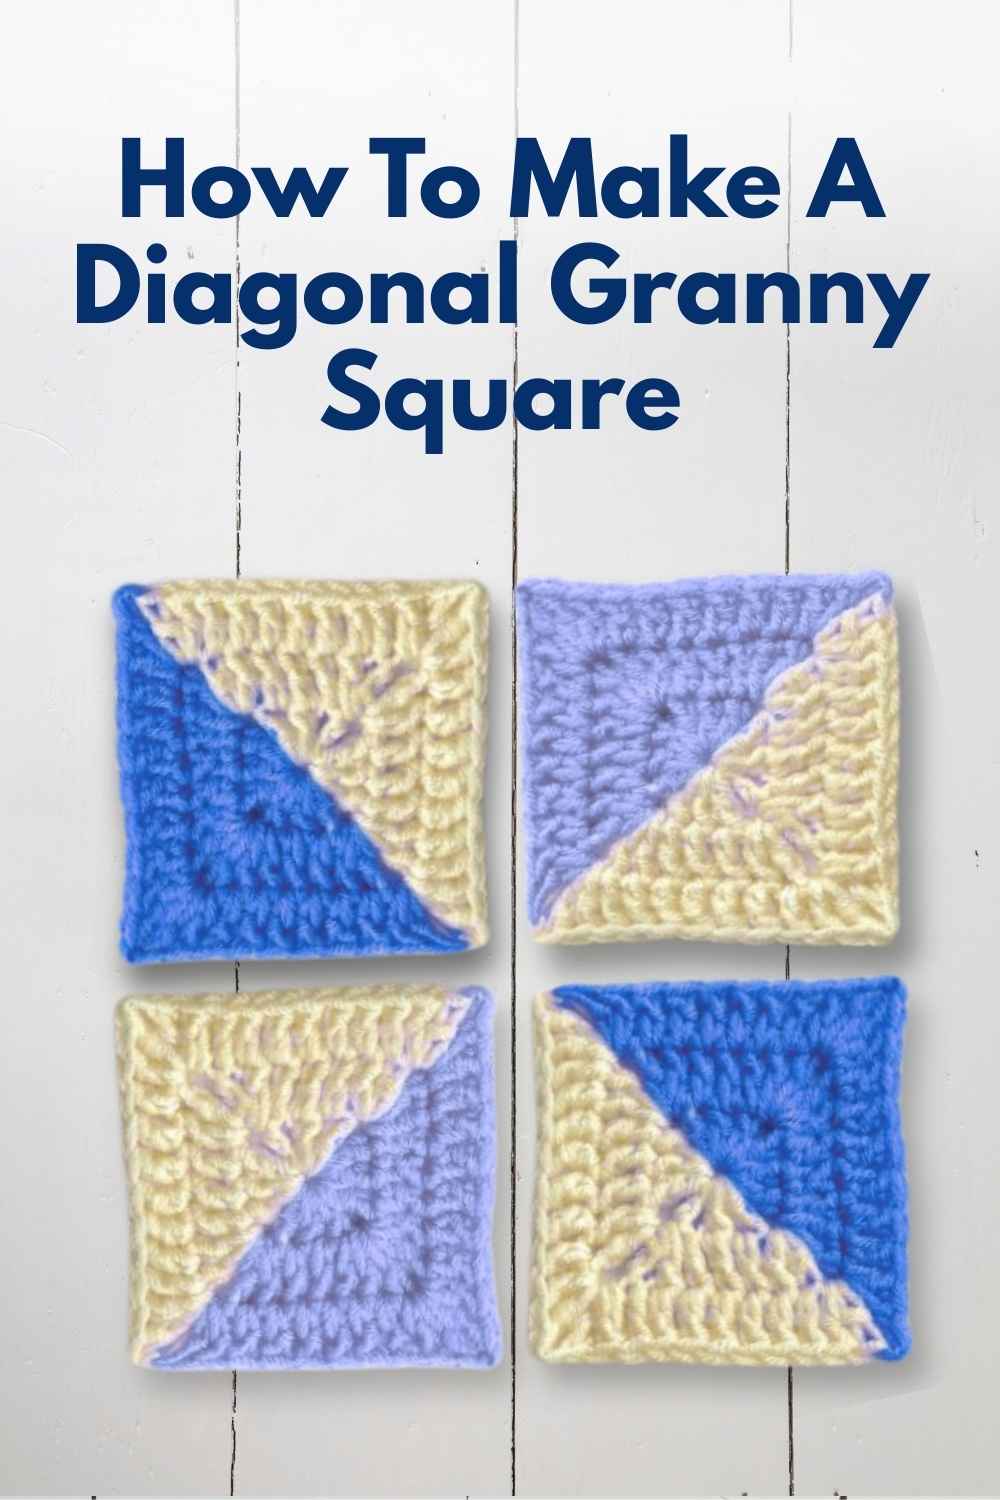
In fact, I think the hardest part of making this tutorial has been deciding how to describe what I’m showing you! Because actually making a two-tone granny square like this (see, another option right there) is dead simple. And the result is incredibly effective – especially if you want to make a granny square blanket that mimics some of the traditional shapes and patterns usually seen in quilting, like sawtooth stars and pinwheels.
Making diagonal granny squares
These granny squares are a striking twist on a solid granny square. But with two colors, and a small pattern adjustment, to achieve the best effect. Usually to incorporate more than one color into a granny square the extra colors are added in concentric rounds, working outwards from the center. Or you could work in rows, and make stripes of color. But this time we’re going to look at a third way – carrying one shade of yarn inside the stitches of another, so you can switch at any time. This method is called tapestry crochet. And these squares are a great project to start with if you’re new to tapestry crochet, and want to get a feel for how it’s done.

Some notes before you get started
Choosing colors
You can make these diagonally split granny squares in any two colors. But, the greater the contrast between them, the more likely it is you’ll be able to spot the little places where one is poking through the other. And no matter how careful and neat you are, there will be some little places where you can see the yarn you’re carrying through your stitches. It actually put me off using this technique for the longest time. But eventually something shifted, and I’ve learned to appreciate they’re just part of the charm.
Hook size and tension
As a general rule, you can make these squares with whatever hook size your yarn calls for on the wrapper. But, if your natural tension errs towards the loose side, you might find you get better results if you drop down a hook size. This will increase the tension in your square slightly and hold the yarn you’re carrying more in position more securely. Even though the yarn carried inside another stitch can never come loose from the stitch entirely, it can wiggle up inside the stitch over time and become more visible, if your tension is very loose.
The pattern
The sequence of stitches for making these squares contains few surprises. The magic is all in the color changes. You’ll need to know how to chain, slip stitch, and make a double crochet stitch. If you need a refresher on any of those, check out this introduction to the basic crochet stitches. It will also help if you’re familiar with making a solid granny square in just one color.
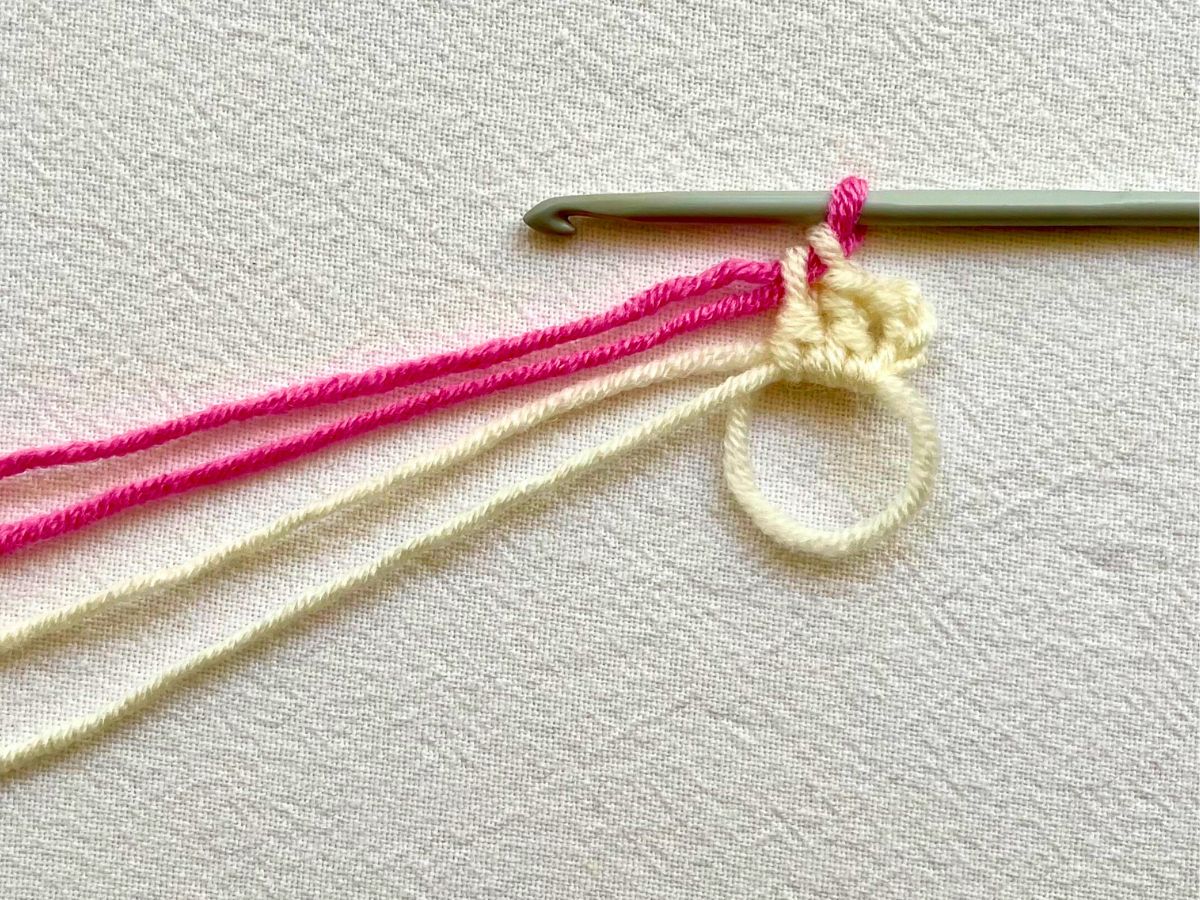
To start
Using your first yarn color (yarn A), make a magic circle. Or you can chain 4 and join them with a slip stitch to form a loop, if you prefer.
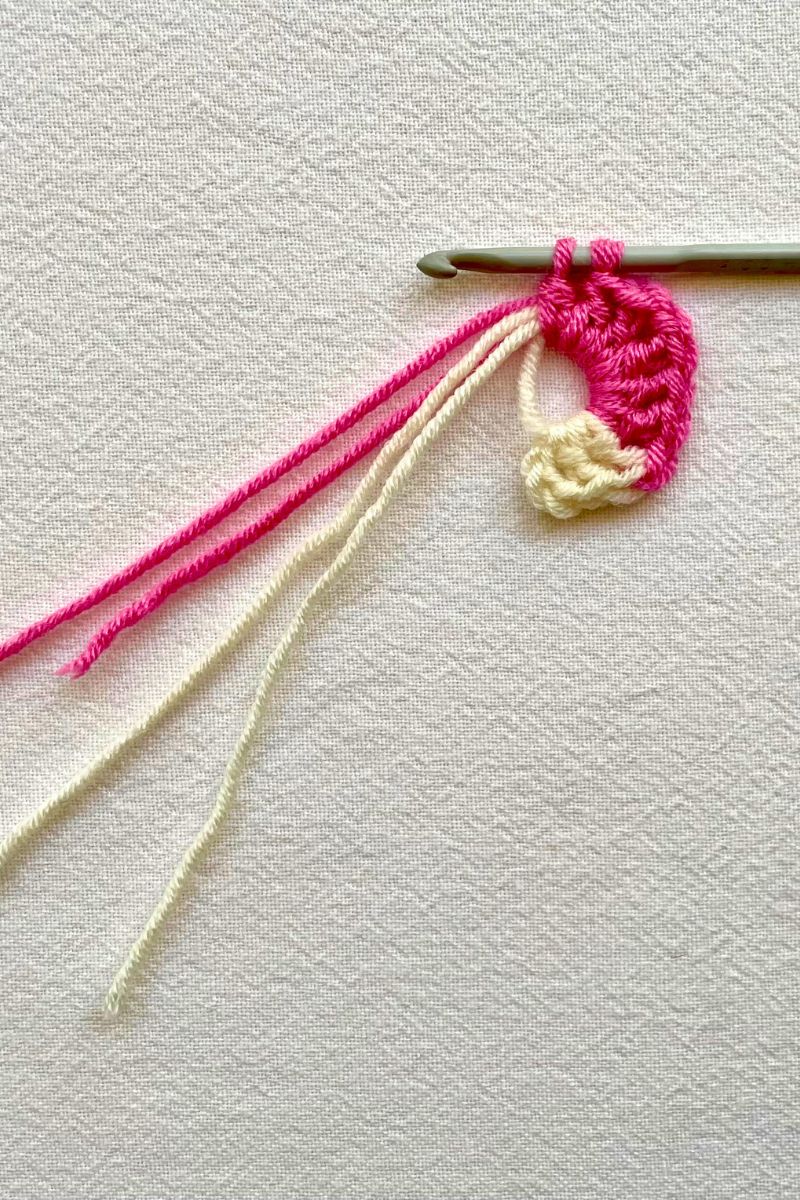
Round 1
Ch3 (counts as the first dc). Working into the magic loop and catching the yarn’s tail as you go, dc 1. Start another dc, but stop before the final yarn over.

Drop yarn A and pick up your second yarn (yarn B). Loop it over the hook from back to front, and use it to finish the double crochet stitch.
Using yarn B:
- Ch 1
- Dc 3 into the magic loop, catching yarn A and both yarn tails as you go.
- Ch 1
- Dc 3 into the magic loop, catching yarn A and both yarn tails as you go, and stopping before the final yarn over of the last stitch.
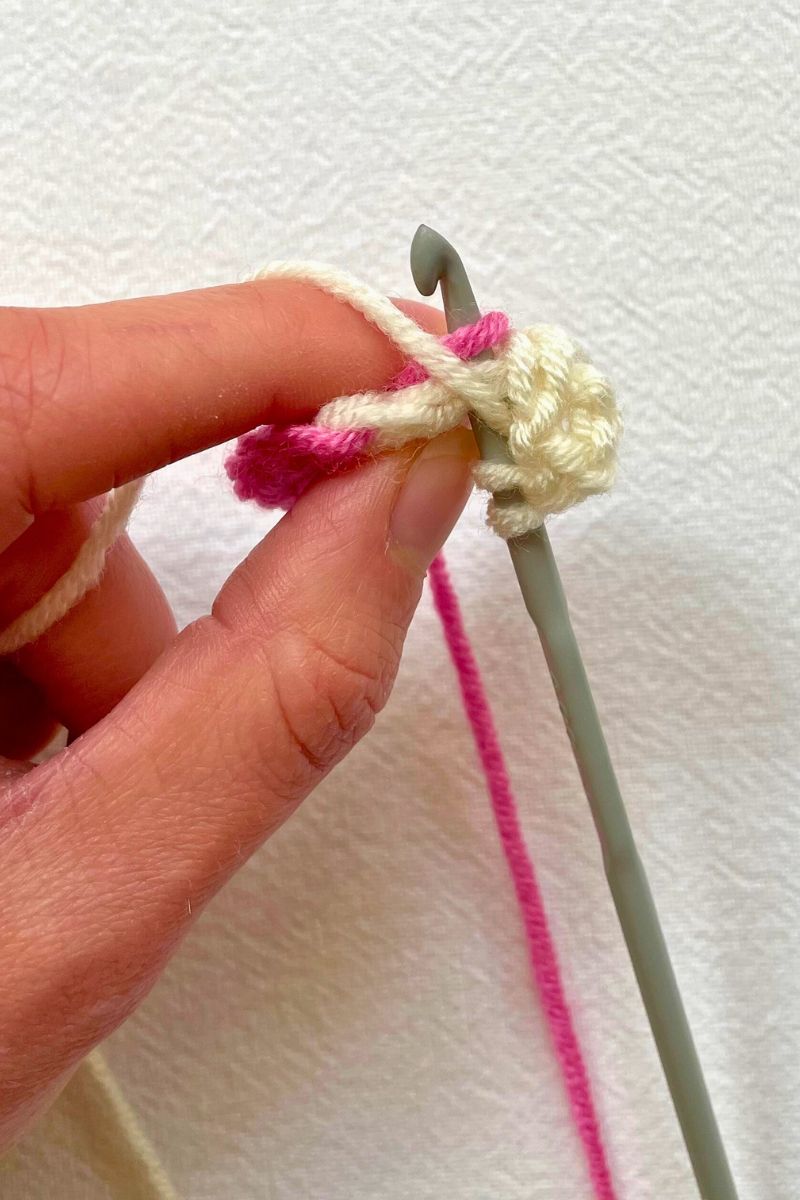
Drop yarn B and pick up yarn A. Make sure it goes behind yarn B, and your yarn tails. Then bring it over your hook, and use it to finish the double crochet stitch.
Continuing to use yarn A:
- Ch 1
- Dc 3 into the magic loop (catching color B and both yarn tails as you go)
- Ch 1
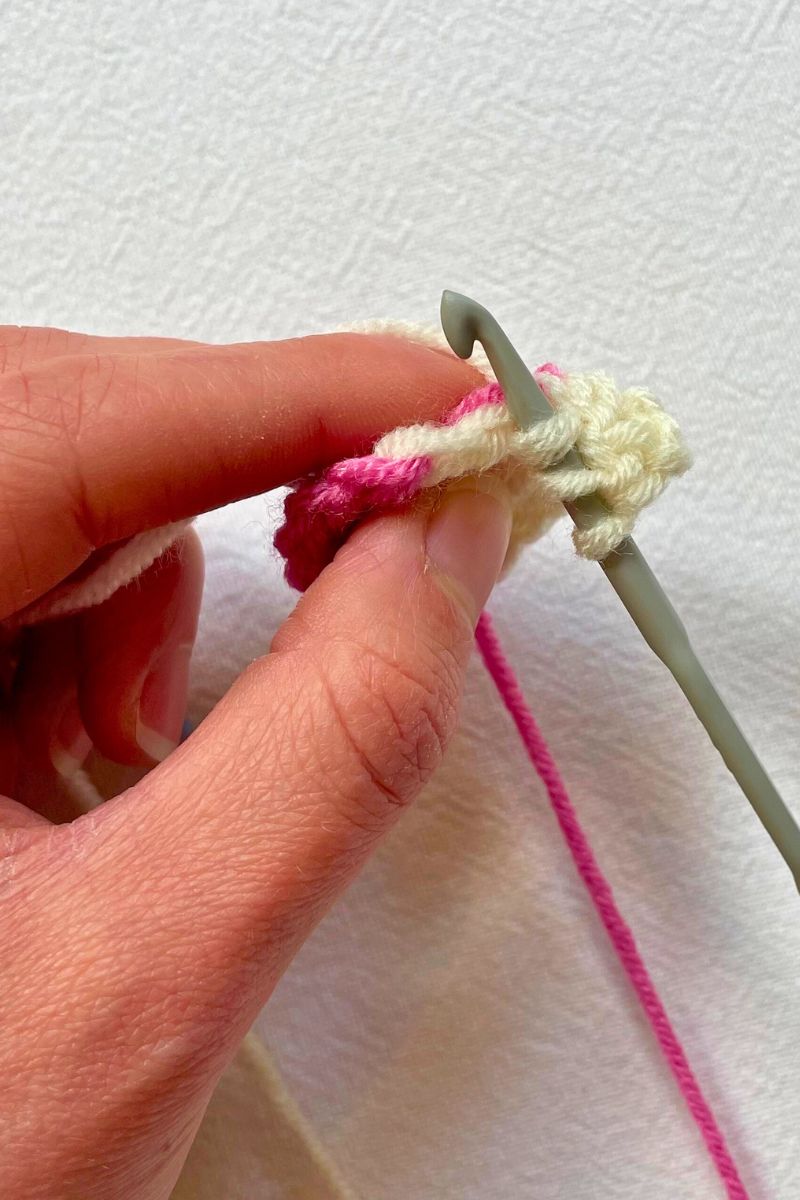
- Sl st to the top of the ch 3 to join.
You should have four sides, each with 3 dc, and four corner spaces, each with one chain. Using single chain corner spaces is an important feature of this pattern – I’ll show you why before the end of this article!

Now is a good time to weave in the yarn tails and get them out of the way. If you started with a magic circle, you can pull the tail of yarn A to tighten the circle. You might also need to pull the tail of yarn B ever so slightly, to take up any slack in it. But, do not pull hard on the tail of yarn B – that will create a dimple in the corner where you joined it.
Round 2
Let yarn B hang free. Using yarn A, ch 3, dc 1 into the corner space.

Next you need to control yarns A and B simultaneously for a moment. Loop yarn A over your hook, in preparation for making a double crochet stitch. Hold yarn B just behind the top of the next stitch, so that it comes up slightly to the right of the stitch*, and travels behind the stitch from right to left. Insert your hook into the top of the ch 3 from round 1 and under yarn B.
* Assuming you’re right handed. If you’re left handed, it will come up to the left of the stitch.
Pick up yarn A and draw it back through the stitch.
Complete your double crochet using yarn A. Here’s the back of the finished stitch, with yarn B trapped at its base:

Now yarn B is in position, it’s quite easy to keep in there while you make the rest of the side. Make 2 more dc into the side stitches, and 2 dc into the corner space. Stop before the final yarn over of the last stitch.

Release yarn A. Pick up yarn B making sure it goes behind yarn A, and use it to finish that double crochet.
Hold yarn A behind the top of the stitches along the next side of your square and use yarn B to:
- Ch 1, and dc 2 into the corner space.
- *Dc into the next 3 stitches, then (dc 2, ch 1, dc 2) into the corner space* twice, stopping before the final yarn over of the last stitch.

Carrying your yarn
Make sure that when you put your hook into each stitch (or the chain space) it goes below yarn A, so that it gets caught in your stitches. Take care not to miss the first stitch on each edge – because the corner spaces are small and so full of stitches, they tend to hide it a bit!
You’ve got the technique now, so switch back to yarn A to finish the round, catching yarn B inside the stitches. Repeat for as many rounds as you want, then tie off and weave in your ends.
Blocking
Finally, block your square to make the edges straight and the corners sharp. Blocking makes an especially big difference when you’re only using one chain to make your corner spaces.

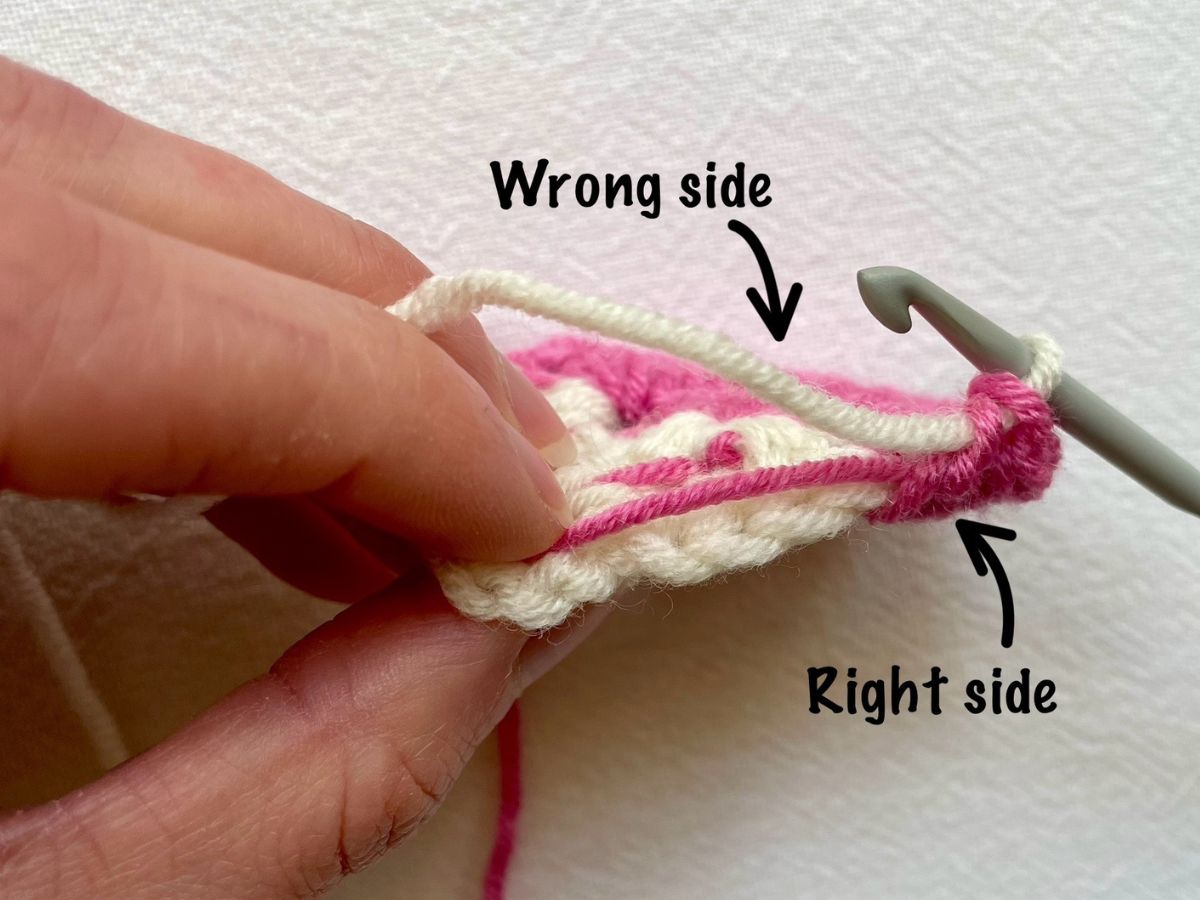
The importance of carrying the yarn behind your stitches
Carrying your yarn slightly behind the previous row of stitches rather than sitting on top of them makes all the difference to how these granny squares turn out. In this picture, I’m about to start working with the white yarn, and carrying the pink yarn inside the stitches. When I look down on the top of my stitches, you can see that I’m holding the pink yarn alongside them, to the wrong side of my work.
Here’s how that looks, compared to if I’d held it on top of them instead.

The square on the left can also start looking like the square on the right over time, if the tension is very loose. Which is why it’s a good idea to use a smaller crochet hook than usual, if you tend to crochet loosely.
What happens if you make two chains in the corners?
For a regular solid granny square, it’s more usual to make two chain stitches in the corner spaces. Using just one for this design is a fantastic tip I picked up from the awesomely talented Therese Hagstedt on Instagram. It works a treat to conceal the ‘wrong’ colored yarn at the corners. I’ve taken this photo slightly sideways onto show you clearly what I mean:

But it’s pretty obvious from any angle in real life – on the square with 2 chains at the corner spaces, the red yarn is clearly visible in the white corner spaces. It’s also poking through the white yarn in the top-left corner spaces. Using just one chain in the corner spaces forces the stitches in the space to bunch together more tightly, fixing these problems.
Tapestry crochet variations
These granny squares are the perfect solution for incorporating triangles and diagonal lines into granny square projects. I’m planning to make enough for a three-color blanket with a pin wheel design. But for more inspiration, try researching traditional quilt making blocks. There are some great examples of what’s possible here.
For more intricate designs, you could even switch colors at every corner, so the square is divided into four triabgles and the colors look like hourglasses.
Diagonal granny square – summary
This granny square pattern is one of the most visually striking, without being intricate to make. I love the impact the bright colors I’ve chosen have – I think they’re going to bring a great energy to my finished blanket. But more muted, tonal hues would have a classic, timeless feel. Let me know which colors you’d use in the comments box down below!