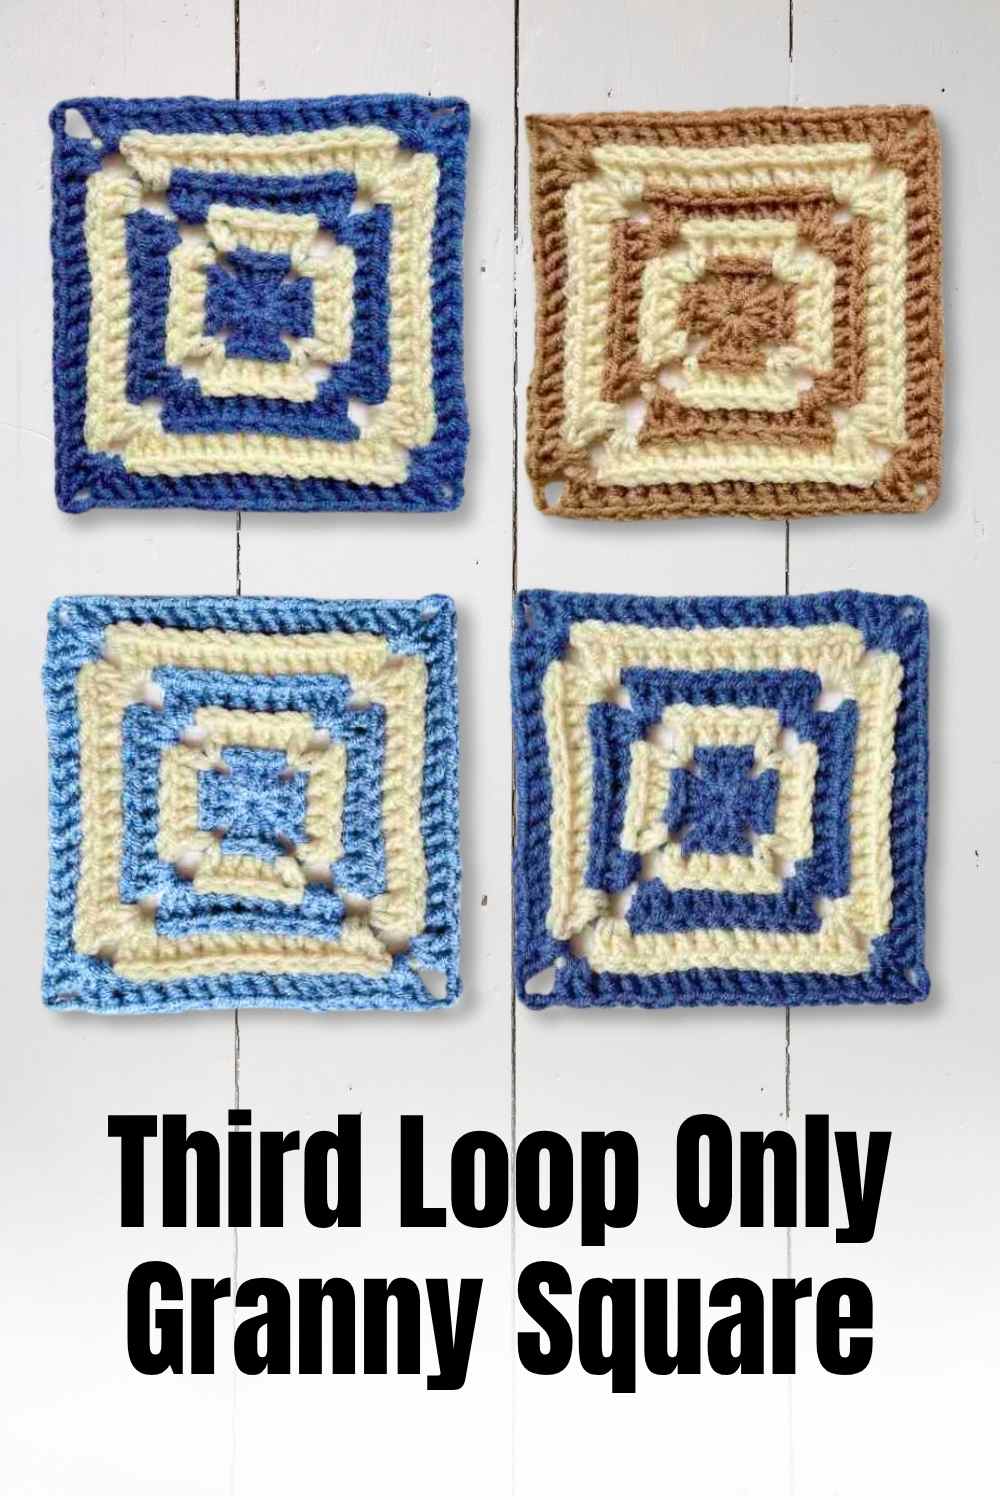
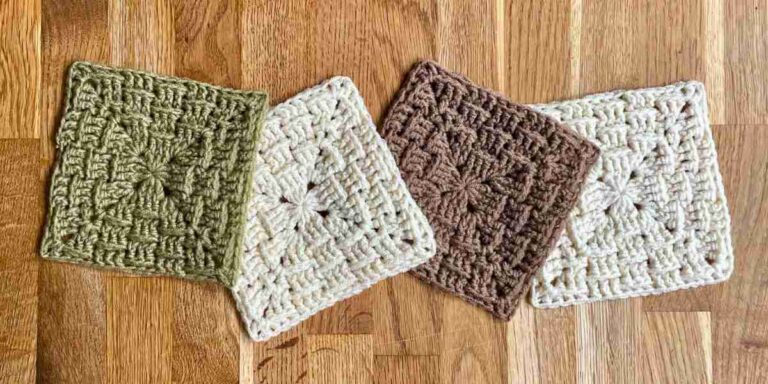
Third Loop Only Granny Square
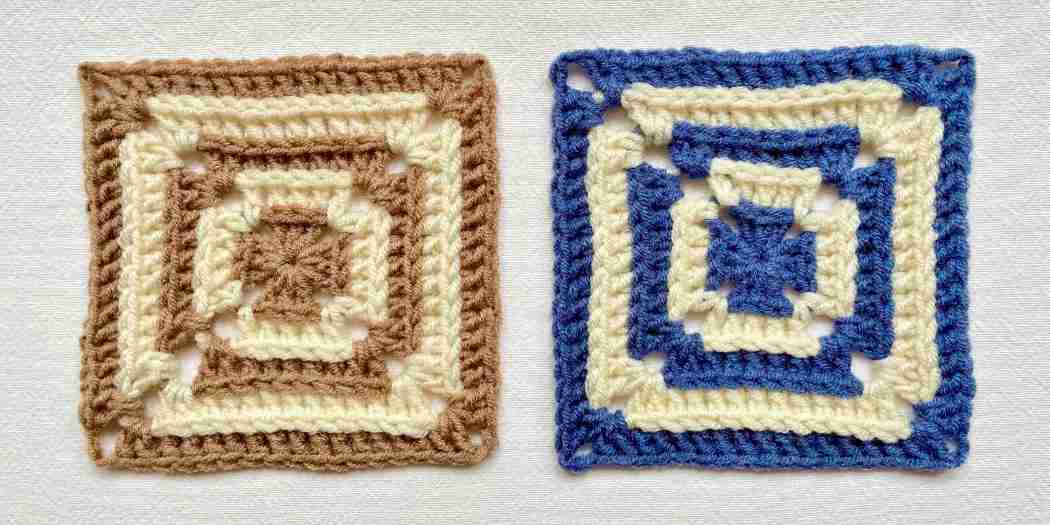
A third loop only granny square is an easy but eye catching alternative to a regular solid granny square. It has an interesting three-dimensional texture, but without being bulky or heavy. So you can turn lots of them into a medium-weight blanket or throw for all seasons.

Like any traditional granny square project, these squares are perfect for using up yarn scraps. But I think they look especially effective in just two colors, like this.
Choosing the yarn and hook
Third loop only granny squares are exceptionally versatile, and look good in almost any yarn. They don’t gobble up yarn like other grannies with interesting 3-dimensional textures, so you might even choose a more high-end or luxurious yarn, without fear of breaking the bank. That said, I’ve made these ones in Hayfield Soft Twist DK, a blend of 90% acrylic and 10% merino, twisted together using the S-on-S plying technique traditionally associated with merino yarns. It’s smooth, strong, and really budget friendly for big projects – I love it!
This pattern shouldn’t present any differences to your usual tension, so use whatever size hook you’d usually pair with the yarn you have picked out.
Getting started
Begin your granny square however you prefer. The options are:
- Magic circle (my preference)
- Making 4 chain stitches and joining them with a slip stitch to make a circle.
- Making 2 chain stitches and treating the first one (the one furthest from your hook) as the starting circle.
The rest of the pattern uses standard American crochet terms. There’s a guide to the basic stitches here if you need it.
Round 1
Into your circle:
- Ch 5 (represents 1 dc, and a two-chain corner space).
- *Dc 3, ch 2* 3 times
- Dc 2
Drop your yarn and pick up your next color. Using the new color:
- Slip stitch into the 3rd chain of the ch 5 from the start of the round.
- Slip stitch into the corner space.
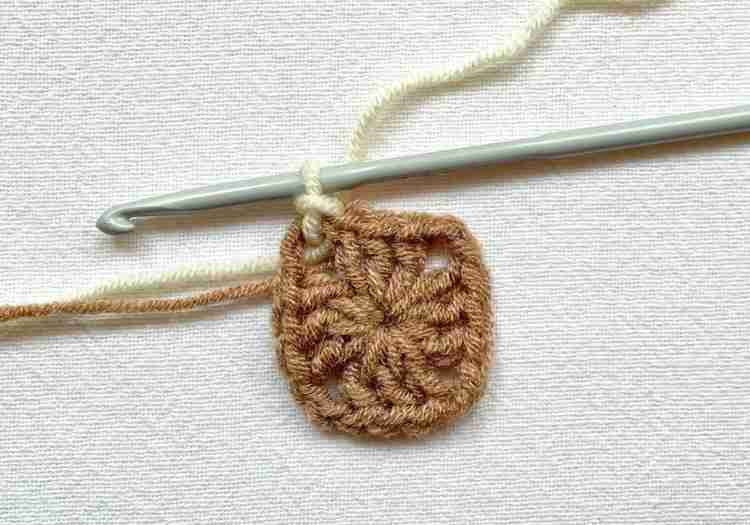
Round 2
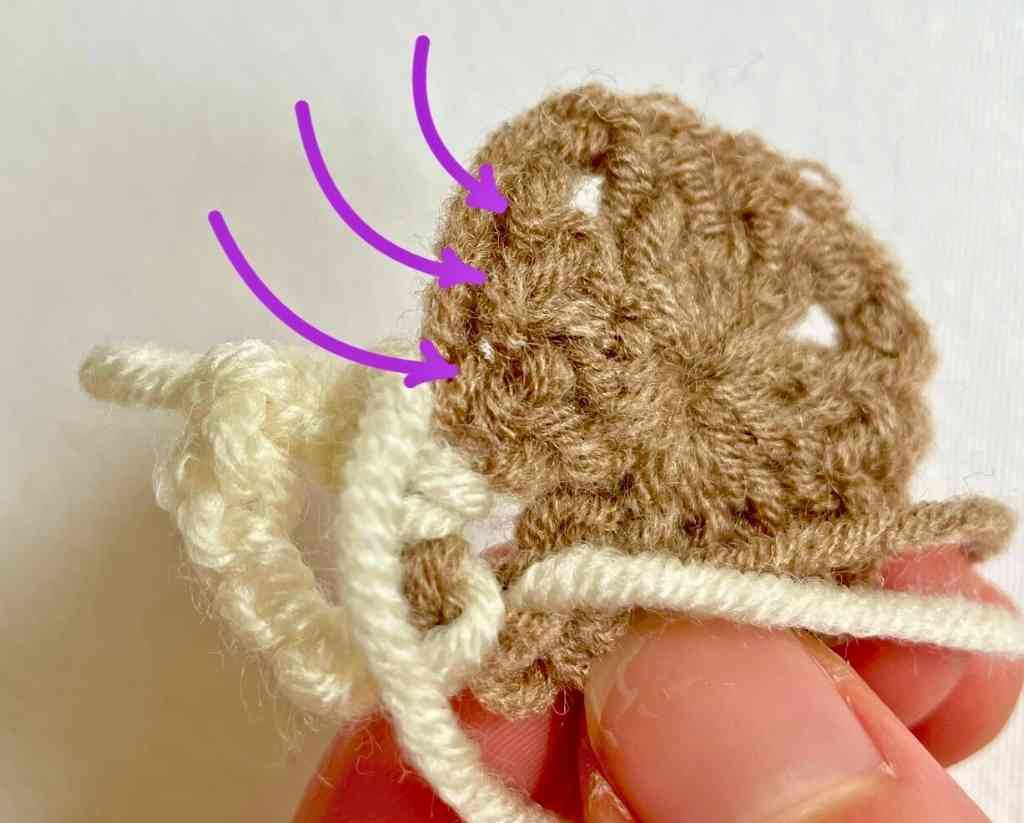
It’s time to introduce some third loop only crochet! The abbreviation to look out for is dc-3lo, which means make a double crochet stitch into the third loop only of the next stitch. Everything about the double crochet stitch itself is exactly the same as usual – it’s just the placement that changes. I’ve got a photo coming up to help with that if you haven’t tried third loop only crochet before.
- Ch 5, dc 1 into the corner space.
- Dc-3lo 3 into the stitches along the first edge. The back loop sits immediately below the back loop – insert your hook downwards into it as indicated by the arrows. In contrast to a regular double crochet, you’re only inserting the hook under one loop, not two.
- (Dc 1, ch 2, dc 1) into the next corner space.
- *Dc-3lo 3, (dc 1, ch 2, dc 1) into the corner space* twice more.
- Dc-3lo 2, then dc into the back loop of the second stitch of the ch 5 from the previous round.
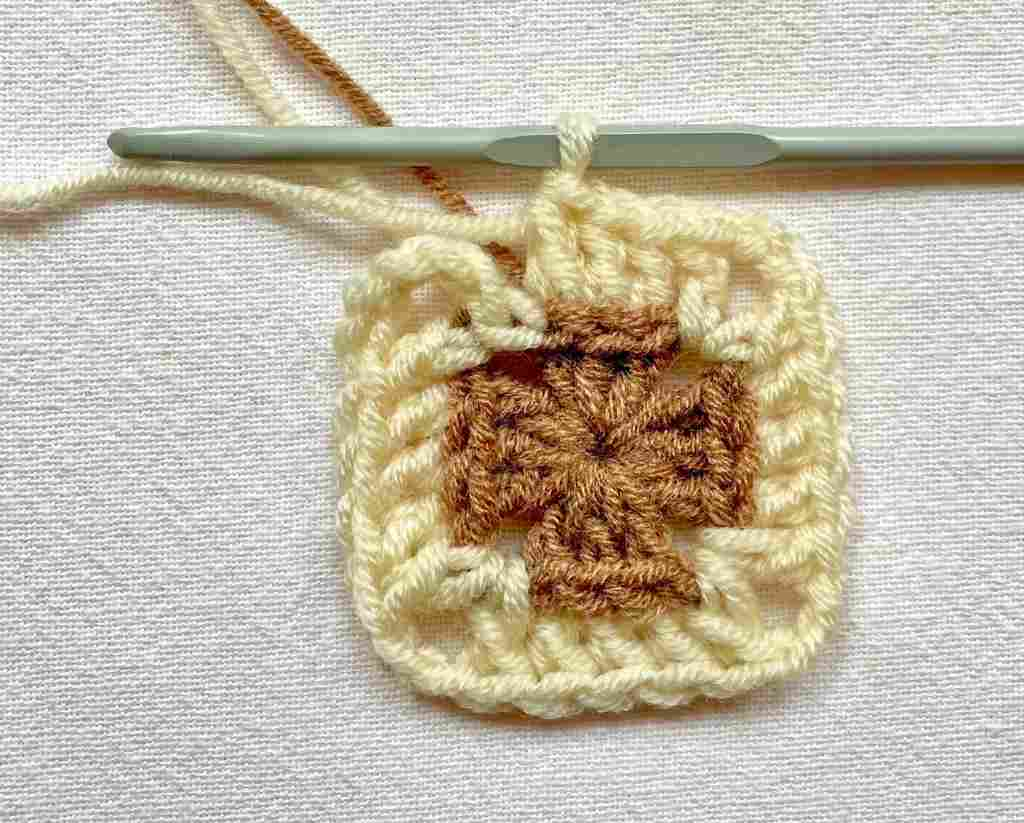
- Drop your yarn and pick up with the next color.
- Sl st into the 3rd stitch of the ch 5 from the beginning of the round, and sl st again into the corner space.
Round 3
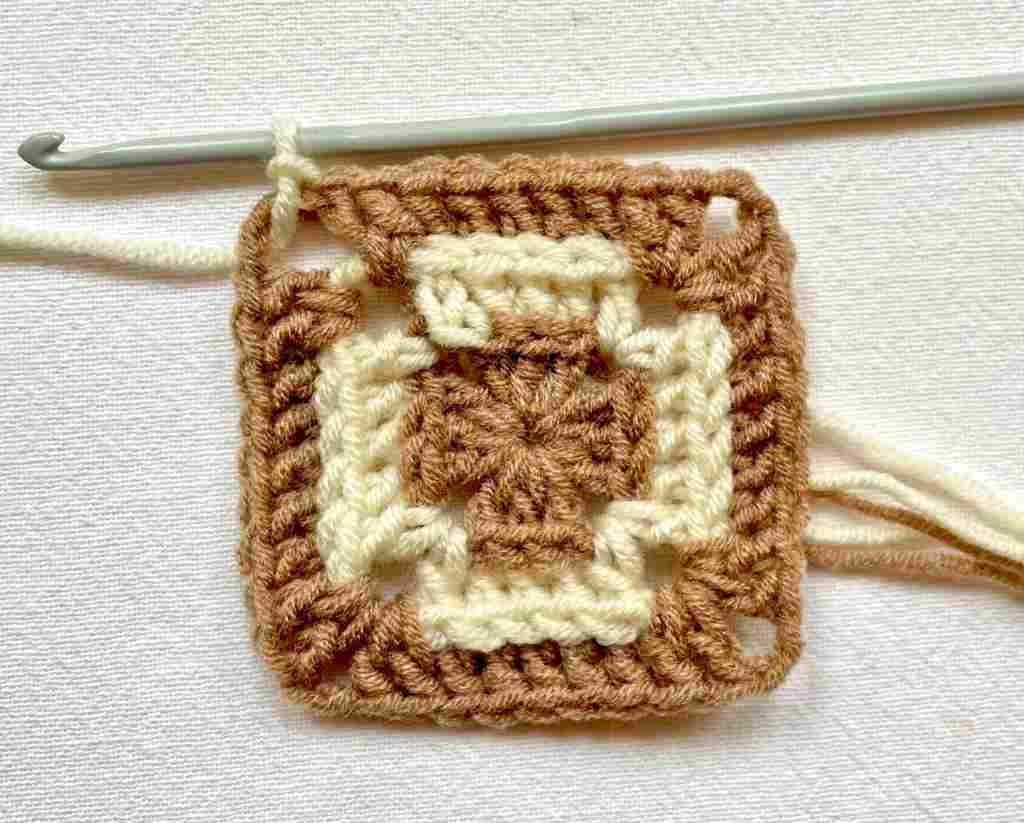
In round 3 the way we work the corners slightly changes, so take note of that. But this is round you’ll keep repeating from here on, so it’s all going to be super straightforward after this!
- Ch 5, dc 2 into the corner space.
- *Dc-3lo 5 into the stitches along the edge, (dc 2, ch 2, dc 2) into the corner space* 3 times.
- Dc-3lo 4, dc into the back loop of the second stitch of the ch 5 from the previous round, dc into the final chain space.
- Drop your yarn and pick up with the next color.
- Sl st into the 3rd stitch of the ch 5 from the beginning of the round, and sl st again into the corner space.
Round 4 onwards
Repeat as for round 3:
- Start with ch 5, dc 2 in the first corner space.
- Dc-3lo into all the edge stitches.
- (Dc 2, ch 2, dc 2) into the corner spaces.
- Finish with a dc into the back of the 2nd st of the ch 5 from the previous round, then a dc into the corner space.
- Change color, slip stitch into the 3rd st of the ch 5 from the start of the round, and sl st into the corner space.
At the end of your final round, don’t change color before the final step. Use the same color as the rest of the round, and only slip stitch once into the 3rd st of the ch 5 from the start of the round. Cut the yarn and pull the yarn tail right through the slip stitch, then get to work weaving in all those ends!
Finishing up
Third loop only granny squares really benefit from being blocked. I’m devoted to blocking my granny squares anyway, but if if you’re usually happy to skip it, well, don’t!
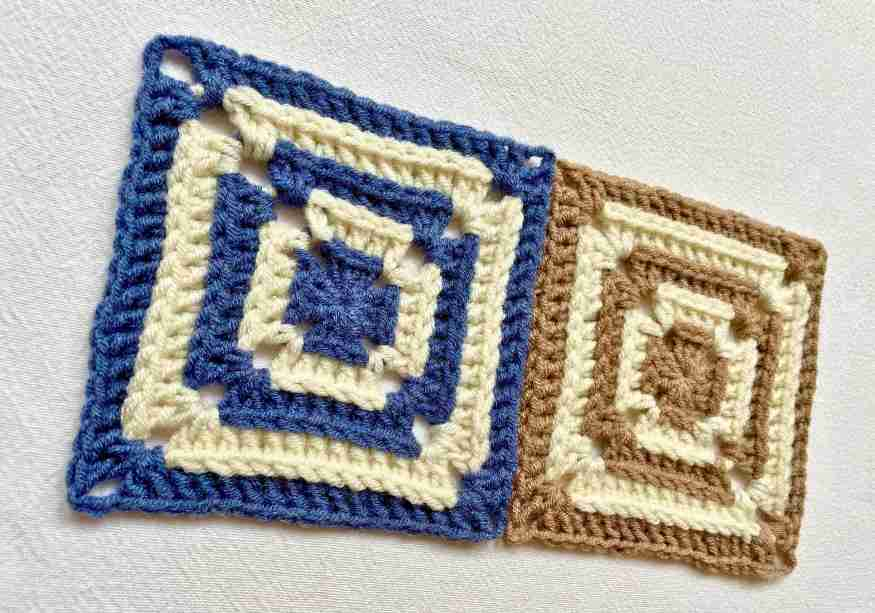
Check out the awesome texture – I think it really elevates these granny squares, without being any harder to make than a typical granny square. I hope you’ll enjoy making some of your own!