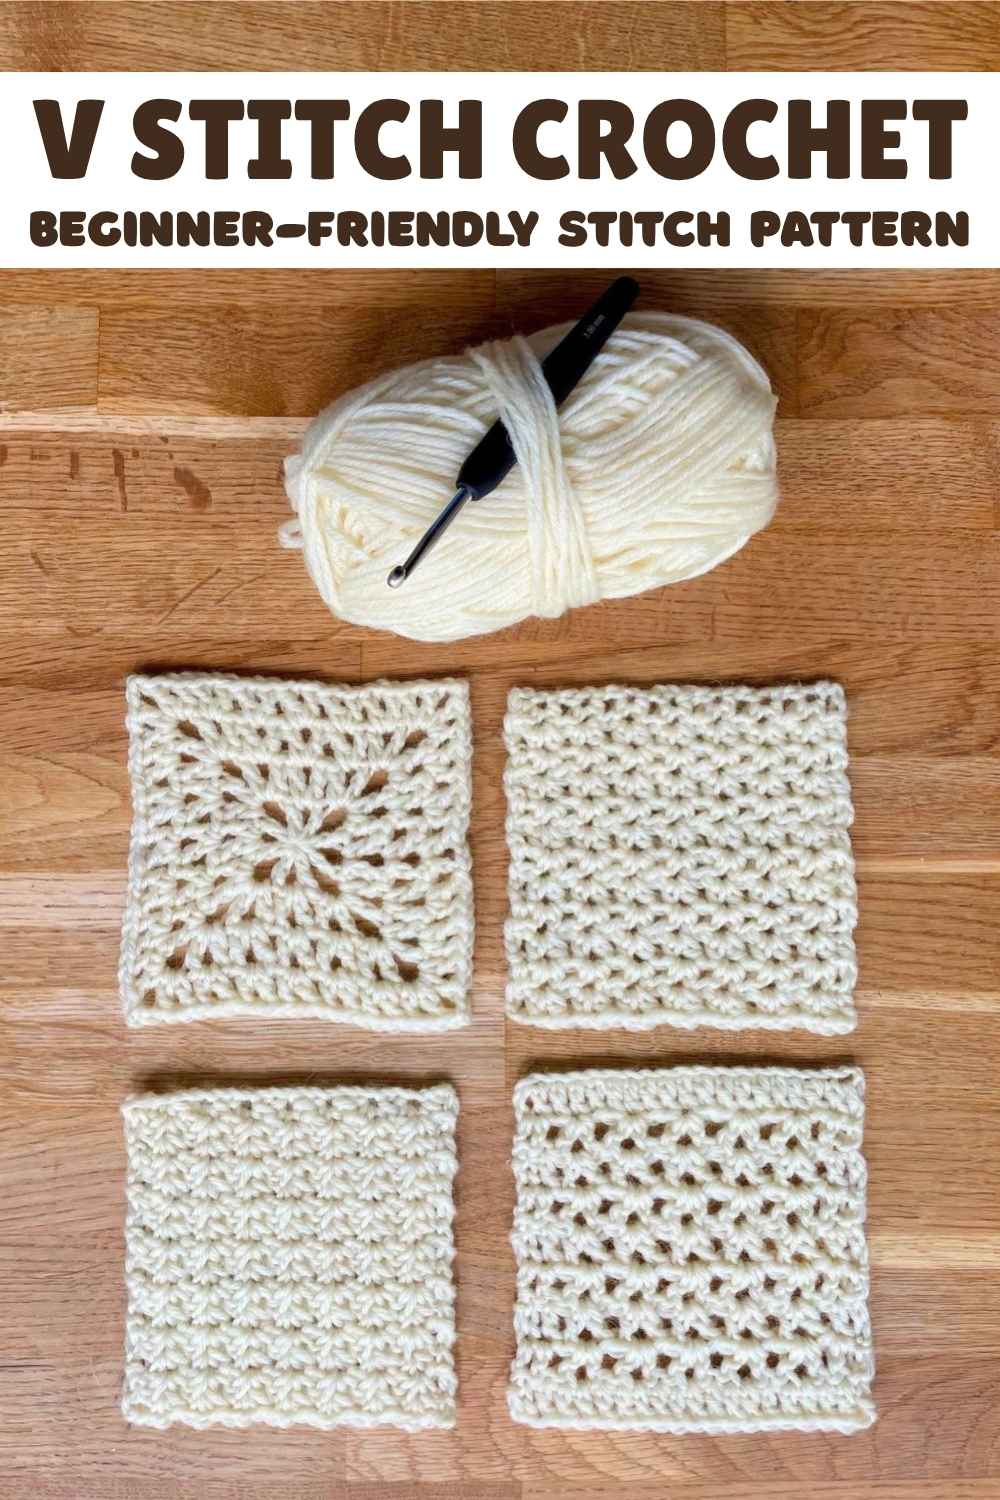
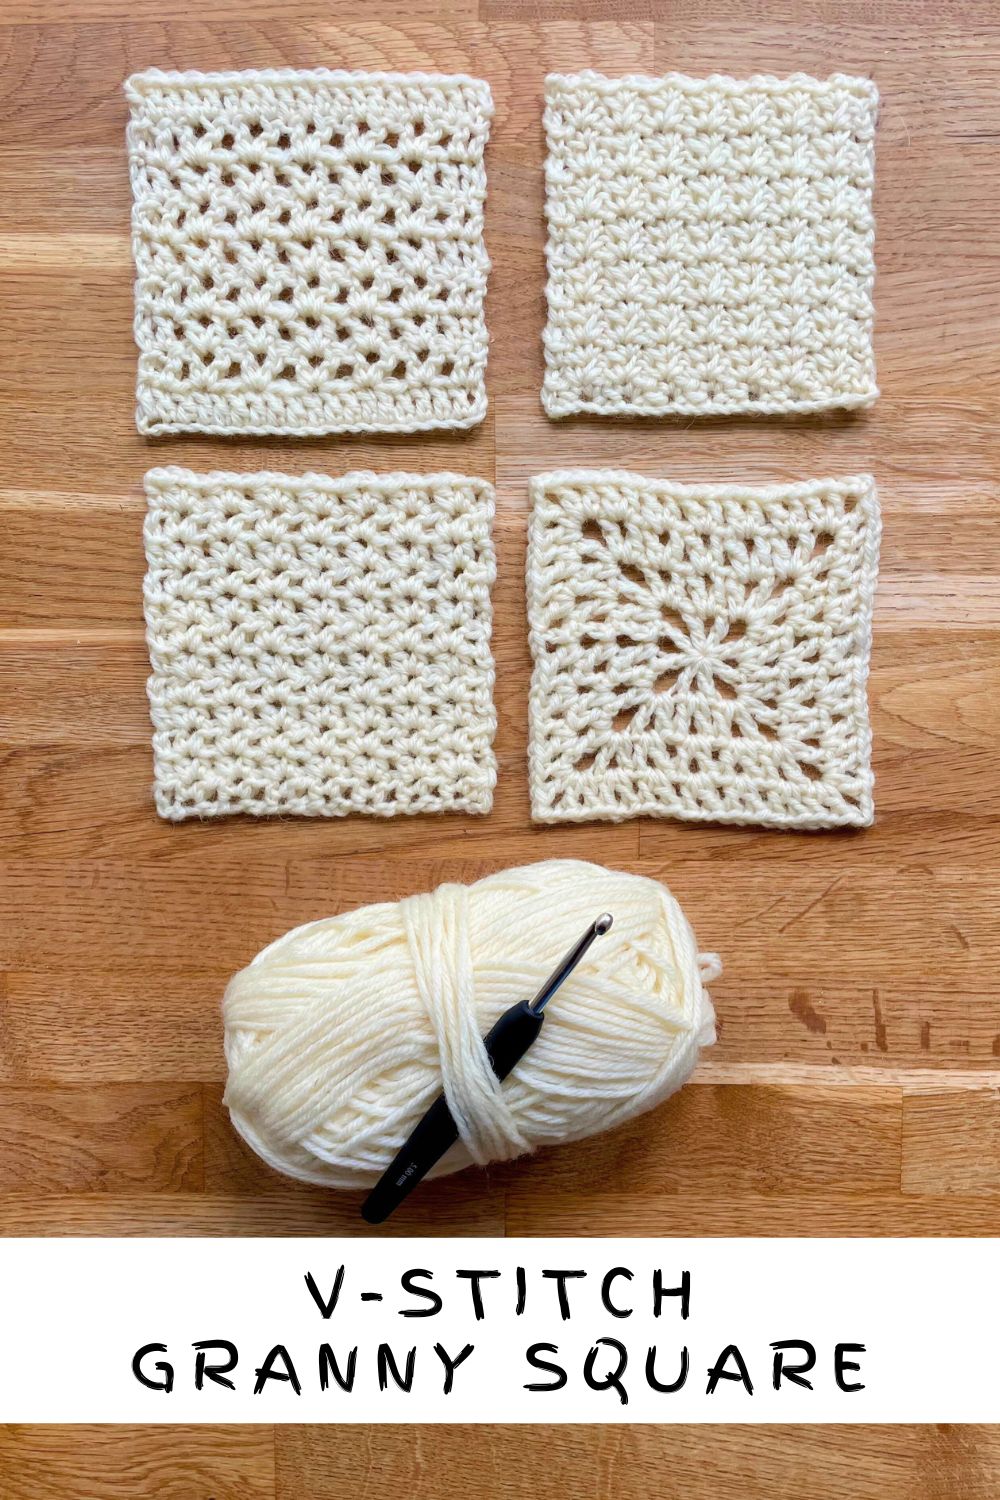
V-Stitch Granny Square – 4 Types To Try
V-stitches are a great way to whip up speedy granny squares with interesting textures. You can use double, half double, or single crochet to make v-stitch.
Whichever you choose, your granny square will be finished with one third less yarn than if you’d made it to the same size using solid stitches. So you’ll finish your project faster, and you’ll save money. Here are 4 ways to make beautiful v-stitch granny squares. And they all go really well with the treble cluster V stitch here too!
- V-stitch – how is it made and what is it good for?
- Double crochet v-stitch granny square in rows
- Double crochet v-stitch granny square in the round
- Half double crochet v-stitch square
- Single crochet v-stitch grannies, a.k.a. spider stitch squares
V-stitch – how is it made and what is it good for?
Without a doubt, the best thing about v-stitches is how quickly you can cover a lot of area with them! Compared to making a solid granny square of the same size, a v-stitch granny square has 33% fewer stitches. But I don’t like them just because they’re thrifty with yarn. V-stitches of all sizes produce intriguing and tactile patterns. They really beckon you in to take a closer look! V-stitch is also extremely beginner friendly – it relies on just two basic stitches at a time, and the bare minimum effort for counting.
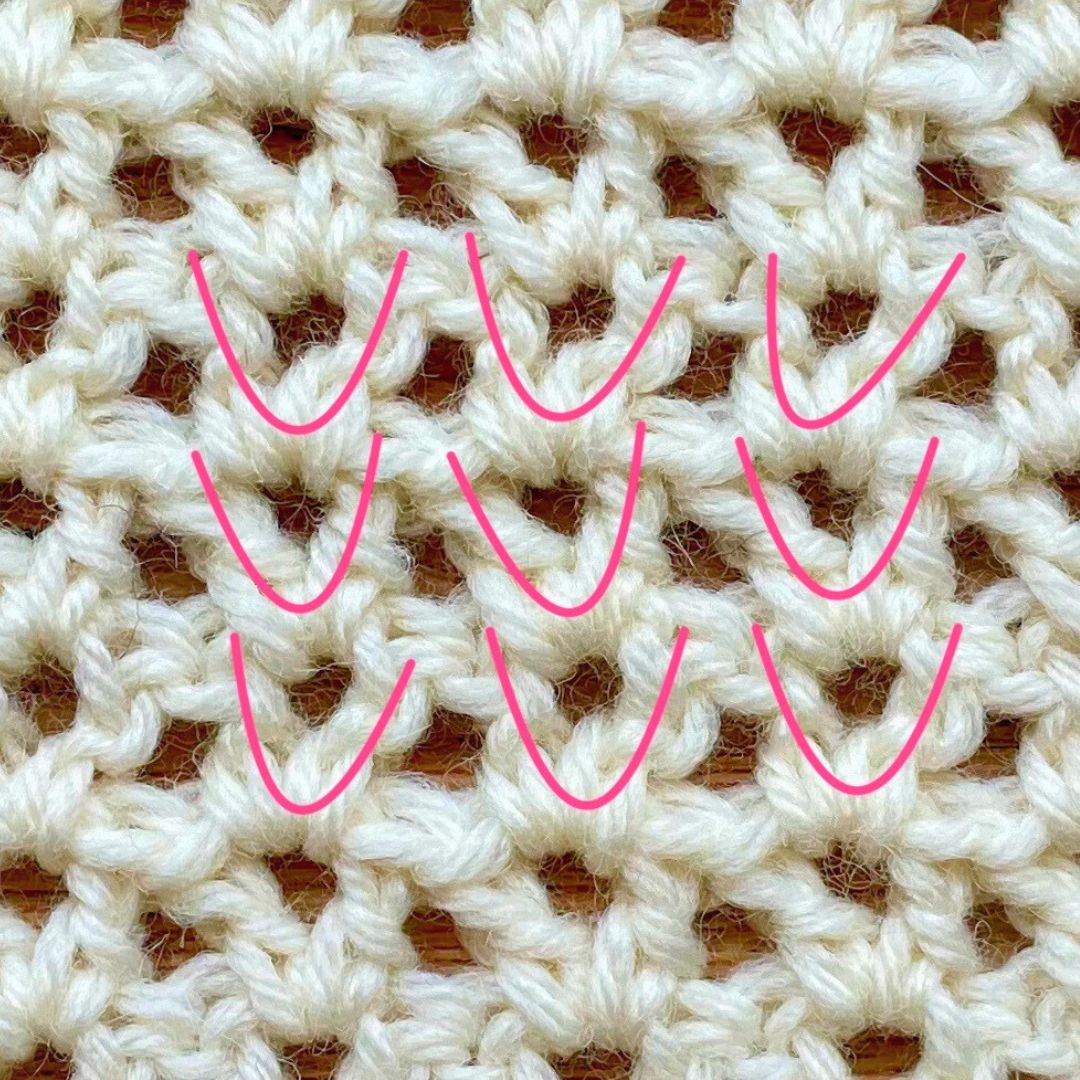
The formula for a v-stitch is stitch-chain-stitch, all made into the same place. The stitches can be single, half double, or double crochet. They could even half treble, treble or double-treble crochet, but I had to draw the line somewhere or this article would never be finished! Since a v-stitch is one stitch wide at the bottom, and three stitches wide at the top, it forms v-shape. The next row of stitches is worked inside the chain space, so that the Vs stack in neat vertical rows:
V-stitch granny squares are great for making:
- Scarves and shawls with fantastic drape
- Lightweight blankets for spring and fall
- Summer sweaters and cardigans
But they’re not a great choice for granny square bags, unless you use cotton yarn or put a lining in your bag, because they tend to stretch and sag. Double and half-double V-stitch are not the best choice for baby blankets either, because they have lots of holes for little fingers to get snagged in. Single crochet v-stitch is denser and free from gaps or holes though!
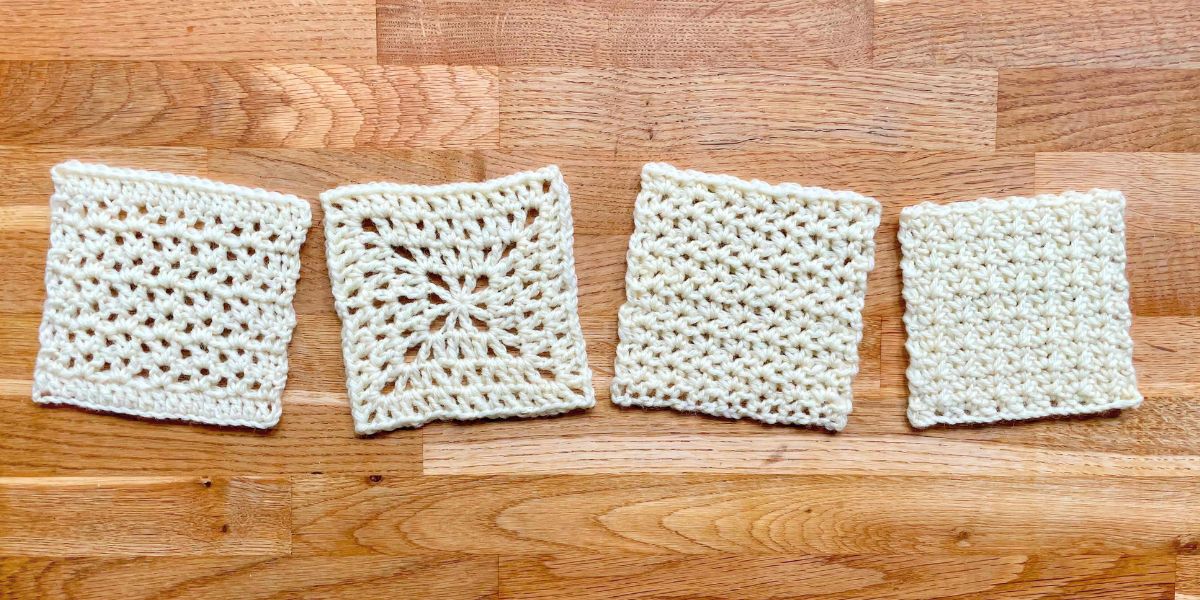
4 ways to make a v-stitch granny square
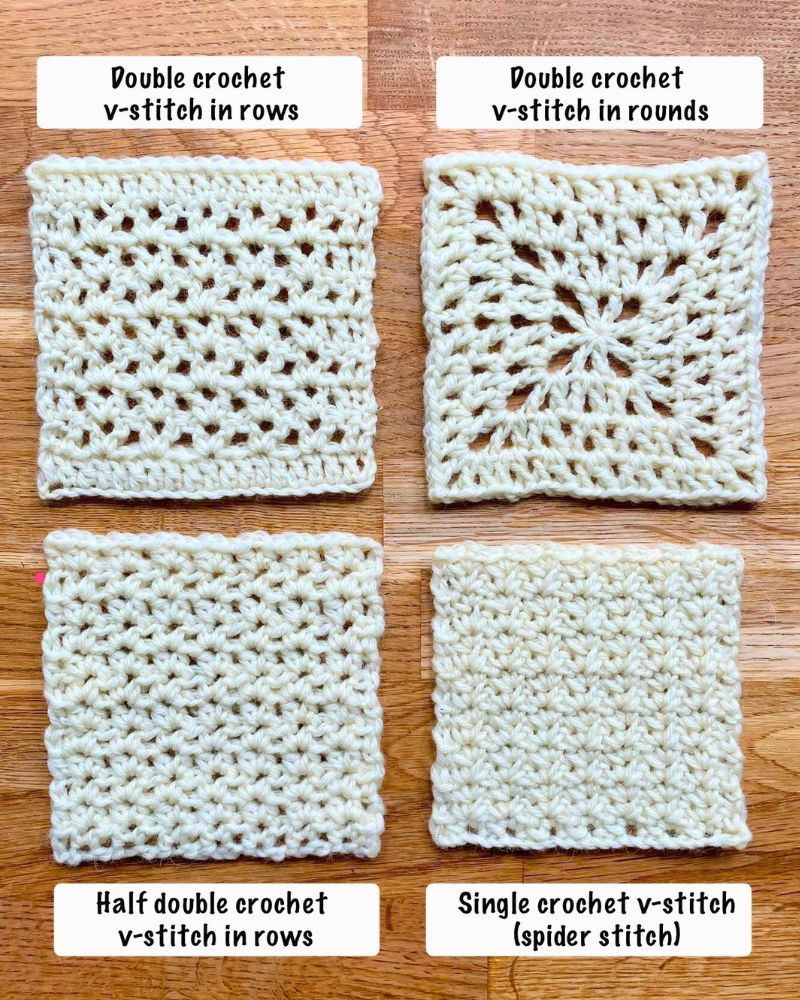
Here are four ways of making granny squares out of v-stitch:
And here’s how they’re made. All the patterns are written in standard US crochet terms. Remember than when multiple stitches are grouped inside brackets, it means you make them all into the same place. So a double crochet v-stitch looks like this: (dc 1, ch 1, dc 1).
Double crochet v-stitch granny square in rows
Double crochet v-stitch is the only variation which works in rows, and in the round. The advantage of making it in rows is that it’s easier to keep the edges nice and straight. If you’re new to crochet and haven’t used v-stitches before, a simple square made in rows is also a good way to introduce it to you, and show you how it’s put together.
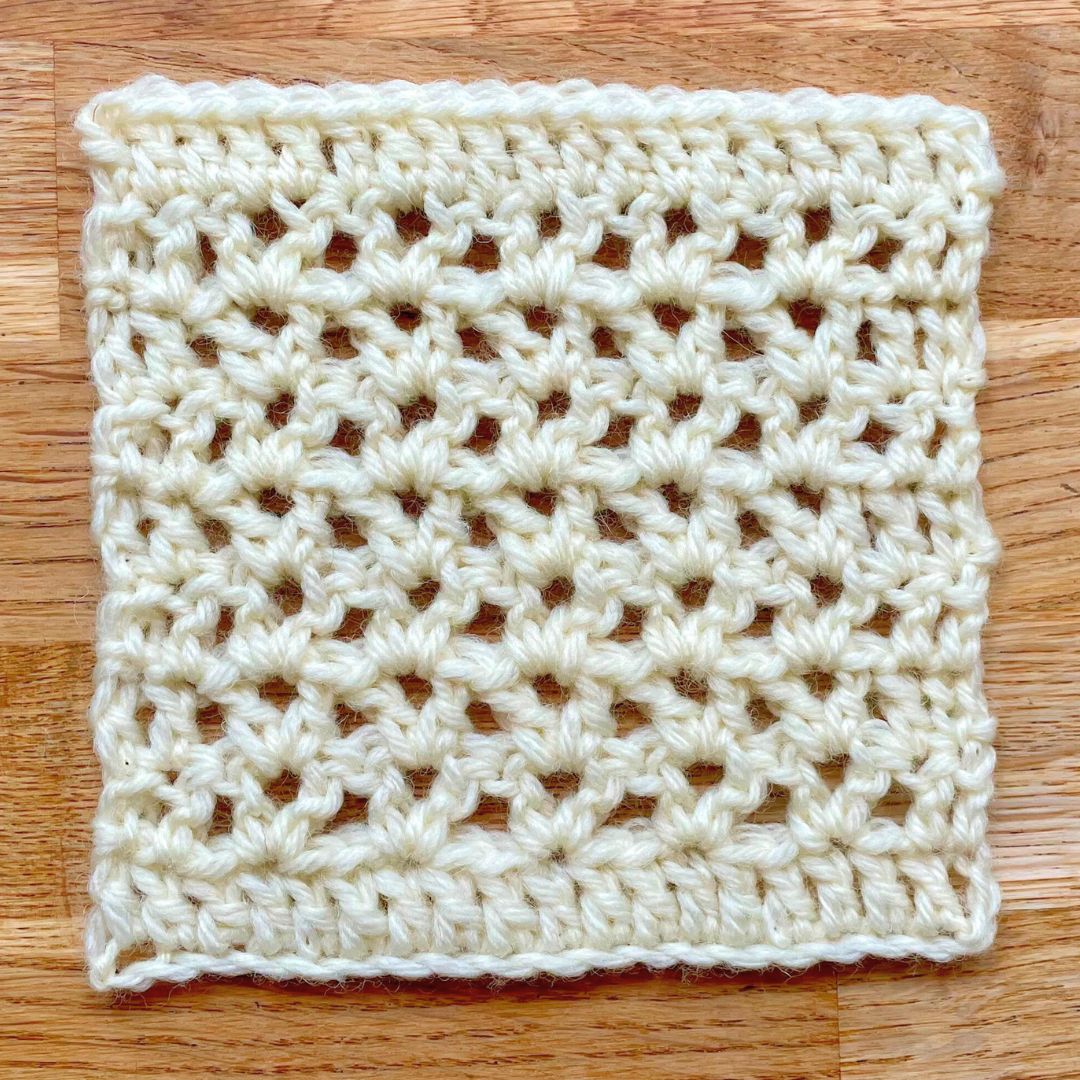
Rows of v-stitch inevitably need two closely-placed stitches at the beginning and end of each row, in order for the pattern to work. I like to balance them out with a row of straightforward double crochet at the top and bottom of the square too. I like how this also creates a solid border and lattice center – almost like a window. Lots of these in different colors would make an interesting granny square blanket, and the solid borders would make it feel a bit more substantial than using double crochet v-stitch alone. The solid border is also handy for concealing your joins!
How it’s done
- Foundation chain: Make a multiple of 3, plus 6. The number of multiples of three is how many Vs you’ll end up with per row. My foundation chain is 21 (15+6), so it will have 5 Vs per row.
- Row 1: Starting in the 4th chain from the hook, dc 1 into every stitch.
- Row 2: Make a stacked single crochet into the first stitch of the row. Stacked single crochets are a sturdier alternative to turning chains, and result in a straighter edge. If you’ve never made one before, it’s simple! Make a single crochet in the usual way, then insert your hook into the left leg of that sc like this:
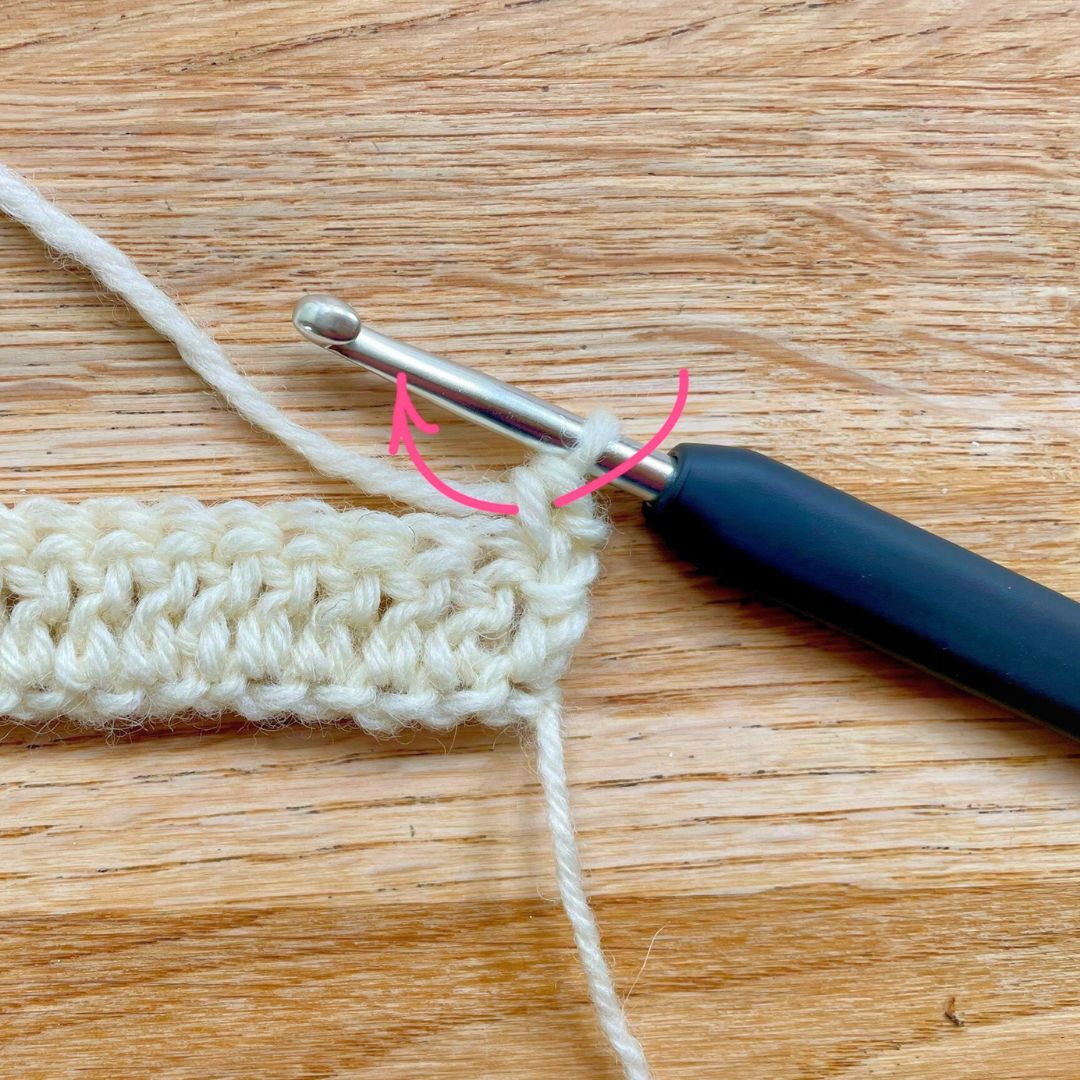
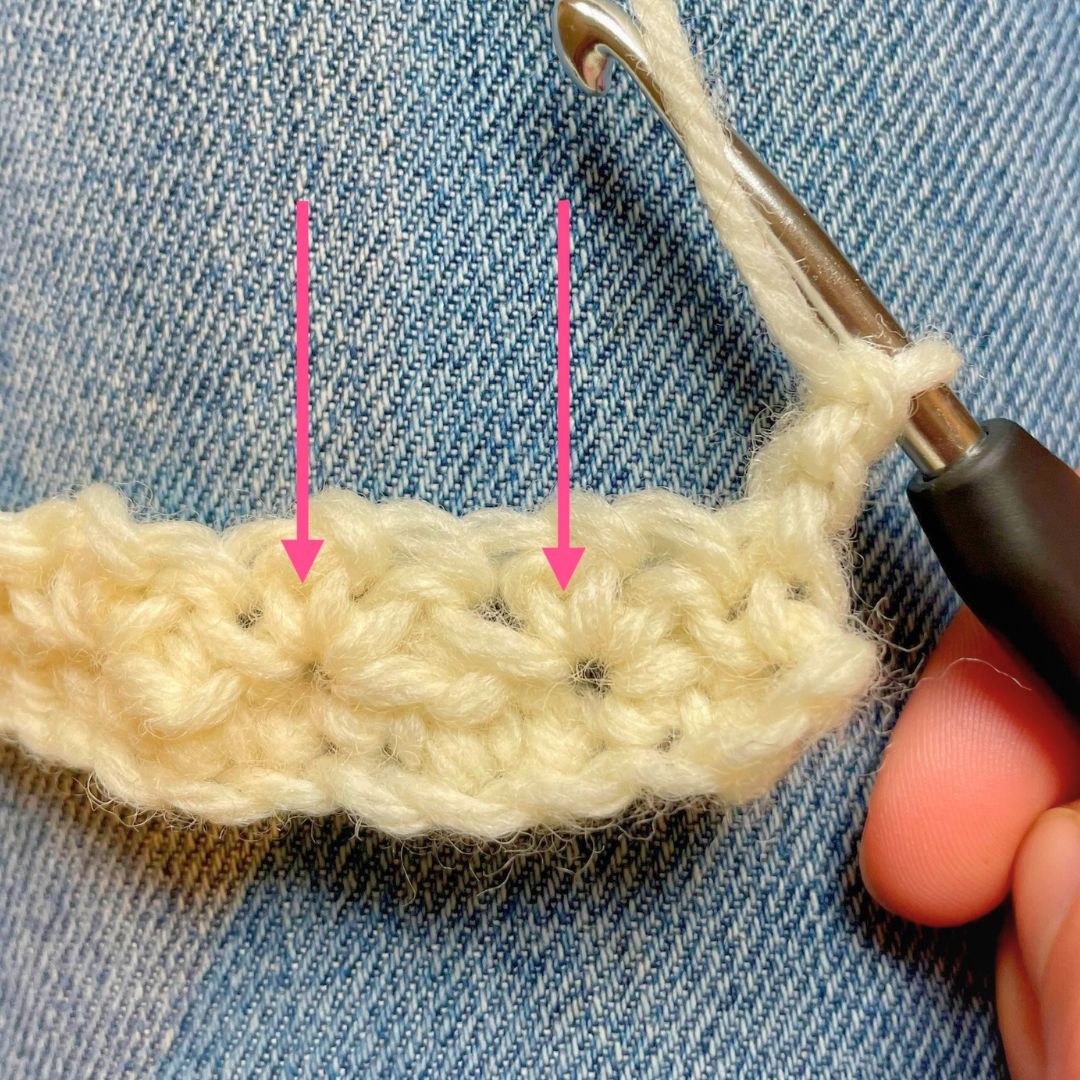
and make another sc. This makes a little stacked pair of single crochets. To complete the row, dc 1, skip 1 st, (dc 1, ch 1, dc 1), *skip 2 sts, (dc 1, ch 1, dc 1)* until there are 3 sts left. Skip 1 st, dc 2 (indicated by the arrows below). The final stitch is into the top of the turning chain from the first row – don’t miss it!

- Row 3: Stack 2 sc in the first st. Dc 1, (dc 1, ch 1, dc 1) into each of the chain spaces from the previous row. Dc into each of the final two stitches.
- Row 4 onwards: Repeat row 3 until your granny is just shy of square, then finish with a row of dc.
V-stitch granny square in the round
If you prefer to make your granny squares in rounds rather than rows, this is the pattern for you. It’s super lightweight and airy, and really fast to work up.
- Make a magic circle.
- Round 1: Chain 4 (represents 1 dc and 1 ch), dc1, ch3, *dc 1, ch 1, dc 1, ch 3* 3 times, sl st into 3rd st of the ch 4.
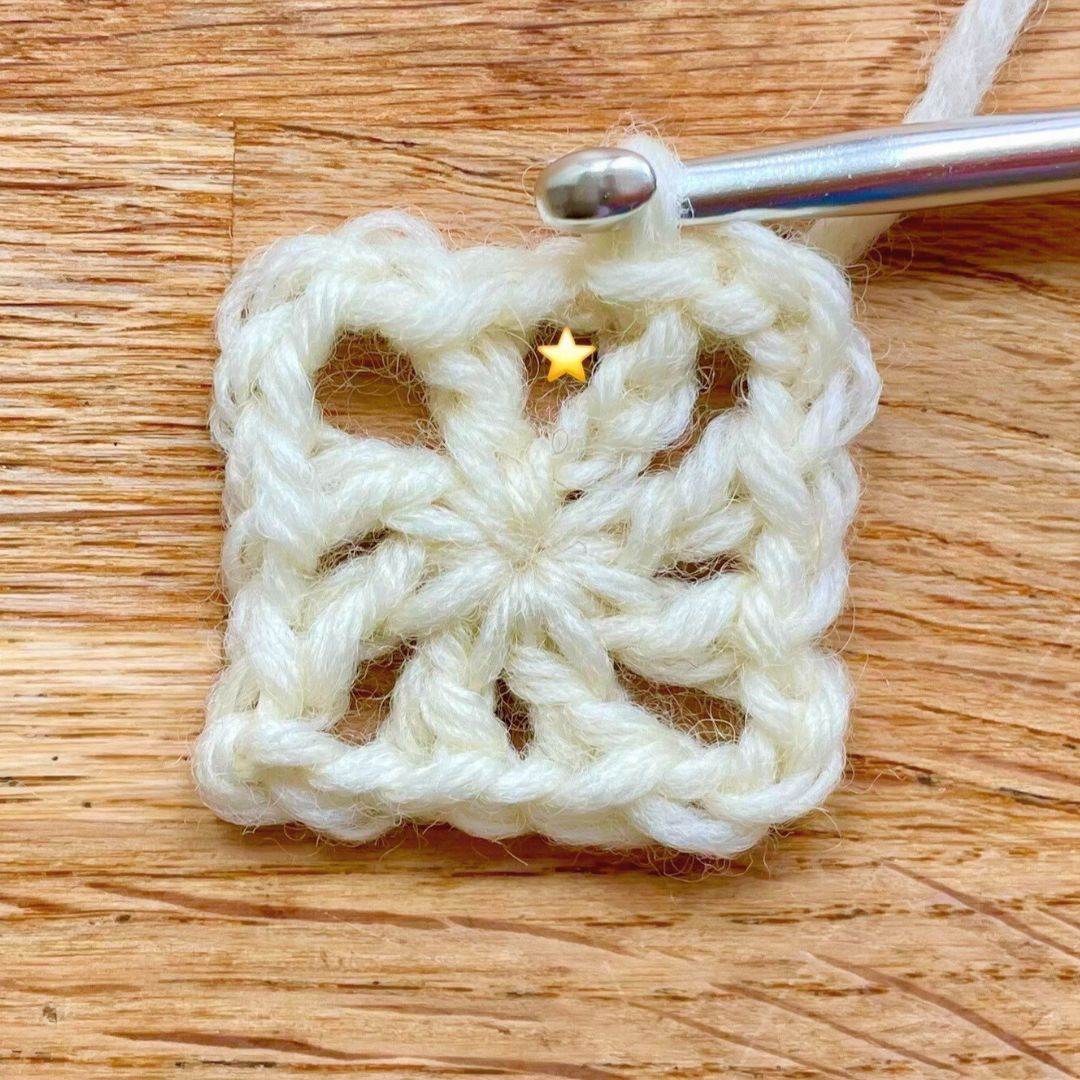
- Round 2: (Sl st, ch 4, dc1) into the next chain space – marked with the star above. (Dc 1, ch 1, dc 1, ch 3, dc 1, ch 1, dc 1) into the corner space. *(Dc 1, ch 1, dc 1) into the next chain space and (dc 1, ch 1, dc 1, ch 3, dc 1, ch 1, dc 1) into the following corner space* 3 times. Sl st into the 3rd st of the ch 4.
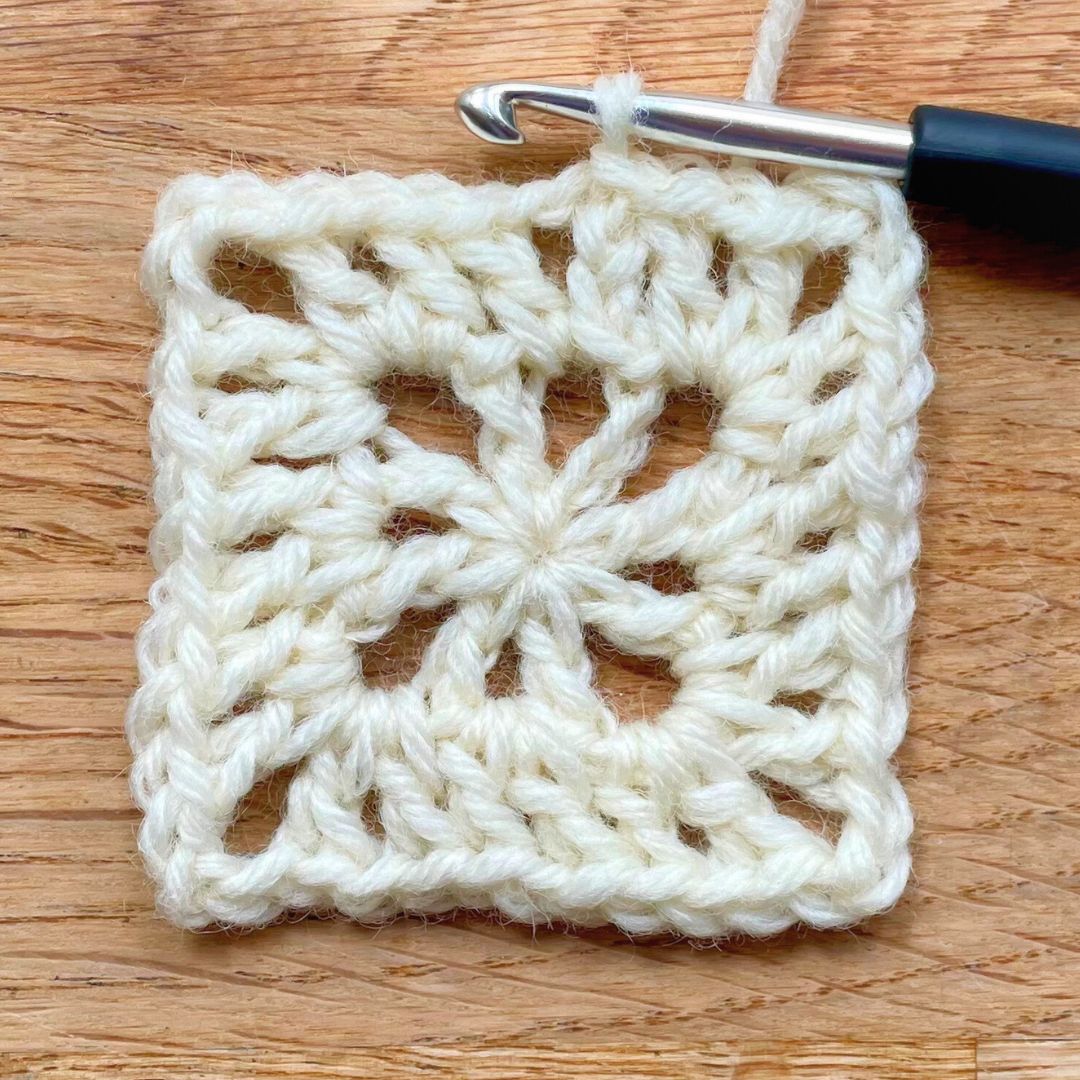
- All further rounds: (Sl st, ch 4, dc1) into the next chain space. (Dc 1, ch 1, dc 1) into all the side spaces, and (dc 1, ch 1, dc 1, ch 3, dc 1, ch 1, dc 1) into all the corner spaces.

I’ve stopped after 4 rounds, to match the size of the other grannies I’ve made for this article.
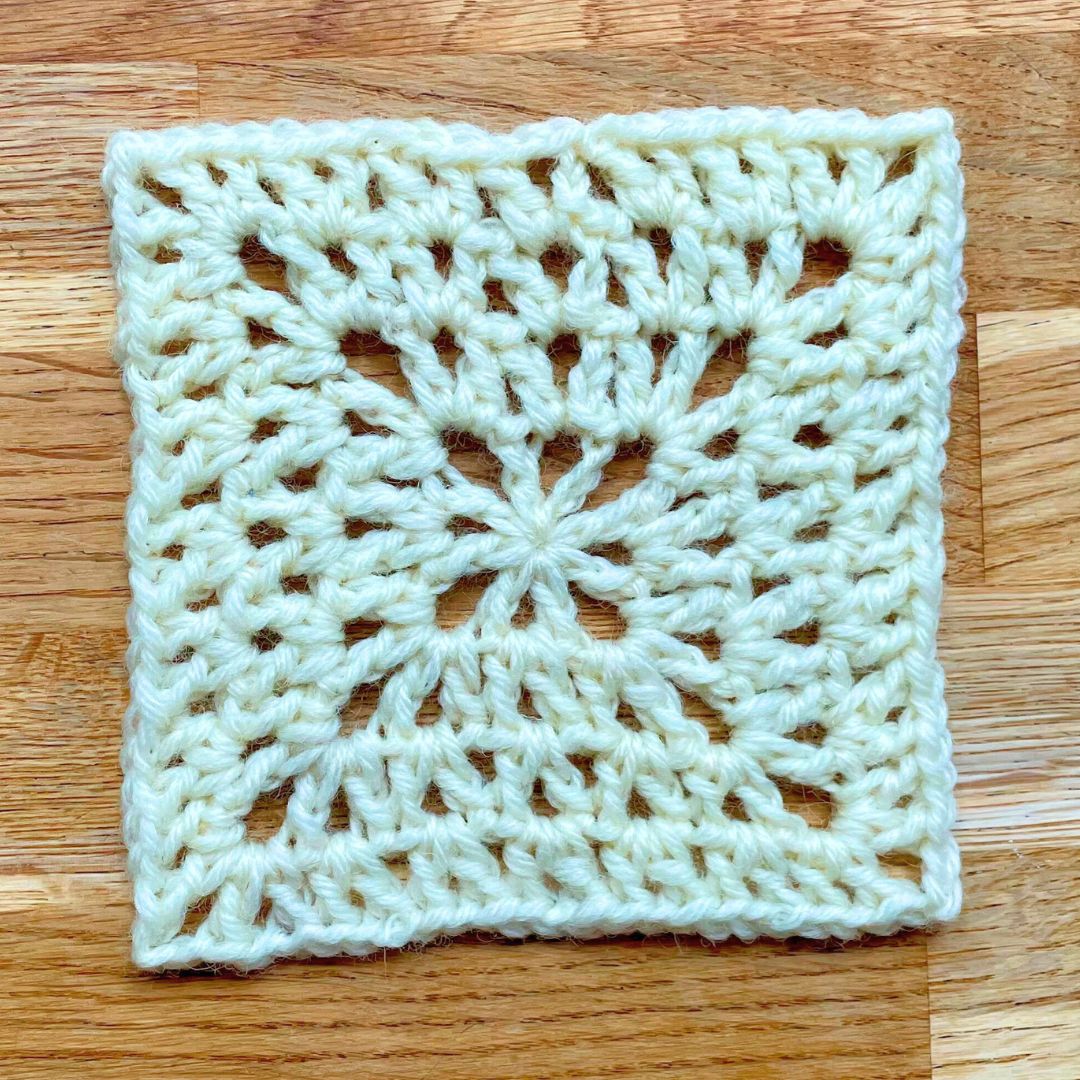
As you can see, the sides of my square are starting to twist a little, meaning they no longer sit straight. If you’re going to add more than 4 rounds, start turning your square over between rounds. So the ‘wrong side’ should be facing you for the 5th row, 7th row, and so on. This will keep the edges nice and square!
Half double crochet v-stitch square
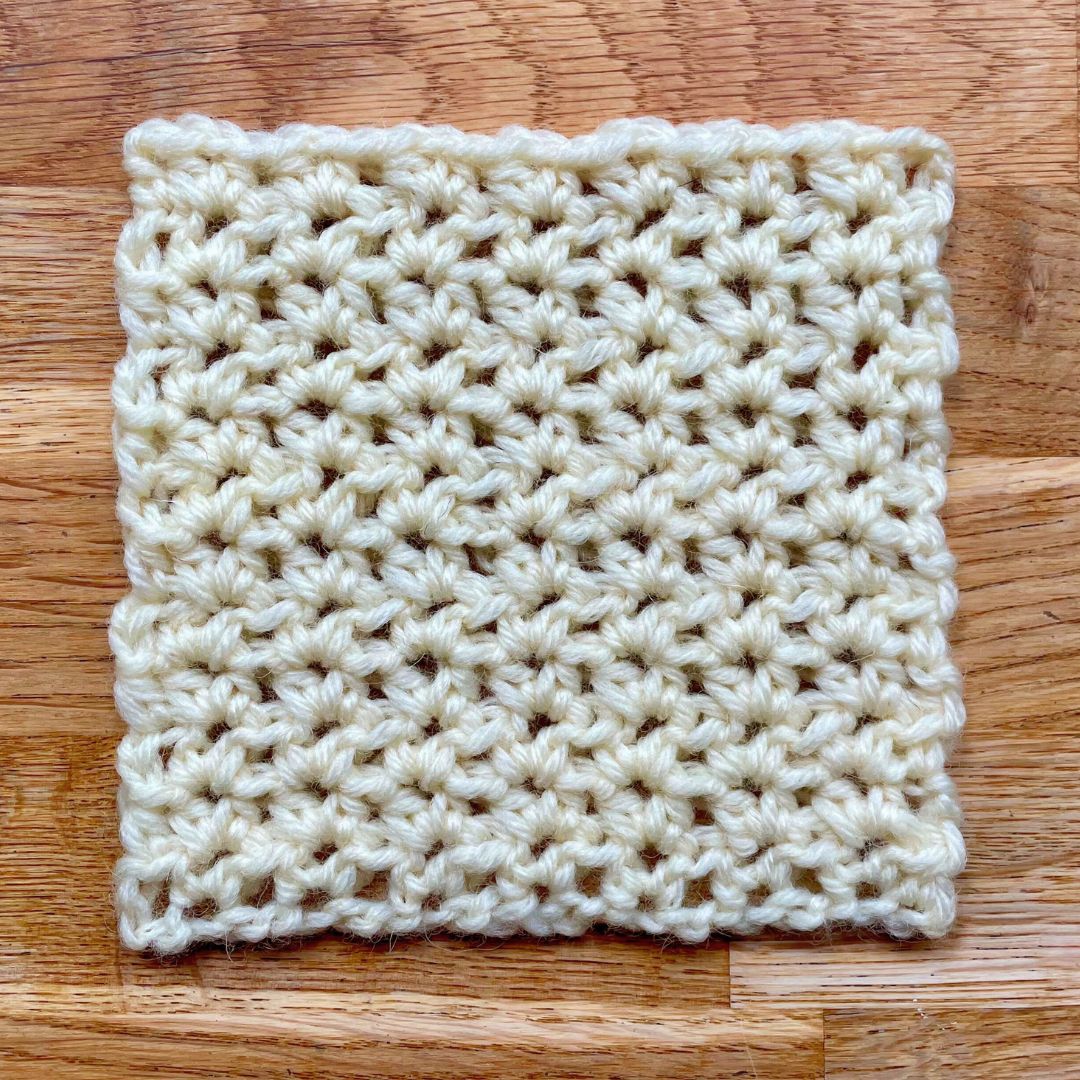
Half double crochet v-stitch is one of my all time favorites. If you make it on a smaller hook size than your yarn usually calls for, it looks like stars. And if you make it with the correct hook size, it produces a wonderful mesh-like fabric – neither solid, nor so lacy that it snags on things.
- Foundation chain: Multiple of 3, plus 2. My square starts with a chain of 25 (21 + 4).
- Row 1: Starting in the 4th chain from the hook *(hdc 1, ch 1, hdc 1), skip 2 sts* until you have 1 st remaining, hdc in the final stitch.
- Row 2: Ch 2, (hdc 1, ch 1, hdc 1) into each chain space from the previous row, hdc into the top of the turning chain.
- Repeat row 2 until your granny is square!
What about an HDC v-stitch granny square in the round?
Half double crochet v-stitch only really works to make granny squares in rows. This is because half double stitches are wide relative to their height. Meaning if you work them in rounds, the edges of the square end up wavy and won’t sit flat. To get round that in a standard hdc granny square, we usually skip the first stitch on each side. But that’s easier said than done when you’re working with v-stitches! In fact, I would go so far as to say it can’t be done. But if you can prove me wrong, please show me how in the comments!
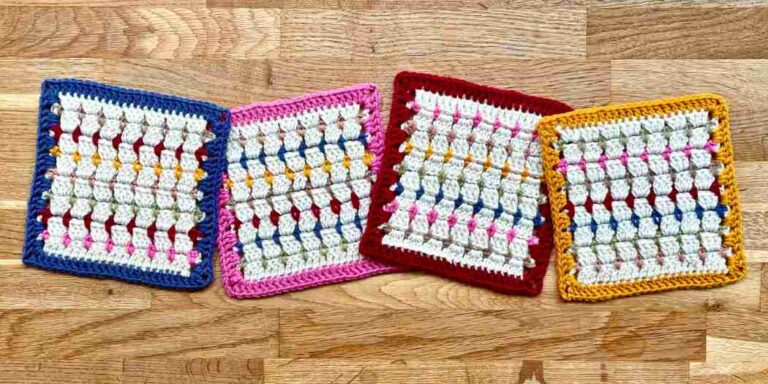
Single crochet v-stitch grannies
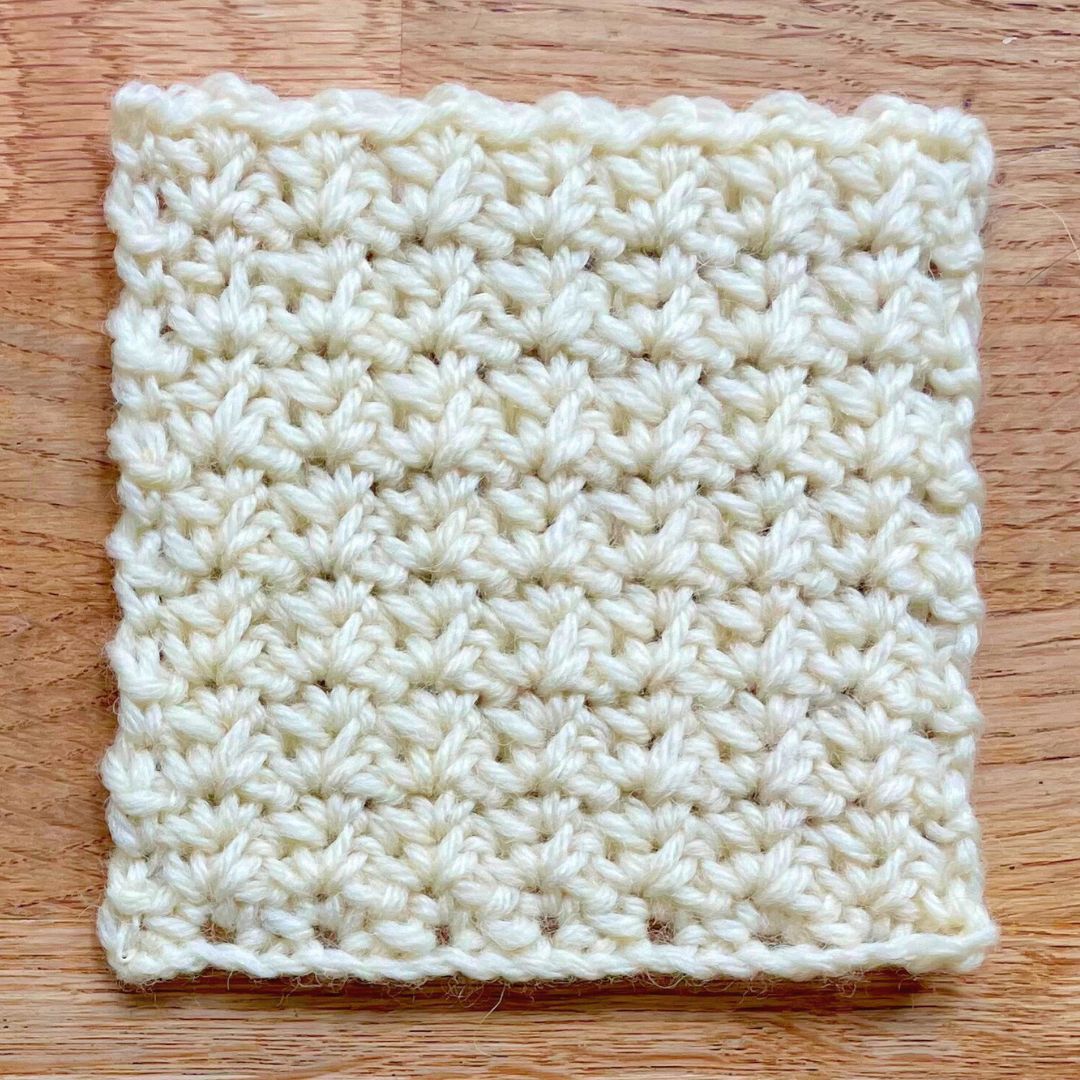
Finally, what about a single crochet v-stitch granny square? Single crochet v-stitch is also known as spider stitch. It’s a brilliant alternative to using plain old single crochet, because it’s still warm and dense, but it’s faster to work up. It also has a charming, vintage-feeling texture. Spider stitch granny squares made in muted neutrals and pastel hues have a homely, cottagecore vibe.
- Foundation chain: Make a multiple of 3. I used a foundation chain of 24.
- Row 1: Starting in the 4th chain from the hook *(sc 1, ch 1, sc 1), skip 2 sts* until you have 2 sts remaining. Skip 1 st, sc 1.
- Row 2: Ch 2, (sc 1, ch 1, sc 1) into each chain space from the first row, sc into the top of the turning chain from the previous row. Don’t worry if it curls up – that will sort itself out when you make the 3rd and 4th rows.
- Repeat row 2 until your square is as tall as it is wide.
Usually chain spaces are the easiest thing in the world to find, but in this case they’re surprisingly shy! Here they are:
V-stitch granny squares – summary
V-stitches are quick and satisfying to make granny squares from. Depending on the height of the stitch you choose, the results can look very different too! If you’re a stickler for making your granny squares in rounds, then your options are a bit more limited. But I think all four possibilities are worthy of consideration for your next granny square project. Let us know what you have in mind using the comments box down below!