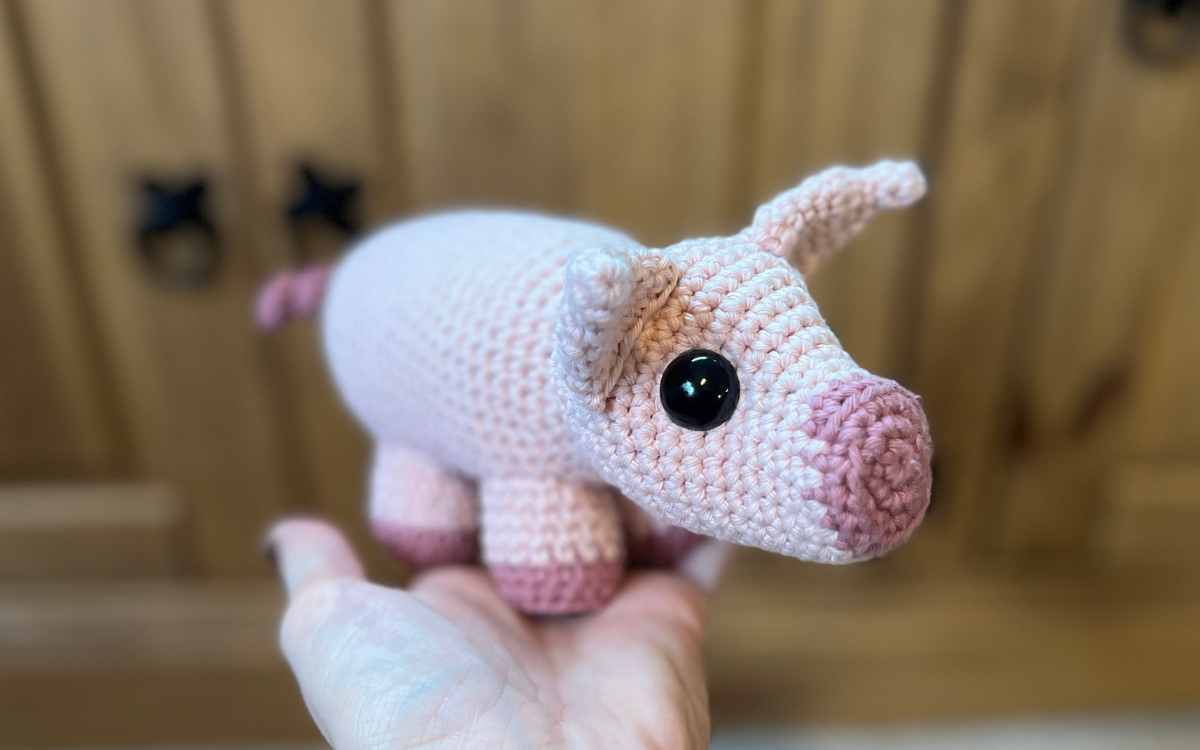
I Crocheted a Piglet – Free Amigurumi Pattern

I crocheted a piglet, and I literally can’t wait to share it with you. My new more realistic crochet piglet design is a big step away from my previous cartoony amigurumi pig pattern from several years back. Although I still love the original, this one takes it up a notch.
You’ll find this crochet piglet pattern completely beginner friendly, and quick to create. The perfect new amigurumi project for a novice, or speedy gift idea for a regular crocheter to put together in just a few hours.

Your Equipment Checklist
- 3.5mm crochet hook
- 50g Rico aran cotton yarn*, dark pink
- 25g Rico aran cotton yarn*, light pink
- Dark brown yarn scrap
- Tapestry needle*
- Toy stuffing*
- 10mm safety eyes*
Abbreviations and Techniques
- sc – single crochet
- 2sc – two single crochets into one stitch
- sc2tog – one single crochet joins two stitches
- BLO – stitch into the back loop only
- cc – color change
- ch – chain
- sk – skip the next stitch
My Free Crochet Piglet Pattern
You’ll work the head and body as one piece, then sew the ears, tail and legs on afterwards.
The Head and Body

Work with your 3.5mm crochet hook and dark pink yarn.
Round 1
Make a magic circle of six stitches (6)
Round 2
2sc x 6 (12)
Round 3
(1sc, 2sc) x 6 (18)
Round 4
BLO 1sc x 18
cc light pink
Round 5 – 6
1sc x 18
Round 7
(1sc x 2, 2sc) x 3, 1sc x 9 (21)
Round 8
(1sc x 3, 2sc) x 3, 1sc x 9 (24)
Round 9
(1sc x 4, 2sc) x 3, 1sc x 9 (27)
Round 10
(1sc x 5, 2sc) x 3, 1sc x 9 (30)
Round 11
(1sc x 6, 2sc) x 3, 1sc x 9 (33)
Round 12
(1sc x 7, 2sc) x 3, 1sc x 9 (36)
Round 13 – 16
1sc x 36
Round 17
(1sc x 4, sc2tog) x 6 (30)
Round 18
1sc x 30
Round 19
(1sc x 3, sc2tog) x 6 (24)
Round 20
1sc x 24
Round 21
(1sc x 3, 2sc) x 6 (30)
Round 22
(1sc x 4, 2sc) x 6 (36)
Insert the safety eyes, and tie the backs together to indent them into the head slightly. Stuff your piglet so far.
Round 23 – 40
1sc x 36
Round 41
(1sc x 4, sc2tog) x 6 (30)
Round 42
1sc x 30
Round 43
(1sc x 3, sc2tog) x 6 (24)
Round 44
(1sc x 2, sc2tog) x 6 (18)
Fill with toy stuffing
Round 45
(1sc, sc2tog) x 6 (12)
Round 46
sc2tog x 6, then hand sew to close.
Four Legs

Begin in your dark link yarn with your 3.5mm crochet hook.
Round 1
Make a magic circle of eight stitches (8)
Round 2
2sc x 8 (16)
Round 3
BLO 1sc x 16 (16)
Round 4
1sc x 16
cc light pink
Round 5 – 8
1sc x 16
FIll each leg with toy stuffing, and then sew the open end onto the underside of your piglet. Position them at each end of the body, they should sit flush next to each other in pairs. .
Two Ears

Your piglet’s crochet ears will be made in the light pink yarn only.
Round 1
Make a magic circle of five stitches (5)
Round 2 – 3
1sc x 5
Round 4
2sc x 5 (10)
Round 5 – 7
1sc x 10
Round 8
(1sc, 2sc) x 5 (15)
Round 9
1sc x 15
Do not stuff your piglet’s ears, instead flatten them and sew onto the top of the head.
Crocheting Your Piglet’s Tail

Ch20, sk, then 1sc into every remaining stitch.
Tie off leaving a long tail, attach your yarn needle and sew the tail into the center of the closing point of your crochet piglet’s body.
Finishing Details
To finish off your cute crochet piglet pattern, attach a scrap of dark brown yarn to your needle.
Weave back and forth in the face to create two nostrils, spanning across two stitches vertically either side of your original nose magic circle.
Tie off and hide the loose end, then move onto the trotters.
Weave twice through the starting magic circle of each foot, around to the color change level of the darker pink. This will give the suggestion of separate trotters on your amigurumi piggy feet.
*The products linked in this pattern were carefully selected by Lucy Kate Crochet. If you decide to purchase using the links provided, we may earn a small commission on that sale. This is at no extra cost to you.


This is such a lovely pattern and I loved making it. Mine came out bigger as I used chunkier yarn but it’s so so cute! I love all the little features.