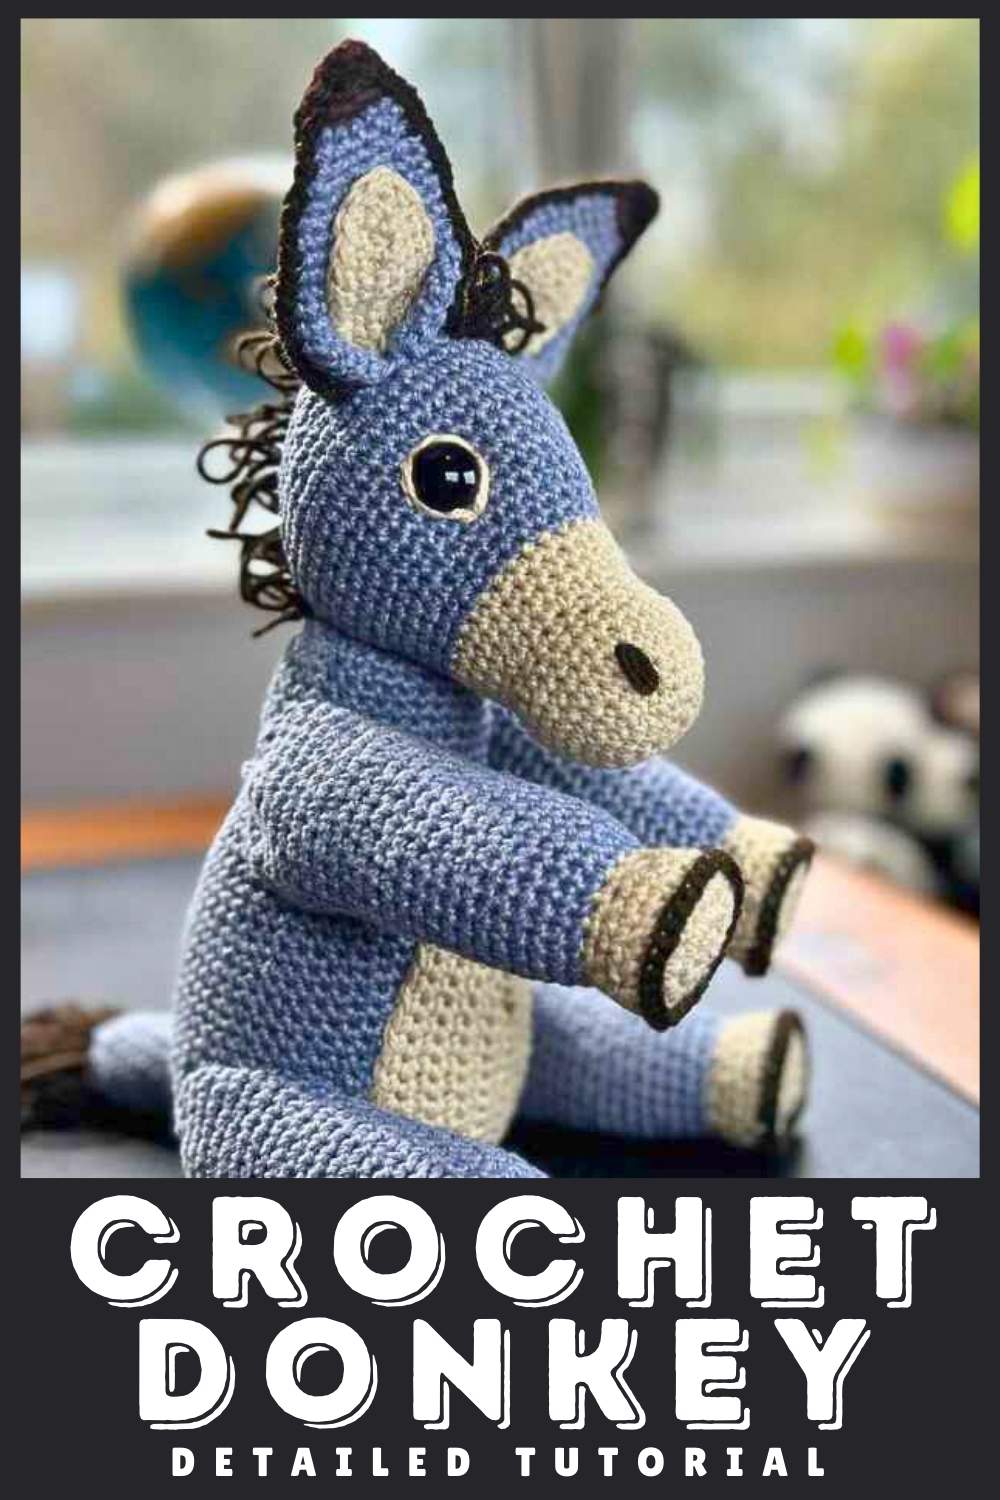
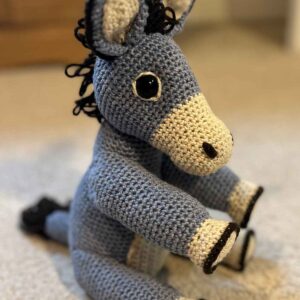
How To Crochet A Donkey – Free Amigurumi Pattern
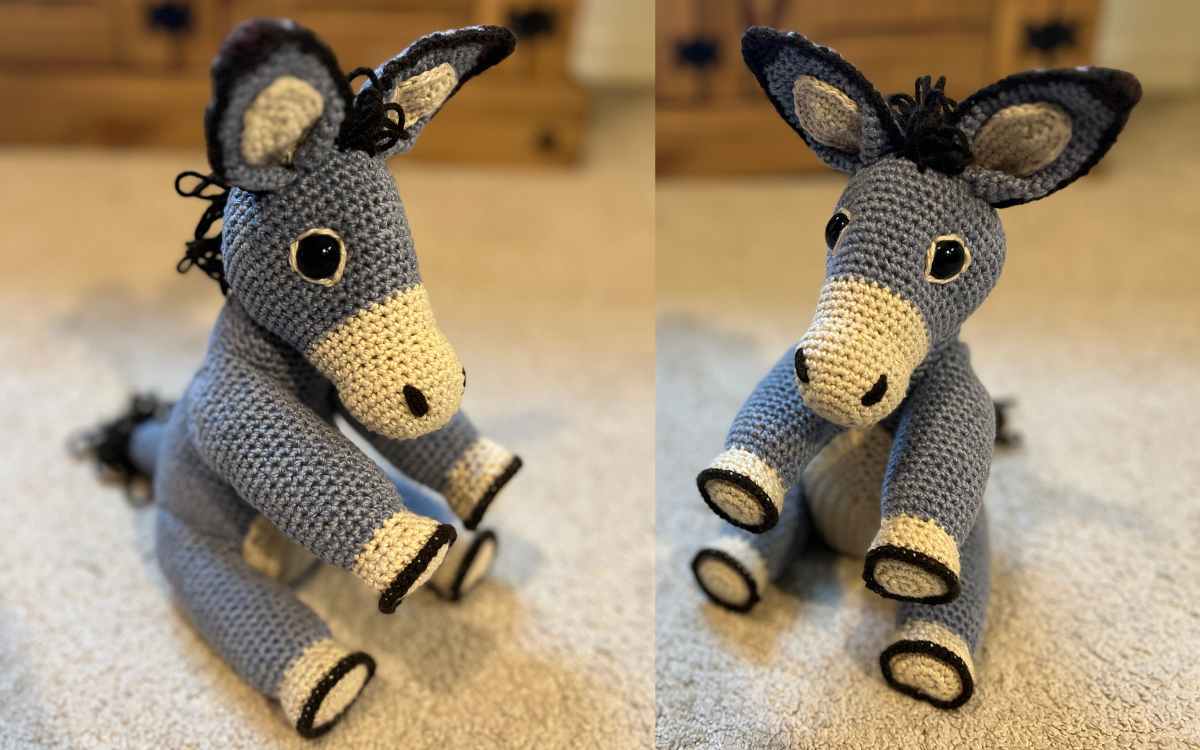
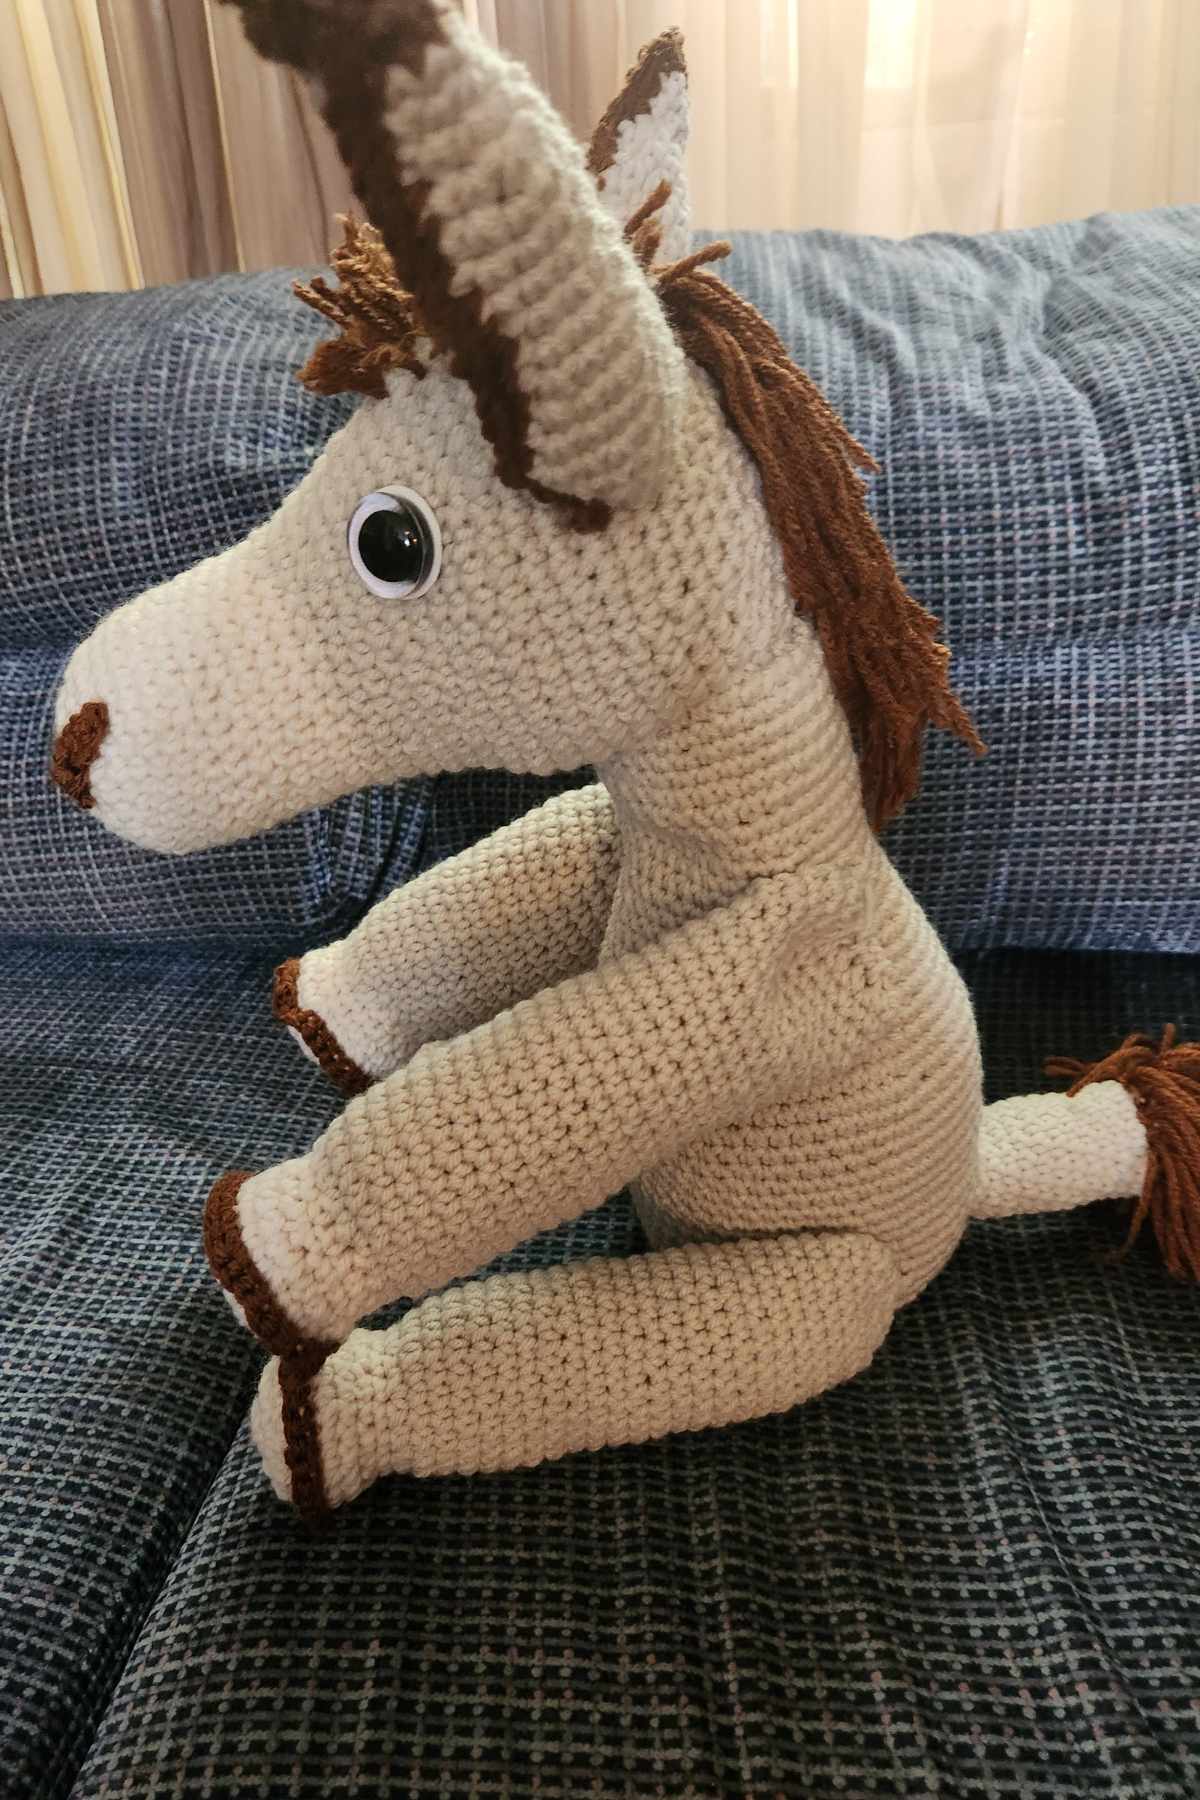
You know that situation where you design a toy horse for your daughter, so you then have to immediately make a crochet donkey for your son? No? Just me? Well, you get a new pattern out of it, so I won’t complain!
My free crochet donkey pattern is an intermediate level design, but laid out in simple, straight forward steps. You can absolutely give it a go as an amigurumi beginner, just be prepared for a bit of a learning curve.
If you prefer your patterns in PDF form and advert free, this pattern is also available to download from our shop here:
This design will use a range of skills, including surface crochet, hand sewing, and fairly heft dollop of patience too. But don’t let that put you off, I can confirm he’s well worth the effort if my son’s reaction was anything to go by!
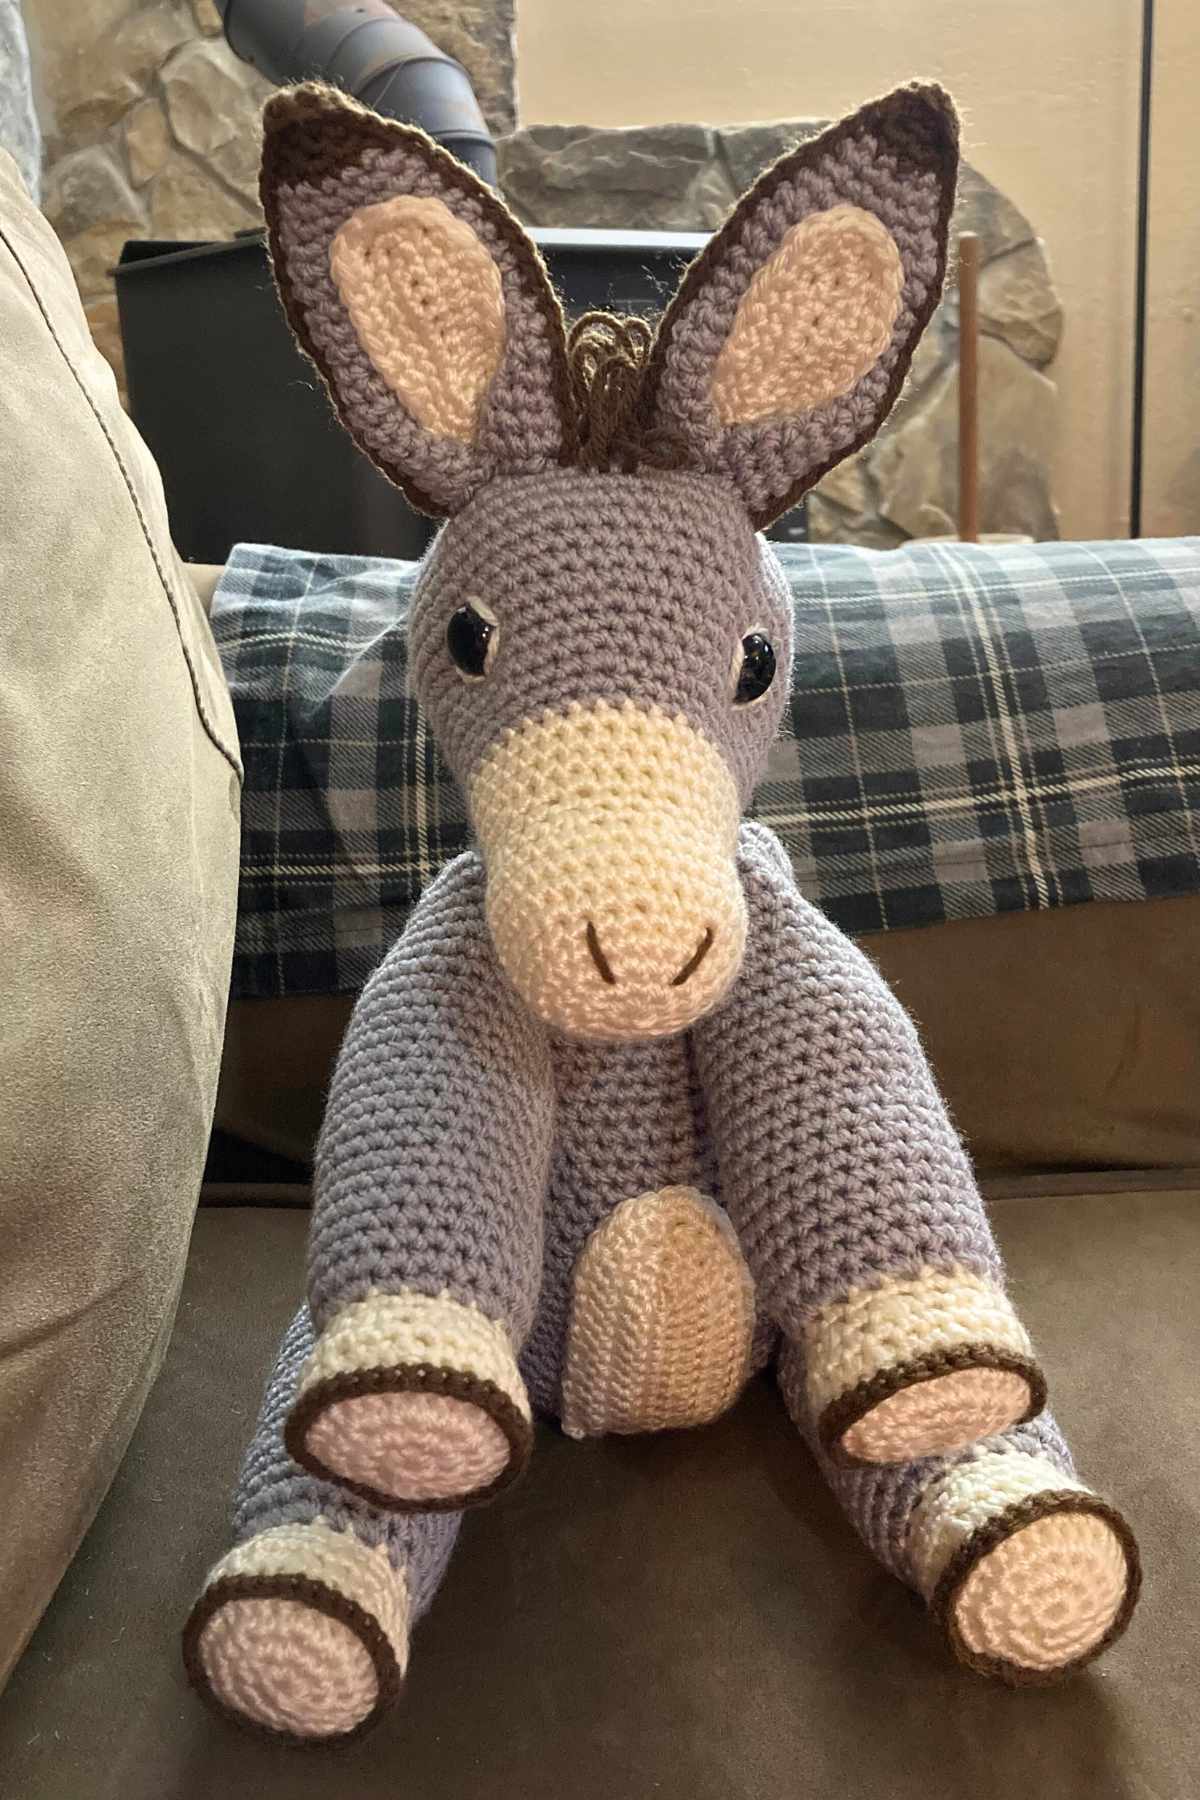
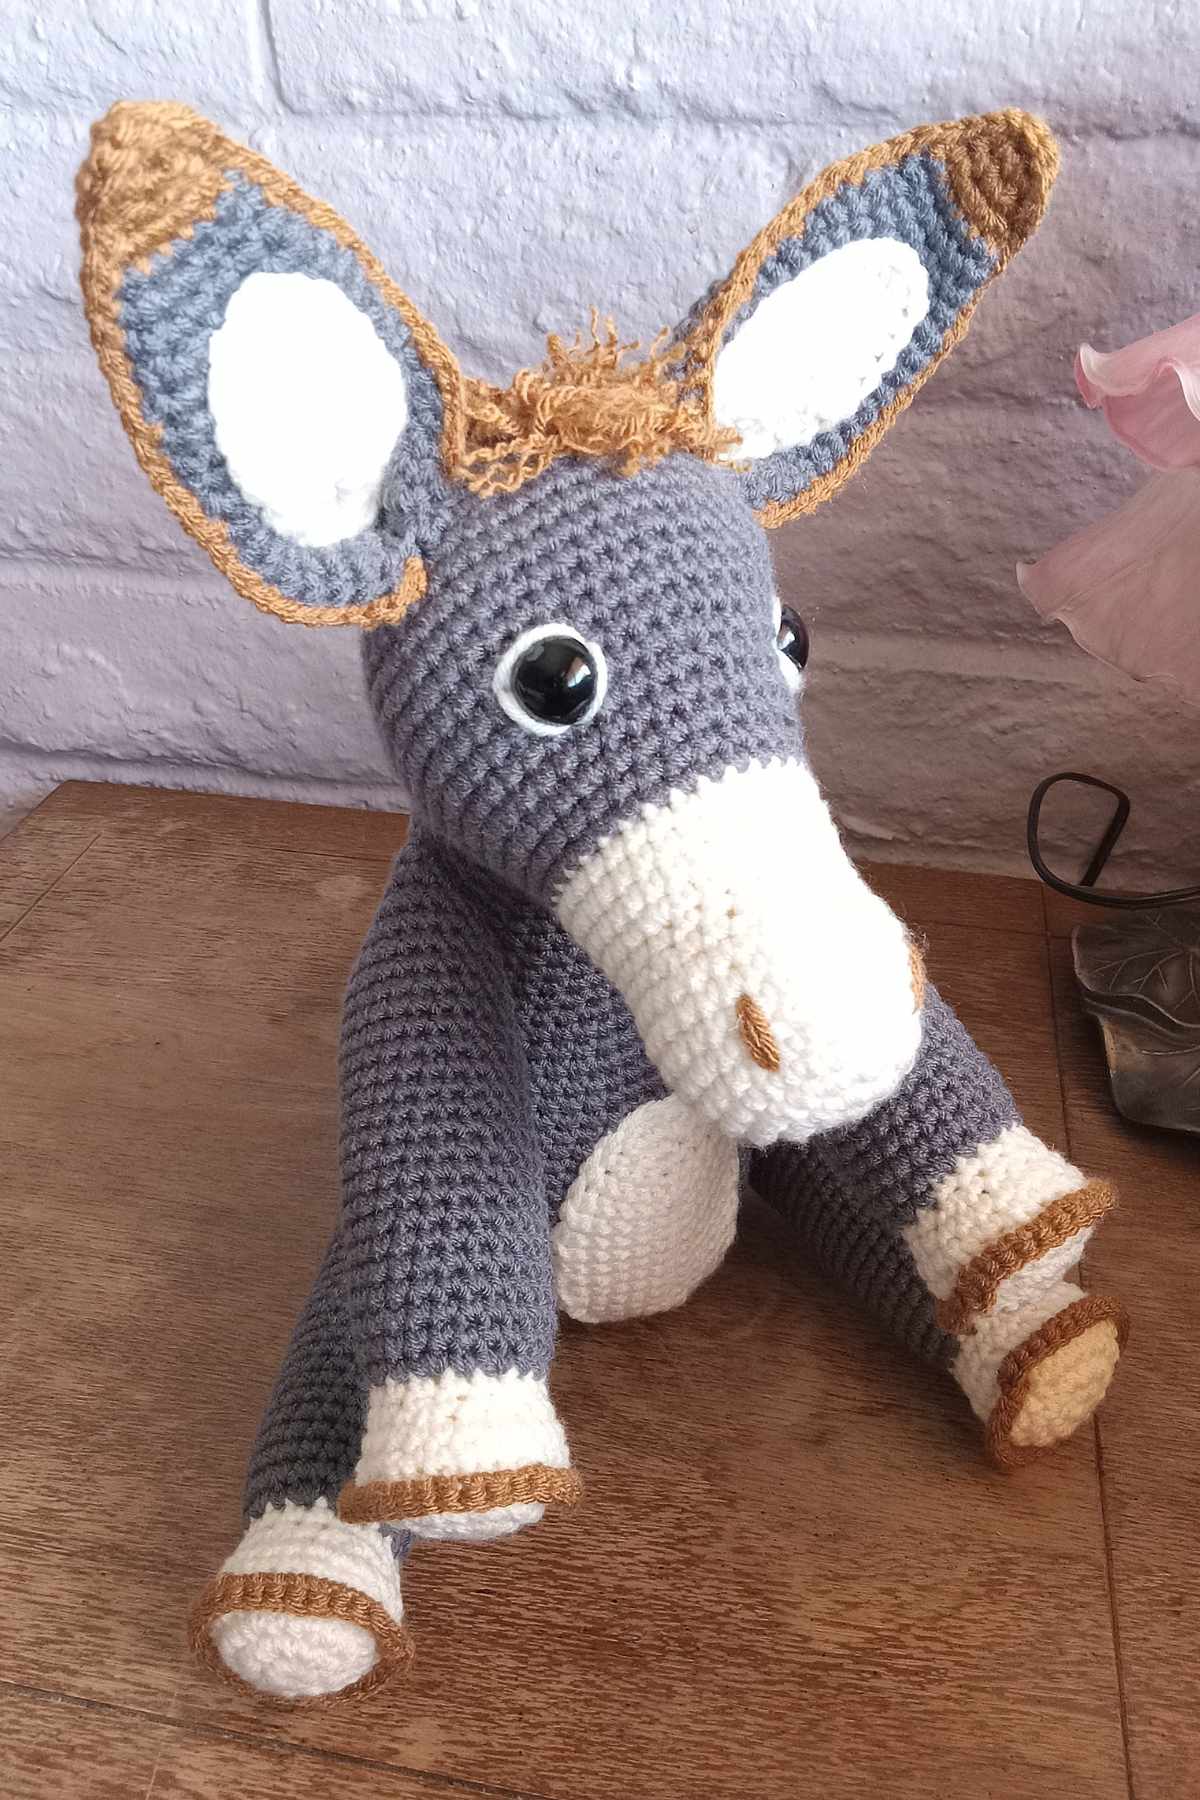
This donkey is called Sausage Roll, because that’s what my four year old has named him… I can only apologise. The eleven year old called her horse Jeremy, so hopefully that’s some consolation. Since making this pattern I’ve also turned it into an awesome zebra, which has yet to be named!
Your Equipment List
Here’s what you’ll need to crochet your own donkey pal:
- 3.5mm crochet hook
- 2.5mm crochet hook (for surface crocheting)
- 100g gray DK yarn
- 50g cream DK yarn
- 50g brown DK yarn
- 16mm safety eyes*
- Tapestry needle*
- Toy safe stuffing*
- Stitch markers
I highly recommend you use the yarn I did for this pattern, as I found it great to work with and had a super finish. It’s Hobbii’s DK cotton silk range. You’ll see on the packaging it advises a bigger hook size, but go with the 3.5mm for this pattern.

Techniques and Tips
I’ll use abbreviations in the pattern instructions, so if you come across any you don’t recognise just flick up here and check out the information and links for clarification.
- sc – single crochet
- 2sc – two single crochets into one stitch
- sc2tog – join two stitches together with one single crochet
- cc – color change
- BLO – crochet into the back loop only
- ch – chain
- turn – rotate the piece 180 degrees
- slst – slip stitch
My Free Crochet Donkey Pattern
You are going to create your crochet donkey in sections, which will be hand sewn together as you go along.
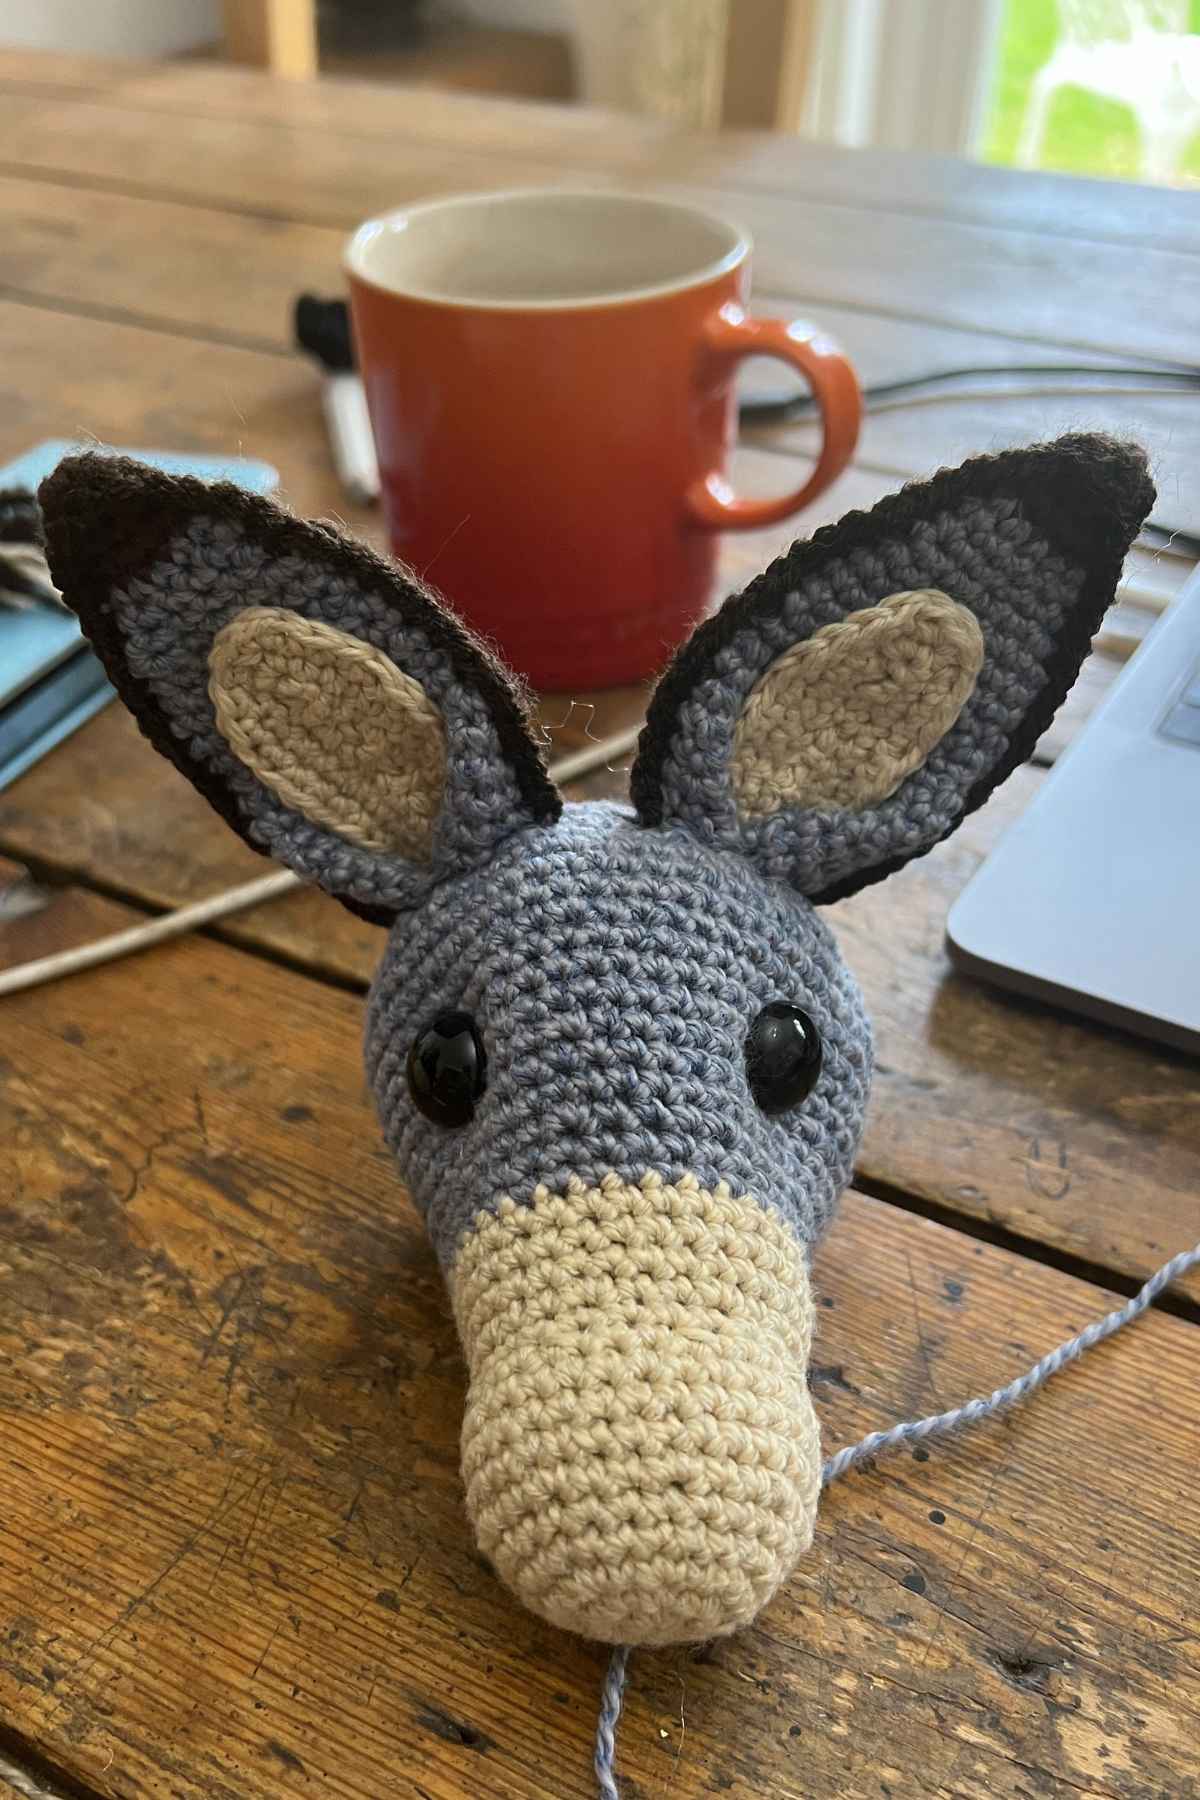
Amigurumi Donkey’s Head
We’ll start with the muzzle, working in your cream yarn with the 3.5mm crochet hook.
Round 1
Make a magic circle of eight stitches (8)
Round 2
2sc x 8 (16)
Round 3
(1sc, 2sc) x 8 (24)
Round 4 – 5
1sc x 24 (24)
Round 6
(1sc x 2, 2sc) x 8 (32)
Round 7 – 9
1sc x 32
Round 10
(1sc x 2, sc2tog) x 8 (24)
Round 11
1sc x 24
Round 12
(1sc x 2, 2sc) x 8 (32)
Round 13 – 15
1sc x 32
cc gray
Round 16 – 17
1sc x 32
Round 18
(1sc x 3, 2sc) x 8 (40)
Round 19 – 20
1sc x 40
Round 21
(1sc x 4, 2sc) x 8 (48)
Round 22 – 24
1sc x 48
Round 25
(1sc x 5, 2sc) x 8 (56)
Round 26 – 28
1sc x 56
Round 29
(1sc x 5, sc2tog) x 8 (48)
Round 30
1sc x 48
Round 31
(1sc x 4, sc2tog) x 8 (40)
Round 32
1sc x 40
Round 33
(1sc x 3, sc2tog) x 8 (32)
Round 34
1sc x 32
Insert the safety eyes at round 22 level, approximately a third of the way around the head apart. If you like, you can tie the backs together with a piece of yarn to inset them slightly into the head.

Round
(1sc x 2, sc2tog) x 8 (24)
Round
(1sc, sc2tog) x 8 (16)
Round
sc2tog to close, the tie off and hide the yarn tail within the head.
Crochet Donkey’s Ears
Your crochet donkey’s outer ears will be started in the brown yarn, and worked with your 3.5mm crochet hook.
Round 1
Make a magic circle of six stitches (6)
Round 2 -3
1sc x 6
Round 4
2sc x 6 (12)
cc gray
Round 5 – 7
1sc x 12
Round 8
(1sc, 2sc) x 6 (18)
Round 9 – 14
1sc x 18
Round 15
(1sc x 2, 2sc) x 6 (24)
Round 16 – 19
1sc x 24
Round 20
(1sc x 3, 2sc) x 6 (30)
Round 21
1sc x 30
Slst, and tie off, leaving a long tail of yarn which you’ll use to sew the ear into shape then onto the head a little later.
The inner ears
Use your cream yarn and 3.5mm crochet hook.
I worked around a starting chain to get this effect.
Ch9, sk, 1sc x 7, 3sc, 1sc x 7, 3sc, 1sc x 8, 3sc, 1sc x 9, 3sc, 1sc x 10, 3sc, 1sc x 11.
Sewing your crochet donkey’s ears

First you are going to construct the ear sections, then you’ll sew them onto the top of your donkey’s head.
Lay your gray section, flattened, on a desk. Place the cream section lined up with the bottom of the ear, in the center. Using a length of cream yarn and your needle, weave around the edge of the cream inner ear to attach it.
Now fold the gray sections bottom corners to meet in the middle, over the cream section, securing it firmly.
Holding the pointed end upright, now sew them to the top of your donkey’s head. The ears should sit in line with the position of the eyes.
Edging the donkey’s ears
You are now going to give definition to the ears by working a series of single crochets into the surface of the stitches around the perimeter of the ears. Use your 2.5mm crochet hook to make working into these smaller gaps a little easier.
Highlighting the Eyes

Take your cream yarn and needle, and sew four big stitches around the edges of each safety eye, giving the impression of cream eyeliner. Go around the circumference twice, and hide the tail inside the head.
Crocheting the Nostrils

Your nostrils will be sewn in the brown yarn, work across three stitches in length from around the fourth to seventh round, in straight lines. Just to give a hint of the nose.
Crochet Donkey’s Body
This section will be made entirely in gray yarn, with the 3.5mm crochet hook.
Round 1
Make a magic circle of eight stitches (8)
Round 2
2sc x 8 (16)
Round 3
(1sc, 2sc) x 8 (24)
Round 4
(1sc x 2, 2sc) x 8 (32)
Round 5 – 16
1sc x 32
Round 17
(1sc x 3, 2sc) x 8 (40)
Round 18 – 19
1sc x 40
Round 20
(1sc x 4, 2sc) x 8 (48)
Round 21 – 24
1sc x 48
Round 25
(1sc x 5, 2sc) x 8 (56)
Round 26 – 42
1sc x 56
Round 43
(1sc x 5, sc2tog) x 8 (48)
Round 44
(1sc x 4, sc2tog) x 8 (40)
Round 45
(1sc x 3, sc2tog) x 8 (32)
Round 46
(1sc x 2, sc2tog) x 8 (24)
Round 47
(1sc, sc2tog) x 8 (16)
Fill with toy safe stuffing.
Round 48
sc2tog to close, tie off and hide the end of the yarn within the body.
Sewing the Head to the Body
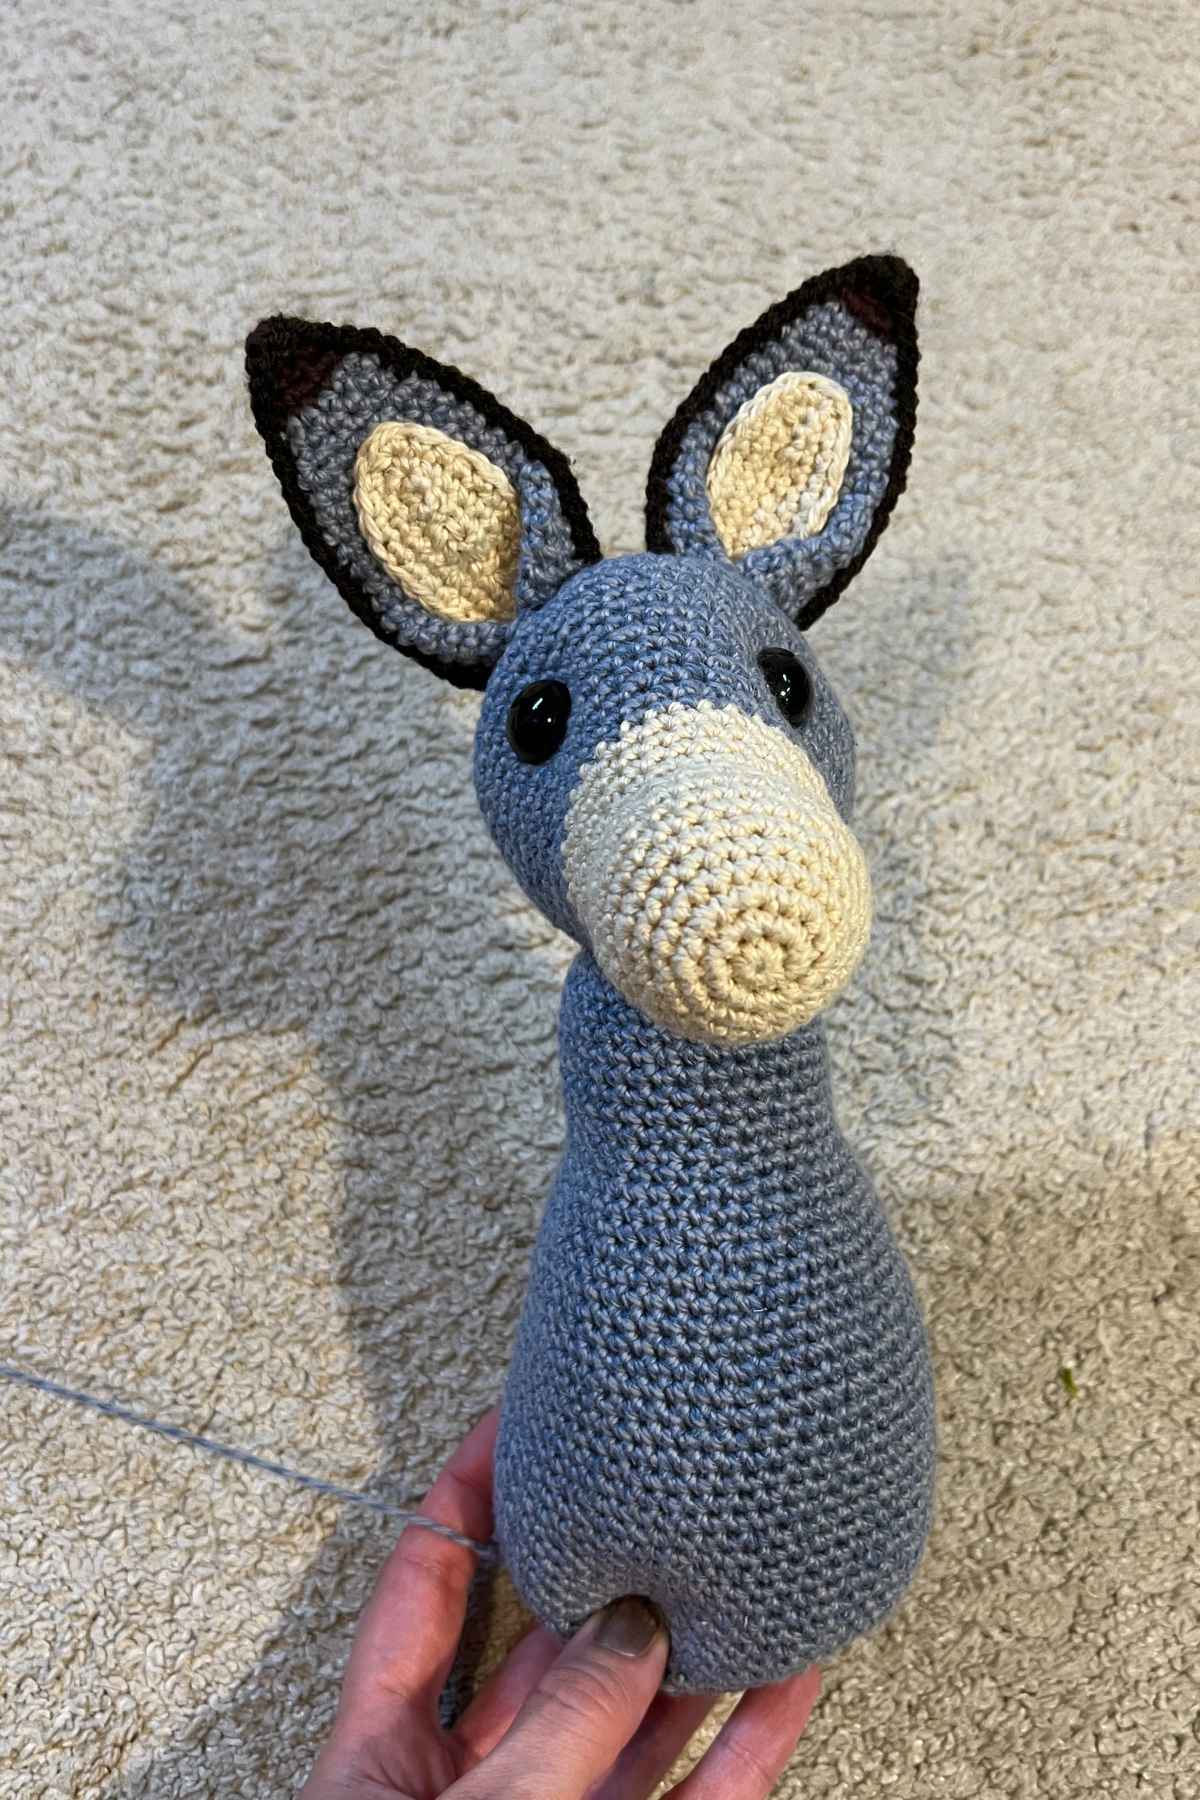
I like to position my crochet toys so that their chins are sloping downwards, but you can go with whatever you think looks best. Position the head to your satisfaction, then holding it in place with your non-dominant hand, use your dominant hand to weave in and out between the head and body securing each stitch together.
Crocheting the Patch

You are now going to crochet a cream patch for your donkey’s tummy. You’ll work back and forth around a chain.
Round 1
Ch13, sk, 1sc x 11, 3sc, 1sc x 12
Turn
Round 2
Ch1, 1sc x 12, 3sc, 1sc x 13
Turn
Round 3
Ch1, 1sc x 13, 3sc, 1sc x 14
Turn
Round 4
Ch1, 1sc x 14, 3sc, 1sc x 15
Turn
Round 5
Ch1, 1sc x 15, 3sc, 1sc x 16
Now hand sew the patch so that the flat ends sits on the floor at the same level as your donkey’s body section.
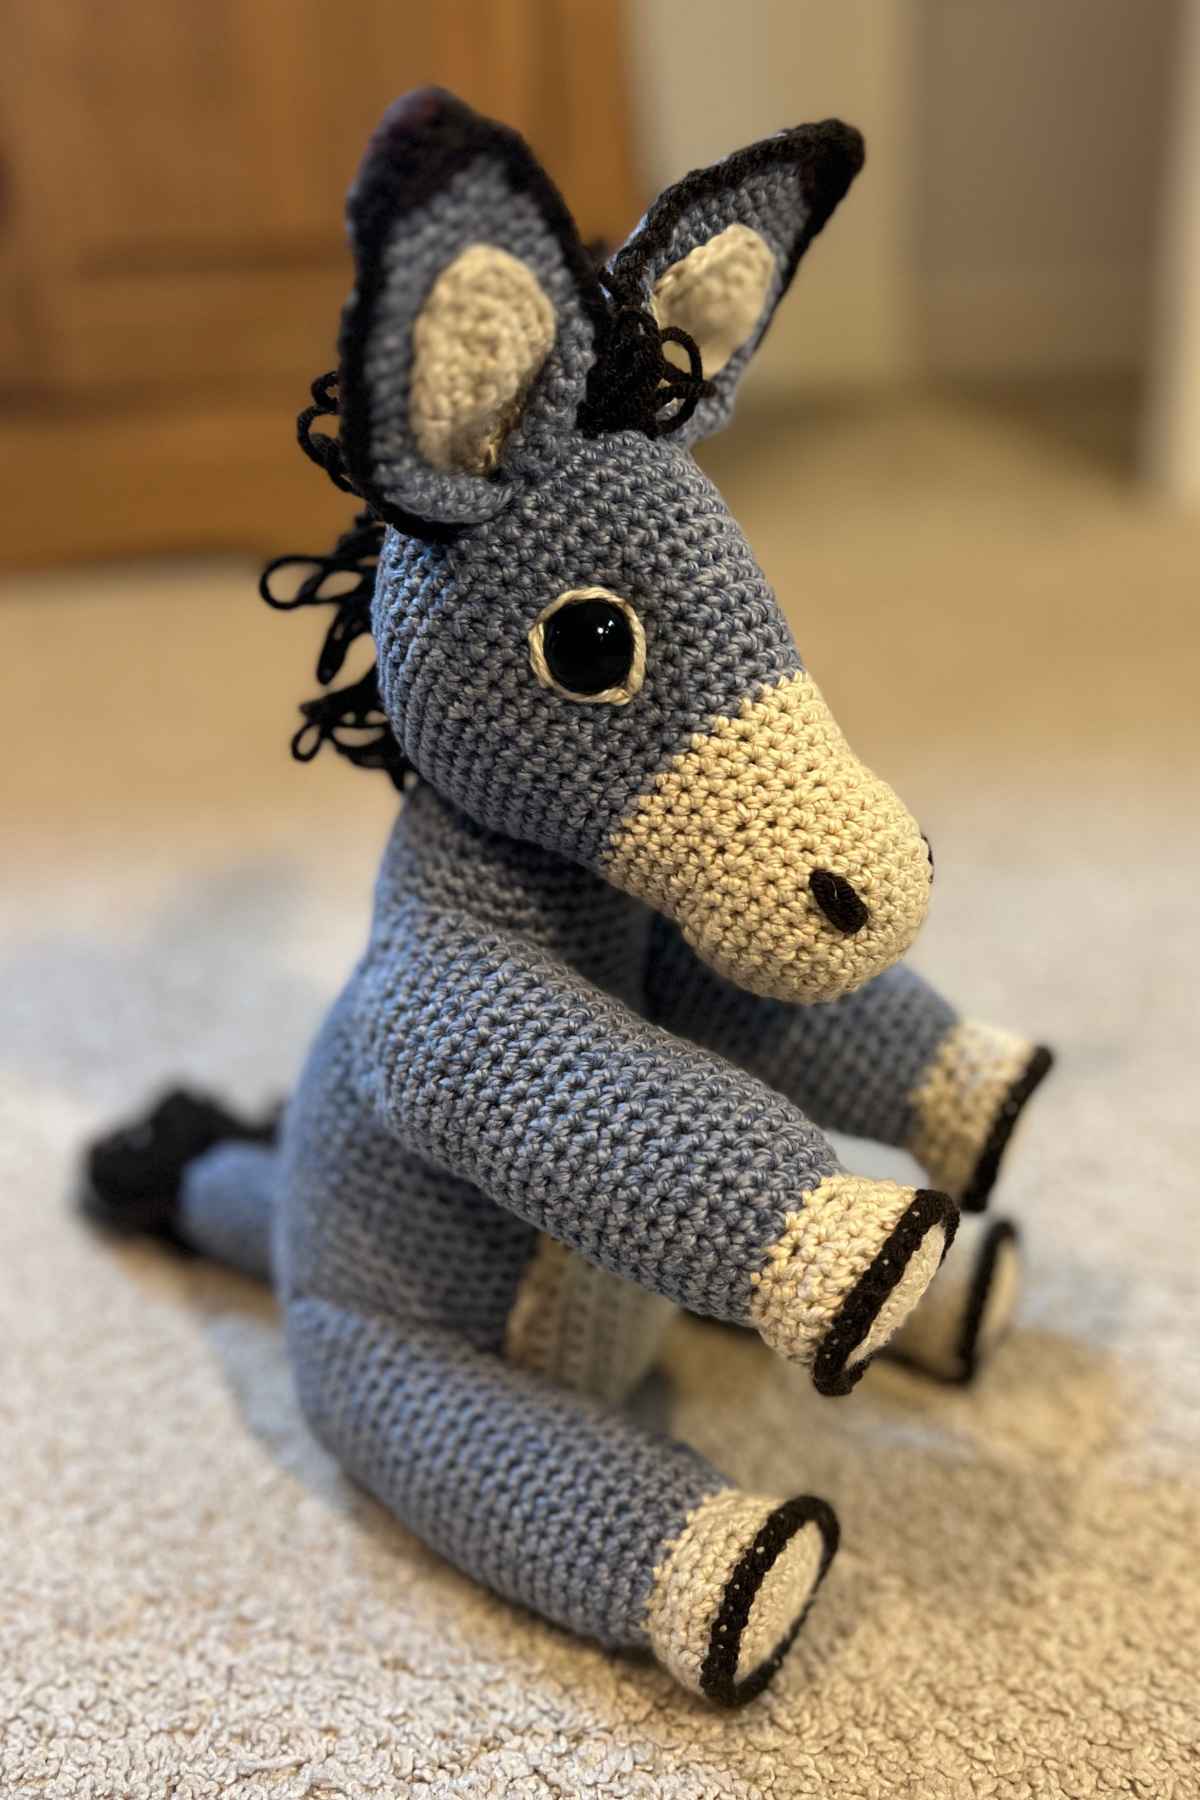
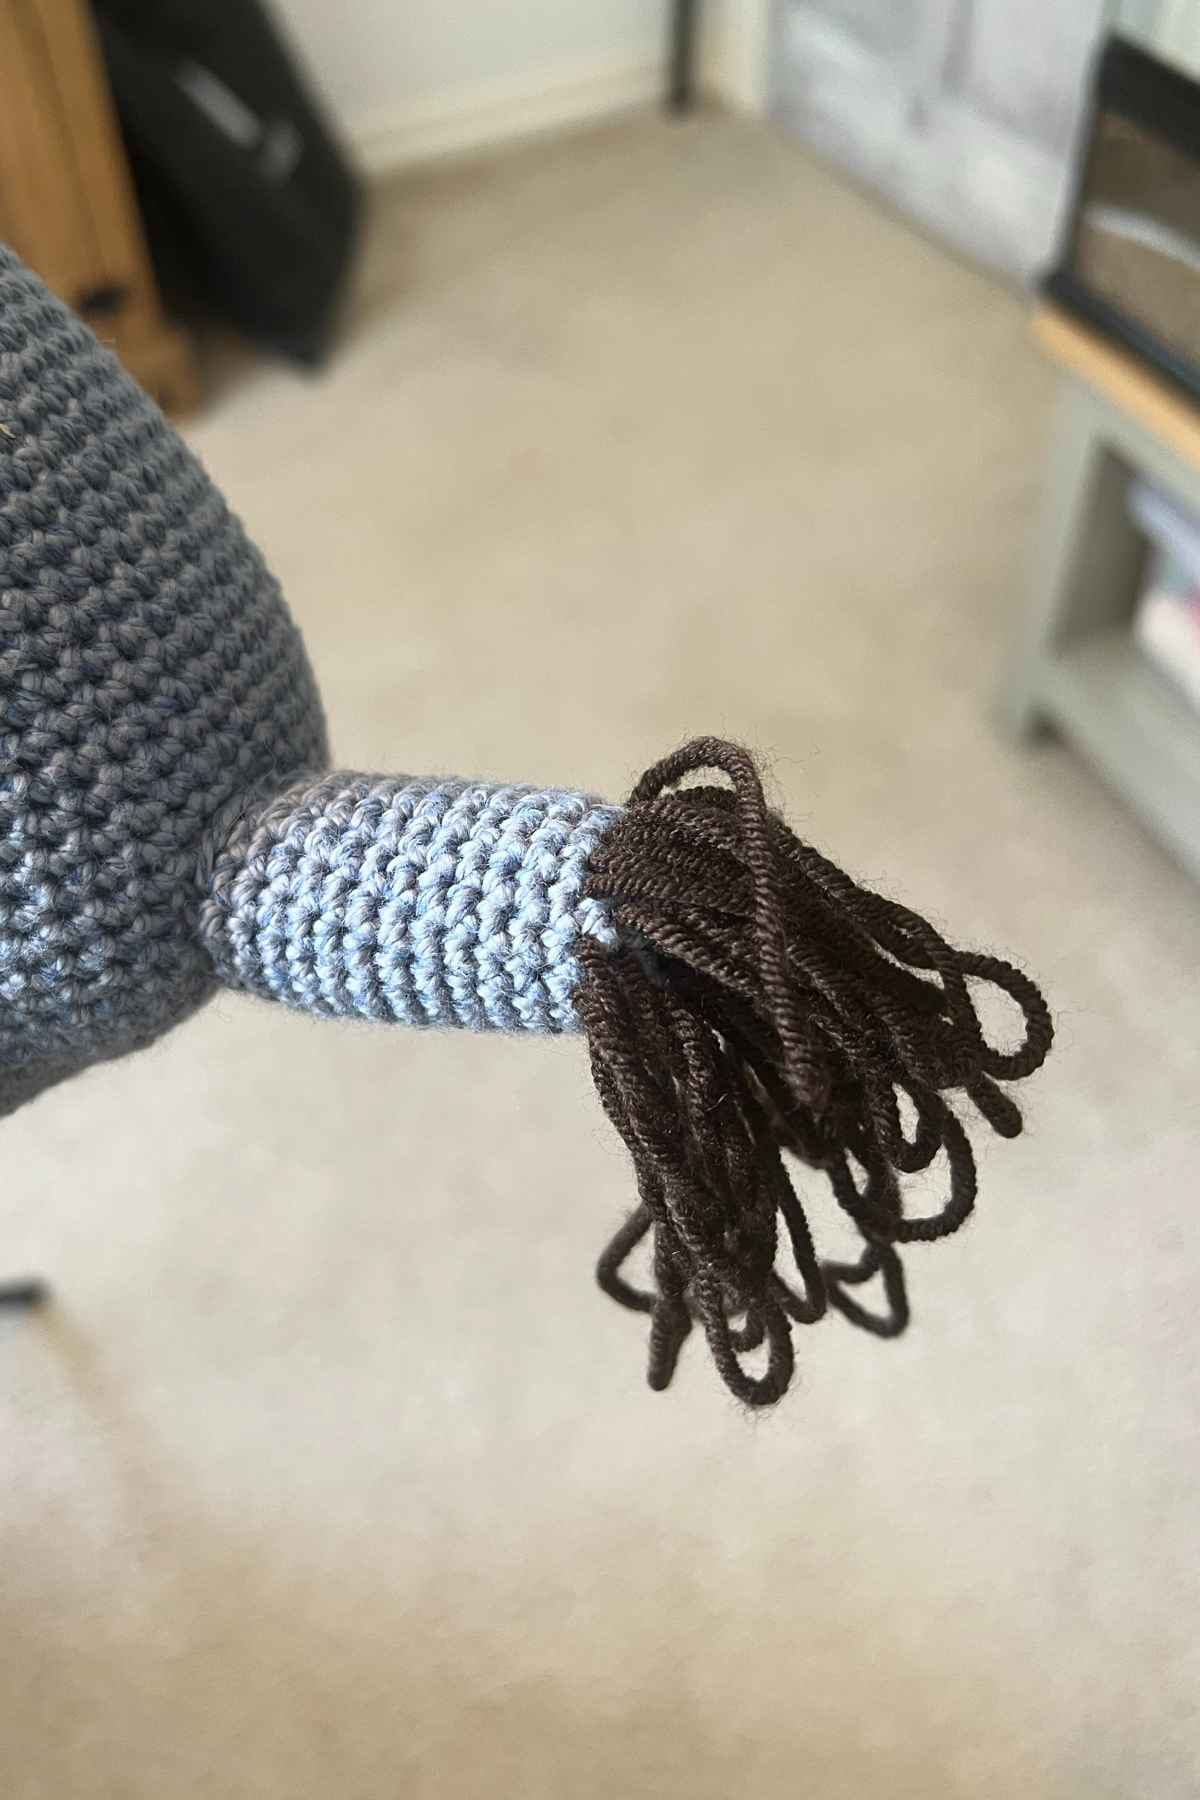
The Donkey’s Mane

Donkeys have a short, bristle brush like mane that comes from their forehead to the back of the neck. Cut a long strand of your brown yarn and thread the tapestry needle. Now sew back and forth along the line you want the hair to fall, leaving each stitch as a loose loop.
Snip along each loop and tie them together to get that full donkey hair impact.
Crocheting the Legs

Begin the legs at the hooves, using your 3.5mm crochet hook and cream yarn.
Round 1
Make a magic circle of eight stitches (8)
Round 2
2sc x 8 (16)
Round 3
(1sc, 2sc) x 8 (24)
Round 4
(1sc x 2, 2sc) x 8 (32)
Round 5
BLO (1sc x 2, sc2tog) x 8 (24)
Round 6
1sc x 24
Round 7
(1sc, sc2tog) x 8 (16)
Round 8
1sc x 16
cc gray
Round 9
(1sc, 2sc) x 8 (24)
Round 10 – 32
1sc x 24
Round 33
(1sc, sc2tog) x 8 (16)
Stuff up to round 26, leave the rest empty.
Round
sc2tog to close
Edging the hooves

You are now going to single surface crochet using the 2.5mm hook and brown yarn, around the back loop only section of each hoof to define it. At the end of the circle, hide the yarn tails inside the foot.
Attaching the Legs
Sew your legs on around the edge of the empty section of each limb. Arms should sit about round 16, legs should sit either side of the base of the body section.
Crochet the Tail
Your donkey’s short tail section will be worked in gray yarn with the 3.5mm crochet hook.
Round 1
Make a magic circle of six stitches (6)
Round 2
2sc x 8 (16)
Round 3 – 15
1sc x 16
Slst and tie off, leave a long tail for sewing. Fill to the top, then place against your donkey at the back, and sew it tightly in place.
The tail fur
Sew your donkey a lovely fluffy tail end using your needle and brown yarn. This time begin your loops of yarn at the center of the tail’s magic circle, then work around each stitch until you are about a third of the way down the tail. Tie off and hide the loose end inside the gray section.

*The products linked in this pattern were carefully selected by Lucy Kate Crochet. If you decide to purchase using the links provided, we may earn a small commission on that sale. This is at no extra cost to you.


This site should allow for a print button and numbered the pages so, we do not have to print all the comments and ads also, because that is a waste of ink and paper.
Hi Charmaine, We’re currently working on creating PDFs for the patterns, which will make printing a lot more efficient. We’re nearly there, hopefully not too long now. Best wishes, Lucy Kate.
Thank you for sharing your pattern Lucy – he’s adorable. Can’t wait to get started – Linda
Thanks so much, I hope you enjoy making him!
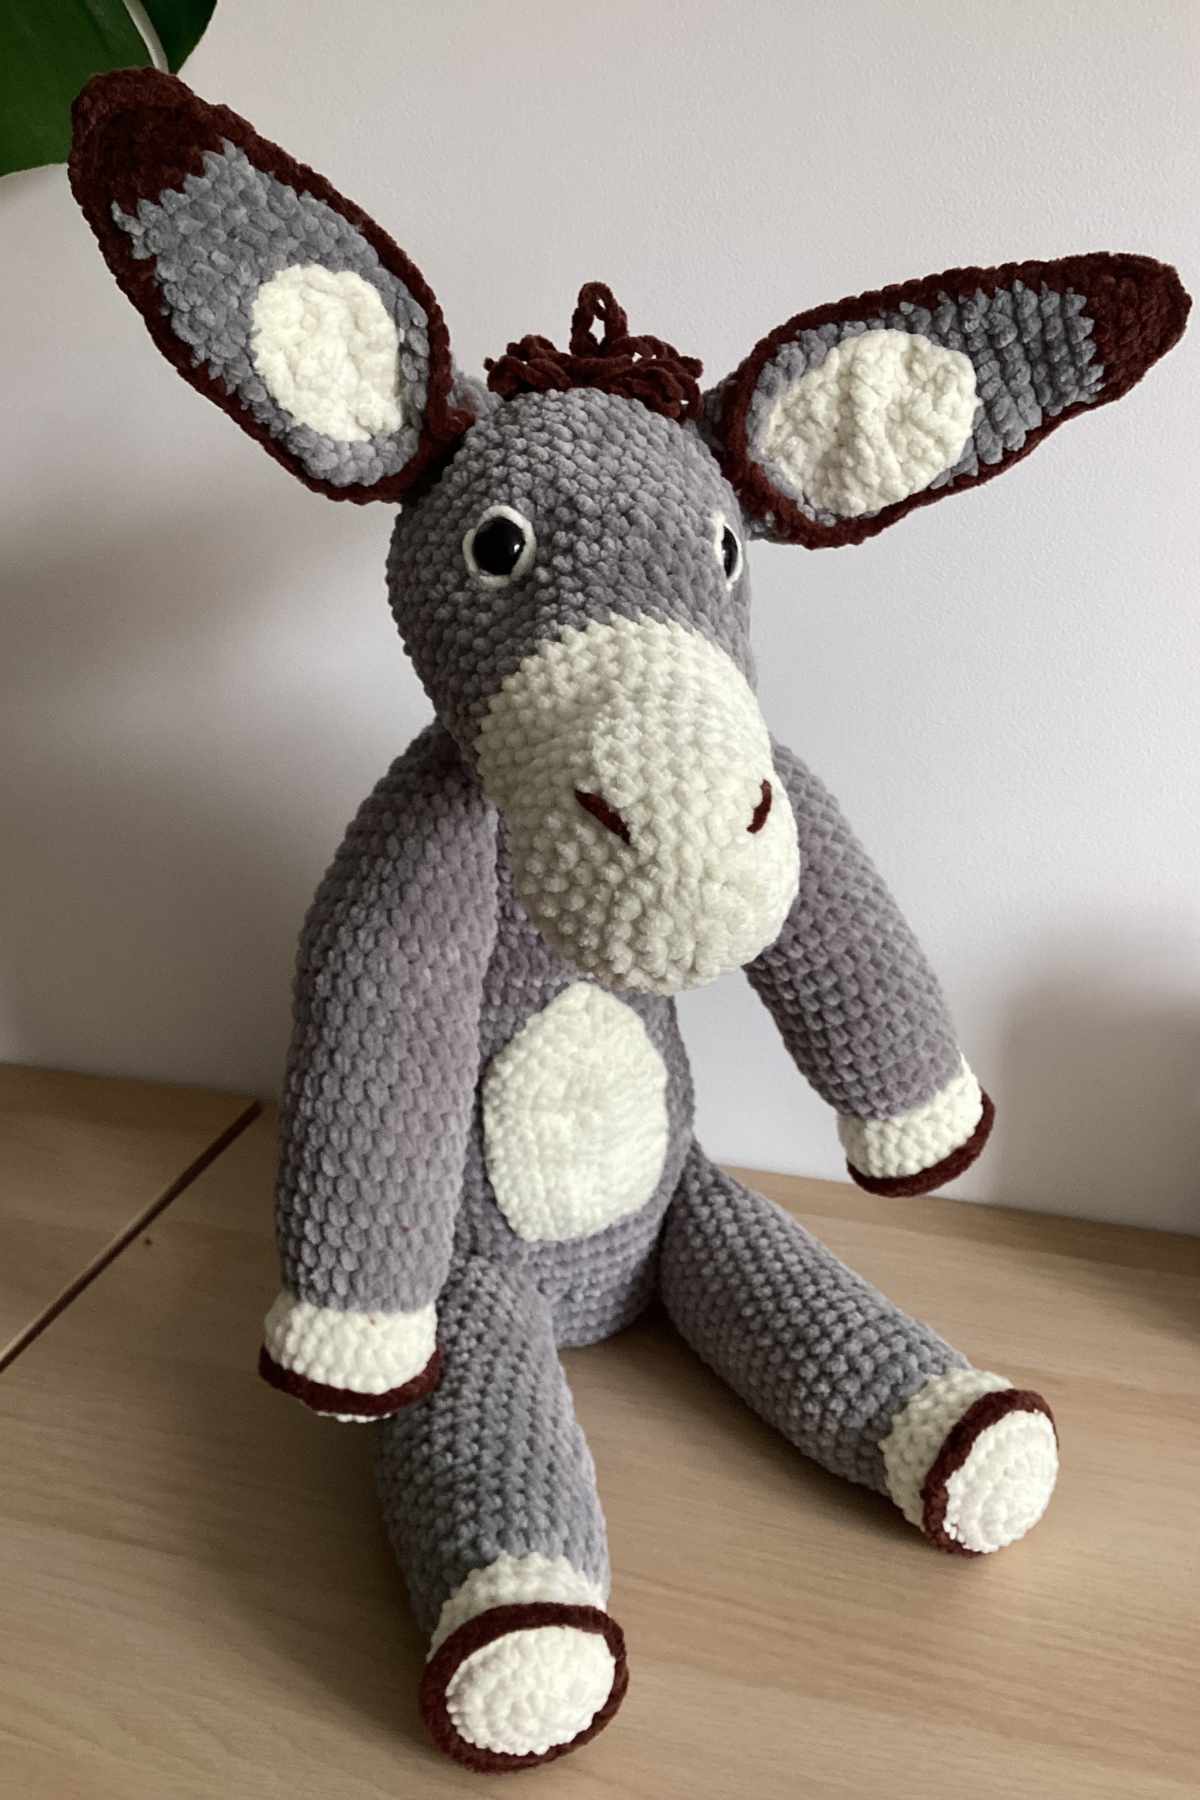
I had so much fun making Mr. Donkey. I had to play yarn chicken (the yarn was a found treasure and a bit short for the pattern). I solved it by crocheting his tummy patch by changing colors on the tummy side of the body. So, I was able to give him a belly button.
One instruction I would add to pattern is that the body is started at the neck. I figured it out as I designed the tummy, but it would have been helpful to see it written.
Thanks for the fun pattern.
Thank you so much for your feedback, and I’m delighted to hear you enjoyed making your donkey! Lucy Kate, x
I’ve made a donkey thanks to your pattern and it is so cute! I am a total beginner but your pattern was clear and great for learning new techniques. Thak you for creating it.
That’s so lovely to hear, I’m so glad you enjoyed making it!
This is my first Amigurumi and while it seemed daunting, your instructions were so clear and made the process very easy! Thank you 😉
That’s so lovely to hear, you are very welcome!
I have just finished making my donkey. He’s a gift for my mum who has a soft spot for donkeys. He’s lovely! A brilliant pattern. Thank you so much!