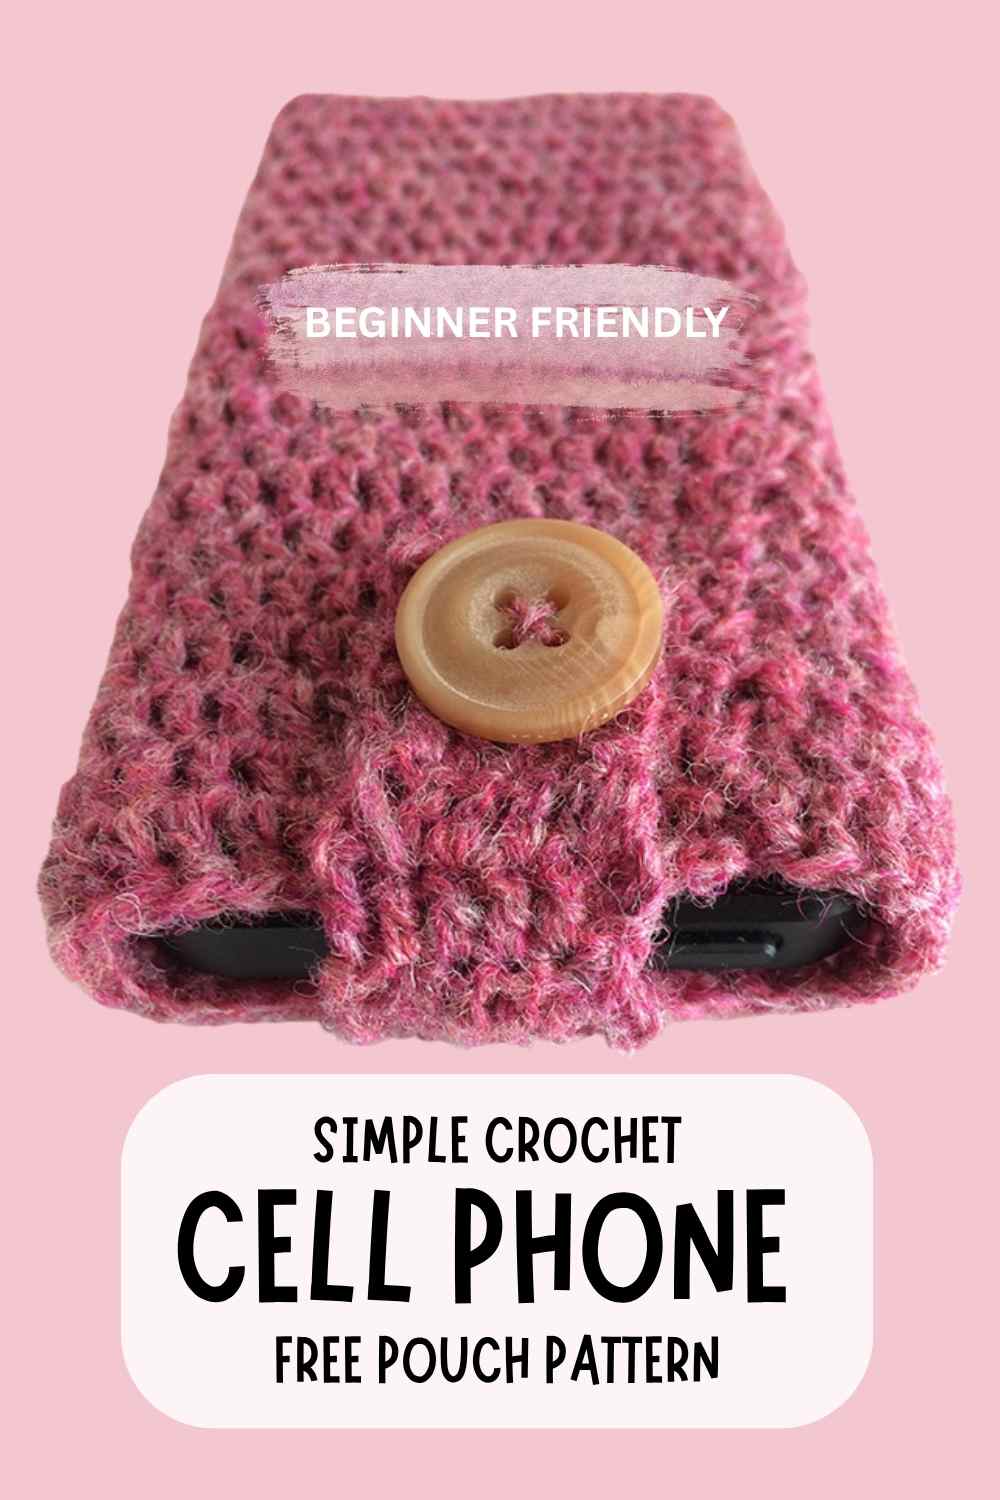
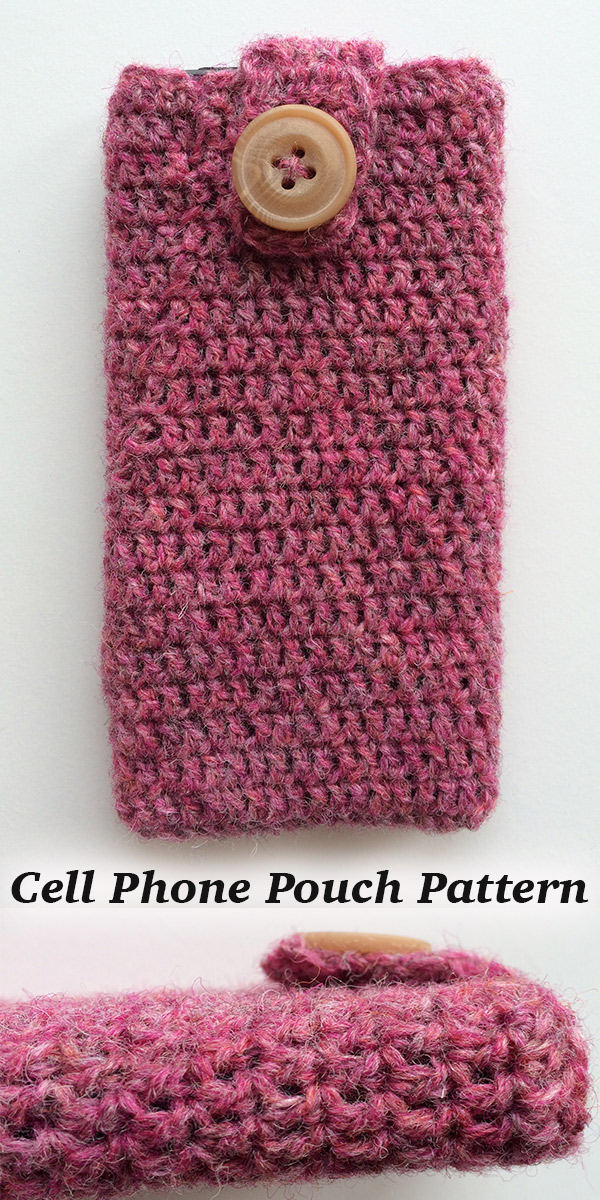
Free Crochet Cell Phone Pouch Pattern – Quick And Easy To Make!
This free cell phone pouch pattern isn’t just beginner friendly, it’s the perfect first crochet project.
I share step by step instructions to show you how to use some simple stitches to hook up a cute pouch in the color of your choice!
It’s a fun and practical way of making your cell phone more unique.
Crochet Cell Phone Pouch Equipment
To create your cell phone pouch with this pattern, you will need the following equipment:
- 2.5mm crochet hookPaid Link
- 50g ball of 4ply 100% wool yarn (I used Women’s Institute Unique Shetland yarn in pink)
- 1 button
- fine yarn needlePaid Link
- scissors
If you want to embellish your pouch, then I recommend having a small quantity of 100% wool 4ply yarn in another color too. I have used a green shade also from the WI Unique Shetland range.
Crocheting Your Cell Phone Pouch
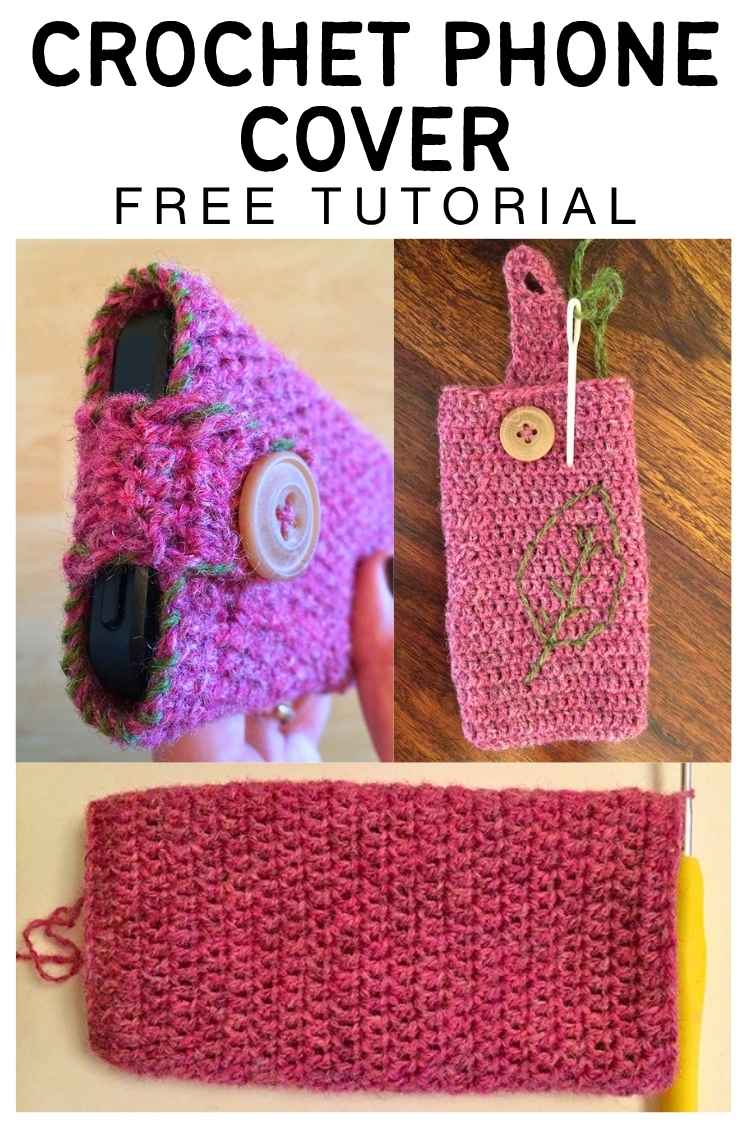
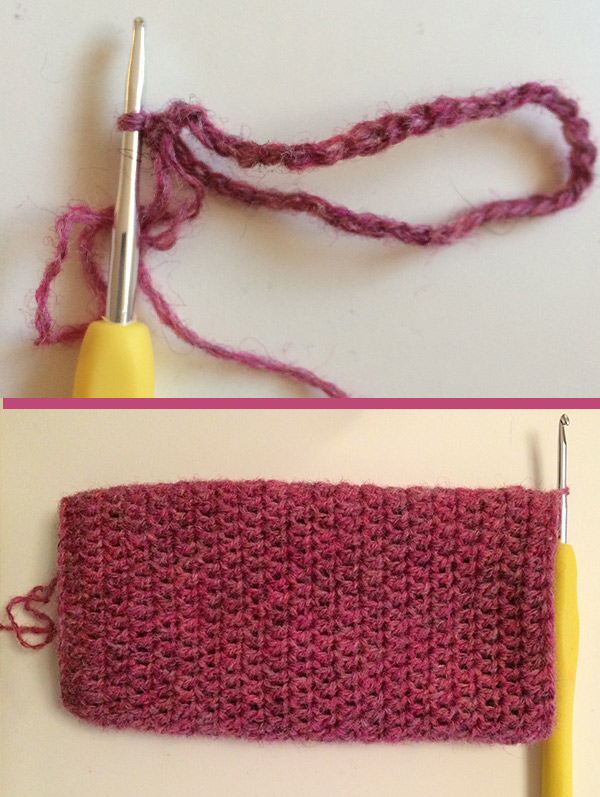
The crochet pattern works from a basic chain formed into a ring. It is built up from this part as a cylinder, with the button tab and optional embellishments to be added upon completion. This crochet cell phone pouch pattern was designed around an iPhone 6. You probably have a much more recent model!
Adjusting The Pattern For A Different Model Of Phone
If you have another model of smart phone, then simply produce the initial chain and hold it around the width of your phone. Adjust accordingly, making the chain longer for a wider phone or shorter for a thinner one. From this point you can simply follow the pattern as described.
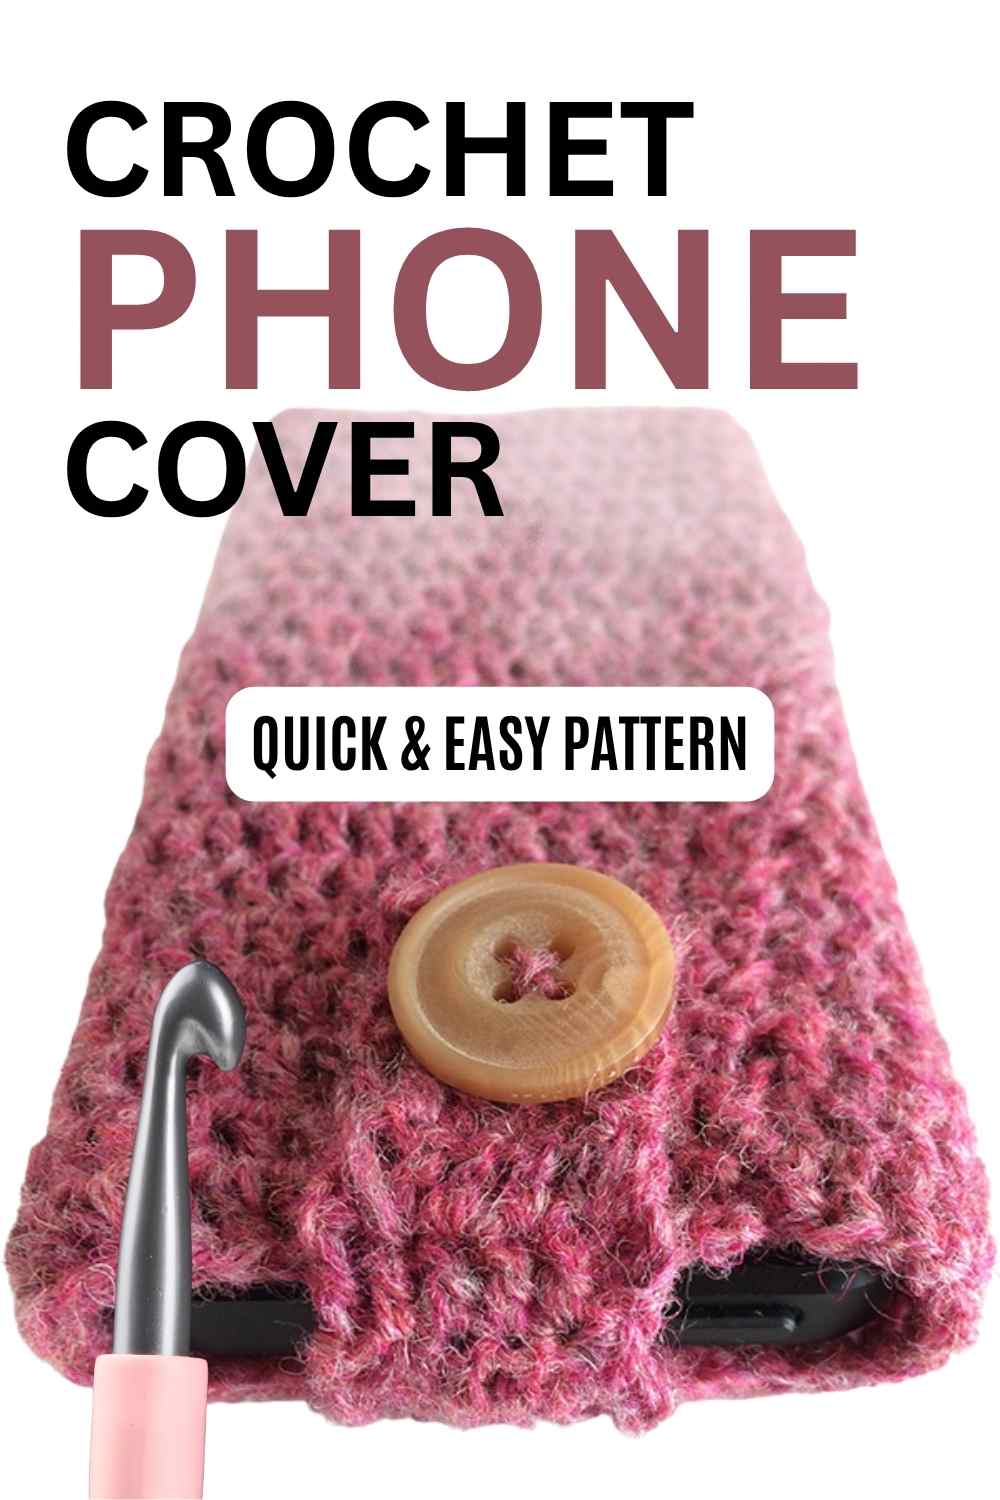
Cell Phone Pouch Pattern
Begin by using your 2.5mm crochet hook and the 4ply wool yarn. I recommend using a crochet hook with a soft grip if you have one, as the pattern although short is quite repetitive. A soft grip crochet hook will stop your hand from becoming sore as you work the yarn.
Round 1
Make a chain of 40 stitches (ch 40). Slip stitch (sl st) into the first chain to join as a circle.
Round 2
*Ch3 to form the first double crochet (dc).
dc once into each stitch for the remainder of the round.
At the end of the round sl st to join.
Round 3 – 22
Repeat from *.
Round 23
In this round you will be forming the tab which holds your cell phone inside the pouch.
*Ch3 to form the first dc.
Make 1dc into each of the next 5 stitches.
Round 24 to 27
Repeat from *.
Round 28
Ch3 to form the first dc.
Make 1dc into the next stitch.
Ch2 and skip two stitches.
Make 1dc into the next 2 stitches.
Round 29
*Ch3 to form the first dc.
Make 1dc into the next stitch. Make 2dc into the chain gap. Then make 1dc into each of the next 2 remaining stitches.
At the end of the row tie off and weave in the loose end.
Joining the Base of the Crochet Cell Phone Pouch
Turn the pouch inside out, and work from the first round.
Hold the pouch flat, with your button tab in the centre of one side at the other end.
Cast your yarn onto the hook, and single crochet the two sides together.
At the end of the row cut off the loose end and weave it back in.
Turn the pouch the right way out again.
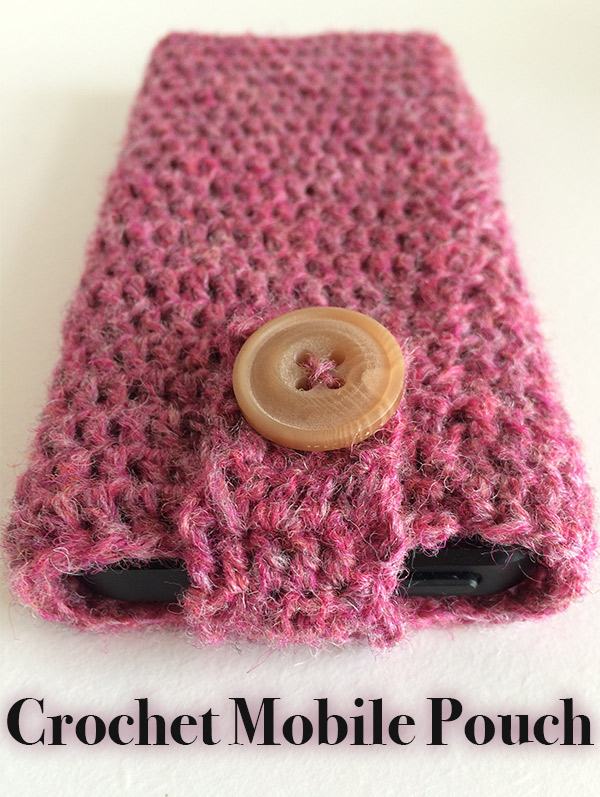
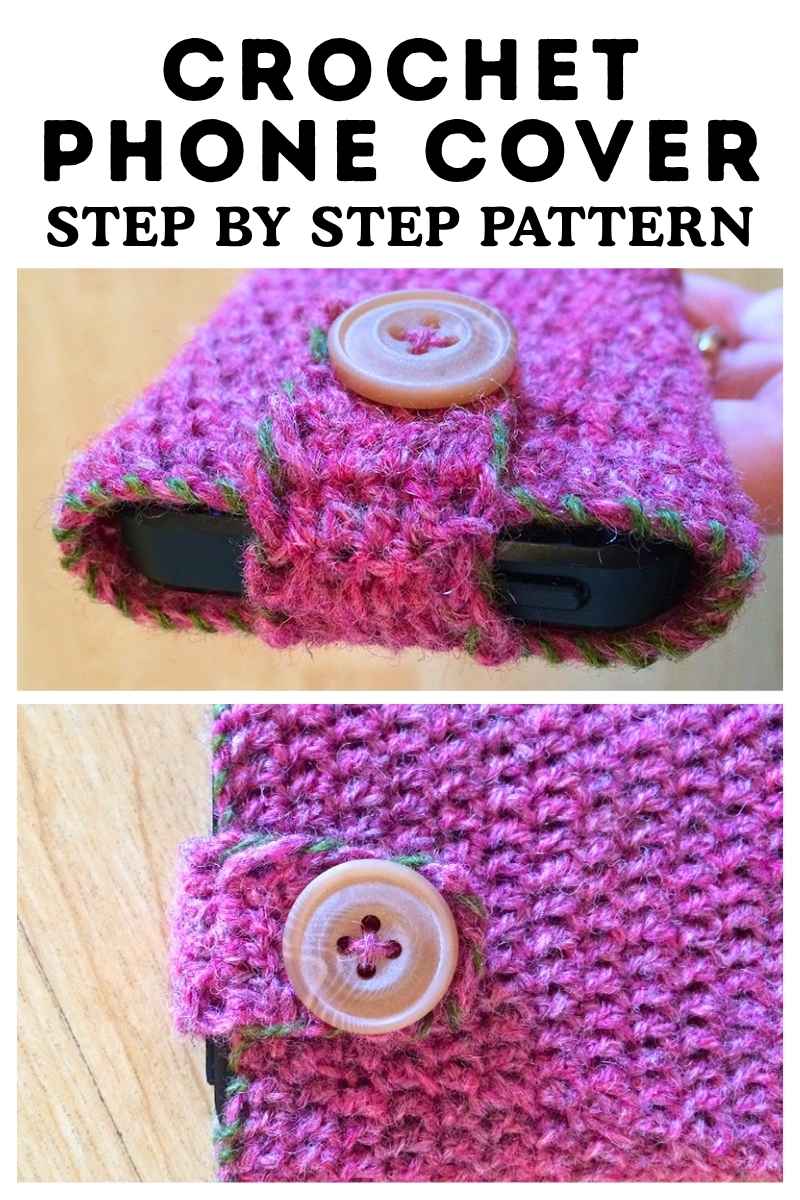
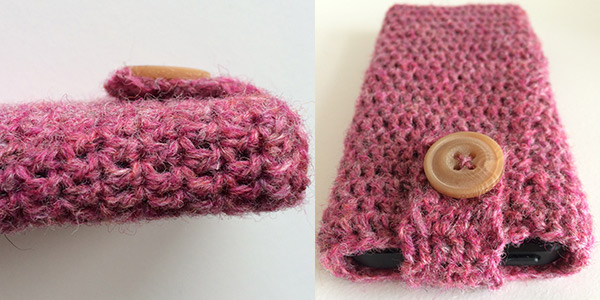
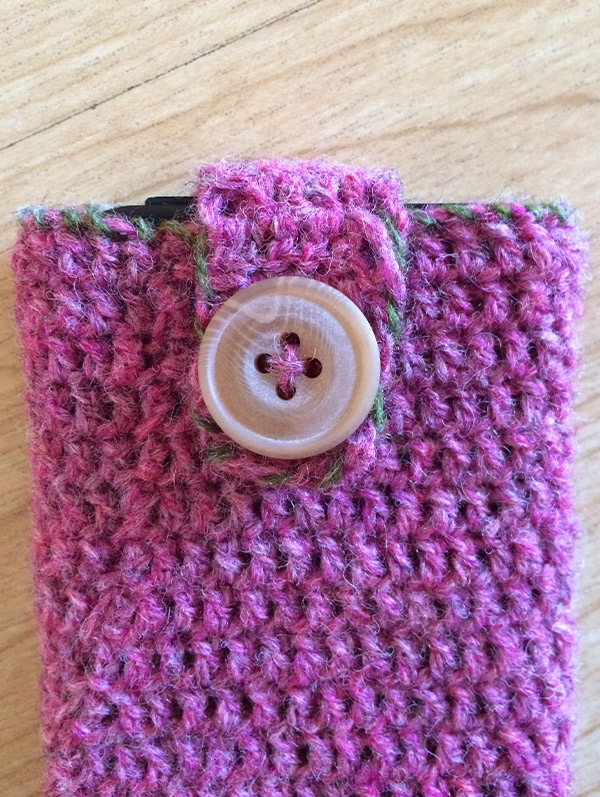
Attaching the Button
Take your button, yarn needle, and a length of yarn.
Put your cell phone inside the pouch and hold the flap over.
Using your finger mark the point where the button hole lies on the other side of the pouch.
Thread the needle with your yarn, and sew the button on in the appropriate place.
Embellishing Your Crochet Cell Phone Pouch
Once your pouch is complete you will be able to use to keep your cell phone safe and looking pretty.
But you might well want to personalise it a bit further.
My first attempt doing this was to sew a design onto it. I would be the first to admit that I am not the world’s best at stitching direct designs. In fact, the initial effort is so laughable I thought it would only be fair to share it with you!
Photos demonstrate this a little more clearly than I could in words:
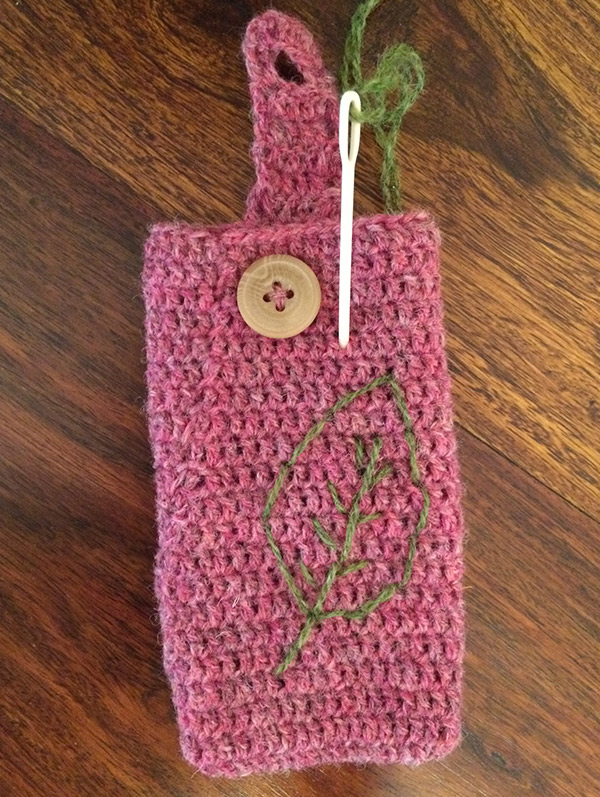
In case you hadn’t worked it out – this was meant to be a leaf…
However if you are better at sewing than I am, you might want to make a prettier pattern on your crochet pouch!
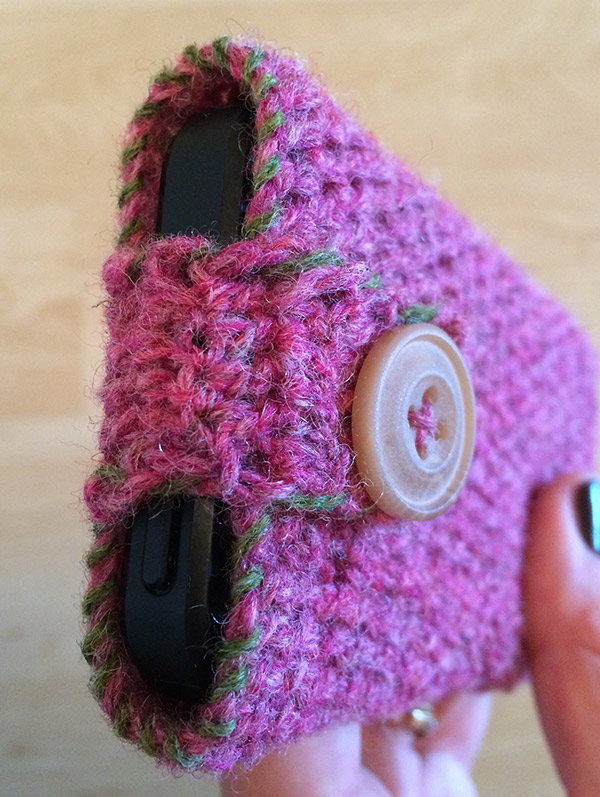
Crochet Cell Phone Pouch Edging
Another way to embellish your crochet pouch is with edging. This is the sort of sewing which thankfully is more my speed.
Taking the green yarn I worked a blanket stitch into each stitch around the top edge of the pouch. I think it’s worked out well, and I’m quite pleased with the result.
I hope you enjoy making this quick and simple crochet cell phone pouch. You can share photos on my crochet facebook page, I’d love to see them!
Happy Crocheting! x