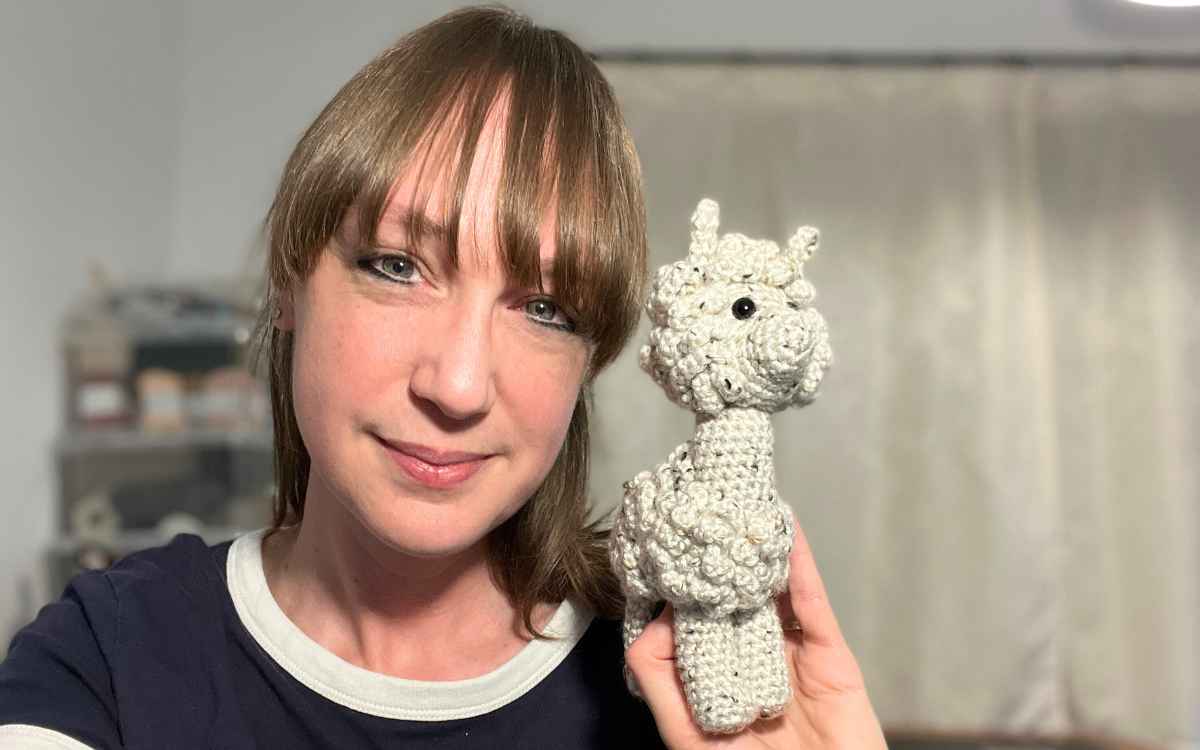
Crocheting an Amigurumi Alpaca – Free Pattern
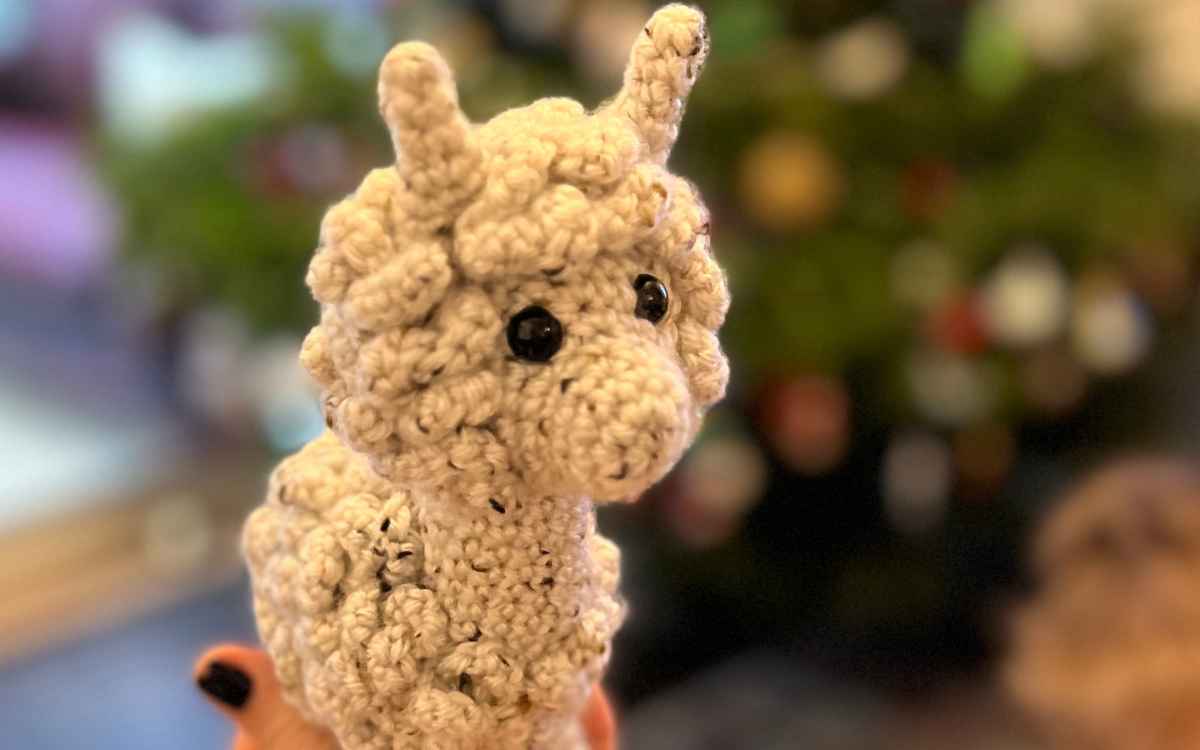
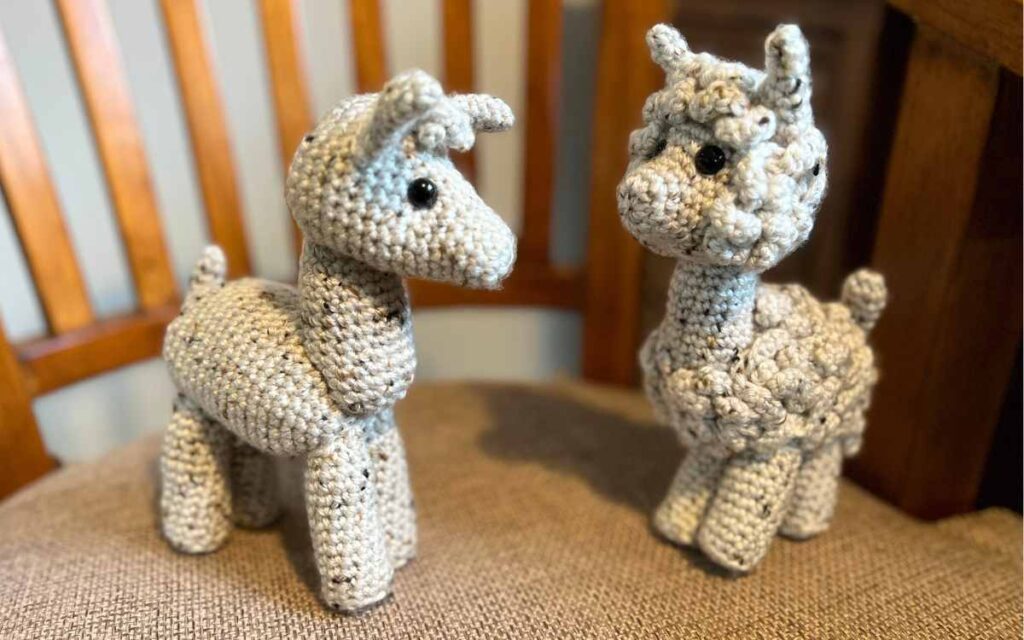
This crochet alpaca pattern is suitable for beginners to crochet through to amigurumi experts, with no color changes and simple, clear instructions. And it is quicker than you’d think to crochet that curly coat!

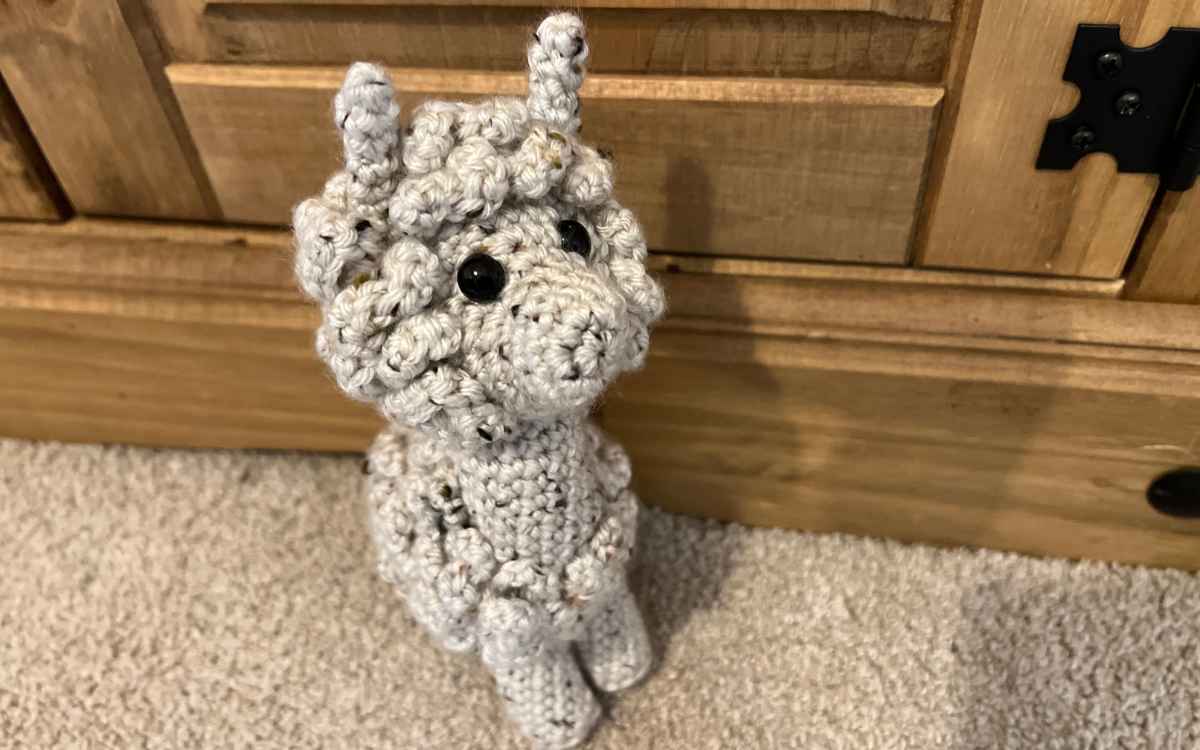
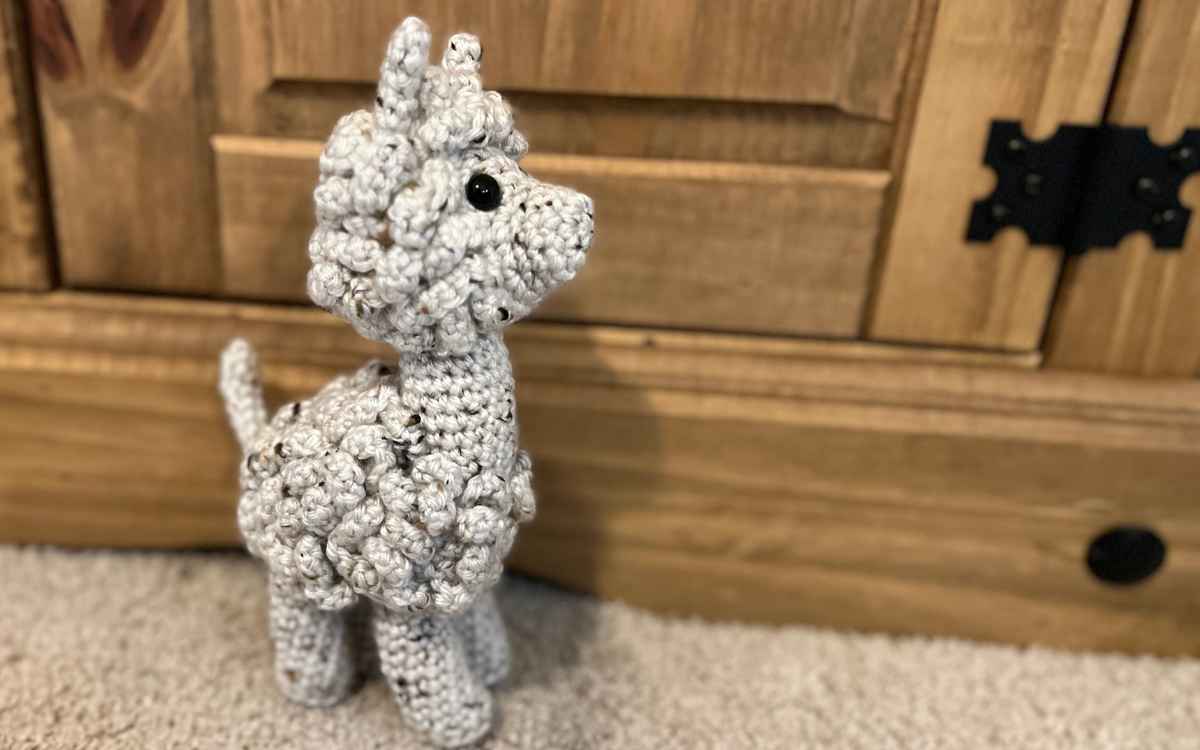
I’ve styled this crochet alpaca pattern similarly to my crocheted sheep, with woolly fur, but I’ve added a fun twist to the eyes to give it that classic alpaca expression. You can even crochet your alpaca a llama friend when you’re done!

Your Crochet Alpaca Kit List
- 4.5mm crochet hook
- 4mm crochet hook
- Women’s Institute Soft and Smooth Tweed, aran weight, Marl.
- 2 x 10mm safety eyes
- Toy safe stuffing
This crochet pattern uses an aran weight yarn. You should find it works up fine in other yarn weights from DK to Chunky, but you will need to also swap the hook as appropriate and probably the size of the safety eyes too if you change weights.
Pattern Notes and Stitches
This pattern is made up of standard stitches and techniques including:
- Magic circles
- Single crochets
- Chains
- Hand sewing
I will explain each abbreviation the first time I use it in full written English, to help crochet beginners stay on track.
Your Crochet Alpaca Pattern
This pattern is made entirely with the same yarn, but you will switch between the 4mm and 4.5mm hook. All body pieces will be crocheted with your 4.5mm crochet hook, but you’ll crochet the fur with your 4mm crochet hook.
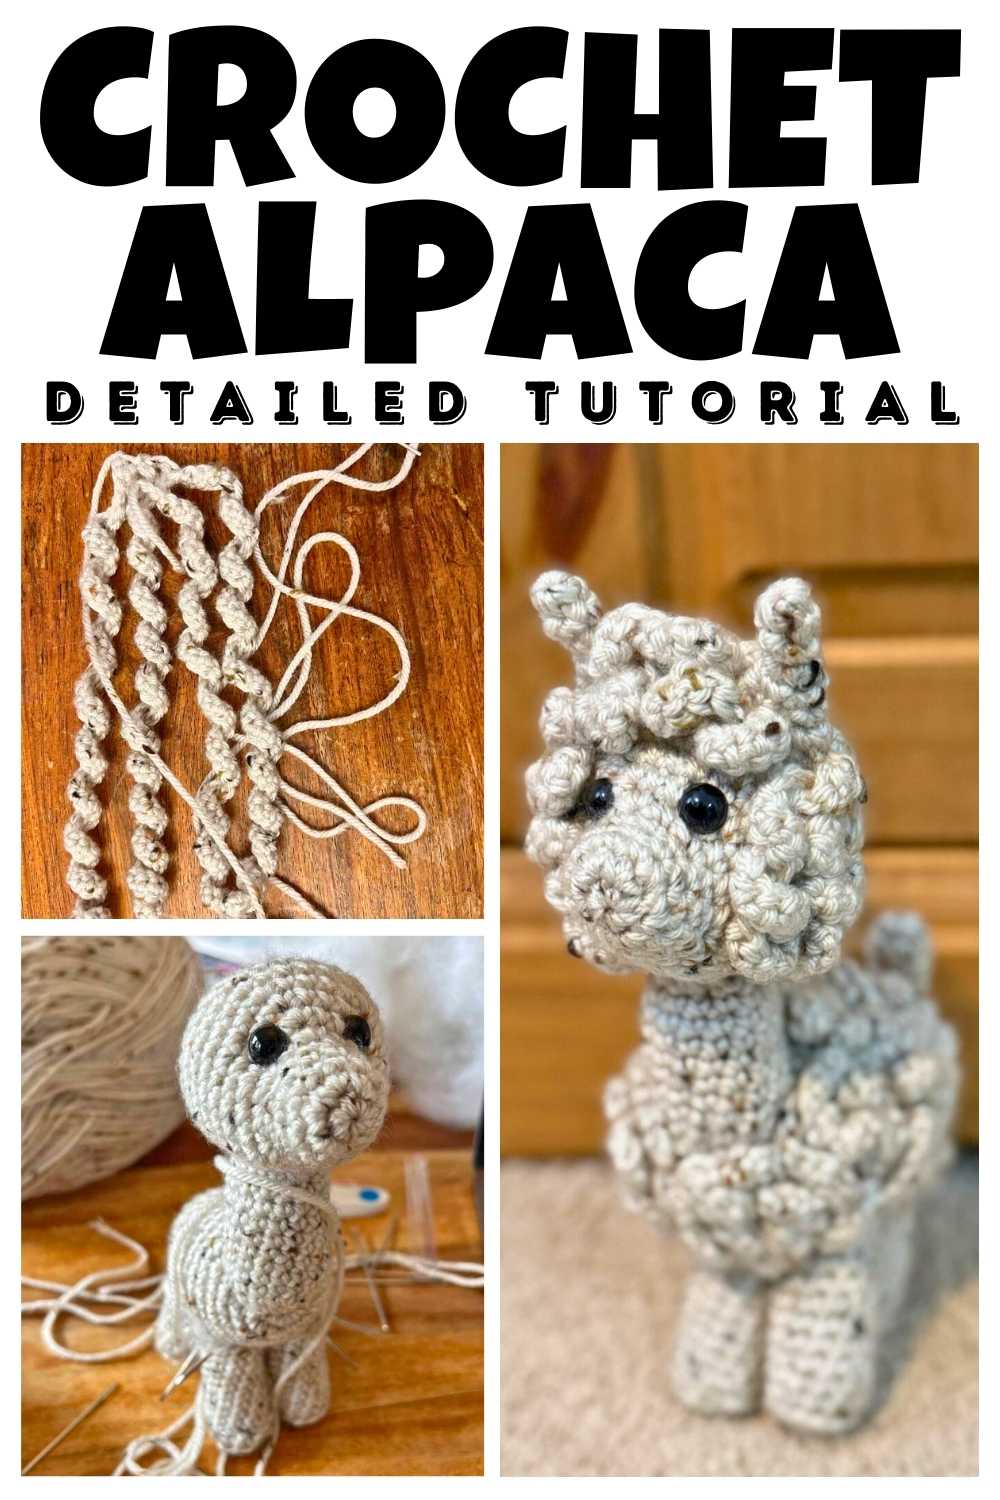
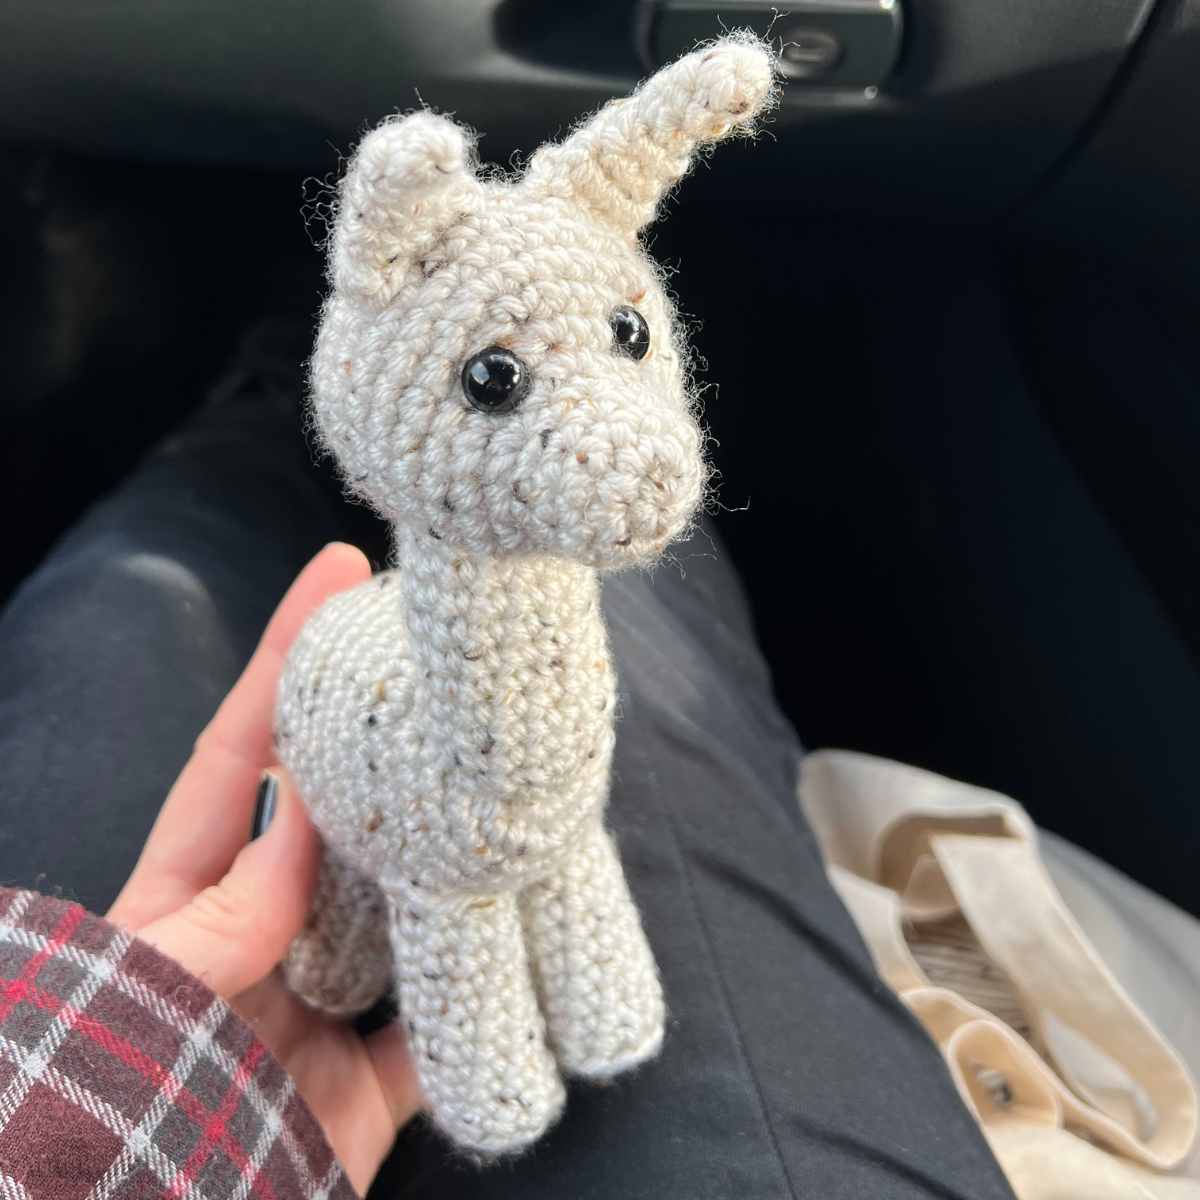
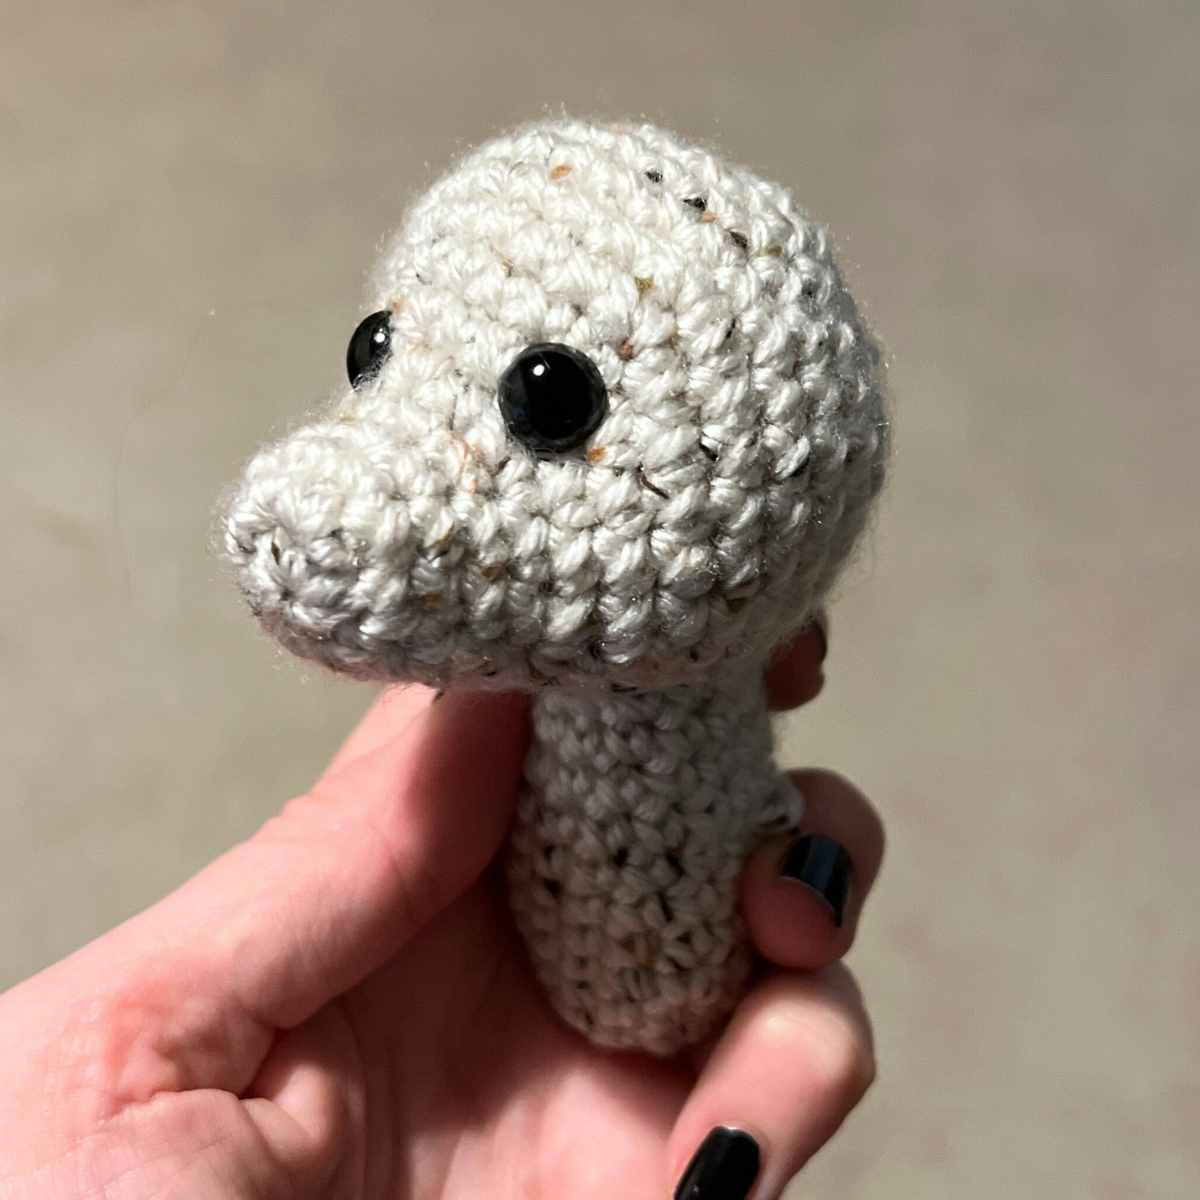
The Crochet Alpaca’s Head
Round 1
Make a magic circle of six stitches (6)
Round 2
Put two single crochets into each stitch of the round.
2sc x 6 (12)
Round 3 – 5
Make one single crochet in each stitch.
1sc x 12 (12)
Round 6
Single crochet once into the first stitch, and twice into the next. Repeat in that pattern for the length of the round.
(1sc, 2sc) x 6 (18)
Round 7
(1sc x 2, 2sc) x 6 (24)
Round 8
(1sc x 3, 2sc) x 2, 1sc x 16 (26)
Round 9
(1sc x 4, 2sc) x 2, 1sc x 16 (28)
Round 10
(1sc x 5, 2sc) x 2, 1sc x 16 (30)
Round 11 – 13
1sc x 30 (30)
Round 14
Single crochet once in the first three stitches, then use one single crochet to join the next two stitches together. Repeat for the duration of the round.
(1sc x 3, sc2tog) x 6 (24)
Round 15
(1sc x 2, sc2tog) x 6 (18)
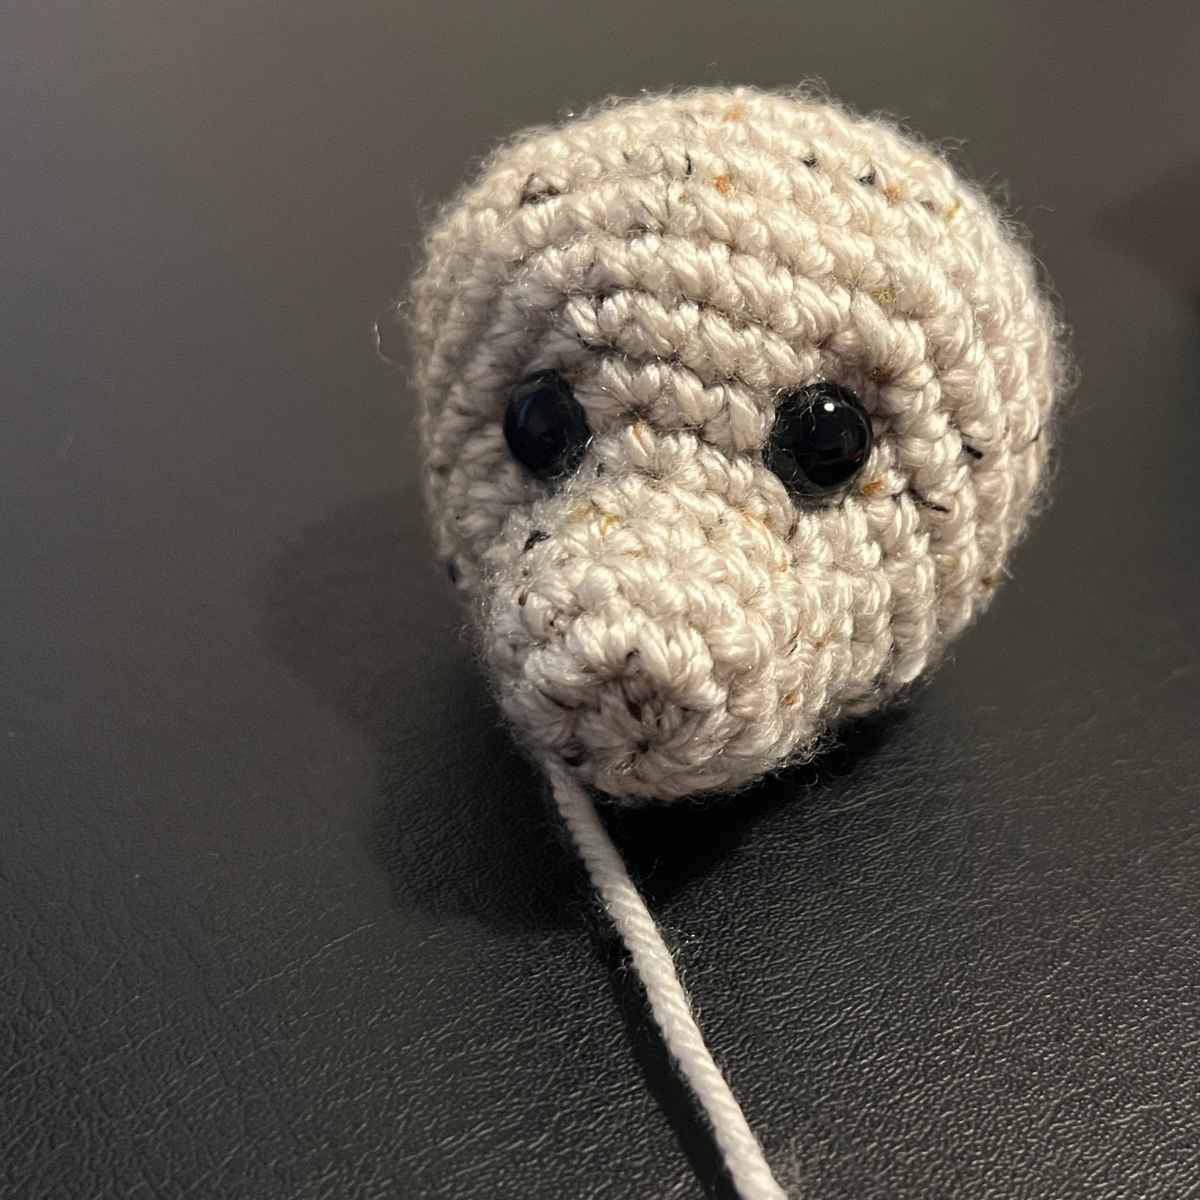
You’ll now need to attach your safety eyes, and with a small amount of thread loop them together slightly to give the indented expression.
Round 16
(1sc, sc2tog) x 6 (12)
You can now fill the head with toy stuffing, being careful to put a little stuffing in the muzzle so it doesn’t get left empty.
Round 17
Sc2tog x 6, then hand sew closed.
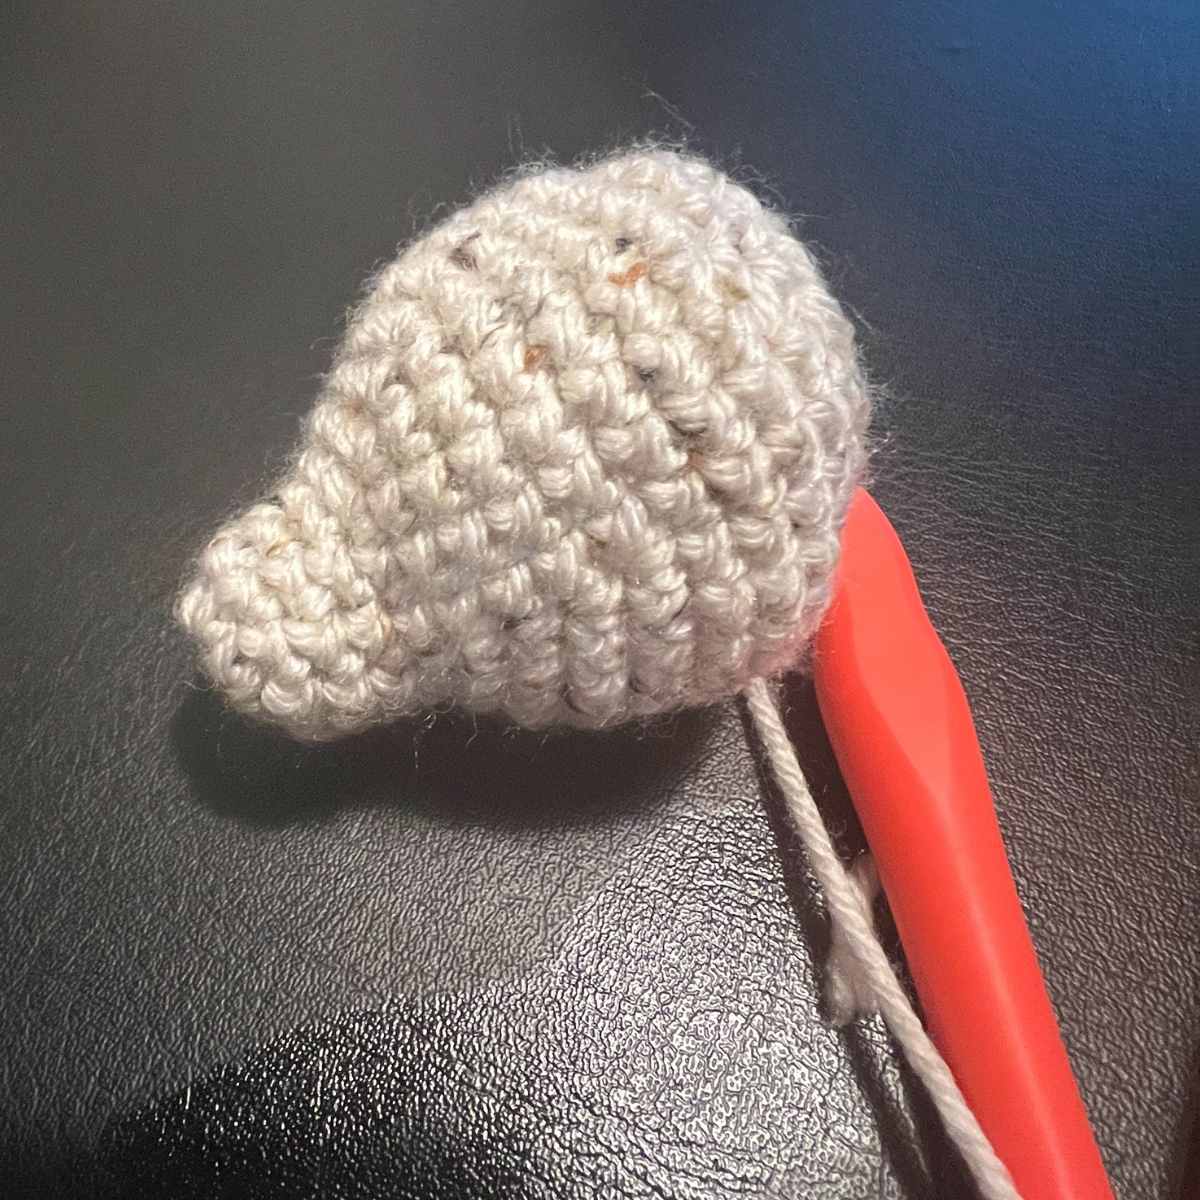
Crochet Alpaca Ears
Round 1
Make a magic circle of four stitches
Round 2 – 3
1sc x 4 (4)
Round 4
1sc, 2sc, 1sc, 2sc (6)
Round 5 – 6
1sc x 6 (6)
Round 7
2sc x 6 (12)
Sew your two ears into either side of the alpaca’s head, lining them up to face forwards towards the eyes.
Crocheting the Neck
Round 1
Make a magic circle of six stitches (6)
Round 2
2sc x 6 (12)
Round 3
(1sc, 2sc, 1sc x 2) x 3 (15)
Round 4 – 11
1sc x 15 (15)
Round 12
(1sc, sc2tog, 1sc x 2) x 3 (12)
Fill with toy stuffing.
Round 13
Sc2tog x 6, then hand sew to close.
Sew The Head To The Neck
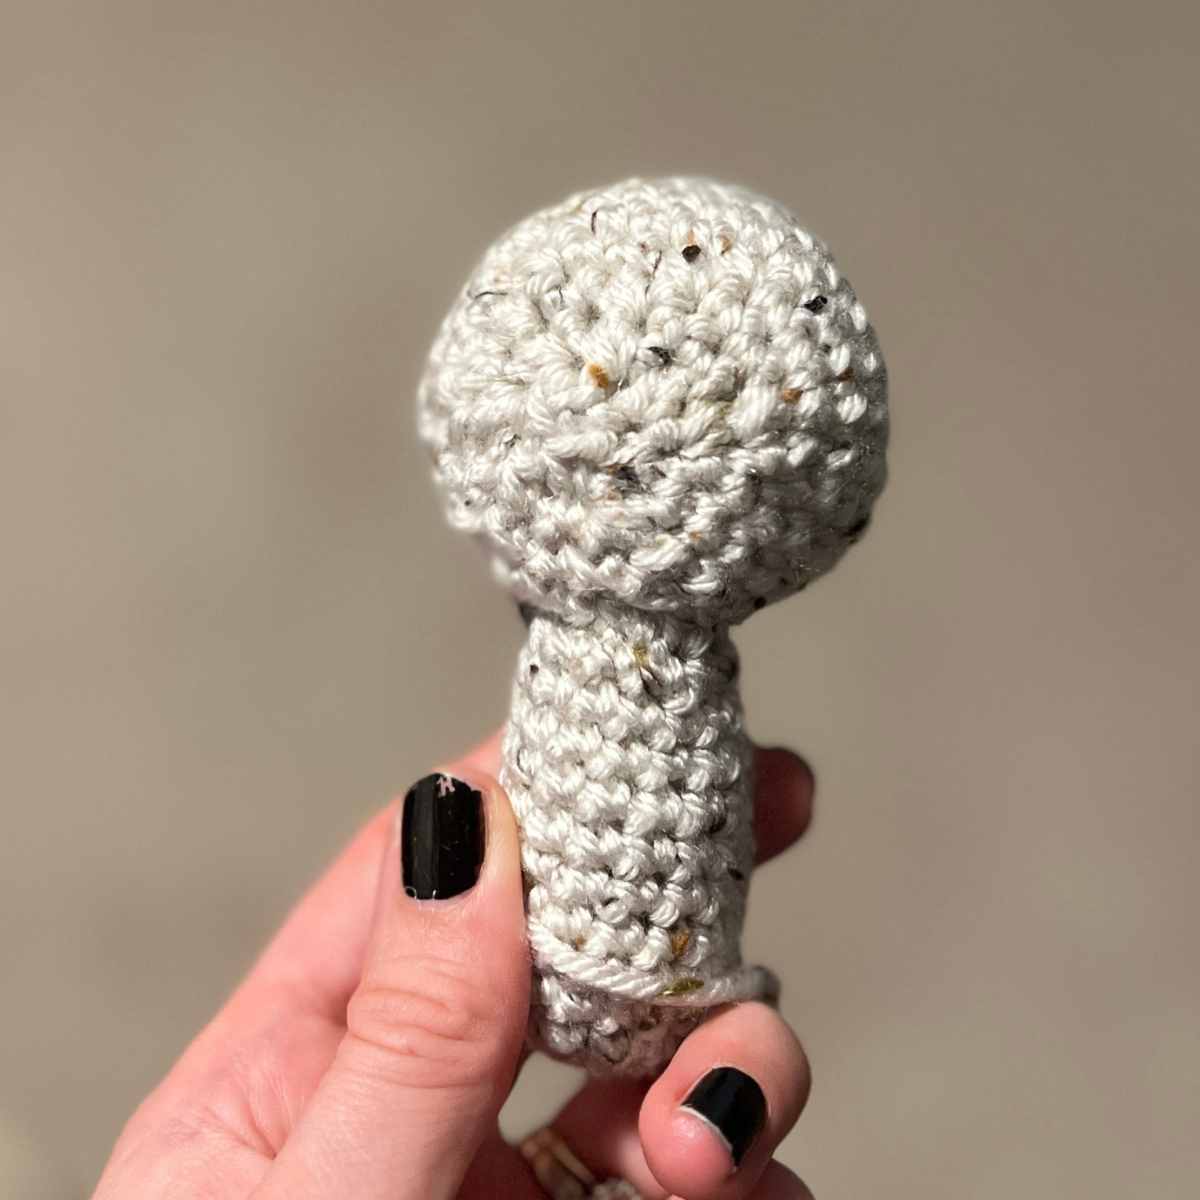
Using the same yarn, thread a thick needle and weave the neck onto the head. Make sure you line up the eyes so that the head is sitting symmetrically on the neck. The muzzle should stick forward, and the neck should line up with the back of the head.
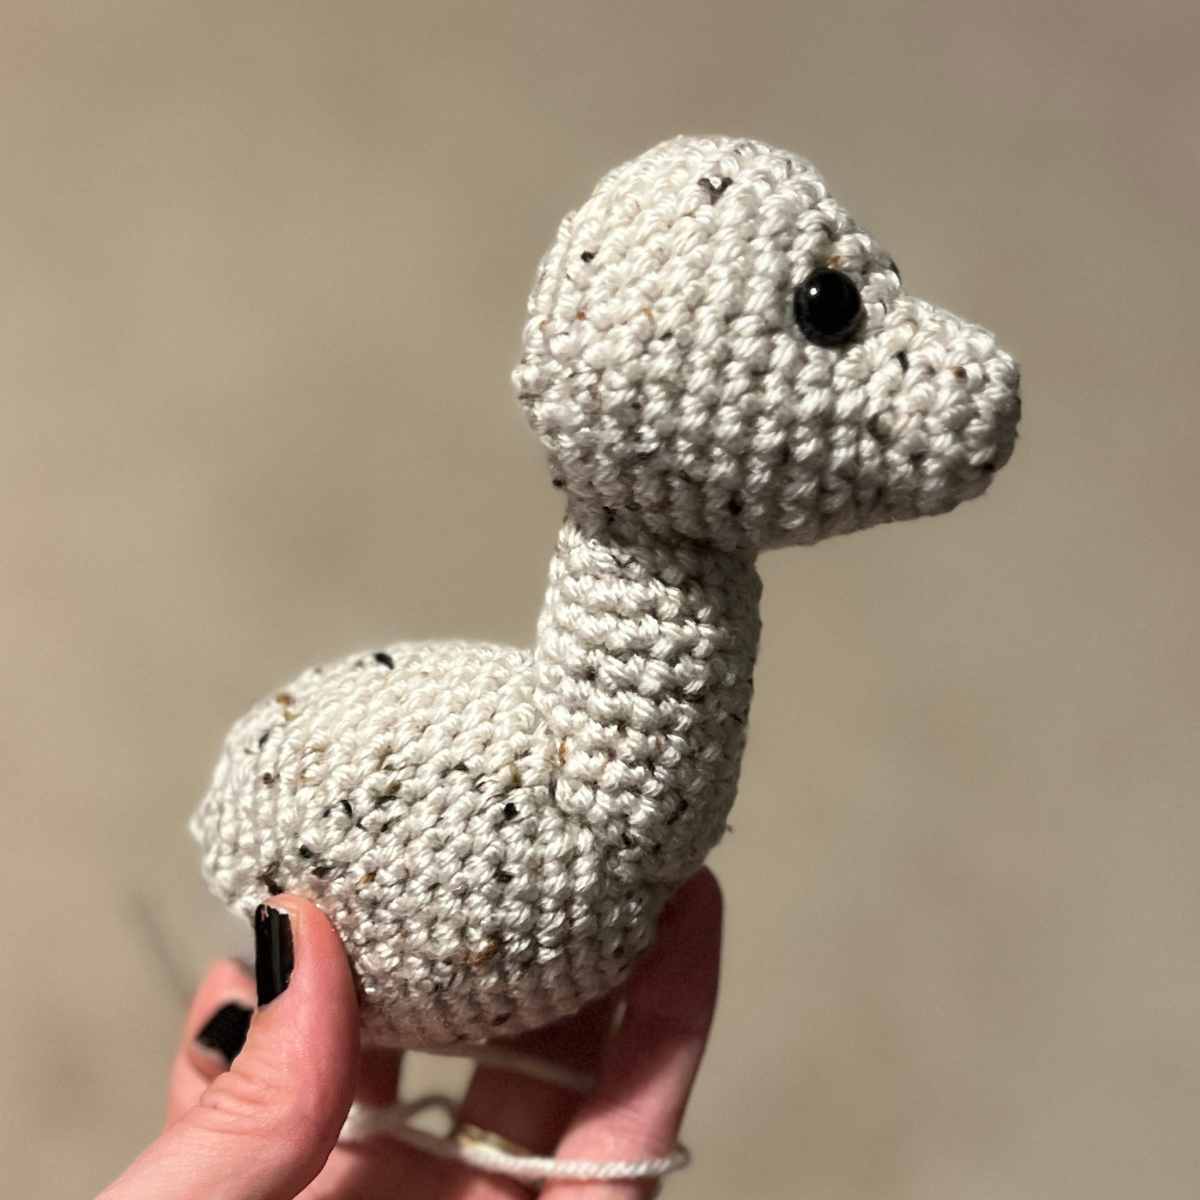
Crochet Alpaca’s Body
Round 1
Make a magic circle of eight stitches (8)
Round 2
2sc x 8 (16)
Round 3
(1sc, 2sc) x 8 (24)
Round 4 – 5
1sc x 24 (24)
Round 6
(1sc x 2, 2sc) x 8 (32)
Round 7 – 12
1sc x 32
Round 13
(1sc x 2, sc2tog) x 8 (24)
Round 14 – 15
1sc x 24 (24)
Round 16
(1sc, sc2tog) x 8 (16)
Sew The Neck Onto The Body

Before stuffing, you’ll want to sew your neck onto the body. Line the bottom of the neck to the central magic circle of the body. Sew the neck onto the body, slightly wrapping the body around the neck.
Round 17
1sc x 16 (16)
Round 18
Sc2tog x 6 then hand sew to close.
Back Legs
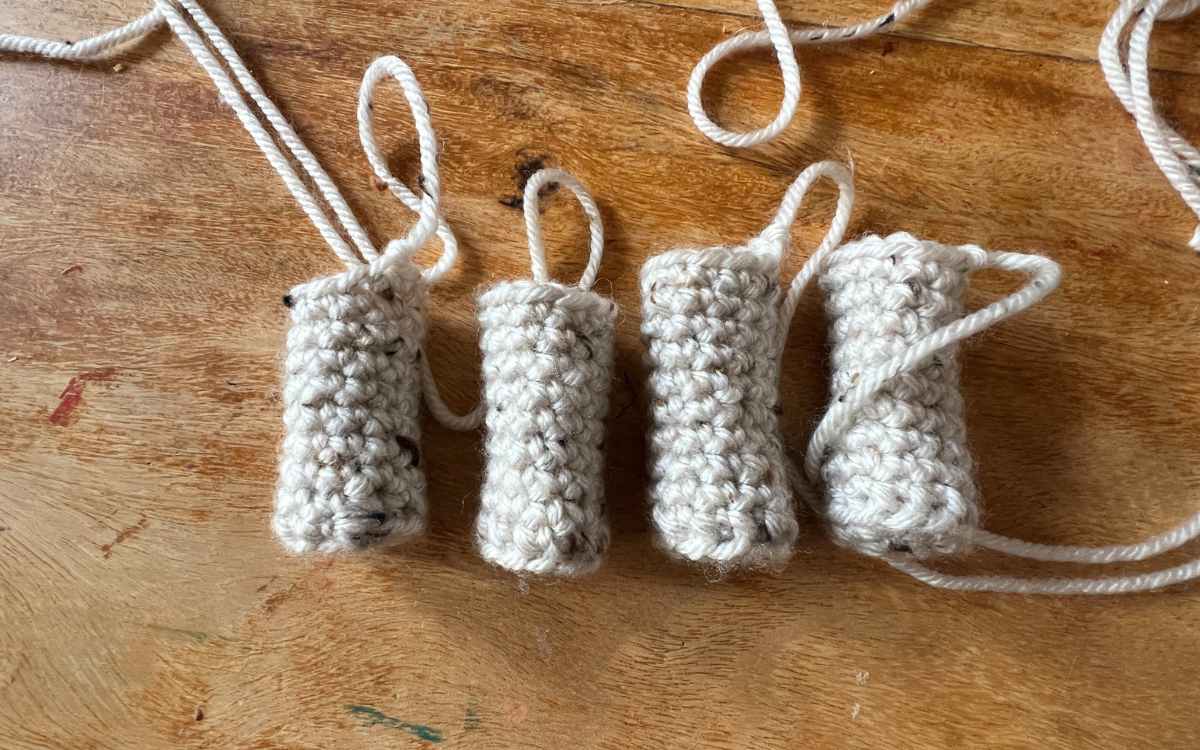
You are going to make your back legs slightly shorter than the front. This will tip your crochet alpaca’s head back a little, putting the weight of the heaviest part further towards the center of the toy. This will help it to stand more securely when it’s finished.
Round 1
Make a magic circle of six stitches (6)
Round 2
2sc x 6 (12)
Round 3
1sc x 12 into the back loop only (12)
Round 4 – 11
1sc x 12 (12)
Slip stitch into the next stitch, and tie off a long train of thread, ready for you to sew later.
Front Legs

Your front legs will be a little longer than the alpaca’s back legs, and the final round will be a partial round.
Round 1
Make a magic circle of six stitches (6)
Round 2
2sc x 6 (12)
Round 3
1sc x 12 into the back loop only (12)
Round 4 – 12
1sc x 12 (12)
Round 13
1sc x 6 (12)
Slip stitch into the next stitch, and tie off a long train of thread.
Sewing Your Alpaca’s Legs Onto The Body
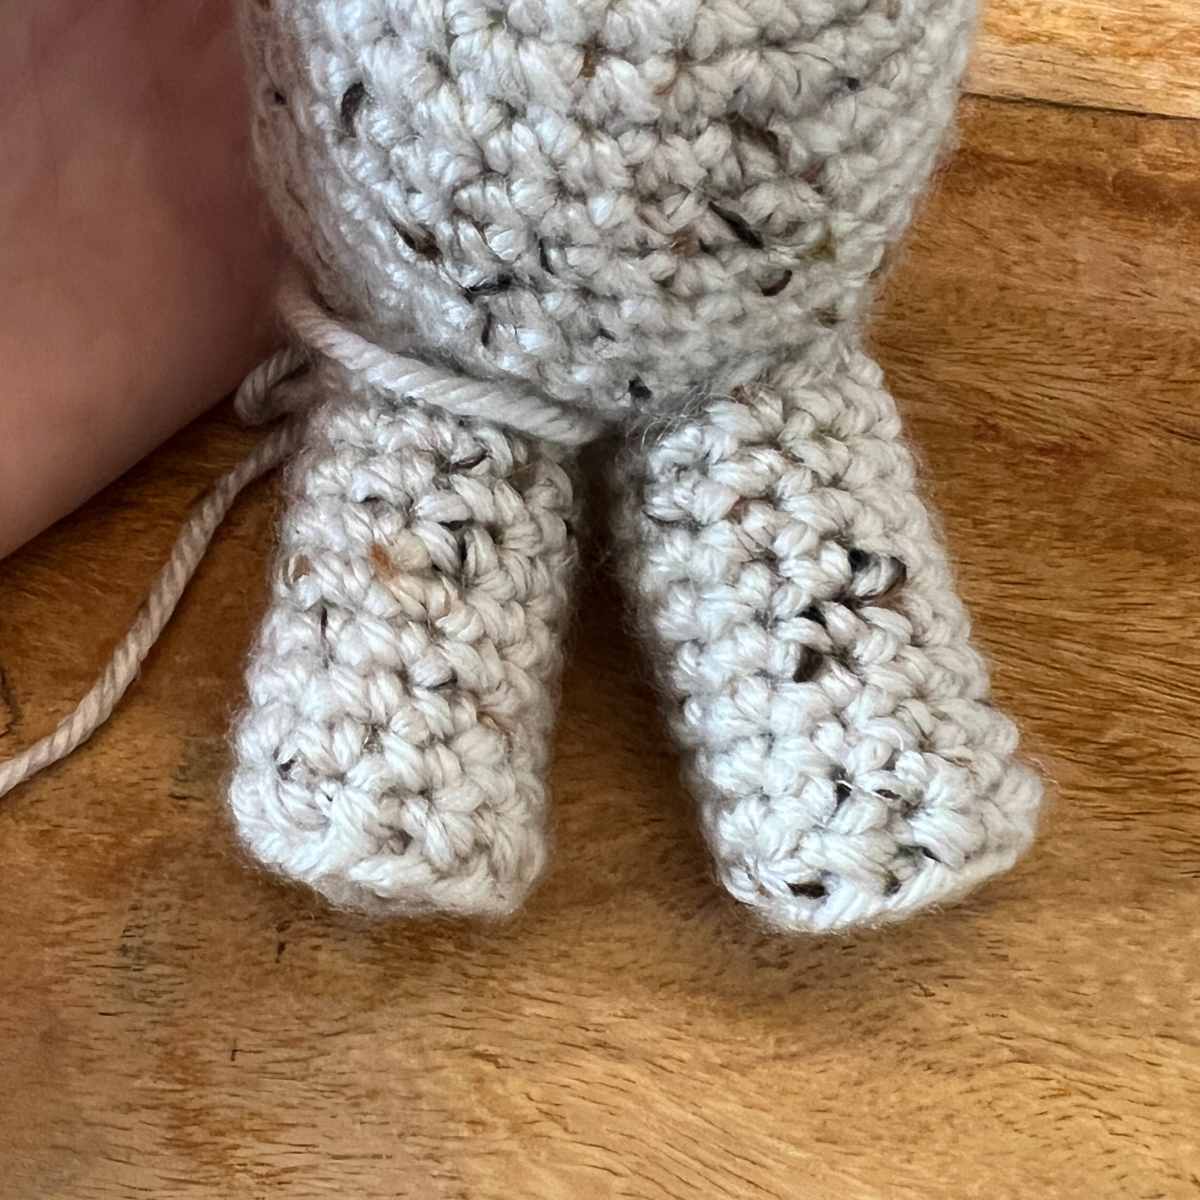
First you’ll need to stuff your amigurumi alpaca’s legs. Use small blobs of filler, pushing them down into the leg gently so that it is completely stuffed but not over filled.
Place the longer legs at the front of the body, and the shorter legs to the rear. Weave in and out to sew them on securely.
Crocheting Your Tail
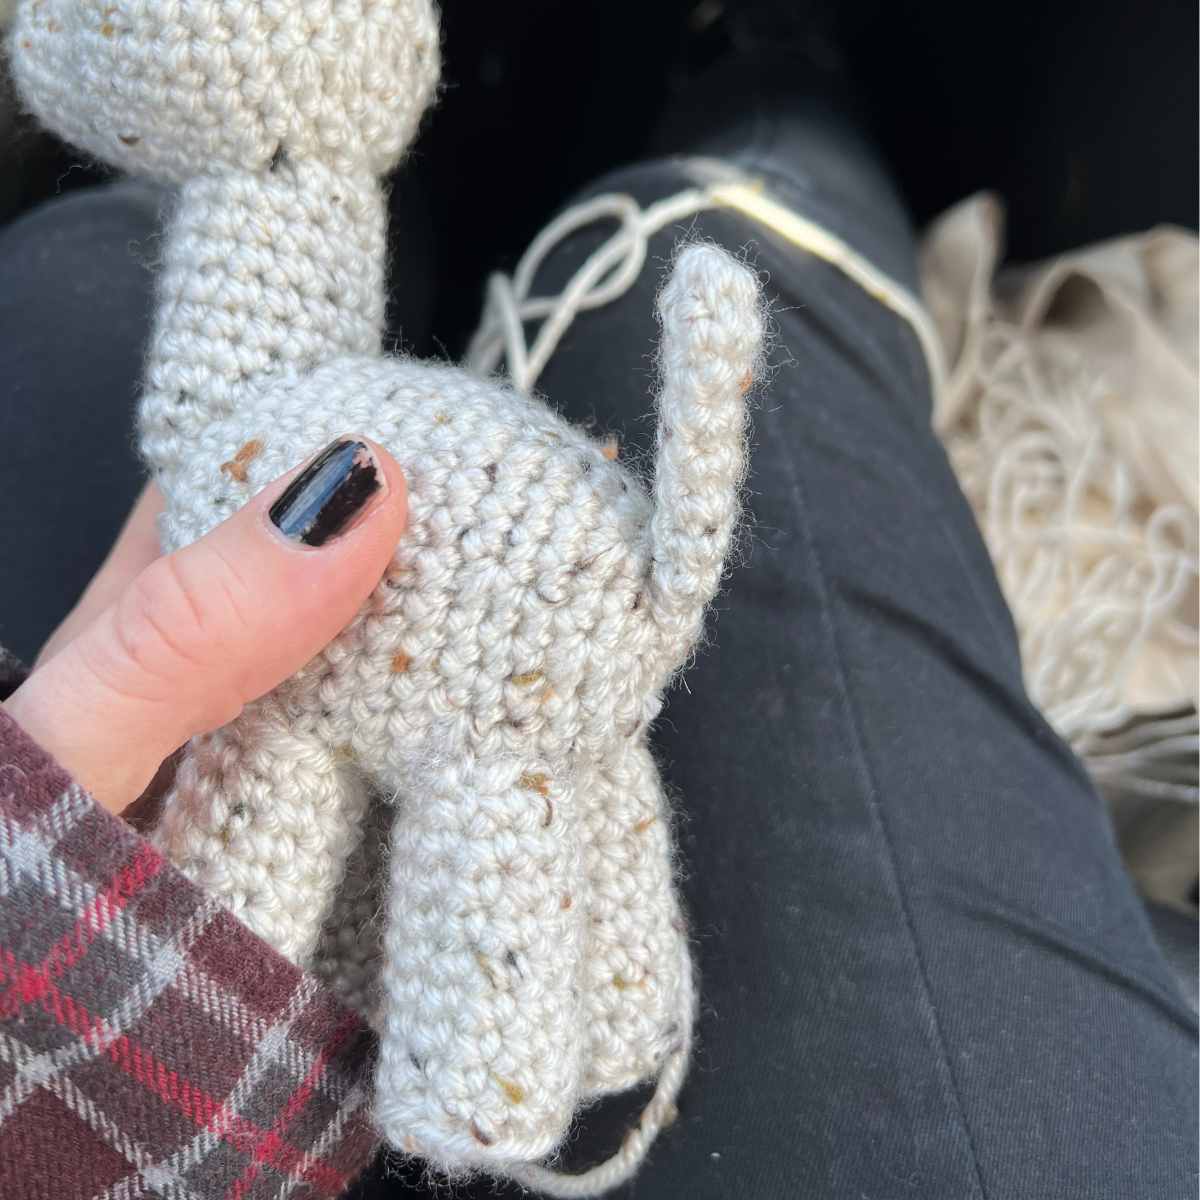
Your alpaca needs a tail!
Round 1
Make a magic circle of six stitches
Round 2 – 11
1sc x 6 (6)
Sew The Tail Onto The Back End
Hand sew the based of the tail directly onto the back end of your alpaca toy.
Crochet Alpaca Fur
You are going to crochet your alpaca some fur by putting single crochets into long chains, then hand sewing them onto the body in groups. You can learn the method in this video with my crochet sheep pattern.
I recommend making the chains in four groups or four connected chains, two for the head and the remaining two for the body sections.
Crochet Fur Group 1
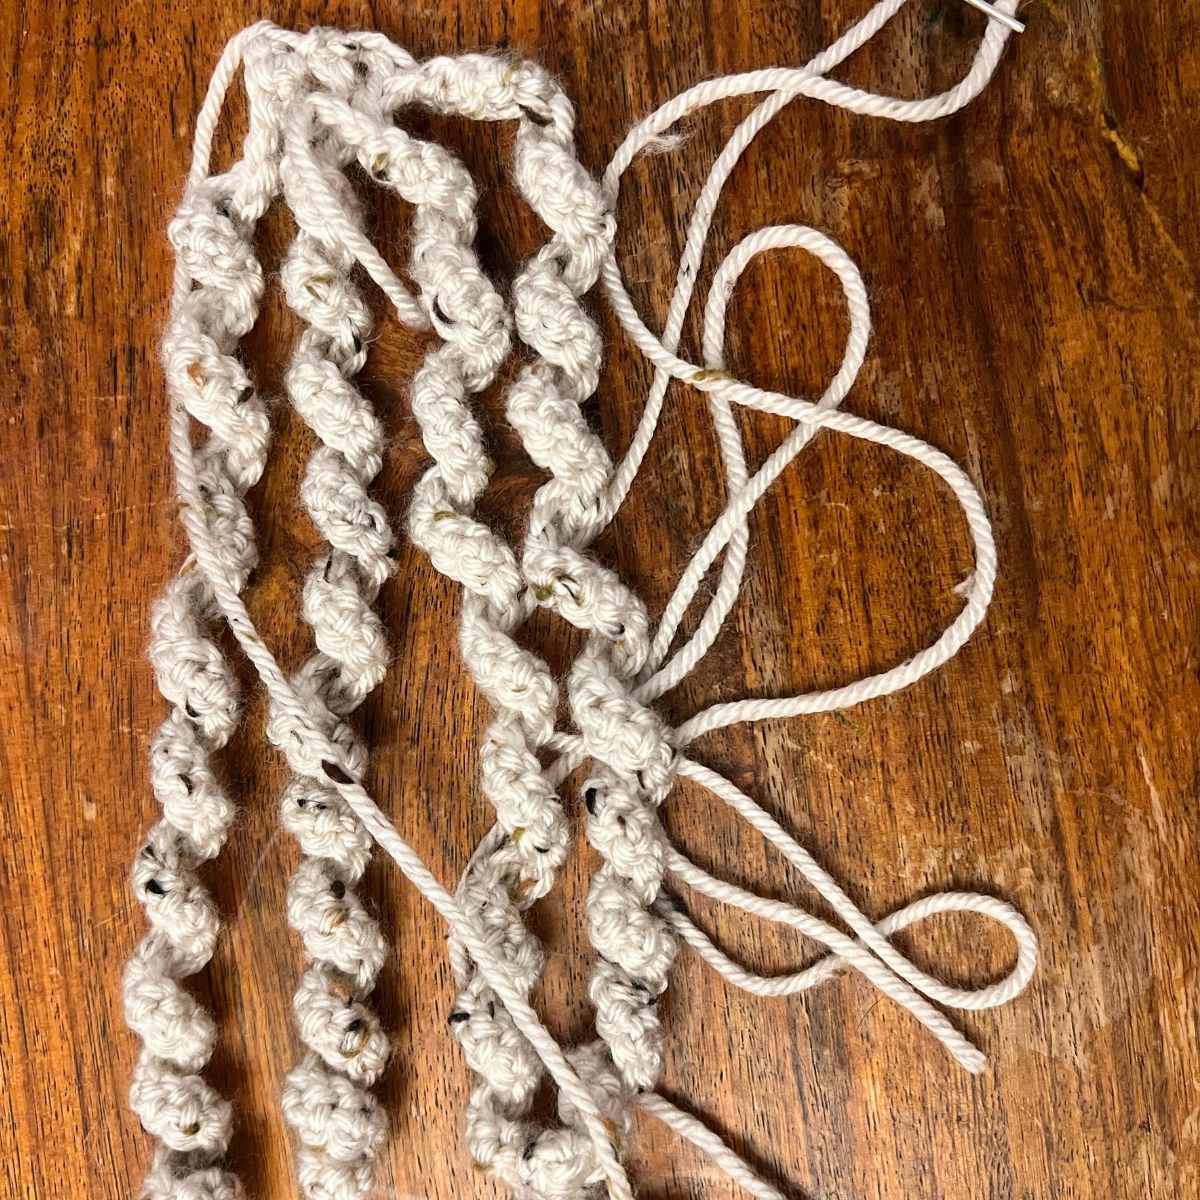
- *Chain 51
- Skip the first loop, single crochet into each remaining chain
- Repeat from * three times
Crochet Fur Group 2
- *Chain 71
- Skip the first loop, single crochet into each remaining chain
- Repeat from * three times
Crocheting Your Own Amigurumi Alpaca
When following a crochet pattern, remember it’s okay to move outside of the bounds of your instructions. If you want to! Your alpaca could be multi-colored, it could be covered in curls or have none at all. All of these expressions of your own creativity can come from any of my patterns, and I love seeing photographs of your finished pieces if you’re willing to share them.
Happy Crocheting!
Lucy Kate, x