How To Crochet A Magic Circle
Magic circles are an integral part of my amigurumi crochet patterns, and many of my other patterns too. Although almost all my toy patterns start with a magic circle, I have several different ways of creating one. Today I’ll share my two favorite beginner crochet circle methods.

Your first option is a little trickier, but makes a more closed and complete shape, the second is more of a beginner crochet magic circle easier for new crocheters, but it will leave a gap.
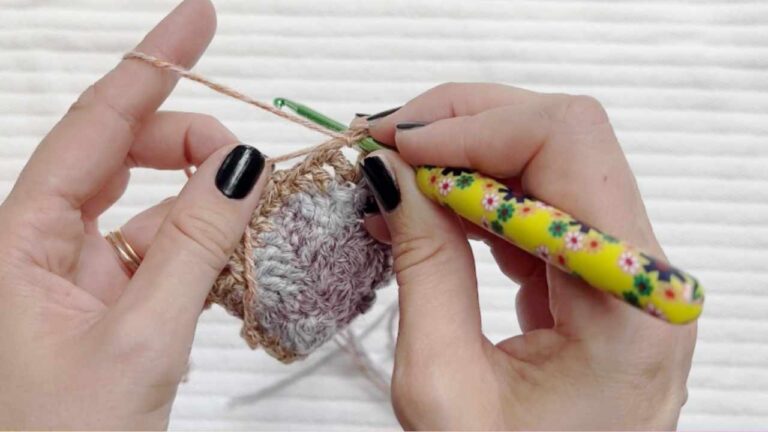
In the instructional video above I show you how to produce my favorite Magic Circle. I recommend you use a bright color, which will enable you to easily see the stitches you create. You might find it helpful to use a slightly larger hook size as well, 5mm or bigger.
Words Matter!
Before we begin, it’s worth mentioning that a lot of patterns will use ‘magic circle’ and ‘magic loop’ interchangeably. Traditionally the magic loop is just the initial two loop structure, and the magic circle is the loop with stitches in closed up. But it’s worth looking carefully at pattern instructions as this is not universal langugage!
Magic Circle Step By Step
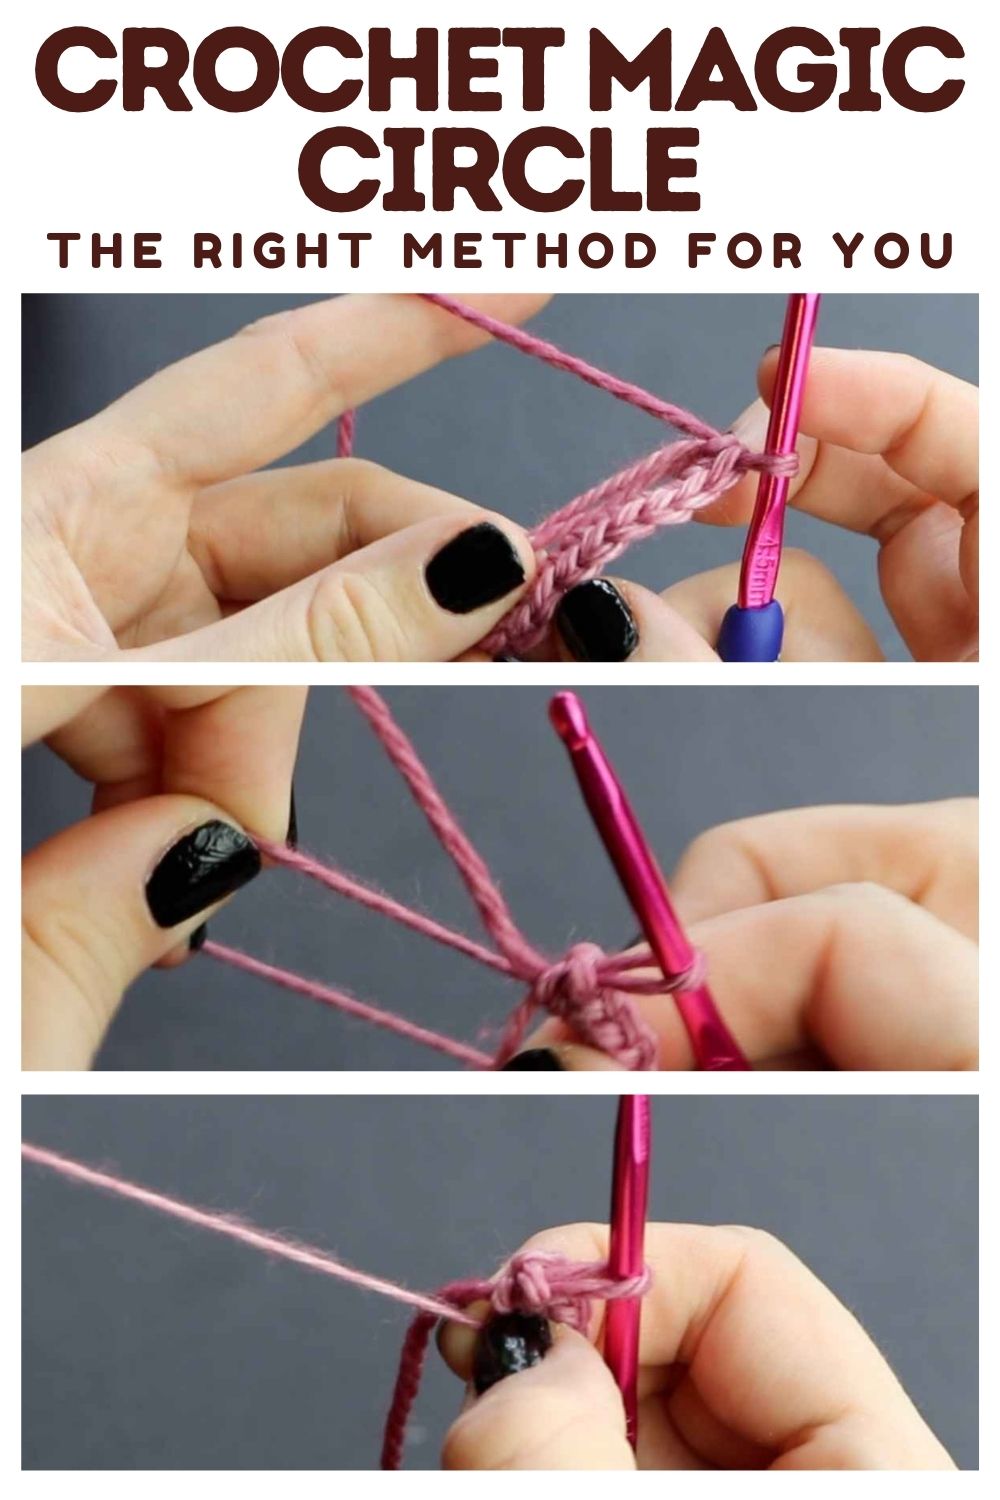
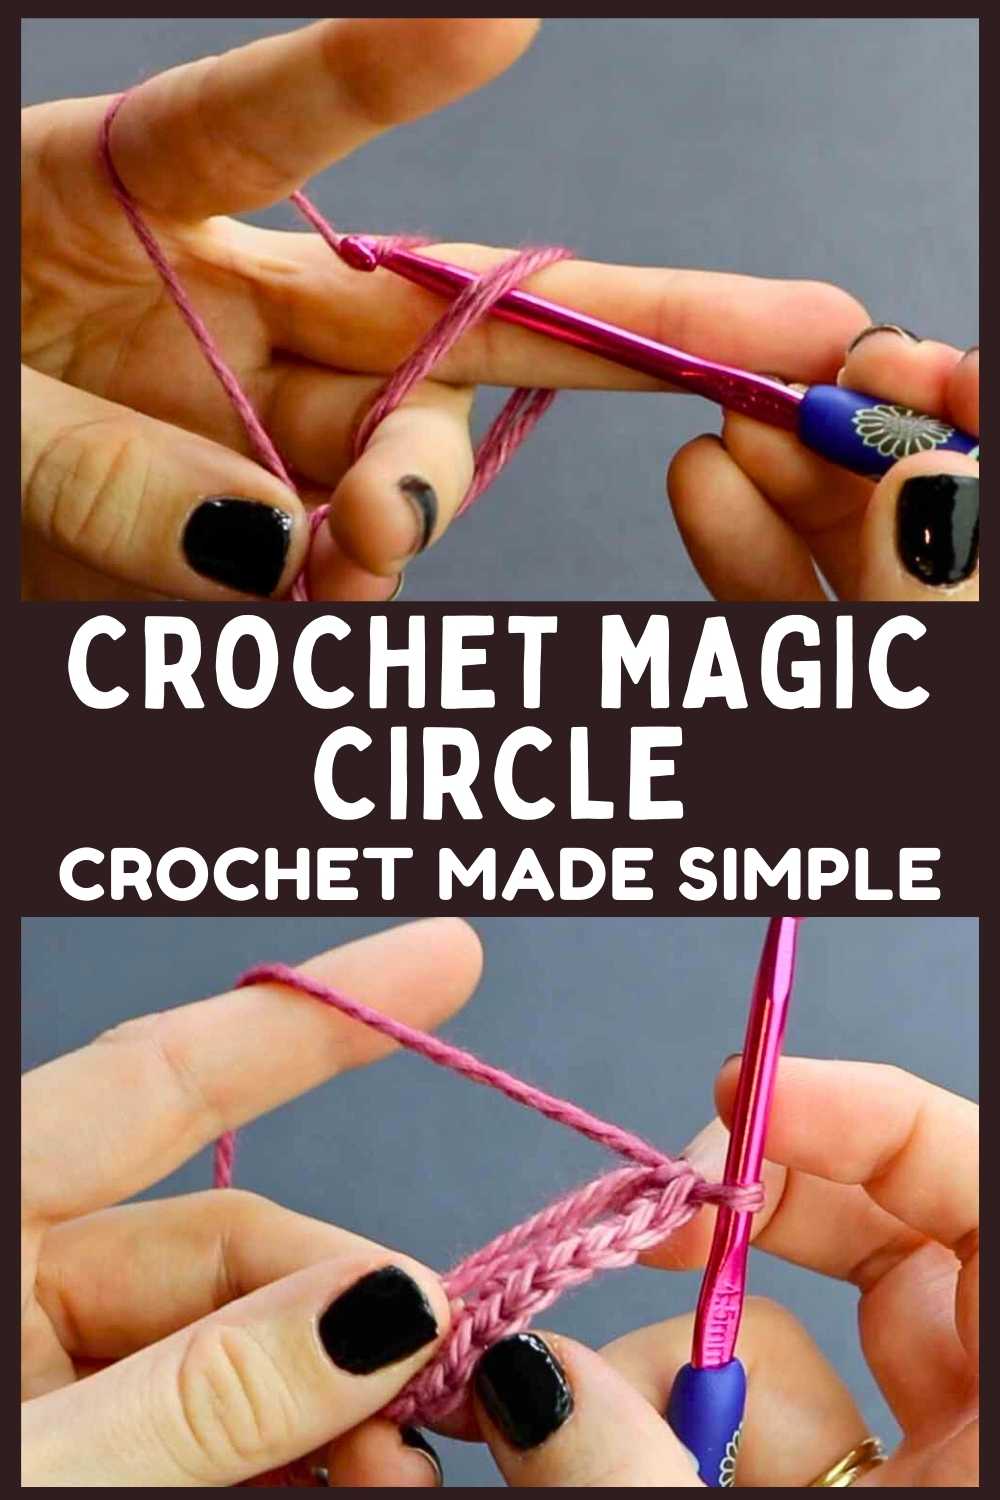
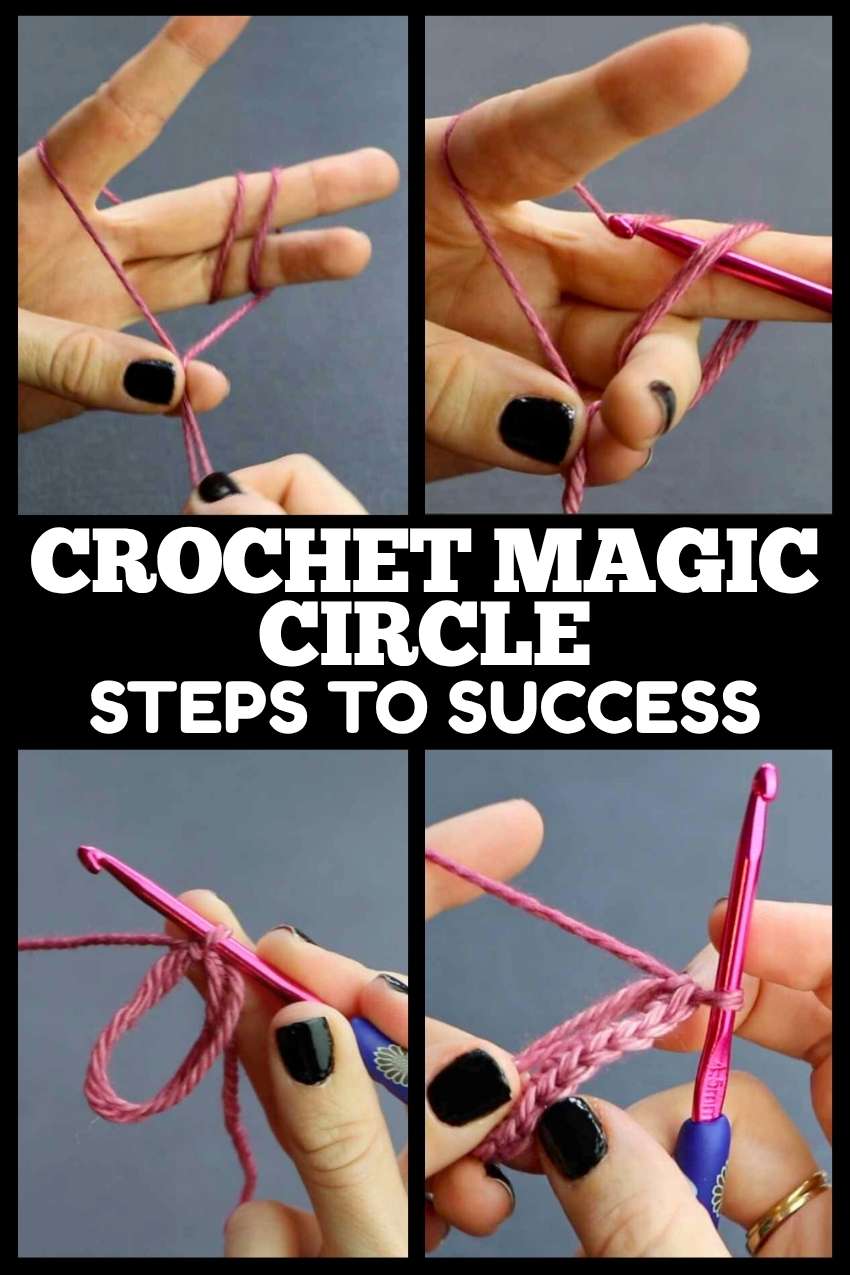
To help you to work along with the video, here are my illustrated written instructions.
I’ll assume you’re right handed, but for left handed crocheters simply reverse the hand used
1. Turn your left hand palm up, spreading out your first and little fingers, but keeping your second and third fingers together.

2. Lay a long tail of yarn over the top of your left hand past your first finger, around the back of the hand and wrap it twice over the joined third and fourth fingers.
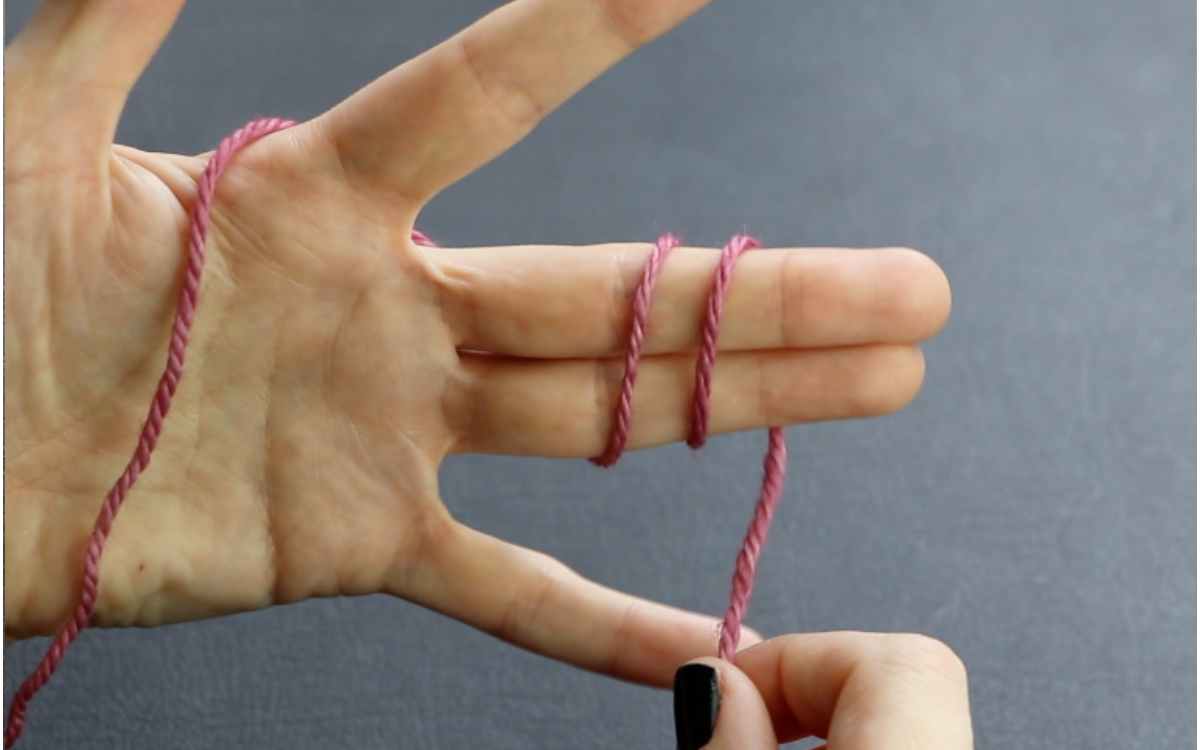
3. Pinch the yarn end and tail end together with your left thumb and little finger.

4. Taking your hook in your right hand, insert the hook through the two loops over those fingers. Hook up the yarn and pull it through the loops.

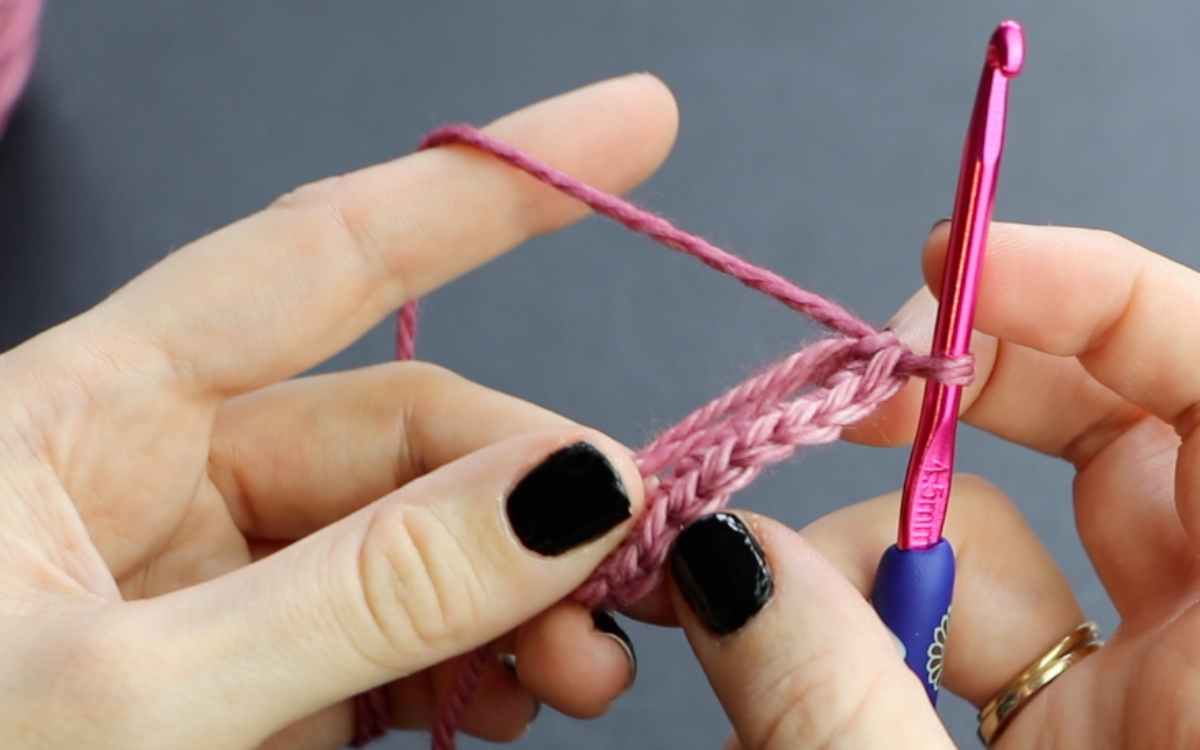
5. Hook up the yarn again, and pull it through the loop on your hook.

6. Now single crochet the number of stitches described by the pattern into the ring. Using the ring in the same way you would work a single crochet into a chain or crocheted stitch.
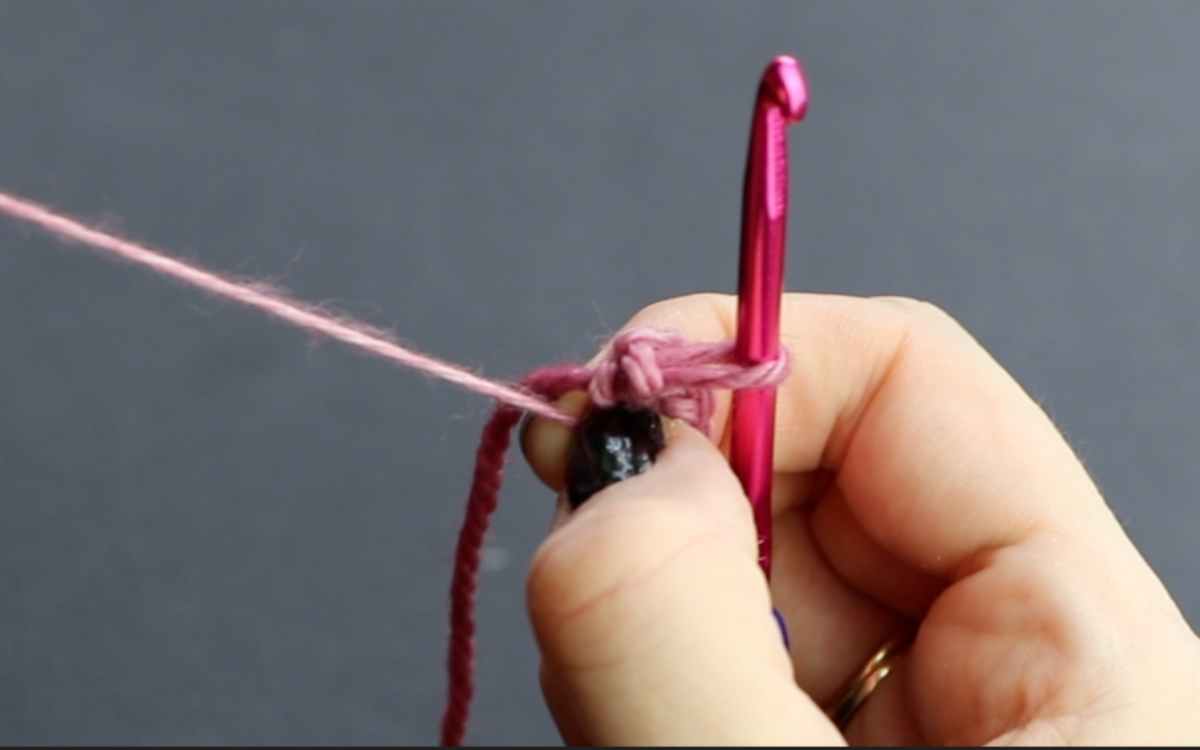
7. You’re now ready to tighten the ring. Turning the stitches you’ve just made to face downwards, take the inner ring of the loops and gently pull, pinching the bottom of those stitches with your right thumb and third finger.

8. Now gently pull the tail end of the yarn to close the ring. And you’re done!
Chaining A Crochet Circle
For that that don’t mind a gap in their starting circle, you can make a version of this using a chain. It’s most commonly found in amigurumi when using chenille yarn, which can get stuck if you try to use a traditional magic loop methodology.
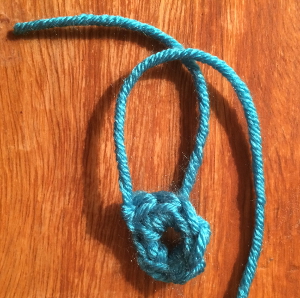
Simply crochet a short chain and slip stitch it together.
The downside is that you can’t tighten up your circle after it’s complete.
This means that you need to pick the number of stitches in the circle which will give an appropriate size for your project.
In some cases you might like to consider using a smaller hook for the central circle than you do for the rest of the piece.
The lack of tightening is an important factor though, and for this reason I would not recommend starting with a chain for making a project that needs stuffing for example. Toys with little holes on the tops of their heads always look slightly odd, and might leak stuffing later on.
Don’t Panic!
Although magic circles can seem a little daunting when you first start out crocheting, you will quickly find that if you practice a few times they are the best method of making a circle for a lot of projects.
Intricate works and toys will be vastly improved by the use of one.