Bullion Stitch Granny Square

I was a bit intimidated when I first tried to bullion stitch crochet, because it uses a different tool I wasn’t familiar with. Fortunately, I was pleasantly surprised with how quickly my hand got used to the feel of the latch hook, and how to use it to make my stitches do something really quite unique.
Bullion stitch isn’t as showy as star stitches, or as three-dimensional as bobble stitch. But it’s very distinctive, and no other stitch can pass for it.
And boy is bullion stitch slow to work with. Plus it takes a fair amount of practice to make a uniform row of bullion stitches. So if you see a project with bullion stitch granny squares in it, you know some time and experience that can’t be faked went into making it. And you know what? It looks pretty good too!

- What is bullion stitch?
- How to crochet a bullion stitch
- How to make bullion stitches without a latch hook
- Bullion stitch granny square in rounds: pattern
- Bullion stitch granny square in rows: pattern
What is bullion stitch
Put simply, it’s one of these! Or as my 10 year old describes them, “those funny little croissant stitches”.

Bullion stitch features a tightly wound coil of yarn, threaded onto a central core, and held in place with a chain stitch at the top. The coil can have anywhere between 6 and 14 twists in it. But the classic and most widely used number is 7, since 7 twists usually results in a bullion stitch close to the same height as a double crochet stitch. Meaning you can use them next to each other without your working edge getting hopelessly wavy and wobbly.

Crocheting bullion stitch
The first distinctive feature of bullion stitch is that most people set aside their regular crochet hook and use a latch hook to make it instead. Drawing a regular crochet hook neatly through several coils of yarn is really tricky. Unlike drawing it through one or two loops at a time, as in the basic crochet stitches, you can’t do it in one smooth motion. So you have to manipulate each loop off the hook individually. And inevitably some end up being tight, whilst others end up loose.
Enter, a latch hook
If you’ve never seen a latch hook before, behold – your new bullion stitch making best friend.

Latch hooks are also used for making latch-hooked rugs, throw pillows and wall hangings. But we’re going to use it to draw our yarn through several loops at a time, without the hook snagging and getting stuck. The hinged bit beneath the hook swings freely. It pushes open and flush with the shaft when you insert the hook into a stitch. Then when you pull the hook back through the stitch, it swings shut, so that several loops of yarn can slide right off the end of the hook, without getting caught.
How to crochet a bullion stitch
These are the steps for making a bullion stitch:
- Wrap the yarn around the hook 7 times. The yarn comes over the hook towards you , and goes under the hook away from you – exactly the same as ‘yarn over’ in any other stitch.
- Insert the hook through both loops of the stitch you’re making your bullion stitch into. The latch will open as you do this.
- Yarn over, and draw back through. The latch will close as you pull it back through – make sure your working yarn is trapped inside the hook!
- Now slide your new loop back along the hook, to the other side of the latch.
- Yarn over again, and draw through all 8 loops on the hook.
- The loop left on your hook is the core of your bullion stitch. If your tension is too tight and the core is very short, your stitch will look bunched up and bulgy at the end. If your tension is too loose and the core is long, your stitch will look straggly and likely it’s starting to unwind. So check and make any tension adjustments before you move on. I find I need to lift my hook just a millimeter to make my core fractionally longer.

- Yarn over, and draw though the remaining loop on your hook. This chain stitch secures and finishes your bullion stitch. Check your tension again – if this stitch is tight, your bullion stitch will end up coiled up like a cooked shrimp!
Here’s a video showing all those steps together:
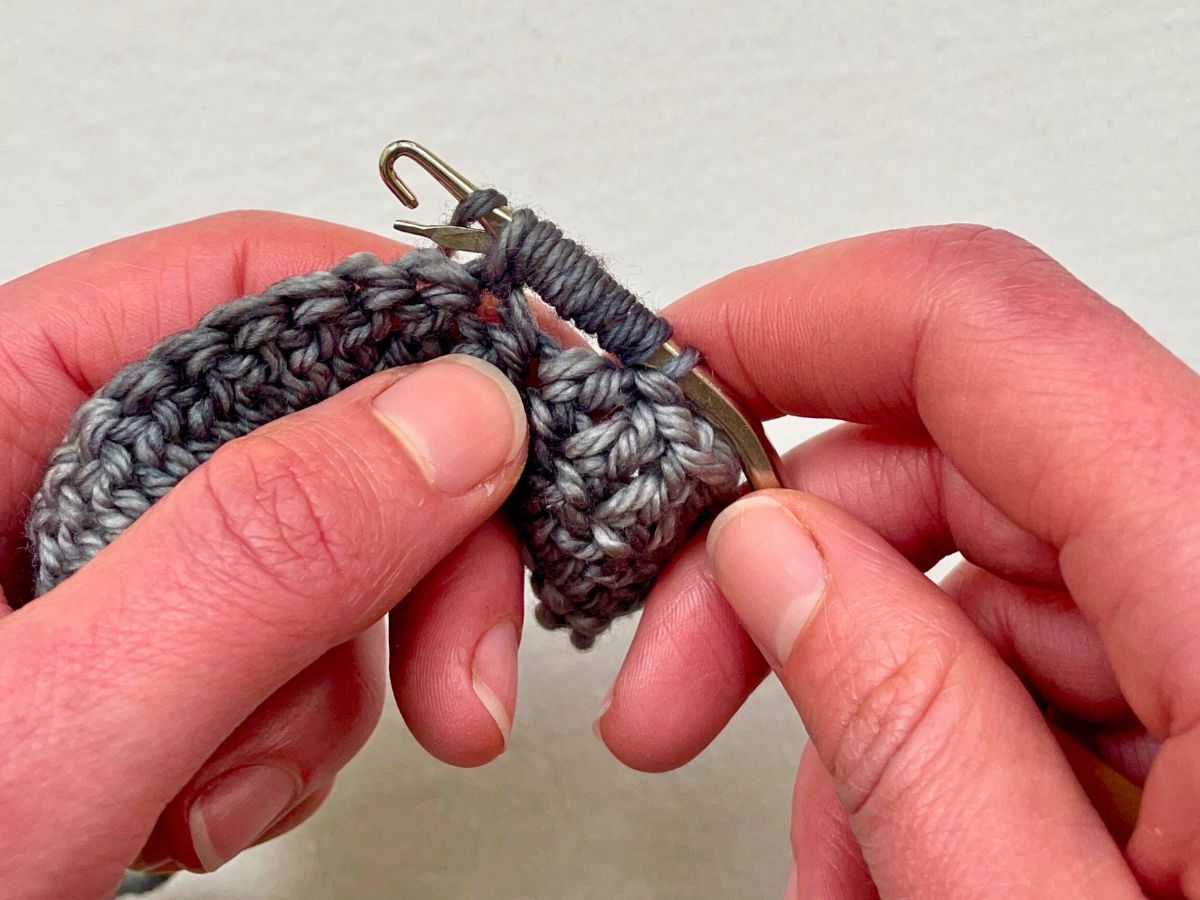
No latch hook? No problem
Let’s quickly have a look at what happens if you use a standard crochet hook. The hook doesn’t slide easily through all eight loops, so you need to pinch one at a time between finger nail and thumb nail, and lift them over the end of your hook.

It’s exceptionally tricky keeping the tension even doing this. The coil tends to end up looking like a tiny typhoon.

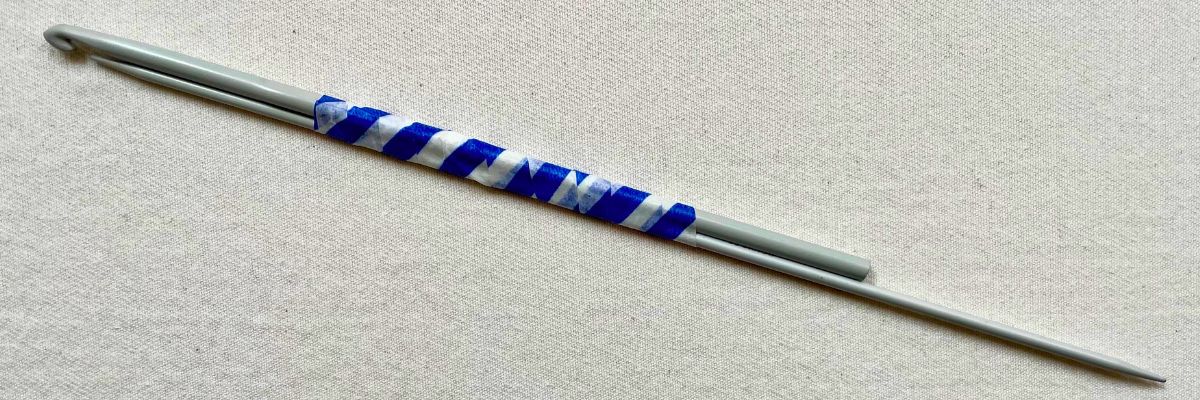
Maybe typhoon stitch should become a thing, but it’s not the effect we’re looking for here! However if you don’t have a latch hook, you can still experiment with bullion stitch. All you need is:
- A second crochet hook, knitting needle, or smooth chopstick
- Washi tape, rubber bands, or hair ties.
I’ve used a small double pointed knitting needle. The trick is to position it so close to the tip of your hook that when you slide all your loops off they slip free of the hook too, without snagging. But you also need to allow just enough space that you can still use your crochet hook to pick up yarn and pull it through.
This hack is handy for testing a sample of bullion stitch, and deciding if you want to use it on a bigger scale. But if you decide to go ahead, it’s worth investing in a latch hook. They only cost about $5, and they make bullion stitch much quicker. And by ‘much quicker’ I still mean pretty slow compared to most other stitches!
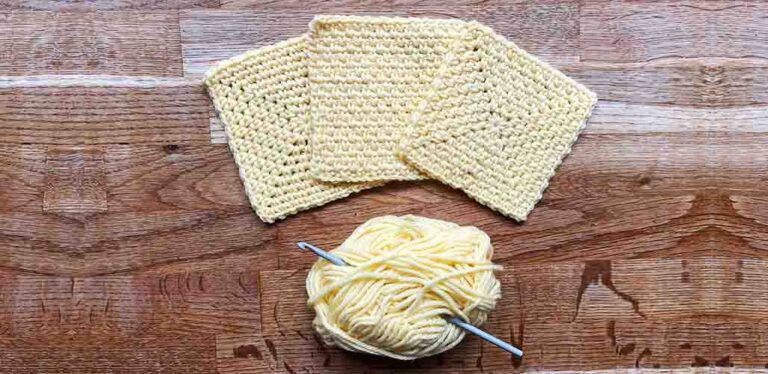
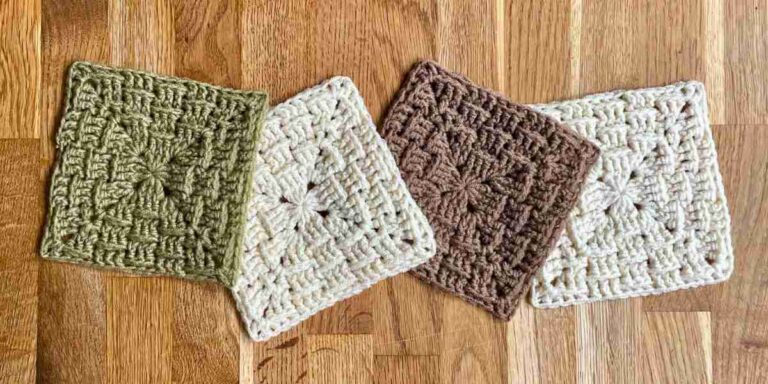
2 bullion stitch granny squares
Bullion stitch works for making granny squares in the round, and in rows. The decorative effect really is beautiful. For example, they would look stunning at the center of a flower granny square. Both types of bullion stitch granny are single sided, meaning they have a right side, and a wrong side. And the trick for making either style look good is to go slow, take your time, don’t rush.
Both patterns use standard US crochet terms. The standard abbreviation for bullion stitch is BS. It’s ok to smirk whenever you see it, I won’t judge.
How to make a bullion stitch granny square in rounds
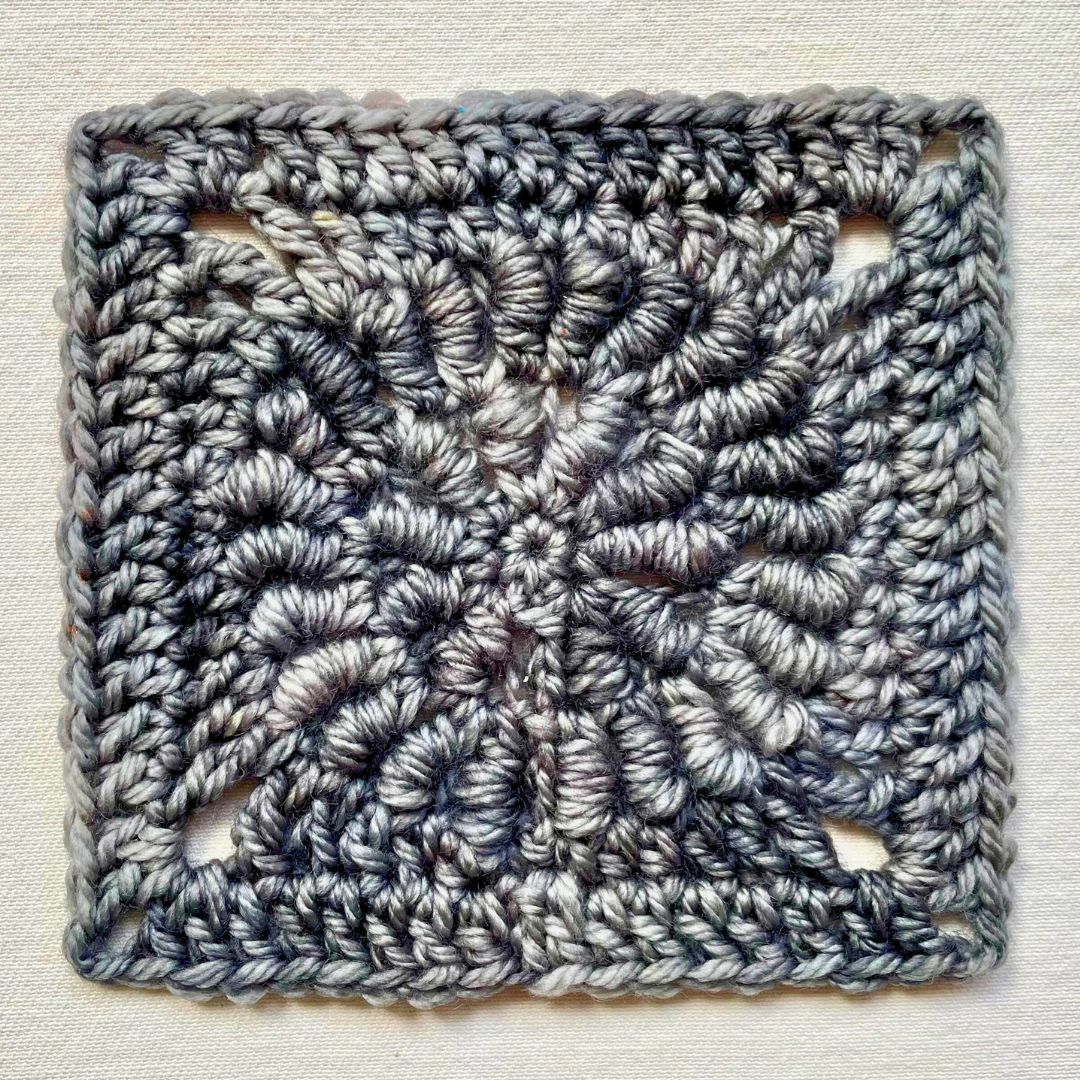
- Make a magic circle, or sc 4 and join with a sl st – crocheter’s choice!
- Round 1: Sc 5, sl st to join. 5 sts.
- Round 2: Ch 3, 2 BS into each st, sl st into first BS to join. This results in 10 bullion stitches, and also 10 chain stitches – for the purposes of the next round we’re going to count all of them. 20 sts.
- Round 3: Ch 3, *BS 4, 2 BS into next stitch* 4 times, sl st into the first BS to join. This results in 24 bullion stitches, and also 24 chain stitches – for the purpose of the next round we’re going to count all of them. 48 sts.
- Round 4: Ch1, sc 1, hdc 2, dc 2, tr 1, ch 2, *tr 1, dc 2, hdc 2, sc 2, hdc 2, dc 2, tr 1, ch 2* 3 times, tr 1, dc 2, hdc 2, sc 1, sl st to first sc. 48 side sts, plus 4 pairs of corner chains.
- Round 5: Ch 3, dc 6, (dc 2, ch 2, dc 2) into corner space, *dc 12, (dc 2, ch 2, dc 2) into corner space* 3 times, dc 6, sl st to first dc to join. Cut yarn and weave in ends.
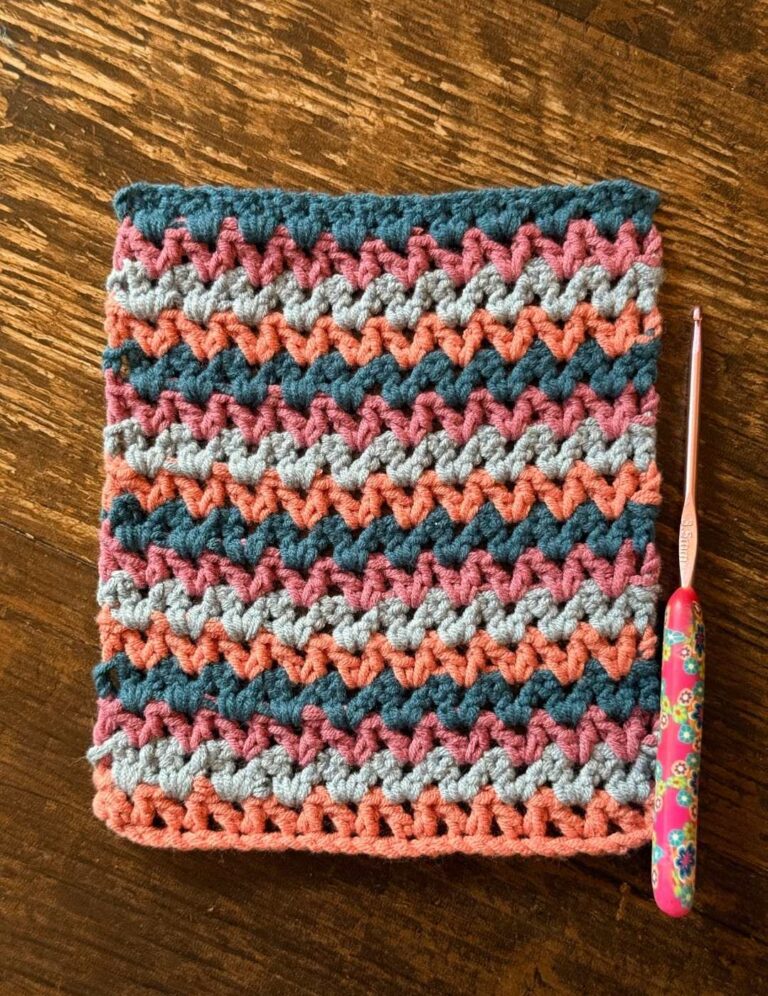
How to make a bullion stitch granny square in rows
Working bullion stitch in rows is a little different to working it in rounds. You have to remember to only work into the tops of the bullion stitches themselves, not the chains between as well. I’ve used stacked single crochets at the start of my rows, for a sturdy, straight edge. But you can replace them with three chain stitches if you prefer. I described how to stack two single crochets in my v-stitch granny square tutorial.
- Foundation chain: Using a larger hook (I sized up from a size F/4mm hook to a size J/6mm hook) make an odd number of chains.
- Row 1: Switch to the correct hook size for your yarn. Starting at the fourth stitch from the hook, dc all the way along the foundation chain.
- Row 2: Stack 2 sc in the first st, dc 1, BS to 2 sts from the end of the row, dc 2.
- Row 3: Ch 1, sc into every dc and every BS – but not the chains in between them!
- Repeat rows 2 & 3 until your granny is just shy of square.
- Final row: Stack 2 sc into the first st, dc across whole row, tie off and weave in ends.
Bullion stitch granny square – summary
Bullion stitches are decorative and unique. Making them with a latch hook is a bit fiddly at first – getting to grips with any new piece of equipment takes time. But like every other skill in crochet it gets easier with practice! Even with plenty of experience, they are one of the slowest stitches to work with though. They’re a sophisticated and understated way of embellishing a granny square bag or blanket for another crochet lover. They’ll really appreciate the extra lengths you went to! Let us know how you’re going to use your bullion stitch granny squares in the comments box down below.