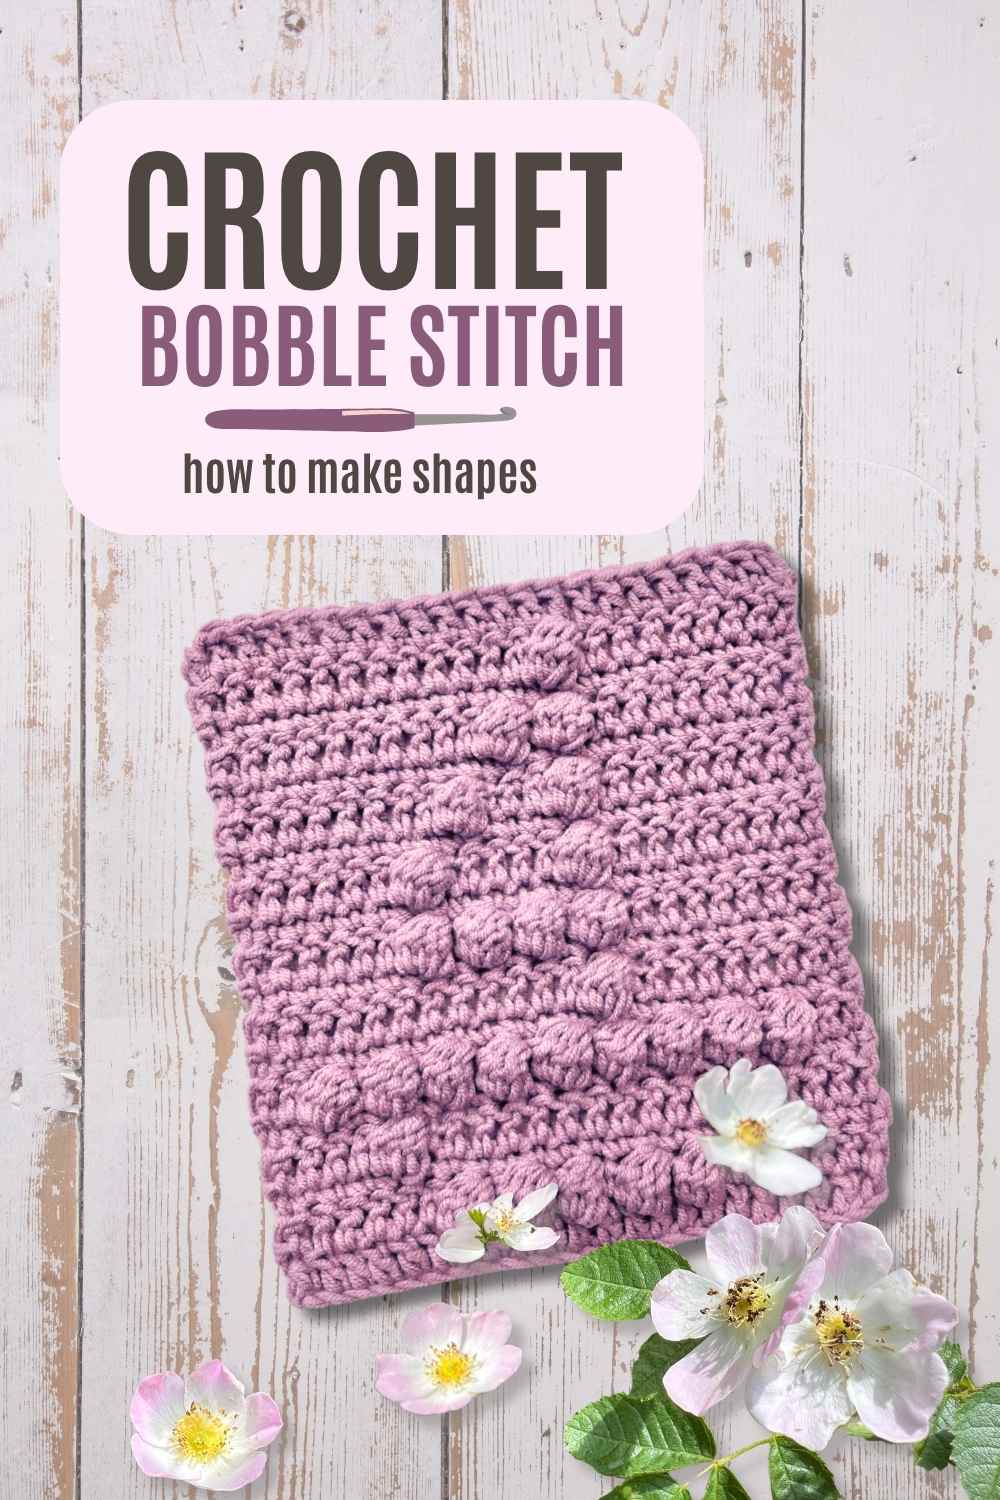
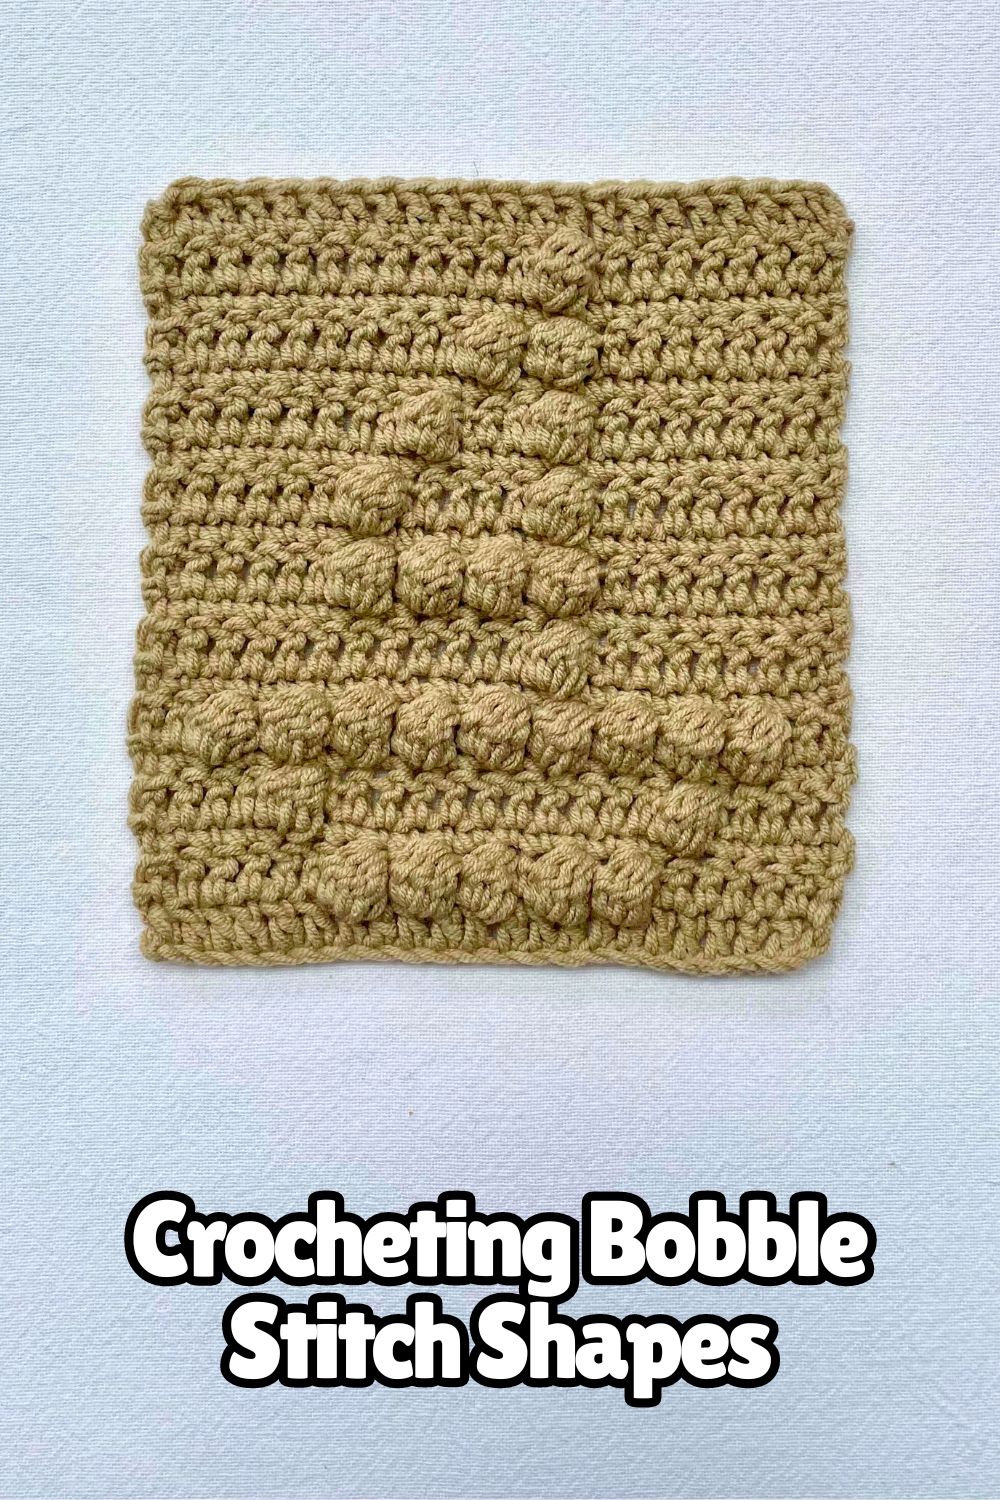
Crocheting Bobble Stitch Shapes
A little while back, I showed you how to incorporate the wonderfully bumpy bobble stitch into granny squares. But one technique I wasn’t very familiar with at the time was making shapes, recurring patterns, or motifs from bobble stitches. Since then I’ve done lots of experimenting with exactly that. So now I’m going to show you exactly how to design and make bobble stitch shapes.
I’ve got some simple patterns to share, but I’m also going to make it really easy for you to design your own patterns – including amazing embossed bobble stitch lettering!
Making bobble stitches – a quick reminder
Bobble stitches are fabulous little clusters of double crochet, that form cute convex bubbles on the surface of your fabric. Bobbles are made across two stitches. In the first stitch you crochet five double crochet together (dc5tog):
- Yarn over
- Insert hook through stitch, yarn over and pull through
- Yarn over and draw through two loops on your hook (two loops remaining)
- Repeat steps 1 – 3 (three loops remaining on hook)
- Repeat steps 1 – 3 three times more (six loops remaining on hook)
- Yarn over, and draw through all six loops.
And in the second stitch, make a single crochet. This pushes the double crochets in the previous stitch outwards, forming a plump bobble.
How bobble stitch shapes are designed
Understanding bobble stitch picture patterns – and even designing your own – is really simple when you keep in mind two things:
- A bobble stitch is about as wide and tall as two double crochet stitches. This means that you can combine bobble stitches and pairs of double crochets like tiles to build up a picture.
- Bobble stitches are non-reversible. This means that when you’re working back and forth in rows, you need to alternate rows that have bobble stitches in them with rows of single crochet, so you’re always working in the same direction when you make the bobbles.
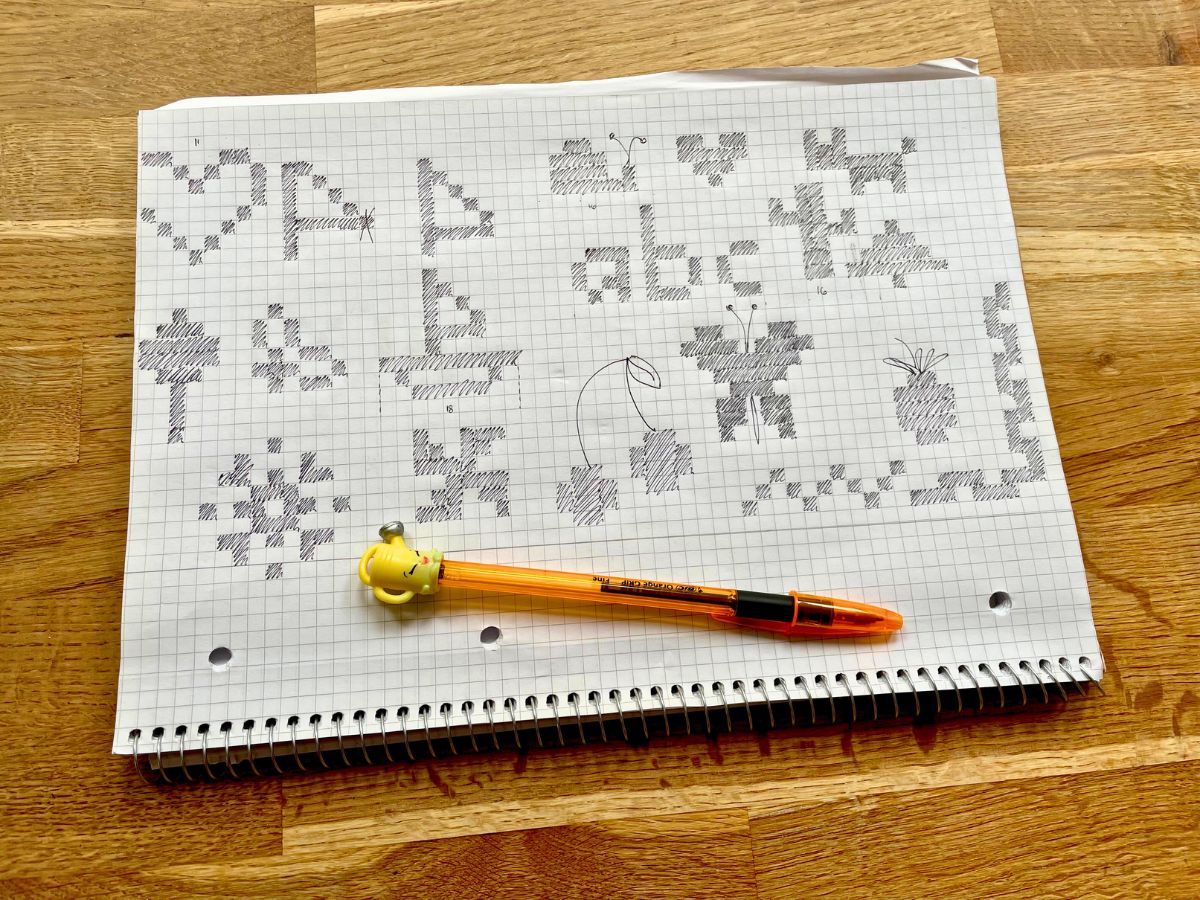
Now all you need to design a bobble stitch pattern is a grid of squares to lay it out on. You could use:
- Squared paper (ideal for rapidly brainstorming ideas)
- A hand sketched grid (does the job just fine for small designs)
- A spreadsheet or table on an electronic device (handy for refining ideas without redrawing them several times).
On your grid, each square is two stitches wide, and may represent either:
- A bobble stitch (1 dc5tog, plus 1 single crochet)
Or
- 2 double crochets
You can represent them any way you like. I use a large-ish solid dot for my bobbles, and leave the box empty for two double crochets.
There’s no need to draw in the rows of single crochet in between your bobble rows. Just remember that they need to be made!
Reading your pattern
Bobble stitch patterns are read from left to right, starting at the bottom row and working upwards. Some people do prefer to read them from right to left, since rows of crochet themselves progress from right to left. If you’d like to do that, just bear in mind your pattern will be reversed, and the finished design will be a mirror image of the template you worked from. Easy ways to correct the pattern so you can follow it from right to left are to:
- Take a photo and flip the image using your smartphone or computer.
- Prop a paper pattern up facing a light source, and read it through the back of the page.
Shape distortion
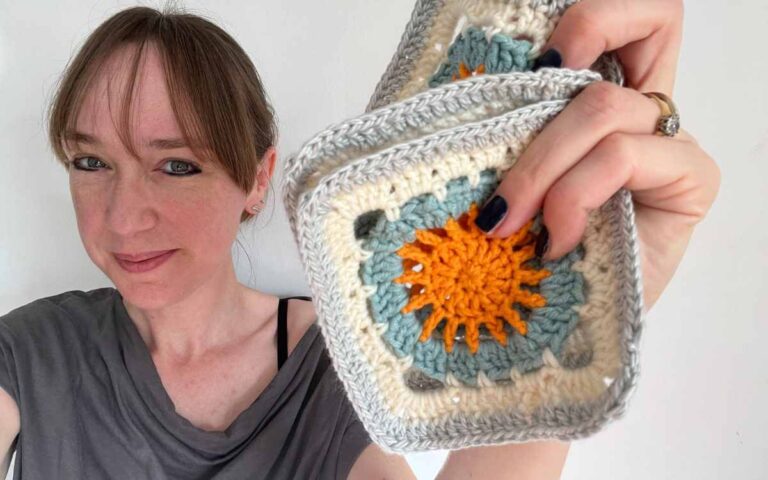
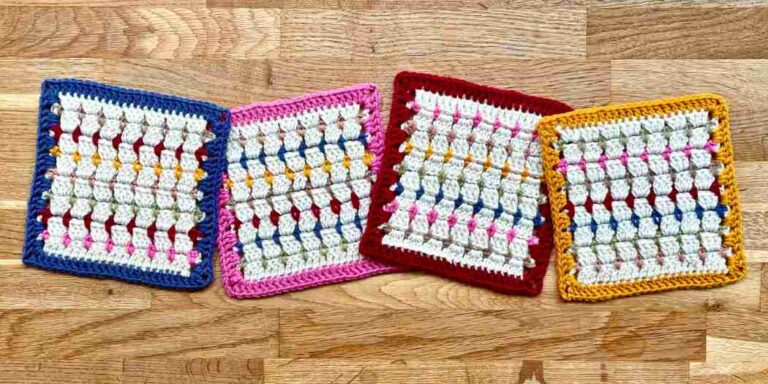
Here’s a reminder of the granny square with a bobble stitch motif from my previous article:
Its shortcomings are pretty obvious – it’s not square! But my design was. What I’d failed to take into account was that bobble stitches are taller than they are wide. And two double crochets are also taller than they are wide. In fact, a square bobble stitch pattern drawn out on paper will only be about 85% as wide as it is tall when it’s made up.
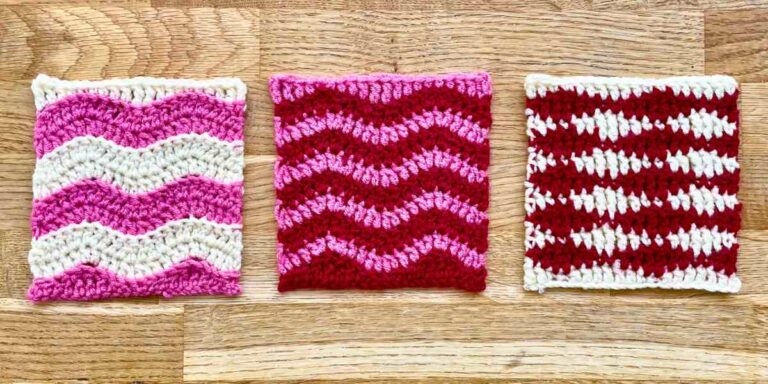
Here’s another illustration. The top pattern is square and the bottom pattern is a wide rectangle.

And here they are made up:

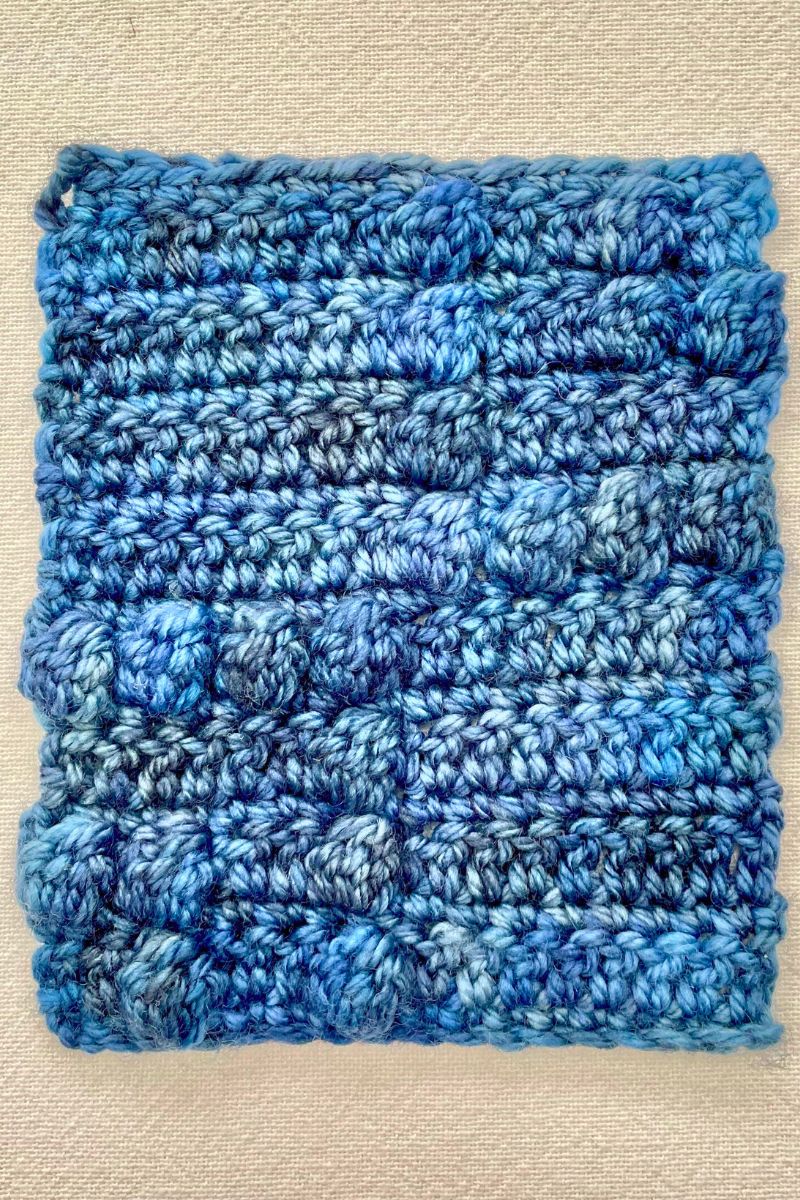
The top pattern produced the tall rectangle from my previous article. And the bottom pattern produces a square. The same effect will apply when you crochet any bobble stitch shape. So, if proportions are important for your pattern to make sense, design it slightly wider than you want it to turn out. Better still, make samples of small areas, to check they’re going to look right!
Some simple bobble stitch shape patterns
Now you know how to design a bobble stitch pattern, there’s really no limit on how far you can make your own. Some people cover whole king size blankets with intricate designs! Before you commit to something so big, here are some simple designs to try out first or inspire your pattern.
Bobble stitch hearts
Hearts are one of the most simple and satisfying bobble stitch motifs to make. Since they’re easily recognizable from any angle, they work well as a border.
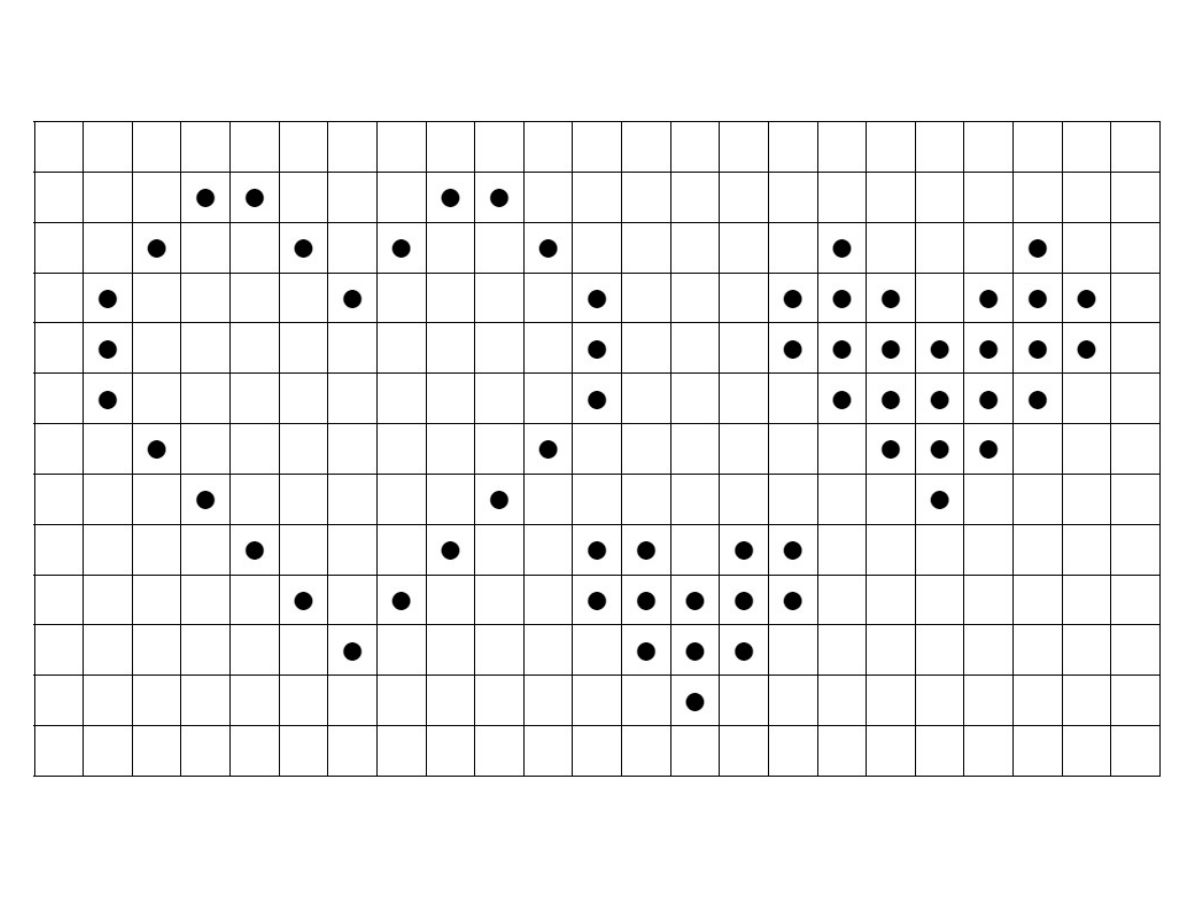
Here are patterns for three sizes of heart. To count out space for them, remember that each square in the grid is two stitches wide.
Here are the largest and smallest hearts made up:
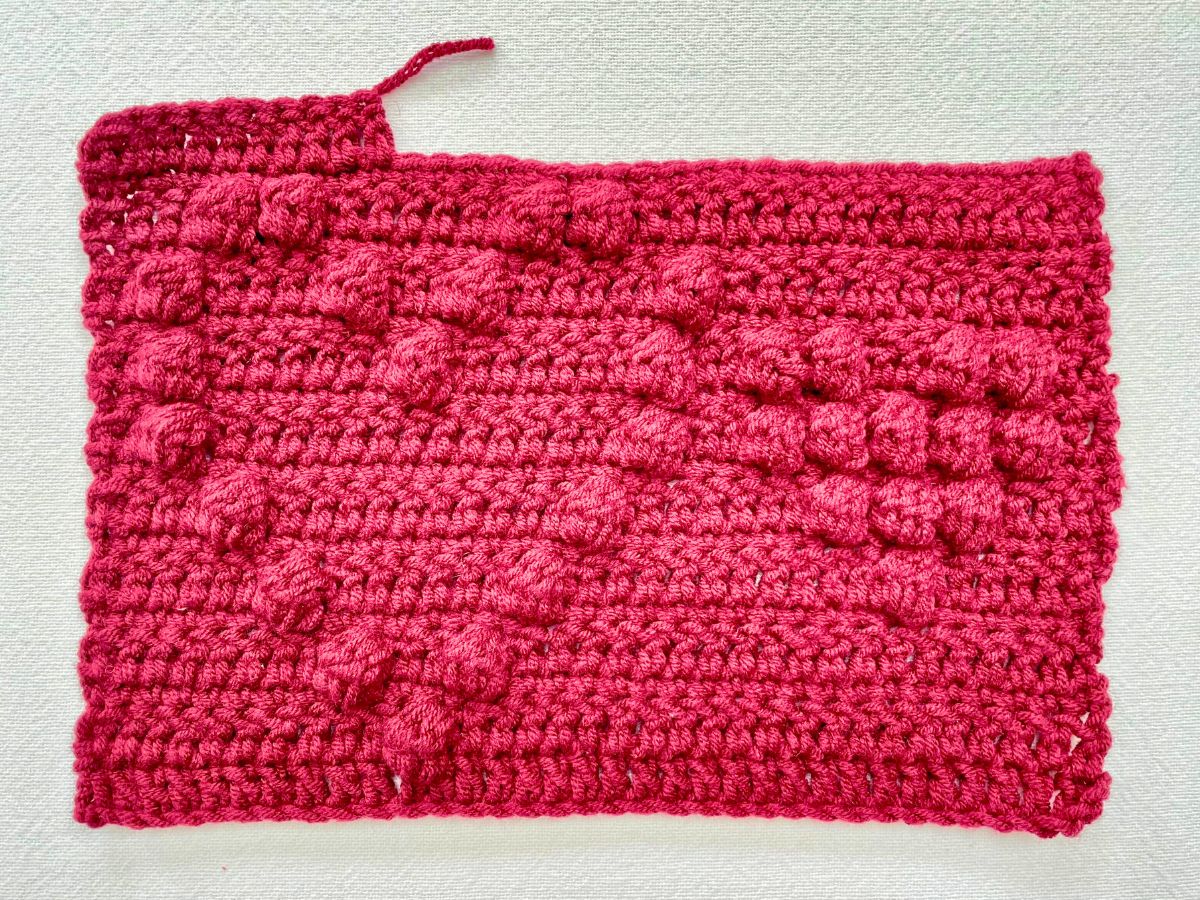
I didn’t think I’d have enough yarn to include all three of them, and sure enough, I ran out shortly after completing two!
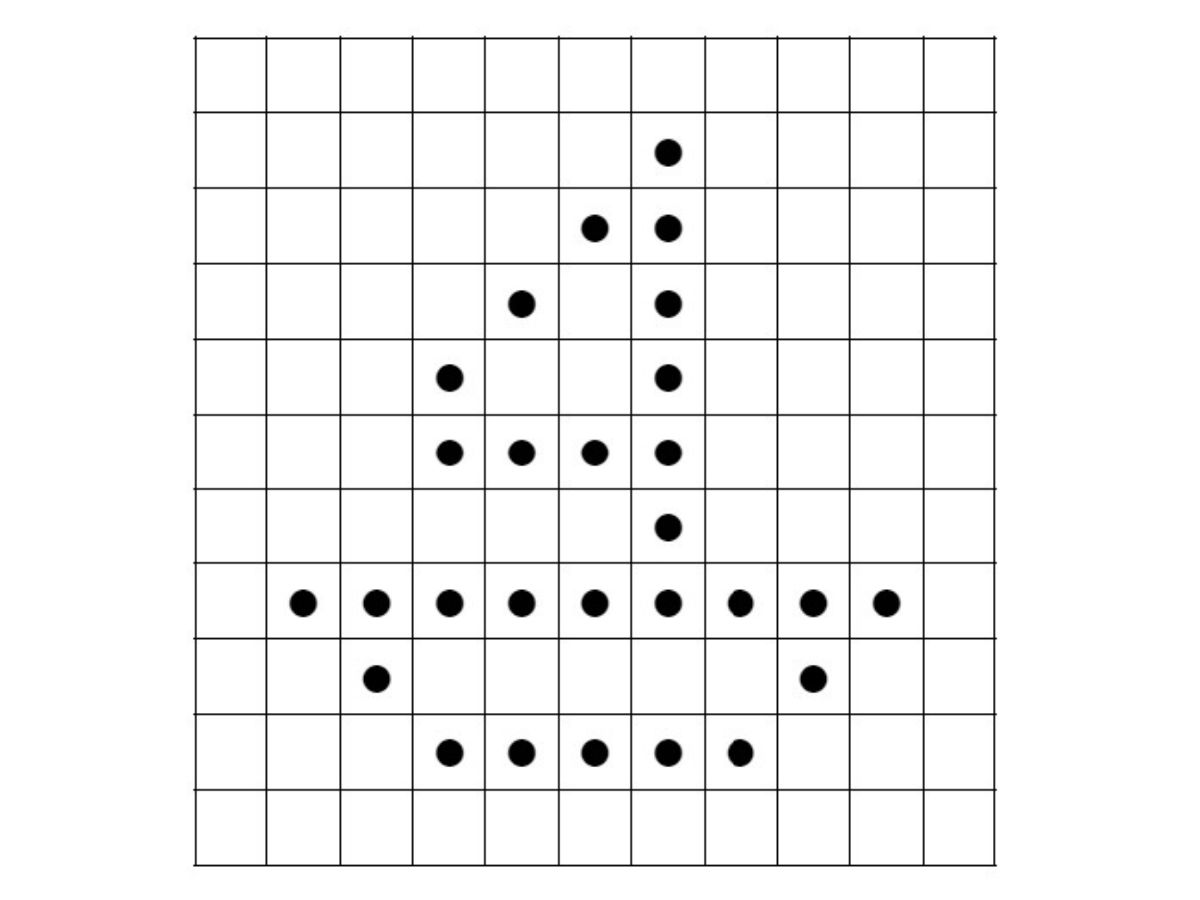
Bobble stitch boat
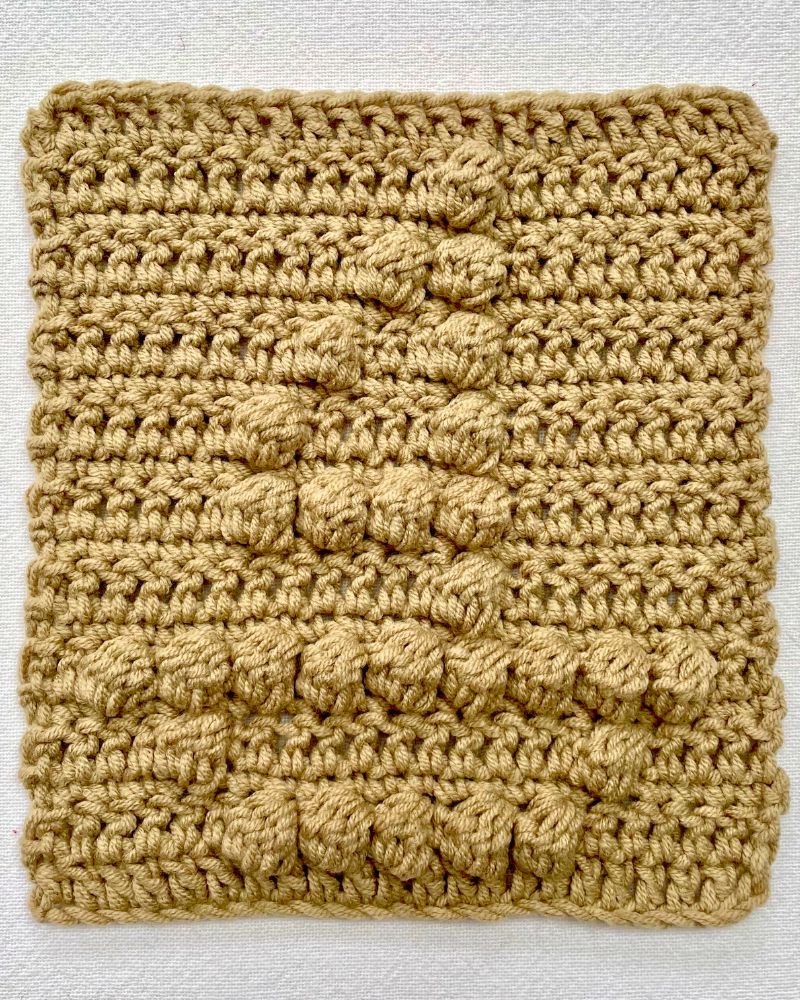
This was my daughter’s favorite design from my page of doodles above. It’s just a shame I didn’t have any blue yarn in my stash to make an example from! That would have looked even more charming. The pattern is 18 stitches (9 bobbles) wide, and 9 bobbles tall.
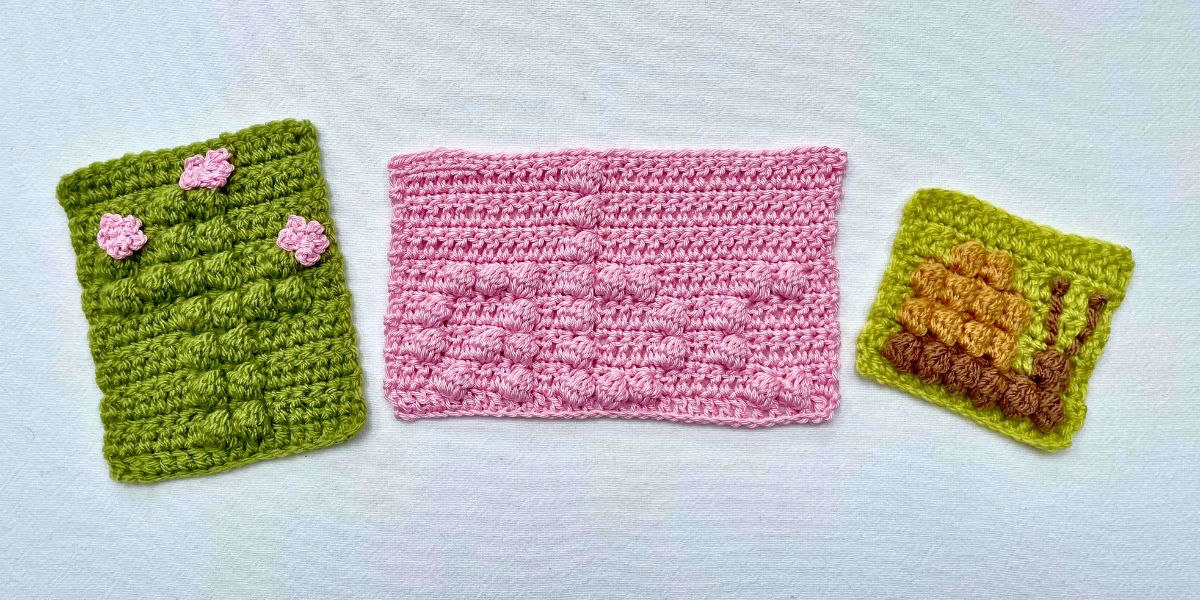
Bobble stitch cactus
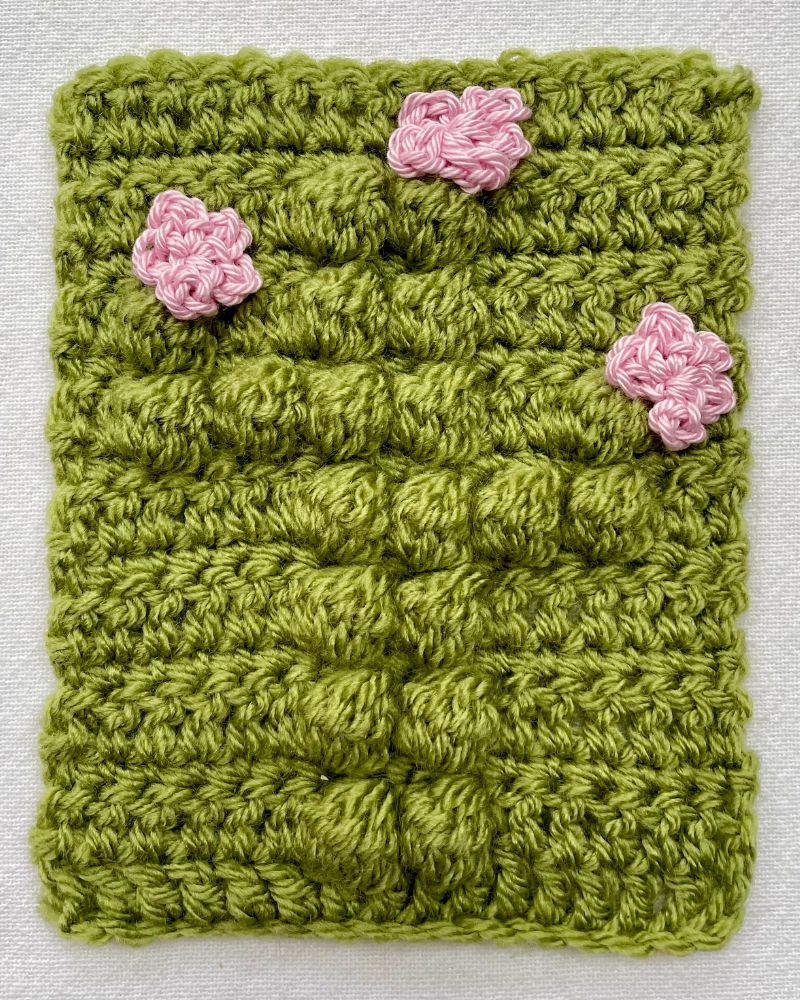
Embroidery embellishments are a popular way of bringing bobble stitch designs to life. This cactus is very straight forward, but it would look sad and maybe even a little hard to recognize without its pink flowers. Here’s the pattern:
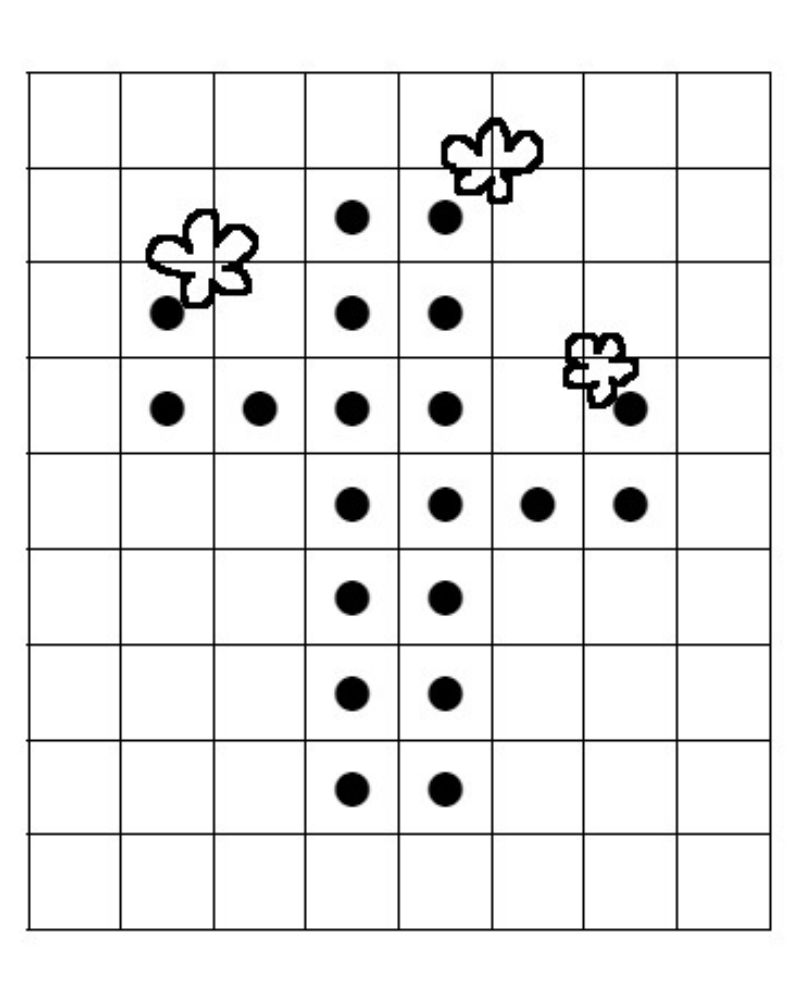
The flowers are added last and could hardly be simpler. Using a contrasting yarn:
- Make a magic circle.
- *Ch3, sl st into the magic circle* 5 times.
- Cut the yarn and use the tails to tie the flower to the side of a cactus limb.
If you fancy making your cacti bigger, these puff stitch flowers would be perfect for keeping the scale right.
Bobble stitch snail
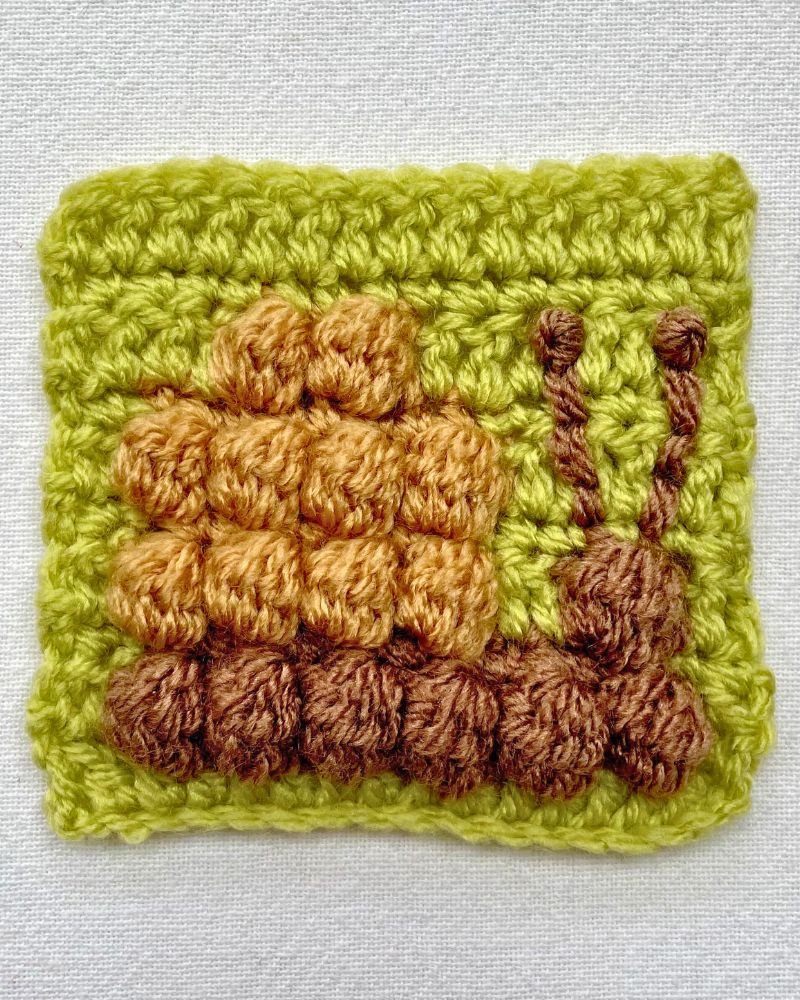
Bobble stitch patterns are an excellent opportunity to experiment with color changes and use up yarn scraps. The single crochet stitch after the dc5tog is the ideal place to hide a change of yarn. The body and shell of this cute little snail are made in two colors. The antennae are embroidered on last – they’re made up of three simple back stitches, and a french knot at the end.
Here’s the pattern:
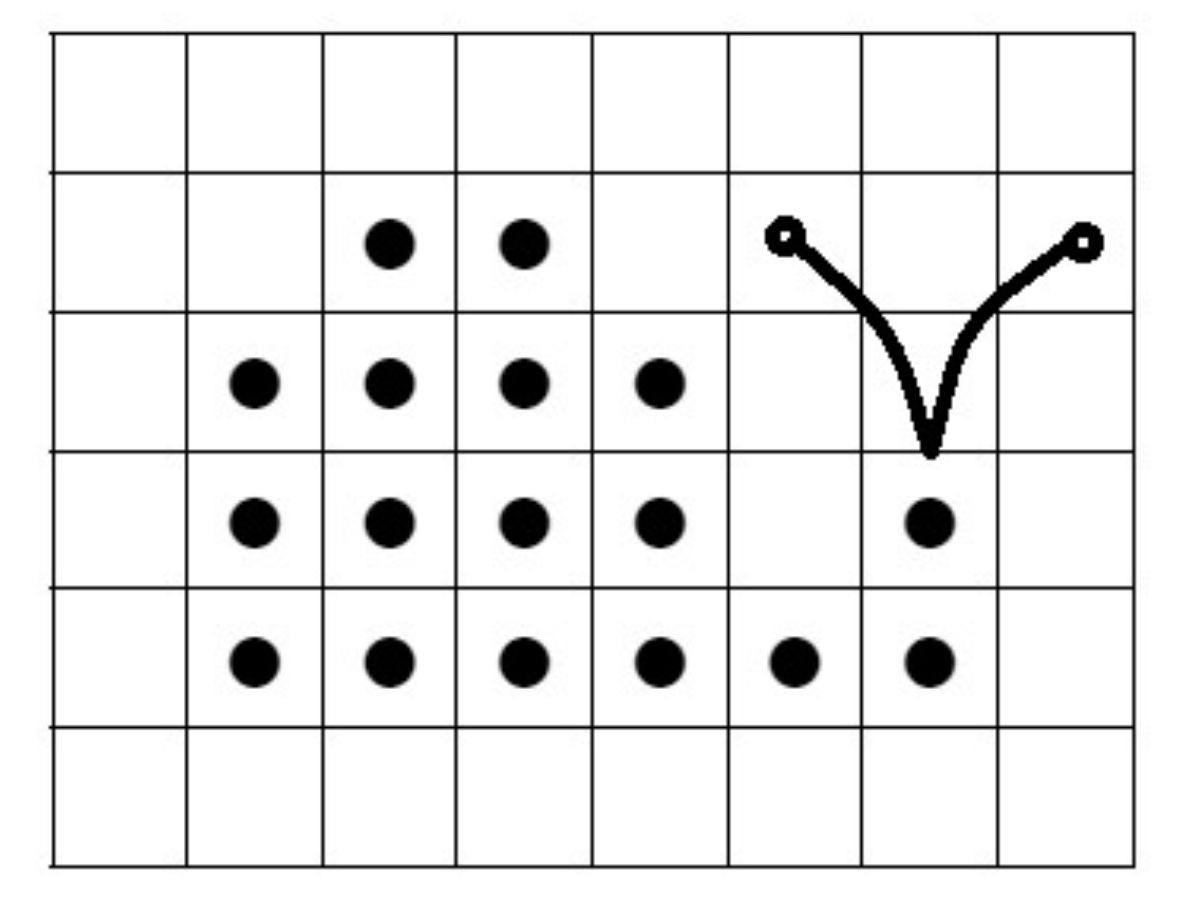
The snail itself is 12 stitches (or six bobbles) across, and four bobbles high (eight rows, if you count the rows of single crochet between the bobble rows).
Bobble stitch lettering
If you’re looking for something really fun and inventive to do with bobble stitch, using it to spell out words is just the thing. For example, using bobble stitches to spell out a baby’s name on a blanket is a lovely way to make a personalized keepsake. I’m not going to give you a pattern for a whole alphabet here though, because I have a much better tip – cross stitch patterns! There are countless cross stitch fonts already designed, many of which are free to download online. And the majority of them translate perfectly into making bobble stitch patterns – just avoid any cross stitch alphabets with half stitches in them.

Stacked vs offset bobble stitches
In all these designs, I’ve stacked my bobble stitches in neat vertical rows. This keeps things simple, and means the patterns can be drawn out on any square grid. But, there’s no reason the bobbles can’t be offset or staggered, like bricks in a wall. Since each bobble stitch occupies two stitch spaces, it’s as simple as lining them up so that one bobble isn’t directly above the one below – fill one space with an extra double crochet instead.
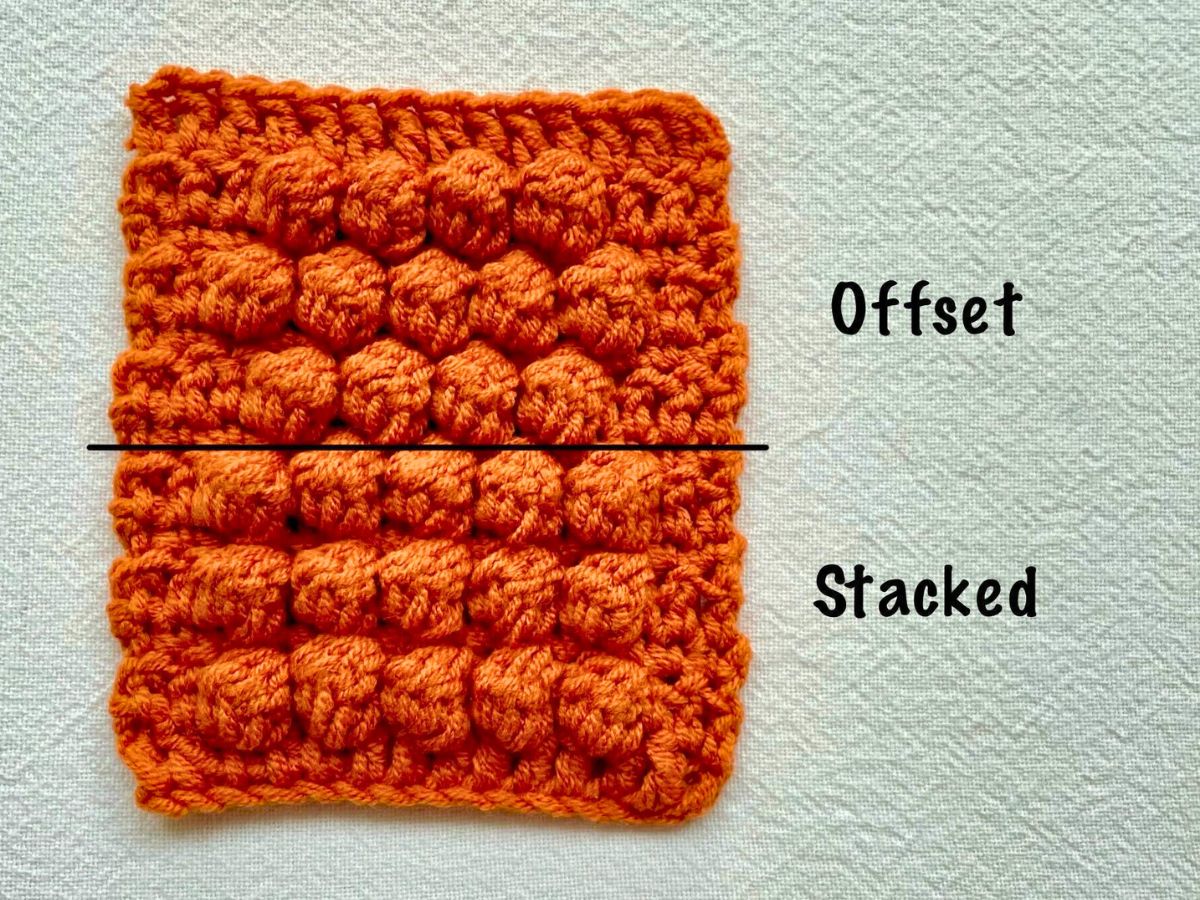
Offsetting bobble stitches gives you a little bit extra freedom to make designs more recognizable. In fact, I’m already thinking the three short rows of offset bobbles in that photo could be turned into a cute little pumpkin motif with an embroidered stalk!
Crocheting bobble stitch shapes – summary
Crocheting bobble stitch shapes look deceptively complicated. In fact, they’re very easy to construct, and a lot of fun to watch materialize when you make them! Bobble stitch patterns are the perfect way to customize crochet blankets for children, with either their name or a picture of something they love. If you need more ideas to get you started, simple cross stitch patterns are a brilliant place to start, since they’re laid out on the same grid pattern. Let me know what pattern ideas you have in mind using the comments bow down below!