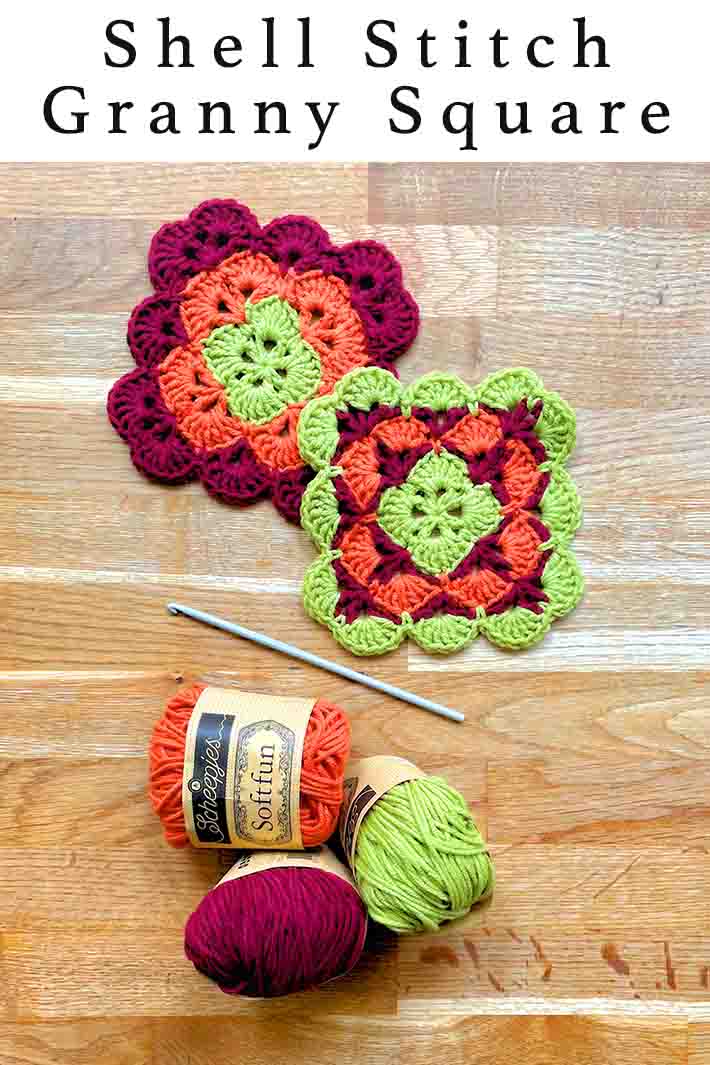
Shell Stitch Granny Square
The shell stitch granny square can be a fiddly challenge at first, but it’s more than worth the effort! A single shell stitch granny square makes an attractive coaster, place mat or pot stand. Or if you keep working outwards for long enough, a beautiful blanket with an attractive scalloped border.

Alternatively, multiple shell stitch squares can be pieced together using the join-as-you-go method, to achieve a decorative tiled effect. The appearance of shell stitch grannies also changes dramatically depending on where you make color changes. So if you’re keen to flex your crochet muscles and experiment with something a little out of the ordinary, this is the perfect pattern to try!
- Choosing a yarn and getting started
- How to make a shell stitch granny square
- When to stop
- Playing with color
Choosing a yarn and getting started
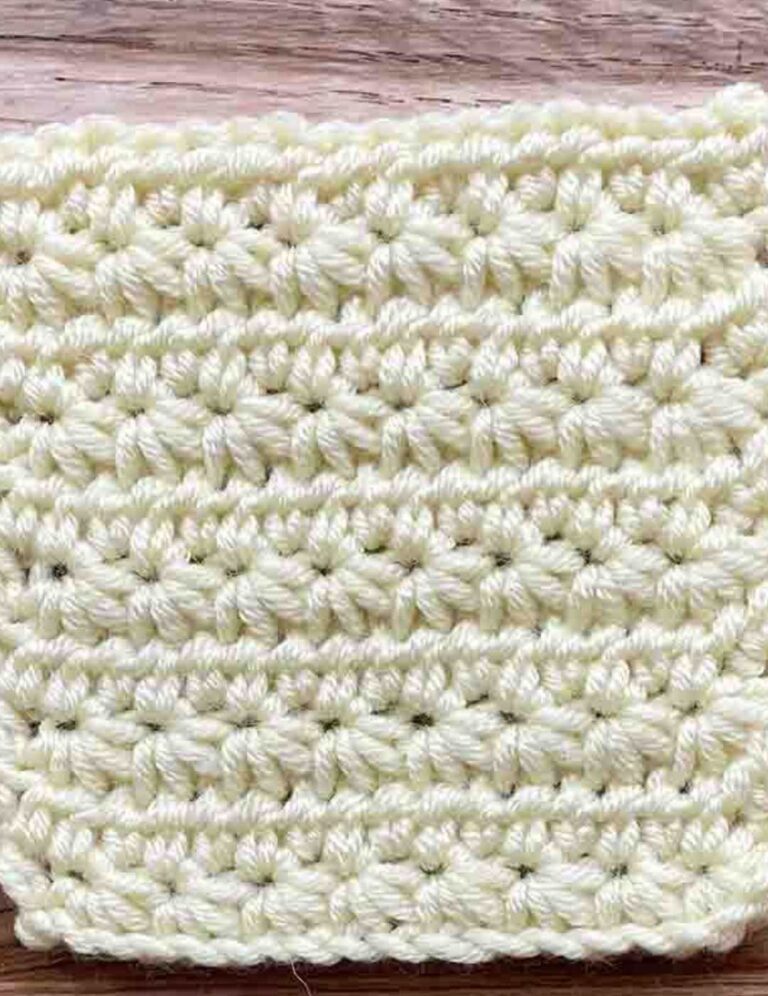
Shell stitches are pretty, versatile clusters of double crochet, joined at the bottom but not at the top. There are several popular shell stitch variations that can be adapted to making granny squares, by working them outwards from the center, rather than in rows. In this article I’m going to focus on using classic shell stitch (also known as the solid shell stitch). It’s a lovely, dense crochet stitch without many gaps or holes – perfect for coasters that don’t let drips through, and blankets that don’t let heat out! Here are a couple of notes before you get started:
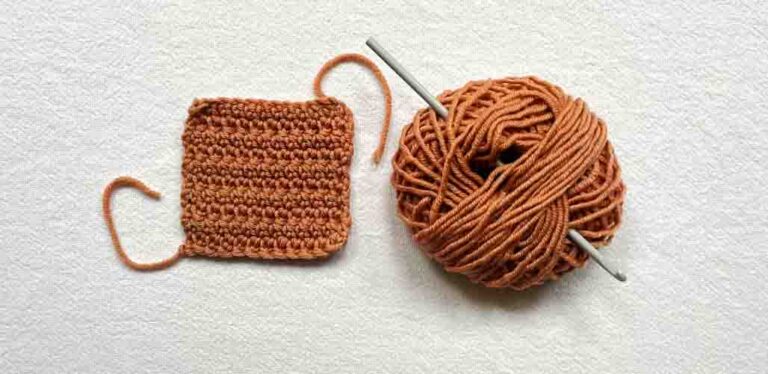
- Choose a relatively smooth yarn for shell grannies, since their impact is all in the layout of your stitches. You don’t want that detail getting lost in a haze of fuzz!
- Each row of shells is made by adding two rounds of stitches.
- The first four rounds require a bit of concentration and counting the first time you make them. After that, the underlying pattern is easy to follow, and there’s something quite pleasing and mindful about it.
- There are a couple of techniques that you don’t often see in granny squares, but I’ve got lots of detailed photos to help you follow them.
- If you’ll be joining your squares, stop one row before they reach the desired size, so you can join them later – we’ll come back to this later!
How to make a shell stitch granny square
This pattern uses standard American crochet terms and abbreviations.
- Ch = Chain
- Ch sp = Chain space
- Dc = Double crochet
- Sc = Single crochet
- Sl st = Slip stitch
Round 1
Make a magic circle of eight stitches. Ch 4 (which represents 1 dc, and 1 ch), *dc, ch* seven times, sl st into 3rd link of the ch 4 to join.
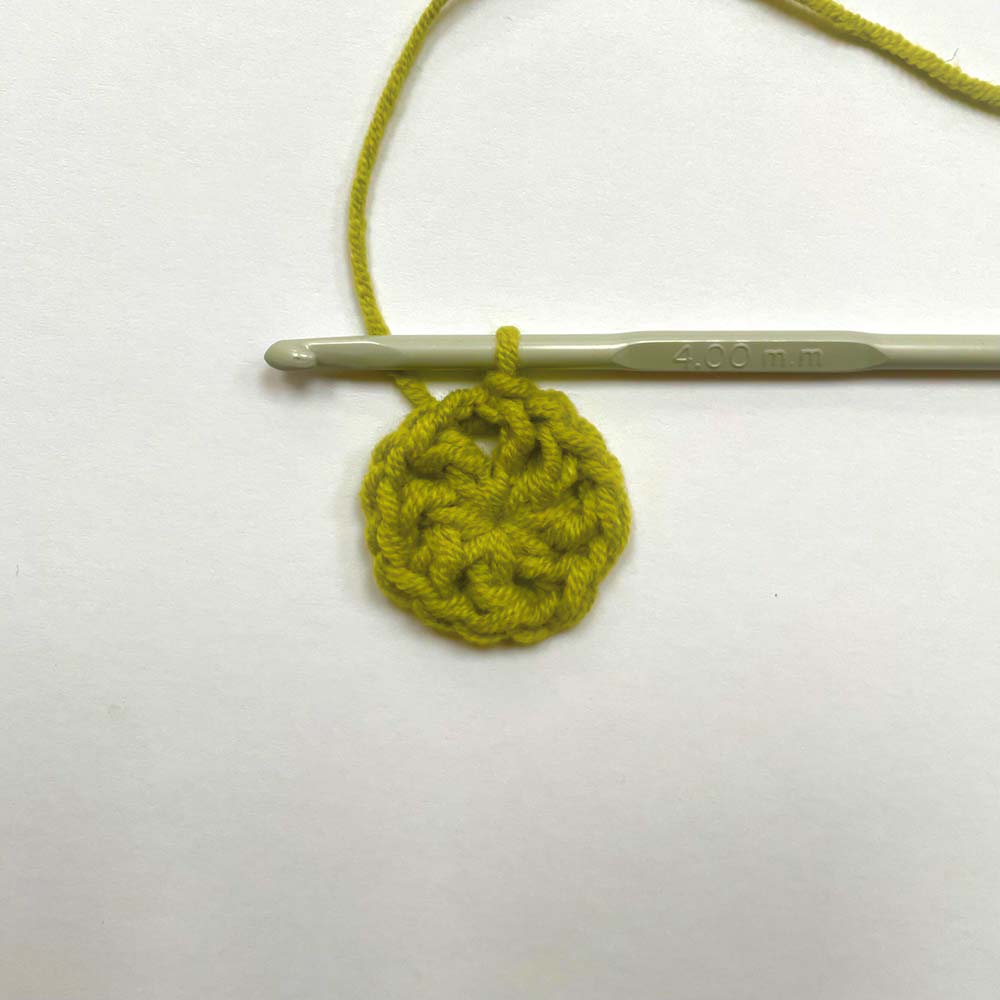
Round 2
Ch 1. Working into the chain spaces only, *sc into the next space, dc 7 into the following space* four times. Sl st into first sc to join.
Round 3
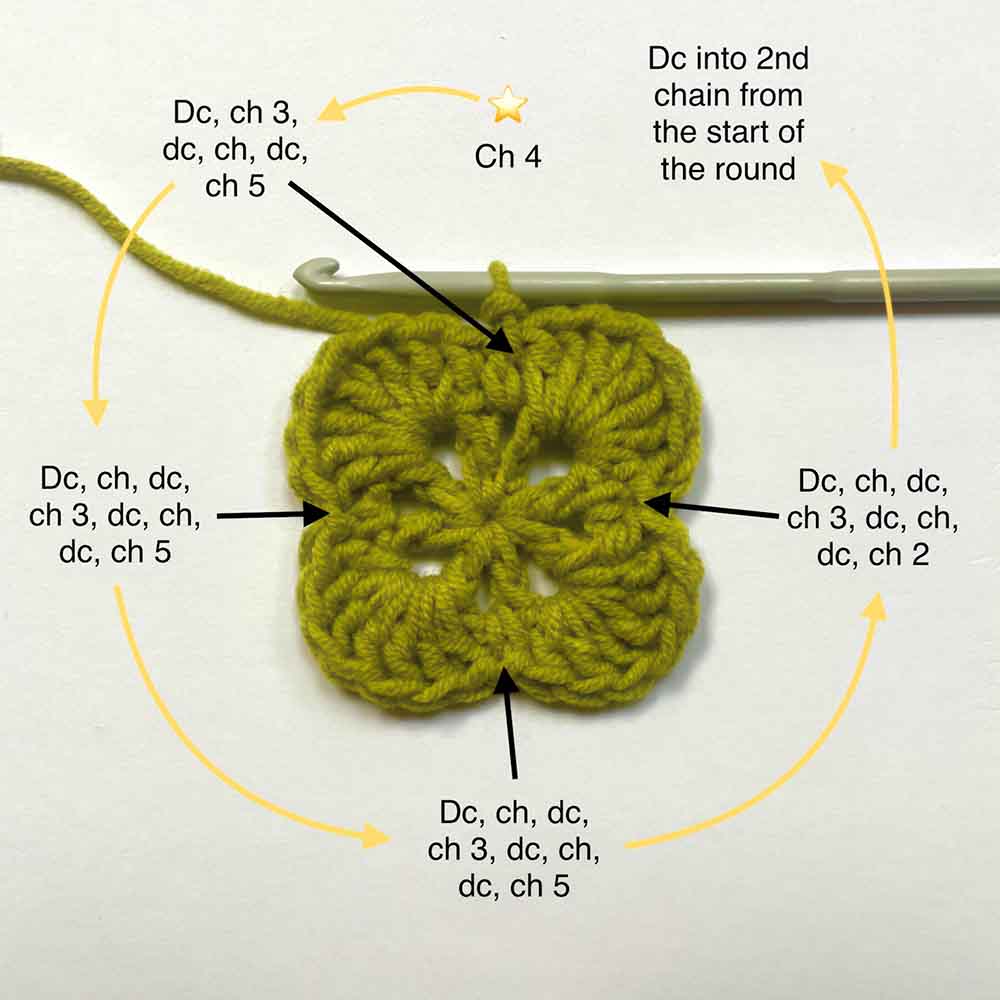
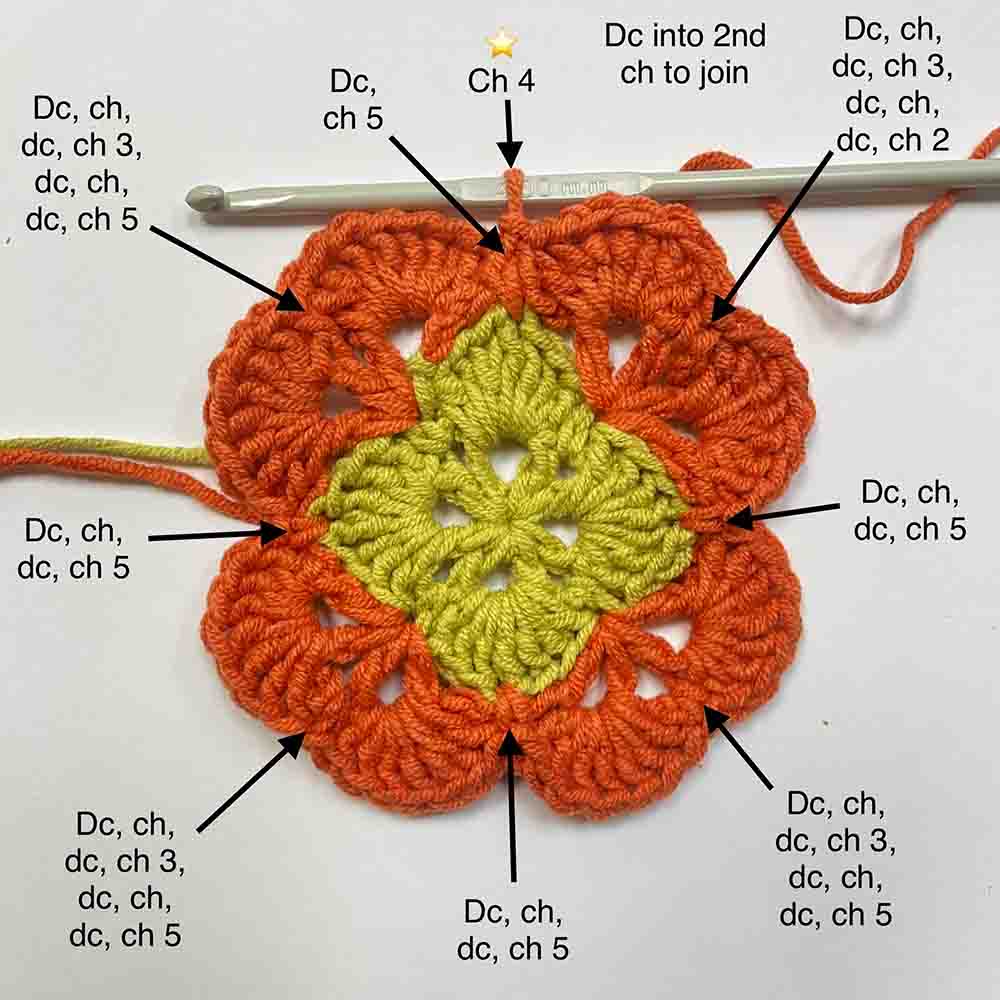
Ch 4. (Dc, ch 3, dc, ch, dc, ch 5) into the same sc you slip stitched into at the end of round 2. (Dc, ch, dc, ch 3, dc, ch, dc, ch 5) into the next 2 sc. Into the final sc: dc, ch, dc, ch 3, dc, ch, dc, ch 2 (not 5!). Join by making a dc into the 2nd link of the ch 4.
Here’s a diagram of where all those stitches are going. The round starts at the star, and works counterclockwise:
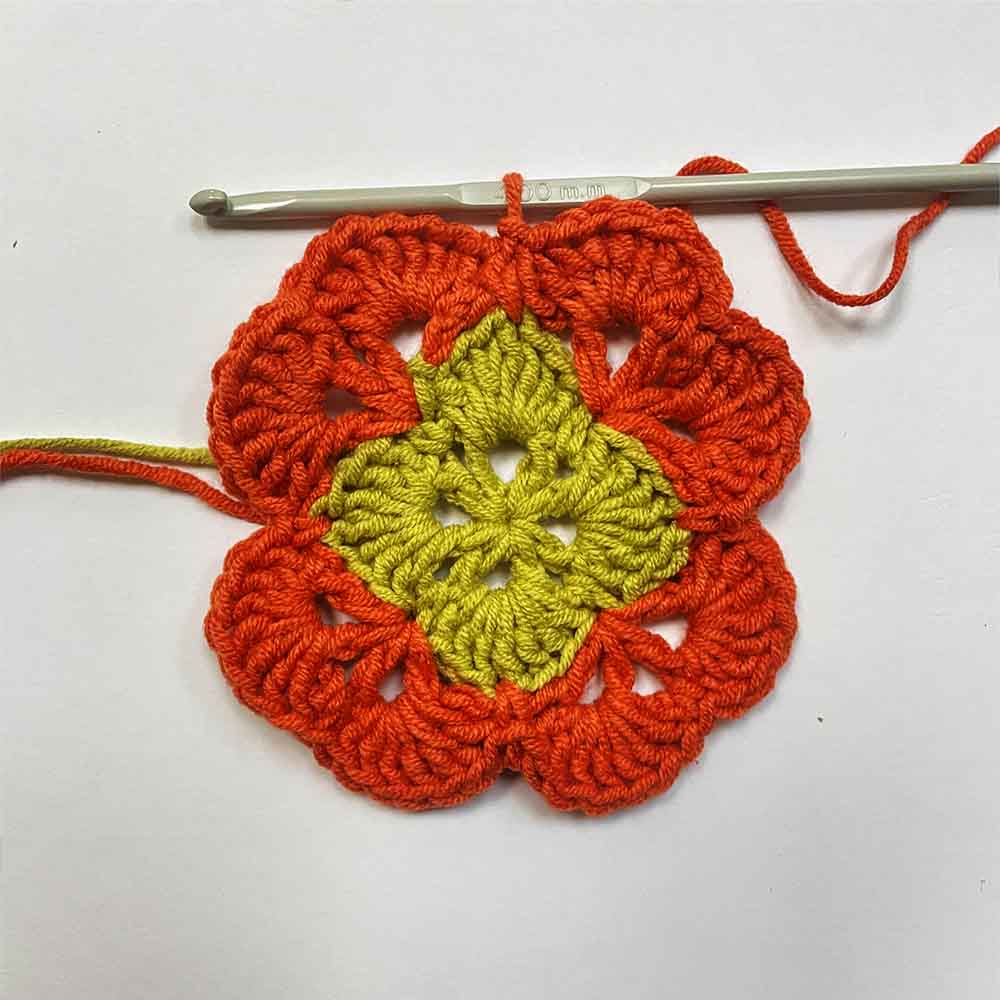
And here’s how it going to look once you’ve made it:
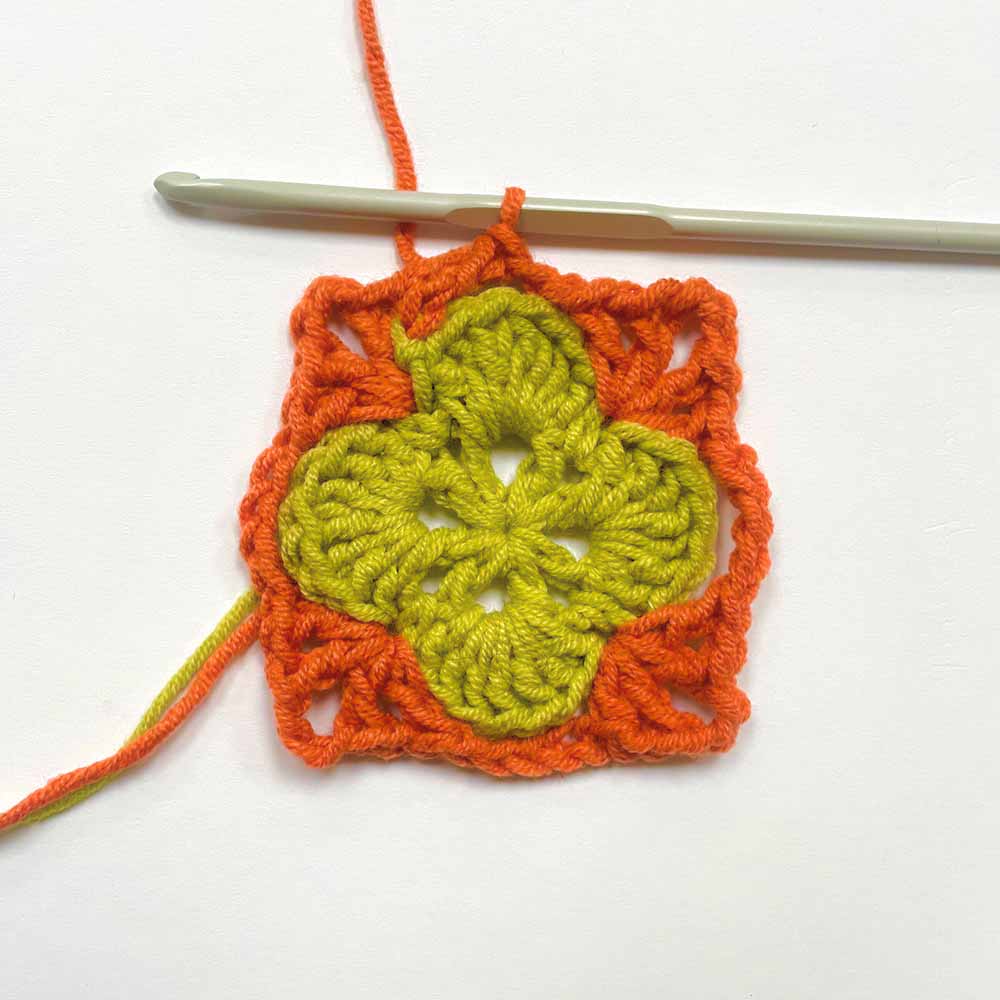
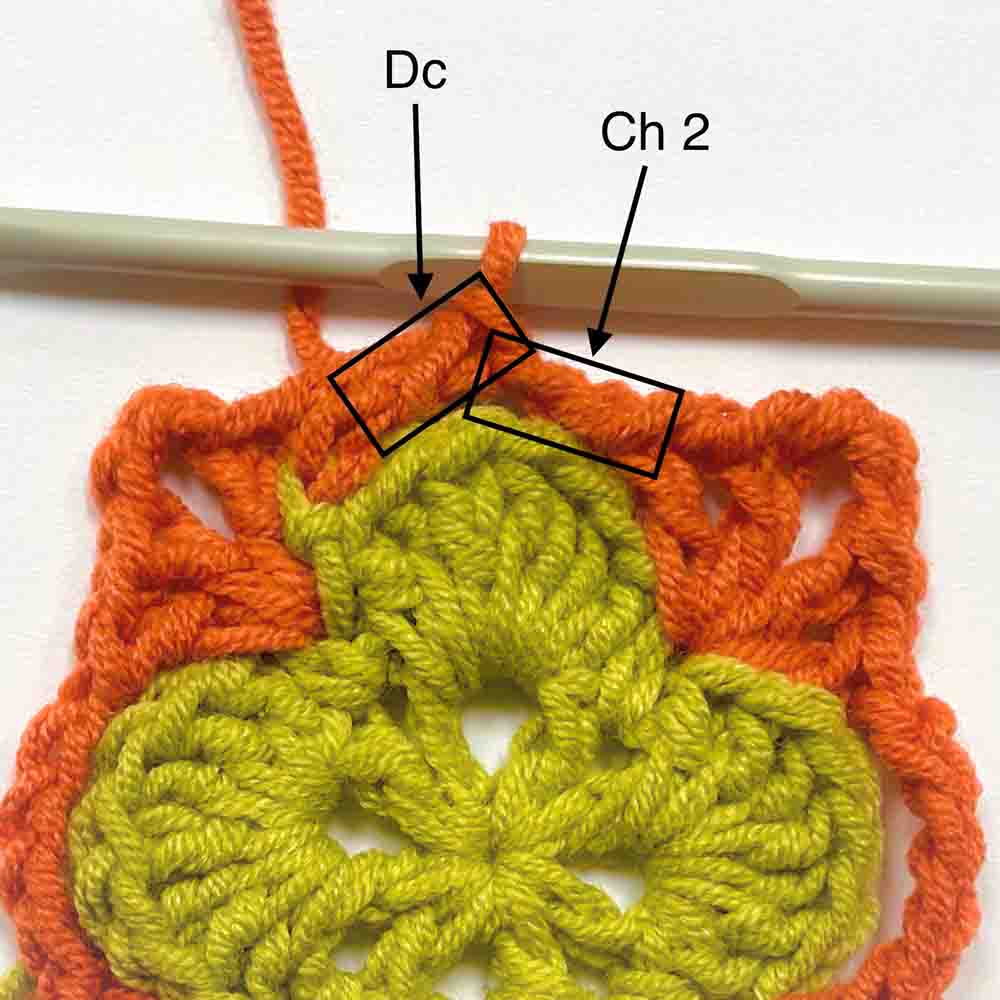
Take a quick look at that join, and how it bridges the final gap using two chains and one double crochet, rather than 5 chains and a slip stitch. It’s a bit unusual, and fairly unique to granny squares made from shell stitch. But it means your next round starts right above the center of a shell. Clever, huh?
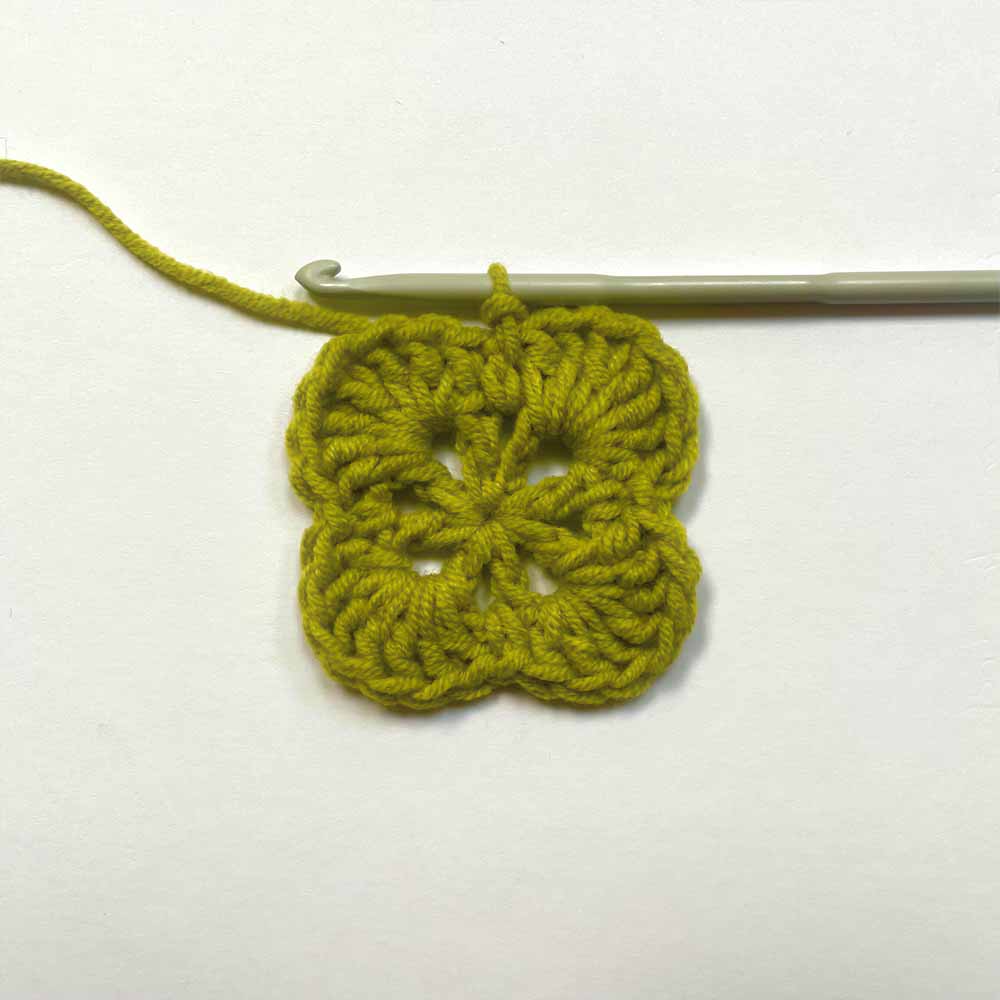
Round 4
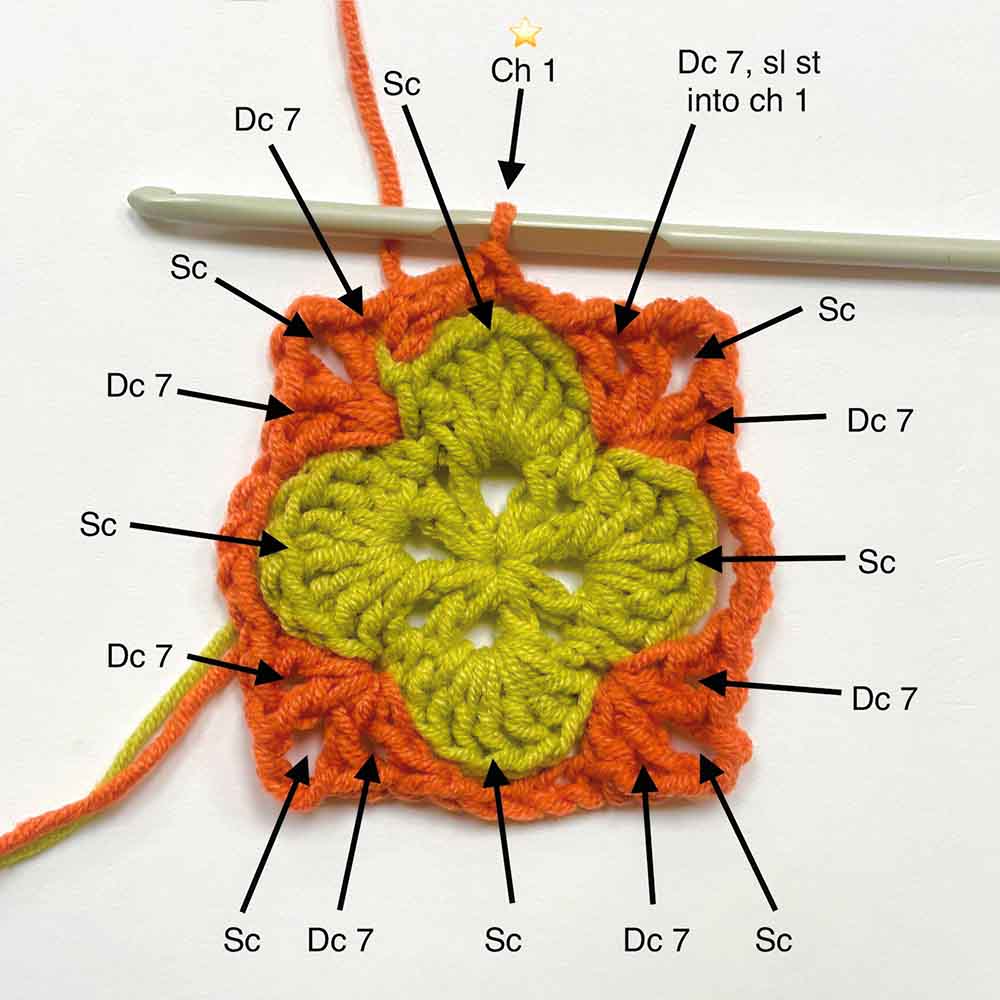
Ch 1. Sc into the top of the 4th dc of the shell from round 2 – make sure you work your stitch around the post of the dc that joined round 3 as well. Dc 7 into the ch 4 space from round 3. Sc into the ch 3 space. Dc 7 into the next ch space. Sc into the top of the 4th dc of the next shell from round 2. Make sure you catch the ch 5 from round 3 in your stitch. *Dc 7 into ch 1 sp, sc into ch 3 sp, dc 7 into ch 1 sp, sc into the 4th dc of the next shell* twice more. Dc 7 into ch 1 sp, sc into ch 3 sp, dc 7 into ch 1 sp. Sl st into the chain stitch from the start of the round to join.
Here’s a diagram of where to place those stitches. Remember, start at the star, and work counterclockwise.
There’s a real mix of inserting your hook into the top loops of previous stitches, and into chain spaces, so pay close attention to that at first. It will all come very easily in another couple of rounds! Here’s a picture of how round 4 looks when it’s done:
Round 5
Ch 4. (Dc, ch 5) into the first sc you made in round 4. *(Dc, ch, dc, ch 3, dc, ch, dc, ch 5) into the next sc, and (dc, ch, dc, ch 5) into the sc after that* three times. (Dc, ch, dc, ch 3, dc, ch, dc, ch 2) into the final sc, and join with a dc to the 2nd link of the ch 4.
Here’s another visual representation of where all those stitches are going:
And here’s how they’ll look:
Round 6
Hopefully you can see the pattern forming now!
For the next round, and all the following even-numbered rounds:
- Ch 1.
- Sc into the central stitch of the shell below.
- Dc 7 into all the ch 1 spaces.
- Sc into the center of all the previous shells, catching the ch 5’s as you go.
- Sc into the ch 3 corner spaces.
- And sl st into the first ch to join.
Like this:
Round 7
My square is about 4″ across now, which I think is about the perfect size. But for a round 7, and all following odd-numbered rounds:
- Ch 4.
- (Dc, ch 5) into the first sc from the previous round.
- (Dc, ch, dc, ch 5) into the sc stitches on the sides (with a deep indent).
- (Dc, ch, dc, ch 3, dc, ch, dc, ch 5) into the sc at the corners (with a shallow indent).
- And finish by working ch 2, joining with a dc into the 2nd link of the ch 4.
When to stop
For single-square projects, like coasters, place mats, pot rests, and blankets made in one continuous square, finish whenever your project reaches the size you want it to be. You can:
- Finish on an even-numbered row, and your work will already have a perfect scalloped edge with a gorgeously vintage feel.
- Or finish on an odd-numbered row, if you want a foundation for working a different type of border (I’m not sure why you would do this though!
If you’re making a blanket from lots of squares, you’ll need to stop making each one a row before they’re ‘done’. Shell stitch grannies don’t really lend themselves to being sewn together, and you’ll need to use the join-as-you-go technique when you work your final round. This can be an odd- or even-numbered round, and you can see the method for both in this video:
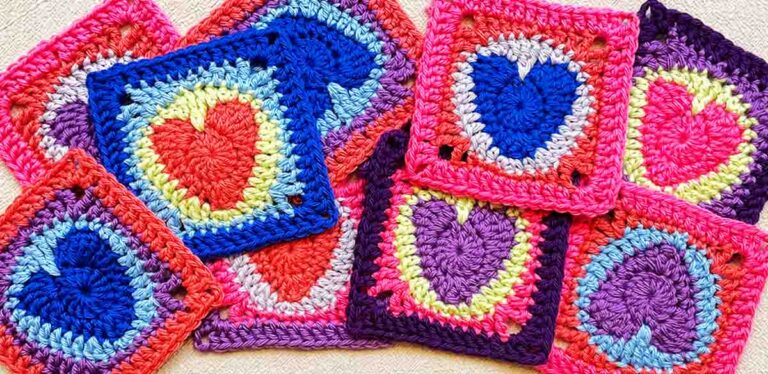
Playing with color
Finally, where you make your color changes in a shell stitch granny square makes a big difference to how it looks. And I just want to show you that.
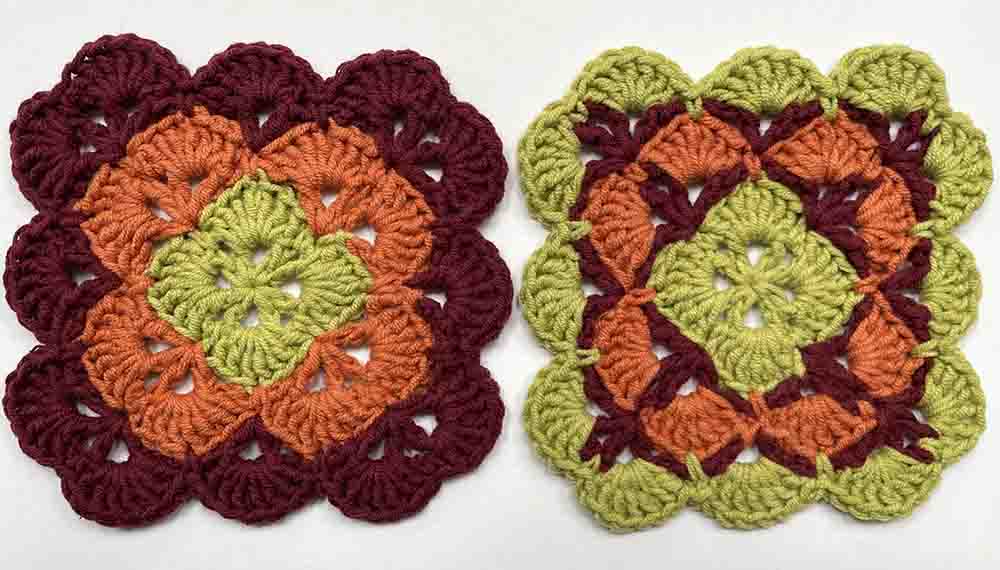
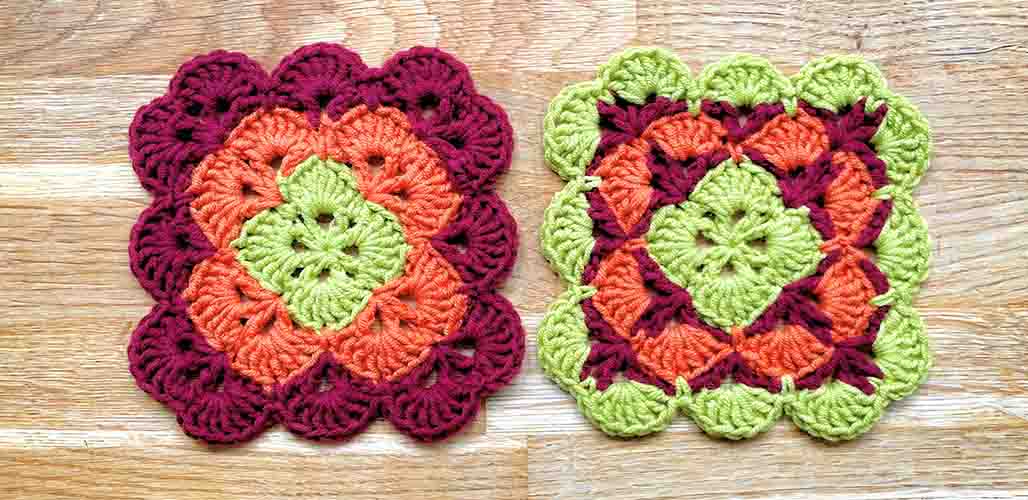
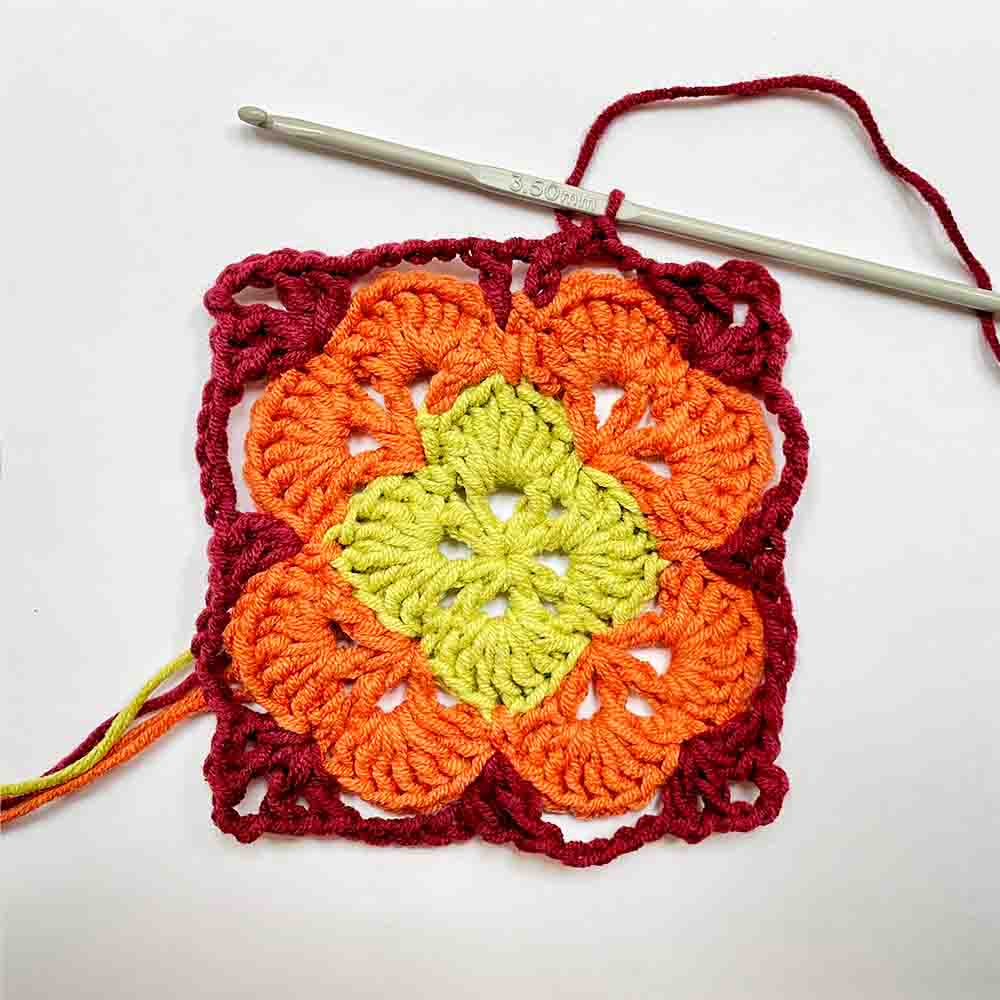
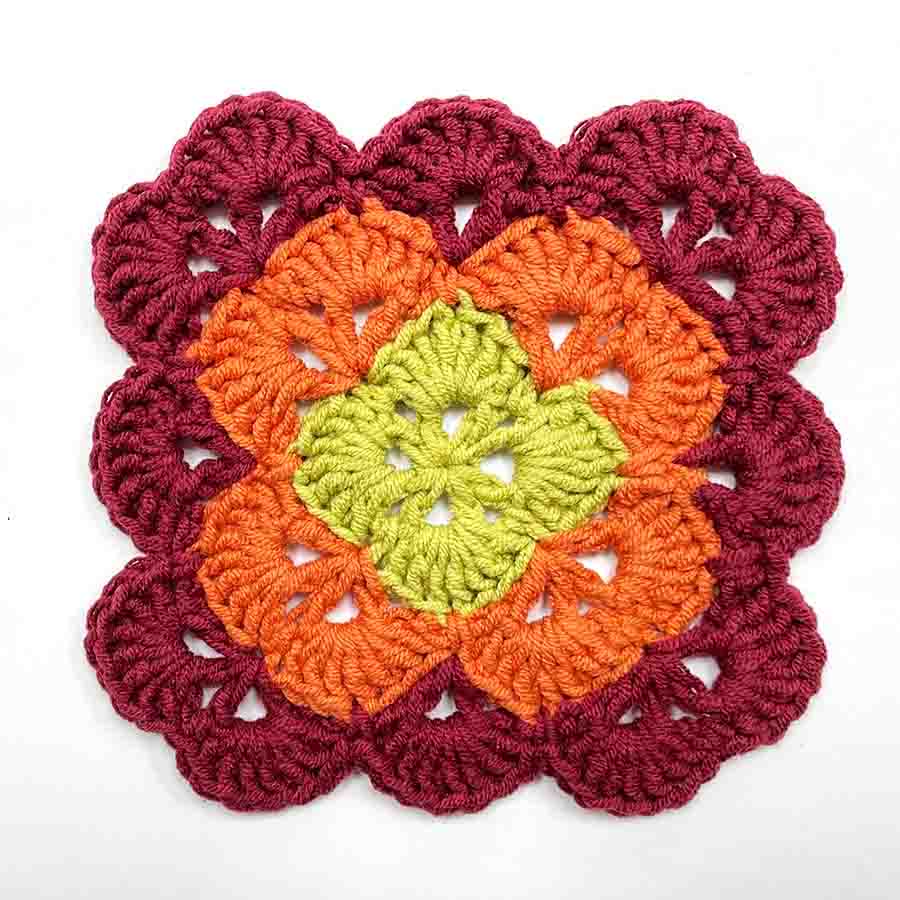
In the square on the left, I changed colors after rounds 2 and 4. In other words, I worked one odd-numbered row and one even-numbered row in the same color before changing. This produces a really clean, bold result. In the square on the right, I worked the odd-numbered rounds in dark red (except round 1) and the even-numbered rows in lighter colors. Picking out the odd numbered rows in a contrasting color produces a much more visually intricate design, which is very traditional for shell stitch granny square projects.
Shell stitch granny square – summary
Shell stitch granny squares can be simple and bold, or detailed and highly decorative. They make a very different impact depending on how big you make them, where you change color, and how you join them together. But even a lone 4″ square is beautiful, and can work by itself as a drinks coaster or mat. And that isn’t something that can be said for many types of granny square! Let us know how you’ll use your in the comments box down below.

with the shell edges, how do you connect them together?
did you ever get a reply on connecting them together?
Hi Vicki, towards the bottom of the article there’s a YouTube video demonstrating two methods for joining the squares – depending on what device you’re using to read the article, it might just be appearing as a url though. Here it is again: https://www.youtube.com/watch?v=RXJ83VG6m3o
It’s a little late, but I hope that helps!
Sarah
Thank you so much for this tutorial, especially the photo breakdowns of where to place the stitches. They were SO HELPFUL!
I like to make shawls using a large “Granny square” and then continuing to crochet long strips off of the sides that are next to one another on one of the “points” of the square. I like this “shell stitch” Granny square you did, BUT do you have a tutorial (or the NAME of the type of Shell stitch) for making a piece of work that is just straight? I am finding it very difficult to find younger people who know the “names” of the different types of stitches. I hope you can help me. Thanks