Free Squishy Crochet Ice Pop Pattern
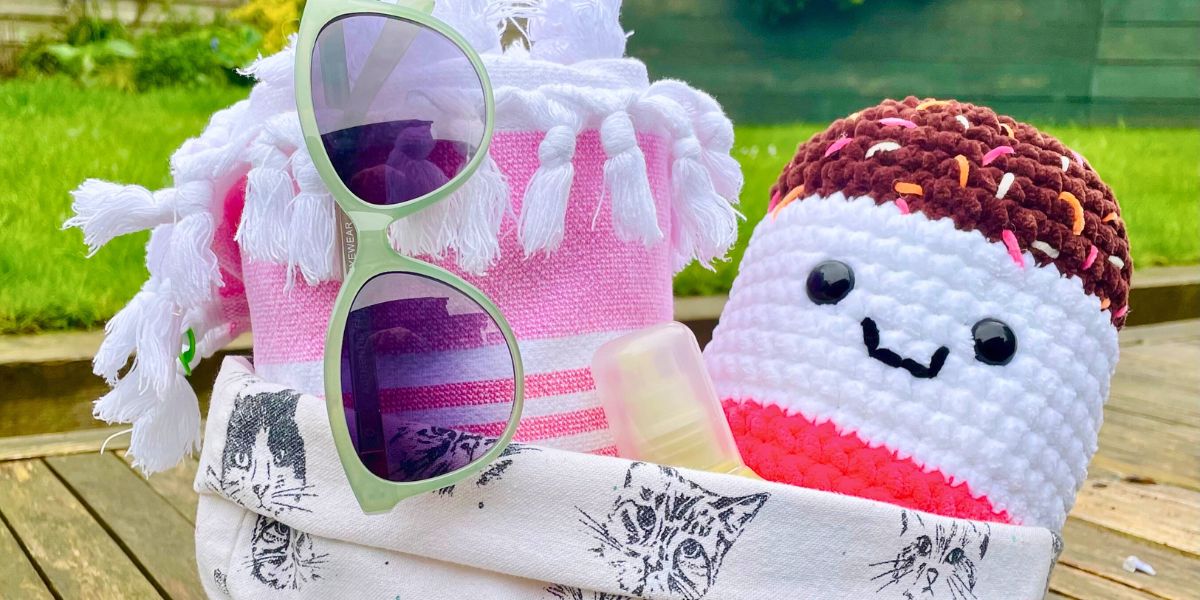
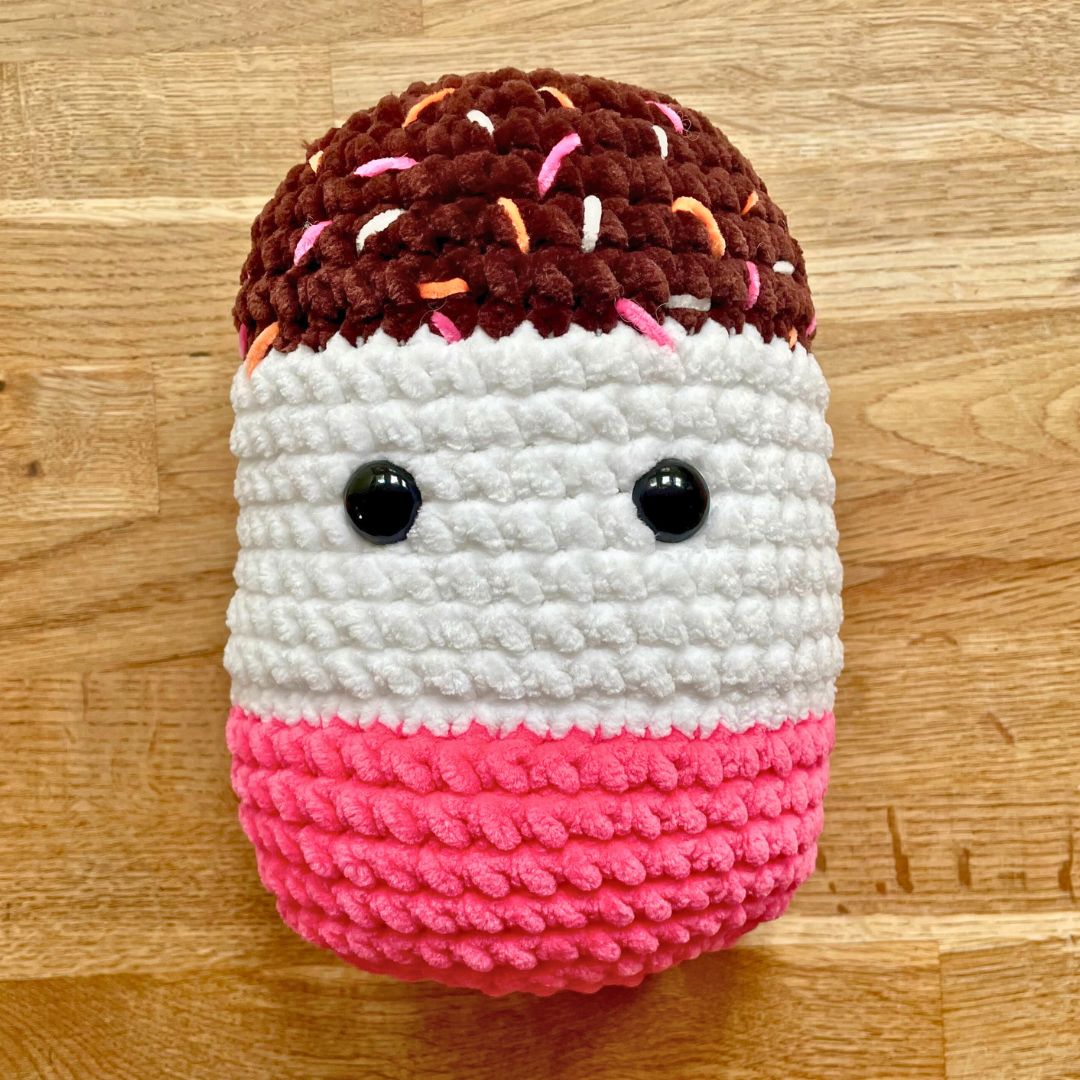
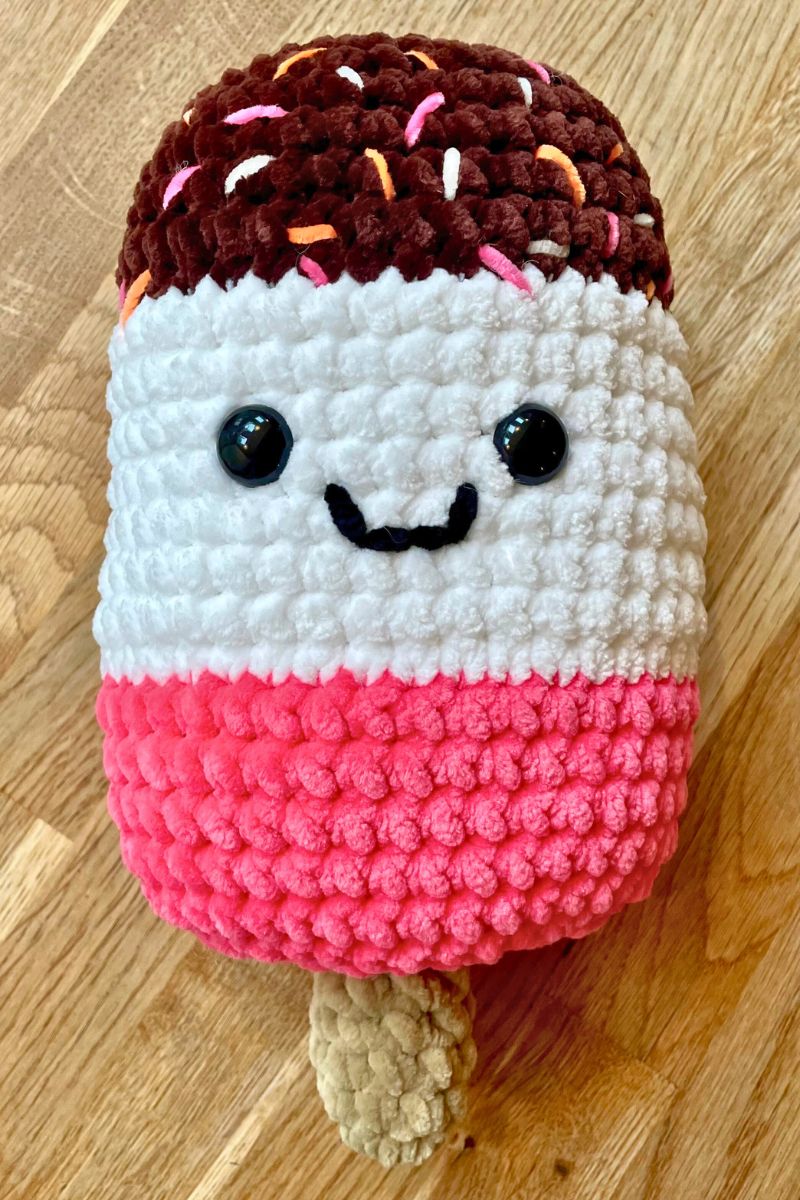
Hi there! What do you think of Fabian, my squishy crochet ice pop pattern? He is smiling and ready for summer, even though the weather here isn’t exactly co-operating with his sunny outlook on life at the moment. Fabian is a super simple amigurumi project, perfect for beginners. He’s also a great way to learn about and practice making color changes, if you’re new to them. I have an easy peasy technique in store for achieving really crisp color transitions, which will make you feel like a pro. Your own squishy ice pop can be big enough to cuddle or small enough to hang on a keychain, depending what yarn you use. So pick a size, and let’s go!
Materials for making your own squishy crochet ice pop
Fabian’s looks are inspired by the Fab ice lollies I used to enjoy as a kid. But if you grew up high on the sugar from Bomb Pops or Jolly Rancher popsicles, then obviously you can pick whichever colors make you feel most nostalgic, and leave off the sprinkles. To make your own squishy ice pop like, you’ll need:
- Three (or more) colors of yarn in the same weight for the main body of the ice pop. I’ve used King Cole Super Bulky Yummy yarn* in white and disco pink, and Paintbox Super Bulky Chenille* in chocolate.
- Small quantities of yarn in the same weight for the stick and embroidering the mouth. I’ve used the Paintbox Chenille* in latte for the stick, and black King Cole Yummy yarn* for the mouth.
- Scraps of lighter weight yarn for the sprinkles (optional). I’ve used Rico Ricorumi’s DK Nilli Nilli yarn in white, neon orange, and neon pink.

You’ll also need:
- Safety eyes. I’ve used 16mm (⅝”) eyes*. You’d need 12mm (½”) eyes for an ice pop made with worsted weight yarn, and 10mm (⅜”) eyes for anything smaller.
- A crochet hook the right size for your thickest yarn. If you tend to crochet loosely, use a hook one size smaller than suggested on the wrapper so the stuffing doesn’t show through the stitches later.
- Stitch markers
- Toy safe stuffing*
- A darning needle
- Scissors
Deciding how big you want your ice pop to be
You don’t have to use a super bulky yarn to crochet your ice pop. Whatever you choose, just make sure the yarn you use to embroider the sprinkles is lighter. For example, you could pair a worsted yarn for the body with a fingering yarn for the sprinkles. Or a DK yarn for the body with lace yarn or even embroidery floss for the sprinkles.
The weight of yarn you choose will determine how big your squishy ends up.
- Super bulky yarns make an ice pop roughly 7” tall.
- Bulky yarns make an ice pop about 6” tall.
- Worsted yarn ice pops are about 5” tall.
- DK yarns produce an ice pop 4” tall.
NOTE: These measurements don’t include the stick!

Squishy crochet ice pop pattern
This pattern is dead easy because it’s made in just two parts: the body, and the stick. We’ll make the body first, and attach the stick after the body is stuffed and closed.
I’ve used standard American crochet terms, and the only stitches you’ll need are:
Ch chain
Sc single crochet
Sl st slip stitch
Inc increase (make 2 sc in the same place)
Dec decrease
I recommend using the invisible decrease technique for smooth, gap free results:
- Insert your hook through the front loop only of the next stitch, then through the front loop only of the following stitch (fig. 1). 3 loops on hook.
- Yarn over and draw through two loops. Two loops remaining on hook.
- Yarn over and draw through both remaining loops (fig. 2).

The body
Start with the color you want to appear at the top of your ice pop (in my case chocolate brown). Make either a magic circle, or by making four chains and joining them with a slip stitch to form a loop. If you’re using a velvet or chenille yarn like me, then the four-chain loop is easier to close. But if you’re using a smooth yarn and you prefer a magic circle, then go for it!
- 1st round: Ch 1, sc 8 into the center of the magic circle or 4-ch loop (8 sts)
- 2nd round: 8 inc (16 sts)
- 3rd round: *1 sc, inc* 8 times (24 sts)
- 4th round: *2 sc, inc* 8 times (32 sts)
- 5th round: *3 sc, inc* 8 times (40 sts)
- Rounds 6 – 9: Sc all the way round

Round 10: Color change
When you get to round 10, it’s time to change color for the first time. I’m changing to white. You can, of course, make the simplest color change there is: let go of your first yarn color, pick up your second, and just keep going. Here’s a little illustration of how that will look.

It’s perfectly respectable and nothing to be embarrassed about, but it is a little bit zig-zaggy, and we can reduce that using an alternative technique. It’s fractionally more complicated, but I encourage you to give it a go, because I think the results are definitely worth it:
- As if making a single crochet, insert the hook into the next stitch and draw through a loop of the color you’ve been using so far (picture 1). We’ll call this the old color. Two loops on hook.
- Make a loop of your new color over the hook, and draw it through both loops (picture 2). This completes your first sc.
- Insert the hook into the next stitch and draw through a loop of the old color again (picture 3). Two loops on hook.
- Loop the new color over the hook, and draw it through both loops (picture 4).
- Repeat steps 3 and 4 for the rest of the round.

Here’s how the color transition is going to look using this technique. There’s still a bit of zigzag, but it’s much less pronounced.
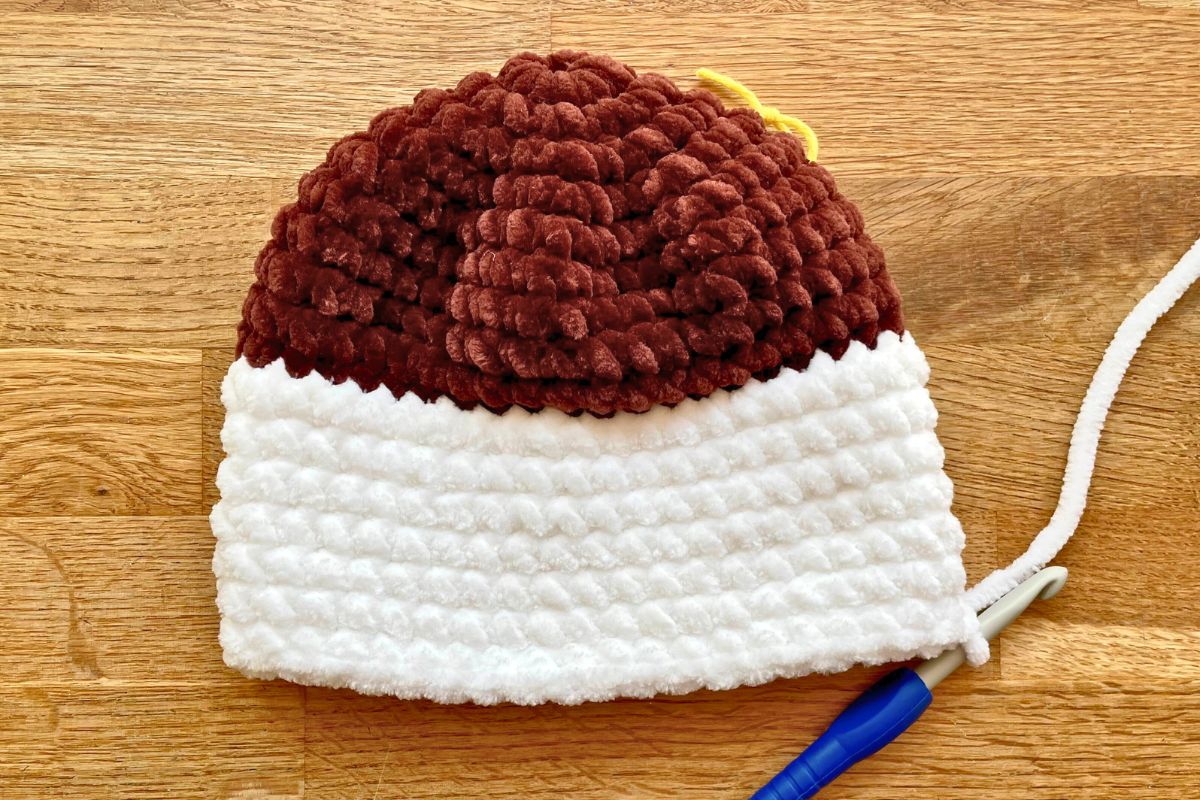
When you’ve completed the round, cut the old yarn leaving a 4” tail, and weave it in. Now continue with just your new yarn.
- Rounds 11 – 17: Sc all the way round
- 18th round: Change to 3rd color
- Rounds 19 – 23: Sc all the way round
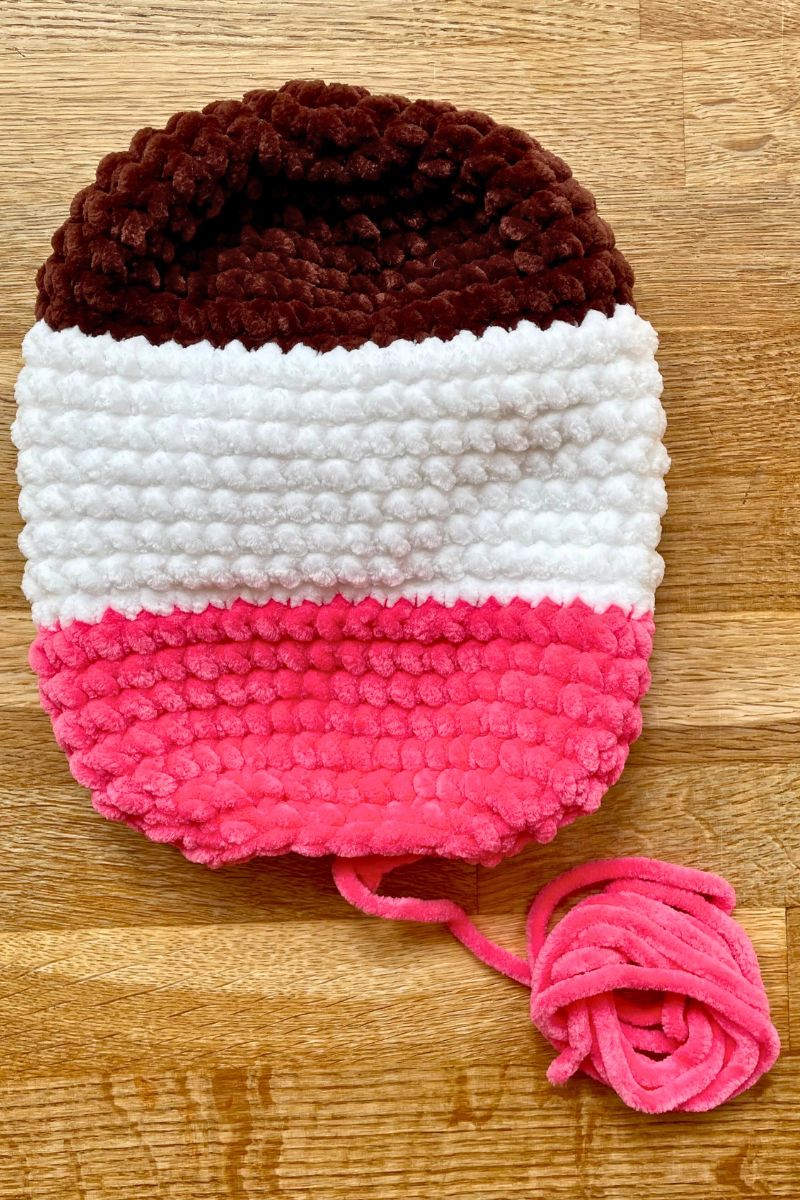
To make a 4 color ice pop
My ice pop has three colors. Fabs had (still have, in fact) a strawberry layer, a milk layer, and then the top third was dipped in chocolate. (To my parents’ consternation, I almost always lost interest in them once I’d eaten the chocolate off). But if you want to replicate something like a Jolly Rancher popsicle, no worries – just make your color changes in rows 8, 14, and 20.
Rounds 24 onwards
The body of your ice pop is nearly done now, and it’s time to start making your rounds smaller again:
- First, sc 10. This is so that the places where you’ve changed color end up on the back of your squishy, but the seam at the very bottom still runs from side to side later. Mark where you are – this is the start of round 24.
- 24th round: 3 dec, sc 8, 6 dec, 8 sc, 3 dec (28 sts)
- 25th round: 3 dec, sc 2, 6 dec, 2 sc, 3 dec (16 sts)
- Put a stitch marker into the loop on your hook, and cut your yarn leaving a 24 inch tail.
Embroidering the sprinkles
Next I went in with my lighter yarn and added sprinkles by just diving in and out through the chocolate layer with a darning needle.

Honestly, I think it’s easier to get the tension right if you add them after stuffing and closing the body. But I was waiting on the delivery of some more safety eyes at this point, so I decided to press ahead and do them now. I’ve actually lightly stuffed the top section of the body to help me position the sprinkles and get the tension accurate.
You can see that the stitches to make my sprinkles are pulling strands of the Polyfil stuffing through to the outside of my squishy. If this happens to you too, just pick them off with tweezers or trim them with scissors when you’re finished.
Add the eyes
Next insert your ice pop’s eyes. Spread out your ice pop’s body facing upwards in front of you and make sure it’s straight. The two pairs of single crochets in round 25 (highlighted in bold above) should be lined up. Now the stalks of the safety eyes go in the gap between rows 13 and 14, and 6 stitches apart – 3 either side of center. Push the backs on firmly and give them a wiggle to make sure they’re not going to come free again.
Stuffing and closing the body
Eyes in place, stuff the body firmly with Polyfil or similar toy stuffing. Then to close it:
- 26th round: 8 dec (8 sts), sl st into the next st, and pull the yarn tail all the way through.
Poke in a little more stuffing if it will fit, and thread the yarn tail onto a darning needle. Think of the remaining eight stitches as two parallel rows of fours stitches, running from one side of your squishy to the other, and join them using a mattress stitch. If you’re not sure how this should look, insert the needle inwards through the outer loops in the sequence shown in picture 1 (the needle is already in position to make the first stitch). Don’t pull them tight just yet (picture 2).
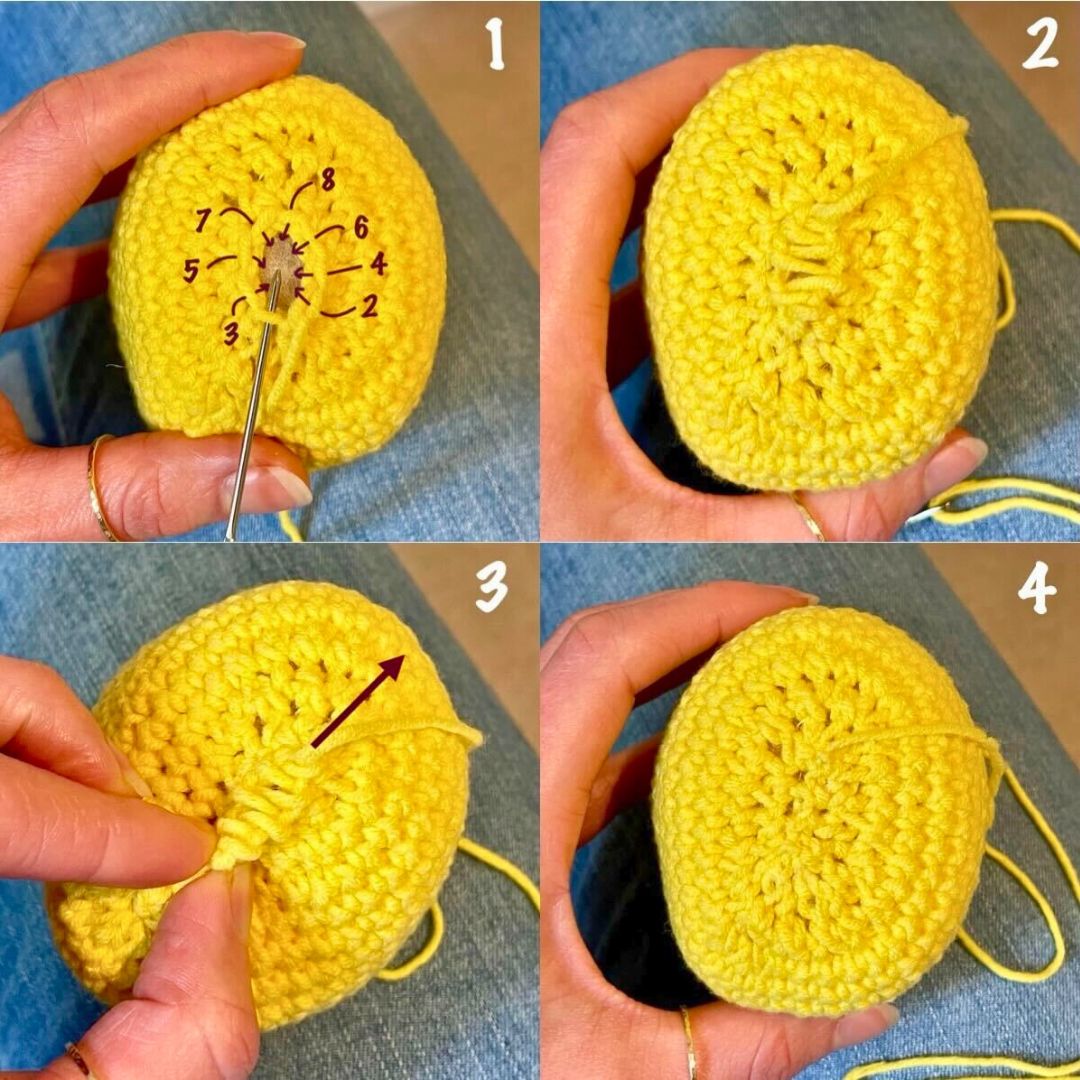
Once all the stitches are in place, pinch the end you started at firmly and pull the tail in the other direction (picture 3). The hole should zip right up (picture 4). Tie off the end and poke it inside the body.
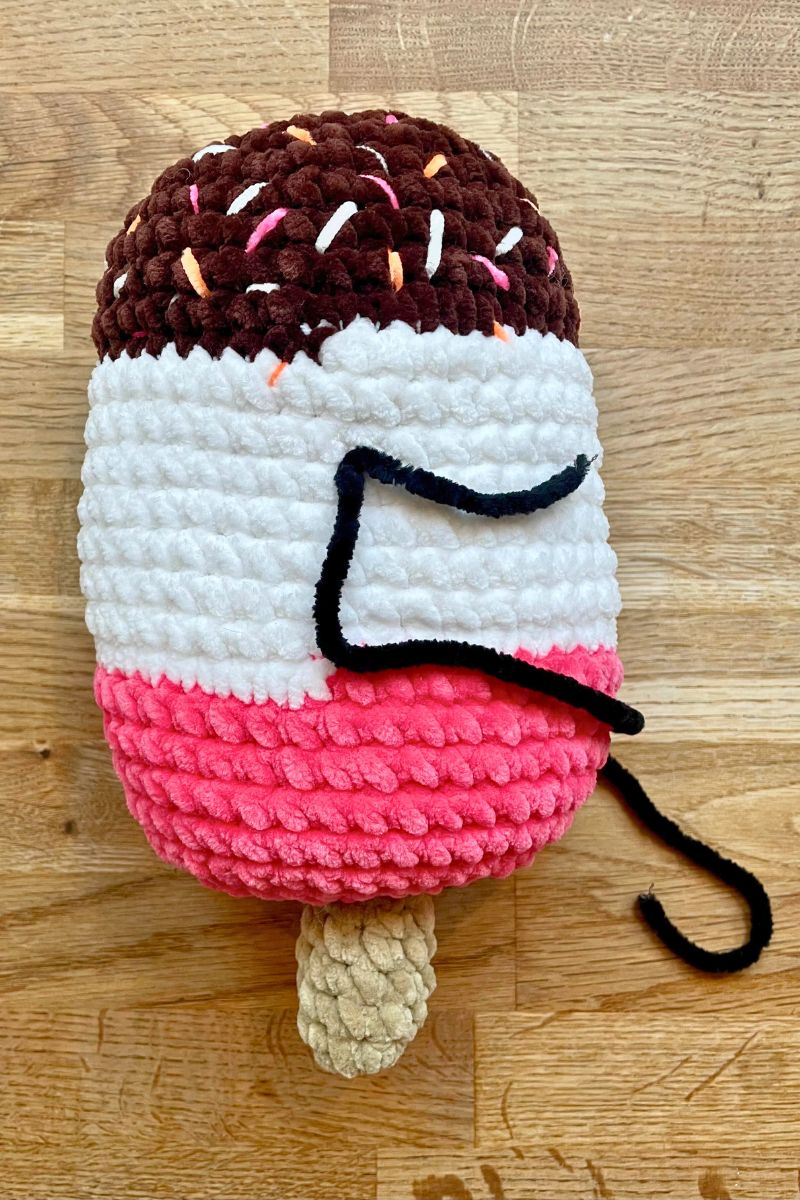
The stick
To make your ice pop’s stick:
- Magic circle, or ch 4 and join with a sl st.
- Round 1: Ch 1, Sc 8 into the circle or loop.
- Rounds 2 – 4: Sc 8
- Sl st once into the next st, cut the yarn leaving a long tail for sewing, and pull the tail right through the sl st.

Stuff the stick firmly, and use the yarn tail to sew it onto the bottom of your ice pop. Take care to get it central – I had to unpick and reattach mine because it was miles off on the first attempt! It helps to hold it in place and mark the outline of where it meets the body with pins. That way, if the stick does shift while you’re sewing it on, you’ll notice and still put the stitches in the right place.
The finishing touch
Of course, it’s the mouth! Because who doesn’t smile when they’re eating an ice pop? (Even if they do only intend on nibbling the chocolate off the top). Fabian’s smile is four stitches long and follows the grid pattern made by the crochet stitches. If you want to design your own smile, or experiment with other expressions, a great way to experiment without committing is using a smartphone. Take a photo of your ice pop, open up the editing options, choose the drawing tool and have a go marking out different possibilities.
When you’re ready to commit, thread your yarn onto a darning needle, and push it right through from the back of the body to the front, leaving a tail poking from the back of the body. Embroider the mouth using back stitch, then push the needle all the way through the body and back out through the same space on the back of the body. Tie the two ends together, trim the tails, and poke the knot inside the body. Here’s my yarn going into and coming back out of Fabian’s back:
And you’re done! It’s time to admire your squishy and take some glamor shots.

Squishy crochet ice pop pattern – summary
This squishy toy is such a fun summer project. He’s the very definition of ‘simple yet effective’. Once you’ve made him, there’s nothing stopping you from making my squishy cat and owl patterns too. They’re both based on the exact same body shape. I’d love to see how your squishy ice pops turn out too, so if you make one please share a photo on Instagram or Facebook. Have fun!
*The products linked in this pattern were carefully selected by Lucy Kate Crochet. If you decide to purchase using the links provided, we may earn a small commission on that sale. This is at no extra cost to you.
