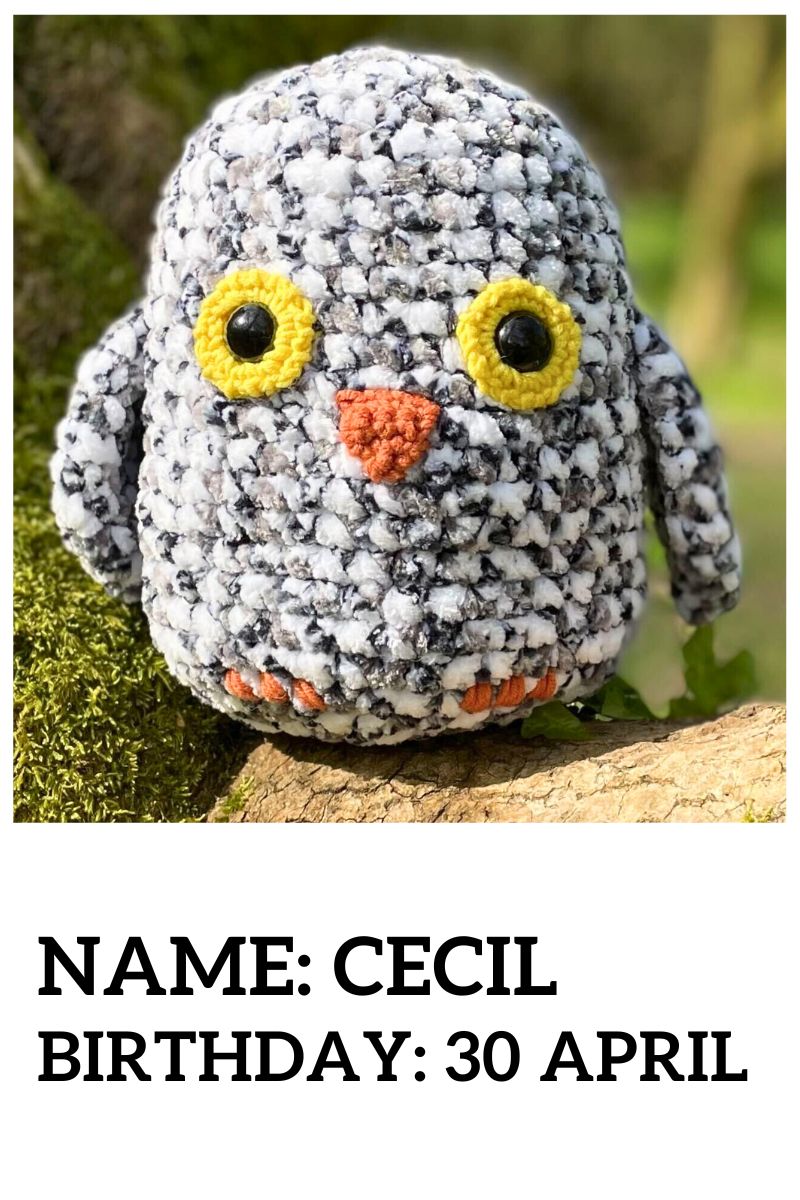
Squishy Crochet Owl Pattern

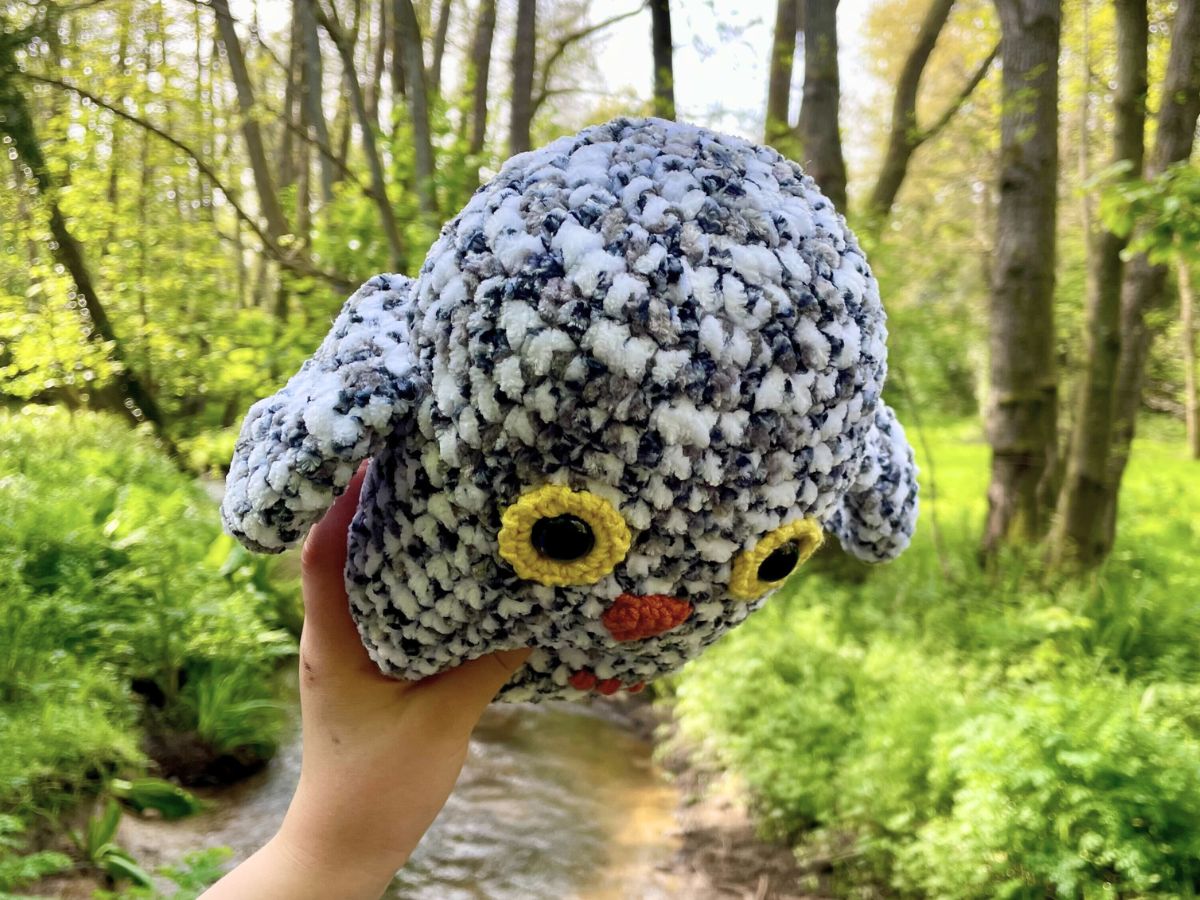
Hoot hoot! Let me introduce you to Cecil, my squishy crochet owl. He is truly one of the great thinkers of our age, not to mention a master of concealment. But best of all, he is simple to make, and a perfect entry-level amigurumi project. Cecil is made from super bulky, fluffy chenille and stands 7” tall.

My daughter assures me he’s got all the properties of a perfect cuddle buddy. But you can make him smaller or larger by using a lighter or heavier yarn. A mini squishy crochet owl would be a thoughtful gift for an ornithologist pal, or someone heading off to college. This pattern is even quick enough to make at the last minute, and of course goes fabulously with my other squishy kitty pattern.
Squishy crochet owl materials
Since I’ve made my owl plushy-sized, with my 10 year old in mind, I’ve used an ultra soft polyester chenille. But I know these fluffy yarns aren’t everyone’s cup of tea, and he’ll look just as good in another fiber! This is definitely a great project for using up leftovers of any variegated or speckled yarn sitting in your stash though. Even in non-natural colors, they’re a pleasing nod to an owl’s natural camouflage.
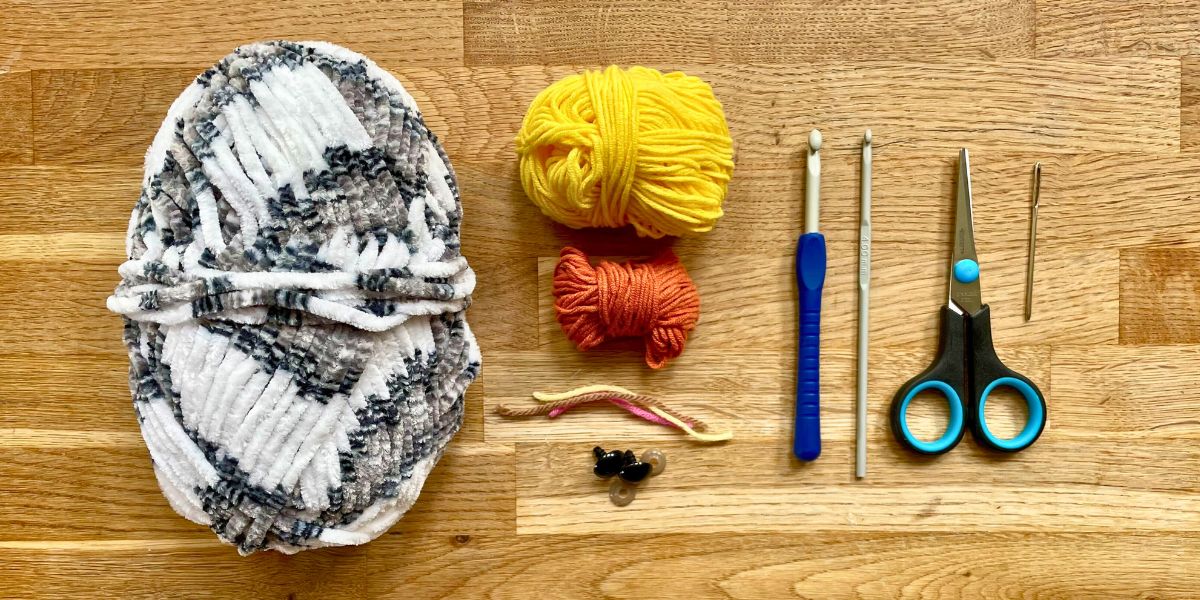
To make your own squishy owl, you’ll need:
- Yarn for the body and ears. I used ⅔ of a ball (65g/85yds) of King Cole Yummy yarn* in the shade ‘licorice’. I’m thrilled with how the pattern on the yarn translated into the pattern on the owl – it was a real “squeeee” moment!
- Small quantities of contrasting yarn in a lighter weight for the eyes, nose and whiskers. I used Scheepjes Softfun* DK in ‘canary’ for the eyes, and in ‘clay’ for the beak.
- Crochet hooks to match your yarns. If the yarn wrapper gives a range of sizes, use the smallest recommended size. It’s also a good idea to go down a hook one size if your tension is generally on the loose side – it prevents the stuffing from peeping out between your stitches later.
- Safety eyes*. If you’re using bulky or super bulky yarn, use approximately ⅝” (16mm) eyes. Use ½” (12mm) eyes for an owl made with DK or worsted yarn, and ⅜” (10mm) eyes for yarn any lighter than that.
- Safety tested toy stuffing*.
- Stitch markers to keep track of your progress. Or some scraps of yarn – surely I can’t be the only one who can never find stitch markers when I need them!
- Scissors.
- A darning needle.
How big will your squishy owl be?
This depends on the exact yarn you use, the size of your hook, and how tight you crochet. But to give you an idea:
- Super bulky yarn (around 130 yds per 100g) makes an owl about 7” tall.
- Bulky yarns make an owl about 6” tall.
- Worsted weight yarn owls will be about 5” tall.
- DK yarns make an owl about 4” tall.
I haven’t made this body shape with a jumbo yarn yet, or with anything lighter than DK. If you do, let me know what yarn you use and how big your own turns out in the comments box down below!
Pattern notes
This pattern uses standard American crochet terms. The only ones you need to know are:
- Ch chain
- Sc single crochet
- Sl st slip stitch
- Inc increase (make 2 sc in the same place)
- Dec decrease
When you get to the base, I recommend using the invisible decrease technique:
- Insert your hook through the front loop only of the next stitch, then through the front loop only of the following stitch (3 loops on hook).
- Yarn over and draw through two loops (two loops remaining on hook).
- Yarn over and draw through both remaining loops.
If you’re brand new to crochet, look at Lucy’s guide to basic techniques before you start, and check out my photos of the invisible decrease technique in this squishy crochet cat pattern.
Now let’s begin!
Squishy crochet owl pattern
Cecil’s body is worked from the top down. It starts as a circle, and finishes with a relatively flat oval base, so that he stands up unsupported. The irises, beak and wings are made separately and sewn on. And finally the talons are embroidered on.
The body
Start with either a magic circle, or by making four chains and joining them with a slip stitch to form a loop – crocheter’s choice! I tend to use a magic circle for smooth yarns, but a four chain loop for fluffy yarns like the one I’m using here. Magic circles made from fluffy yarns can be hard to tighten.
- Make a magic circle, or ch 4 and sl st to join.
- 1st round: Ch 1, sc 8 into the magic circle or 4-ch loop (8 sts)
- 2nd round: 8 inc (16 sts)
- 3rd round: *1 sc, inc* 8 times (24 sts)
- 4th round: *2 sc, inc* 8 times (32 sts)
- 5th round: *3 sc, inc* 8 times (40 sts)
- Rounds 6 – 23: Sc all the way round
- 24th round: 3 dec, sc 8, 6 dec, 8 sc, 3 dec (28 sts)
- 25th round: 3 dec, sc 2, 6 dec, 2 sc, 3 dec (16 sts) Put a stitch marker into the loop on your hook, and cut your yarn leaving a 24 inch tail.

For a shorter squishy crochet owl, start decreasing from round 21, instead of round 24. This is an especially great option if you want your owl to look more like a chick!
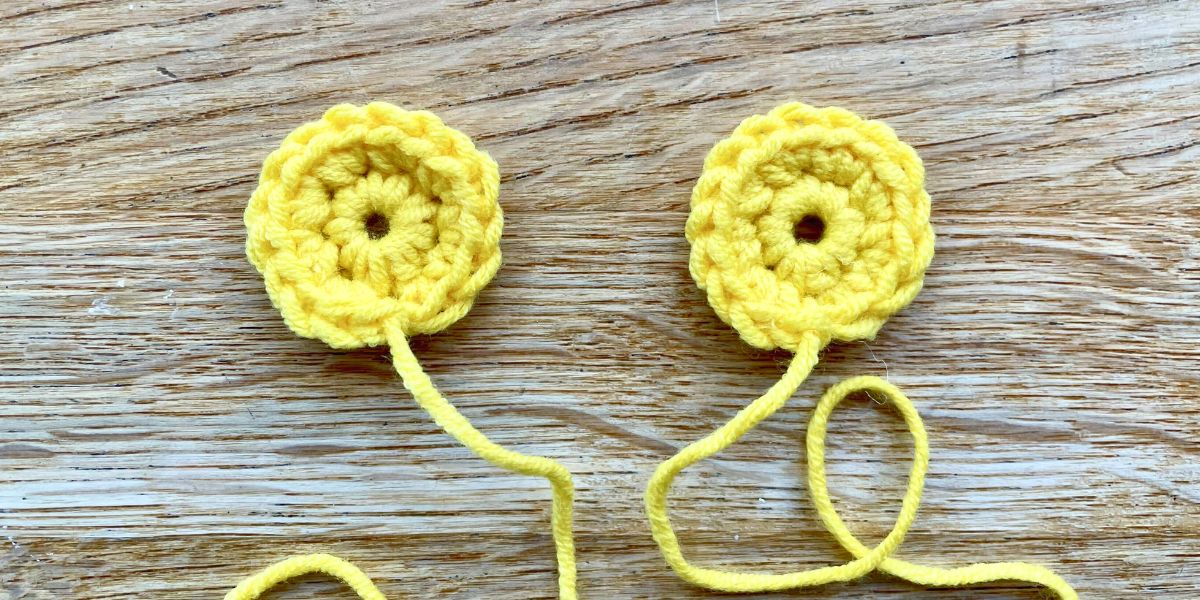
The irises
Make two, using one of your contrasting yarns. Any shade of yellow or orange will look the part, but you could even choose black, for a squishy crochet barn owl.
- Make a magic circle or ch 4 and sl st to join. Don’t worry about pulling the center completely closed.
- 1st round: Ch 1, sc 8 into the circle or loop (8 sts)
- 2nd round: 8 inc (16 sts)
- Sl st once into the next stitch, cut the yarn leaving a long tail for sewing, and pull the yarn tail all the way through the sl st.
TIP: If you’re using a fluffy yarn, you’ll always need more yarn for sewing than you thin, so be generous!
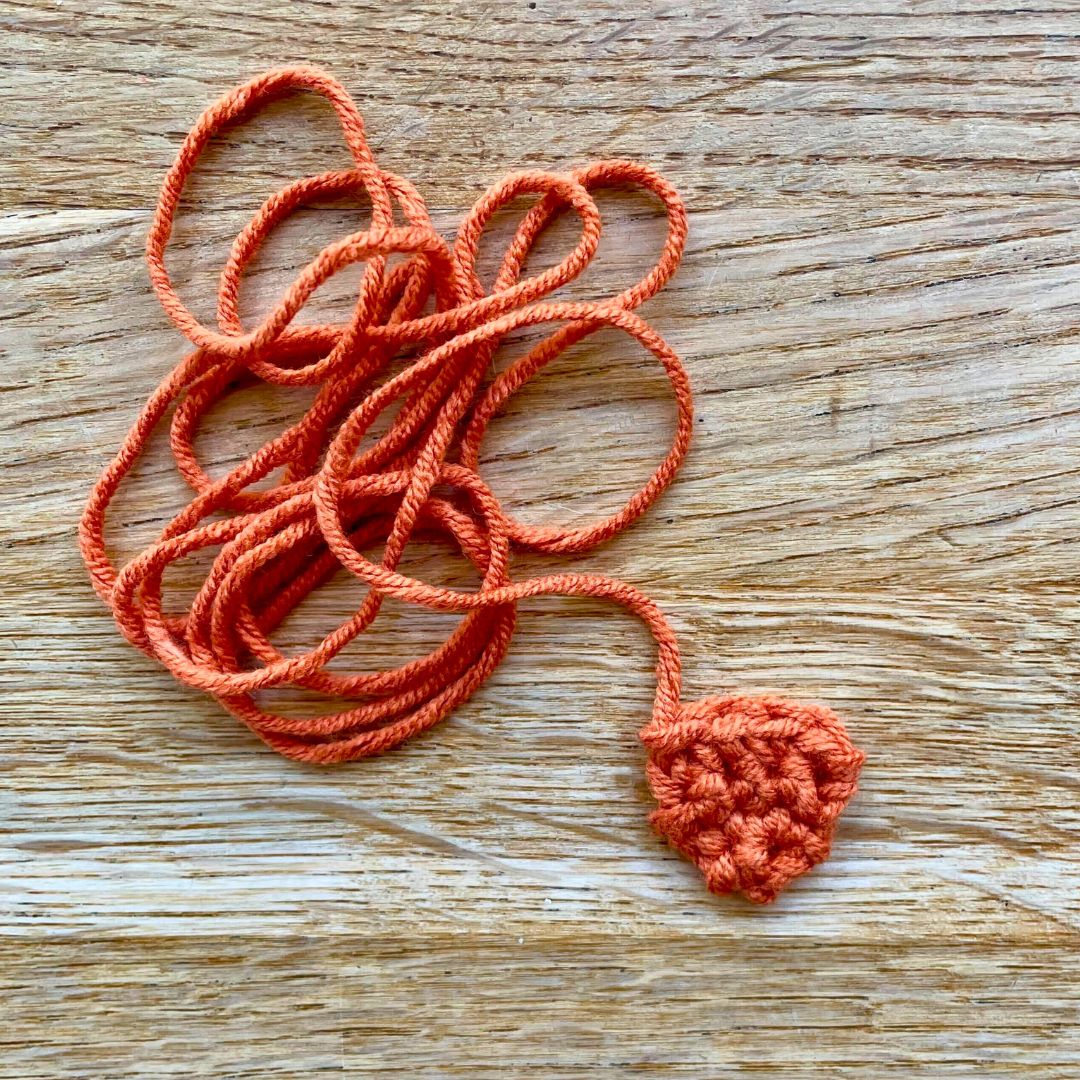
The beak
Most owls’ beaks are black or yellow. I’m using a bit of artistic license and making mine in orange. Working in rows not rounds this time:
- Foundation chain: Ch 2
- 1st row: In the 2nd ch from the hook, inc (2 sts).
- 2nd row: 2 inc (4 sts).
- 3rd and 4th rows: Sc 4 (4 sts)
- Pull the yarn all the way through the final stitch – there’s no need to tie it off.
NOTE: There are no turning chains at the start of each row.
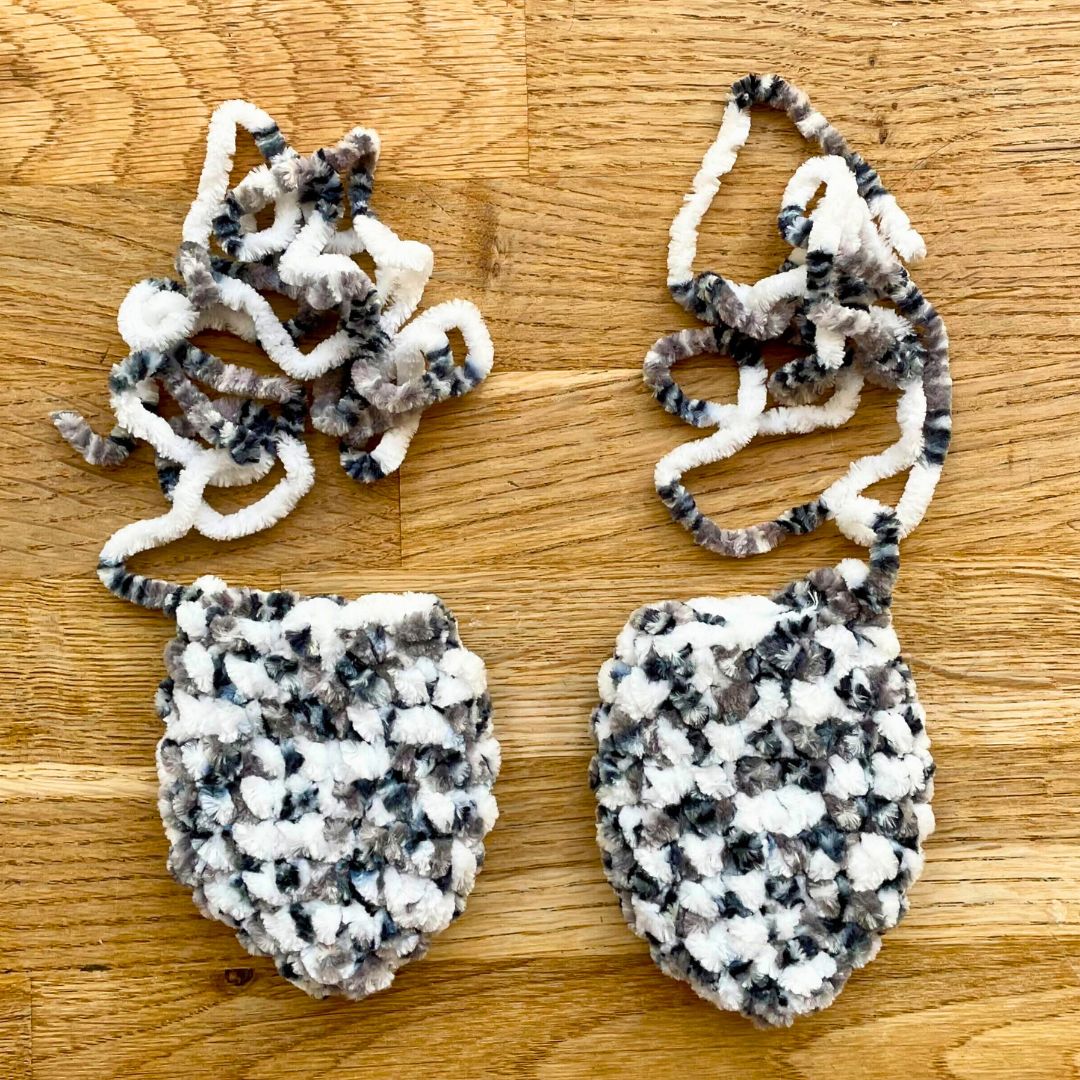
The wings
In the same yarn you used for the body, and working in rounds again:
- Make a magic circle or ch 4 and sl st to join.
- 1st round: Ch 1, sc 5 into the circle or loop (5 sts)
- 2nd round: 5 inc (10 sts)
- 3rd round: *1 sc, 1 inc* 5 times (15 sts)
- Rounds 4 – 9: Sc all the way round
- 10th round: *1 sc, 1 dec* 5 times (10 sts)
- Sl st once into the next stitch, cut the yarn leaving a long tail for sewing, and pull the yarn tail all the way through the sl st.
Make two.
Assembling your owl
Right, all of his parts are ready, so let’s get to building your own squishy crochet owl!
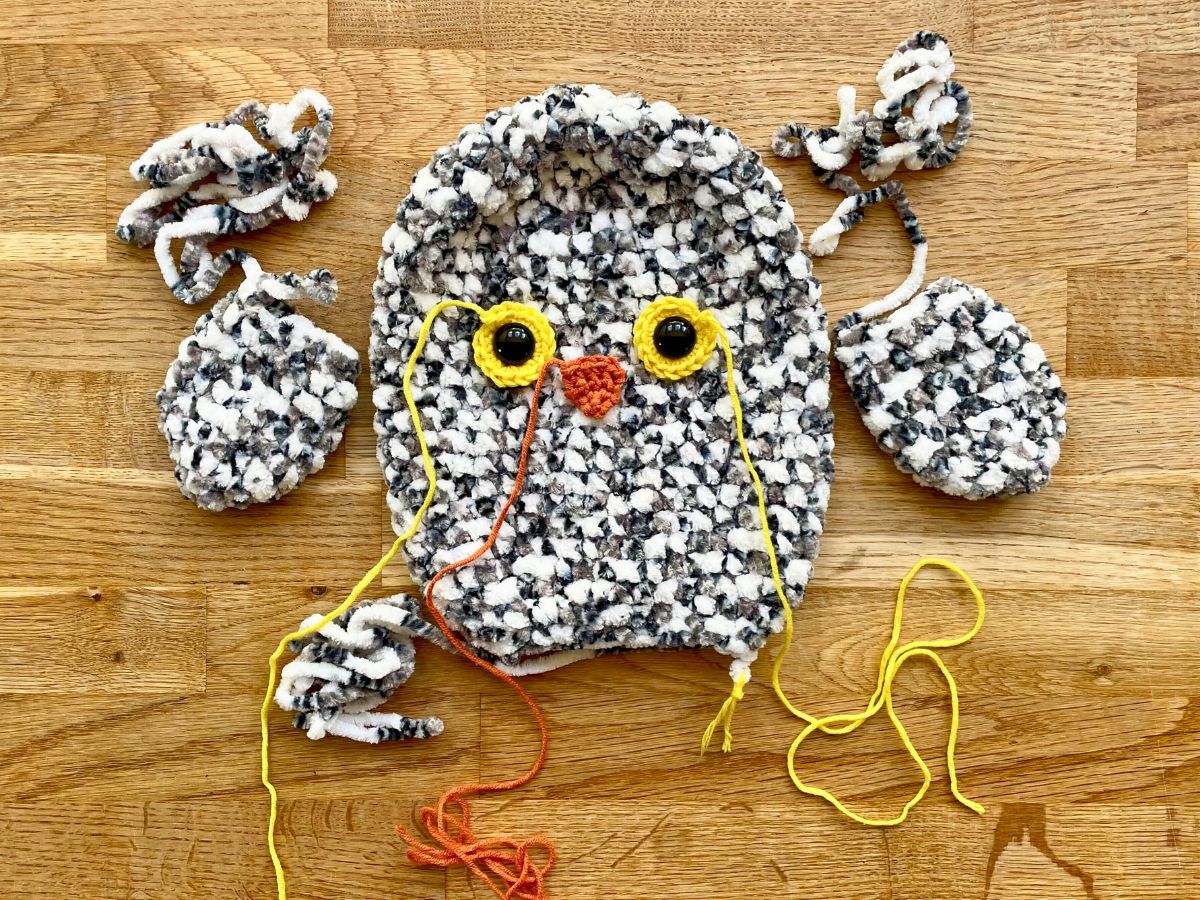
Start by spreading the body out flat, so you can see clearly where the midline of the front is. Now thread the stalks of the safety eyes through the centers of the irises, and push them into the body – 11 rows down from the center of the top of the head, and 6 stitches apart. If you followed the instructions for making your owl shorter, insert the eyes 10 rows down. Push on the backs.
Sewing down the edges of the eyes and beak
Thread the yarn tail onto a darning needle, and push the needle through the next stitch counter-clockwise around the edge of the iris (picture 1). It’s important to put your first stitch here, of the outline of the iris will have a dimple in it later. Now work around the iris, anchoring each stitch to the body with a whip stitch. Push the needle out through the body slightly inside the circumference of the eye (picture 2), then up through the edge of the iris (picture 3). This stops the stitches extending beyond the outer edge of the eye (picture 4).
* Or the next stitch clockwise, if you crochet left handed.

Repeat for the second eye, and sew on the beak in the same way.

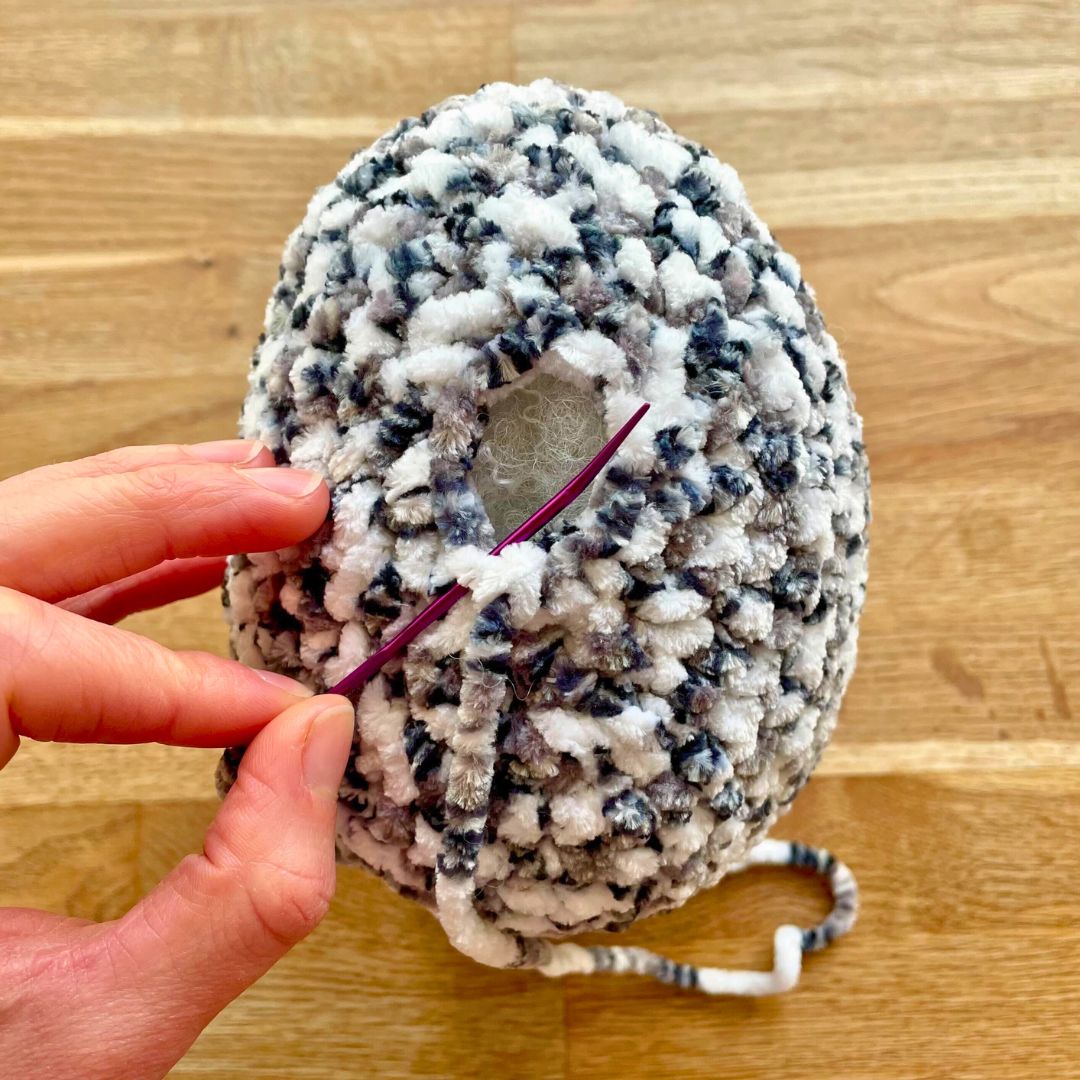
Stuffing and closing your owl
Here comes a fun part – it’s time to firmly stuff your owl with polyester toy filling. If you’re making yours the same size as mine you’ll need about 2oz of filling. When it’s full, work one more round of crochet stitches:
- 26th round (23rd round for a shorter owl): 8 dec (8 sts), sl st into the next st, and pull the yarn tail all the way through.
Poke in a little more stuffing if it will fit, and thread the yarn tail onto a darning needle. Picture the remaining eight stitches as two parallel rows of fours stitches, running from one side of your squishy to the other, and join them using a mattress stitch.
If you’re unsure how that should look, there’s a detailed explanation in my squishy crochet cat pattern.
Joining the wings
Next your owl is going to need his wings in order to take flight. Thread the yarn tail onto a darning needle, and join the wings to the body with stitches around the 11th row. Start four stitches back from the edge of eye, and work from front to back on both sides. It’s pretty normal for joins to end up a little bit uneven, but if your wings are set an even distance at the front, no one will notice if one ends further back than the other! The stitch markers in this photo show roughly where the stitches need to go.

You can sew down just the top edge of the wing opening, or you can thread the needle through both sides of the opening. I’ve sewn down both sides, because it makes the join feel more secure. But the wing will look exactly the same if you only sew down the top edge, and then the wings are like secret pockets you can hide love notes or cash in. Which is pretty cool too.
One last step – adding talons
Some people break into a cold sweat at the prospect of adding embroidery to their amigurumi. And if you count yourself among them, then you can skip this step. No one is coming to check you did it! But I do recommend at least giving it a go. It’s super simple, and it just follows the grid pattern made by the crochet stitches.
- Cut a piece of yarn the length of our arm, and thread the two ends into a darning needle.
- Place your owl firmly down on a flat surface, and make a note of the lowest row that’s still clearly visible – this is the row you’ll embroider the talons onto.
- Starting a couple stitches to the side of the midline, insert your needle beneath that row, and bring it out in the diagonally opposite corner of that stitch.

- Pull needle through the loop at the other end of the yarn (picture 1), and insert the needle back behind the same stitch, in the opposite direction. This should pull the tip of the loop inside the body, hiding it (picture 2).
- Insert the needle in at the top of the same talon, and bring it back out as illustrated in picture 3. Embroider two more talons using two diagonal stitches for each.
- Wrap one of the yarn tails behind one of your stitches (picture 4), knot it to the other yarn tail, trim the ends and poke the know inside the body.
- Repeat on the other side of the body.
You’ve done it! Give your owl a squeeze, choose it a name, then take its photo and show them off to everyone you know.
Squishy crochet owl pattern – summary
I love how cuddly and characterful this owl turned out, and I hope you’ll enjoy using the pattern too. It never ceases to amaze me how the simplest designs can be the most effective. My favorite thing about this pattern is how versatile it is. A small owl made with lightweight yarn could become a key chain or even a Christmas tree decoration. A medium sized owl would be a cute addition to a bookshelf or desk. I’d love to know what you’re going to do with your owl, so please let us know in the comments box down below. Or even better, show us how it looks on Instagram or Facebook.
Pin For Later!
*The products linked in this pattern were carefully selected by Lucy Kate Crochet. If you decide to purchase using the links provided, we may earn a small commission on that sale. This is at no extra cost to you.


