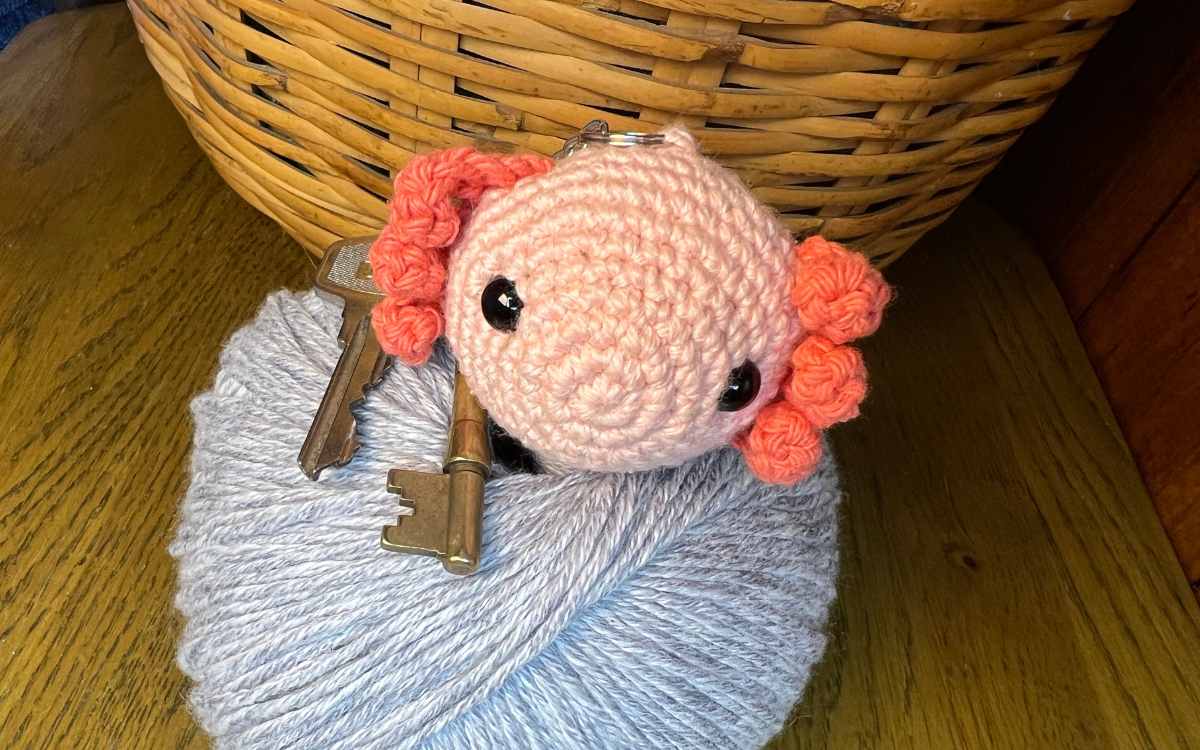
Free Amigurumi Axolotl Keychain Pattern
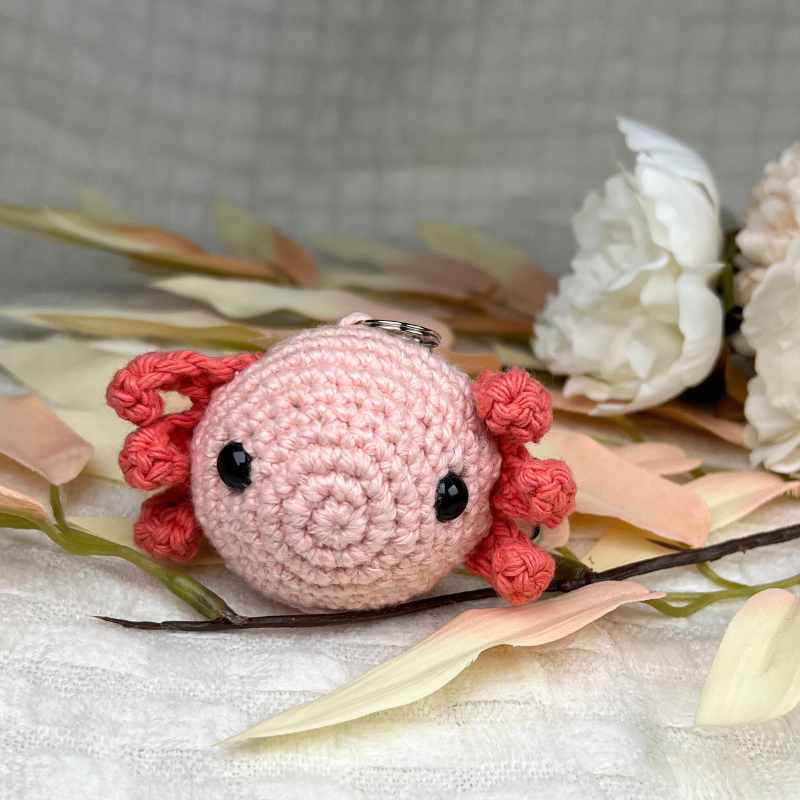
My household has gone Full Axolotl in the last few days. Which is funny, because it’s one of the few pets we don’t have here… for now. Both my kids picked up different styles of axolotl toys at a fair at the weekend, and my envy of their purchases inspired this new amigurumi axolotl keychain pattern.
My crochet axolotl used a tiny amount of yarn, but has such a big personality. And given you can work one up in the time it’d take to make a meal from scratch, I might make a few more and stash them in my drawer as potential last minute gifts!
What You’ll Need
This is what I used to design my amigurumi axolotl keychain:
- 2.5mm crochet hook
- 30g Hobbii cotton silk pale pink DK yarn
- 3mm crochet hook
- 20g dark pink Lily Sugar n Cream yarn*
- Toy safe stuffing*
- Stitch markers
- Tapestry needle
- 10mm safety eyes*
- Stitch markers
Techniques and Tips
- magic circle
- sc – single crochet
- ch – chain
- 2sc – put two single crochets into one stitch
- sc2tog – join two stitches with one single crochet
- surface crochet
- sk – skip the next stitch along
- slst – slip stitch
Free Amigurumi Axolotl Keychain Pattern
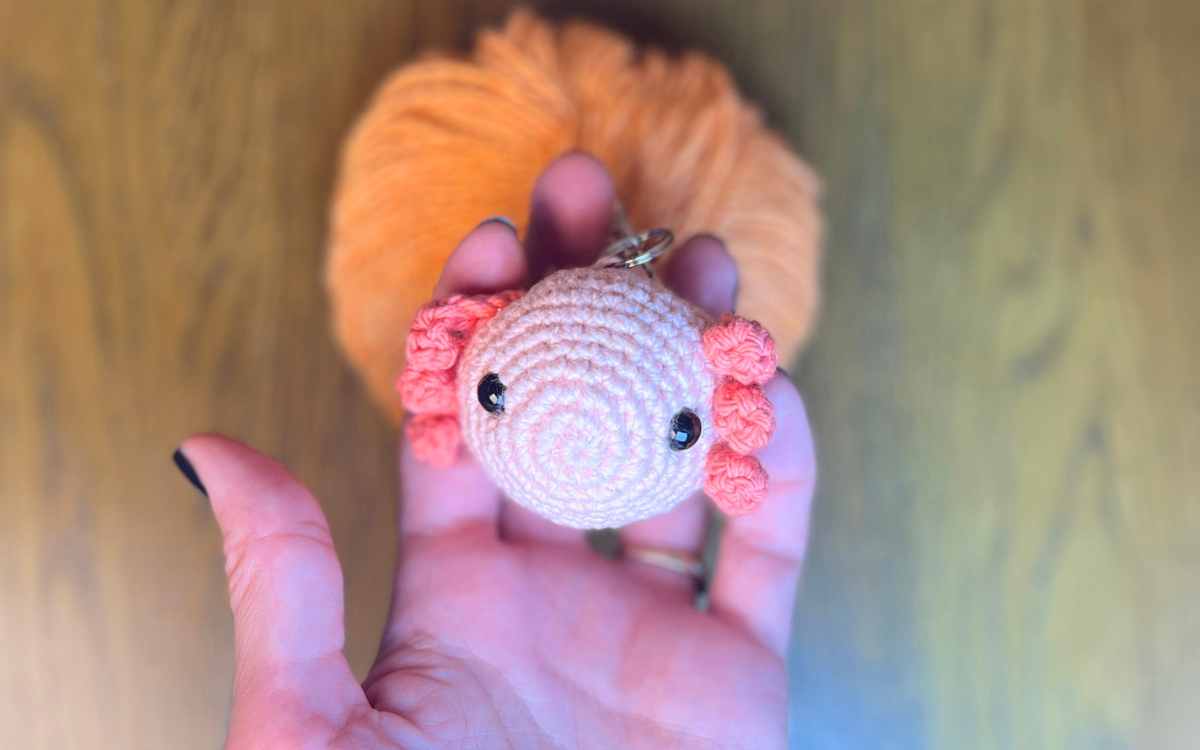
I made my crochet axolotl in three sections, the head, body and tail, then the tail fin detailing and finally the gills around the face.

Head to Tail
This section will create from your axolotl’s head to the tip of their tail.
Round 1
Make a magic circle of eight stitches (8)
Round 2
2sc x 8 (16)
Round 3
(1sc, 2sc) x 8 (24)
Round 4 – 5
1sc x 24
Round 6
(1sc x 2, 2sc) x 8 (32)
Round 7
(1sc x 3, 2sc) x 8 (40)
Round 8 – 10
1sc x 40
Round 11
(1sc x 3, sc2tog) x 8 (32)
Round 12 – 13
1sc x 32
Round 14
(1sc x 2, sc2tog) x 8 (24)
Round 15 – 16
1sc x 24
Insert safety eyes at round 6 level.
Round 17
(1sc, sc2tog) x 8 (16)
Round 18 – 20
1sc x 16
Fill with toy stuffing.
Round 21
sc2tog to close
Detailing the Tail
Continue working in your 2.5mm crochet hook, but this time you’ll switch to surface crocheting.
Cast onto your hook, and slip stitch into a point equivalent to exactly between the axolotl’s eyes but 15 rounds back, then working directly towards the point of the tail make 1sc in each stitch. Continue around the underneath of your axolotl until you are directly under your first stitch. Then slip stitch to join, and weave the loose tail back into the body.
Crochet Axolotl Gills
I switched it up for the gills, because they need to really stand out. You’ll need your 3mm crochet hook and some darker pink cotton blend yarn.
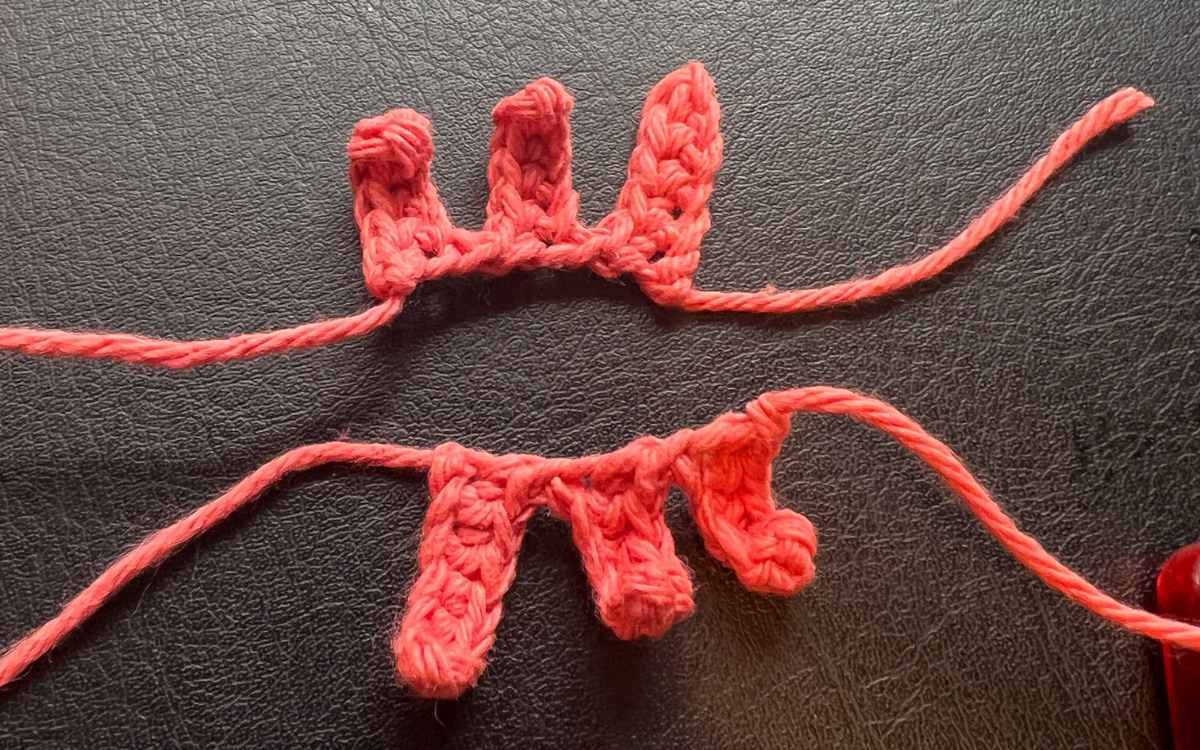
Make two of the following:
Row 1
Ch6, sk, 1sc x 5
Row 2
Ch7, sk, 1sc x 5
Row 3
Ch7, sk, 1sc x 5
Once you have made your two gil sections, hand sew them to either side of the eyes using the same colored yarn.
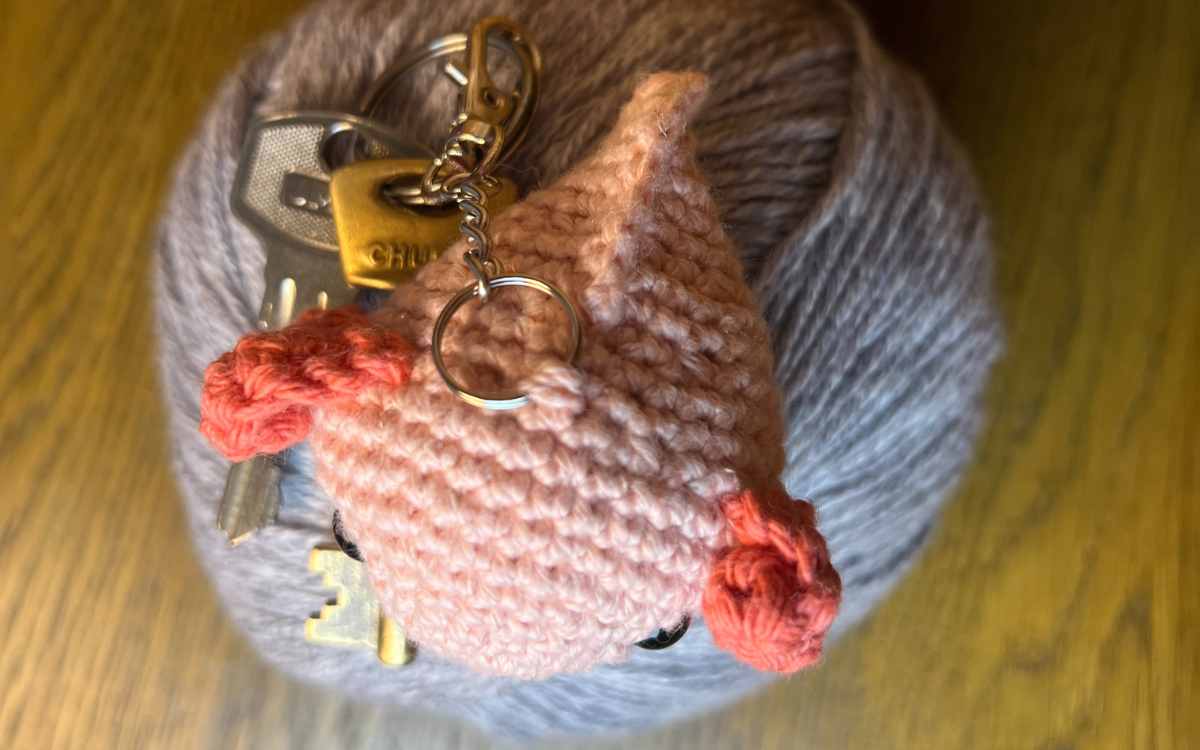
Attaching the Keychain
There are several ways you can attach your keychain, but this is how I did mine.
I bought a bulk pack of blank keychains online, and they came unassembled. Once I’d opened them and had a good look at what I was dealing with, I chose the parts that looked best on the toy, and then took the same color yarn as the body of the axolotl. I hand sewed the chain onto the body, because I decided I’d rather have the low risk of the yarn snapping than the high risk of the stitches deforming when I pushed the ring through. But there is no wrong way!
*The products linked in this pattern were carefully selected by Lucy Kate Crochet. If you decide to purchase using the links provided, we may earn a small commission on that sale. This is at no extra cost to you.
