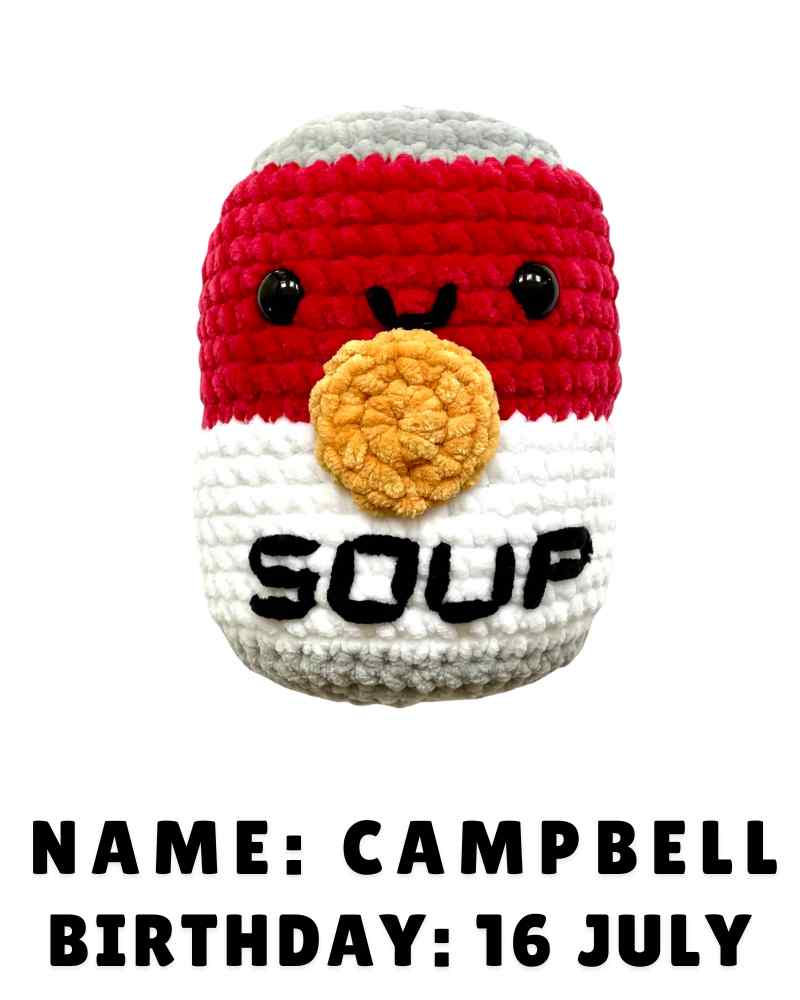
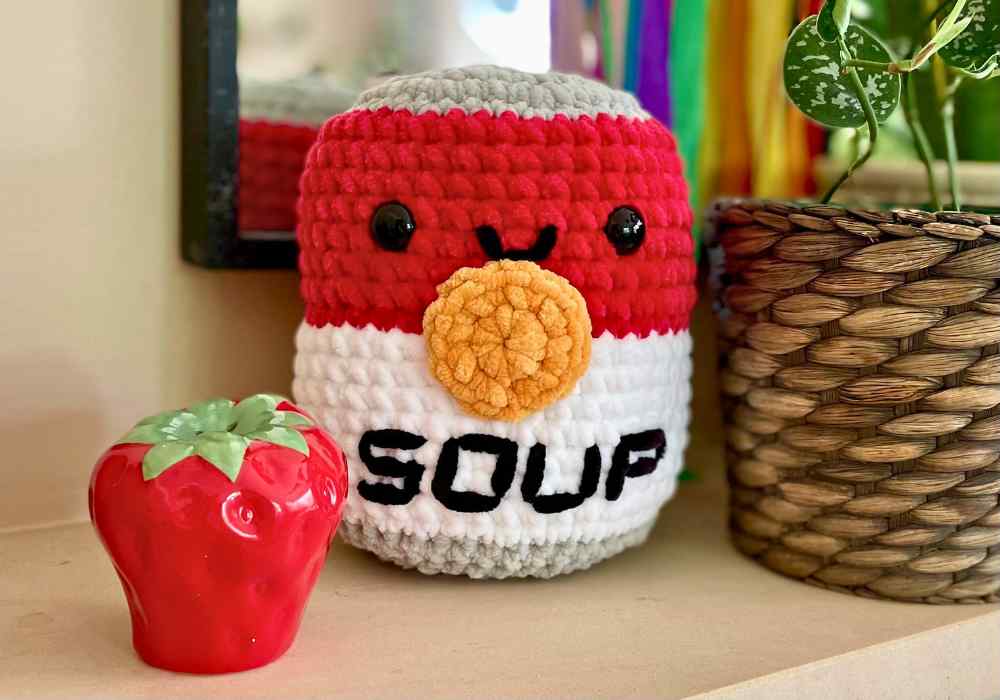
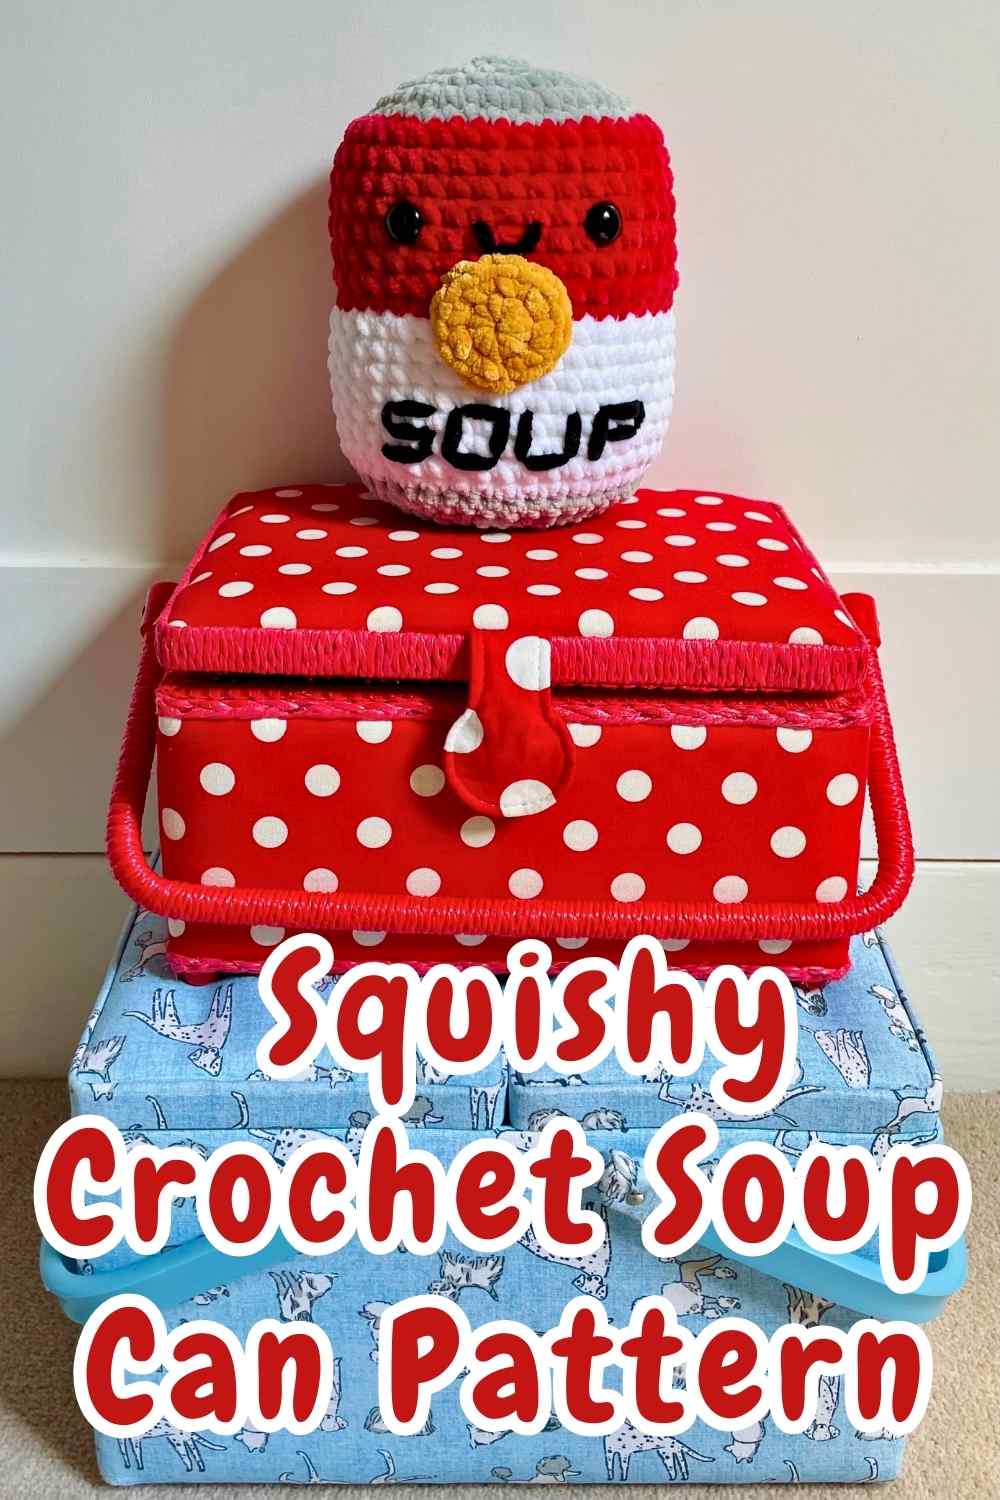
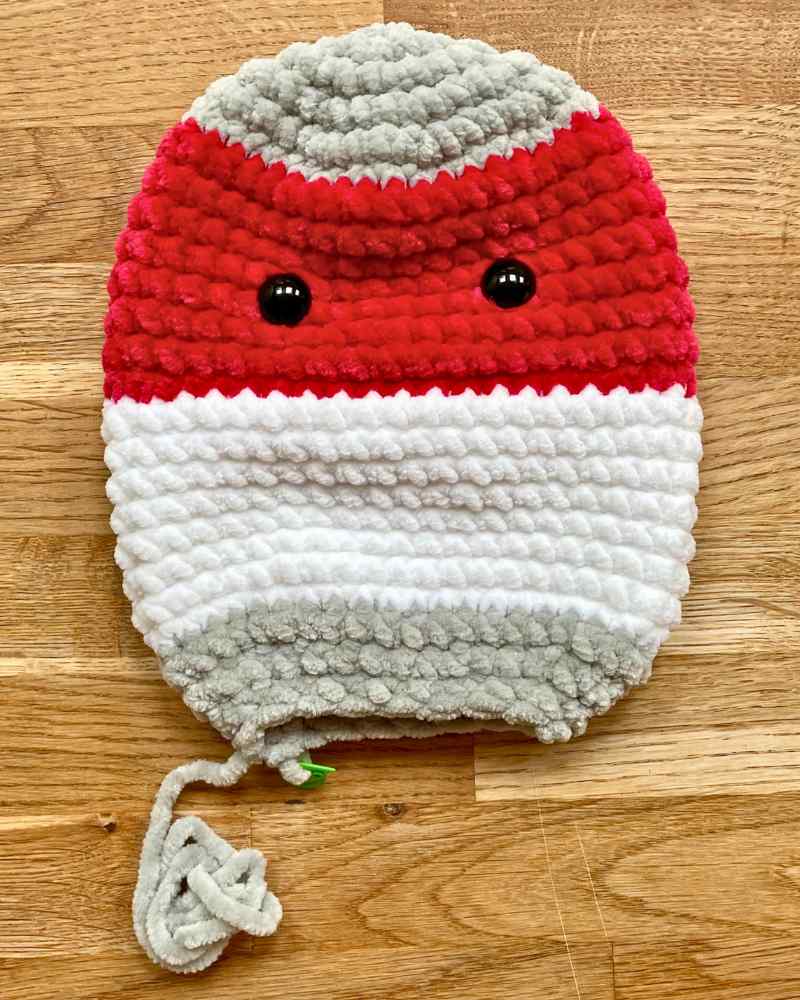
Squishy Crochet Soup Can Pattern
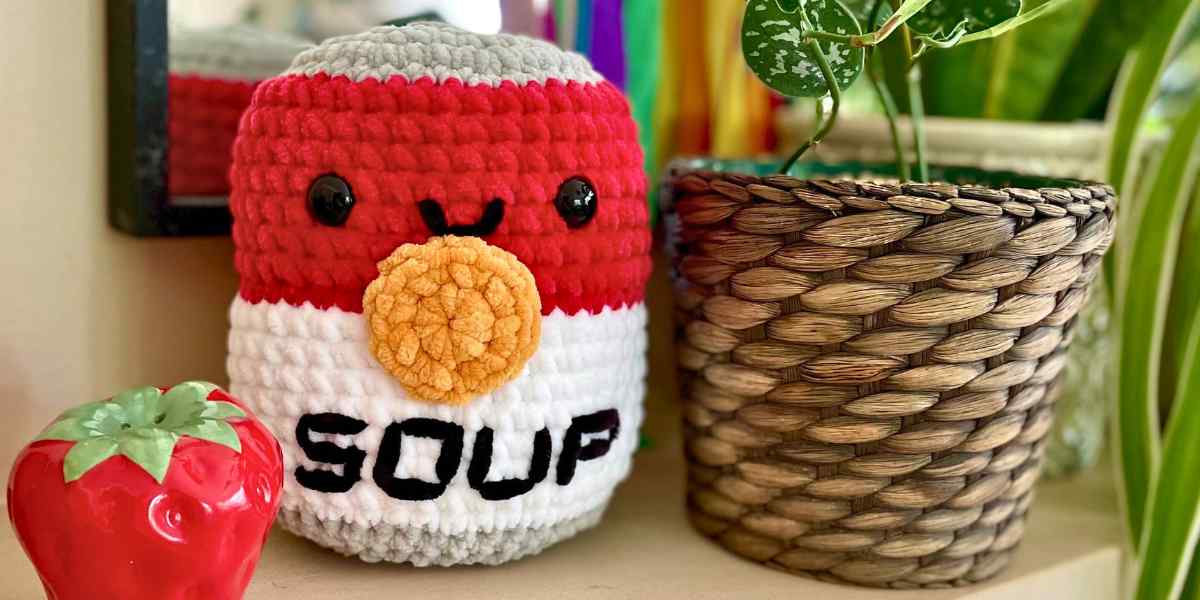
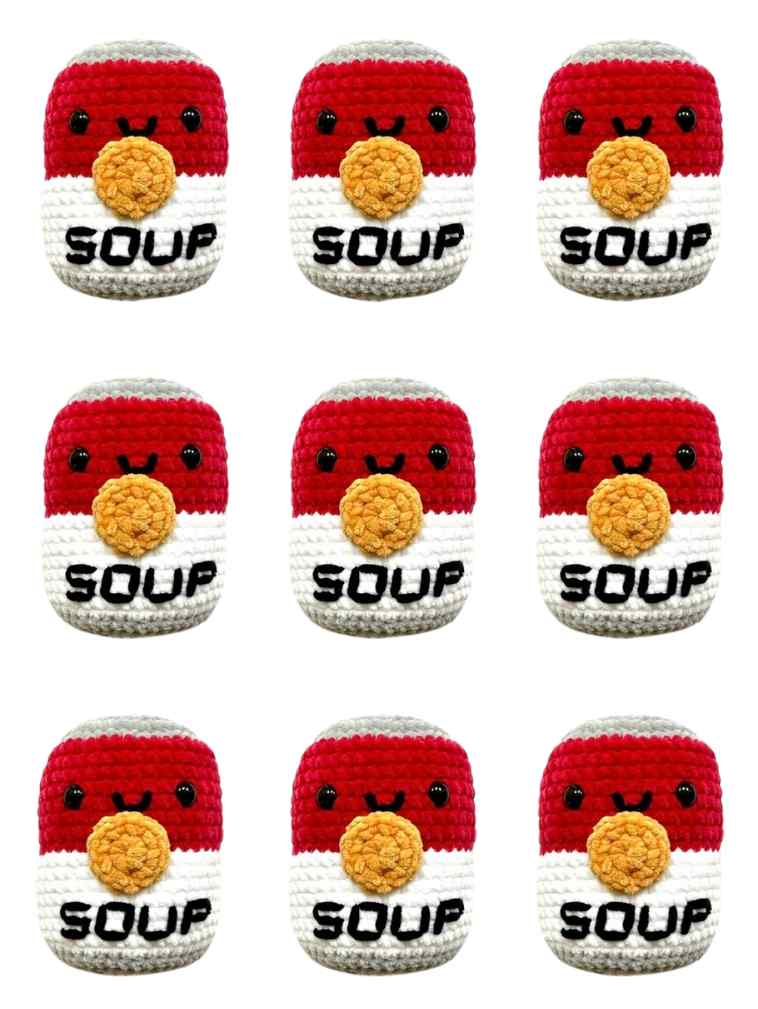
Greetings! Welcome to my squishy crochet soup can pattern. Ever since I came up with the basic body template for all my squishy patterns, I’ve had an idea in the back of my head to try making one in the likeness of a can of Campbell’s soup. Inspired, you might have already guessed, by Andy Warhol’s famous pop art paintings. This week, I finally tried turning that idea into reality, and now you can decide whether or not my attempt was successful. But I’ll happily admit – I love it! A squishy crochet can is kitsch and unexpected, and the iconic Campbell’s branding is instantly recognizable. A smaller version would be a cute desk buddy for a modern art lover, and an even bigger version could be an eye-catching scatter pillow.
Best of all, this pattern is dead simple to make, and a really fun introduction to the quirky and offbeat world of amigurumi.
Materials
To make your own crochet Campbell’s soup, you will need:
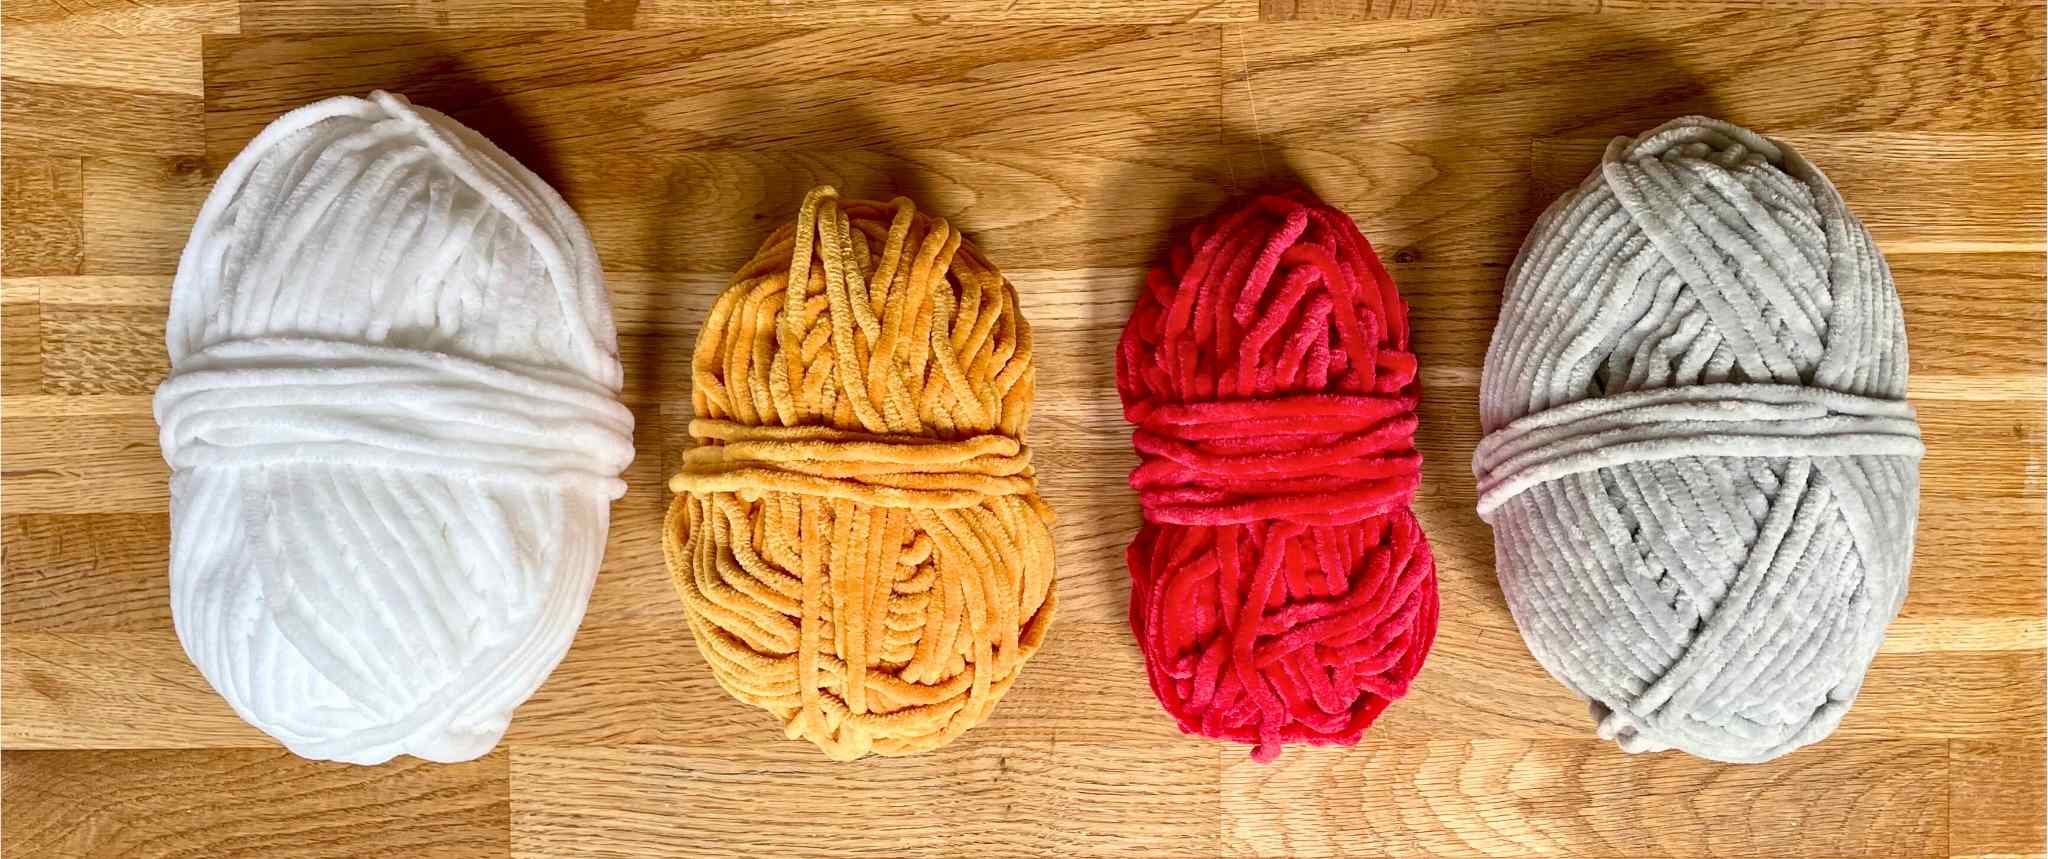
- Yarn in red, white, gray, yellow and black. I’ve used Cygnet’s Jellybaby yarn in postbox, white, and pearl gray, and Hobbii’s Toucan yarn in mustard and black. You can use any weight or fiber of yarn, as long as all your yarns are the same weight.
- Crochet hook. Your can will look more effective if your tension is tight. Unless you already crochet with a grip like you’re chiseling granite, I recommend using a hook one size smaller than you usually would with the yarn you’ve chosen.
- Stitch markers. Or scraps of yarn, for keeping track of rounds.
- Safety eyes. I’ve included notes on what size to choose down below.
- Toy stuffing. Ideally something very bouncy, like PolyFil.
- Darning needle.
What weight of yarn should you choose?
This pattern will work with any weight of yarn. The size you choose will also determine how big your soup can turn out, and what size safety eyes will look right.
| Yarn weight | Finished height (approx.) | Safety eye diameter |
| DK | 4 inches | 12mm |
| Worsted (aran) | 5 inches | 12mm |
| Bulky | 6 inches | 16mm |
| Super bulky | 7 inches | 16mm |
| Jumbo | 8 inches | 20mm |
Pattern notes
This pattern only uses a small number of very basic techniques. The abbreviations I use in the instructions are:
Ch chain
Sl st slip stitch
Sc single crochet
Inc increase (make two single crochets in the same space)
Dec decrease
The best decrease to use for amigurumi projects is the invisible decrease, because it doesn’t leave any gaps for stuffing to show through. To make an invisible decrease, insert your hook into the front loop only of the next two stitches, so you have three loops on the hook (left, below). Put the yarn over the hook, and draw it through the first two loops on the hook – leaving you with two loops still on the hook. Yarn over again, and draw it through both of those loops (right, below).

Squishy crochet soup can pattern
Now let’s get making! The can is worked from the top down, in one continuous spiral. The eyes need to be added before the can is stuffed and closed, and the gold label, mouth and lettering are added last.
The can
With your gray yarn, either make a magic circle, or 4 chain stitches and slip stitch into the furthest chain from the hook to form a loop. I prefer a magic circle with smooth cottons and wools, and a 4-ch loop with fuzzy chenilles or brittle acrylic yarns. The 4-ch loop is easier to tighten later without the yarn snapping.
- 1st round: Ch 1, sc 8 into the magic circle or 4-ch loop (8 sts)
- 2nd round: 8 inc (16 sts)
- 3rd round: *1 sc, inc* 8 times (24 sts)
- 4th round: *2 sc, inc* 8 times (32 sts)
- 5th round: *3 sc, inc* 8 times (40 sts)
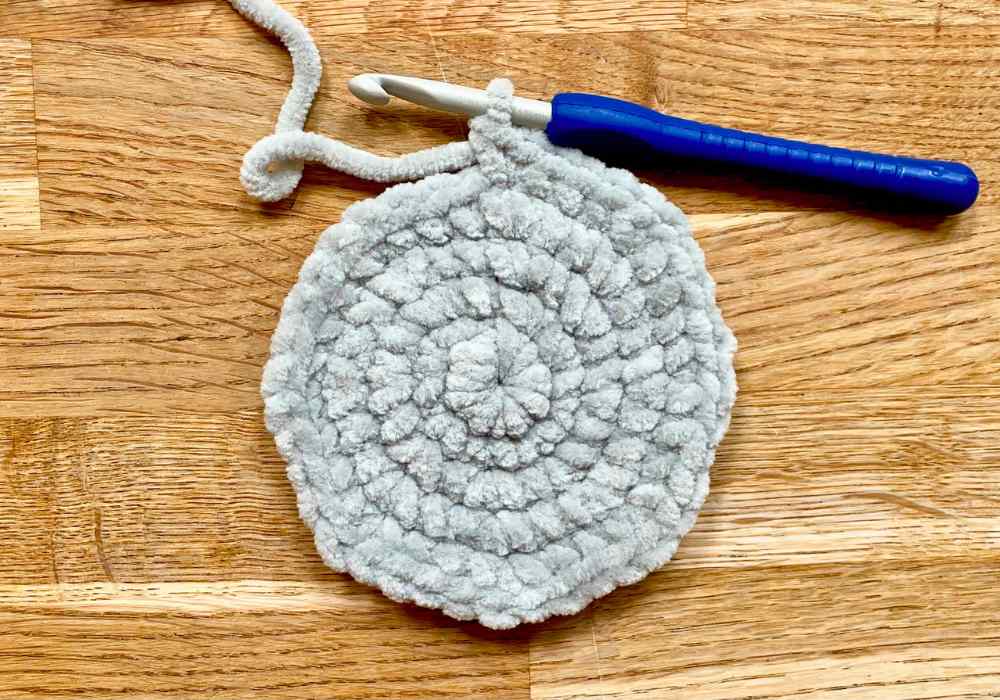
- 6th rounds: Sc all the way round, changing color to red as you go (40 sts)
Changing color
I think the success of this design lies partly in the crisp color changes between gray, red, white and gray again. To achieve them, we’re going to change yarn color continuously in every stitch of round 6.
For each stitch:
- Insert the hook into the stitch and draw through a loop of gray yarn (picture 1).
- Put the red yarn over the hook next (picture 2), and draw it through.
- At the end of each stitch you’ll have one red loop left on the hook (picture 3). Each stitch has gray legs, and red top loops.
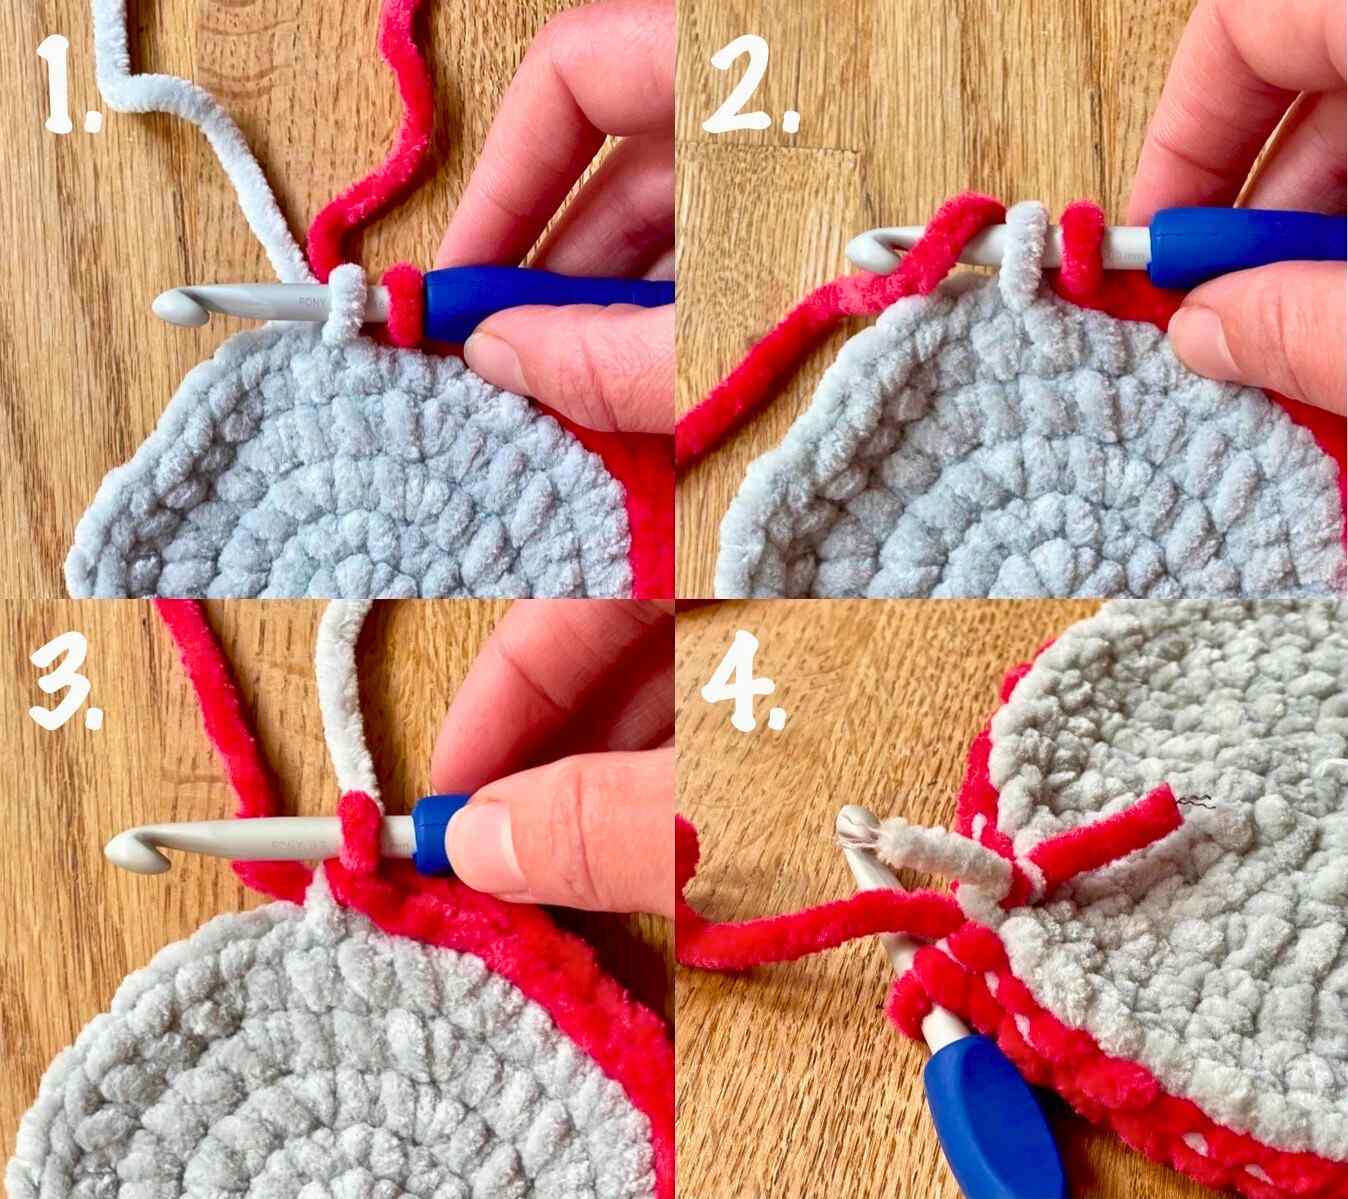
When you’ve repeated this for every stitch in round 6, cut the gray yarn and tie the end to the start of the red yarn (picture 4).
Continuing the body
- Rounds 7 – 13: Sc all the way around in red.
- 14th round: Sc all the way round, changing color to white as you go.
- Rounds 15 – 21: Sc all the way round in white.
- 22nd round: Sc all the way round, changing color to gray as you go.
- 23rd round: Sc all the way round in gray.
- 24th round: 3 dec, sc 8, 6 dec, 8 sc, 3 dec (28 sts)
- 25th round: 3 dec, sc 2, 6 dec, 2 sc, 3 dec (16 sts)
Put a stitch marker into the loop on your hook, and cut your yarn leaving a 24 inch tail.
Insert the safety eyes halfway down the red section of the body, between rows 10 and 11. They should be about 8 stitches apart, but it could be a couple more or less, depending on the weight of your yarn and the size of the eyes. It’s a good idea to make the gold label and check it fits well between them before pushing on the backs!
The gold label
Start with a magic circle or 4-ch loop.
- 1st round: Ch 1, sc 8 into the magic circle or 4-ch loop (8 sts)
- 2nd round: 8 inc (16 sts)
Slip stitch once, cut the yarn leaving a long tail for sewing, and pull the yarn tail all the way through the slip stitch.
Check the label fits well between the eyes (it should sit halfway over the line between the red and white halves of the can). Then set it to one side to sew on after your squishy is stuffed.
Stuffing and closing your squishy
When you’re confident the eyes are set the right distance apart, push the backs on firmly to secure them. Then pack the can with toy stuffing. Remember that you can always fit in a little more when it seems full, and it will all squash down a bit after your squishy is closed and finished. This pattern definitely looks better firmly stuffed, so you’re aiming to fit in as much as you can without stretching or distorting the stitches.
Grab your hook again, and crochet one more round:
- 26th round: 8 dec (8 sts)
Slip stitch once, pull the yarn tail all the way through, and thread it onto a darning needle. Close the remaining hole with mattress stitch through the front loops only. If that’s not a method you’ve used before, it look like this:
The first picture shows where all the stitches go (the needle is already in position for the first stitch). Make the stitches loosely at first as in picture 2. Then either pull them tight one at a time (best for fuzzy wools) or pinch the start of the join firmly and pull the yarn tail in the opposite direction (picture 3). Oh and you see those gaps between the other stitches? That’s what happens when you don’t use a small enough crochet hook! Just as well this was just a demonstration squishy!
With you can closed, hide the yarn tail inside the body, and sew the gold label in place.
Adding the lettering and smile
Finally, it’s time to embroider on the lettering and give your soup a heart warming smile. This is pretty simple – each letter just follows the grid pattern in the crochet stitches. Each of the letters is based on a square, two rows high, and two stitches wide. Since crochet stitches tilt slightly, the letters also tilt – a really cute nod to the script-style fonts on real Campbell’s soup tins. I could pretend I planned it that way, but in all honesty it was a happy accident!
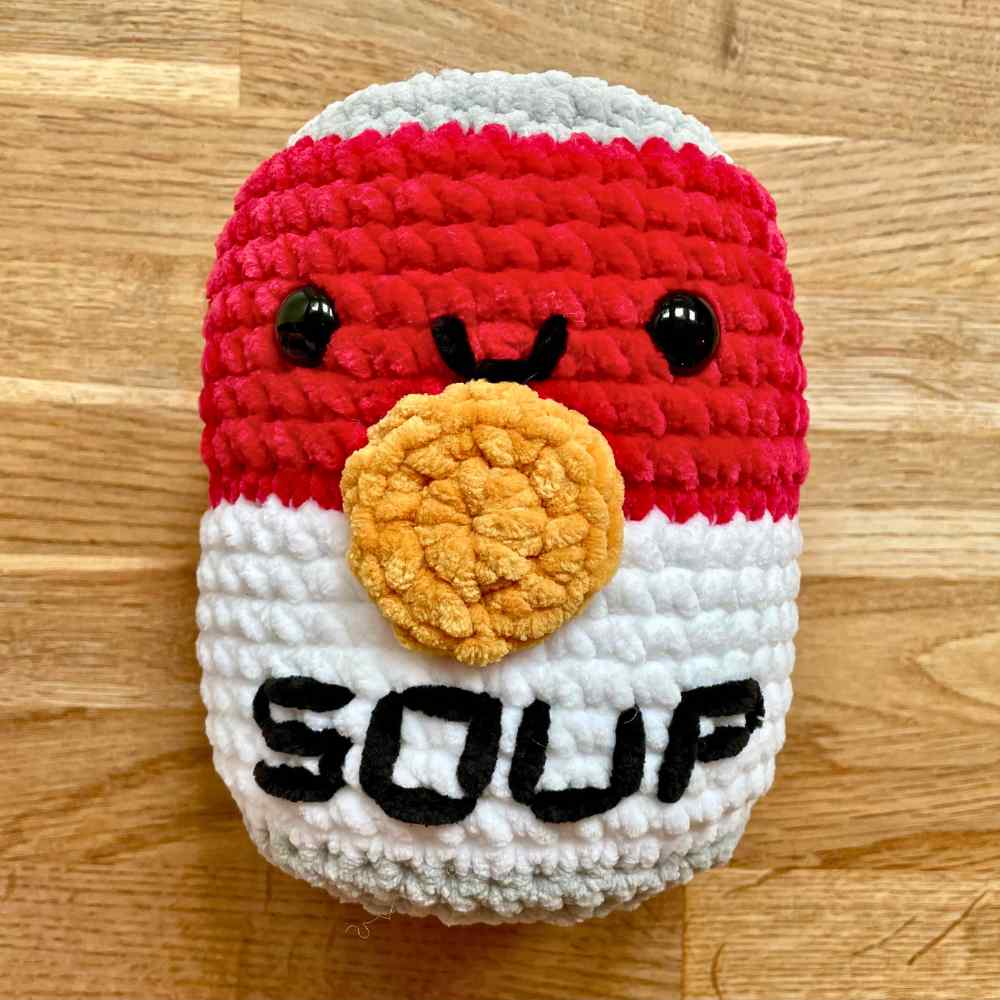
Surprisingly, when I made the lettering central to the gold label (with the space between the O and the U lining up with the center of the label) the word itself actually looked lopsided, and too far left. I think probably because the P takes up less space than the other letters. So I unpicked my first attempt, and redid it all one stitch to the right. Which is mathematically off center now, but looks much more balanced!
The smile is simply three stitches which follow the grid pattern in the single crochets again. There should be just enough space for it to fit between the eyes and the gold circle.
Dealing with yarn tails
The easiest way to deal with the yarn tails from the gold label and the black lettering is to feed all of them out through the same point on the back of the body. Then knot them together tightly, trim the ends, and poke the know back inside the body. The stuffing will keep the knot anchored, so the stitches on the front of the body stay taut.
And with that, your squishy soup can is finished! I hope you’ve loved making it, and I’d love to know what you’re going to do with it next. Please let us know in the comments box down below!