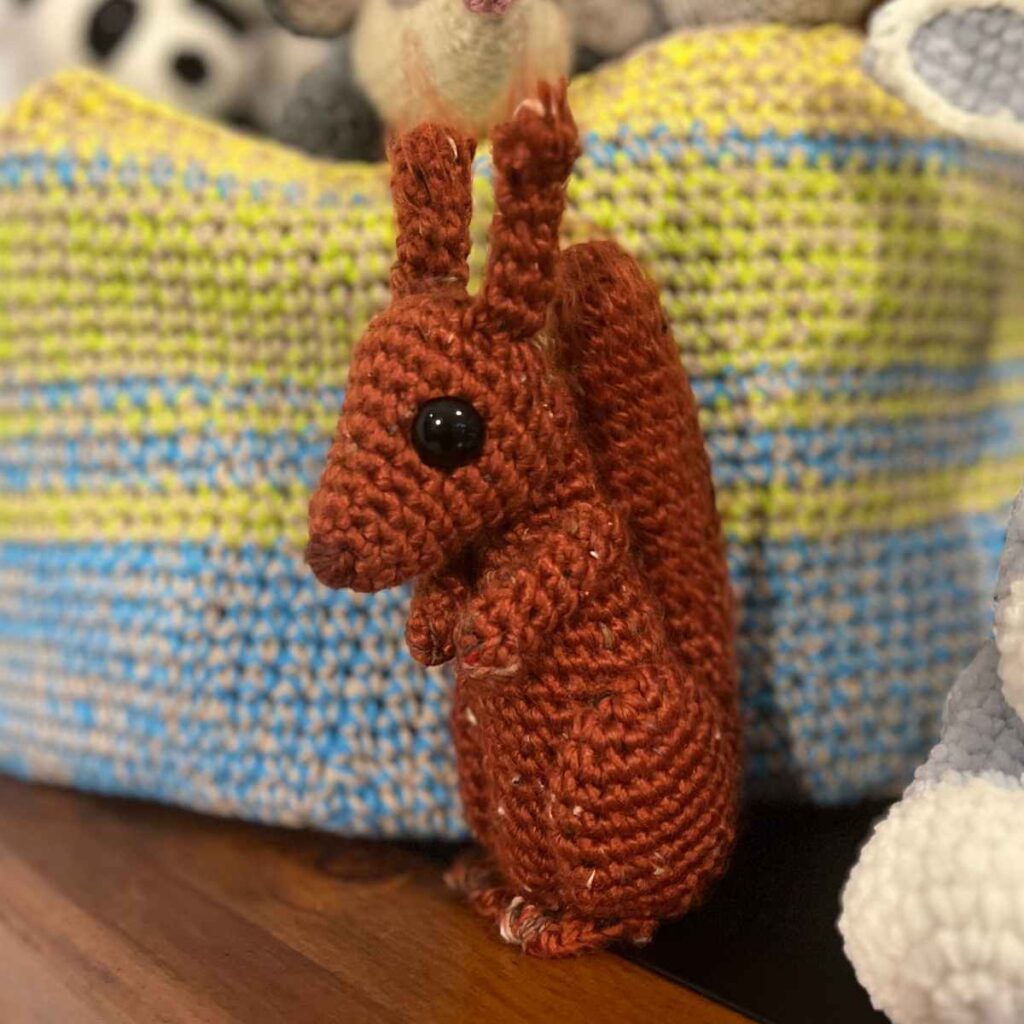
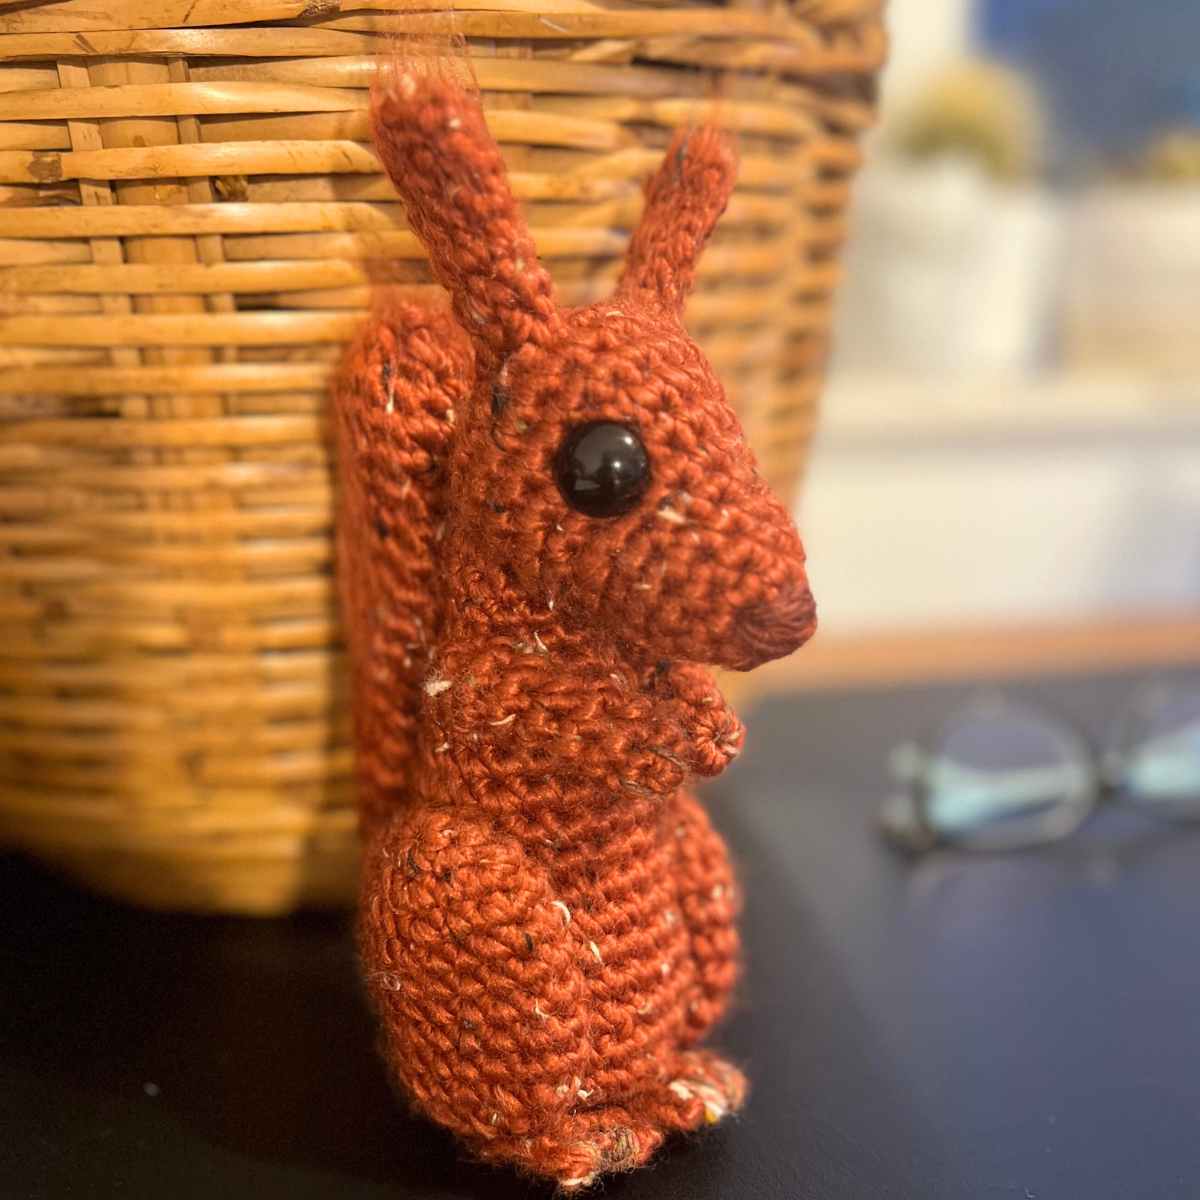
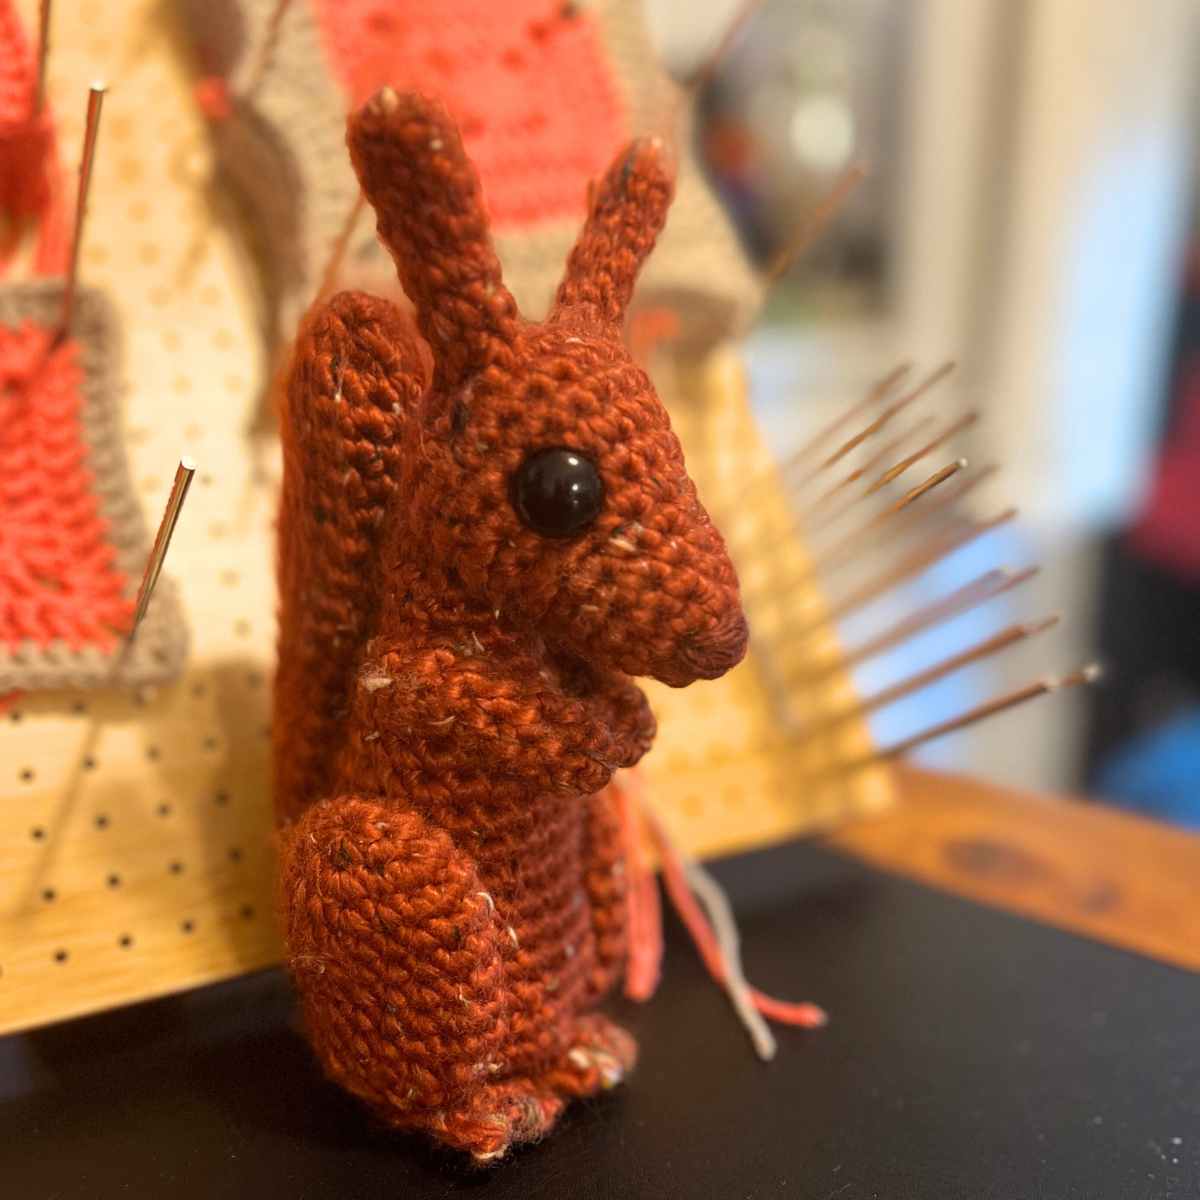
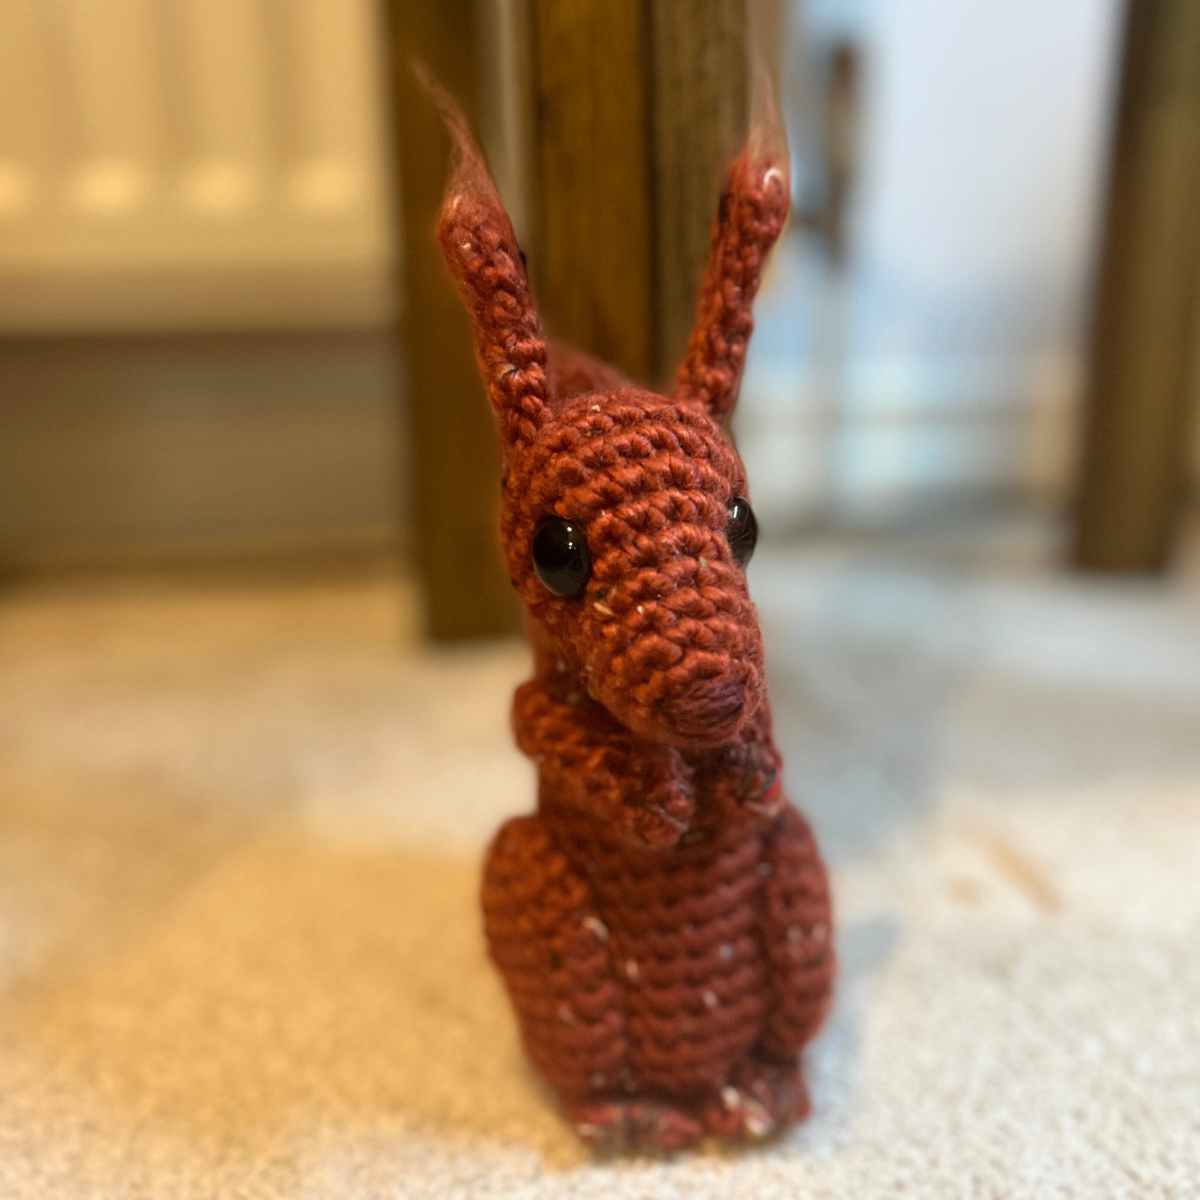
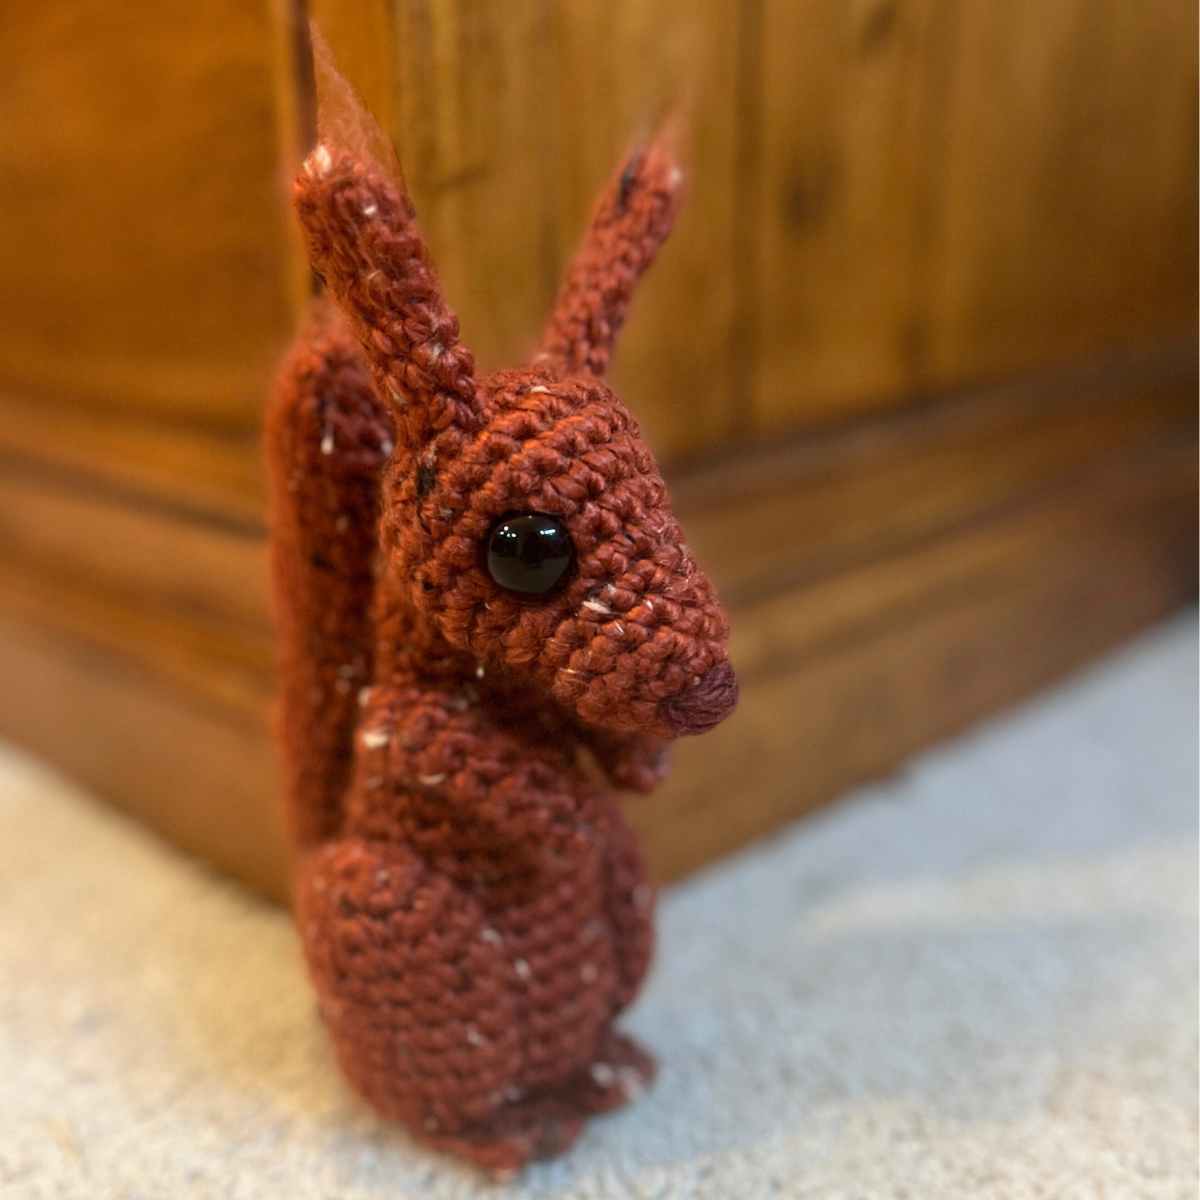
Cute Little Crochet Squirrel

Designing my crochet red squirrel was a bit of a challenge, but you’ll find following the pattern couldn’t be easier! I’ve made this squirrel in red yarn but if you prefer the traditional grey squirrel color, that’s fine too!
This cute amigurumi squirrel is made using basic techniques, and I’ve laid it out with clear instructions that beginner crocheters to experts will find easy to understand.
Your Kit List
- 5mm crochet hook
- Tapestry needle
- 3.5oz / 100g Knitcraft aran yarn in terracotta
- A scrap of darker yarn for the nose and finger markings
- Toy safe stuffing*
- 14mm safety eyes*
- Firm bristled brush
I used two strands of Knitcraft’s aran recycled yarn for this pattern. This was because when I started working it I found it quite thin and prone to snapping, but I loved the color! So I sized up the hook from their recommended size and used two strands at once.
I recommend you do the same if you use this yarn, or use a single strand of heavier weighted wool blend or acrylic yarn in a red shade.

Pattern Notes and Tips
This pattern is worked in the round from separate magic circles, with each section hand sewn together as you go along. I advise that you brush out the tail and ears before attaching them to the relevant section, as when I brushed them out afterwards it caused the hand sewn joining stitches to pull a little.
You’ll find some abbreviations in this squirrel pattern, here’s what they mean:
- sc – single crochet
- sc2tog – join two stitches together with one single crochet
- 2sc – put two single crochets into one stitch
- sk – skip the next stitch
- ch – make a chain
Free Red Squirrel Crochet Pattern
Crocheting the Head
Round 1
Make a magic circle of six stitches (6)
Round 2
2sc x 6 (12)
Round 3 – 5
1sc x 12 (12)
Round 6
(1sc, 2sc) x 6 (18)
Round 7
1sc x 18 (18)
Round 8
(1sc x 2, 2sc) x 6 (24)
Round 9 – 10
1sc x 24 (24)
Round 11
(1sc x 2, sc2tog) x 6 (18)
Stuff the nose only.
Insert safety eyes into the front of the face, using a strand of yarn to attach them together to give that inset look.
Round 12
(1sc, sc2tog) x 6 (12)
Stuff the rest of the head.
Round 13
sc2tog x 6, then hand sew to close.
Crocheting the nose
Attach your darker yarn to the needle, and sew backwards and forwards along the top of the starting magic circle to make the nose.
Crochet Squirrel’s Body
Round 1
Make a magic circle of six stitches (6)
Round 2
2sc x 6 (12)
Round 3 – 6
1sc x 12 (12)
Round 7
(1sc, 2sc) x 6 (18)
Round 8 – 9
1sc x 18 (18)
Round 10
(1sc x 2, 2sc) x 3, 1sc x 9 (21)
Round 11 – 18
1sc x 21 (21)
Round 19
(1sc x 2, sc2tog) x 3, 1sc x 9 (18)
Round 20
(1sc, sc2tog) x 6 (12)
Stuff the body.
Round 21
sc2tog x 6, then hand sew to close.
Sew the head onto the body
Using the same yarn type, attach a needle and firmly weave the head onto the magic circle neck section of the body.
Making Amigurumi Squirrel Ears
Round 1
Make a magic circle of five stitches (5)
Round 2 – 7
1sc x 5 (5)
Using your hard bristled brush, brush upwards along the ear to give your crochet squirrel’s ears a fluffy look.
Attach the ear upright onto the top of your squirrel’s head, lining them up with the inside of the eyes.
Crochet Red Squirrel Arms
Round 1
Make a magic circle of five stitches (5)
Round 2 – 8
1sc x 5 (5)
You don’t need to stuff the arms, just sew the open end onto the body at the shoulder points. You can use the yarn needle and a darker color of red to sew three marks for the fingers.
Crocheting the Legs
Round 1
Make a magic circle of six stitches (6)
Round 2
2sc x 6 (12)
Round 3
(1sc, 2sc) x 6 (18)
Round 4 – 9
1sc x 18 (18)
Round 10
(1sc, sc2tog) x 6 (12)
Round 11
sc2tog x 6, then hand sew to close.
Flatten the circle, leaving the magic circle at the top and closed end at the base. Sew around the circumference to attach to the bottom half of the body.
Crochet Red Squirrel’s Feet
Row 1
Ch6
Row 2
Sk, 1sc x 5, turn
Row 3 – 4
Ch1, sk, 1sc x 5, turn
When you’ve completed your feet, hand sew them to the base of the body and legs.
Crocheting the Tail
Round 1
Make a magic circle of six stitches (6)
Round 2
2sc x 6 (12)
Round 3 – 22
1sc x 12 (12)
Fill with toy safe stuffing.
Round 23
sc2tog x 6, then hand sew to close.
Brushing out the fur

Take your hard bristled brush, and going from round 23 up to the starting magic circle brush firmly. You’ll find depending on the yarn type you’re using this might take a little time and require some elbow grease.
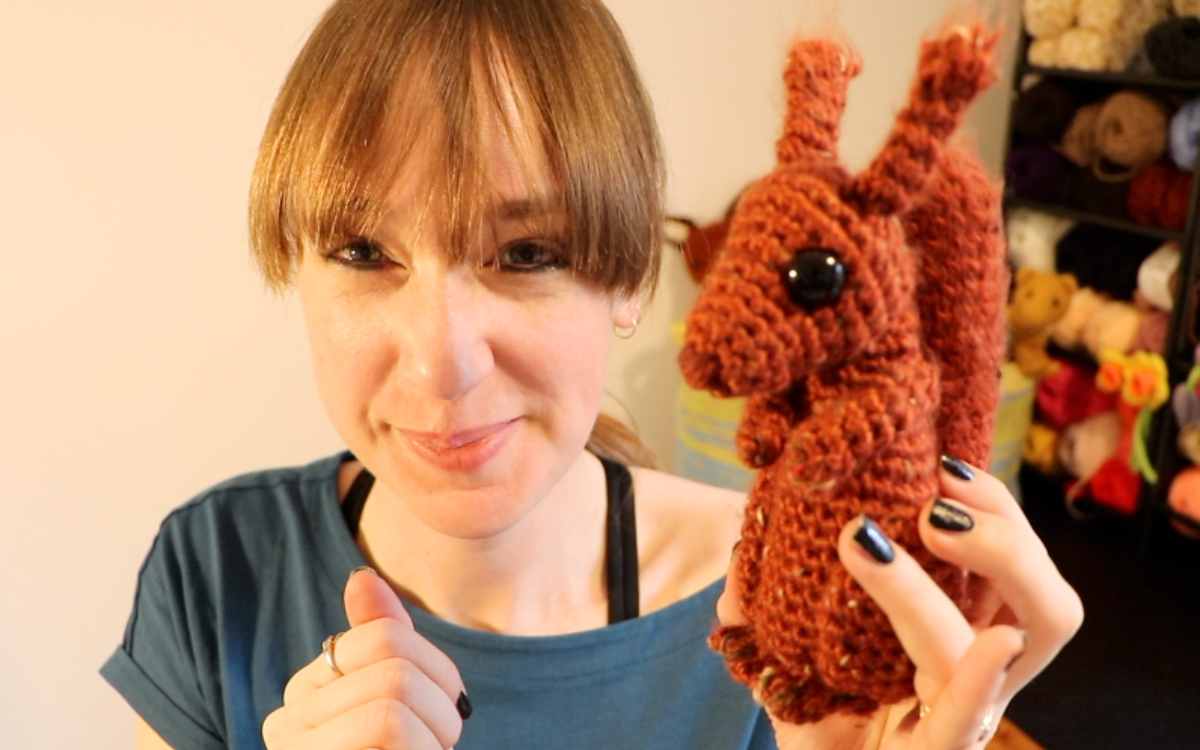
Your Crochet Red Squirrel
I hope you’ve enjoyed making this pattern, and can’t wait to see photos if you’d like to share them on Instagram or Facebook.
Happy Crocheting!
Lucy Kate, x
*The products linked in this pattern were carefully selected by Lucy Kate Crochet. If you decide to purchase using the links provided, we may earn a small commission on that sale. This is at no extra cost to you.
