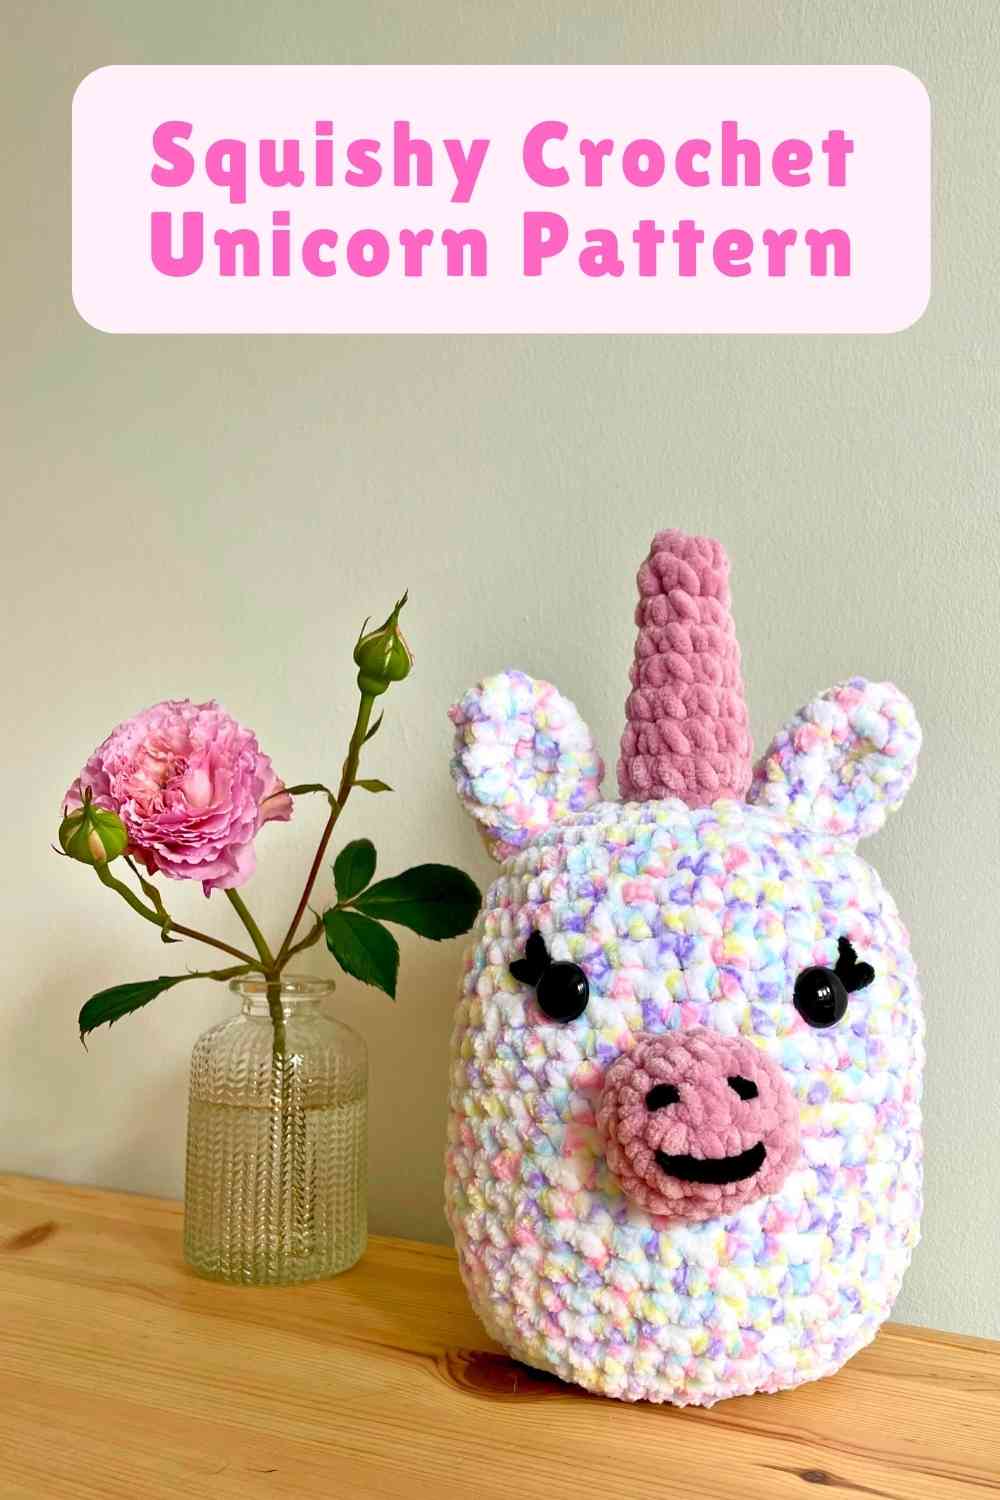
Squishy Crochet Unicorn Pattern
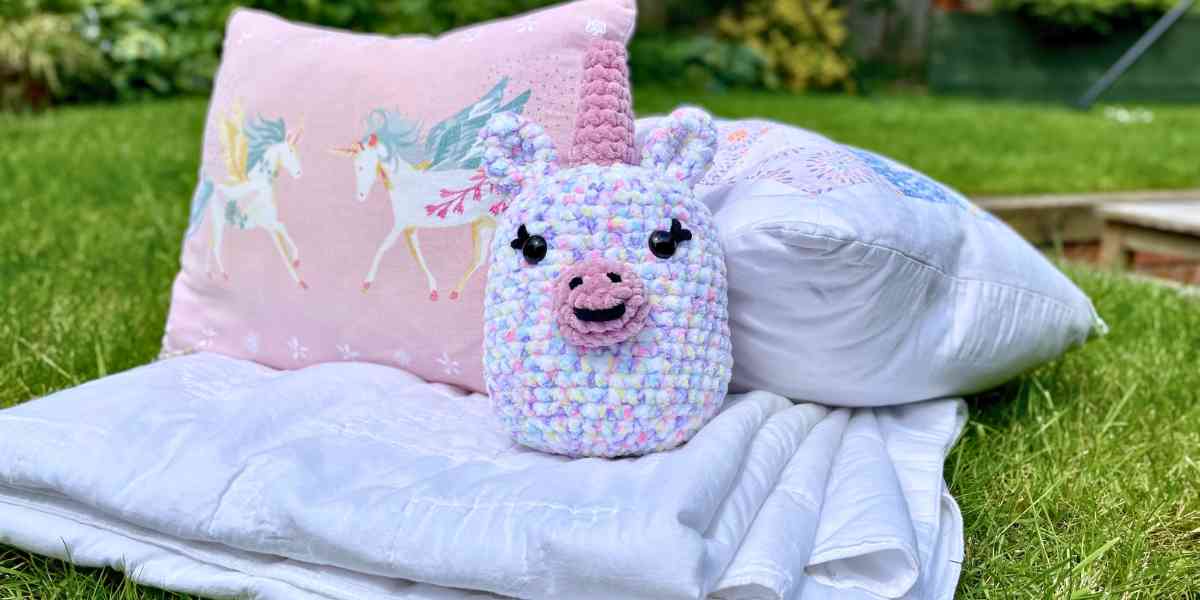
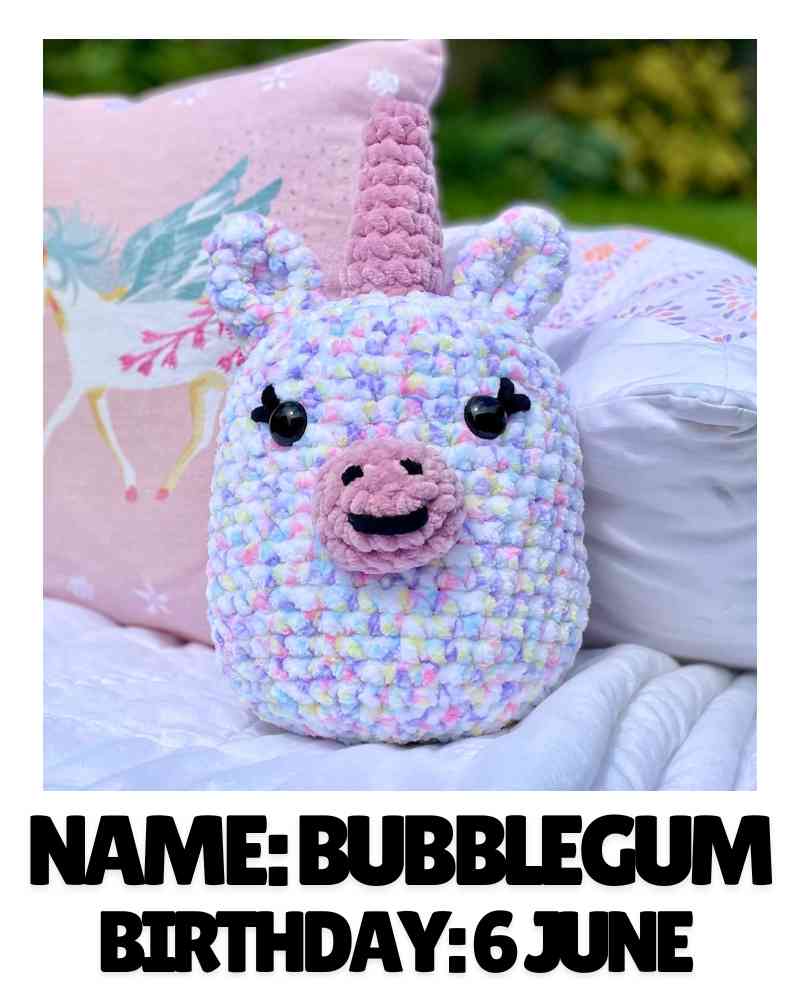
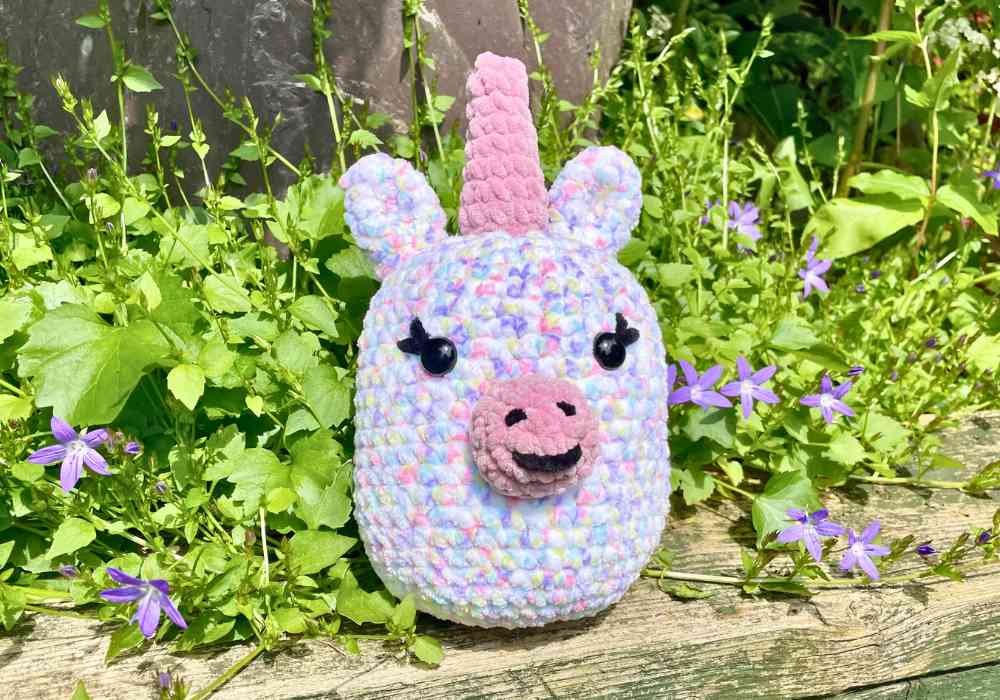
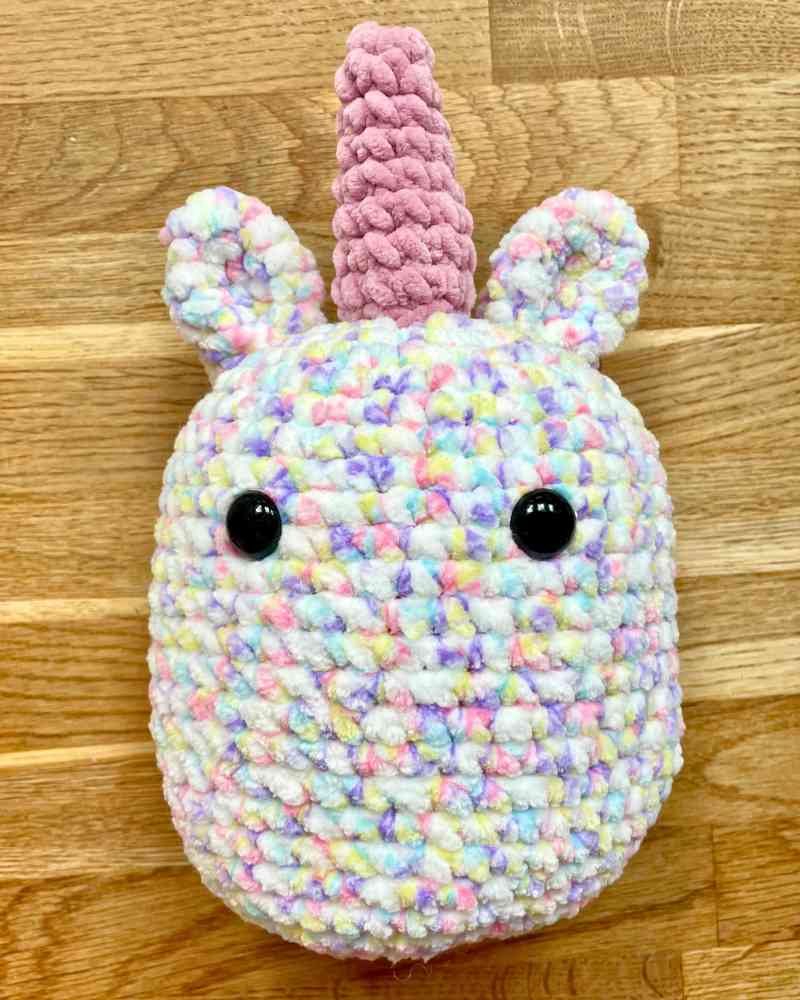
Hello! Welcome to my pattern for Bubblegum, a squishy crochet unicorn without the fiddly legs. She’s sweet and whimsical, and she’d look right at home in any unicorn-mad child’s plush toy collection. It’s the first time I’ve tried making one of these simple amigurumi plushies with a muzzle, and it took several attempts to come up with something I’m happy with. I hope you’ll have a go and see what you think.
Choosing yarn
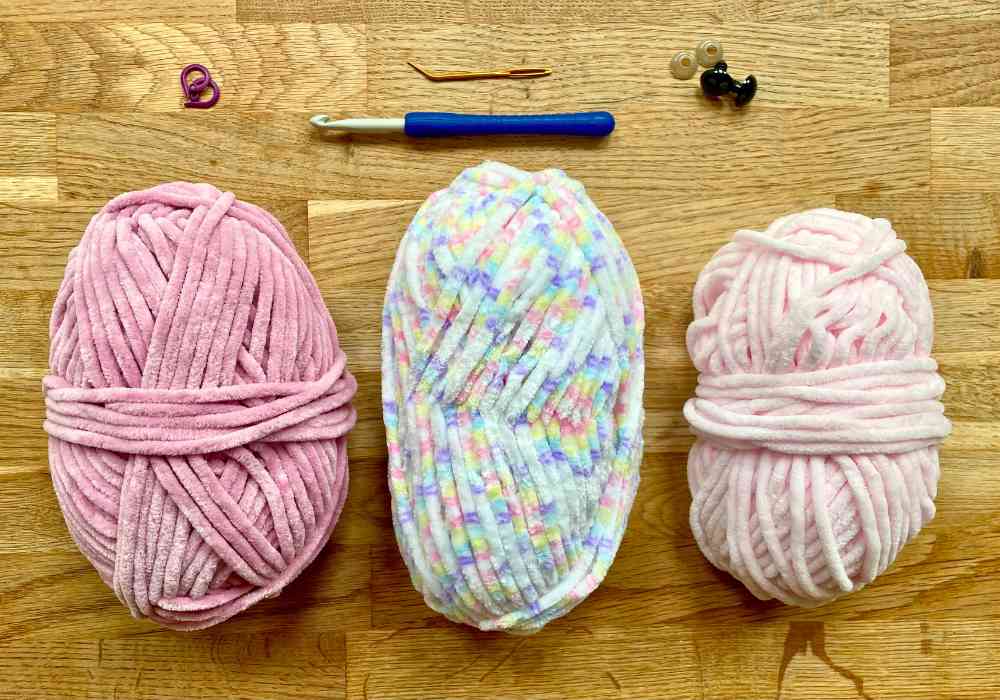
Usually I take pride in the fact that all my squishy patterns can be replicated with whatever yarn you have to hand. I mostly use chenille and velvet yarns because I love how tactile and squashy they are. They’re perfect for making soft toys for children, and I just happen to have a plush-toy-mad 10 year old. But for this pattern, I do think that only chenille yarn will work – for the muzzle at least. Otherwise the construction looks a bit holey.
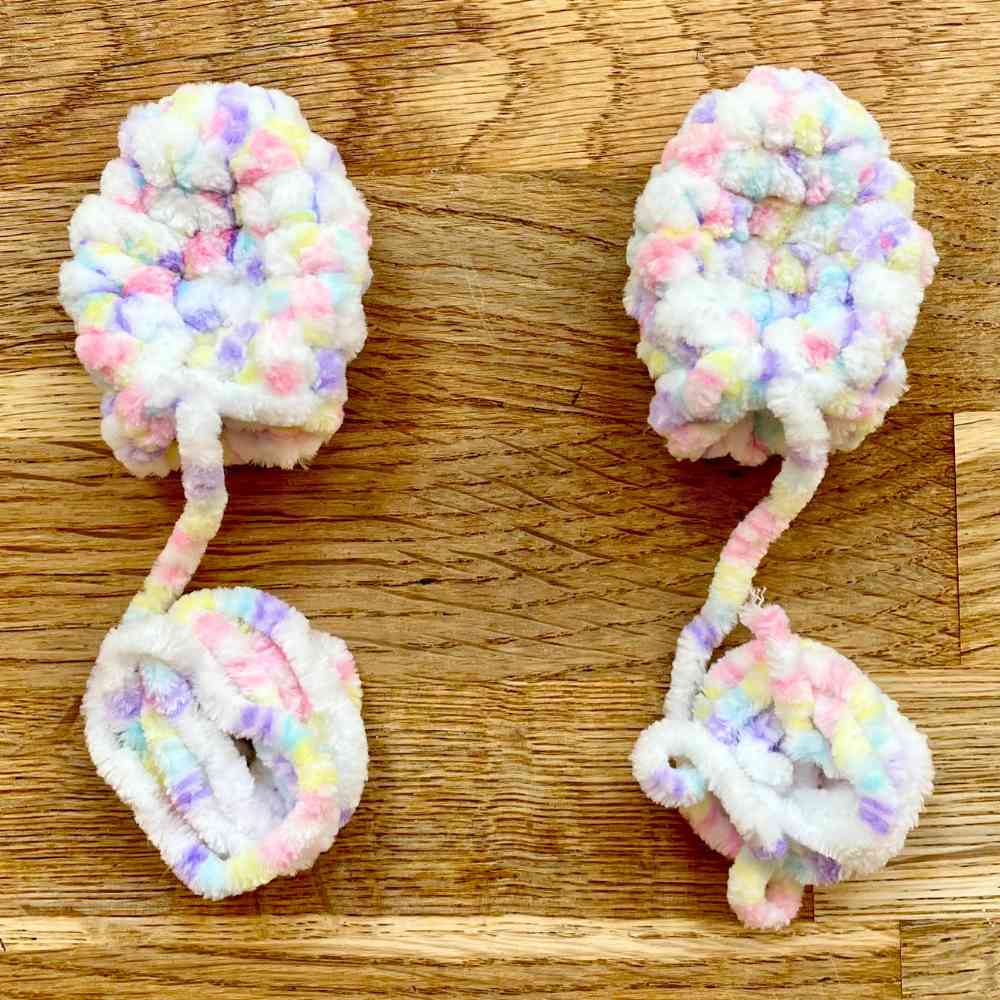
I’ve used King Cole Yummy in the shade Tutti Frutti (above center) and Hobbii Toucan yarn in Lavender (above left), which are both super bulky yarns. I also had a light pink yarn laid out, but in the end I decided it didn’t provide enough contrast.
Bubblegum is 7” tall to the top of her head, not including her ears or horn. Here are some alternative chenille yarns, and roughly how tall your unicorn will turn out if you use them:
- DK weight – Rico Ricorumi. Finished height: 4 inches.
- Worsted weight – Bernat Baby Velvet. Finished height: 5 inches.
- Bulky weight – Bernat Velvet. Finished height: 6 inches.
- Super bulky weight – King Cole Yummy, Paintbox Chenille, Bernat Blanket, Premier Parfait (to name a few – this really is the category with all the choice!) Finished height: 7 inches.
- Jumbo weight – Bernat Blanket Extra, Premier Parfait. Finished height: 8-9 inches.
Other materials
I also used:
- A size J/10 crochet hook. I recommend using one size smaller than the yarn wrapper recommends – it results in tension which is slightly tight, and keeps the stuffing from poking out between the stitches.
- Polyester toy stuffing.
- 16mm safety eyes. These work with bulky and super bulky yarns. For DK and worsted yarns try 12mm eyes, and for jumbo yarns try 20mm eyes.
- Stitch markers or yarn scraps.
- Sewing thread in a closely matching color to the muzzle.
- A sewing needle
- A darning needle
- Scissors
Pattern notes
Bubblegum’s body is worked in a spiral from the top down. It starts as a circle, and finishes with a flat oval base, so that she can stand up unsupported. The ears, horn and muzzle are made separately and sewn on. And lastly the eyelashes, nostrils and mouth are embroidered on.
This pattern uses standard American crochet terms. The only ones you need to know are:
Ch chain
Sc single crochet
Sl st slip stitch
Inc increase (make 2 sc in the same place)
Dec decrease
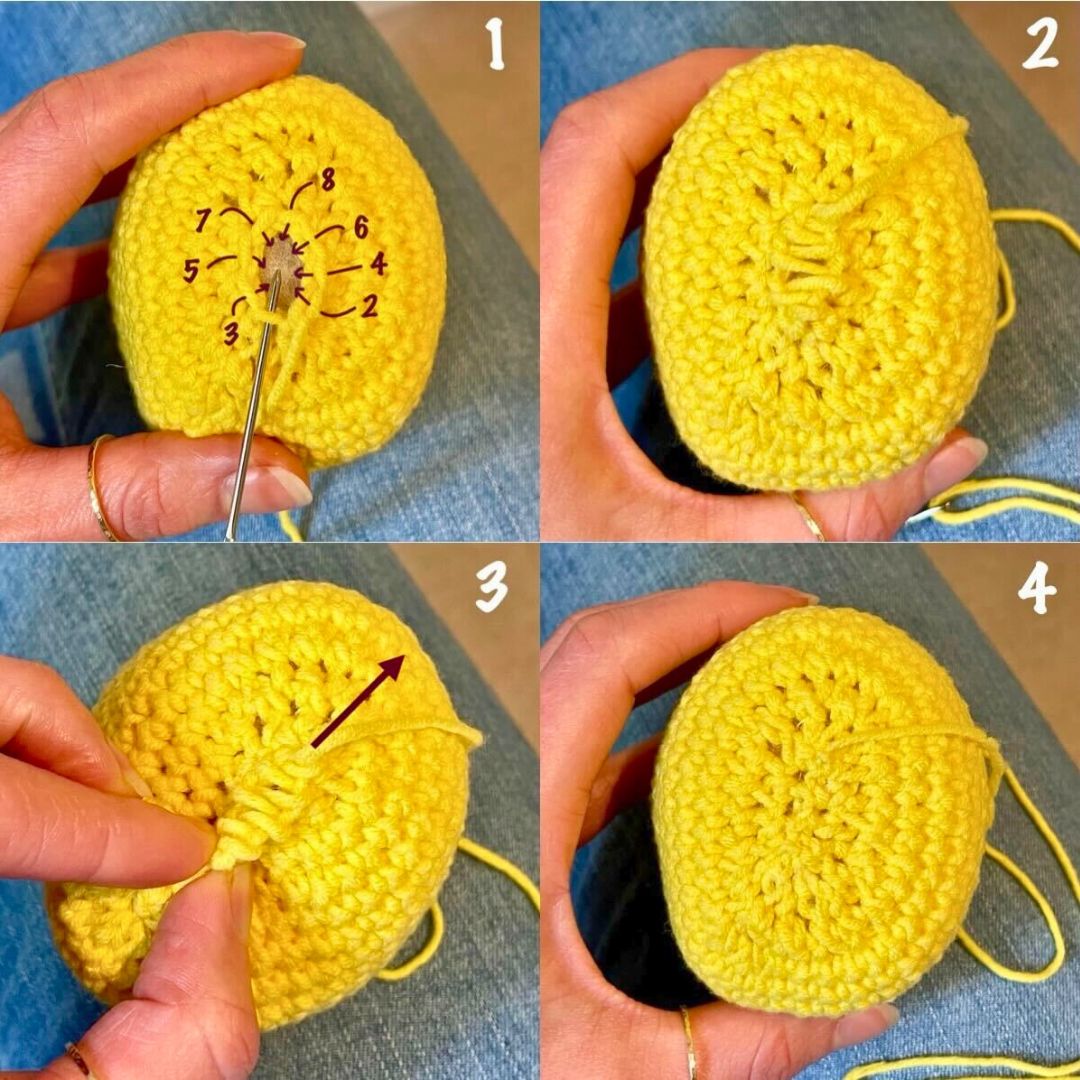
If you’re brand new to crochet, look at Lucy’s guide to basic techniques before you start. When you get to the base, I recommend using the invisible decrease technique:
- Insert your hook through the front loop only of the next stitch, then through the front loop only of the following stitch (3 loops on hook) (fig. 1).
- Yarn over and draw through two loops (two loops remaining on hook).
- Yarn over and draw through both remaining loops (fig. 2).

Now let’s begin!
Making the body
Is it a body, or simply a disembodied head? Who can say? Let’s not overthink it.
- Ch 4 and sl st into the furthest chain from the hook to join.
- 1st round: Ch 1, sc 8 into the 4-ch loop (8 sts)
- 2nd round: 8 inc (16 sts)
- 3rd round: *1 sc, inc* 8 times (24 sts)
- 4th round: *2 sc, inc* 8 times (32 sts)
- 5th round: *3 sc, inc* 8 times (40 sts)
It’s useful to pop a stitch marker in the last stitch of round 5 to help keep track of where the following rounds begin and end – especially if you’re using a speckled yarn like mine! I’ve tied a scrap of yarn around my stitch.

- Rounds 6 – 23: Sc all the way round
- 24th round: 3 dec, sc 8, 6 dec, 8 sc, 3 dec (28 sts)
- 25th round: 3 dec, sc 2, 6 dec, 2 sc, 3 dec (16 sts)
- Put a stitch marker into the loop on your hook, and cut your yarn leaving a 24 inch tail.

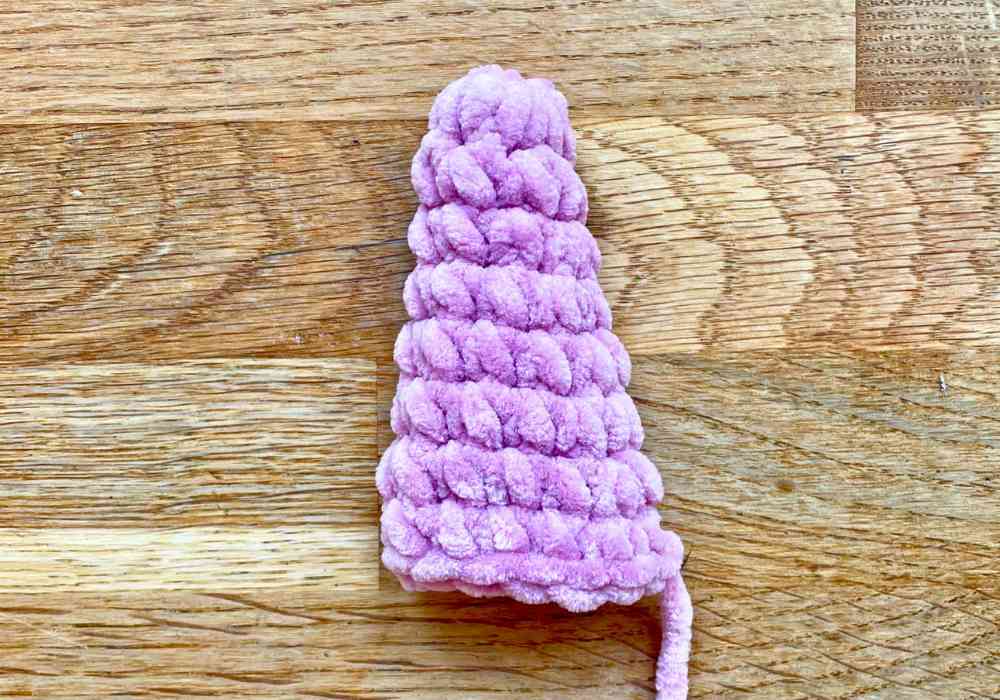
The horn
- Ch 4 and sl st into the furthest train from the hook to join.
- 1st round: Ch 1, sc 6 into the 4-ch loop (6 sts)
- 2nd round: Sc all the way round (6 sts)
- 3rd round: *2 sc, inc* twice (8 sts)
- 4th round: Sc all the way round (8 sts)
- 5th round: *3 sc, inc* twice (10 sts)
- 6th round: Sc all the way round (10 sts)
- 7th round: *4 sc, inc* twice (12 sts)
- 8th round: Sc all the way round (12 sts)
Make 1 slip stitch, cut the yarn leaving a long tail for sewing, and pull the yarn tail right through the slip stitch. Stuff the horn firmly, taking care to poke a small pinch of stuffing right into the the tip of the horn at the start.
The ears
Make two.
- Ch 4 and sl st into the furthest train from the hook to join.
- 1st round: Ch 1, sc 8 into the 4-ch loop (8 sts)
- 2nd round: Sc all the way round (8 sts)
- 3rd round: *1 sc, inc* 4 times (12 sts)
- 4th & 5th rounds: Sc all the way round (12 sts)
- 6th round: *2 sc, inc* 4 times (16 sts)
Make one slip stitch, skip 6 stitches, and make another slip stitch. The ears will fold round at the base like a horse’s, helping them to stand upright. Cut the yarn leaving a long tail for sewing, and pull the tail right through the slip stitch.
The muzzle
- Ch 3
- 1st round: Skip the chain closest to the hook and work 8 sc into the other two stitches like this (I’ve wiggled my hook free, to give you a clearer view):
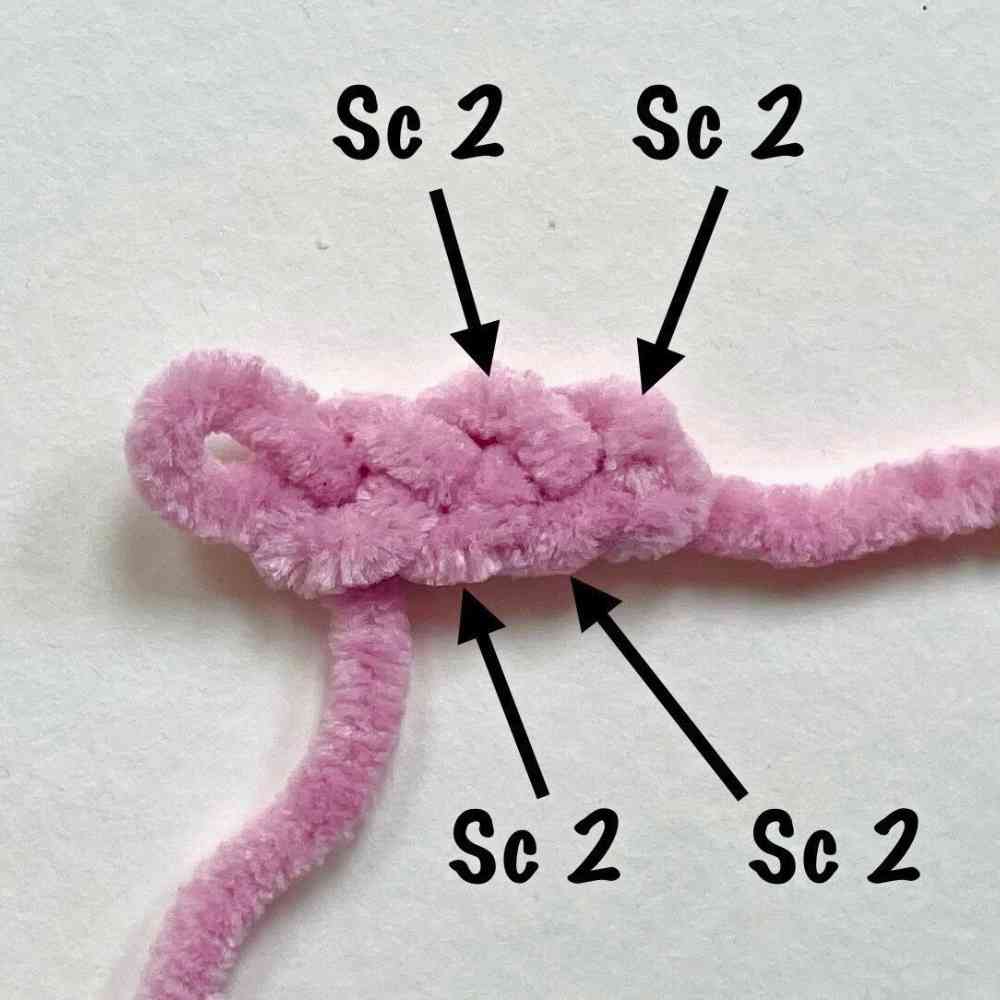
- 2nd round: Inc, 2 sc, 2 inc, 2 sc, inc (12 sts)
- 3rd round: Sc, *inc, 2 sc* 3 times, inc, sc (16 sts)
Sc once more to even out the shape, sl st, cut the yarn, and pull the yarn tail right through the slip stitch.
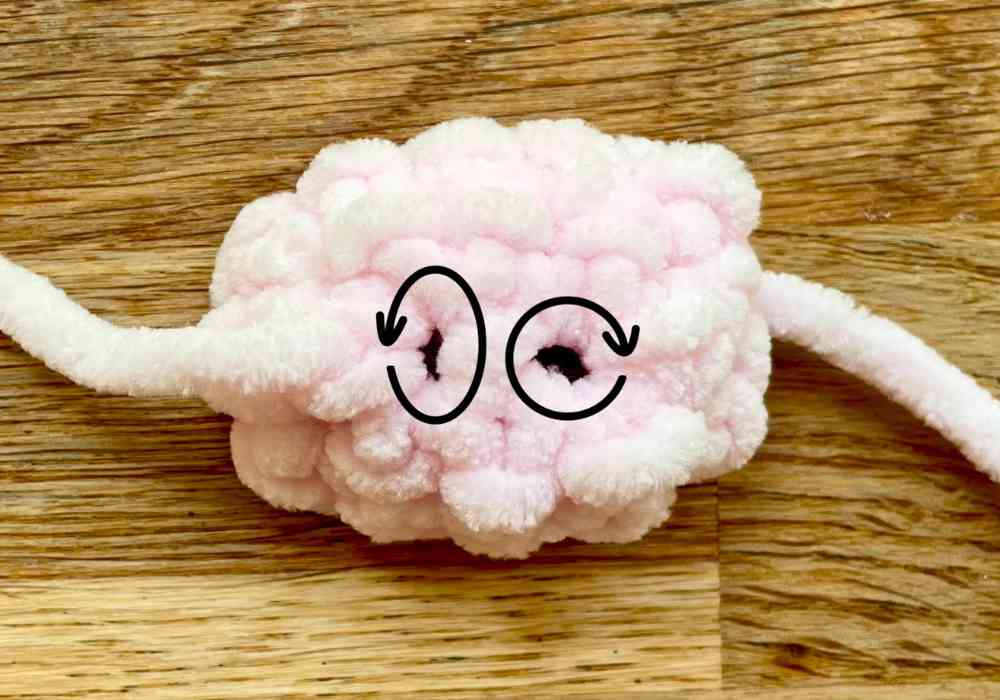
Now, the muzzle isn’t quite perfect at this stage. In all likelihood, you have two holes either side of the center, where you worked into both sides of the foundation chain. They look a bit like nostrils, except a unicorn with toy stuffing poking out of its nose won’t do at all! I tried finding another stitch pattern which avoids them, but I was never happy with the shape of the muzzle.
In the end I decided to flip the muzzle inside out, and use a needle to run a loop of sewing thread inside the stitches around each hole – as indicated by the arrows. Then tie the thread in a knot and pull it tight to close the hole (close each hole separately, with its own loop of thread).
This is as good a time as any to embroider the nostrils and mouth on too, if you prefer. But I did it later, so I’ll come to the details of that in a moment!
Assembling your unicorn
Spread your unicorn’s body out flat in front of you, and position the eyes 7 stitches apart, between rows 10 and 11.
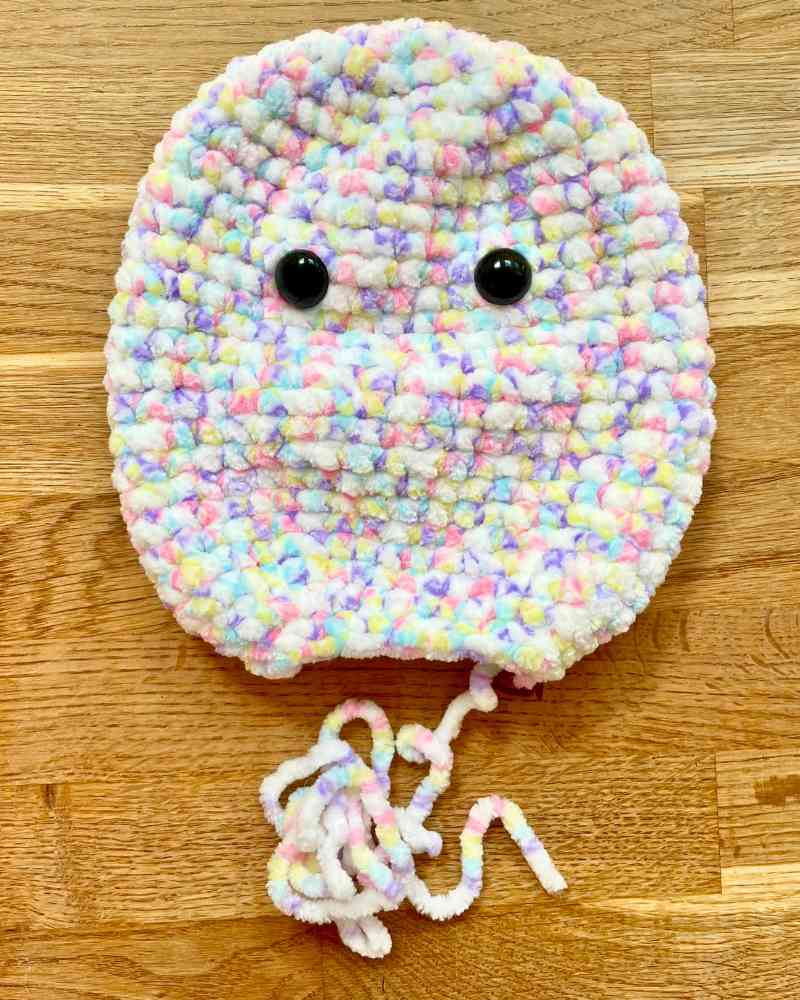
Press the backs on securely, and stuff the body firmly with toy stuffing. Work one more round:
- 26th round: Dec 8 (8 sts)
Use what’s left of the yarn tail to close what’s left of the opening, using mattress stitch through the front loops only of the remaining stitches. Make the stitches loosely at first following the sequence in fig. 1 below. Then either pull them tight one at a time, or pinch the starting point firmly and pull the yarn tail in the opposite direction.
Next sew on the horn slightly forwards of the top of the head, and the ears either side. The backs of the ears sit level with the back of the horn. The fronts end up slightly set back from the front of the horn.
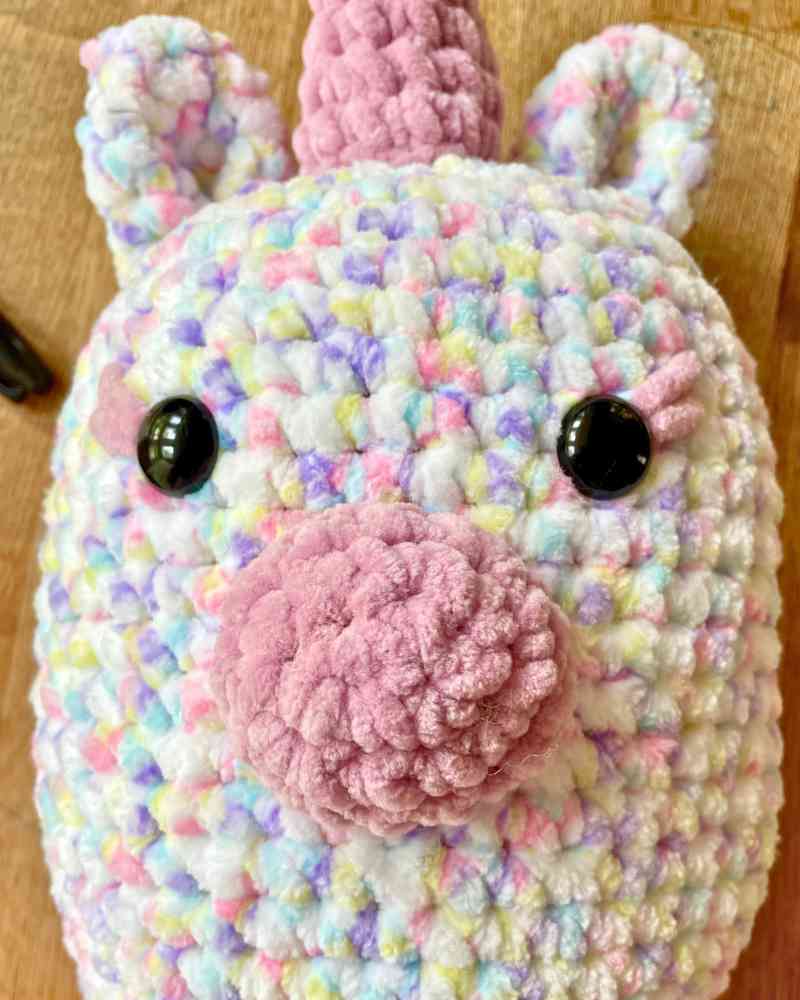
Sew on the muzzle so the top sits level with or just below the bottom edge of the eyes. Stitch roughly two thirds of the way around the circumference of the muzzle, then poke some stuffing inside it and close the remaining gap. If you haven’t already done it, now’s time to add the mouth and nostrils. They’re always one of the details I add last, but more out of habit than anything else!
Embroidering the nostrils and mouth
I’m using a black chenille in the same weight as my other yarns to embroider the details of Bubblegum’s face. But you could use any contrasting color, a different fiber, or even double up a lighter weight yarn.
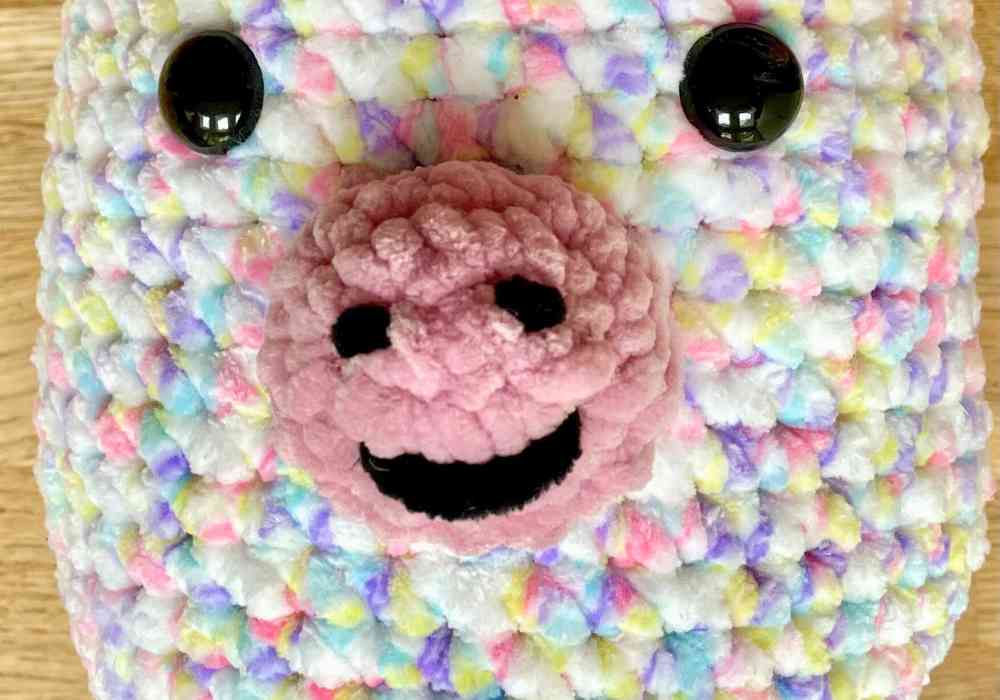
For the embroidery on the muzzle, first I threaded the yarn into a gap between the body and the muzzle, leaving a 3” yarn tail poking out from the gap for tying off later. The nostrils are two small stitches covering just one strand of yarn (or half a stitch) on the muzzle to keep them small. The mouth is a single longer stitch, and where you position it will make all the difference to your unicorn’s attitude! It can be an extra long stitch for a wide grin, or a short, off-center stitch for a wry smile.
Once you’ve made all three stitches (two nostrils and the mouth) feed the yarn back out through the same gap between the body and the muzzle. Tie the two yarn tails together, trim the ends short, and poke the knot and the ends inside the muzzle.
Adding the eyelashes
One of Bubblegum’s most winsome features is her eyelashes. And they’re incredibly easy to add.
- Cut a length of yarn roughly three times the depth of your squishy.
- Tie a loose overhand knot in the yarn, and position it around one eye.
- Tuck the yarn under the eye, then tighten the knot.
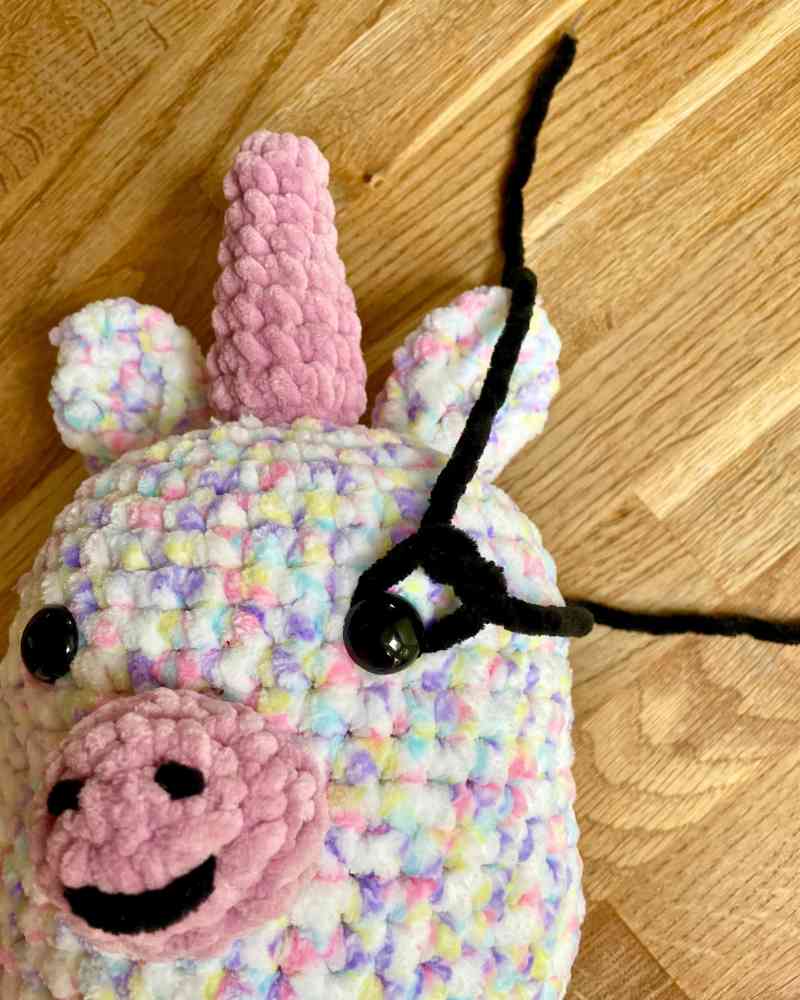
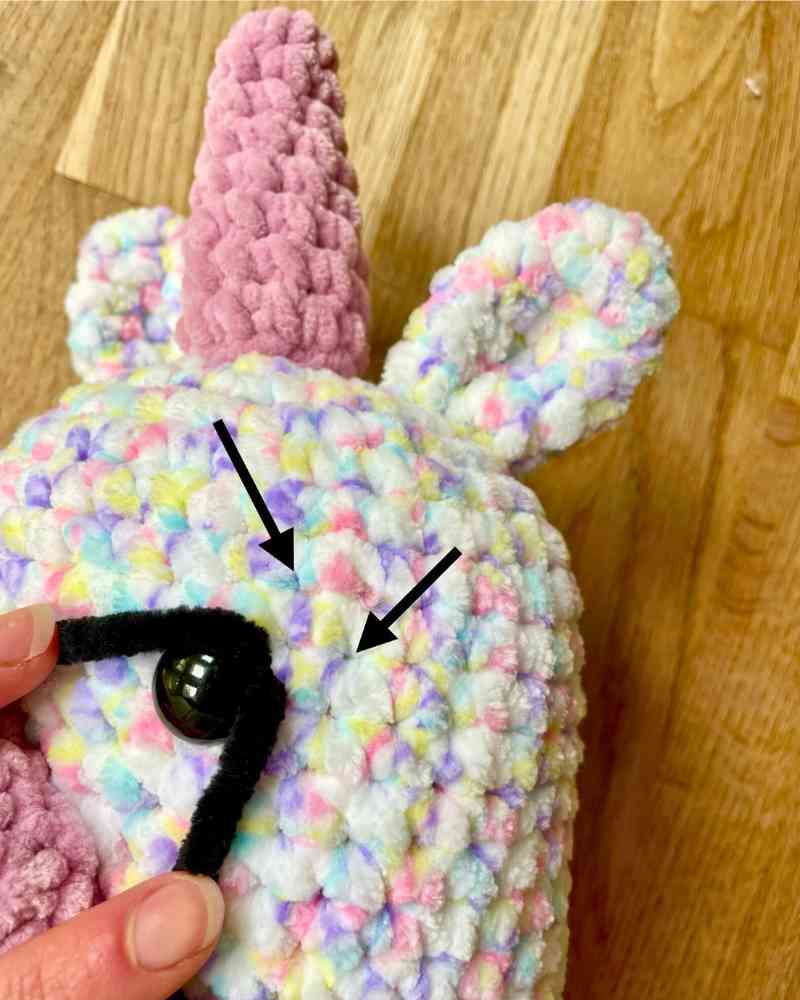
- Use a darning needle to thread the yarn tails into the body just beyond the outside edge of the eye. Roughly in the spots indicated by the arrows, but you can make them more flamboyant if you wish!
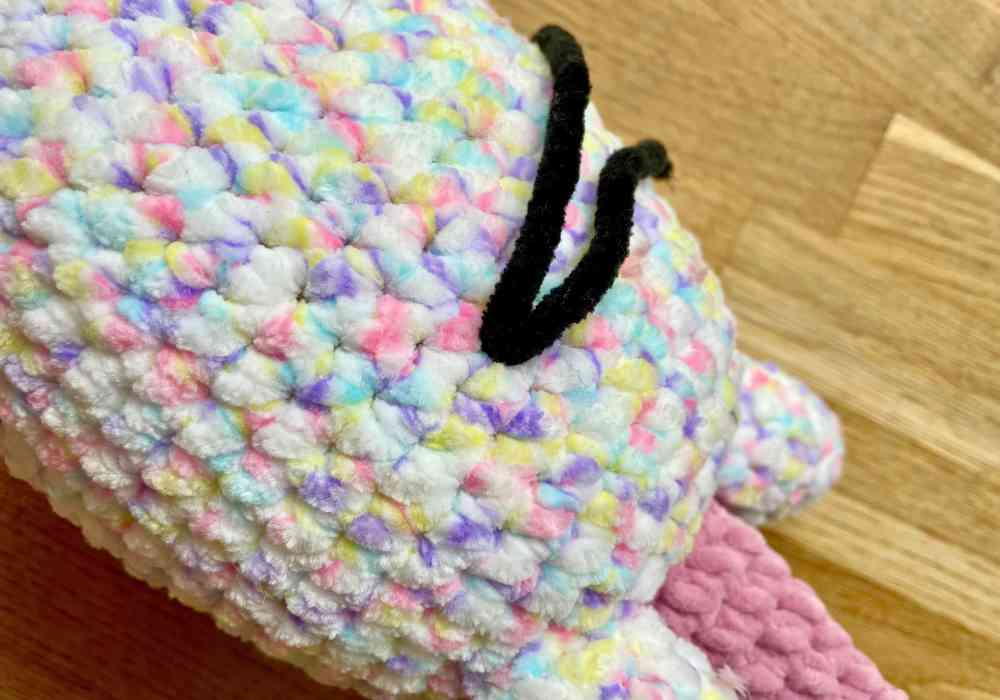
Bring both yarn tails out through the back of the unicorn in the same spot.
Tie them together, trim the ends, and poke the knot inside the body. The stuffing will keep the knot anchored in place.
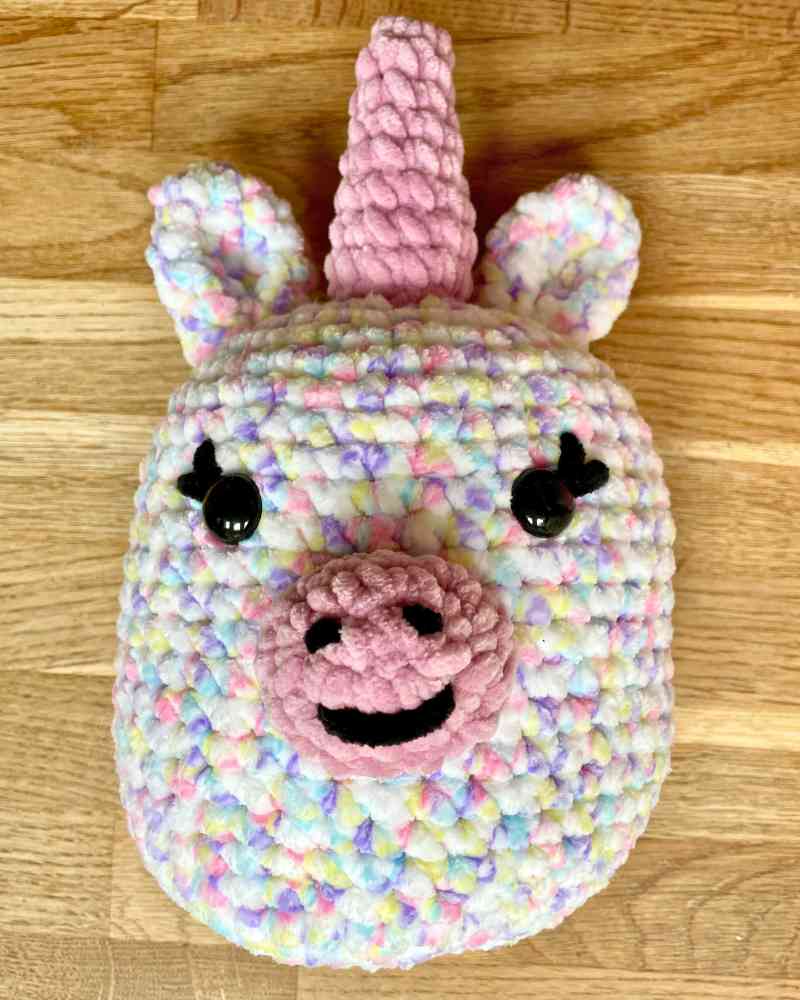
Project complete
All the finishing details are in place, it’s time to stand back and admire your creation!
We’d love to see how it turned out, so if you’re on social media please tag Lucy in a post on Instagram or Facebook and let us know what your unicorn is called!
Squishy crochet unicorn pattern – summary
I hope you’ve enjoyed following along with this pattern. Let me know what you think of the construction of the muzzle – would you make it differently? Overall I think Bubblegum pretty adorable, and she’s definitely been a hit with my daughter. I’m sure whoever receives your finished squishy unicorn will love it too. In the meantime, happy crocheting!