Squishy Crochet Chick Pattern
Hello there, welcome to my free squishy crochet chick pattern! I’m excited that this pattern involves virtually nothing by way of embroidery. So if sewing a smile onto your amigurumi animals brings you out in a cold sweat, this entry-level pattern is just the thing!
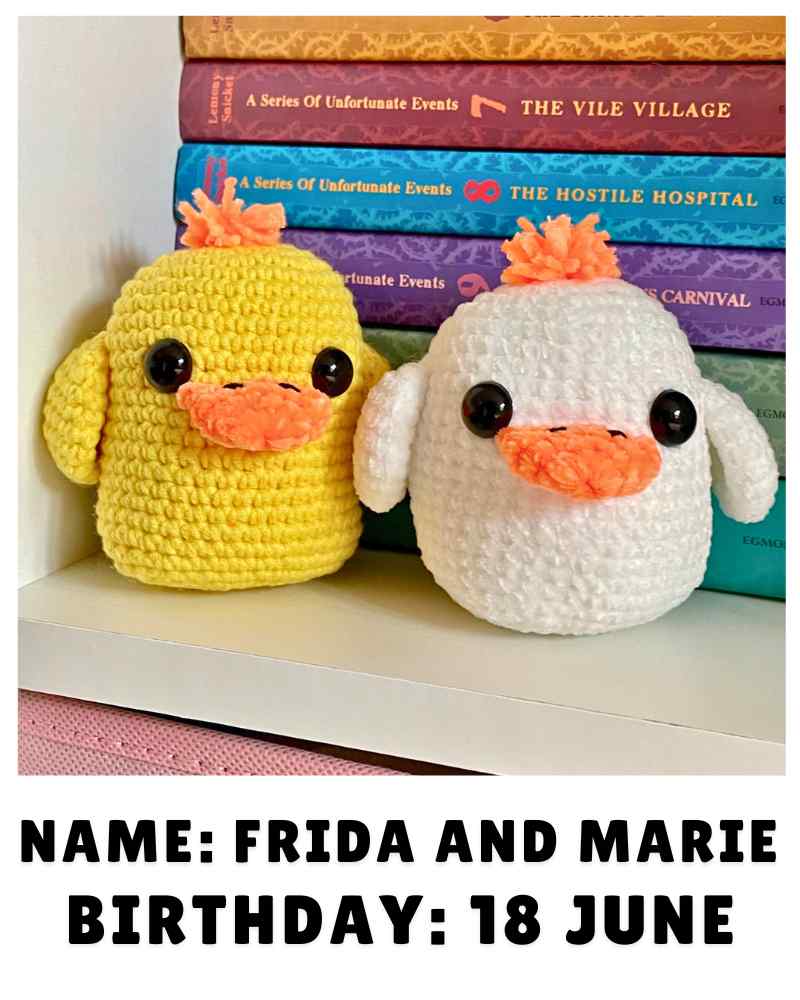
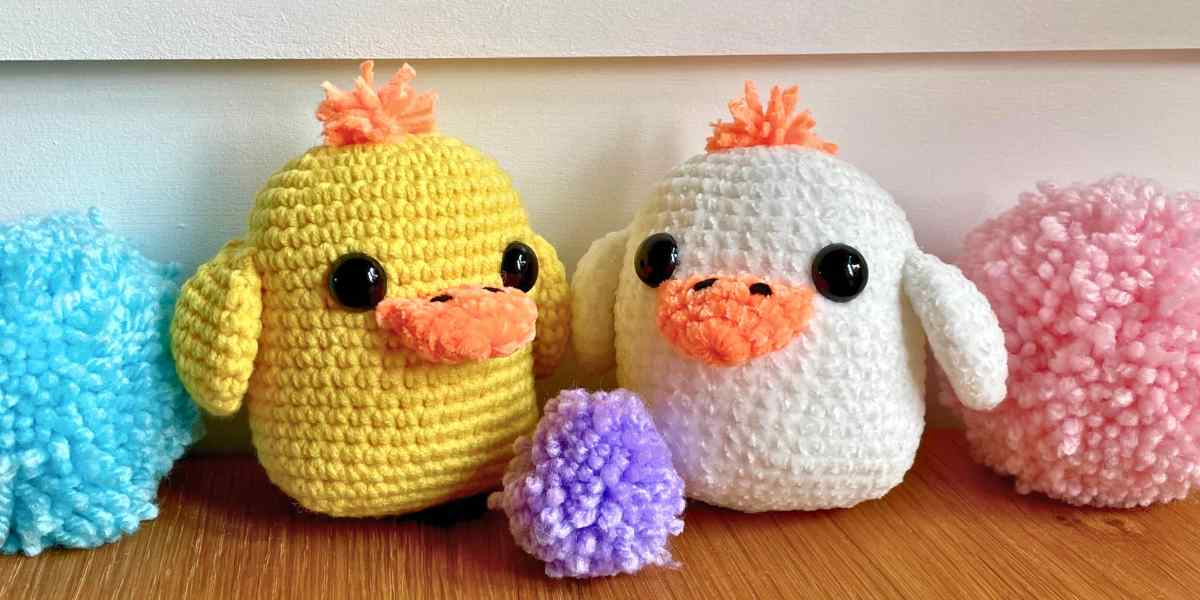
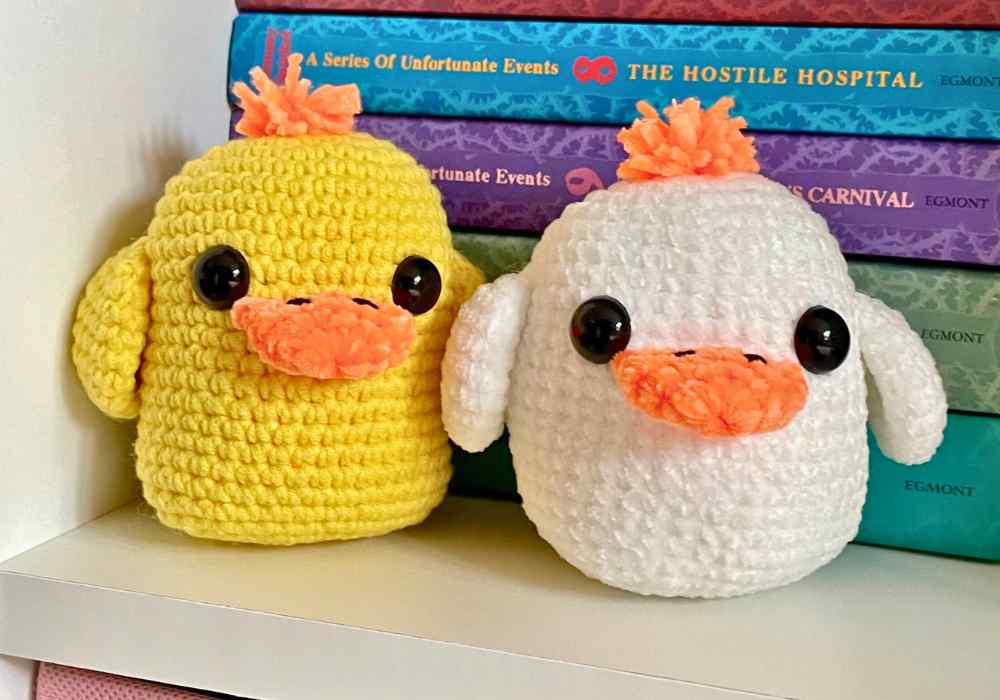
I let my 10 year old daughter name the two lil’ chicks in the photos accompanying the pattern, so I’m slightly surprised to announce that they’re called Frida and Marie 🙂
Once you’ve made your own baby hens, why not give them a bovine buddy to hang out with on the farm!
Materials
To hatch your own squishy crochet chick you’ll need:
- Yarn for the body and wings. You can use any weight, fiber or color you like. For Frida and Marie I used Scheepjes’ softfun (a DK cotton acrylic blend) in the shade canary, and Rico Ricorumi’s nilli nilli yarn (a DK chenille) in white.
- Yarn for the beak and tuft of head feathers. I used Rico Ricorumi’s nilli nilli yarn in neon orange for both.
- A crochet hook one size smaller than the wrapper on your yarn recommends.
- Scraps of black yarn for the nostrils (optional).
- Safety eyes. I’m using 12mm eyes with DK yarn, and they would work with worsted yarn too. For bulky or super bulky yarns try 16mm eyes, and for jumbo yarns try 20mm eyes.
- Toy stuffing.
- A darning needle.
The weight of yarn you choose will dictate how big your chick turns out. As a rough guide:
- DK yarns make a chick 3-4″ high.
- Worsted yarns make a chick 5″ tall.
- Bulky yarns make a 6″ chick.
- Super bulky yarns make a chick 7-8″ high.
- Jumbo yarns make a 9″ chick or bigger – there’s a lot of variation in this category.
Those estimates are to the top of the head, not including the sweet tuft of head feathers.
Pattern notes
This pattern is written in standard US crochet terms. You’ll only need to know the bare minimum number of stitches, which are:
Ch chain stitch
Sl st slip stitch
Sc single crochet
Inc increase (make 2 sc in the same space)
Dec decrease
There’s an introductory guide to the basic stitches right here, if you need it. For the decreases, I recommend using the invisible decrease method, which is perfect for amigurumi. Insert the hook into the front loop only of the next two stitches (left, below). Put the yarn over the hook, and draw it through both front loops – you’ll have two loop remaining on the hook. Yarn over again, and draw it through both loop (right, below). Done!

Squishy crochet chick pattern
The chick’s body, wings and beak are all made in spiralling rounds. The eyes need to be added before the body is closed, in order to secure the backs, but I prefer to add everything else once the finished. Get your hook and yarn ready, let’s go!

The body
You can start all of your chicks parts either with a magic circle, or by chaining 4, and slip stitching into the furthest chain from the hook, to make a loop. Creator’s choice! I find that if you’re using a yarn which snaps easily, the 4-chain loop is easier to tighten without too much tension on the yarn.
- Make a magic circle, or ch4 and sl st to join.
- 1st round: Ch 1, sc 8 into the magic circle or 4-ch loop (8 sts)
- 2nd round: 8 inc (16 sts)
- 3rd round: *1 sc, inc* 8 times (24 sts)
- 4th round: *2 sc, inc* 8 times (32 sts)
- 5th round: *3 sc, inc* 8 times (40 sts)
- Rounds 6 – 23: Sc all the way round
- 24th round: 3 dec, sc 8, 6 dec, 8 sc, 3 dec (28 sts)
- 25th round: 3 dec, sc 2, 6 dec, 2 sc, 3 dec (16 sts)
- Put a stitch marker into the loop on your hook, and cut your yarn leaving a 24 inch tail.
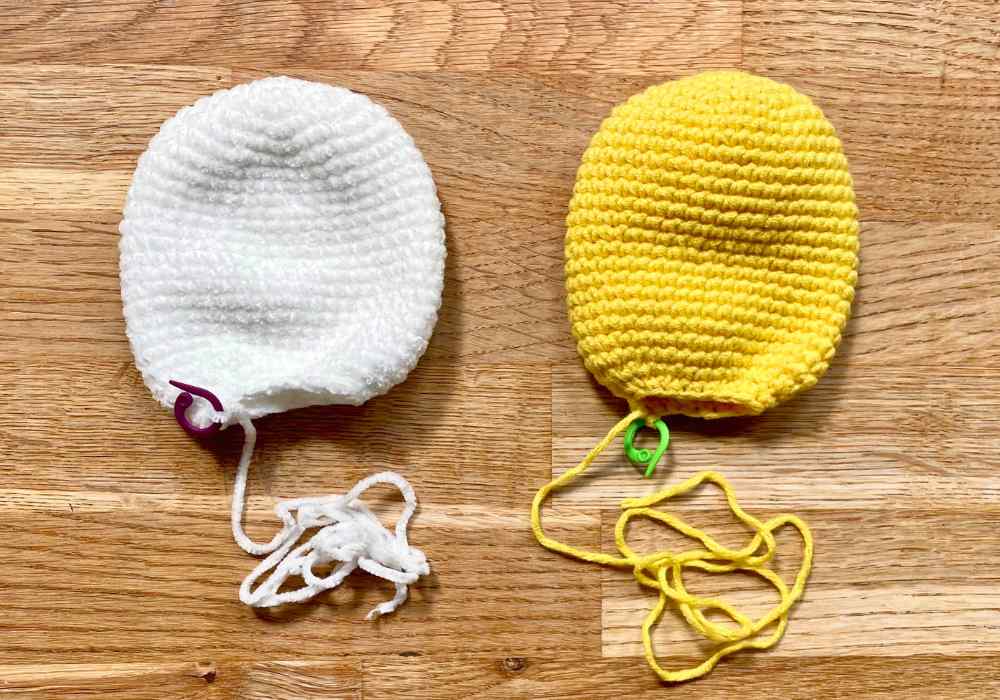
Lay the body so far out flat with the opening at the bottom running from left to right. Position the eyes about 8 stitches apart, between rows 11 and 12, and press the backs on securely. Now stuff the body firmly with toy stuffing and make one more round:
- 26th round: 8 dec, (8 sts)
Closing the body
Make one slip stitch into the next stitch, and pull the yarn tail all the way through, ready for sewing what’s left of the opening closed. Poke in a little bit more stuffing if it will fit and close the two side of the opening with mattress stitch. If you’re new to mattress stitch, the first picture below shows where to place each stitch (the needle is already in position for the first stitch. Make the stitches loosely at first (picture 2) so you can easily see where the next stich goes. Then either tighten the stitches one at a time, or for smooth yarns you can pinch the start point firmly (picture 3) and pull the yarn tail in the opposite direction.
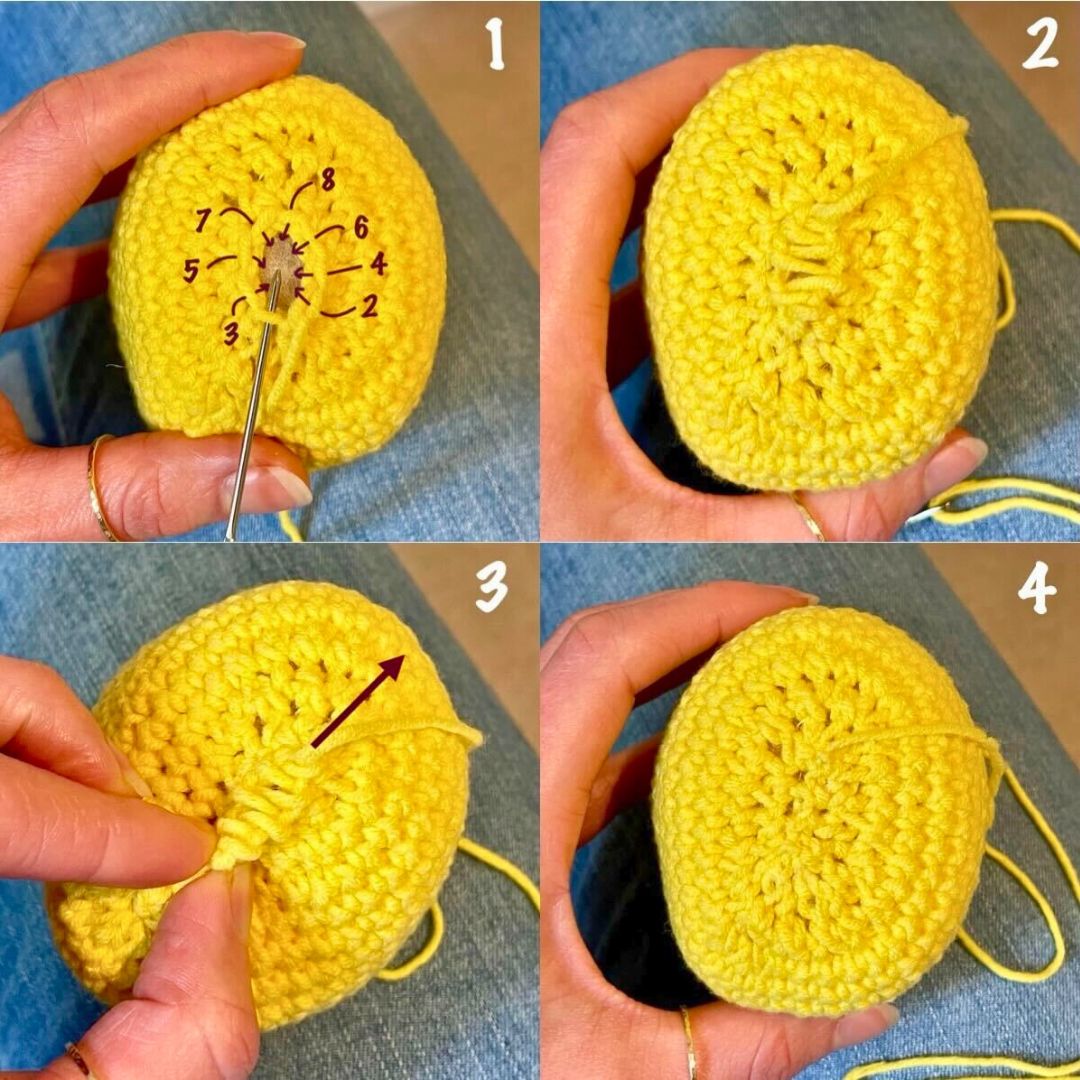
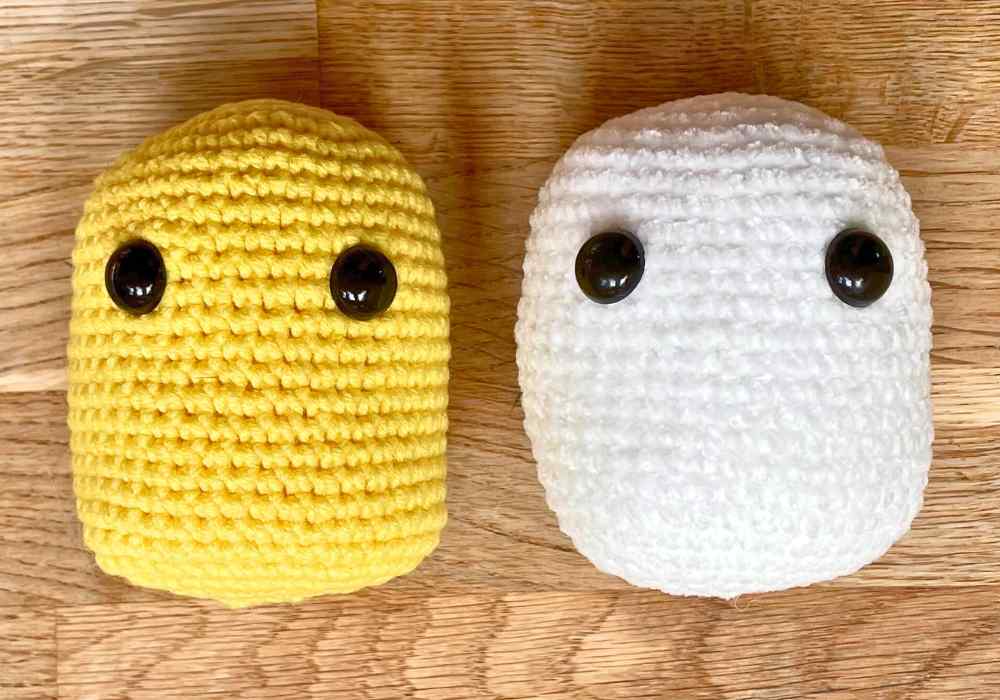
I did this demonstration using DK yarn and the ‘correct’ size hook, so you can see what’s going on clearly. If you go down a hook size to make your chick, the small gaps between stitches in picture 4 won’t be there! Here’s where we’ve got up to so far:
The wings
Make two per chick.
- Make a magic circle, or ch4 and sl st to join.
- 1st round: Ch 1, sc 8 into the magic circle or 4-ch loop (8 sts)
- 2nd round: *Sc 1, inc* 4 times (12 sts)
- 3rd round: *Sc 2, inc* 4 times (16 sts)
- 4th round: *Sc 3, inc* 4 times (20 sts)
- Rounds 5 – 7: Sc all the way round
- 8th round: *Sc 3, dec* 4 times (16 sts)
- 9th round: *Sc 2, dec* 4 times (12 sts)
Sl st once, cut the yarn leaving a long tail for sewing, and pull the yarn tail all the way through the sl st.
The bill
Do you call it a bill or a beak? Either way, make one per chick.
- Make a magic circle, or ch4 and sl st to join.
- 1st round: Ch 1, sc 8 into the magic circle or 4-ch loop (8 sts)
- 2nd round: *Sc 1, inc* 4 times (12 sts)
- 3rd round: *Sc 2, inc* 4 times (16 sts)
- 4th round: Sc all the way round.
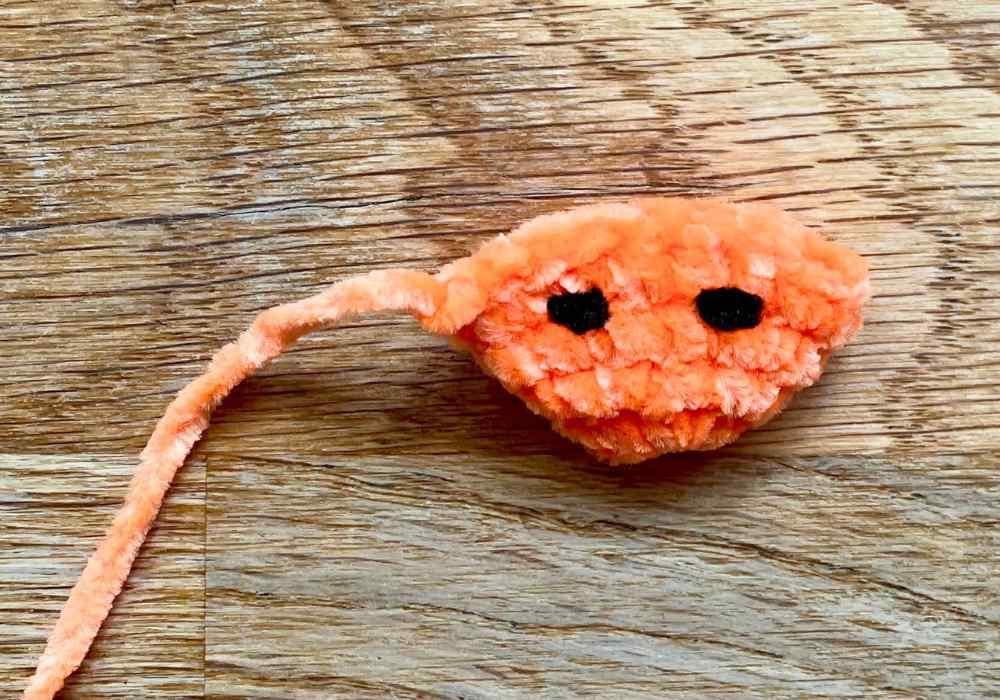
Sl st once, cut the yarn leaving a long tail for sewing, and pull the yarn tail all the way through the final sl st. Using a scrap of black yarn, make two nostrils on the top side of the beak. Relative to the single crochet stitches on the beak, each nostril is one stitch wide, and the space between them is two stitches wide. Once you’ve made them, you can tie the black yarn ends together and leave them tucked inside the bill.
Assembling your chick
Sew the bill onto the body just below the eyes. Sew the wings onto either side of the body, just above the eyes. All you chick is lacking now is a cute tuft of feathers on top of their head, to give them some real character!
Adding the head feathers
Frida and Marie’s head tufts are nothing more than low-density pom poms. I’ve used a fork to make them, but for a chick made in bulkier yarns you will need something a little larger to wrap your yarn around. This YouTube video suggests ways of making pom poms in various sizes.
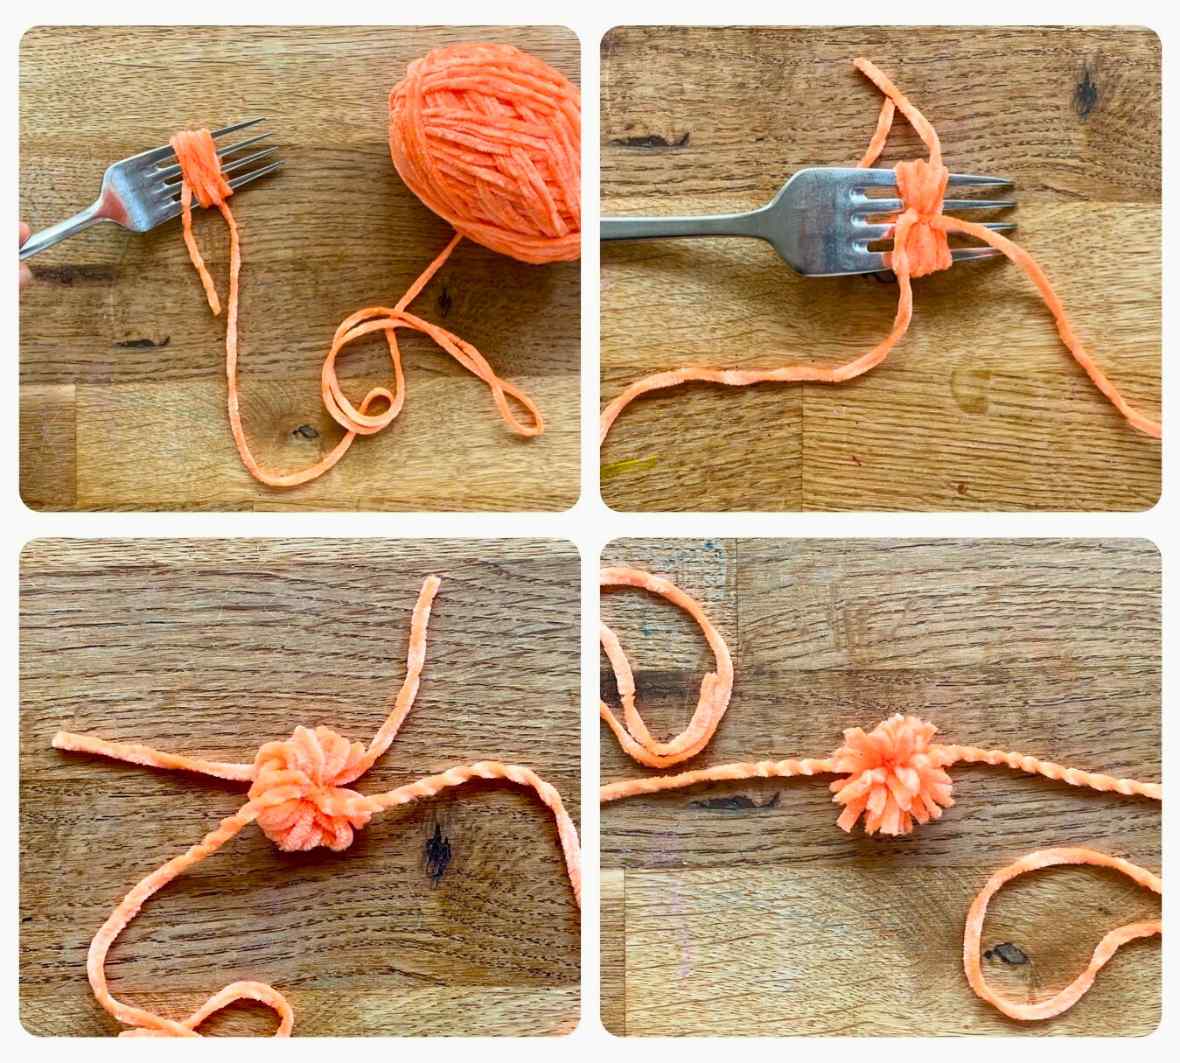
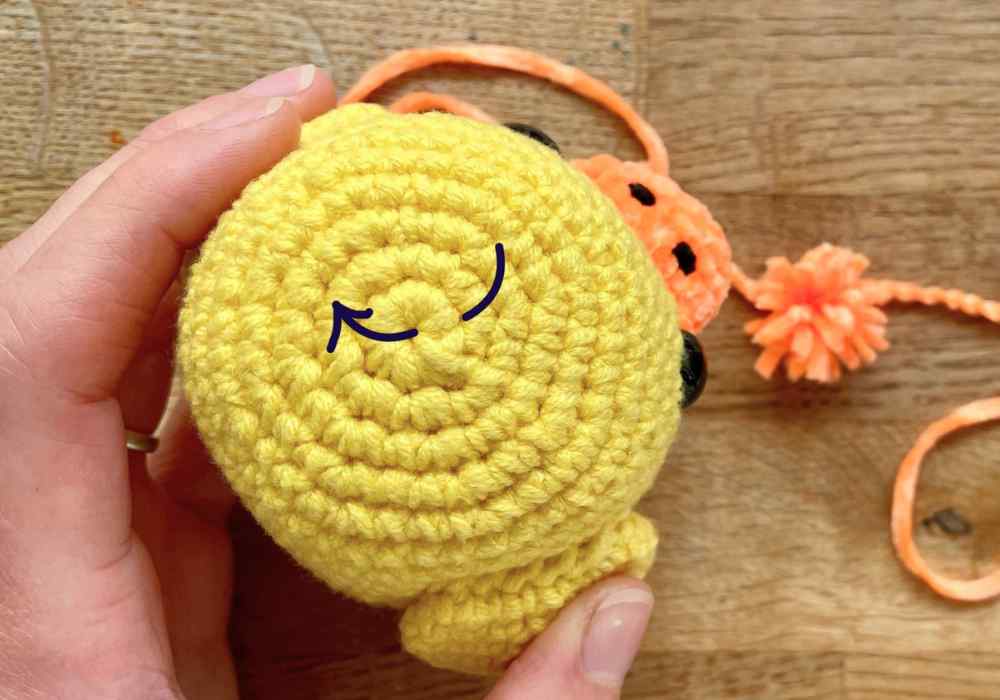
I wrapped my orange yarn around a fork 10 times (top left picture). I tied it around the middle with a long-ish piece of yarn (top right picture) then slid it off the fork, and tied it around the middle a couple more times, to make sure it was tight and secure (bottom left picture). Next I snipped the end of every loop, gave my pom pom a little shake, and trimmed any over-long bits, leaving the tails of the long piece of yarn intact (bottom right picture). Finally, I used those yarn tails to tie the pom pom around a stitch on top of my chick’s head, just forward of center.
You might need to experiment with exactly how many times you wrap your yarn around your fork/fingers/pompom maker, depending on the thickness and texture of your yarn. You want the result to be dense enough that some of the tuft sticks up out of your chick’s head, but not so dense that it looks bushy. It took me three attempts to get a result I was happy with!
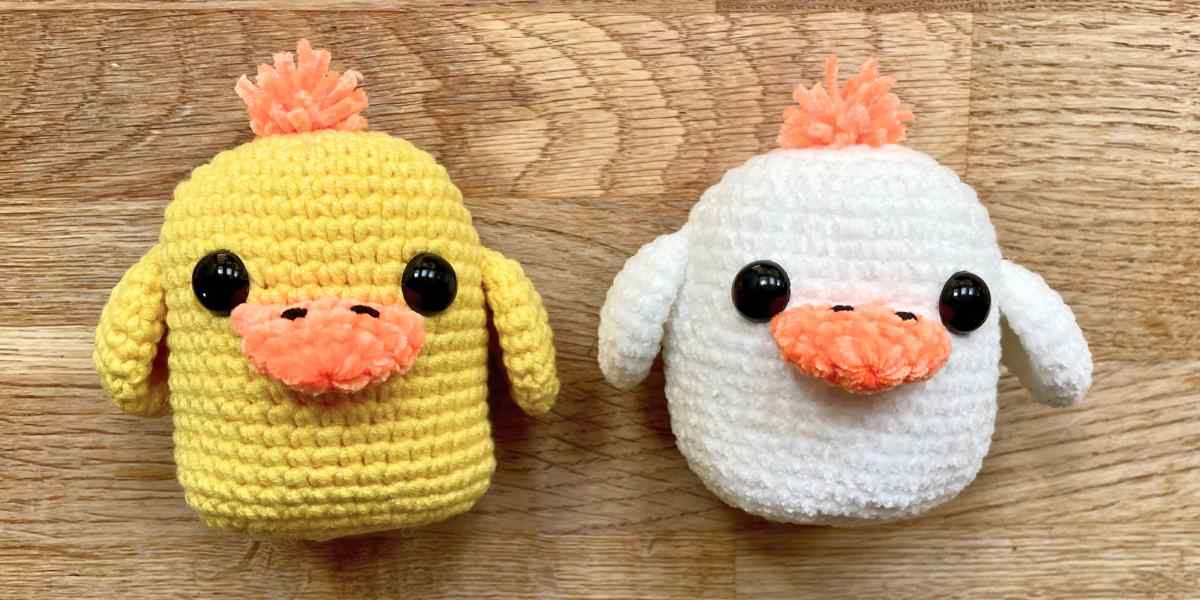
Squishy crochet chick – complete!
And that’s all there is to it. You chick is ready to deploy as a gift or Easter decoration. If you’re keen to make more spring-inspired squishies, then my crochet bunny pattern is a sweet choice. And we’d love to see how your creations turn out, so if you’re on social media, please tag Lucy in a photo on Facebook or Instagram. And happy crocheting!