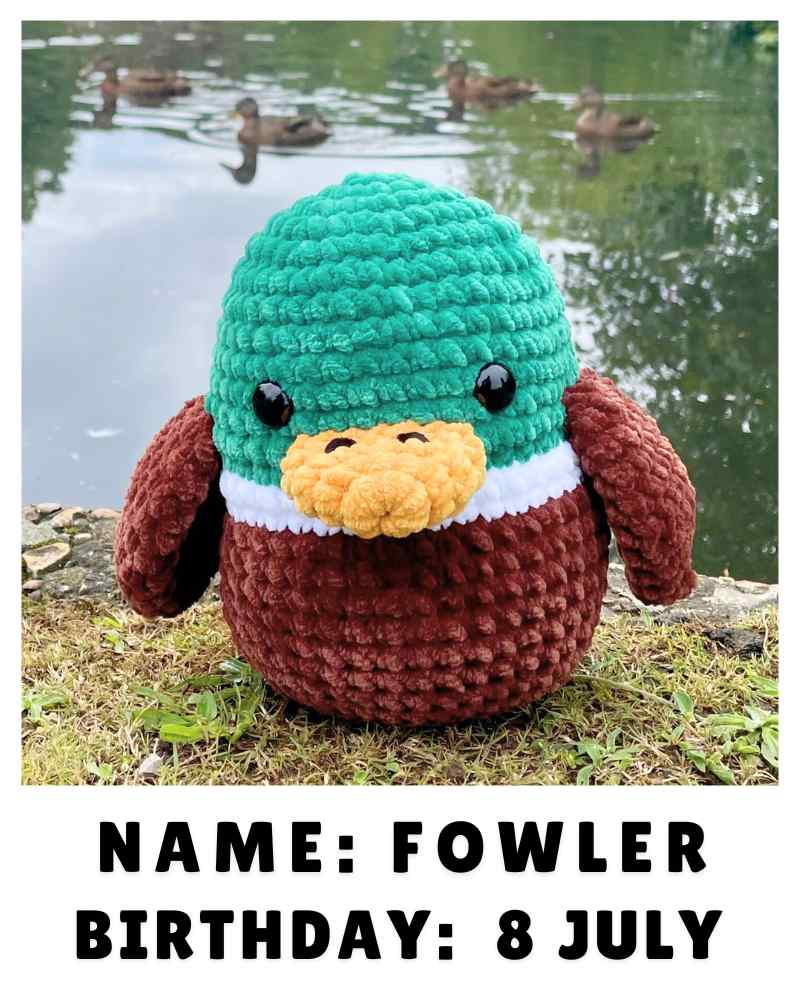
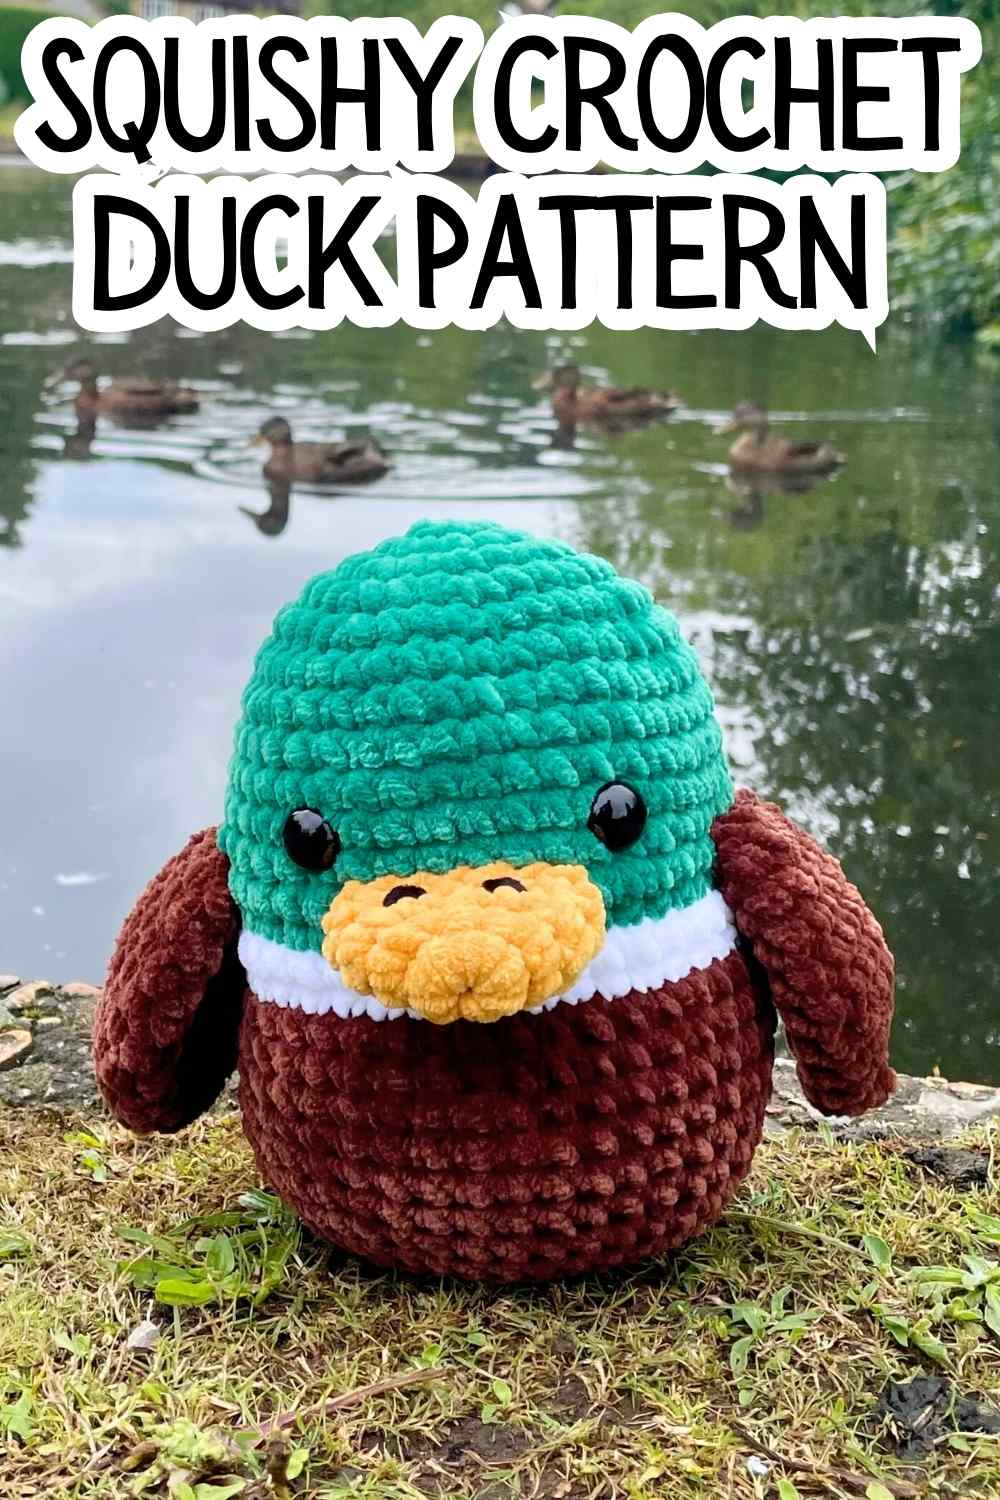
Squishy Crochet Duck Pattern
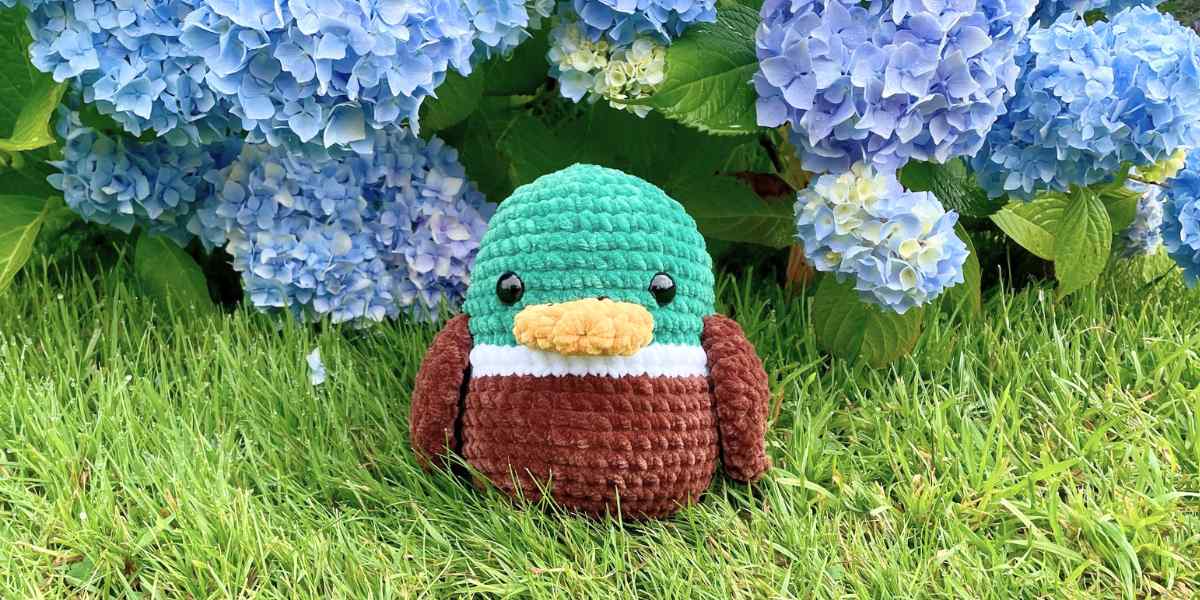
Hi there! This is my squishy crochet duck pattern. Do you use the saying ‘good weather for ducks’ in your region? It’s an old idiom for rain, although it’s not as benevolent as it sounds – the original meaning was actually ‘good weather for hunting ducks’, because the rain masked the hunters’ presence. Good for the hunter I suppose, but less so for the duck!
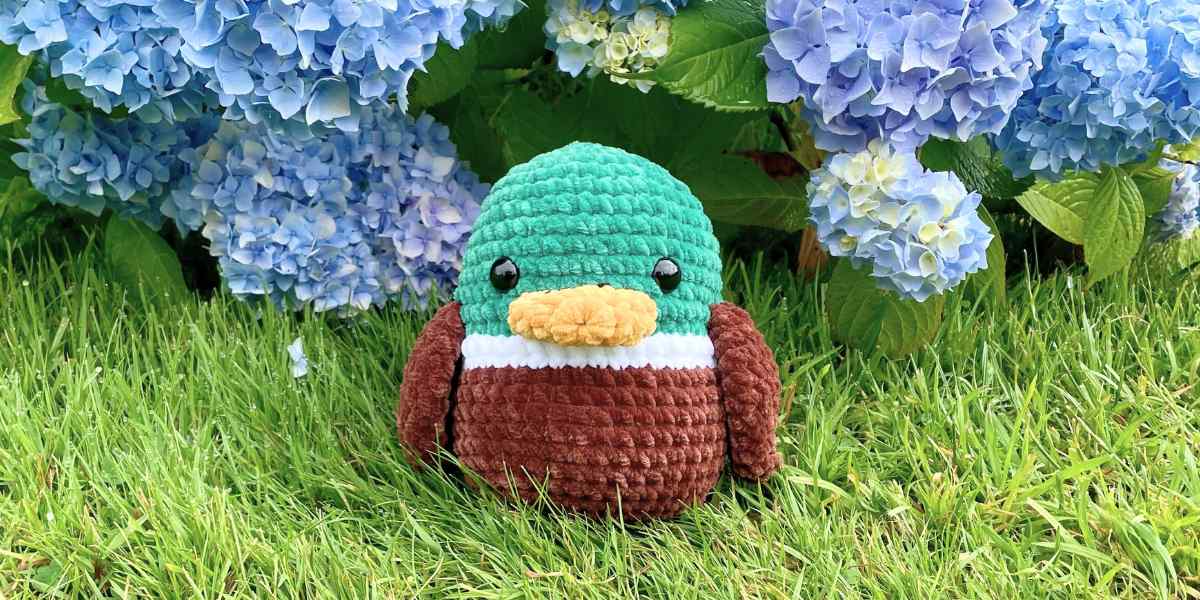
Where I live we’ve not been short of good weather for ducks recently, even though it’s July in the northern hemisphere and we should finally be basking in some summer sun. However the old idiom, and the arrival of ducklings on our local pond did inspire me to develop an easy amigurumi mallard duck pattern. And the results have definitely put a smile back on my face!
He’ll also look really cute alongside my new parrot pattern too – a pair of birds!

Materials
To make your own squishy mallard duck, you’ll need:
- Yarns in brown, green, white and yellow. These all need to be the same weight, but they can be any weight or fiber you like. I love the texture of these super bulky chenille yarns, which make a duck about 7” tall. I’ll include some notes down below about what size duck other yarns will make.
- A scrap of black yarn. For embroidering the nostrils – almost any weight can be made to work, and dark brown or gray would work too.
- Crochet hook. Amigurumi toys work best when they are crocheted tightly, because it stops the stuffing showing through the stitches. Unless your tension is naturally tight, try using a slightly smaller hook than the yarn wrapper suggests – I’m using a size J/6mm hook with super bulky yarn.
- Safety eyes. Mine are 16mm across – I’ve included notes on choosing the right size for your squishy duck down below.
- Toy stuffing.
- Stitch markers.
- Darning needle.
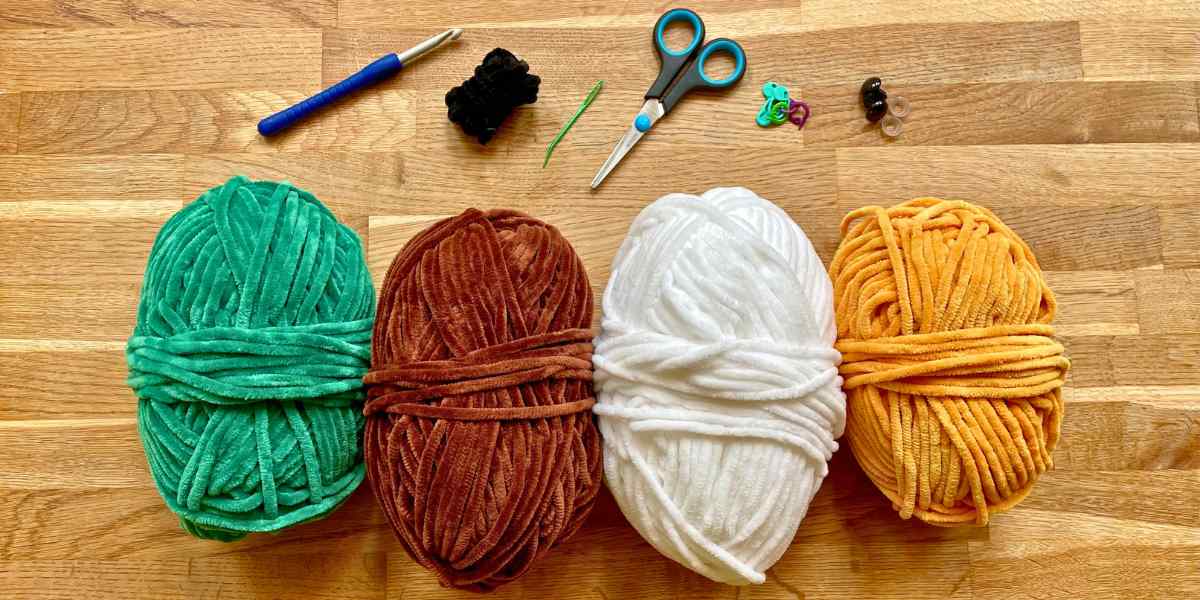
I just love how these yarns look together, even before I’ve started crocheting with them! It’s such a gorgeous color palette.
How big will your crochet duck be?
The height of your duck will be determined by the weight of yarn you make it from. And the scale of the body determines what size eyes will look right. These dimensions will give you an idea of what to expect, but they are approximate. The end result might vary a little depending on the exact yarn you choose, the crochet hook you use, and your natural tension.
- DK yarns make a duck about 4” tall. Try 12mm eyes.
- Worsted yarns make a duck about 5” tall. Try 12mm eyes.
- Bulky or chunky yarns make a duck about 6” tall. Try 16mm eyes.
- Super bulky or super chunky yarns make a duck about 7” tall. Try 16mm eyes.
- Jumbo yarns make a duck 8+ inches tall. Try 20mm eyes. The jumbo category is a bit of a catch-all for all kinds of massive yarns, so you could end up with quite a giant fowl!
Pattern notes
This pattern is in standard U.S. crochet terms and only uses a small number of basic stitches. The ones you need to know are
Ch chain
Sl st slip stitch
Sc single crochet
Inc increase (make two single crochets in the same space)
Dec decrease
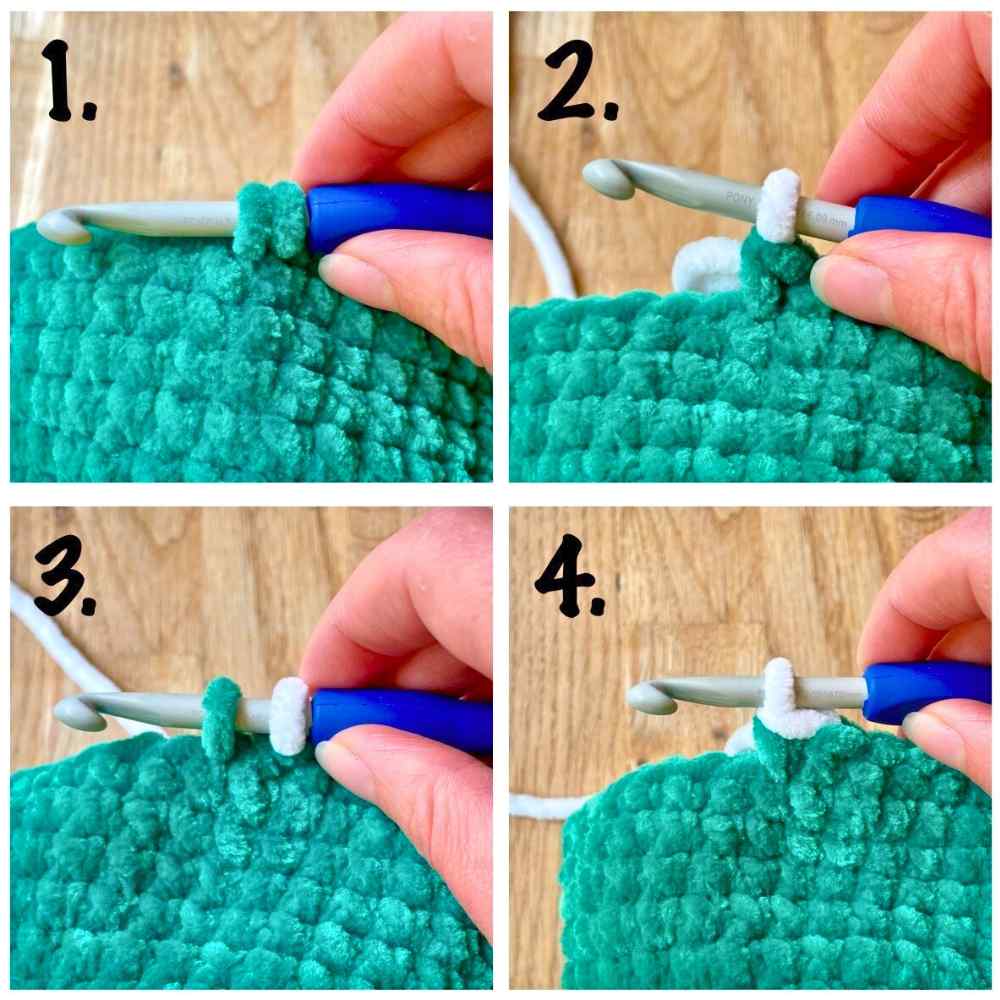
For your decreases, use the invisible amigurumi decrease:
- Insert the hook through the front loop only of the next two stitches (left, below).
- Put the yarn over the hook and draw it through the two front loops. Two loops remaining on hook.
- Yarn over and draw through both loops to finish the stitch (right, below).

Squishy crochet duck pattern
Your duck is going together in three parts (four, if you count the wings separately):
- Body
- Beak
- Wings
They’re all made in spiraling rounds, so use your stitch markers to keep track of where one round ends and the next one begins. You can start each part with a magic circle or by making four chains and joining them in a loop with a slip stitch into the chain furthest from the hook. I prefer the former with smooth yarns, and the latter with fluffy or chenille yarns.
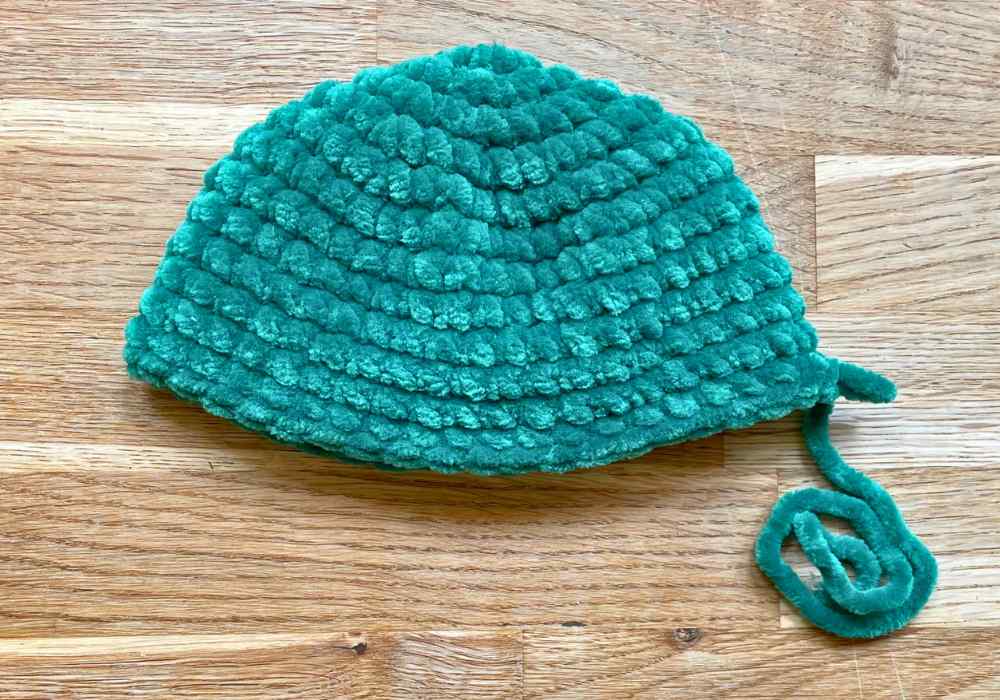
The body
The body is worked from the top down, starting with your green yarn.
- 1st round: Ch 1, sc 8 into the magic circle or 4-ch loop (8 sts)
- 2nd round: 8 inc (16 sts)
- 3rd round: *1 sc, inc* 8 times (24 sts)
- 4th round: *2 sc, inc* 8 times (32 sts)
- 5th round: *3 sc, inc* 8 times (40 sts)
- 6th – 12th rounds: Sc all the way round (40 sts)
Do not cut your yarn yet. I have in this photo, and it was a Silly Mistake.
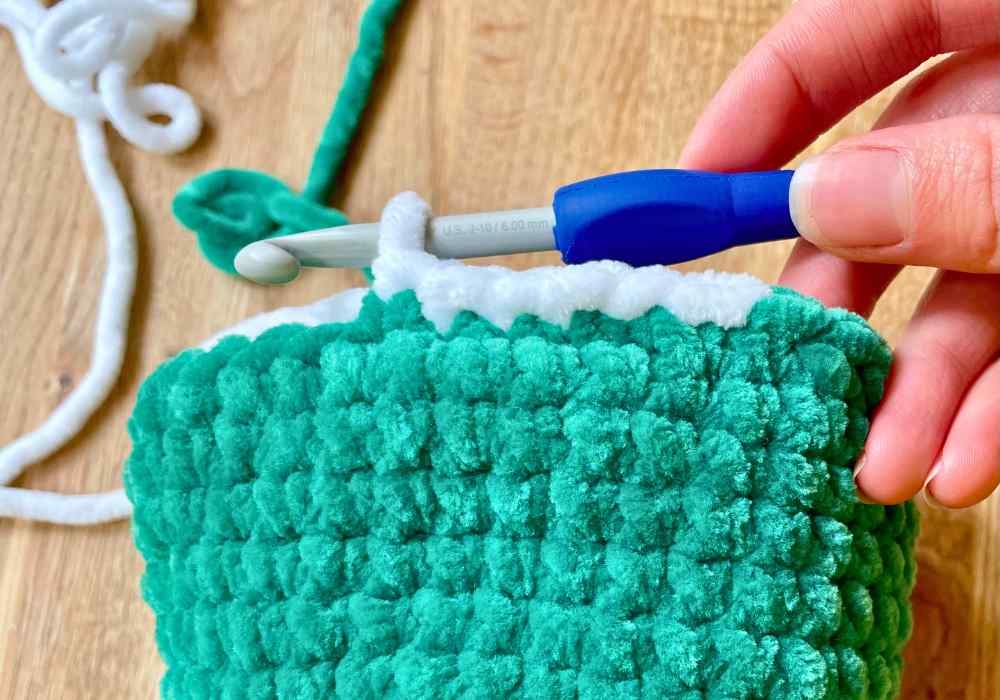
Changing color
At the start of the 13th round, we’re going to start changing color to white yarn. But rather than just dropping the green yarn and picking up with white yarn, we’re going to use both the green and white in every stitch for the next round. This creates a much smoother line where the color changes – as befits a handsome and well-preened waterfowl!
- Insert the hook into the next stitch and draw through a loop of green as before. There are two green loops on the hook.
- Put the white yarn over the hook and draw it through both green loops. You’ve made a complete single crochet, and there’s one loop of white yarn on the hook.
- Insert the hook into the next stitch and draw through a loop of the green yarn. There is one green loop and one white loop on the hook.
- Put the white yarn over the hook and draw it through both loops. One white loop left on the hook.
Keep repeating steps 3 and 4. Your new round is made of single crochet stitches with green ‘legs’ and white top loops.
At the end of the round, cut your green yarn and tie it securely to the white yarn tail inside the body.

- 14th round: Sc all the way round in white (40 sts)
- 15th round: Use the same method to change from white yarn to brown yarn (40 sts)
- 16th – 23rd rounds: Sc all the way round in brown (40 sts)
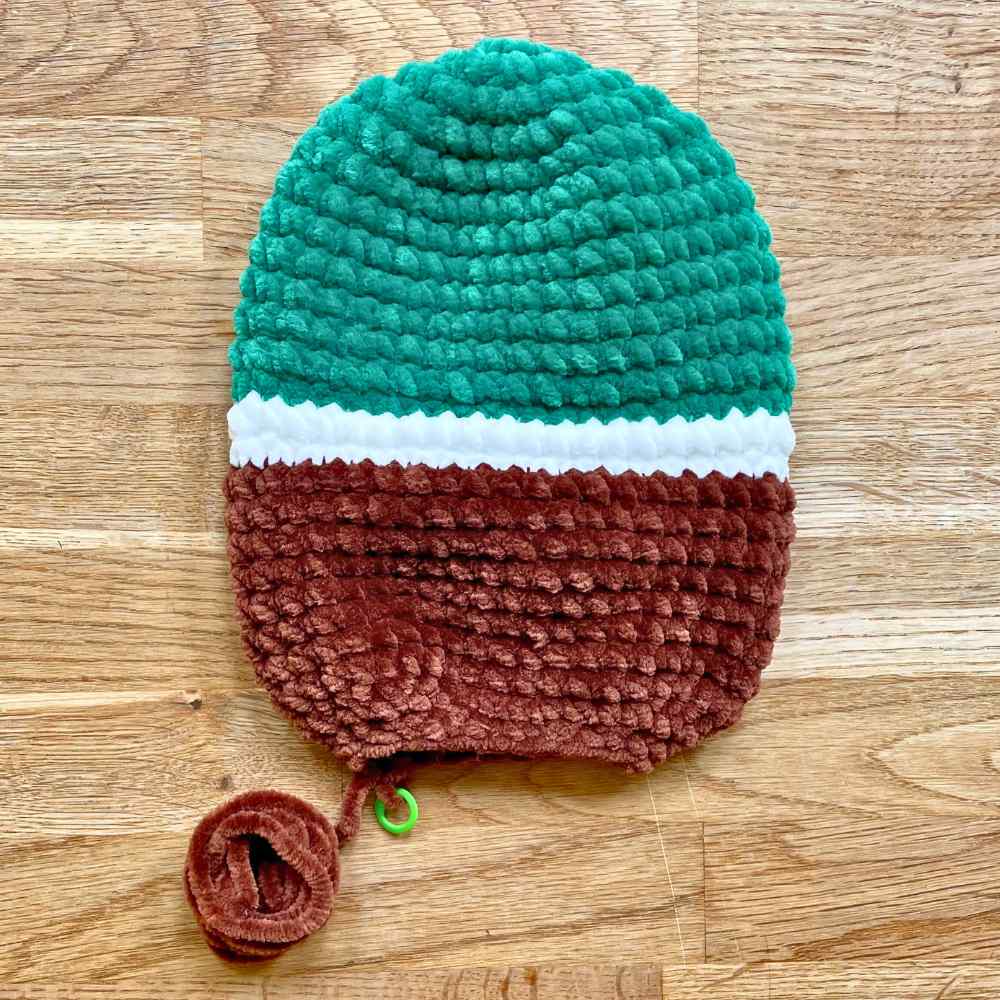
Decreasing at the base of the body
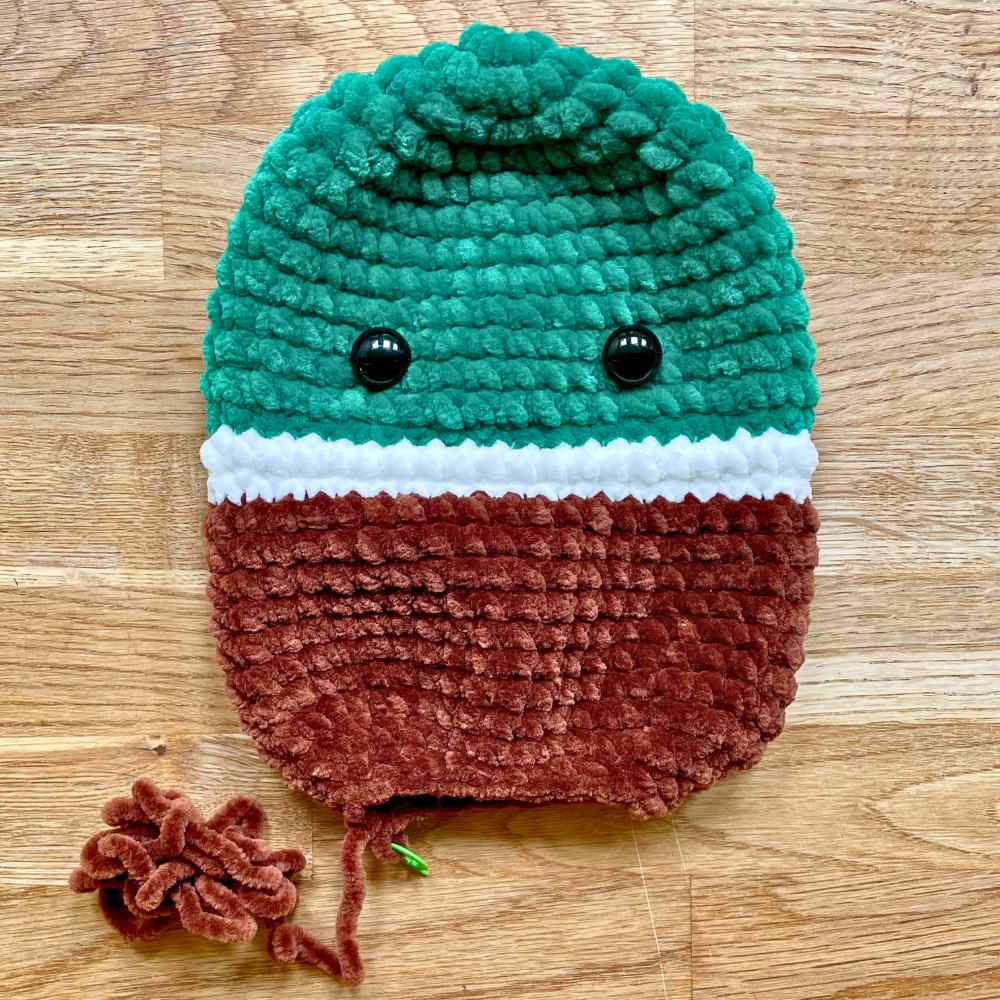
The bottom of your duck is going to be a flat oval shape. This gives it a distinct front and back, with lots of space at the front for cute, wide-set features. It also means your duck can be freestanding. Right now, the front of the body should look like the picture below left, and the back should look like the picture in the center:
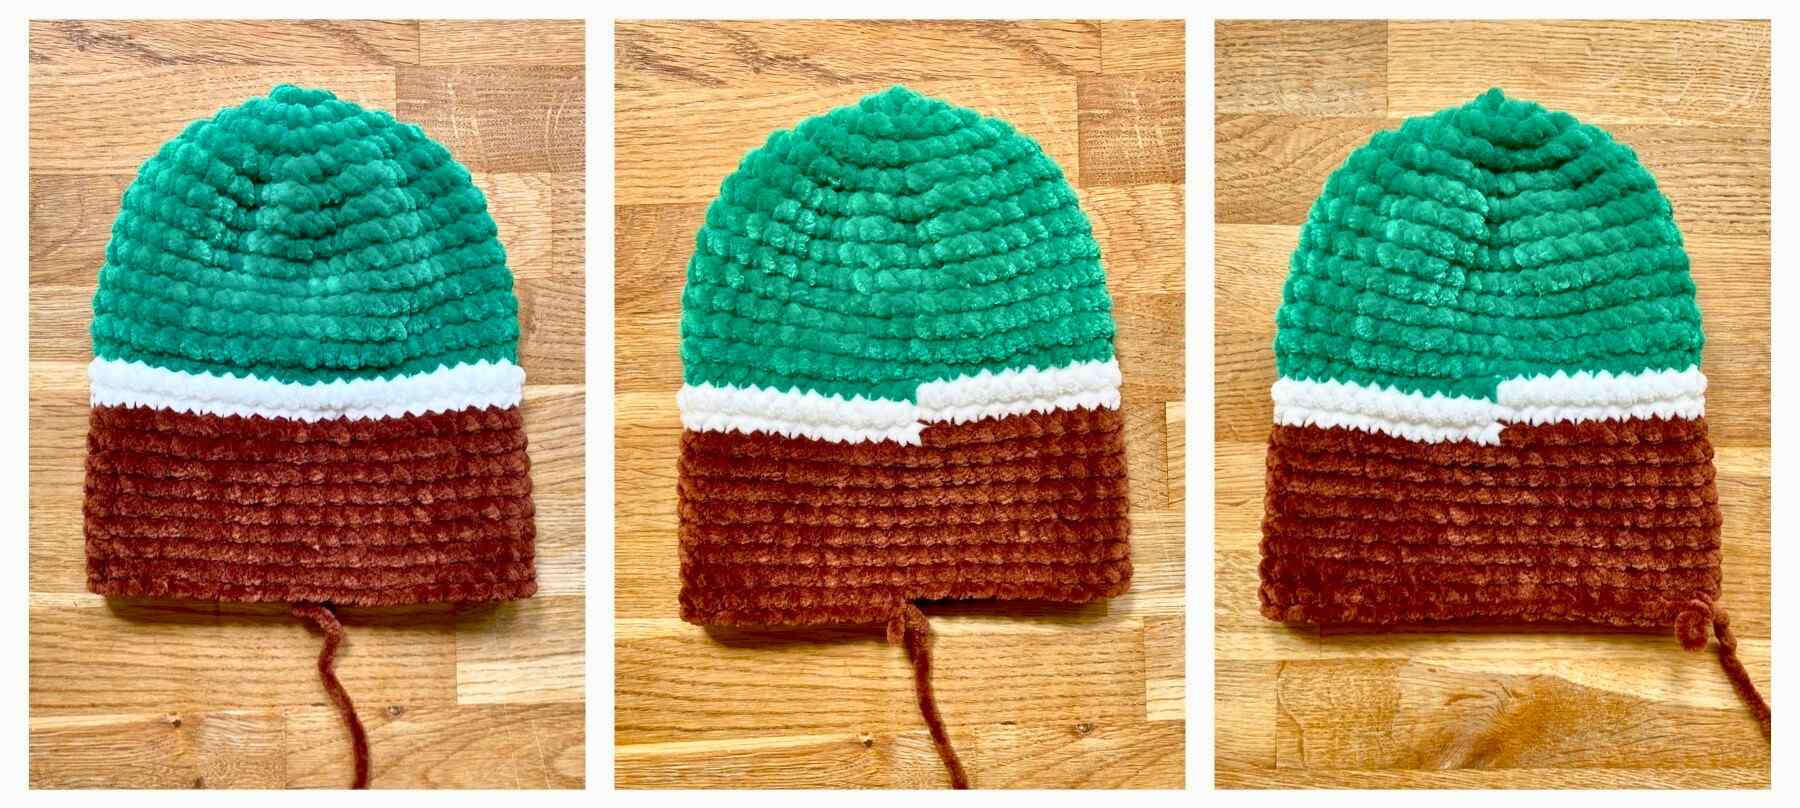
To make sure those color changes are on the back of the finished duck, sc 10 (above right). This position is the new starting point for the final three rounds:
- 24th round: 3 dec, sc 8, 6 dec, 8 sc, 3 dec (28 sts)
- 25th round: 3 dec, sc 2, 6 dec, 2 sc, 3 dec (16 sts)
Put a stitch marker into the loop on your hook, and cut your yarn leaving a 24 inch tail.
Turn the body right side facing, and insert the eyes roughly 8 stitches apart between rows 10 and 11. You can move them slightly from this position if it doesn’t look right – just make sure there’s space between and below them for the beak to fit. Press the backs of the eyes on securely.
Closing the body
Fill the body firmly with toy stuffing, then pick up the stitch where you left off earlier, and crochet one more round.
- 26th round: 8 dec (8 sts)
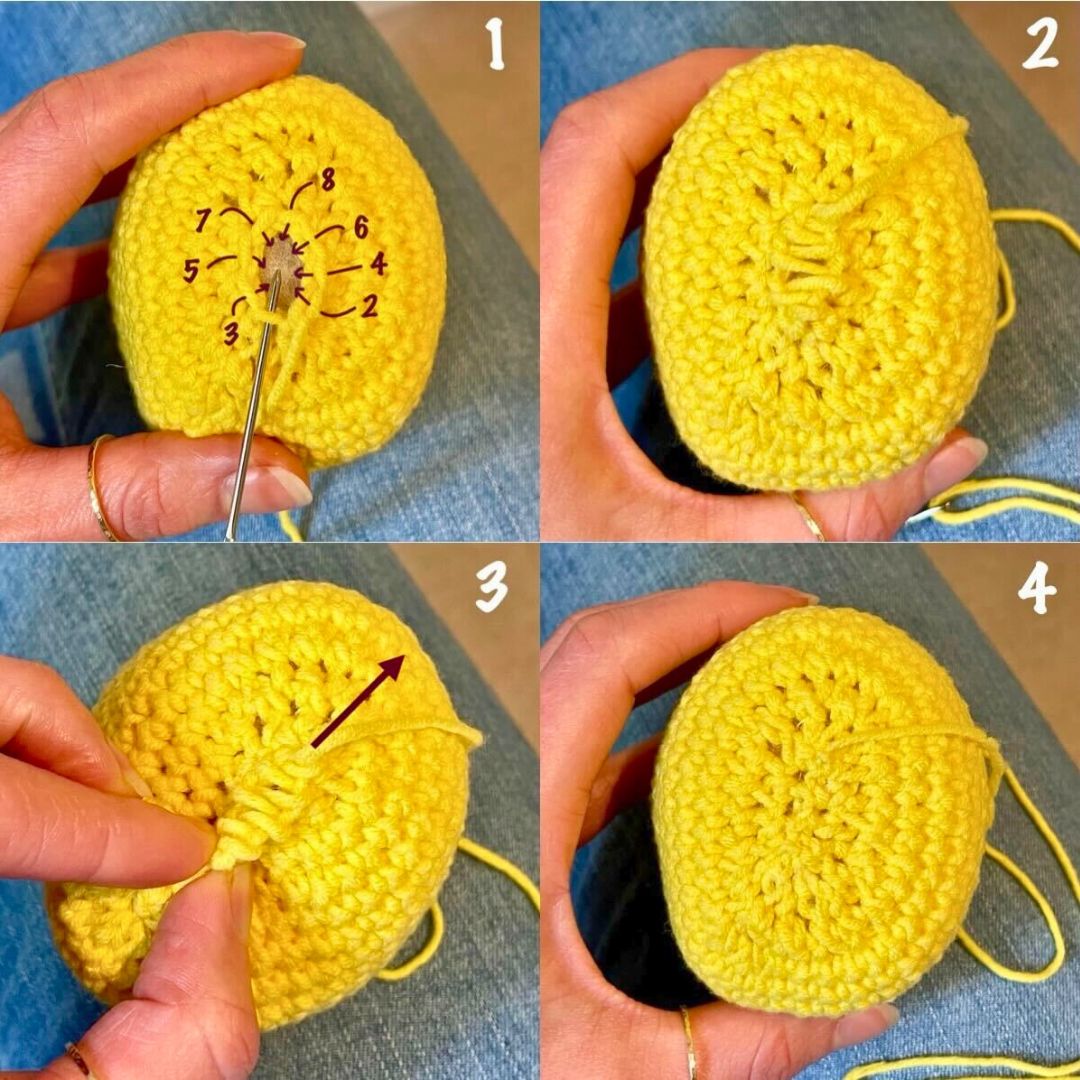
Slip stitch once, and pull the remaining yarn tail all the way through the stitch. Thread it onto a darning needle and use it to close the remaining hole. The neatest way is using mattress stitch through the front loops only. The first picture below shows where each stitch goes (the needle is already in position to make the first stitch). Make the stitches loosely at first so you can clearly see where the next one goes (second picture). Then either pull them tight one by one, or pinch the start of the seam and pull the yarn tail in the other direction (picture 3) to close the opening (picture 4).
Tie off the yarn tail, and poke it inside the body.
The beak
Do you prefer ‘beak’ or ‘bill’? Either way, here’s how to make your duck’s quacker. Using your yellow yarn:
- 1st round: Ch 1, sc 8 into the magic circle or 4-ch loop (8 sts)
- 2nd round: *Sc 1, inc* 4 times (12 sts)
- 3rd round: *Sc 2, inc* 4 times (16 sts)
- 4th round: Sc all the way round.
Slip stitch once, cut the yarn leaving a long tail for sewing, and pull the yarn tail all the way through – this is the center of the underside of the beak. Then use your black yarn to embroider the nostrils on top of the beak – one row in and two stitches apart (below left). I’ve used super bulky yarn doubled up and made each nostril separately, with the yarn tails knotted together inside the beak (below right).

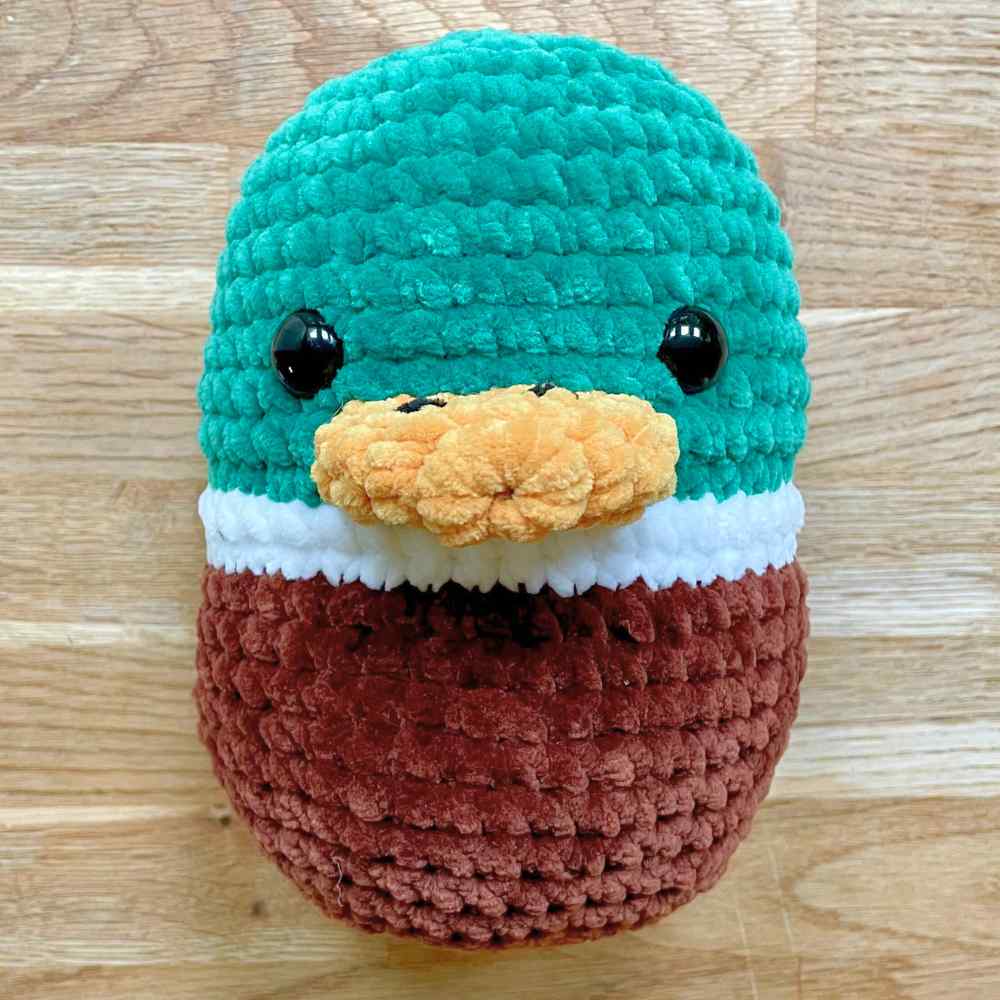
Sew the beak onto the body just below the eyes, taking care to get the nostrils central.
The wings
From quacker to flappers, here’s how to make your ducks wings. Make two, using your brown yarn:
- 1st round: Ch 1, sc 8 into the magic circle or 4-ch loop (8 sts)
- 2nd round: *Sc 1, inc* 4 times (12 sts)
- 3rd round: *Sc 2, inc* 4 times (16 sts)
- 4th round: *Sc 3, inc* 4 times (20 sts)
- Rounds 5 – 8: Sc all the way round
- 9th round: *Sc 3, dec* 4 times (16 sts)
- 10th round: *Sc 2, dec* 4 times (12 sts)
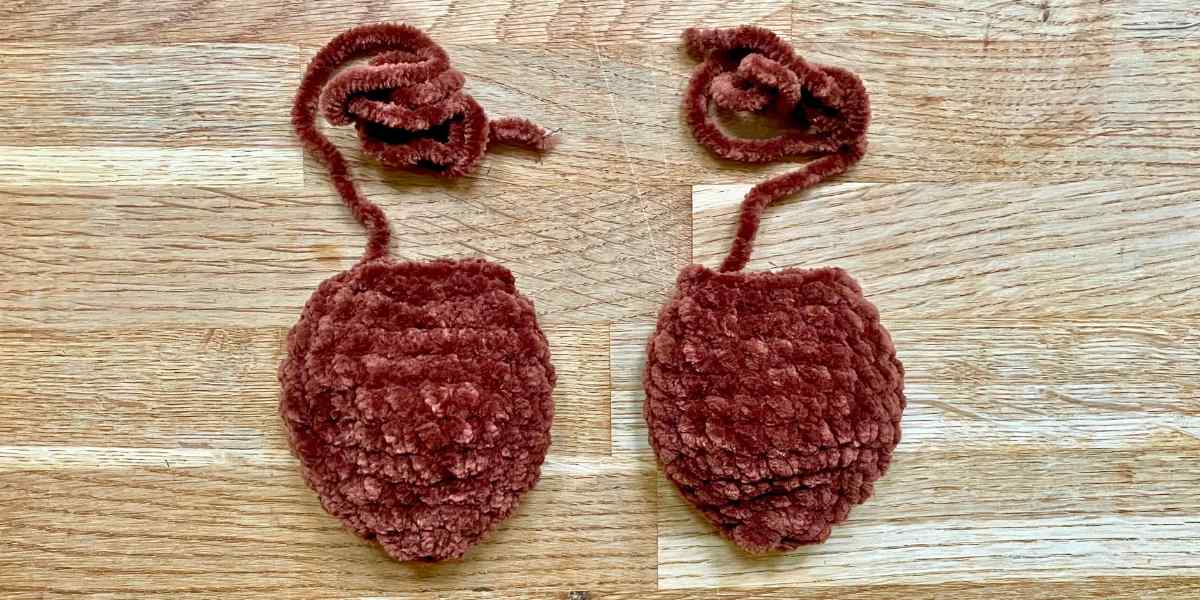
Slip stitch once, cut the yarn leaving a long tail for sewing, and pull the yarn tail all the way through. Sew them onto the sides of the body through 5 or 6 stitches on the top side of the opening. And just like that, your duck is ready to take flight!
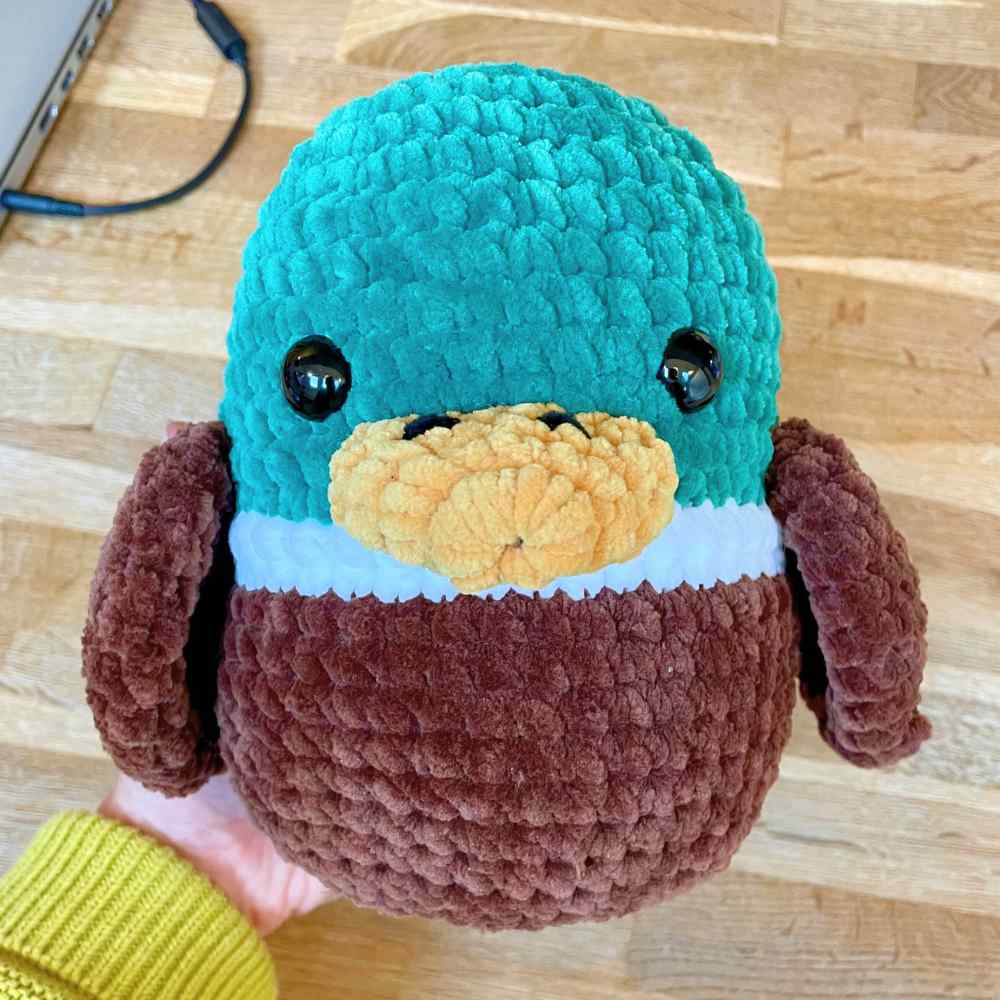
Squishy crochet duck pattern complete!
Your new avian pal is ready to cuddle, admire, or give away – well done! Since his bright green head clearly makes my duck a male mallard, my daughter wants me to make a second all-brown female duck next, so they can be parents to the squishy crochet chicks I’ve made previously. I hope you’ve had fun following this pattern, and if you’d like some more simple squishy amigurumi animals to try, take a look at my other projects here.