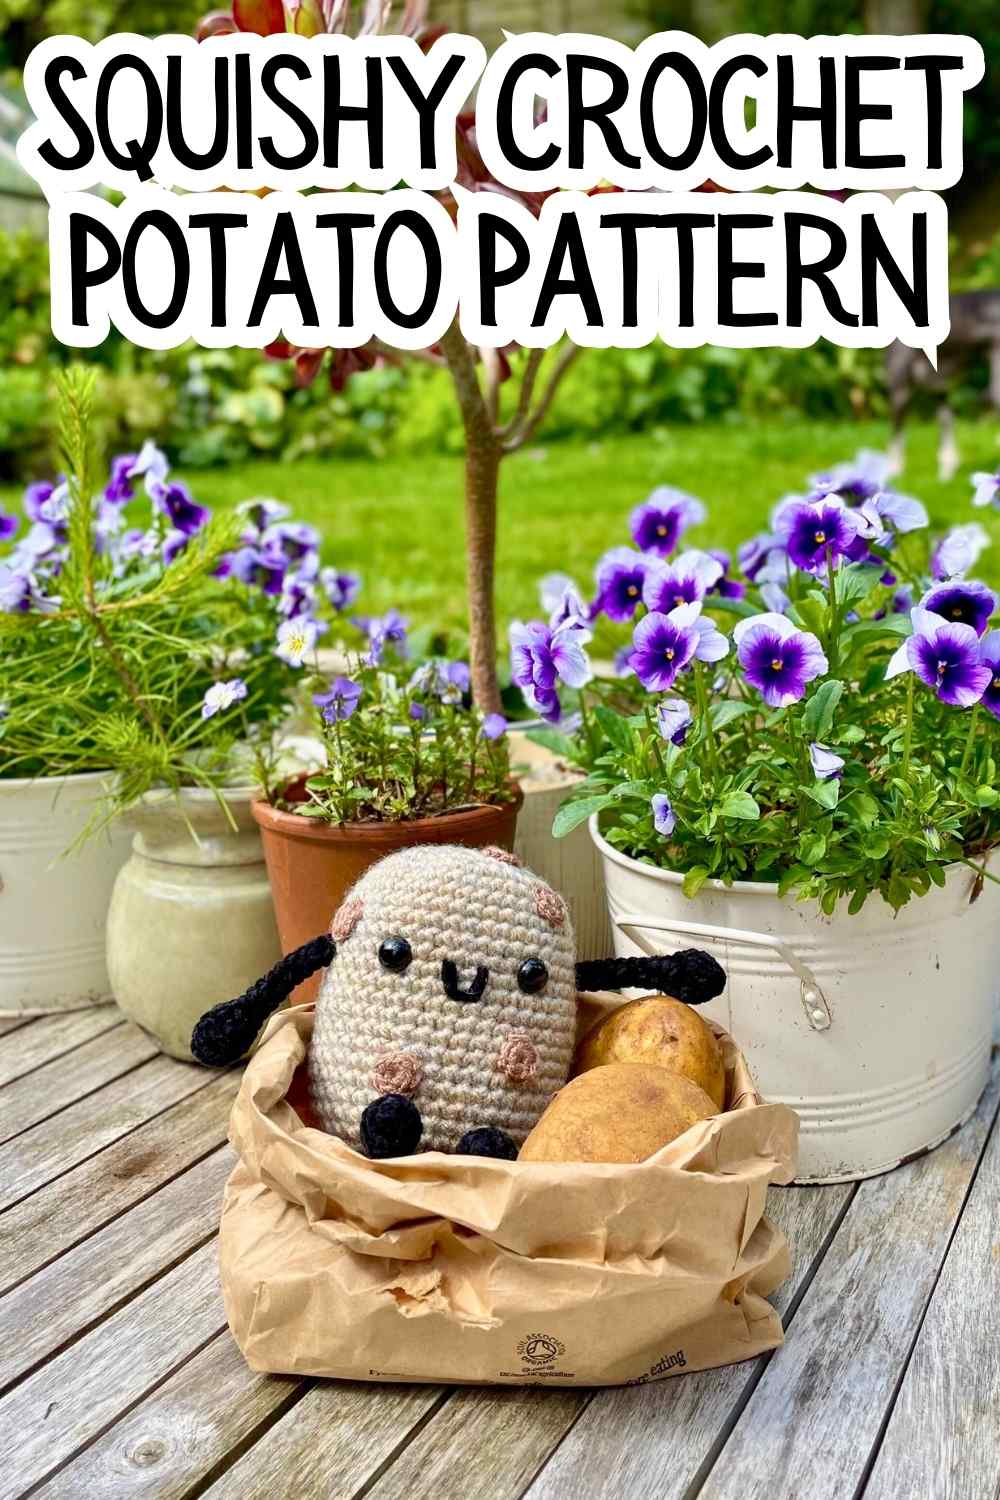
Squishy Crochet Potato Pattern
Howdy, and welcome to my squishy crochet potato pattern! I’ve been feeling inspired to create more cuddly produce since I made an eggplant a few weeks back.
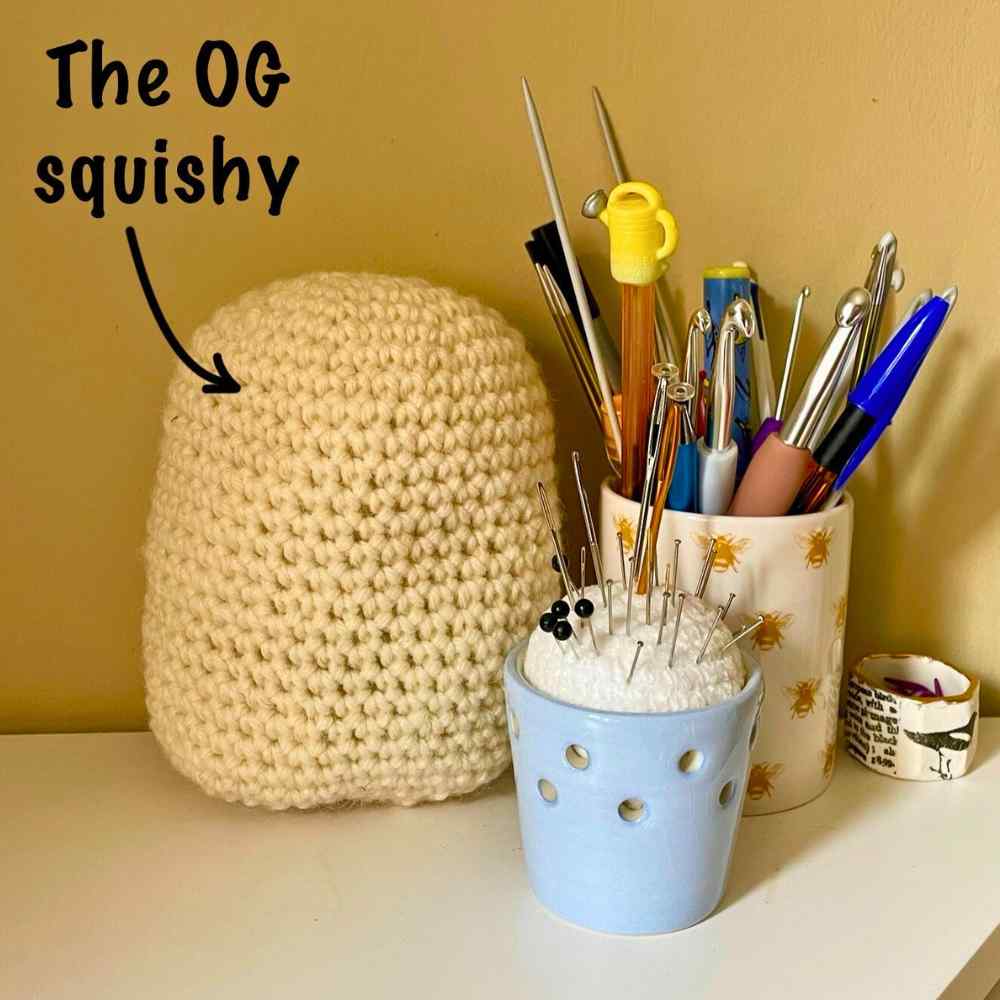
Vegetables with faces are too cute! And this pattern is also a tribute to my original squishy prototype. All the squishy amigurumi patterns I’ve written here are based on the same simple-to-make template, and the first time I perfected that shape (which still sits on my desk) my ten year old daughter took one look at it and said “nice one mom, you’ve crocheted a potato”.
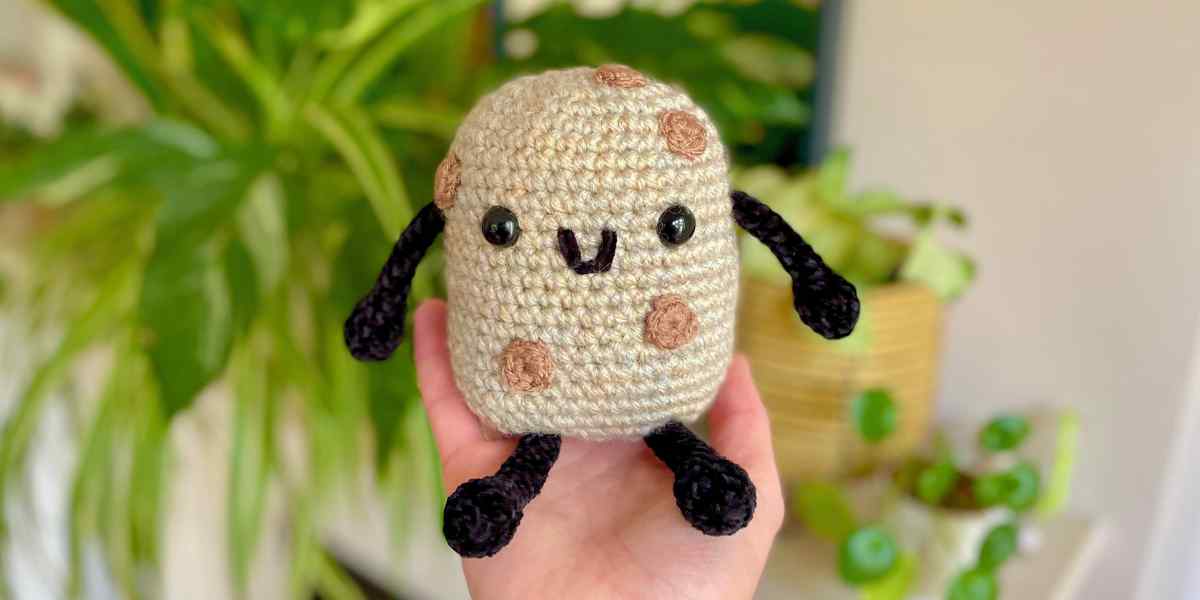
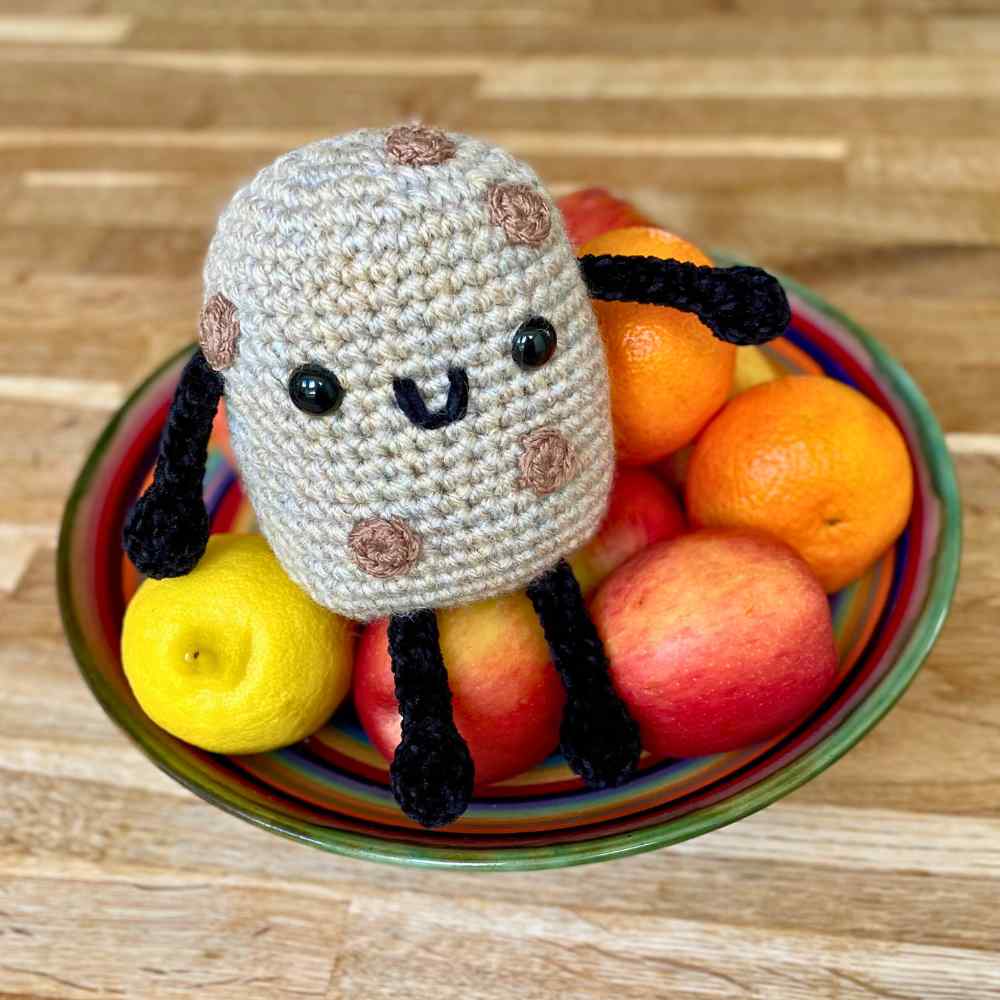
So it was about time that I realised the full potential for a cuddly crochet potato toy! And the result is so much more than just a humble spud. He sits up unaided, and there’s lots of space for adding cute, wide-set features to his face. And best of all, if he turns out a bit lumpy or misshapen it’s all good, because he’s a potato! I think he’d be a fun and unique gift for a child, or a quirky mascot for an avid vegetable gardener.

Materials
To make your own squishy potato companion you’ll need:
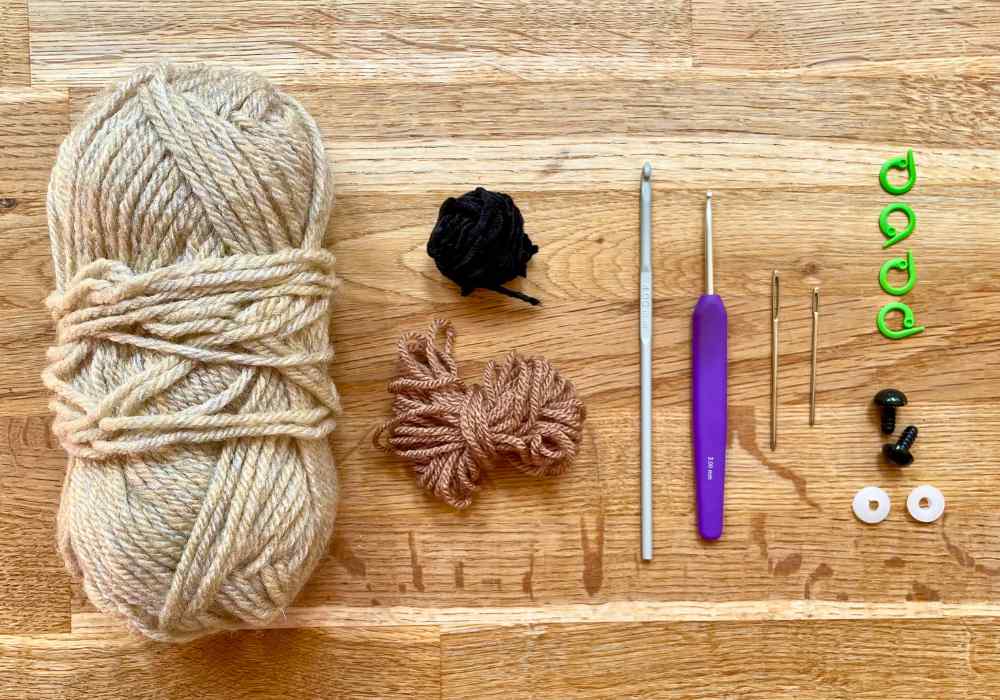
- Yarn for the body. Any thickness or fiber of yarn will do. I’m using a worsted (aran) weight yarn I raided from Lucy’s stash – it didn’t have a wrapper any more, but it feels like a wool and acrylic blend. It’s a pleasingly potato-like brown marl, but any shade of light brown would work – as would earthy reds, muted pinks or even deep purple!
- Yarn for the features. This yarn needs to be one weight lighter than the yarn for the body, so I’m using DK yarns. I’ve got Rico Ricorumi’s nilli nilli yarn (a DK chenille) in black for the arms, legs and smile, and Stylecraft special DK in mocha for the eyes. NOTE: The photo above shows what I had left after I finished developing the pattern – it wouldn’t be enough to make another potato!
- Crochet hooks. One for the body, and one for arms/legs/eyes. Amigurumi holds its shape best when the tension is tight, so I recommend using a hook one size smaller than the wrappers on your yarns recommend.
- Safety eyes. I’ve use 12mm eyes, but refer to the notes on sizing down below if you’re using a different size yarn.
- Stitch markers.
- Toy stuffing.
- Darning needle(s). I’m using one for each weight of yarn, but as long as you have one big enough to use with your thickest yarn, that will be enough.
Notes on sizing
This pattern works for all weights of yarn. The yarn you choose for the body will determine how big your potato turns out, what weight to use for the features, and what size eyes will look right.
| Body yarn weight | Approx. finished height | Yarn weight for features | Safety eye diameter |
| DK | 4 inches | Superfine or fine | 12mm |
| Worsted (aran) | 5 inches | DK | 12mm |
| Bulky | 6 inches | Worsted | 16mm |
| Super Bulky | 7 inches | Bulky | 16mm |
| Jumbo | 8+ inches | Super bulky | 20mm |
Pattern notes
This pattern is written in standard U.S. crochet terms. If you’re not familiar with the basic crochet stitches, check out Lucy’s primer here. The only ones you’ll need to use in this project are:
Ch chain
Sl st slip stitch
Sc single crochet
Inc increase (make two single crochets in the same space)
Dec decrease
For your decreases, use the invisible decrease. This technique is perfect for amigurumi because it’s practically invisible (just as promised!) and doesn’t leave noticeable gaps between the stitches.
- Insert the hook through the front loop only of the next two stitches (below left).
- Put the yarn over the hook and draw it through both front loops.
- Yarn over and draw through both loops remaining on the hook to finish the stitch (below right).

Squishy crochet potato pattern
Your squishy potato is going to need:
- A body
- Limbs
- Eyes (the potato kind, and the seeing kind!)
The body
You can start all of your potato’s parts with a magic circle, or by making 4 chains and joining them in a loop with a slip stitch. If you’re using a yarn which tends to snap easily, then I find a 4-chain loop is easier to tighten.
- 1st round: Ch 1, sc 8 into the magic circle or 4-ch loop (8 sts)
- 2nd round: 8 inc (16 sts)
- 3rd round: *1 sc, inc* 8 times (24 sts)
- 4th round: *2 sc, inc* 8 times (32 sts)
- 5th round: *3 sc, inc* 8 times (40 sts)
- Rounds 6 – 23: Sc all the way round
- 24th round: 3 dec, sc 8, 6 dec, 8 sc, 3 dec (28 sts)
- 25th round: 3 dec, sc 2, 6 dec, 2 sc, 3 dec (16 sts)
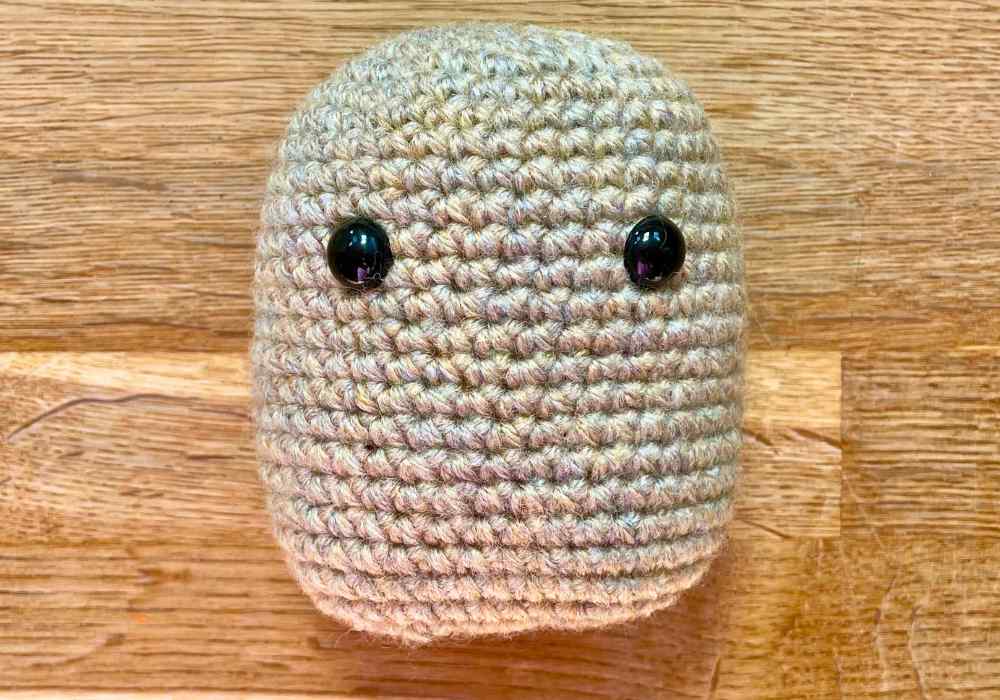
Put a stitch marker into the loop on your hook, and cut your yarn leaving a 24 inch tail. Then spread the body out flat in front of you. It should have a clear front and back, with the opening at the bottom running from left to right.
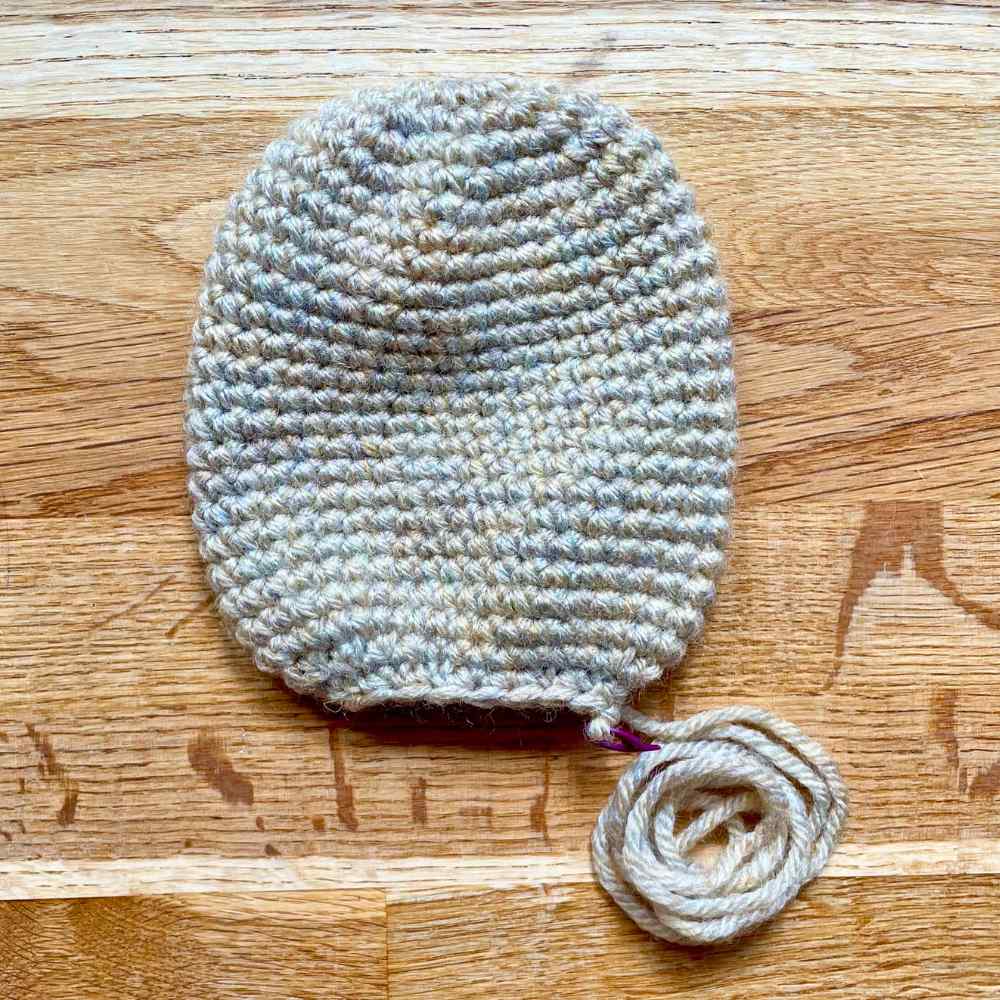
Position the safety eyes roughly 8 stitches apart, between rows 11 and 12. This is just a guide – you can place them a little higher or closer together if it looks better. Press the backs on securely, and fill the body firmly with toy stuffing. Then crochet one more round:
- 26th round: 8 dec (8 sts)
Closing the body
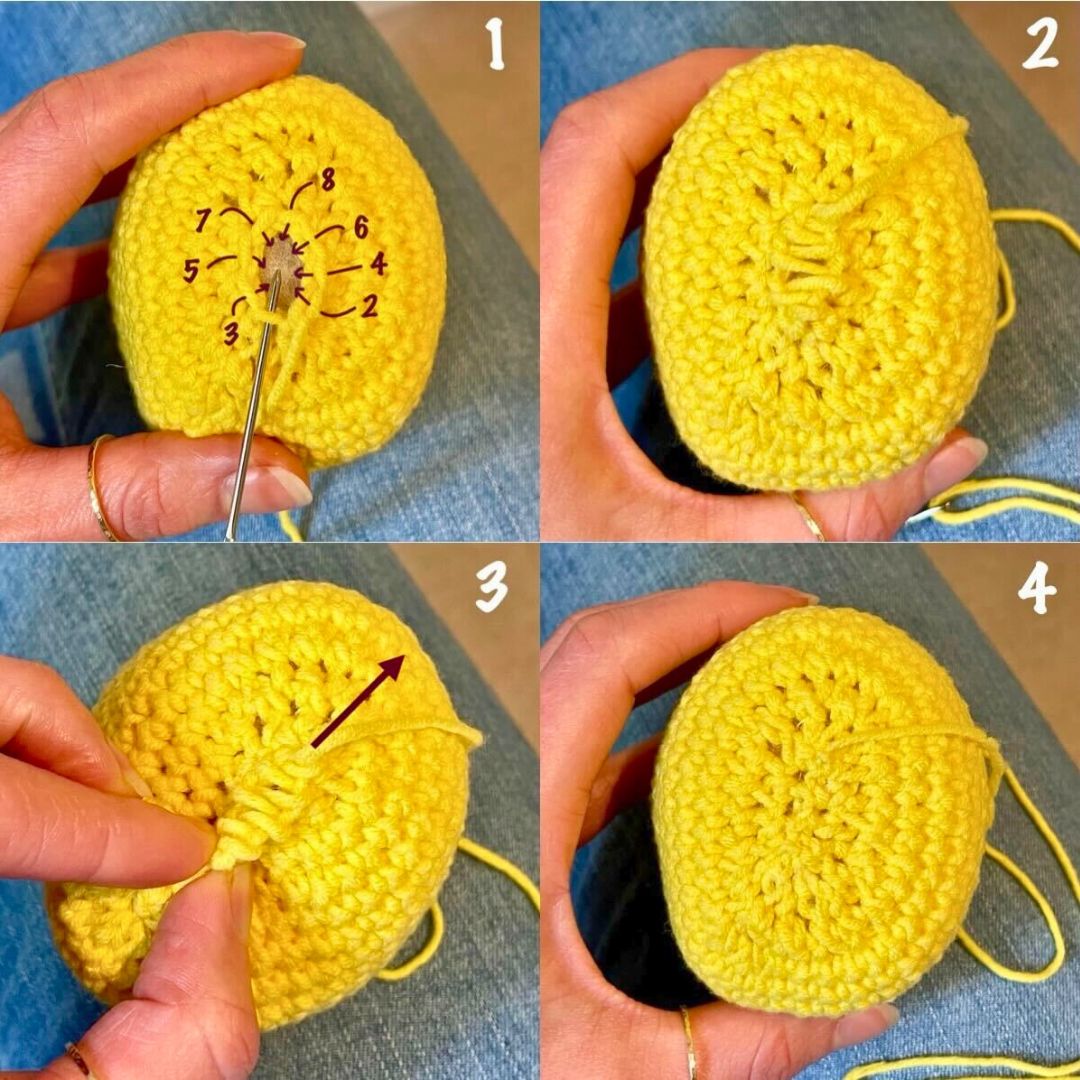
Slip stitch once, then pull the yarn tail right through the stitch. Poke in a little more stuffing if it will fit. And finally, thread the yarn tail onto a darning needle, and use it to close what’s left of the opening. The neatest way is to use mattress stitch through the front loops only. If that’s not a technique you’ve used before, the first picture below shows where each stitch goes. Make the stitches loosely at first, as in picture 2. Then either pull them tight one at a time, or pinch the start of the seam firmly and pull the yarn tail in the opposite direction to zip the stitches shut (picture 3).
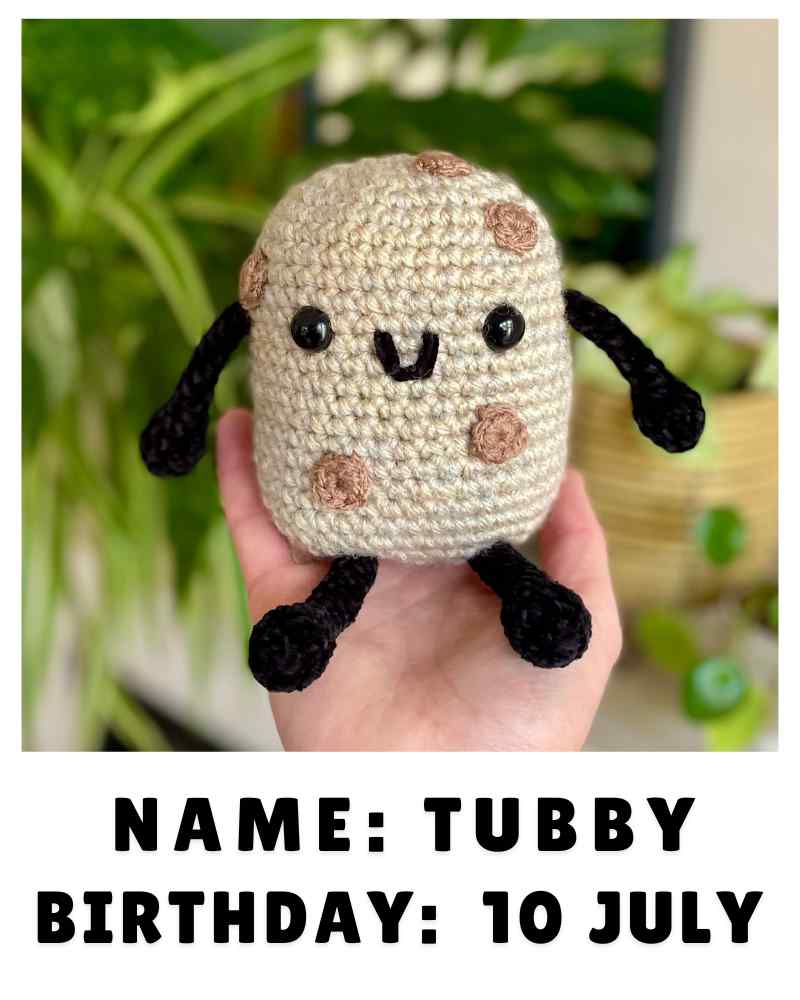
You should now have a potato which looks something like this:
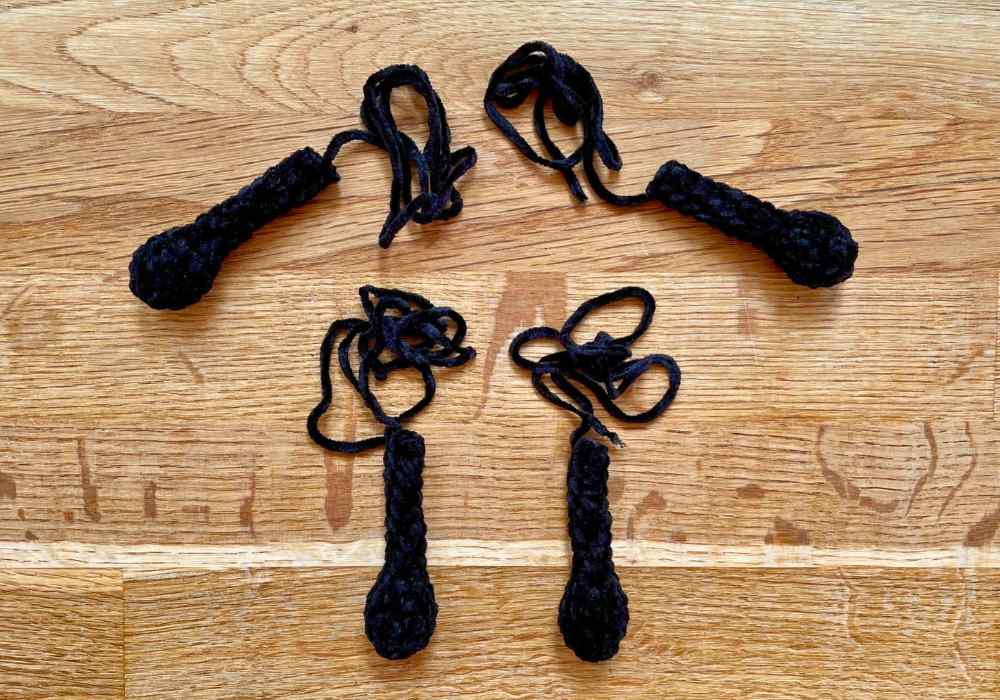
Making the limbs
The arms and legs are all identical. Rounds 5 and 6 can be a bit fiddly – especially if you have the bright idea to use black chenille! If you generally dislike crocheting narrow tubes, then you could make your potato without limbs – it will still look fantastic.
- 1st round: Ch 1, sc 8 into a magic circle or 4-ch loop (8 sts)
- 2nd round: *Sc 1, inc* 4 times (12 sts)
- 3rd & 4th round: Sc all the way round (12 sts)
- 5th round: 6 dec (6 sts)
- 6th – 10th rounds: Sc all the way round (6 sts)
- Poke a little stuffing down into the hand/foot before the limb gets too long. The limbs aren’t stuffed above round 5.
- 11 – 14th rounds: Sc all the way round (6 sts)
Sl st once, cut the yarn leaving 12” for sewing, and pull the yarn tail right through the slip stitch.
Join the arms to the sides of the body level with eyes, and the legs to the front of the body, roughly level with round 24. They should be slightly tucked under the front of the body, but the body shouldn’t end up sitting on top of them.
For the limbs, I like to stitch them in place, then feed what’s left of the yarn tail out through the back of the body. First feed the yarn tails from both arms out through the same spot, tie them together, and trim them short, so they’re left looking like this:
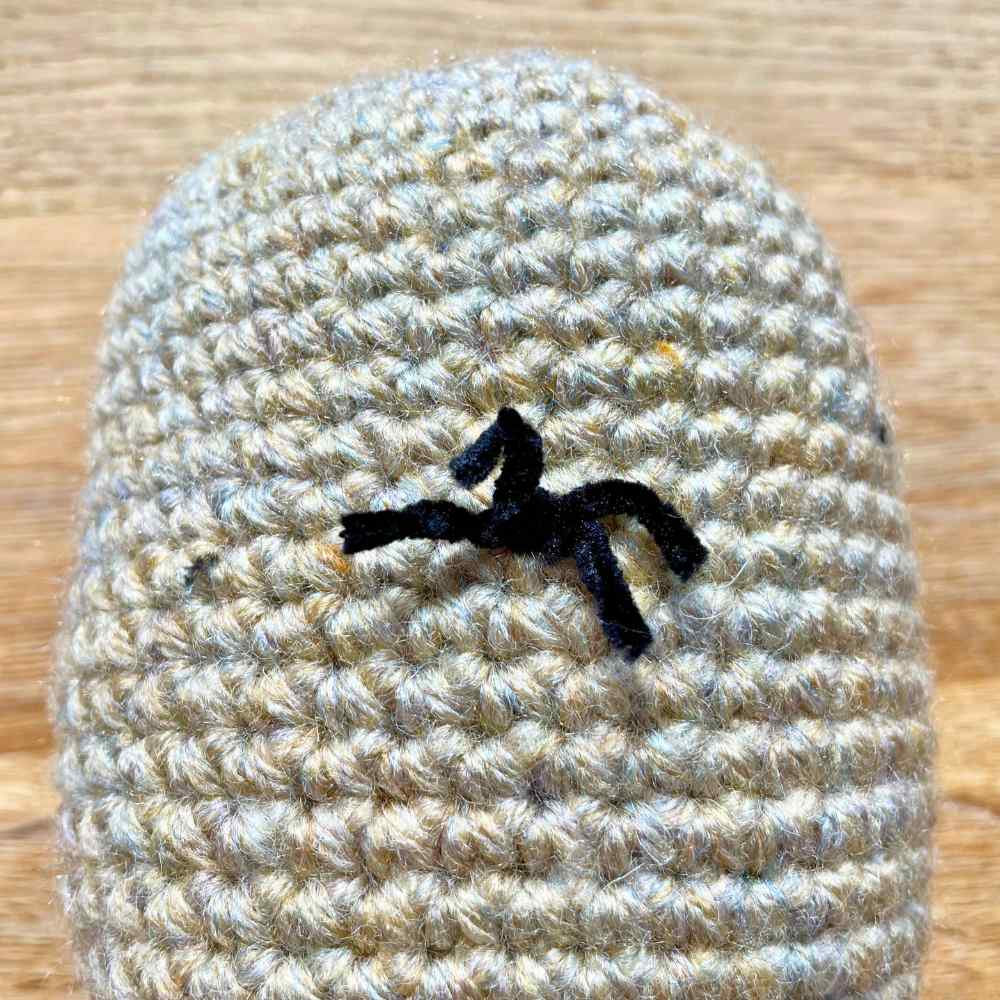
Then poke the knot inside the body and repeat for the legs. The stuffing inside the body will keep the knots anchored in place.
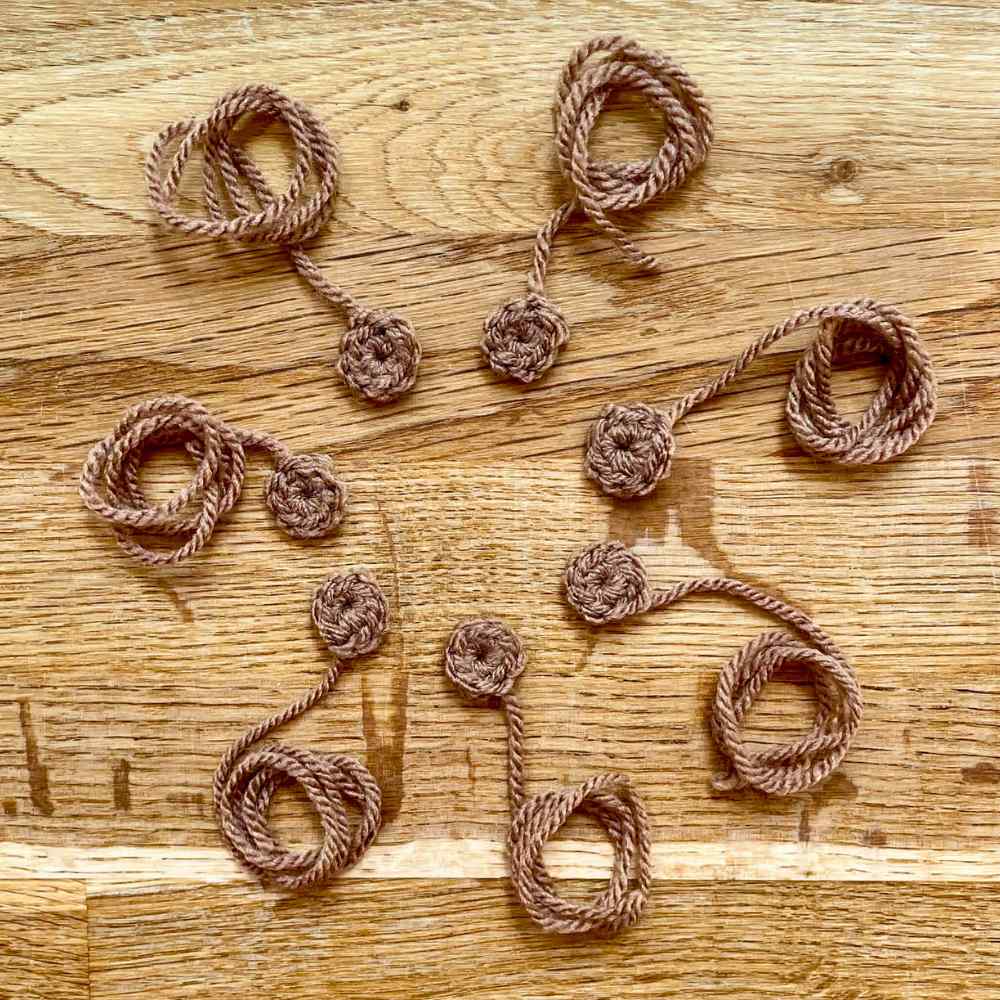
Making the (potato) eyes
These are made in a single round – you’ll need 7 or so.
- 1st round: Ch 1, sc 8 into a magic circle or 4-ch loop (8 sts)
Sl st once, cut the yarn leaving 12” for sewing, and pull the yarn tail right through the slip stitch.
Arrange the eyes randomly over the body. You can either add them actually at random, for a biologically accurate result, or you can very carefully arrange them to give the appearance of aesthetically perfect randomness. I definitely fall into the latter camp!
Use the yarn tails to sew the eyes down. My top tip for achieving a neat finish is to stitch through the back loops only of the eyes, and through a couple of stitches at a time, where the loops overlap.
Like joining the limbs, I attached the eyes two at a time and fed the tails out through the same spot on the opposite side of the body, so I could tie them together. Don’t forget to put a couple of eyes on the back of your potato!
Adding a smile
The final touch to bring your tater to life is a charismatic smile. My potato’s smile is embroidered with just three stitches. I’ve used the same black DK yarn I used for the arms and legs, but doubled up, to give it some extra thickness.
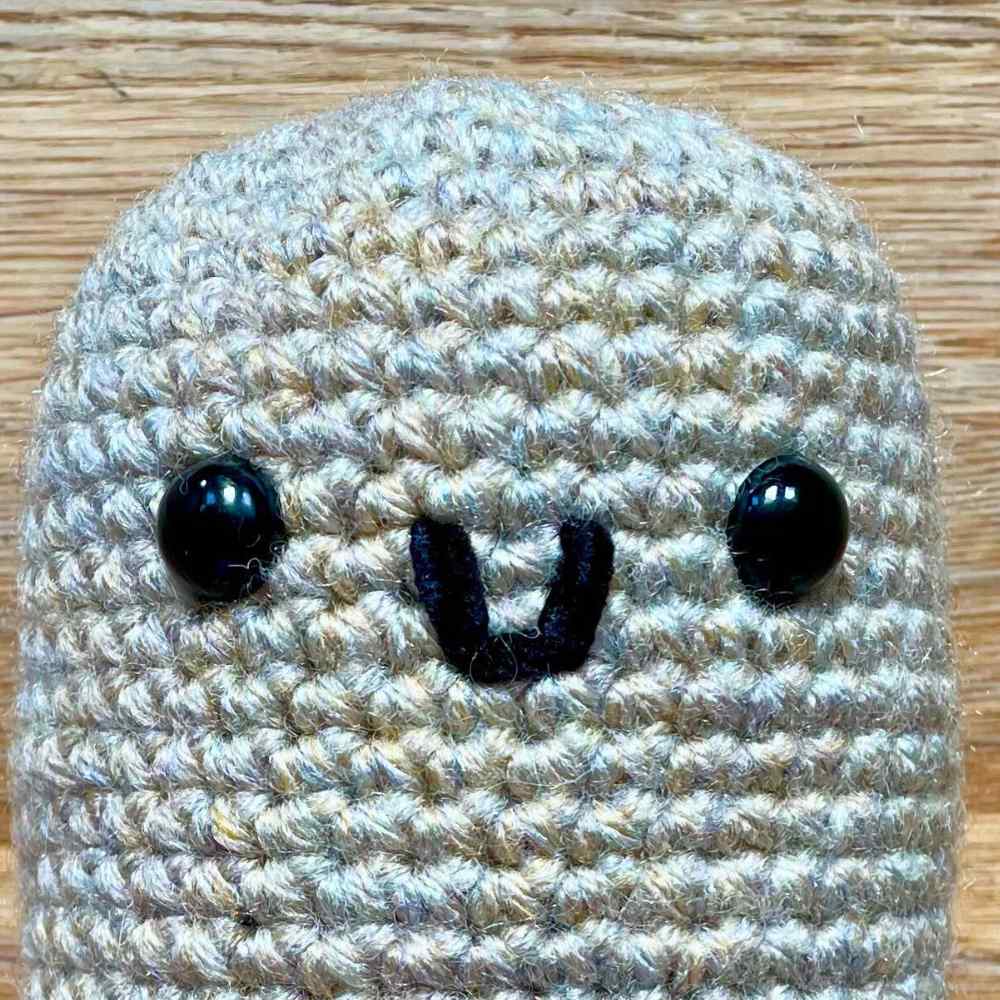
Similarly to joining the limbs and eyes, I pushed the yarn through from the back of the body to the front first, stitched the smile following the grid pattern in the crochet stitches, then fed the yarn back out through the back of the body and tied the two tails together. The inside of this potato must be a real criss-cross of yarns!
Project complete!
And now your crochet potato is fully assembled! I hope you love him as much as I love mine. So give it a name, take lots of pictures, and show it off! If you’re on social media, we’d love to be tagged in a photo Facebook or Instagram.
More squishy foods to make
- Strawberry
- Watermelon
- Ice pop
- Bubble tea
- Egg plant