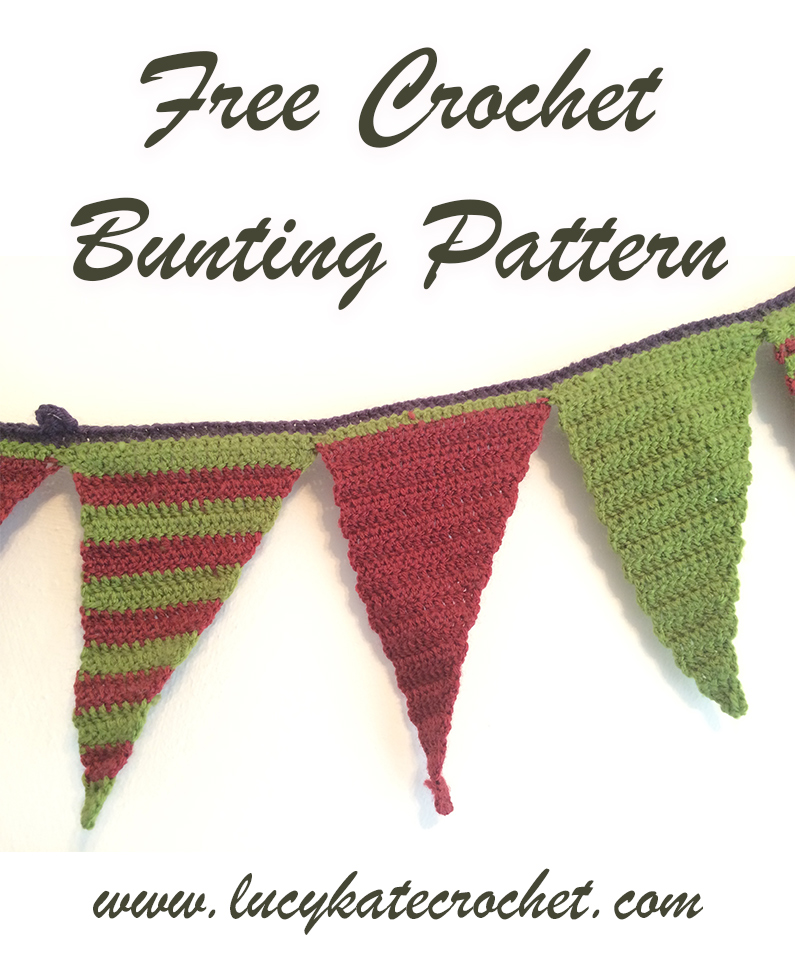
How To Crochet Bunting: Free Crochet Pattern
 In this article we are going to look at how to crochet bunting, with a fabulous yet simple crochet pattern.
[wp_ad_camp_5]I have gone crochet bunting crazy over the last few days.
At least, I think I have. This pattern has given me a few moments of confusion, but not with regards to the design. Just concerning what to name it.
When I set to planning how to crochet bunting for my daughter’s room, I didn’t really think about the traditional.
In fact, I thought of this pattern as a ‘flag garland’ when I was composing it, as in my mind bunting is comprised of neat symmetrical triangles. And these are right angle triangles.
The crochet flags I have put together are less traditional, but to my mind decidedly more funky. Or as funky as a colourful right-angled triangle can be.
Anyway, I think it still counts as bunting, so that’s what I will refer to it as henceforth!
Why Crochet Bunting?
If you’re not familiar with bunting indoors, and more used to seeing it lining marquees at fetes or during street parades, you might be surprised to hear that it has really taken off as a fun addition to kids’ bedrooms.
 Tastefully composed it can even be a classy touch to an adult’s bedroom.
It is a great way to used your handmade skills to brighten up a room, whilst keeping it classy and traditional too.
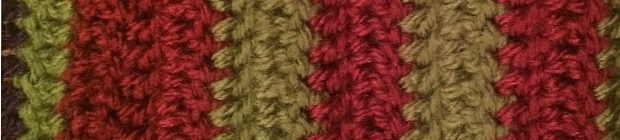
In this design my main colours of choice were green and red, as these will be the focal colours of my little girl’s new bedroom.
Crochet Bunting Yarn
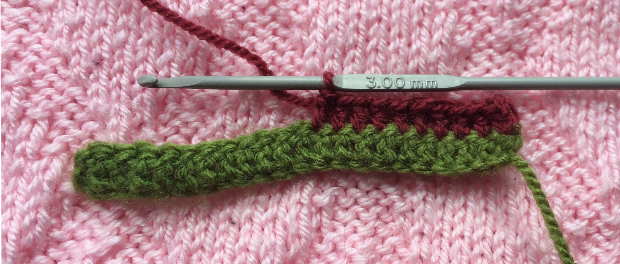
I put this crochet bunting together using a 3mm hook and three colours of yarn.
The yarn I chose to use was Women’s Institute Premium Acrylic yarn in purple, green and red.
It works well for this type of pattern because it’s strong and durable, but not too cause on your fingers when repetitively stitching.
Which, as you can see for a project this long, is a bit of a big task!
Crochet Bunting Equipment
To crochet bunting I recommend using a 3mm hook, some very sharp scissors and that’s it! I didn’t need stitch markers for this one, and I’m sure you won’t either.
The rows follow a logical pattern and contain few enough stitches to allow you the luxury of not needing to count beyond the initial chain.
How to Crochet Bunting
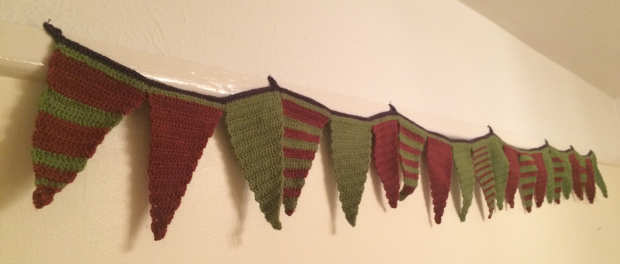
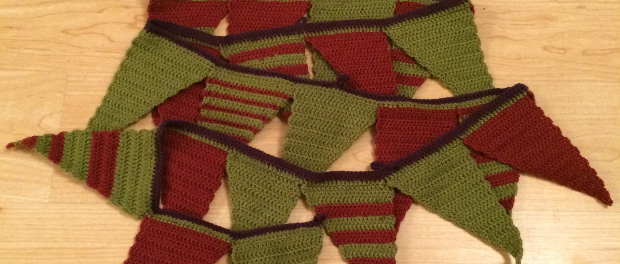
As you can see from the photographs, there are several different flag colours and patterns to make, which comprise the full length of bunting when complete.
[wp_ad_camp_2]We will take a look at the single coloured flags first, then move onto the striped flags and finally look how to attach them all together and create the loops that allow you to pin them onto your wall!
Notes:
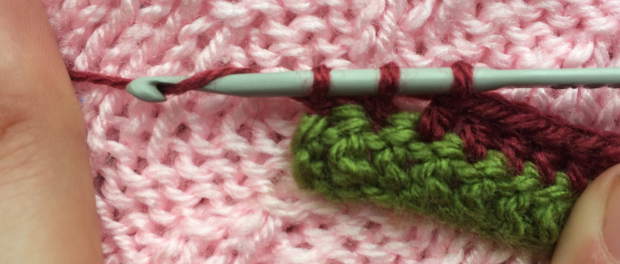
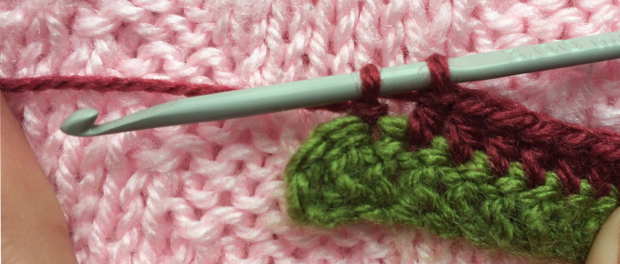
This pattern has one unusual instruction, when moving from the first to the second row. Instead of chaining an additional 2 stitches to begin the second row of double crochets, you will need to chain three and put your first double crochet into the third loop. This gives a curve to the top edge of the triangle and makes it look nicer when you eventually crochet them all together.
Double crochet refers to dc USA – for more information on the difference between UK and US please take a look at this article.
How to Crochet Plain Bunting Flags
This first pattern I will put in full English description, with abbreviations in brackets. The following patterns you can follow along with the abbreviations, to allow us to look quickly at producing each one.
You will need to make 7 flags in green and 7 in red to begin with.
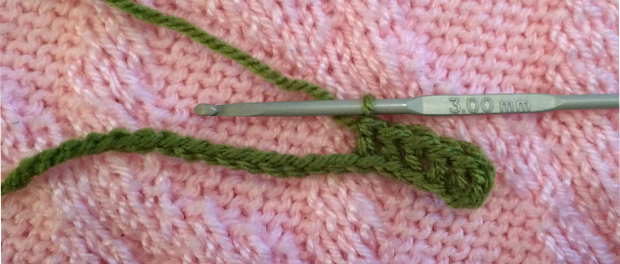
Row 1 – Chain (ch) 21 + 3 (24)
Row 2 – Yarn over and make a double crochet (dc) into the 3rd loop. Double crochet (dc) once into each subsequent stitch. At the end of the row chain (ch) 2
Row 3 – * Double crochet (dc) once into each stitch, stopping after completing the third to last stitch of the row. Then double crochet together the last two stitches (dc2tog). Chain (ch) 2.
Row 4 – Double crochet the first two stitches together (dc2tog). Then double crochet (dc) once into each stitch until the end of the row. Chain (ch) 2.
Row 5 to 23 – Repeat from *
Row 24 – For the final row, working from the base of the chain as previously, simply double crochet the two remaining stitches together. Slip to join and sew the end into the flag with a yarn needle.
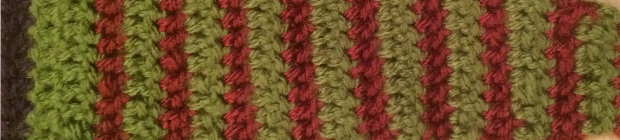
How to Crochet Striped Bunting Flags
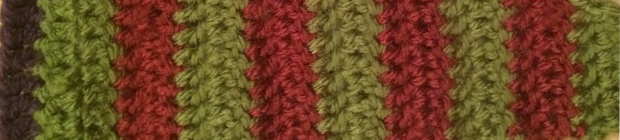
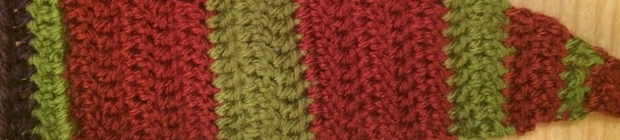
I have four different stripe patterns in my crochet bunting flags. Three use the same stripe sizes, but alternate colours. One is simply alternating colours every row.
Thin crochet bunting stripes
This is the simplest pattern, and the first striped one to make.
Row 1 to 2 will be made in green. From row 3, colours will be swapped at the row end. Remember, make your chain 2 in the next row’s colour.
Row 1 – Starting in green, chain (ch) 21 + 3 (24)
Row 2 – Yarn over and make a double crochet (dc) into the 3rd loop. Double crochet (dc) once into each subsequent stitch. (cc) At the end of the row chain (ch) 2
Row 3 – dc into each st, stopping after completing the third to last stitch of the row. Then dc2tog. Colour Change (cc). Ch 2.
Row 4 – dc2tog. Dc once into each stitch until the end of the row. (cc). Ch 2.
Row 5 – dc into each st, stopping after completing the third to last stitch of the row. Then dc2tog. (cc) Ch 2.
Row 6 – dc2tog. Dc once into each stitch until the end of the row. (cc) Ch 2.
Row 7 – dc into each st, stopping after completing the third to last stitch of the row. Then dc2tog. (cc) Ch 2.
Row 8 – dc2tog. Dc once into each stitch until the end of the row. (cc) Ch 2.
Row 9 – dc into each st, stopping after completing the third to last stitch of the row. Then dc2tog. (cc) Ch 2.
Row 10 – dc2tog. Dc once into each stitch until the end of the row. (cc) Ch 2.
Row 11 – dc into each st, stopping after completing the third to last stitch of the row. Then dc2tog. (cc) Ch 2.
Row 12 – dc2tog. Dc once into each stitch until the end of the row. (cc) Ch 2.
Row 13 – dc into each st, stopping after completing the third to last stitch of the row. Then dc2tog. (cc) Ch 2.
Row 14 – dc2tog. Dc once into each stitch until the end of the row. (cc) Ch 2.
Row 15 – dc into each st, stopping after completing the third to last stitch of the row. Then dc2tog. (cc) Ch 2.
Row 16 – dc2tog. Dc once into each stitch until the end of the row. (cc) Ch 2.
Row 17 – dc into each st, stopping after completing the third to last stitch of the row. Then dc2tog. (cc) Ch 2.
Row 18 – dc2tog. Dc once into each stitch until the end of the row. (cc) Ch 2.
Row 19 – dc into each st, stopping after completing the third to last stitch of the row. Then dc2tog. (cc) Ch 2.
Row 20 – dc2tog. Dc once into each stitch until the end of the row. (cc) Ch 2.
Row 21 – dc into each st, stopping after completing the third to last stitch of the row. Then dc2tog. (cc) Ch 2.
Row 22 – dc2tog. Dc once into each stitch until the end of the row. (cc) Ch 2.
Row 23 – dc into each st, stopping after completing the third to last stitch of the row. Then dc2tog. (cc) Ch 2.
Row 24 – For the final row, working from the base of the chain as previously, simply double crochet the two remaining stitches together. Slip to join and sew the end into the flag with a yarn needle.
How to Crochet Medium Stripes
Your loose ends to be sewn in will hang only to one side of the flag for this striped crochet pattern, as colour changes will be every other row. When you have made one starting with green, make another starting with red.
Row 1 – Starting in green, chain (ch) 21 + 3 (24)
Row 2 – Yarn over and make a double crochet (dc) into the 3rd loop. Double crochet (dc) once into each subsequent stitch. (cc) At the end of the row chain (ch) 2
Row 3 – dc into each st, stopping after completing the third to last stitch of the row. Then dc2tog. Ch 2.
Row 4 – dc2tog. Dc once into each stitch until the end of the row. (cc). Ch 2.
Row 5 – dc into each st, stopping after completing the third to last stitch of the row. Then dc2tog. Ch 2.
Row 6 – dc2tog. Dc once into each stitch until the end of the row. (cc) Ch 2.
Row 7 – dc into each st, stopping after completing the third to last stitch of the row. Then dc2tog. Ch 2.
Row 8 – dc2tog. Dc once into each stitch until the end of the row. (cc) Ch 2.
Row 9 – dc into each st, stopping after completing the third to last stitch of the row. Then dc2tog. Ch 2.
Row 10 – dc2tog. Dc once into each stitch until the end of the row. (cc) Ch 2.
Row 11 – dc into each st, stopping after completing the third to last stitch of the row. Then dc2tog. Ch 2.
Row 12 – dc2tog. Dc once into each stitch until the end of the row. (cc) Ch 2.
Row 13 – dc into each st, stopping after completing the third to last stitch of the row. Then dc2tog. Ch 2.
Row 14 – dc2tog. Dc once into each stitch until the end of the row. (cc) Ch 2.
Row 15 – dc into each st, stopping after completing the third to last stitch of the row. Then dc2tog. Ch 2.
Row 16 – dc2tog. Dc once into each stitch until the end of the row. (cc) Ch 2.
Row 17 – dc into each st, stopping after completing the third to last stitch of the row. Then dc2tog. Ch 2.
Row 18 – dc2tog. Dc once into each stitch until the end of the row. (cc) Ch 2.
Row 19 – dc into each st, stopping after completing the third to last stitch of the row. Then dc2tog. Ch 2.
Row 20 – dc2tog. Dc once into each stitch until the end of the row. (cc) Ch 2.
Row 21 – dc into each st, stopping after completing the third to last stitch of the row. Then dc2tog. Ch 2.
Row 22 – dc2tog. Dc once into each stitch until the end of the row. (cc) Ch 2.
Row 23 – dc into each st, stopping after completing the third to last stitch of the row. Then dc2tog. Ch 2.
Row 24 – For the final row, working from the base of the chain as previously, simply double crochet the two remaining stitches together. Slip to join and sew the end into the flag with a yarn needle.
Dropped stripes
This pattern reflects the previous one, but gives a bigger panel of colour at the beginning. When you have made one starting with green, make another starting with red.
Row 1 – Starting in green, chain (ch) 21 + 3 (24)
Row 2 – Yarn over and make a double crochet (dc) into the 3rd loop. Double crochet (dc) once into each subsequent stitch. At the end of the row chain (ch) 2
Row 3 – dc into each st, stopping after completing the third to last stitch of the row. Then dc2tog. Ch 2.
Row 4 – dc2tog. Dc once into each stitch until the end of the row. (cc)Ch 2.
Row 5 – dc into each st, stopping after completing the third to last stitch of the row. Then dc2tog. Ch 2.
Row 6 – dc2tog. Dc once into each stitch until the end of the row. (cc) Ch 2.
Row 7 – dc into each st, stopping after completing the third to last stitch of the row. Then dc2tog. Ch 2.
Row 8 – dc2tog. Dc once into each stitch until the end of the row. (cc) Ch 2.
Row 9 – dc into each st, stopping after completing the third to last stitch of the row. Then dc2tog. Ch 2.
Row 10 – dc2tog. Dc once into each stitch until the end of the row. (cc) Ch 2.
Row 11 – dc into each st, stopping after completing the third to last stitch of the row. Then dc2tog. Ch 2.
Row 12 – dc2tog. Dc once into each stitch until the end of the row. (cc) Ch 2.
Row 13 – dc into each st, stopping after completing the third to last stitch of the row. Then dc2tog. Ch 2.
Row 14 – dc2tog. Dc once into each stitch until the end of the row. (cc) Ch 2.
Row 15 – dc into each st, stopping after completing the third to last stitch of the row. Then dc2tog. Ch 2.
Row 16 – dc2tog. Dc once into each stitch until the end of the row. (cc) Ch 2.
Row 17 – dc into each st, stopping after completing the third to last stitch of the row. Then dc2tog. Ch 2.
Row 18 – dc2tog. Dc once into each stitch until the end of the row. (cc) Ch 2.
Row 19 – dc into each st, stopping after completing the third to last stitch of the row. Then dc2tog. Ch 2.
Row 20 – dc2tog. Dc once into each stitch until the end of the row. (cc) Ch 2.
Row 21 – dc into each st, stopping after completing the third to last stitch of the row. Then dc2tog. Ch 2.
Row 22 – dc2tog. Dc once into each stitch until the end of the row. (cc) Ch 2.
Row 23 – dc into each st, stopping after completing the third to last stitch of the row. Then dc2tog. Ch 2.
Row 24 – For the final row, working from the base of the chain as previously, simply double crochet the two remaining stitches together. Slip to join and sew the end into the flag with a yarn needle.
Decreasing crochet stripes
Following on from the previous stripe pattern, this begins with a large stripe, and gradually decreases down the crochet pattern. When you have made one starting with green, make another starting with red.
Row 1 – Starting in green, chain (ch) 21 + 3 (24)
Row 2 – Yarn over and make a double crochet (dc) into the 3rd loop. Double crochet (dc) once into each subsequent stitch. At the end of the row chain (ch) 2
Row 3 – dc into each st, stopping after completing the third to last stitch of the row. Then dc2tog. Ch 2.
Row 4 – dc2tog. Dc once into each stitch until the end of the row. Ch 2.
Row 5 – dc into each st, stopping after completing the third to last stitch of the row. Then dc2tog. Ch 2.
Row 6 – dc2tog. Dc once into each stitch until the end of the row. (cc) Ch 2.
Row 7 – dc into each st, stopping after completing the third to last stitch of the row. Then dc2tog. Ch 2.
Row 8 – dc2tog. Dc once into each stitch until the end of the row. Ch 2.
Row 9 – dc into each st, stopping after completing the third to last stitch of the row. Then dc2tog. Ch 2.
Row 10 – dc2tog. Dc once into each stitch until the end of the row. (cc) Ch 2.
Row 11 – dc into each st, stopping after completing the third to last stitch of the row. Then dc2tog. Ch 2.
Row 12 – dc2tog. Dc once into each stitch until the end of the row. Ch 2.
Row 13 – dc into each st, stopping after completing the third to last stitch of the row. Then dc2tog. Ch 2.
Row 14 – dc2tog. Dc once into each stitch until the end of the row. (cc) Ch 2.
Row 15 – dc into each st, stopping after completing the third to last stitch of the row. Then dc2tog. Ch 2.
Row 16 – dc2tog. Dc once into each stitch until the end of the row. (cc) Ch 2.
Row 17 – dc into each st, stopping after completing the third to last stitch of the row. Then dc2tog. (cc) Ch 2.
Row 18 – dc2tog. Dc once into each stitch until the end of the row. (cc)Ch 2.
Row 19 – dc into each st, stopping after completing the third to last stitch of the row. Then dc2tog. (cc) Ch 2.
Row 20 – dc2tog. Dc once into each stitch until the end of the row. (cc) Ch 2.
Row 21 – dc into each st, stopping after completing the third to last stitch of the row. Then dc2tog. Ch 2.
Row 22 – dc2tog. Dc once into each stitch until the end of the row. (cc) Ch 2.
Row 23 – dc into each st, stopping after completing the third to last stitch of the row. Then dc2tog. (cc) Ch 2.
Row 24 – For the final row, working from the base of the chain as previously, simply double crochet the two remaining stitches together. Slip to join and sew the end into the flag with a yarn needle.
Joining The Crochet Bunting Flags
Lay out the flags in a row, in the order you want them to attach together in. Make sure they are all the same way up.
Starting at the top corner of your first flag, slip to join and chain two. Then make a single double crochet into each stitch.
At the end of the row, put your next double crochet into the first stitch of the next flag. Continue until every flag in order is crocheted together. At the end of the row, change to a contrasting colour. Chain two and put another row of double crochets into the next row.
Adding the Crochet Bunting’s Loops
To hold the weight of your bunting without sagging, you will need about seven loops approximately evenly spaced. It doesn’t matter too much exactly where you put each, as long as it’s symmetrical and you have one at each end and one in the centre.
Make your loops by slip stitching into both loops of a stitch, chaining seven, then slip stitching the join to the next loop.
How to Crochet your own Bunting
This project isn’t a short one, but it’s repetitive nature and the small changes between the flags keep it enjoyable and certainly kept my focus.
The great thing about bunting is that once you have the basic outline, there is no limit to the things you can do with the design.
Have fun, and I can’t wait to hear about your crochet bunting successes!