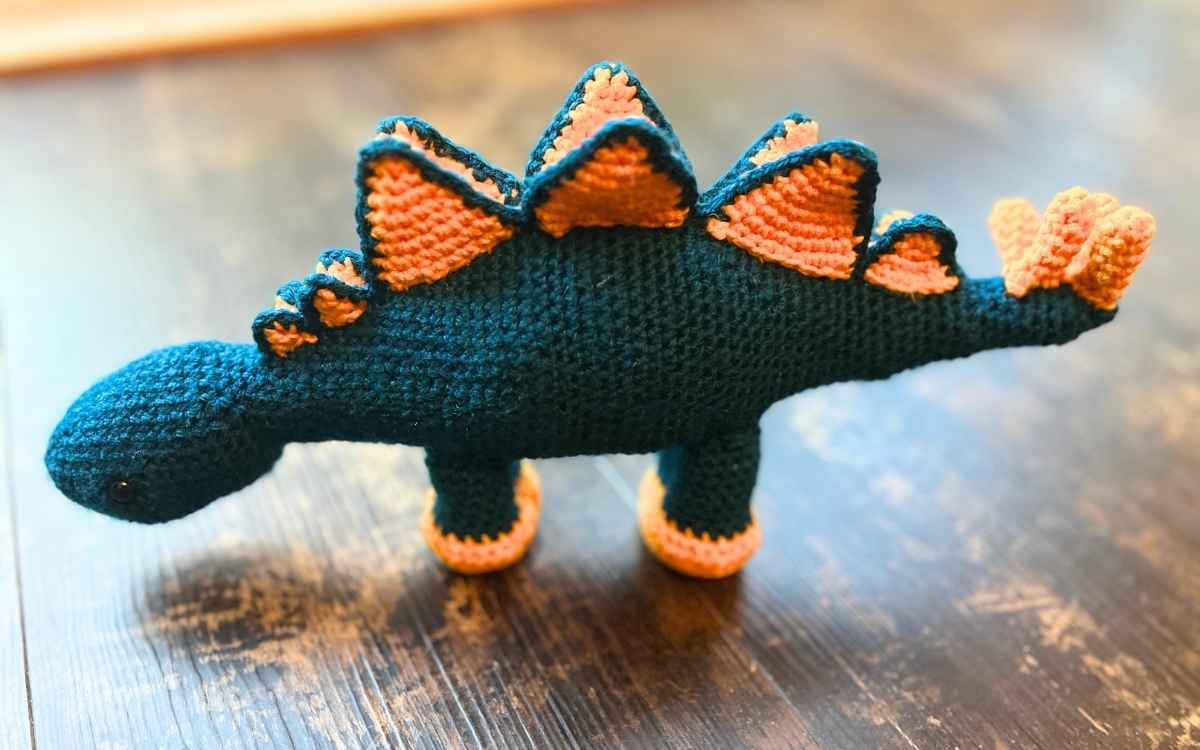
Colorful Crochet Stegosaurus
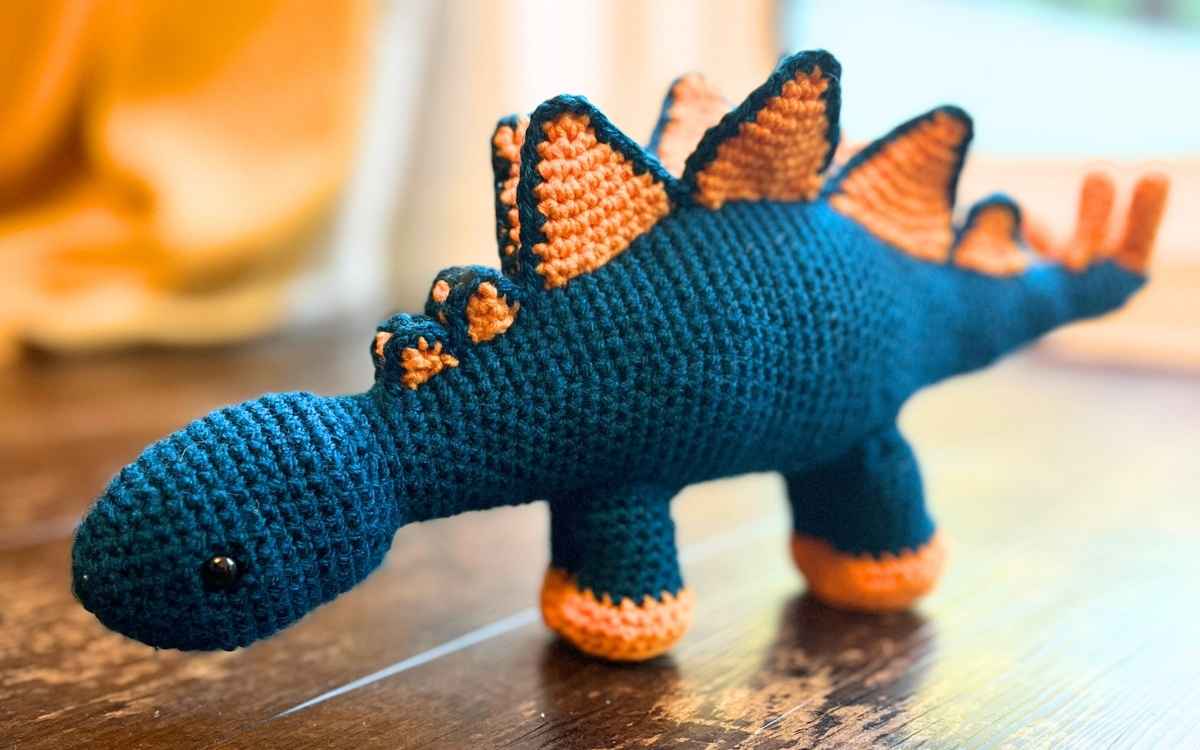
My free crochet stegosaurus pattern is cute, quick to make and great fun. This amigurumi dinosaur uses mainly basic crochet techniques, with a smattering of surface crocheting for the details.
I’ll walk you through each step of the process, so any level of crocheter can enjoy making their very own crochet stegosaurus.
*The products linked in this pattern were carefully selected by Lucy Kate Crochet. If you decide to purchase using the links provided, we may earn a small commission on that sale. This is at no extra cost to you.

This colorful crochet stegosaurus pattern was designed for my wonderful brother. He is an incredibly talented artist, so when he admires my crochet designs it has that extra boost of meaning.
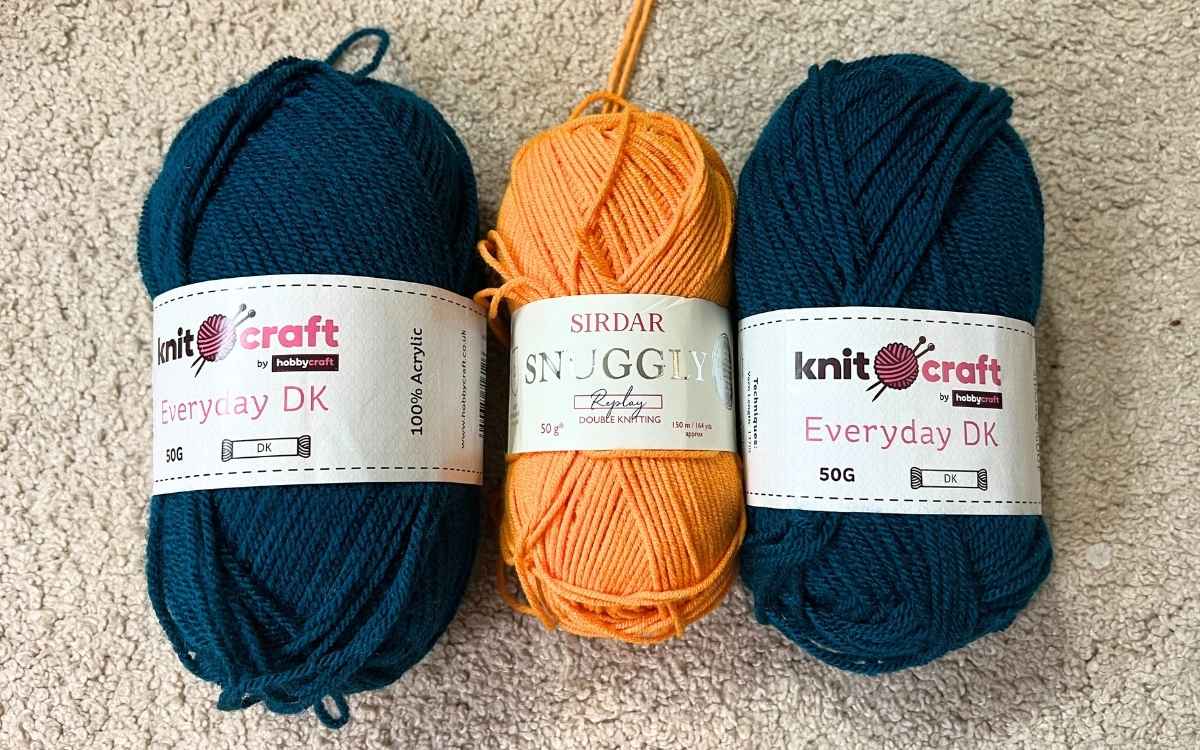
What You’ll Need
I used Knitcraft DK Everyday acrylic yarn in Teal for the bulk of this stegosaurus pattern, and Sirdar Snuggly DK yarn* in Tangerine Twist for the dinosaur’s spines and feet.
- 50g Blue Acrylic DK yarn
- 25g Orange Acrylic DK yarn*
- 3.75mm crochet hook*
- 2.25mm crochet hook*
- Stitch markers*
- Toy safe stuffing*
- Safety eyes*
- Steel yarn needle
The majority of the pattern requires the 3.75mm crochet hook. Your 2.25mm crochet hook will enable you to make surface crochets on the spikes. Anywhere between 2mm and 2.75mm will probably suffice for this task, depending on how tight your tensioning is.
Crochet Pattern Notes and Tips
You’ll find that the free crochet stegosaurus pattern is mostly simple to follow, using standard increases in a round from the magic circle.
The only part where you might find your talents tested is in the surface crochet over the spines, but I’m confident you’ll have no trouble as long as you use a small enough hook.
My patterns are always written in US terms, so if you’re used to crocheting UK style then check out this article for a quick guide to translating between the two.
I will explain every crochet abbreviation the first time I use it in a pattern, but you can find a full abbreviation guide here for you if you get stuck at all.
The Free Stegosaurus Crochet Pattern
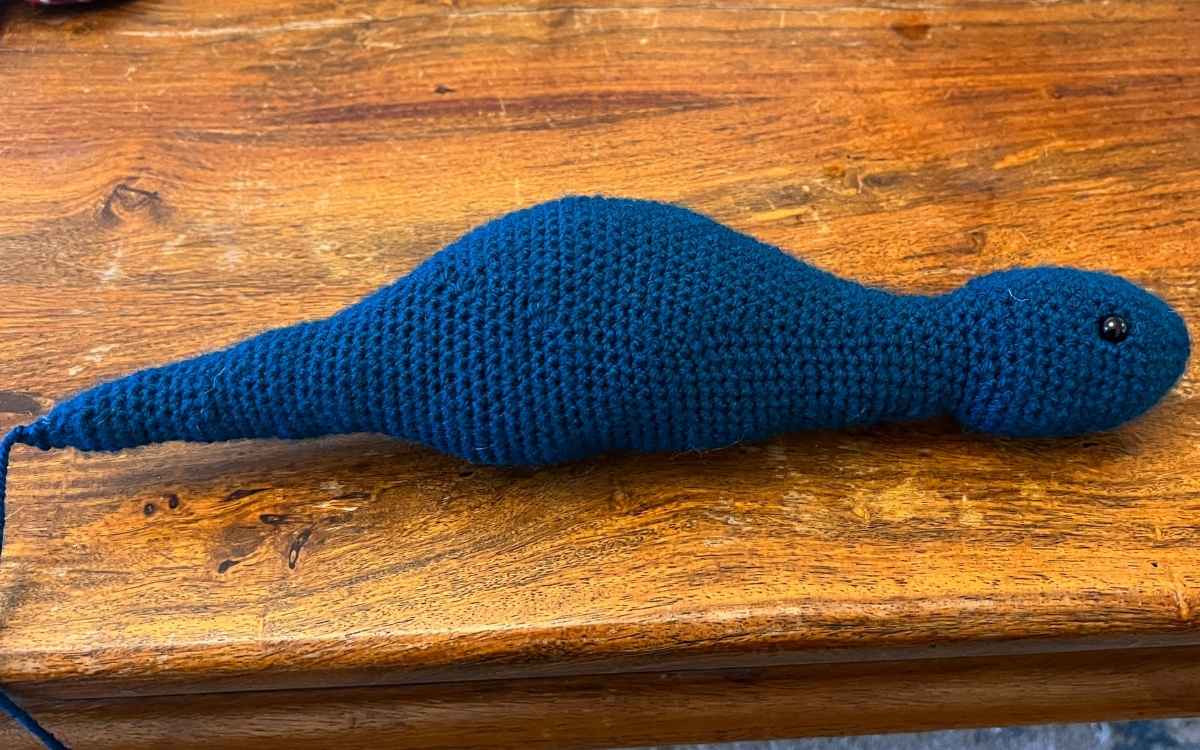
You’ll begin this pattern by creating your stegosaurus head, body and tail all in one long piece. Take note of the partial increases, and try to keep an eye on where the pattern remains flat to help you place the eyes.
How To Crochet A Stegosaurus Head, Body and Tail
Begin working with your teal yarn, using your 5mm crochet hook.
Round 1
Make a magic circle of six stitches (6)
Round 2
Put two single crochets into each stitch of the round, doubling the total stitches.
2sc x 6 (12)
Round 3
Make one single crochet into the first stitch, then two into the next. Repeat this pattern for the length of the round.
(1sc, 2sc) x 6 (18)
Round 4
1sc x 18 (18)
Round 5
(1sc x 2, 2sc) x 6 (24)
Round 6
1sc x 24 (24)
Round 7
(1sc x 3, 2sc) x 6 (30)
Round 8 – 17
1sc x 30 (30)
Round 18
Make one single crochet into each of the first three stitches, then use a single crochet to join the next two stitches together. Repeat this pattern for the length of the round.
(1sc x 3, sc2tog) x 6 (24)
Round 19
(1sc x 2, sc2tog) x 6 (18)
Round 20 – 26
1sc x 18 (18)
Round 27
This round is the first of your partial increases. Make the patterned increase as usual, but half way around the round swap over to simple single crocheting in each stitch. This means part of the circle grows, whilst the rest remains the same.
(1sc x 2, 2sc) x 3, sc x 9 (21)
Round 28
1sc x 21 (21)
Round 29
(1sc x 3, 2sc) x 3, sc x 9 (24)
Round 30
1sc x 24 (24)
Round 31
(1sc x 4, 2sc) x 3, sc x 9 (27)
Round 32
1sc x 27 (27)
Round 33
(1sc x 5, 2sc) x 3, sc x 9 (30)
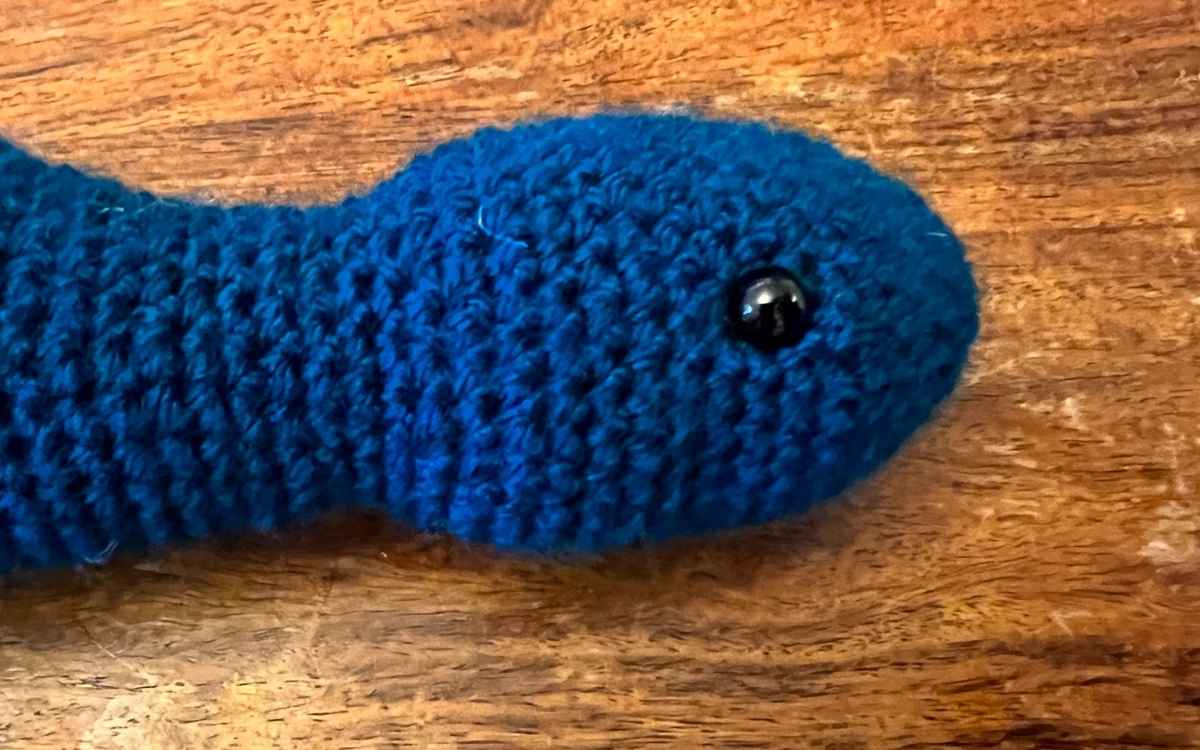
Insert the safety eyes into your dinosaur’s head. Remember that the area that isn’t increased will be the underside of the toy, and position your eyes on either side of the head.
Then stuff the section you have created so far.
Round 34
1sc x 30 (30)
Round 35
(1sc x 6, 2sc) x 3, sc x 9 (33)
Round 36
(1sc x 7, 2sc) x 3, sc x 9 (36)
Round 37
1sc x 36 (36)
Round 38
(1sc x 8, 2sc) x 3, sc x 9 (39)
Round 39
(1sc x 9, 2sc) x 3, sc x 9 (42)
Round 40
(1sc x 10, 2sc) x 3, sc x 9 (45)
Round 41 – 49
1sc x 45
Round 50
(1sc x 11, 2sc) x 3, sc x 9 (48)
Round 51
(1sc x 12, 2sc) x 3, sc x 9 (51)
Round 52
(1sc x 12, sc2tog) x 3, sc x 9 (48)
Round 53
(1sc x 11, sc2tog) x 3, sc x 9 (45)
Round 54 – 56
1sc x 45 (45)
Round 57
(1sc x 10, sc2tog) x 3, sc x 9 (42)
Round 58
(1sc x 9, sc2tog) x 3, sc x 9 (39)
Fill the toy so far with stuffing.
Round 59
(1sc x 8, sc2tog) x 3, sc x 9 (36)
Round 60
1sc x 36 (36)
Round 61
(1sc x 7, sc2tog) x 3, sc x 9 (33)
Round 62
(1sc x 6, sc2tog) x 3, sc x 9 (30)
Round 63
1sc x 30 (30)
Round 64
(1sc x 5, sc2tog) x 3, sc x 9 (27)
Round 65
1sc x 27 (27)
Round 66
(1sc x 4, sc2tog) x 3, sc x 9 (24)
Round 67
(1sc x 3, sc2tog) x 3, sc x 9 (21)
Round 68 – 72
1sc x 21 (21)
Round 73
(1sc x 2, sc2tog) x 6 (18)
Round 74 – 77
1sc x 18 (18)
Round 78
(1sc, sc2tog) x 6 (12)
Round 79 – 85
1sc x 12 (12)
Round 86
sc2tog x 6 (6)
Fill the remainder of the body with toy stuffing.
Round 87
1sc x 6 (6)
Sew the stegosaurus’ tail closed, and hide the tail of the year back into the body.
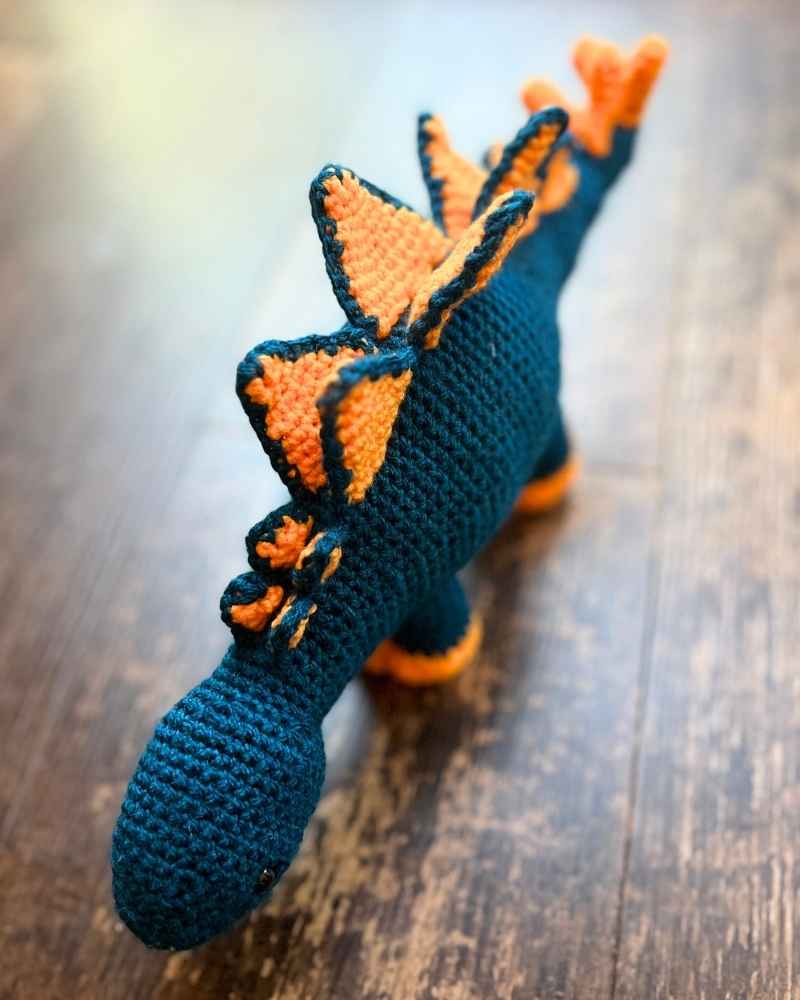
Crocheting The Stegosaurus Spikes
The stegosaurus has plated spines along their back in two rows, and that’s what you’re going to create here. You’ll crochet the spines in orange yarn, and the final detailing will be in teal.
You’ll need to make the following numbers of each size:
- 2 tiny
- 2 small
- 2 medium
- 6 large
- 4 long

Tiny Spines
Round 1
Magic circle of six stitches (6)
Round 2
1sc x 6 (6)
Small Spines
Round 1
Magic circle of six stitches (6)
Round 2 – 3
1sc x 6 (6)
Medium Spines
Round 1
Magic circle of six stitches (6)
Round 2 – 3
1sc x 6 (6)
Round 4
2sc x 6 (12)
Round 5
1sc x 12 (12)
Large Spines
Round 1
Magic circle of six stitches (6)
Round 2 – 3
1sc x 6 (6)
Round 4
2sc x 6 (12)
Round 5 – 6
1sc x 12 (12)
Round 7
(1sc, 2sc) x 6 (18)
Round 8 – 9
1sc x 18 (18)
Attaching the Spines to the Body
You are going to want to line up your crochet spines so that they have just a narrow gap of one or two stitches between them.
To get the spacing right I lined up a couple of yarn needles at the top of the body, and some strands of yarn as markers.
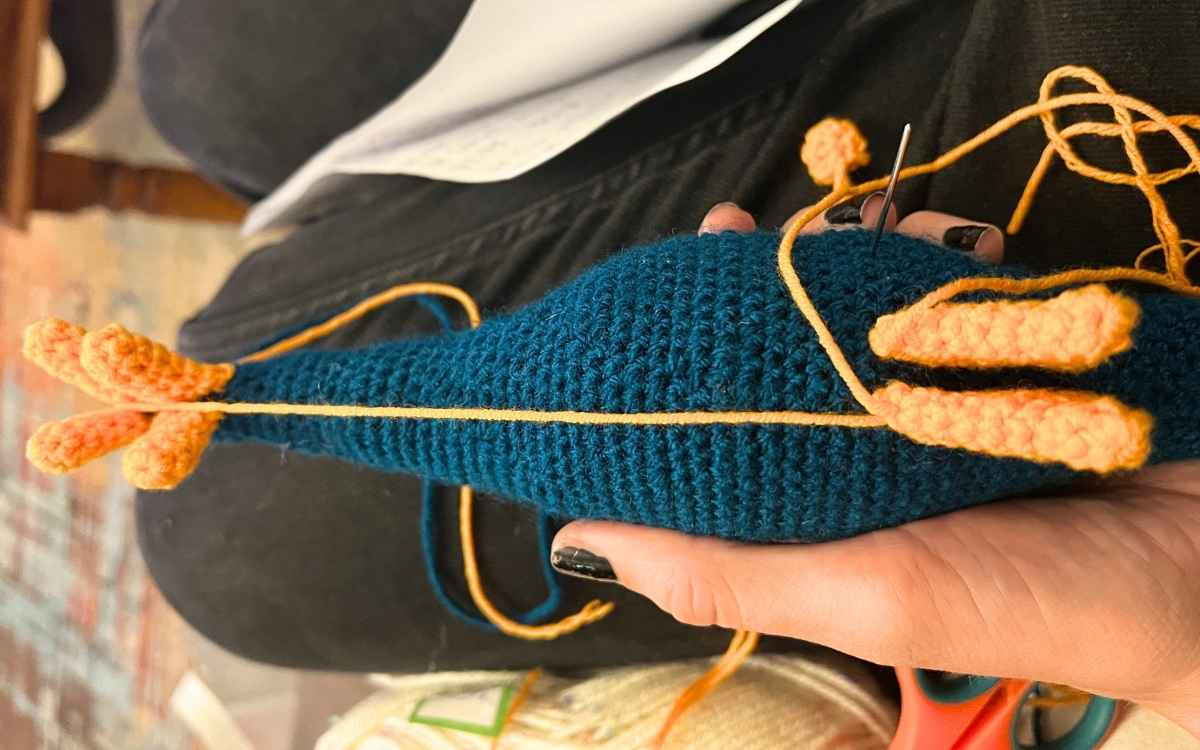
The spines were then hand sewn by weaving in and out of the fabric of the body and the ends of the spines using a steel yarn needle.
Surface Crochet Details
To complete the spines start at the head end and surface crochet with a 2.25mm crochet hook and the teal yarn. You can find instructions for surfacing crocheting here if you aren’t familiar with the technique.
It’s just to give definition to the spines and help them to look more cohesive with the rest of the amigurumi.
Crochet Stegosaurus Legs
I chose to design the crochet stegosaurus legs as two separate pieces. This is because the stego toy is going to stand up securely, and it gives it a wider more stable surface area to balance on.
The bottoms of the feet are in orange, and you’ll use your 5mm crochet hook again and swap the year to teal shortly after foot level.
Round 1
Make a magic circle of eight stitches (8)
Round 2
2sc x 8 (16)
Round 3
(1sc, 2sc) x 8 (24)
Round 4
(1sc x 2, 2sc) x 8 (32)
Round 5
1sc x 32 into the back loop only (32)
Round 6
1sc x 32
Round 7
(1sc x 2, sc2tog) x 8, then color change to teal (24)
Round 8 – 15
1sc x 24 (24)
You can now fill the legs with stuffing, and sew them onto the body.
Attaching the legs
Using a yarn needle, weave in and out of the body and legs to attach them to the underside of your amigurumi dinosaur. Then using the yarn make a single line down each side of the leg, drawing them into two seemingly separate parts.
I am not well versed in the language of sewing, so if you need more help with this aspect just let me know in the comments section below and I’ll try my best to give a more detailed description of make a short video for you.
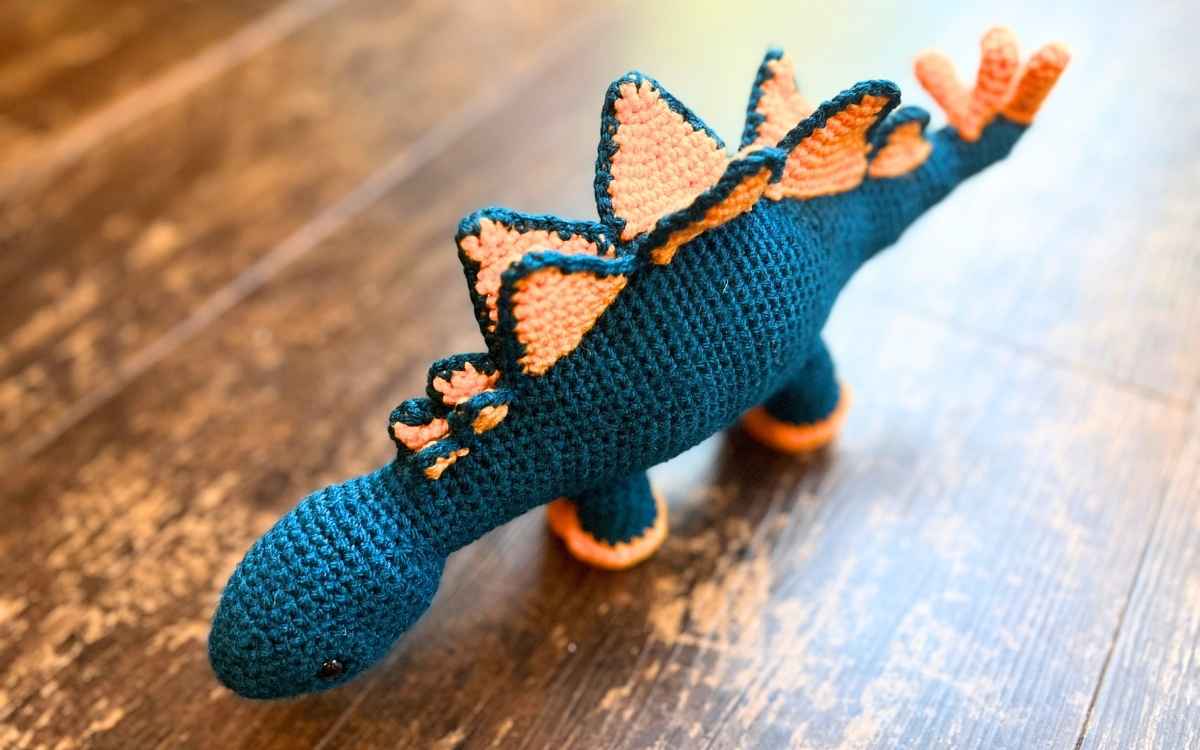
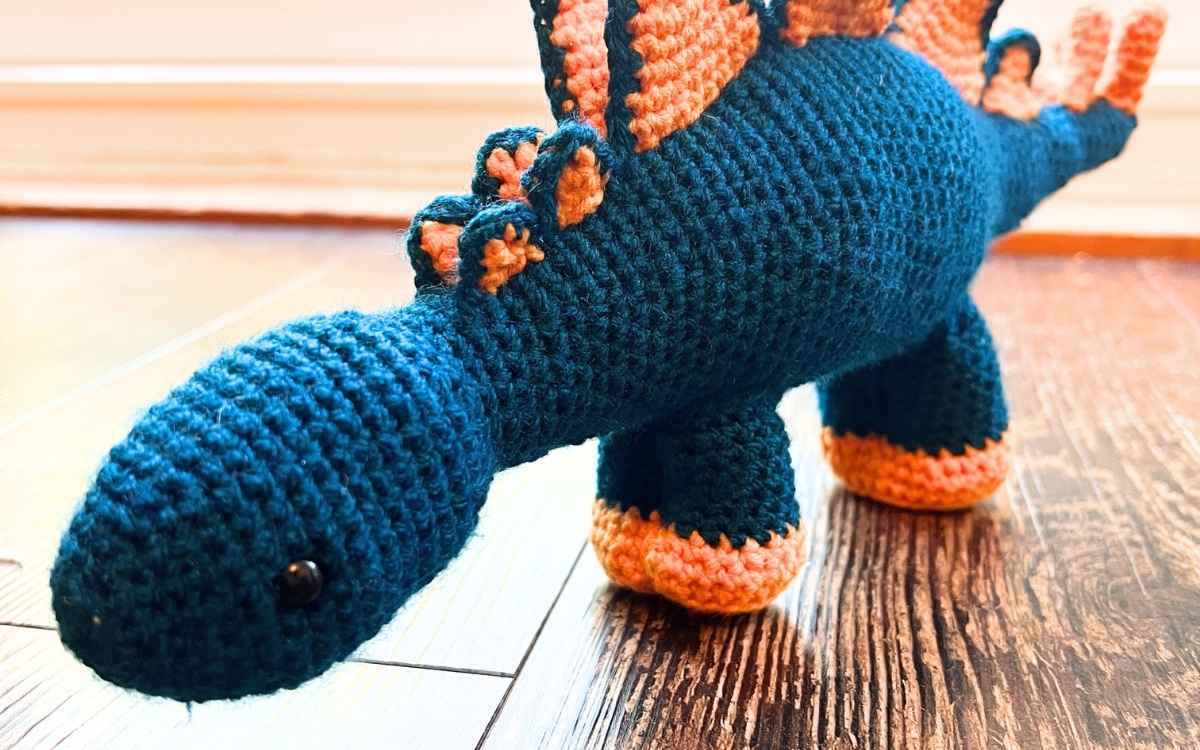
My Crocheted Stegosaurus
This stegosaurus was designed with detail at the front of my mind. I even went back across some of the surface crochet areas that define the body plates to ensure that they looked as uniform as possible.
I’d love to see your crochet dinosaurs if you’d like to share images on my Facebook page or Ravelry. Hope to see you there!
Happy Crocheting,
Lucy Kate, x