Easy Crochet Tortoise Pattern
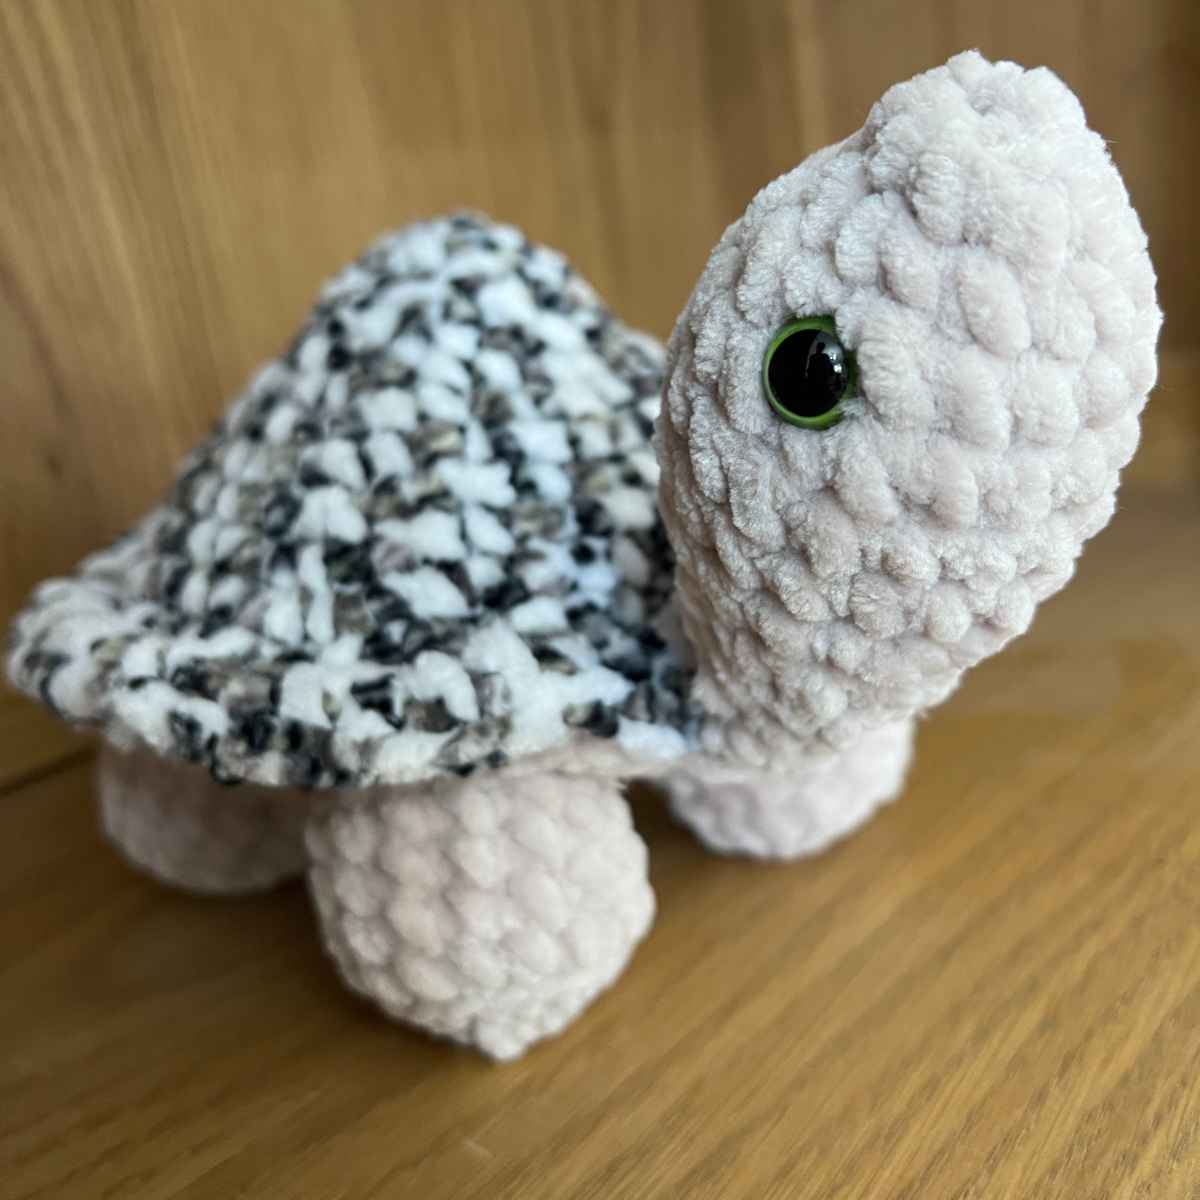
My easy crochet tortoise pattern is beginner friendly and quick to hook up. You’ll use variegated yarn for the shell markings, avoiding color changes! And I’ll share step by step instructions throughout the pattern, and some great tips for working with soft chenille yarn.
In Your Crochet Kit Bag
- 50g King Cole Yummy chenille yarn* in liquorice
- 50g King Cole Yummy chenille yarn* in champagne
- 50g Jubilee chenille yarn in zen
- 5.5mm crochet hook*
- Stitch markers (optional)
- Safety eyes*
- Toy stuffing*
Pattern Notes
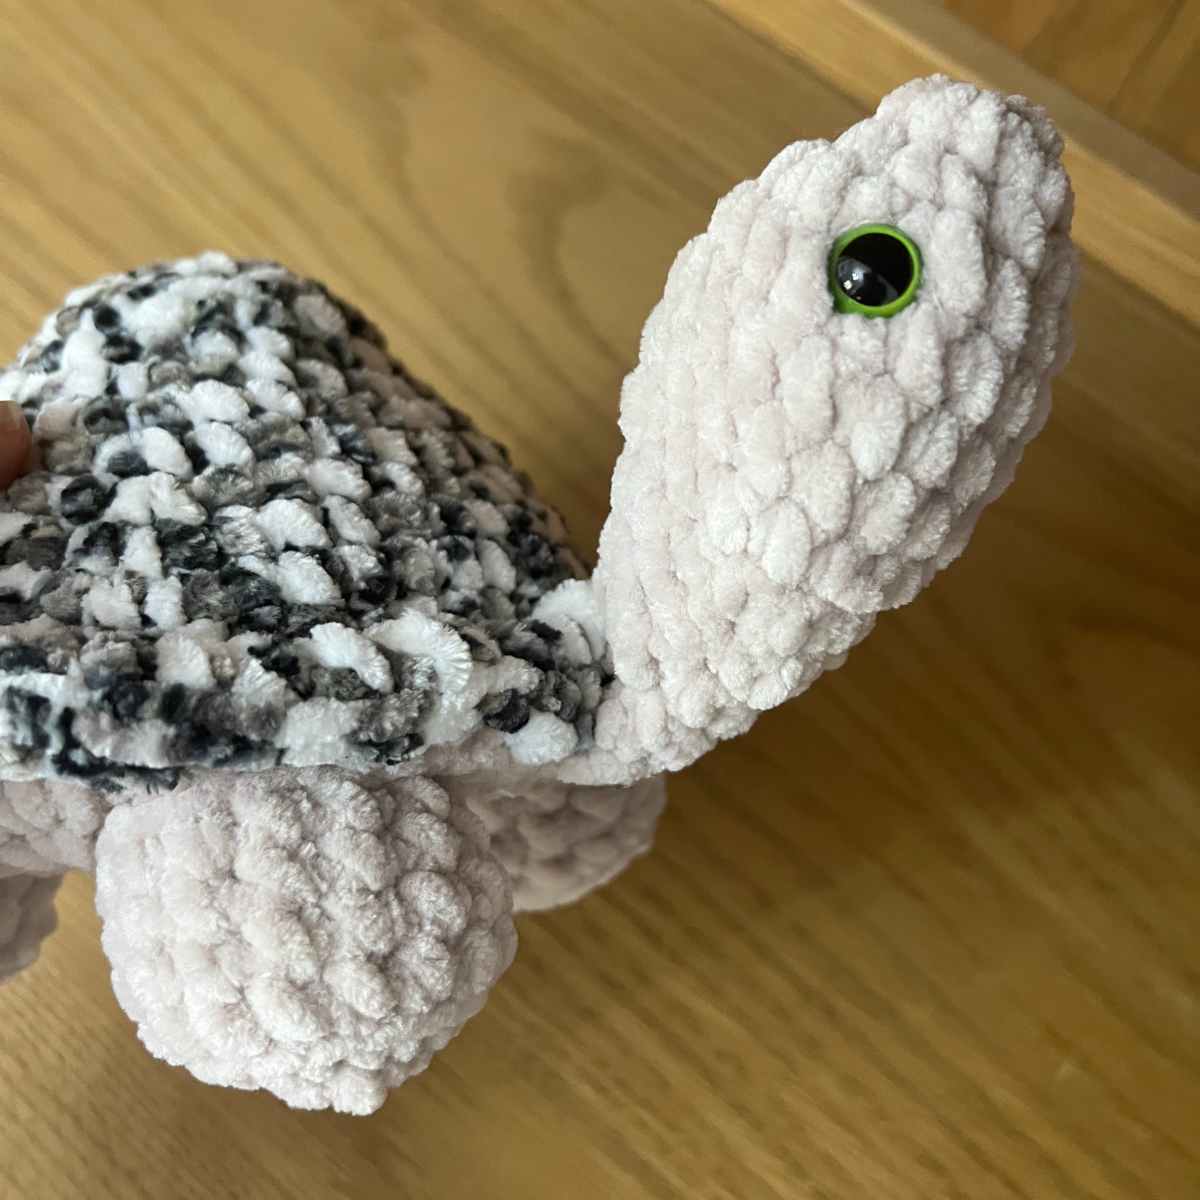
This simple amigurumi pattern achieves the distinctive tortoise-like expression by using rimmed eyes, and a couple of stitches to raise the chin and tilt the head. When you’re done, you can crochet my sea turtle to keep him company!
Tips
Chenille yarn is delicate and it breaks easily. When you make magic circles, loosen your tension to avoid snapping threads. A good magic circle alternative for chenille yarn is the chain ring. Replace the magic circle instruction with a chain three, joined as a loop and with the required number of single crochets into it.
You will need an unusual crochet stitch when you make this tortoise pattern – the puff stitch. You will need to make a repeated pull through of yarn on the same stitch, and I used the three loop puff stitch for this pattern.

My Easy Crochet Tortoise Pattern
Your pattern will be worked in separate sections, which you are going to sew together as you go.
The Tortoise’s Head
Working in the champagne yarn, use your 5.5mm crochet hook.
Round 1
Make a magic circle of six stitches (6)
Round 2
Put two single crochets into each stitch for the round.
2sc x 6 (12)
Round 3
(1sc, 2sc) x 6 (18)
Round 4 – 7
1sc x 18 (18)
Round 8
Put one single crochet into the first stitch, then single crochet the next two together. Repeat for the duration of the round.
(1sc, sc2tog) x 6 (12)
Round 9
1sc x 12 (12)
Round 10
sc2tog x 6 (6)
Round 11
1sc x 6 (6)
Insert safety eyes and fill with stuffing.
Round 12 – 13
1sc x 6 (6)
Slip stitch, tie off and sew the neck together.
Crocheting The Shell
Your tortoise’s carapace will be made using the 5.5mm crochet hook and liquorice, mottled yarn.

Round 1
Make a magic circle of six stitches (6)
Round 2
2sc x 6 (12)
Round 3
(1sc, 2sc) x 6 (18)
Round 4
1sc x 18 into the back loop only/BLO (18)
Round 5
(1sc x 2, 2sc) x 6 (24)
Round 6
(1sc x 3, 2sc) x 6 (30)
Round 7
1sc x 30 (30)
Round 8
(1sc x 4, 2sc) x 6 (36)
Round 9
(1sc x 5, 2sc) x 6 (42)
Round 10
(1sc x 6, 2sc) x 6 (48)
Round 11
(1sc x 7, 2sc) x 6 (54)
Round 12
1sc x 54 (54)
Round 13
Make a single puff stitch into each stitch of the round. I used the three loop puff stitch, which I recommend if you’ve matched my yarn type.
At the end of the round, tie off and sew the yarn end back into the body.
Attaching The Head
Turn the shell upside down, and place your tortoise’s neck onto the side. Using a yarn needle and your liquorice yarn shade, weave between the neck and puff stitch row to attach the head.
When it’s attached, take a separate strand of yarn and sew a couple of stitches between the neck of the tortoise and the row behind the puff stitches. This will give your tortoise his proud upright posture.
The Tiny Tortoise Tail

Create your tail using your champagne yarn and the 5.5mm crochet hook.
Round 1
Make a magic circle of four stitches (4)
Round 2 – 7
1sc x 4 (4)
Attaching The Tail
Place your tail on the opposite end of the shell to the head. Using your liquorice yarn and the yarn needle, sew the tail on to the puff stitch round of the carapace.
The Plastron
The plastron is the tortoise’s base shell. You’ll be crocheting this in your zen yarn, with the 5.5mm crochet hook. This section will basically end up as a flat disc.

Round 1
Make a magic circle of eight stitches (8)
Round 2
2sc x 8 (16)
Round 3
(1sc, 2sc) x 8 (24)
Round 4
(1sc x 2, 2sc) x 8 (32)
Round 5
(1sc x 3, 2sc) x 8 (40)
Round 6
(1sc x 4, 2sc) x 8 (48)
Round 7
(1sc x 5, 2sc) x 8 (56)
Round 8
(1sc x 6, 2sc) x 8 (64)
Round 9
(1sc x 7, 2sc) x 8 (72)
Attaching The Tortoise’s Plastron
With your tortoise shell still upside down, fill it with stuffing and lay the flat crocheted plastron disc on top. Thread your yarn needle with the zen yarn, and sew each edge stitch onto the inner edge of the puff stitch round of the shell.
Make sure you’ve secured the neck and tail onto the plastron as well.
Crochet Tortoise Legs

Make the crochet tortoise legs in champagne yarn with the 5.5mm crochet hook.
Round 1
Make a magic circle of eight stitches (8)
Round 2
2sc x 8 (16)
Round 3
1sc x 16 BLO (16)
Round 4 – 7
1sc x 16 (16)
Fill with toy stuffing, slip stitch to join and tie off leaving a long length of yarn for sewing.
Joining The Legs
Turning your tortoise back upside down, attach your yarn needle and weave the legs onto your tortoise’s plastron symmetrically to balance the weight.
Your Crocheted Tortoise
This pattern is pretty quick to put together, and it has a lovely soft feel when it’s finished. It’s sturdy enough to support itself, and holding that head high is a big part of what gives it character.

I’d love to see your complete tortoise toys, if you’d like to share a photo on my Facebook page or Ravelry. I can’t wait to see them!
Happy Crocheting!
Lucy Kate, x
*The products linked in this pattern were carefully selected by Lucy Kate Crochet. If you decide to purchase using the links provided, we may earn a small commission on that sale. This is at no extra cost to you.