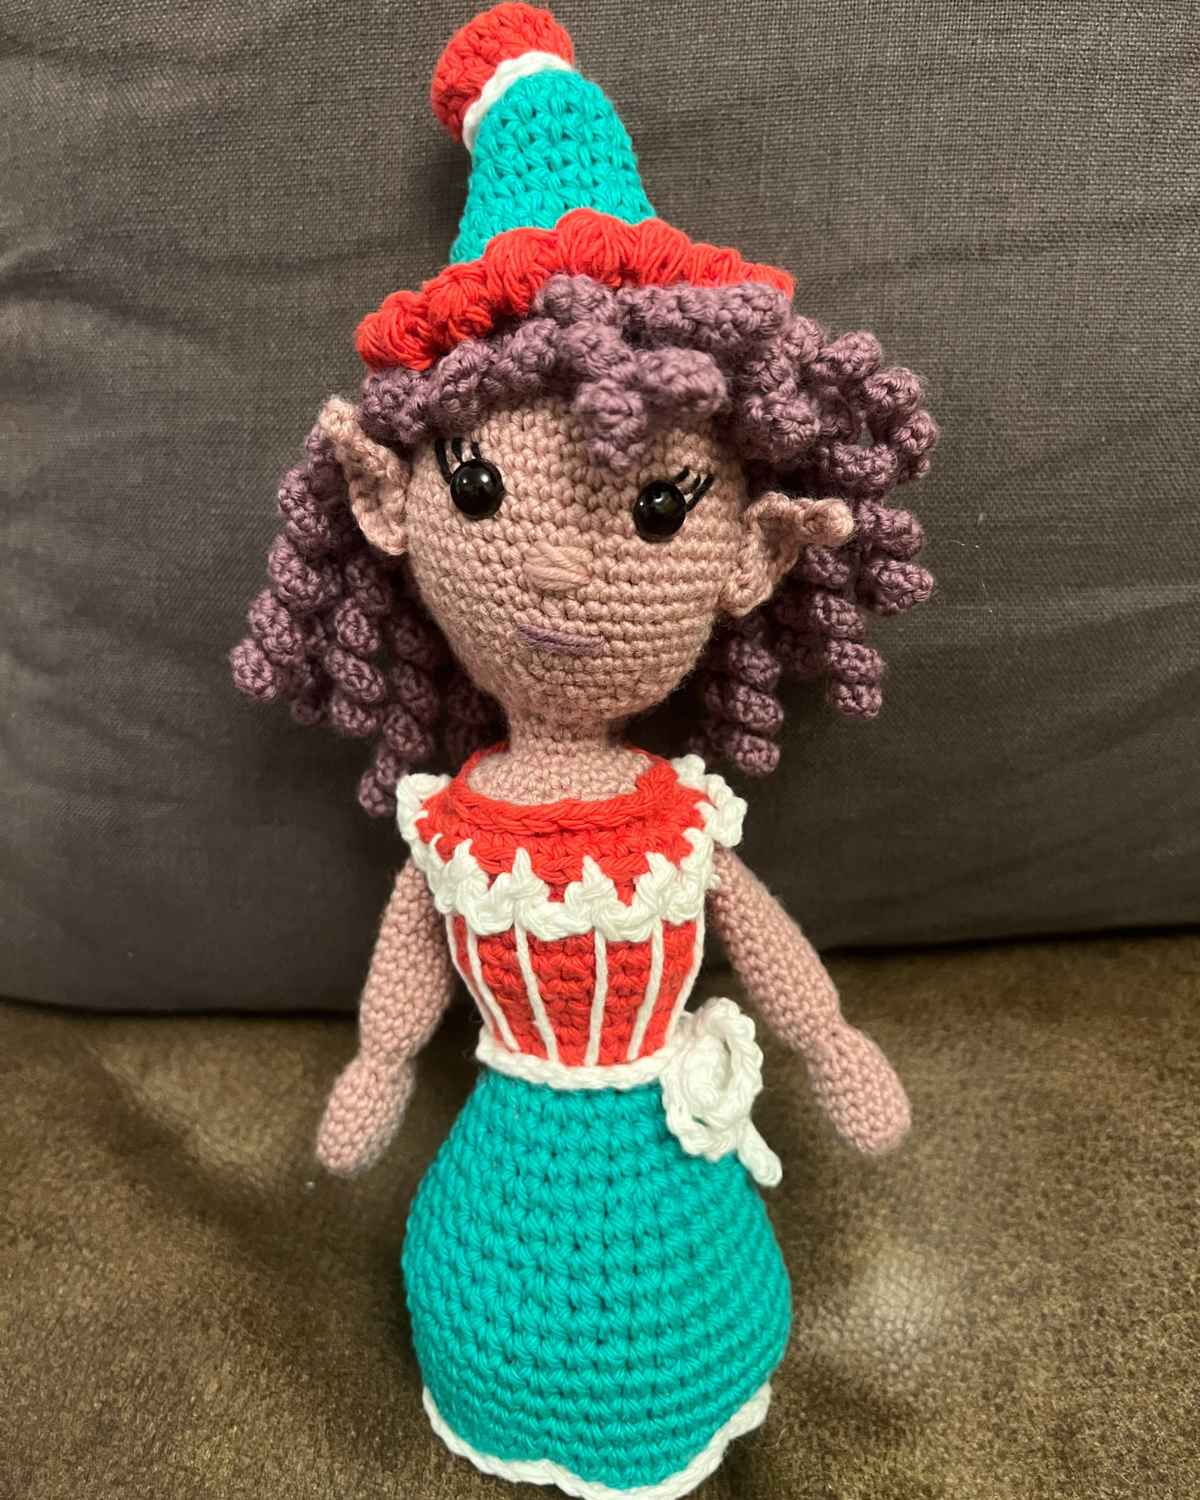
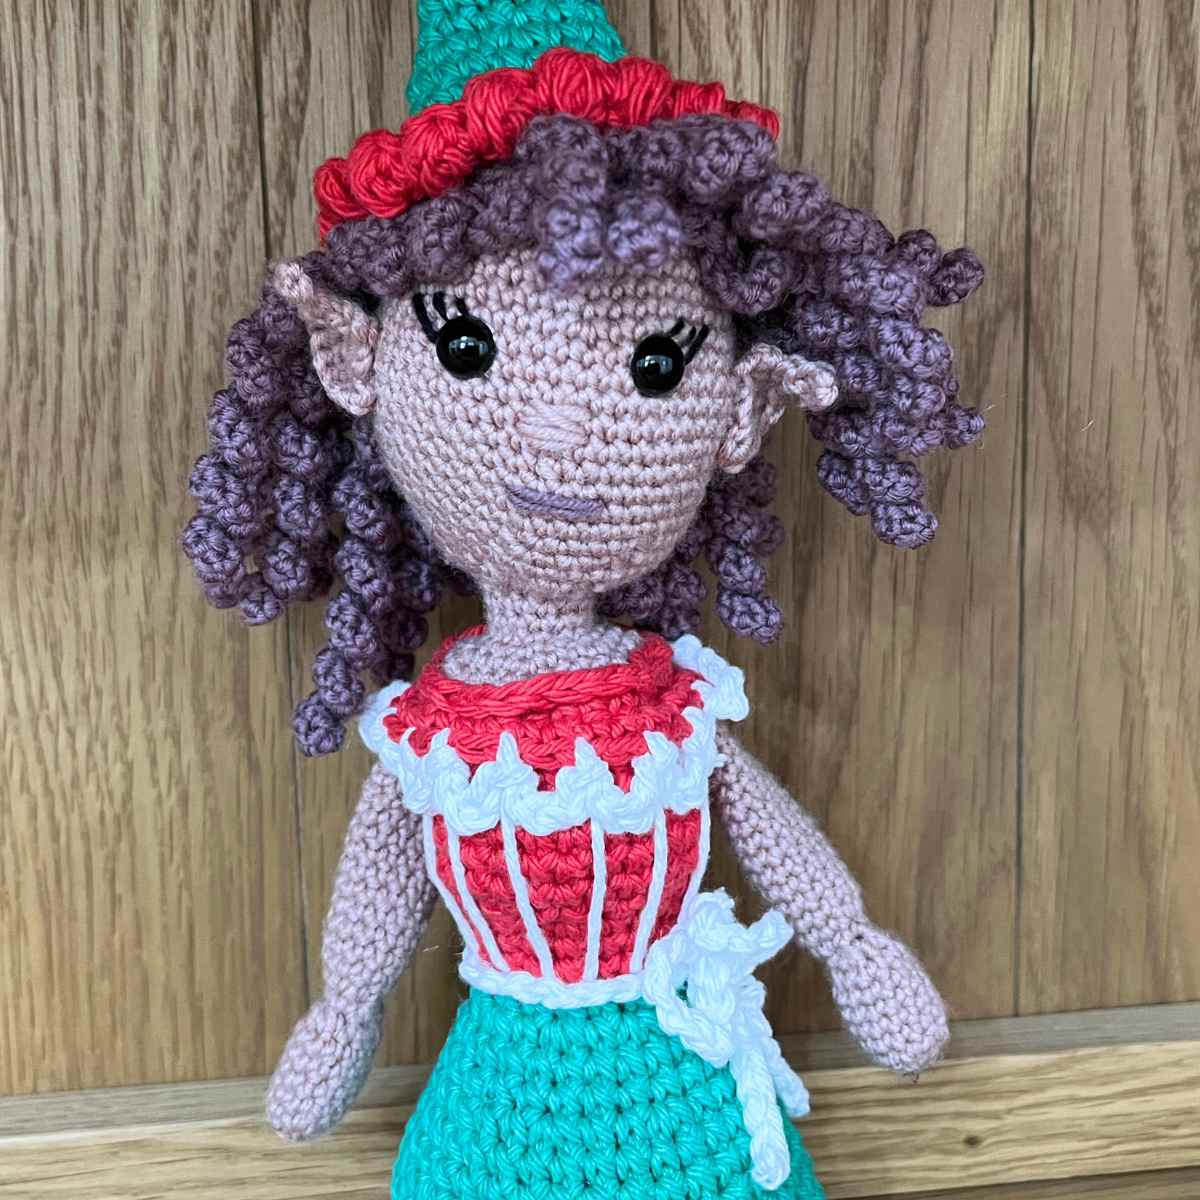
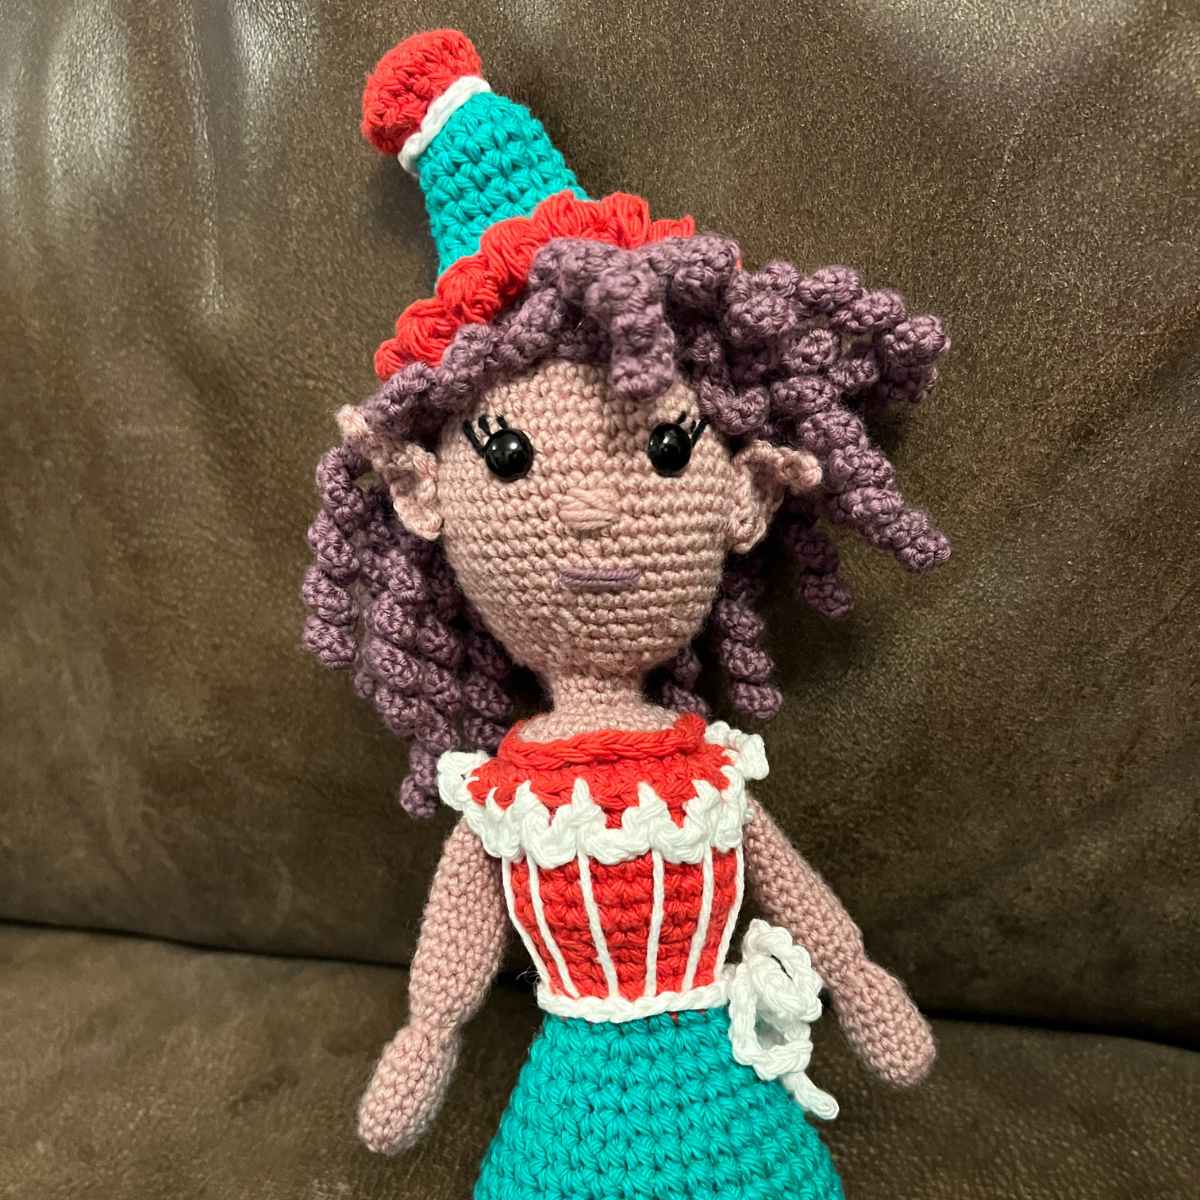
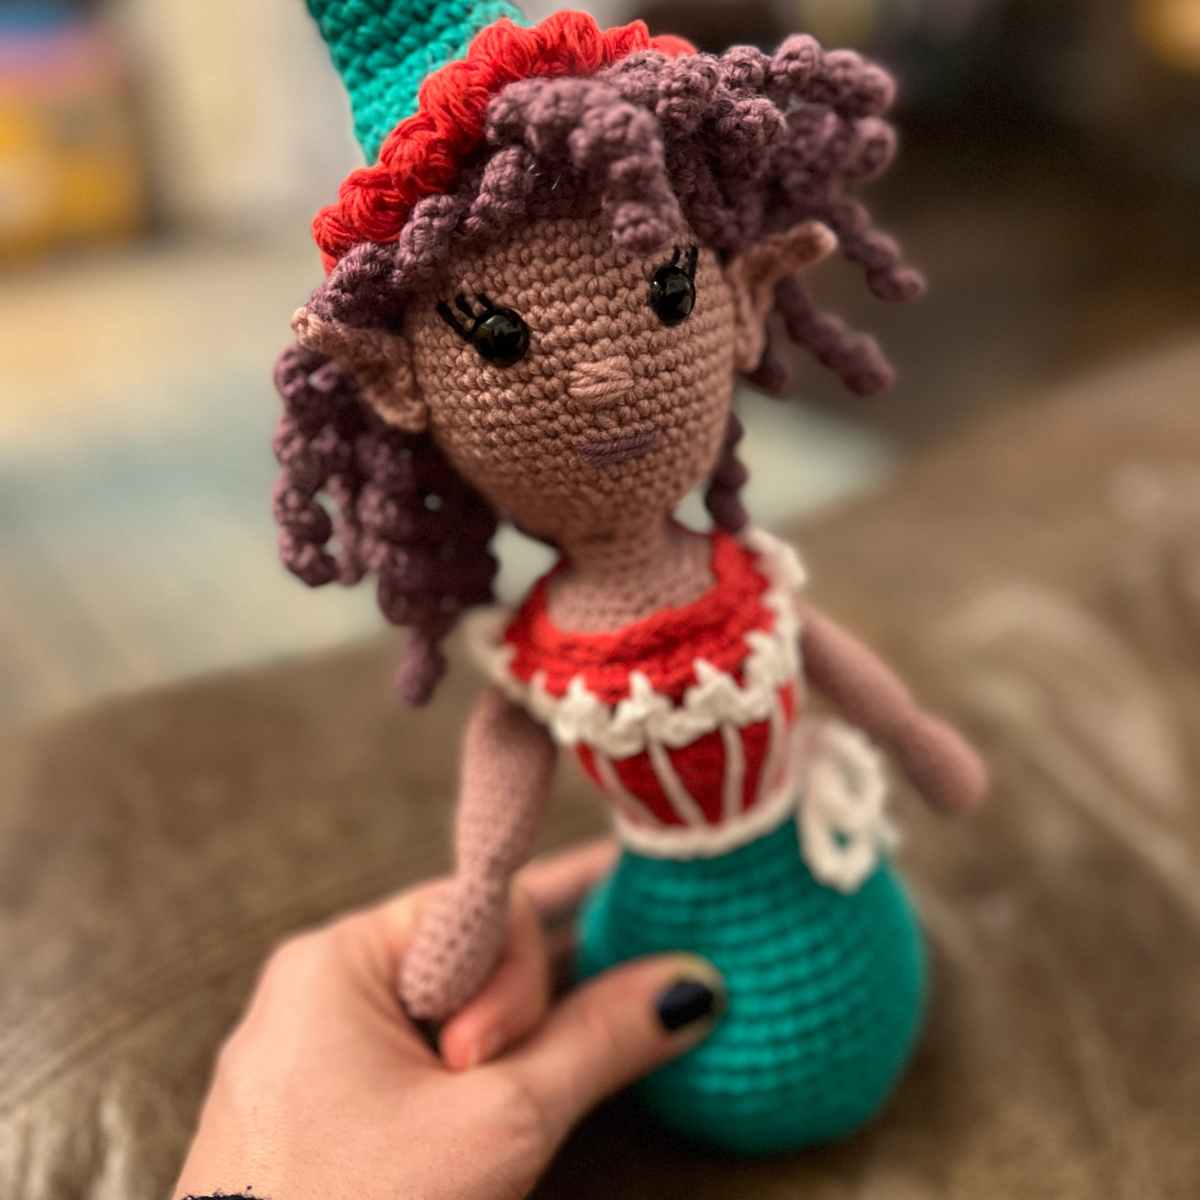
How To Crochet A Christmas Elf Doll
Your crochet Christmas elf doll will happily work as an ornament or decoration, or as a cute plushie for older kids. This pattern is intermediate to advanced level, but don’t fear crochet beginners! It’s still accessible to novices, because I will walk you through each step of the process and give detailed instructions for every part of your doll. And give me a shout in the comments section if you have any questions, I’ll be happy to help.
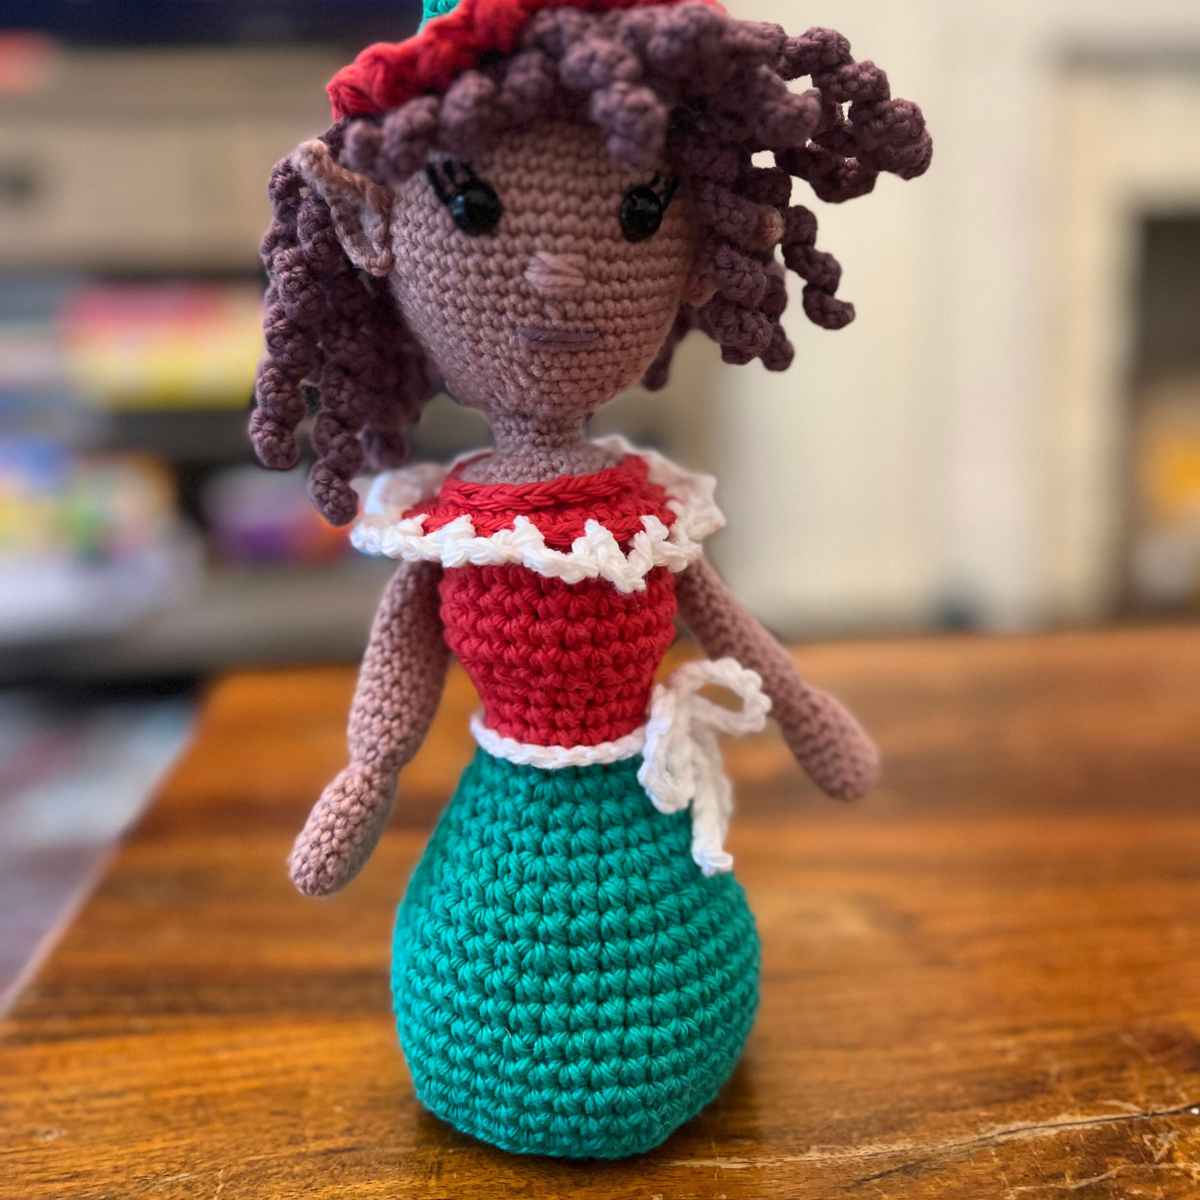
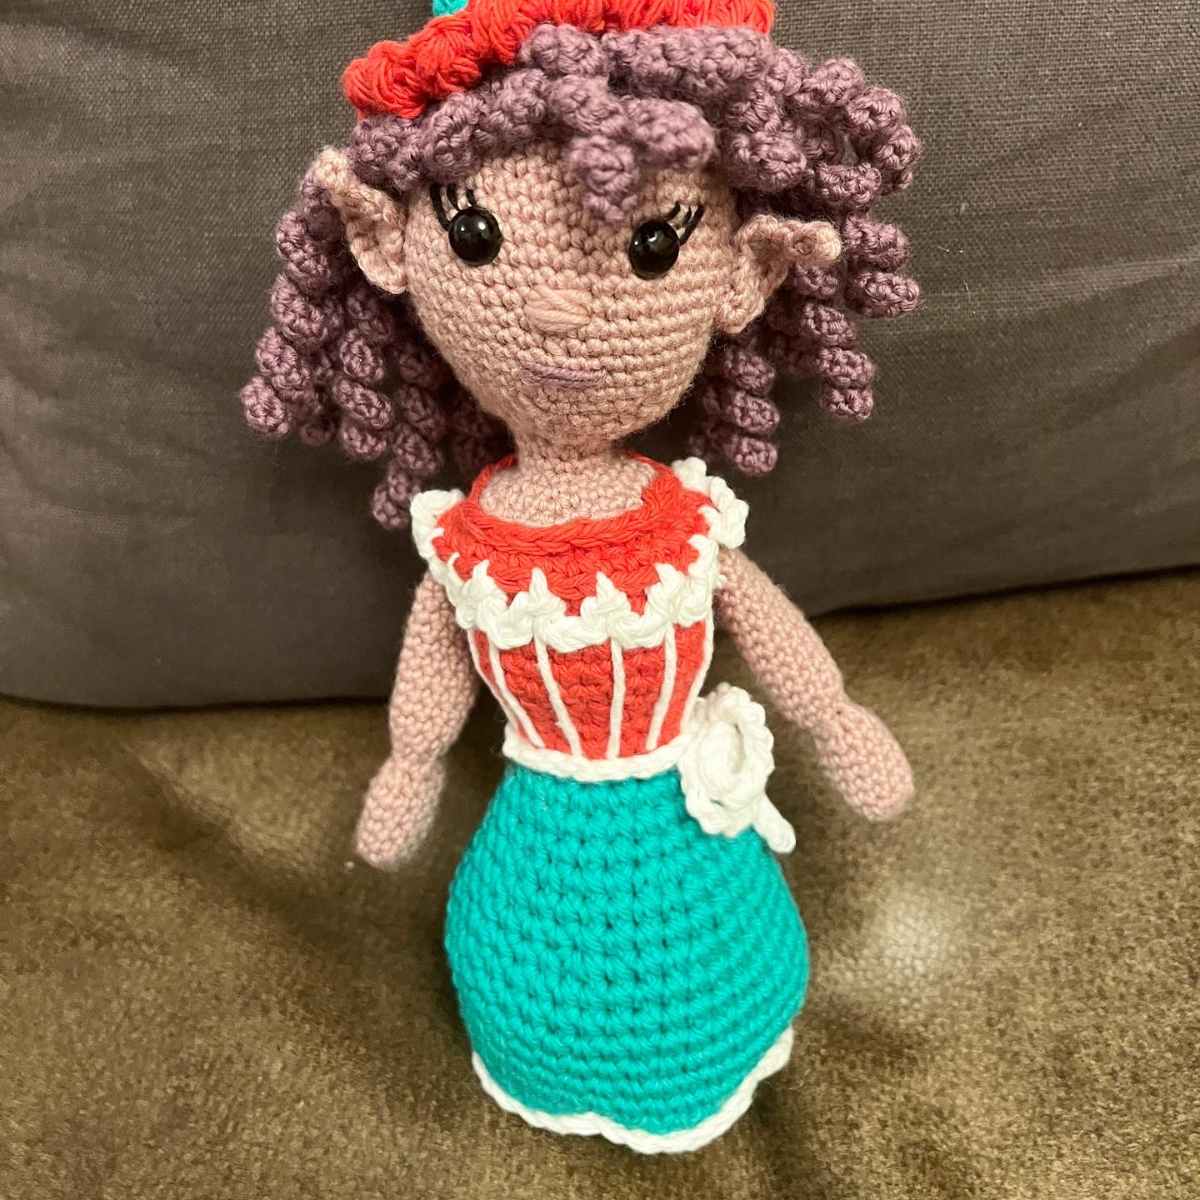
If you’d like a less festive version – I have now turned her into a traditional doll too.
What You Need To Know
My crochet Christmas elf pattern is suitable for newer crocheters, but if it’s your first amigurumi style project I suggest making sure you’ve got some yarn scraps to practice on before you dive in. Especially for the more fiddly features like the ears, or unusual stitches like the puff stitch.
Although it uses a few different yarns and hook sizes, you can mess up the tension a little and still end up with a cute doll.
The actual stitches themselves are those which crochet newbies tend to get to grips with pretty quickly. They include techniques like chaining, single crochets and a bit of hand sewing.
Each time I use an abbreviation for the first time I’ll explain it in full, and I’ll write up certain aspects in full English for ease of understanding.
Hooks, Yarn and Other Kit
A couple of the yarns I used for my doll are frustratingly hard to get hold of in the US, so I’ve put a very close match suggestion in the list for you. It’ll work up very similarly.
- 2oz/50g Lily Sugar ‘n Cream Solids – Red*
- 2oz/50g Lily Sugar ‘n Cream Solids – White*
- 2oz/50g Lily Sugar ‘n Cream Solids – Mod Green*
- F/4mm crochet hook
- 2oz/50g Knitcraft Mocha Grand Merino DK Yarn or Rico Essentials Merino DK*
- 2oz/50g Knitcraft Blush Grand Merino DK Yarn or Sirdar Cashmere Merino Silk DK*
- E/3.5mm crochet hook
- Toy safe stuffing*
- Safety eyes*
- Tapestry needle*
- A scrap of black or dark brown yarn for the eyelashes
The Crochet Christmas Elf Doll Pattern
The skin and hair of the doll will be crocheted in merino wool, the remainder of the pattern will be created in the cotton based yarn to form the elf’s clothing.
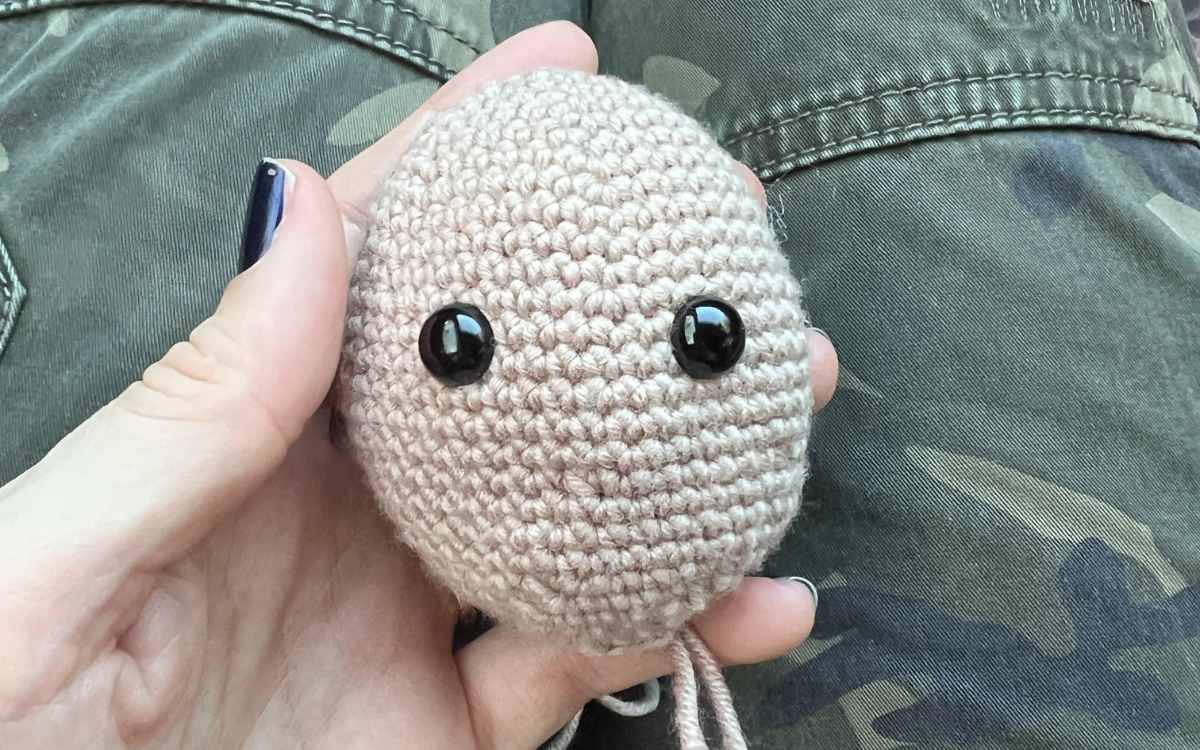
Crocheting Your Elf’s Head and Neck
You are going to work with your blush yarn and 3.5mm crochet hook to create the elf’s head. Make sure you also have the pair of safety eyes to hand, along with some toy stuffing.
Round 1
Make a magic circle of six stitches (6)
Round 2
Put two single crochet stitches into each stitch of the round, doubling the total.
2sc x 6 (12)
Round 3
Make one single crochet into the next stitch, and two into the following stitch. Repeat for the round, increasing the total by six stitches.
(1sc, 2sc) x 6 (18)
Round 4
(1sc x 2, 2sc) x 6 (24)
Round 5
(1sc x 3, 2sc) x 6 (30)
Round 6
1sc x 30 (30)
Round 7
(1sc x 4, 2sc) x 6 (36)
Round 8
(1sc x 5, 2sc) x 6 (42)
Round 9 – 11
1sc x 42 (42)
Round 12
(1sc x 6, 2sc) x 6 (48)
Round 13 – 17
1sc x 48 (48)
Round 18
Make one single crochet into the first six stitches, then use a single crochet to join the next pair of stitches together. Repeat for the rest of the round, reducing the total stitch count by six.
(1sc x 6, sc2tog) x 6 (42)
Round 19 – 21
1sc x 42 (42)
Round 22
(1sc x 5, sc2tog) x 6 (36)
Round 23
(1sc x 4, sc2tog) x 6 (30)
Round 24
1sc x 30 (30)
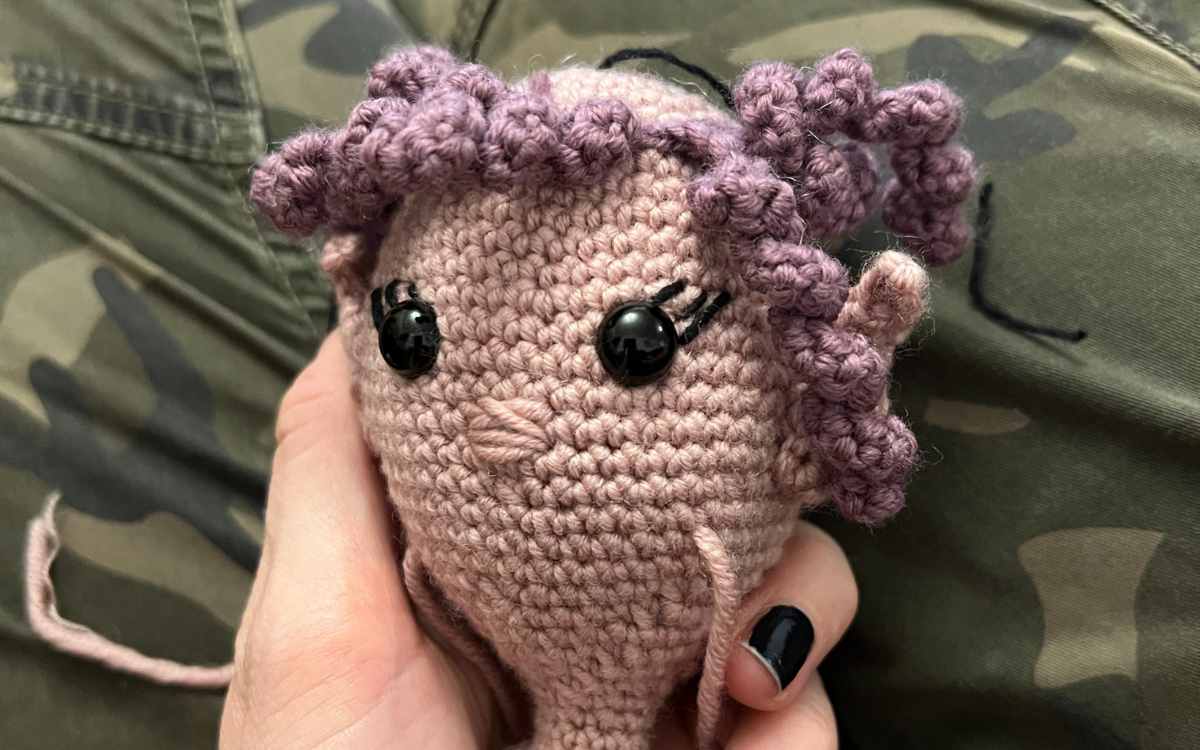
Insert the safety eyes into the front of the head, around row 11. Set them around eight stitches apart from the central post.
Round 25
(1sc x 3, sc2tog) x 6 (24)
Round 26
(1sc x 2, sc2tog) x 6 (18)
Round 27
(1sc, sc2tog) x 6 (12)
Round 28 – 31
1sc x 12 (12)
Round 32
(1sc, 2sc) x 6 (18)
Round 33
(1sc x 2, 2sc) x 6 (24)
Round 34
(1sc x 3, 2sc) x 6 (30)
Slip stitch into the next stitch, and tie off. Weave the loose end back into the head.
Fill the head and neck with toy stuffing. You can add a small piece of foam or pipe cleaners to the neck for extra support.
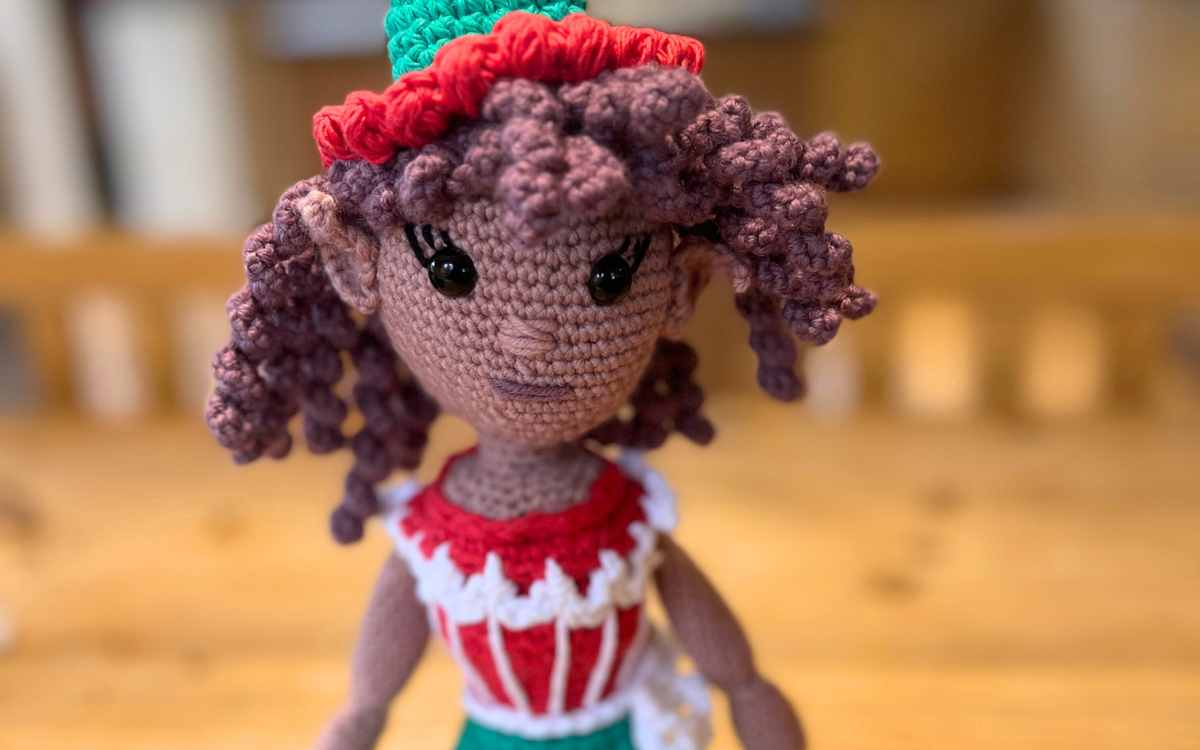
Facial Details
You are going to need your tapestry needle for this section, and to hand sew on the details of the nose, mouth and eyelashes.
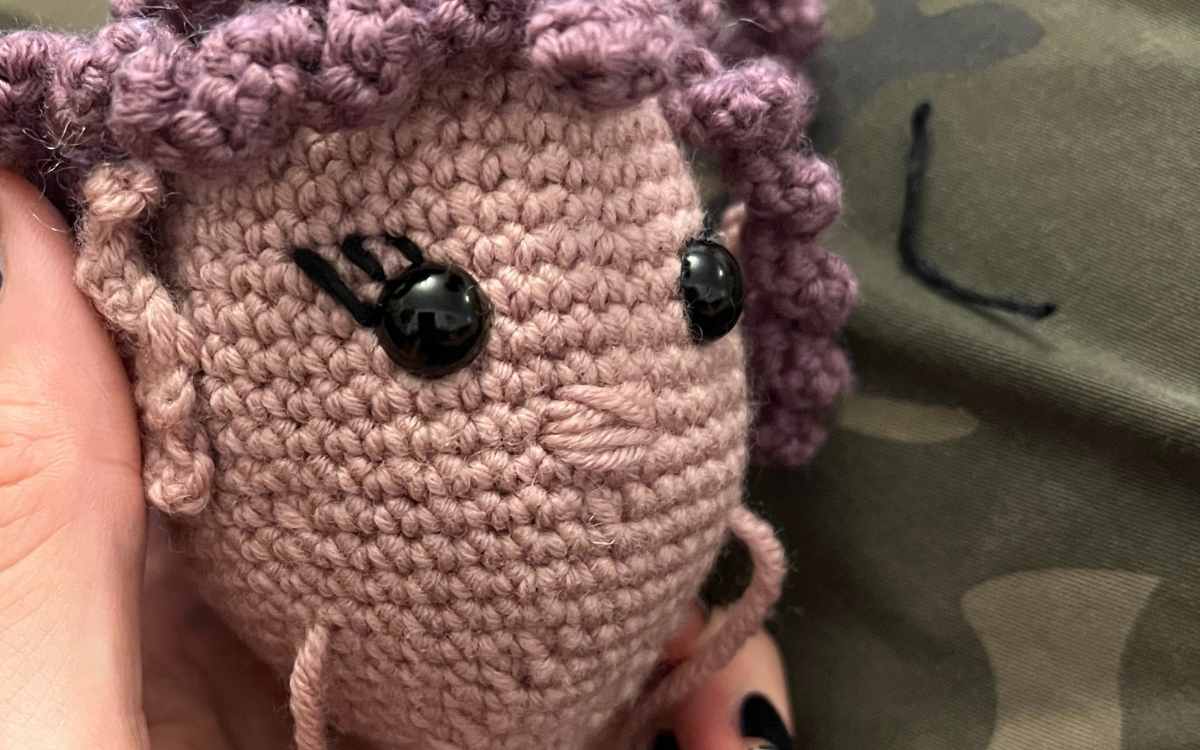
Sewing The Elvern Eyelashes
To create your eyelashes, thread your black yarn (or use the hair color if you don’t have a scrap spare).
Push the threaded needle from the top of the doll’s head, where the entry point will be obscured later, into the far corner of the eye.
Sew into the material diagonally two stitches up and away from the eye.
Push the needle one stitch in towards the eye itself, then at the same angle two stitches diagonally up again.
Repeat a third time for the final more central eyelash.
Creating The Elf’s Nose
Thread your skin color onto the yarn needle now, and weave back and forth around three down in the center of the face. Your nose should be approximately three stitches wide.
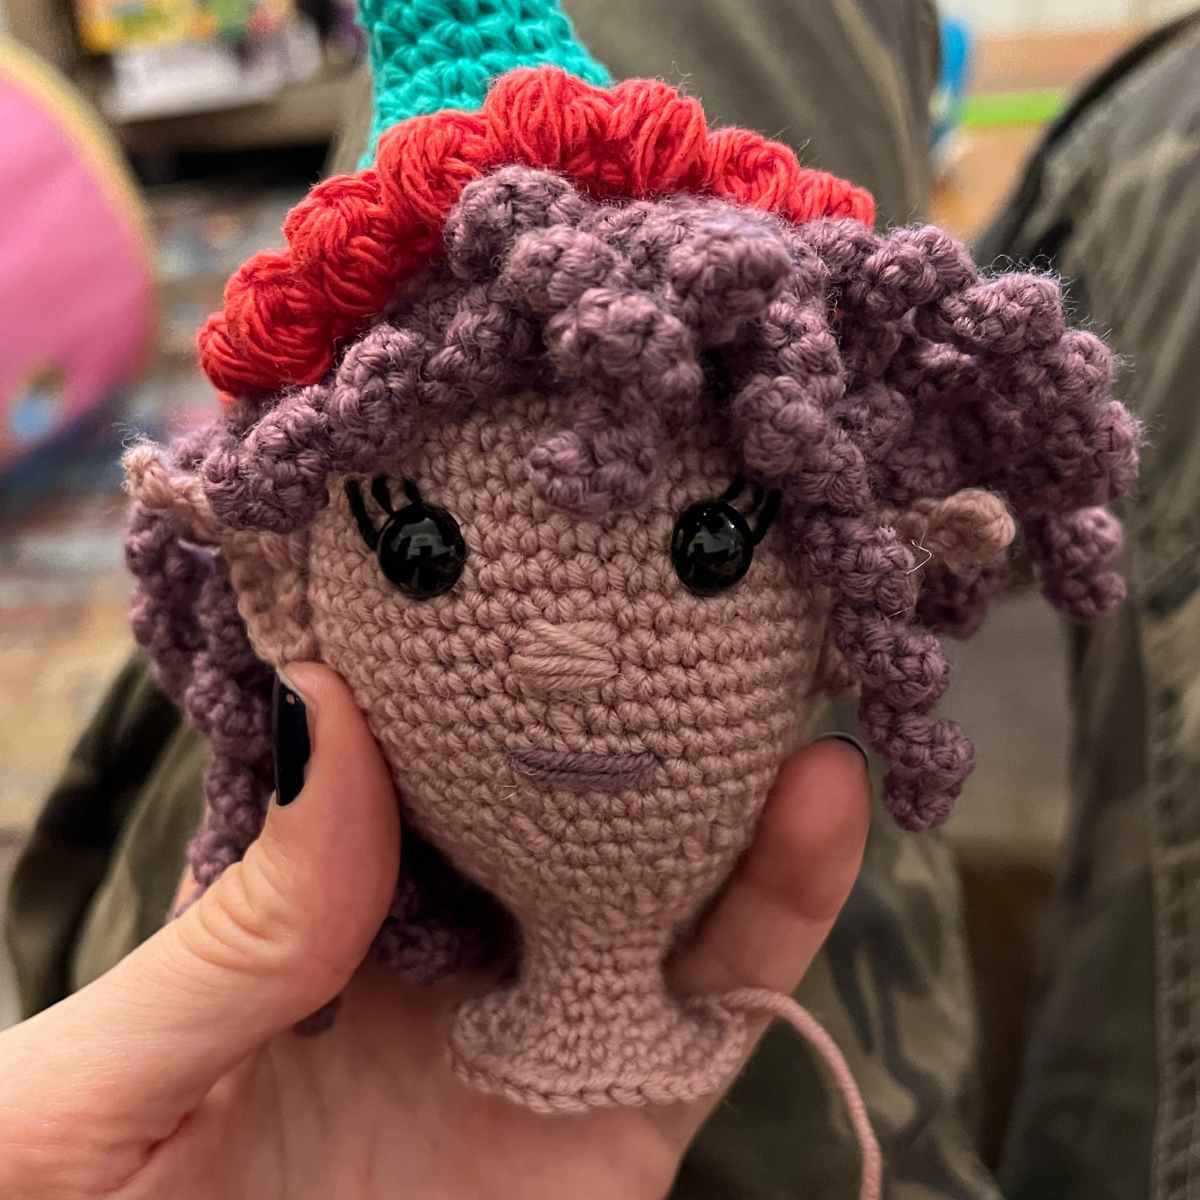
Making Her Mouth
You’ll create your elf doll’s mouth using the same mocha colored yarn as you’ll use for their hair. Thread your tapestry needle and insert it from the top of the head, coming out in line with the inner side of the eyes, around three rounds down from the nose.
Make your mouth with just two lines of yarn, sewn around five stitches wide. Be careful to make sure it lines up with the rest of the facial features, and is symmetrical.
Crocheting The Christmas Elf’s Ears
You’re going to make a bit of an unconventional crochet shape to form your ears.
Use your blush yarn and 3.5mm crochet hook to form a magic circle of six stitches, but don’t join it together.
Turn the circle over, chain two as the first single crochet, then make a single crochet back into your circle into each of the first five stitches. Finally put two single crochets into the last stitch of the magic circle. You’ll now have eight stitches in total.
Repeat this pattern, by turning over the magic circle again, chaining two, then putting one single crochet into each of the first seven stitches, then two single crochets into the final stitch.
Finally, chain two, then make a single crochet into the first loop of the chain, another into the last stitch of the previous section, and a slip stitch into the second to last stitch. Tie off, and use your loose end of yarn and a needle to sew the ear to the head.
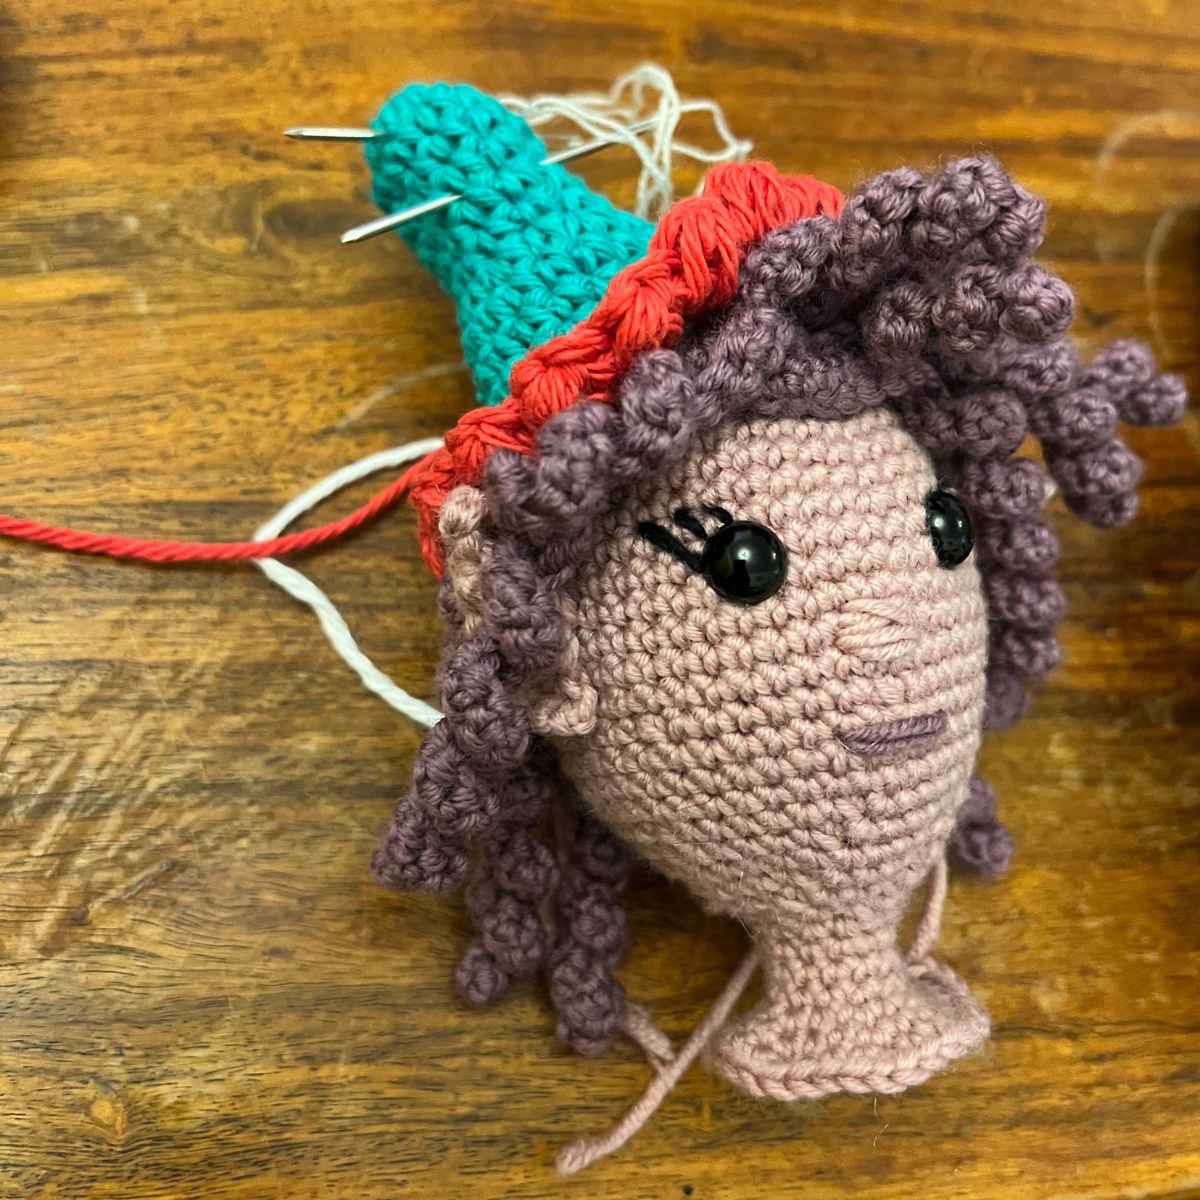
How To Crochet Your Elf Doll’s Hair
Your crochet elf dolls’ hair will be made from a series of chains with single crochets into them.
I used the mocha yarn for her hair, and worked it with a 3.5mm crochet hook.
The simplest way to do these gorgeous curls is in sets of a few chains, that you’ll work back into. Your starting chains should range between 30 and 45 loops long for the sides and back of the hair, and the three sections of bangs should be about twenty stitches long in the chain.
For example:
- Chain 31
- Skipping the first chain, make one single crochet back into each stitch.
- Chain 35
- Skipping the first chain, make one single crochet back into each stitch.
- You now have two separate curl strands.
- Repeat until you have five or six curly hair segments, and then hand sew the string of curls onto the hairline at around round eight of the head.
Repeat this process until you are happy with the number of strands of hair your doll has. I ended up with twenty five longer curls and around five shorter ones as the bangs.
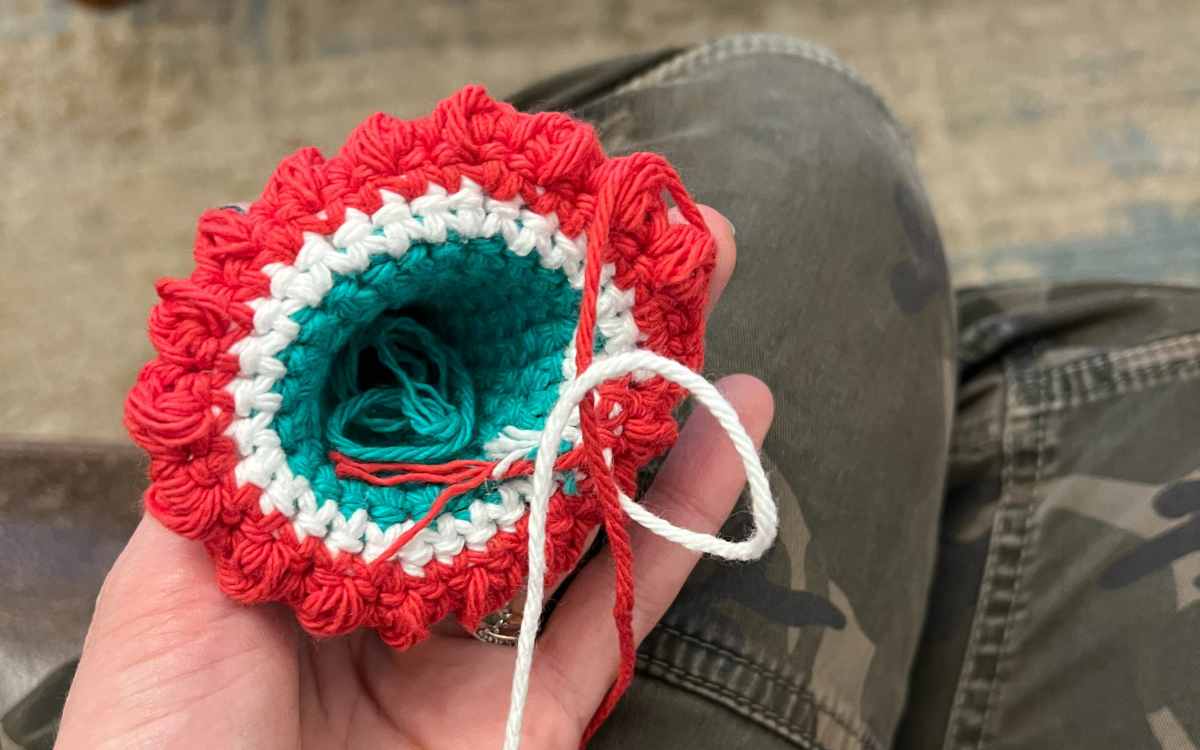
Crochet Elf Hat Instructions
Use your green yarn and 4mm crochet hook to begin the hat.
Round 1
Make a magic circle of six stitches (6)
Round 2
2sc x 6 (12)
Round 3 – 7
1sc x 12 (12)
Round 8
(1sc, 2sc) x 6 (18)
Round 9 – 11
1sc x 18 (18)
Round 12
(1sc x 2, 2sc) x 6 (24)
Round 13
1sc x 24 (44)
Round 14
(1sc x 3, 2sc) x 6 (30)
cc white
Round 15
(1sc x 4, 2sc) x 6 (36)
cc red
Round 16
*Slip stitch into the next stitch, then make a puff stitch with three loops in the following stitch. Repeat from * for the duration of the round.
At the end of the round, leave a long loose end of yarn and attach your yarn needle. Place the hat on the elf’s head at a slight angle, and sew onto the crown.
The Hat’s Red Bobble
Add a red bobble and white detail to finish your hat.
Create the bobble with red yarn and 4mm crochet hook.
Round 1
Make a magic circle of six stitches (6)
Round 2
2sc x 6 (12)
Round 3
(1sc, 2sc) x 6 (18)
Round 4
(1sc, sc2tog) x 6 (12)
Insert the little red ball over the end of the hat, and sew it in place with your tail of red yarn.
White Detailing
To complete the hat, make a chain of 12 stitches, and slip stitch to join it around the baes of the red ball.
The Crochet Elf Doll’s Shoulders
The dress is made in two sections. One built from a round to form the shoulders, and the next from a chained circle, which will follow.
For this part of the dress, use your red yarn and 4mm crochet hook.
Round 1
Make a magic circle of eight stitches (8)
Round 2
2sc x 8 (16)
Round 3
(1sc, 2sc) x 8 (24)
Round 4
(1sc x 2, 2sc) x 2, 1sc x 6, (1sc x 2, 2sc) x 2, 1sc x 6 (28)
Round 5
1sc x 28, then slip stitch to close the round (28)
Color change (cc) to white
Round 6
Attach the white yarn to the latest red round, *chain five, skip the next stitch and slip stitch into the following stitch. Repeat from * for the length of the round.
At the end of the round, tie off and sew the loose ends into the doll.
Join The Neck To The Dress
Using the blush yarn sew the neck onto the top of the dress, with the wider section pointing to the sides as shoulders. Make sure the join is firm and the head is well padded with stuffing or it will nod over.
If you find the head droops anyway, then use the blush yarn again to strengthen the join by sewing back and forth between the lower neck and head.
Crocheting Her Dress
The remainder of the dress is going to be crocheted from a chain loop, which you will extend into the body of the clothing.
Begin with your red yarn and 4mm crochet hook.
Round 1
Make a chain of twenty four stitches, and slip stitch to join. (24)
Round 2 – 6
1sc x 24 (24)
Round 7
(1sc, sc2tog) x 8 (16)
Round 8 – 10
1sc x 16 (16)
cc green
Round 11
1sc x 16 into the front loop only (16)
Round 12
(1sc, 2sc) x 8 (24)
Round 13 – 14
1sc x 24 (24)
Round 15
(1sc x 2, 2sc) x 8 (32)
Round 16 – 17
1sc x 32 (32)
Round 18
(1sc x 3, 2sc) x 8 (40)
Round 19 – 25
1sc x 40 (40)
Round 26
(1sc x 3, sc2tog) x 8 into the back loop only (32)
Round 27
(1sc x 2, sc2tog) x 8 (24)
Round 28
(1sc, sc2tog) x 8 (16)
Round 29
sc2tog to close.
Your Crochet Elf’s Arms
Your Christmas elf doll’s arms will be crocheted with the blush yarn and 3.5mm crochet hook.
Round 1
Make a magic circle of six stitches (6)
Round 2
2sc x 6 (12)
Round 3 – 7
1sc x 12 (12)
Round 8
sc2tog x 6 (6)
Round 9
1sc x 6 (6)
Round 10
2sc x 6 (12)
Round 11 – 25
1sc x 12 (12)
Round 26
In this final round we are going to create the shaped shoulder.
1sc, 1dc x 2, 1tr, 1dc x 2, 1sc, slip stitch and tie off.
Crocheting The Belt
You are going to crochet your elf’s belt in two parts, using the white yarn and 4mm crochet hook.
Firstly the belt is a simple chain of around twenty stitches. This might be slightly more or fewer if you have slightly different yarn or tension to I have.
Use a yarn needle to sew the ends at the back of the dress, it should fit snugly.
You now want to make another chain for the bow, of around fifty stitches. Tie a simple bow, then use your yarn needle to weave it onto the left hand side of the belt.
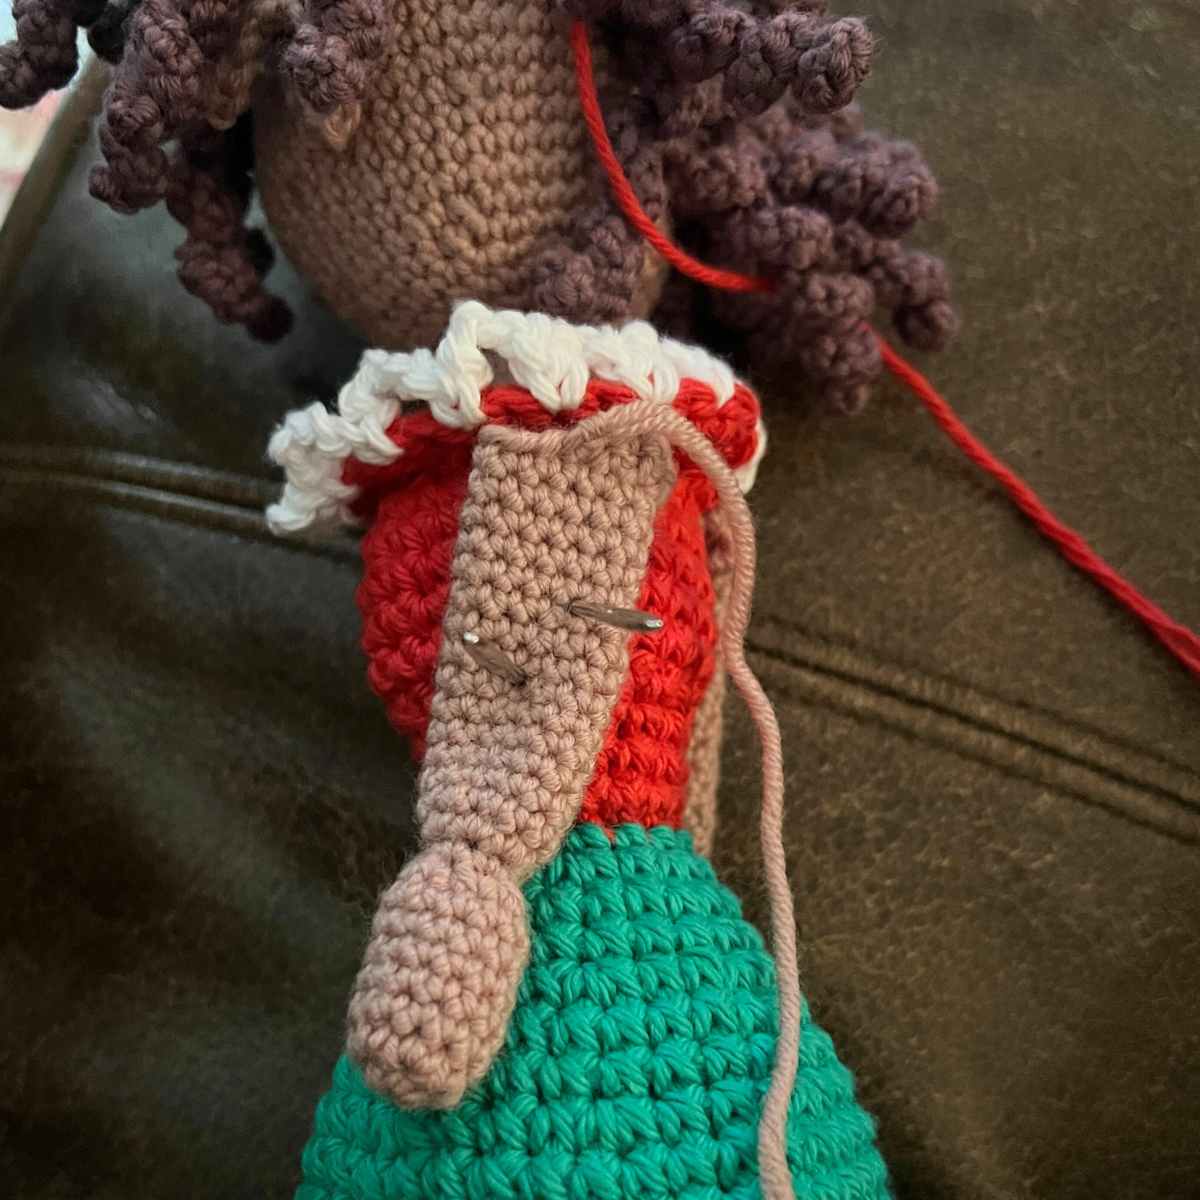
Adding The Bodice Detail
Your bodice detail will tie the upper section of the shoulder detail and the belt of the dress together. It will also hide the join for the tops of the arms.
You’ll need to use your white yarn and a tapestry needle.
You will sew six evenly spaced lines of yarn, they should be set around one stitch apart at the belt and two stitches apart at the shoulder level. Come out with the yarn needle at the belt line, and join back in at the top of the hanging chains.
Chaining A Hem
Make a chain of thirty stitches with your white yarn and a 4mm crochet hook. You’ll want this to fit exactly. Sew it onto the hemline of the dress with the same color yarn, just above the front loop only round.
If it is a little too long then you can undo the starting end of the chain and gently tease out the relevant number of loops.
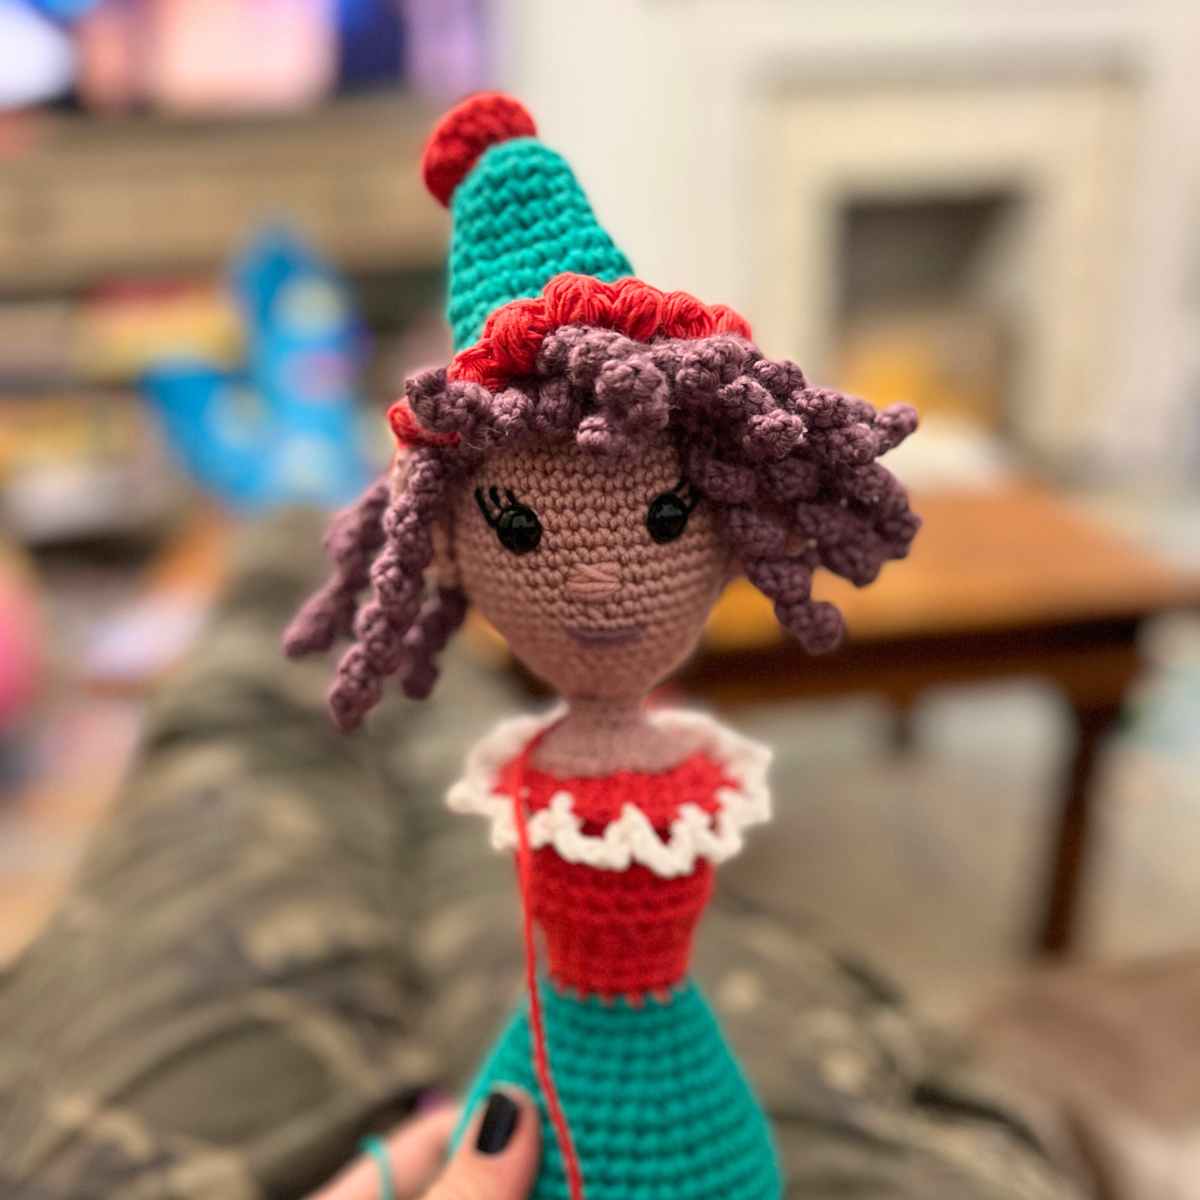
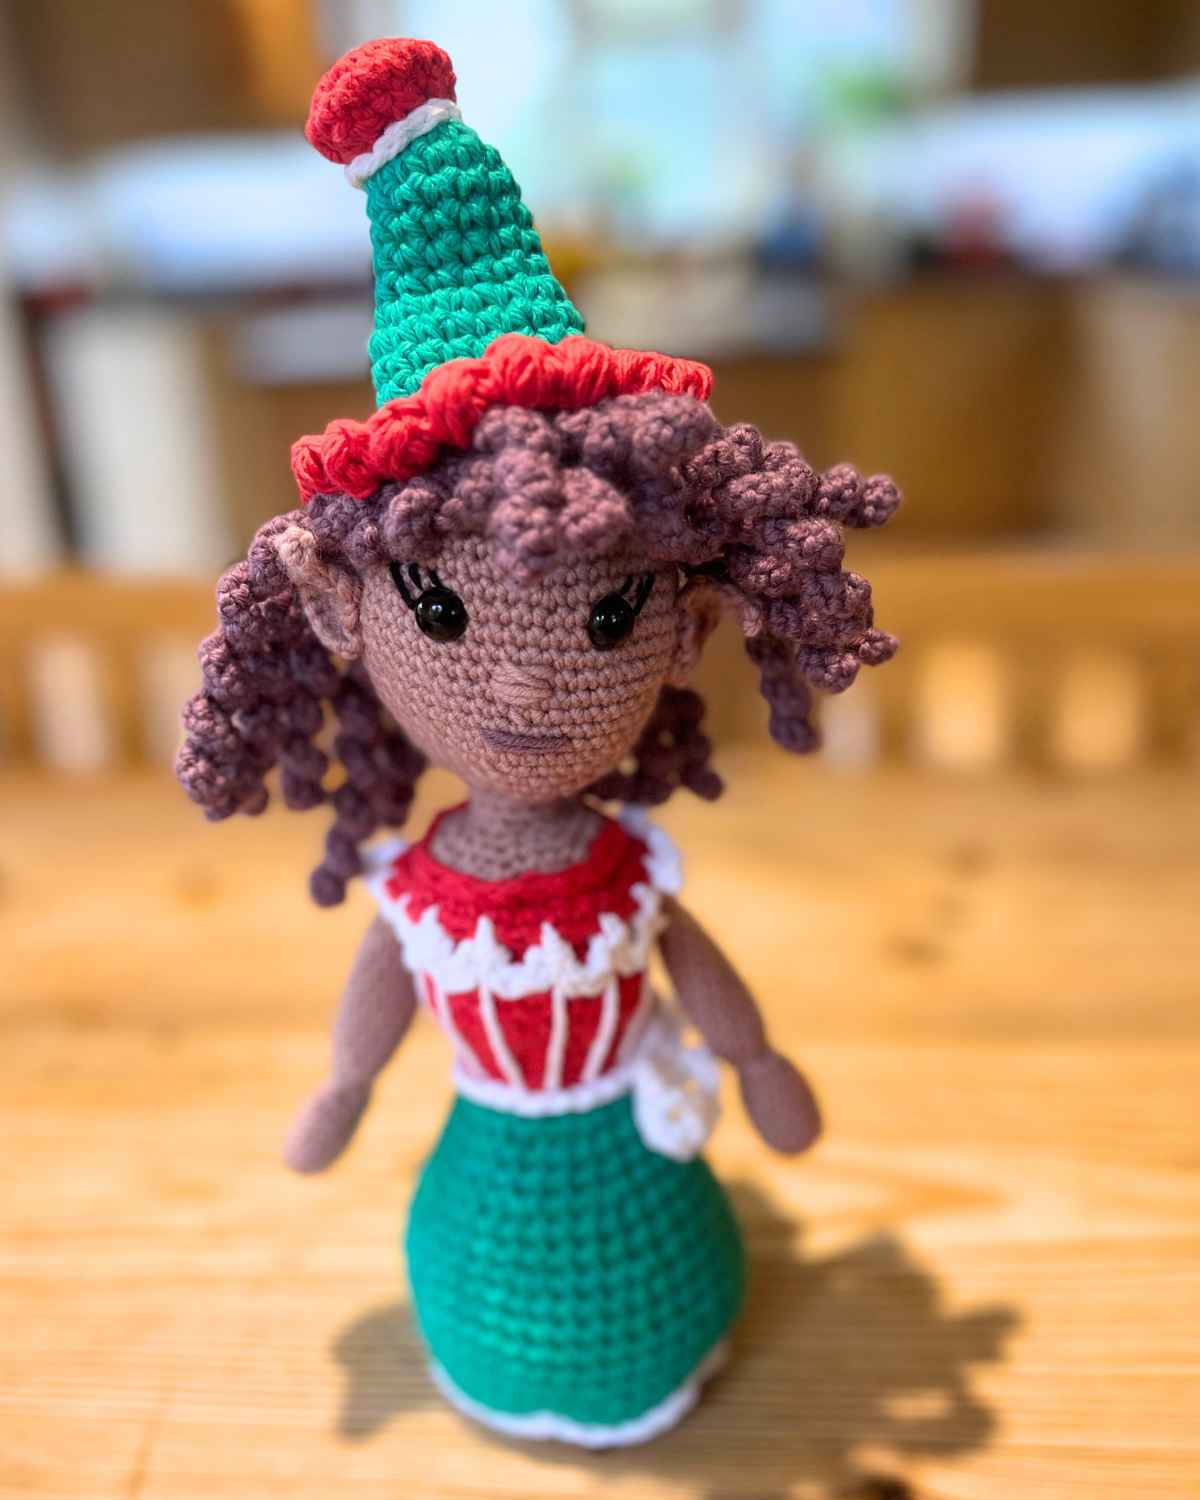
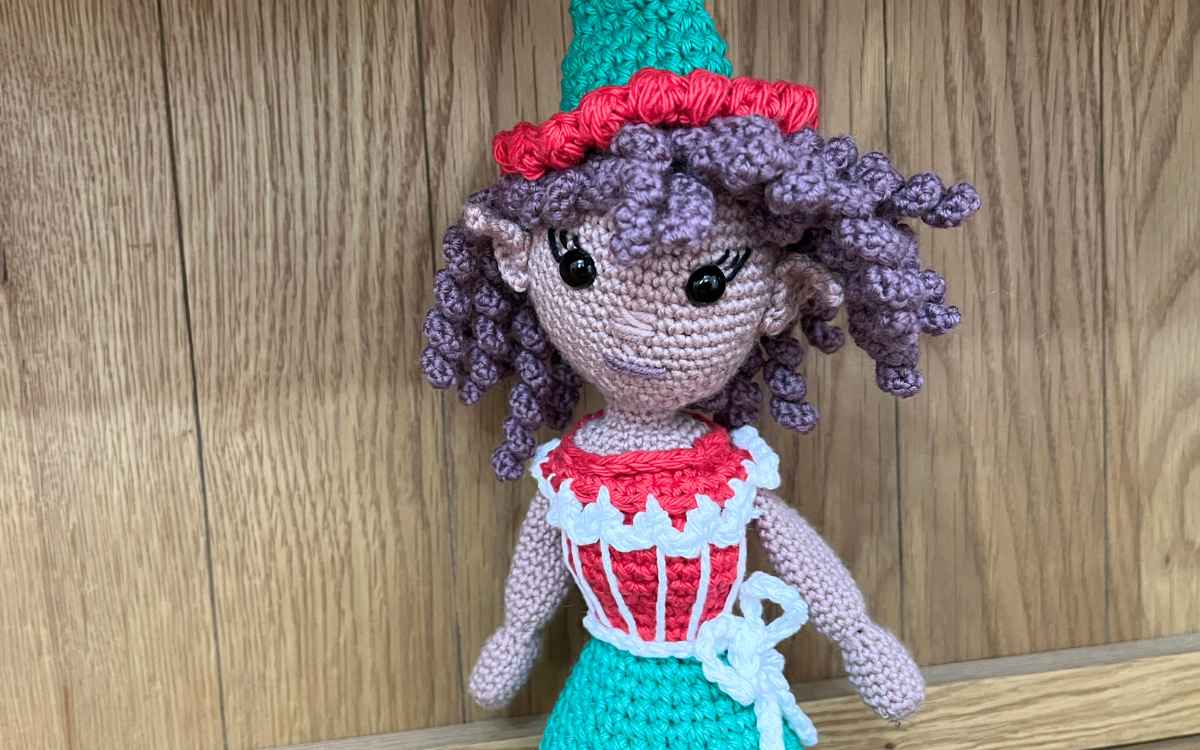
Your Festive Crocheted Elf Doll
I must admit, I’m pretty happy with this amigurumi Christmas elf. It’s a far cry from my old magical elf pattern, that’s for sure!
I wanted it to be a cute Christmas ornament to sit above the fireplace, but it has turned out to be a lovely toy as well.
I’d love to hear what you think about the pattern, and as always share any questions or thoughts with me in the comments section.
Happy Crocheting!
Lucy Kate, x
*The products linked in this pattern were carefully selected by Lucy Kate Crochet. If you decide to purchase using the links provided, we may earn a small commission on that sale. This is at no extra cost to you.