Crochet Pine Marten Pattern
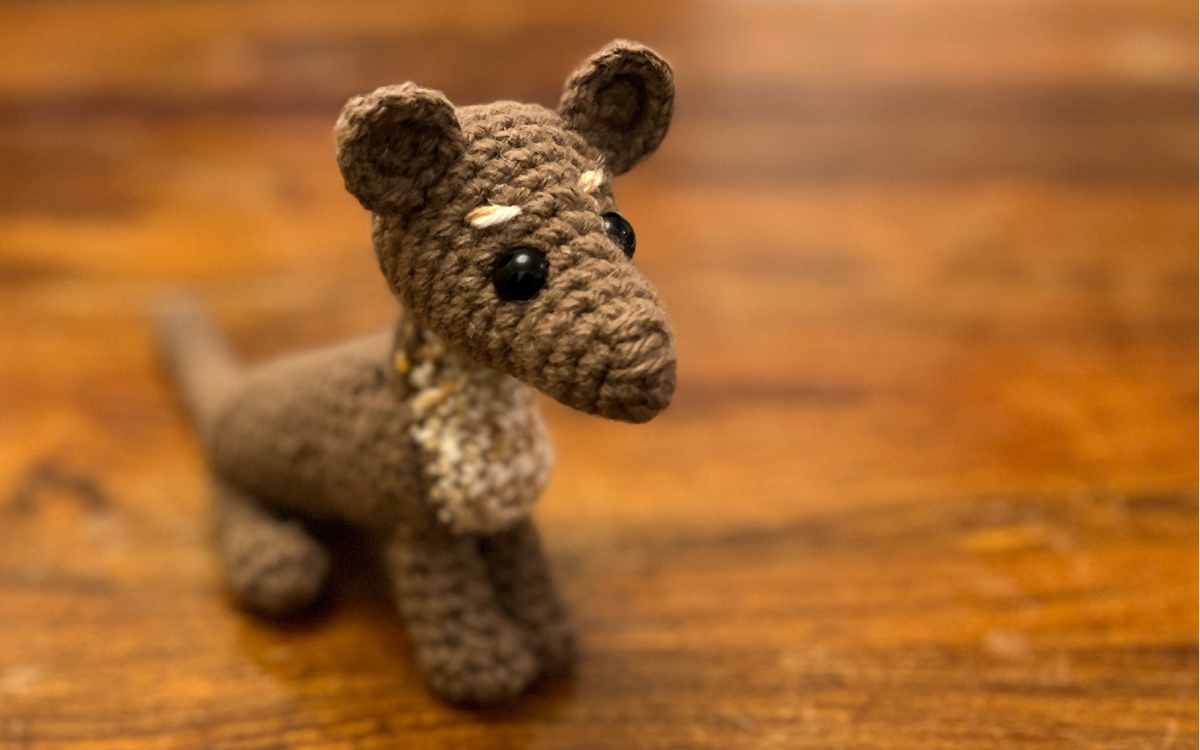
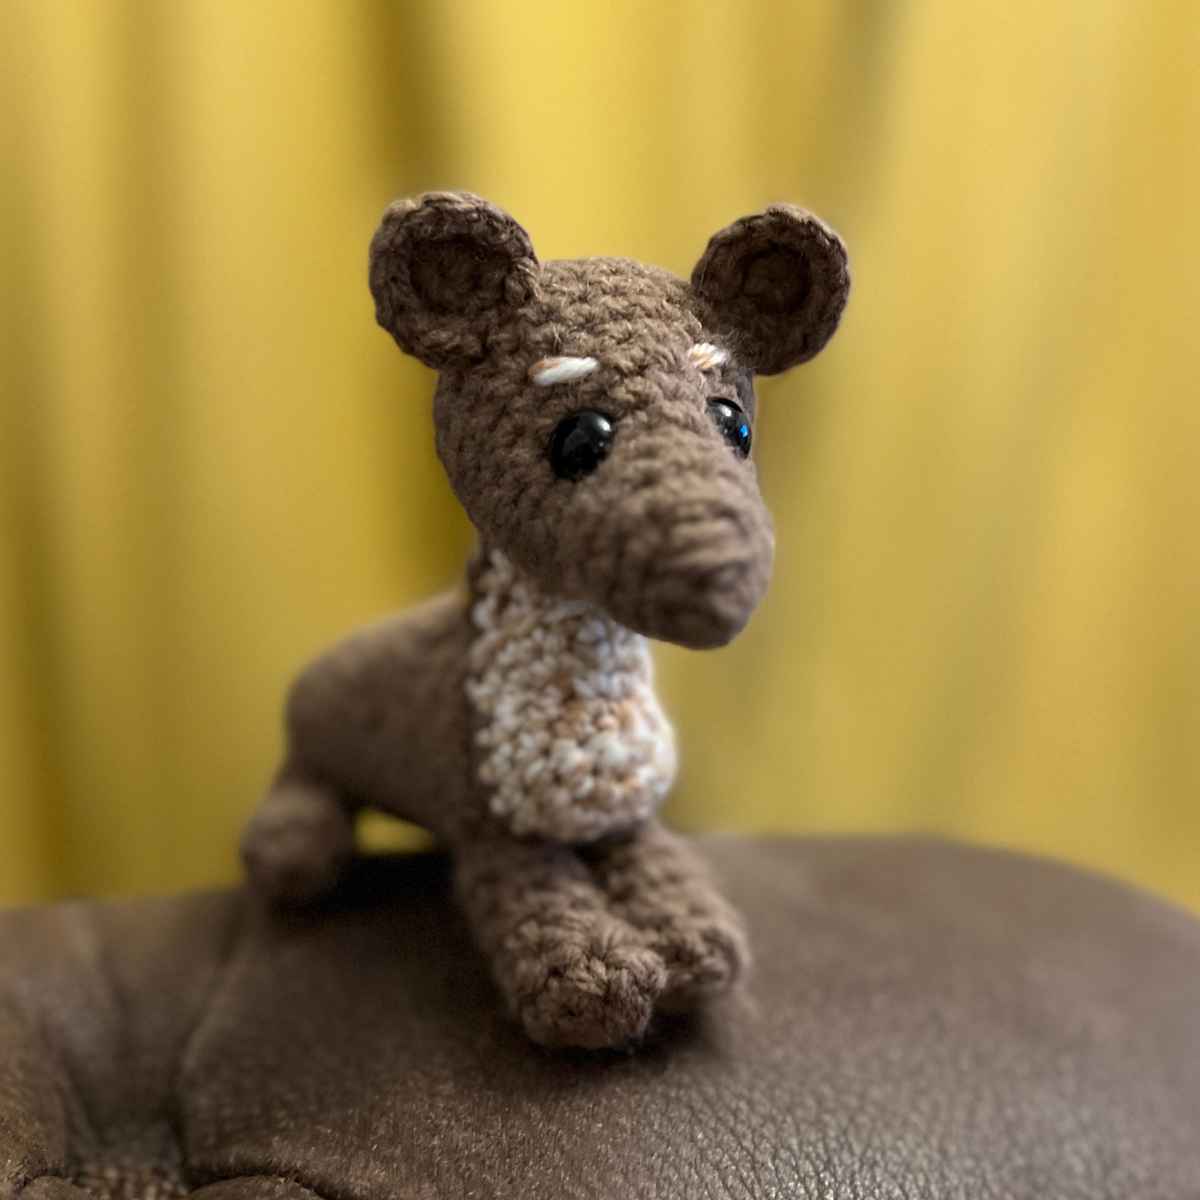
This crochet pine marten pattern was designed to give off that cool but cute energy that is such a big part of this little yet wild animal. Pine marten’s have distinctive markings on their chest and face, and their adorable eyebrows give off an attitude I had to incorporate into the pattern.
My amigurumi pine marten pattern is more of an intermediate level crochet toy, but I hope I’ve given enough extra written information in the tutorial that even an amigurumi novice should be able to follow along. And don’t hesitate to drop a message in the comments if you need a hand.

My crochet pine marten pattern was a request from my daughter. I asked her for an unusual amigurumi animal, and she told me at school they’d been told about the reintroduction of the pine marten into the wild. Pine martens were something you would very occasionally see when I was a kid, but they are pretty scarce these days. Hearing that there numbers are increasing is awesome news, and my amigurumi pine marten pattern is a small celebration of that (and my daughters lovely interest in the natural world!).
What You’ll Need
- 4mm crochet hook
- 100g Hayfield Bonus DK yarn* – 947 – Chocolate
- 50g Bergere de France, Baronval, Armure/orange DK yarn
- Safety eyes
- Toy safe stuffing
- Tapestry needle
Pattern Notes and Instructions
This pattern uses standard crochet techniques for amigurumi. Most of the sections are built from magic circles, working in rounds with increasing and decreasing single crochets. You will also need to be able to make a chain, and for the body section turn and work back into your stitches in the other direction. I’ll give extra information at this point to help you follow along.

How To Crochet A Pine Marten
You’ll crochet your amigurumi pine marten in sections, but sew as you go along.
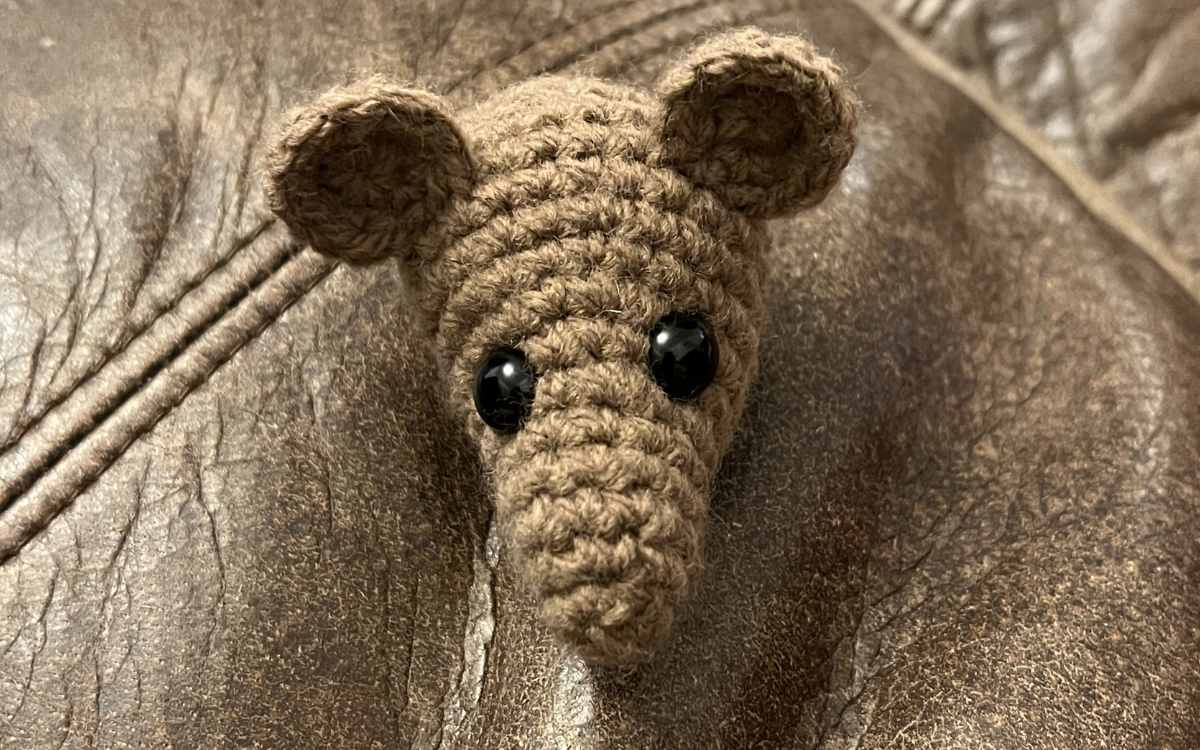
Crochet Pine Marten’s Head
Work your crochet pine marten’s head in the brown yarn, using your 4mm crochet hook. You’ll also need safety eyes, stuffing and a scrap of the orange yarn for this section.
Round 1
Make a magic circle of six stitches (6)
Round 2
1sc x 6 (6)
Round 3
2sc x 6 (12)
Round 4 – 6
1sc x 12 (12)
Round 7
(1sc, 2sc) x 6 (18)
Round 8
1sc x 18 (18)
Round 9
(1sc x 2, 2sc) x 3, 1sc x 9 (21)
Round 10
1sc x 21 (21)
Round 11
(1sc x 3, 2sc) x 3, 1sc x 9 (24)
Round 12 – 14
1sc x 24 (24)
Round 15
(1sc x 2, sc2tog) x 6 (18)

Round 16
1sc x 18 (18)
Insert safety eyes into the front of the face, and fill with toy stuffing.
Round 17
(1sc, sc2tog) x 6 (12)
Round 18
sc2tog x 6 then hand sew to close.
Take your scrap of orange yarn and thread the needle, then sew two little angry eyebrows a round above the eyes.
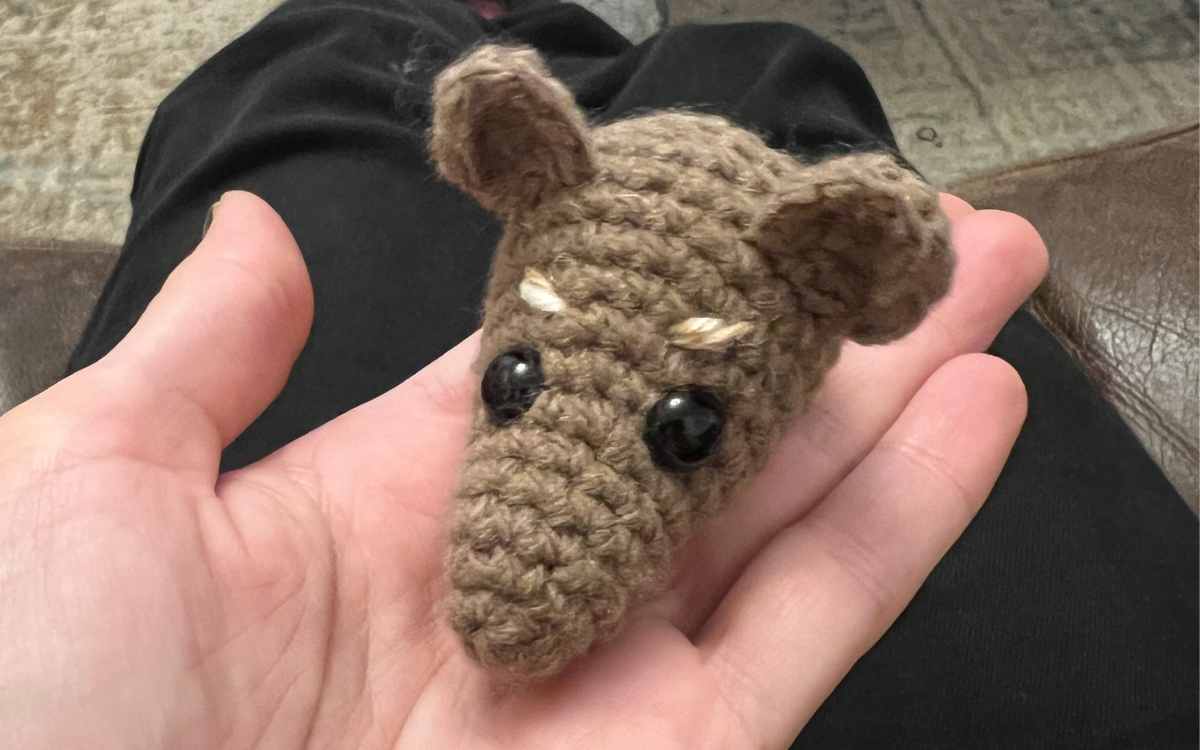
Amigurumi Pine Marten’s Ears
You are going to work your amigurumi pine marten’s ears in brown yarn with yarn 4mm crochet hook.
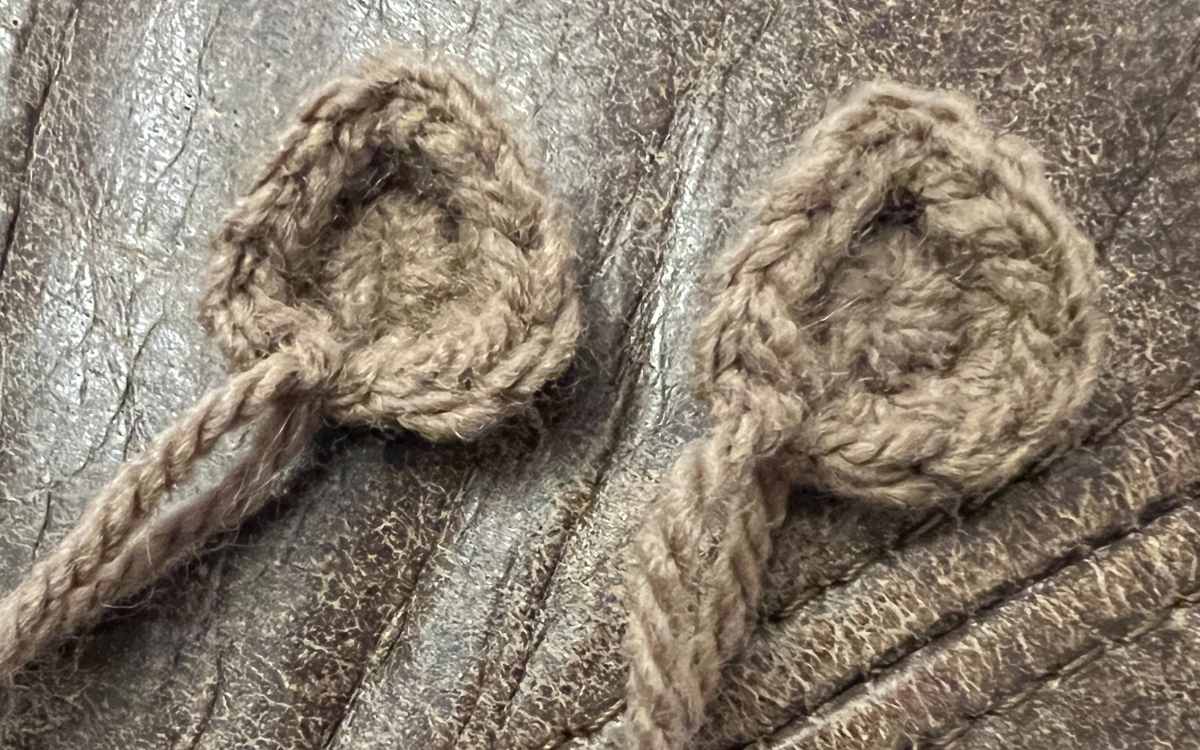
Round 1
Make a magic circle of six stitches (6)
Round 2
2sc x 6 (12)
Now sew the ears upright onto the top of your amigurumi pine marten’s head. Approximately placing them two rounds above the eyebrows.
Crocheting the Neck
Begin in your brown yarn, with your 4mm crochet hook. You’ll switch to your orange yarn, change colors when you see ‘cc’.

Round 1
Make a magic circle of eight stitches (8)
Round 2
2sc x 8 (16)
Round 3 – 7
1sc x 8, cc orange, 1sc x 8, cc brown
Round 8
1sc x 8, cc orange, 1 sc x 8
Round 9
sc2tog x 8, then sew to closed.
Sew Head onto Neck
Using your brown yarn and needle, sew the brown magic circle end of the neck onto the base of the head. Line the orange patch up with your crochet pine marten’s chin.

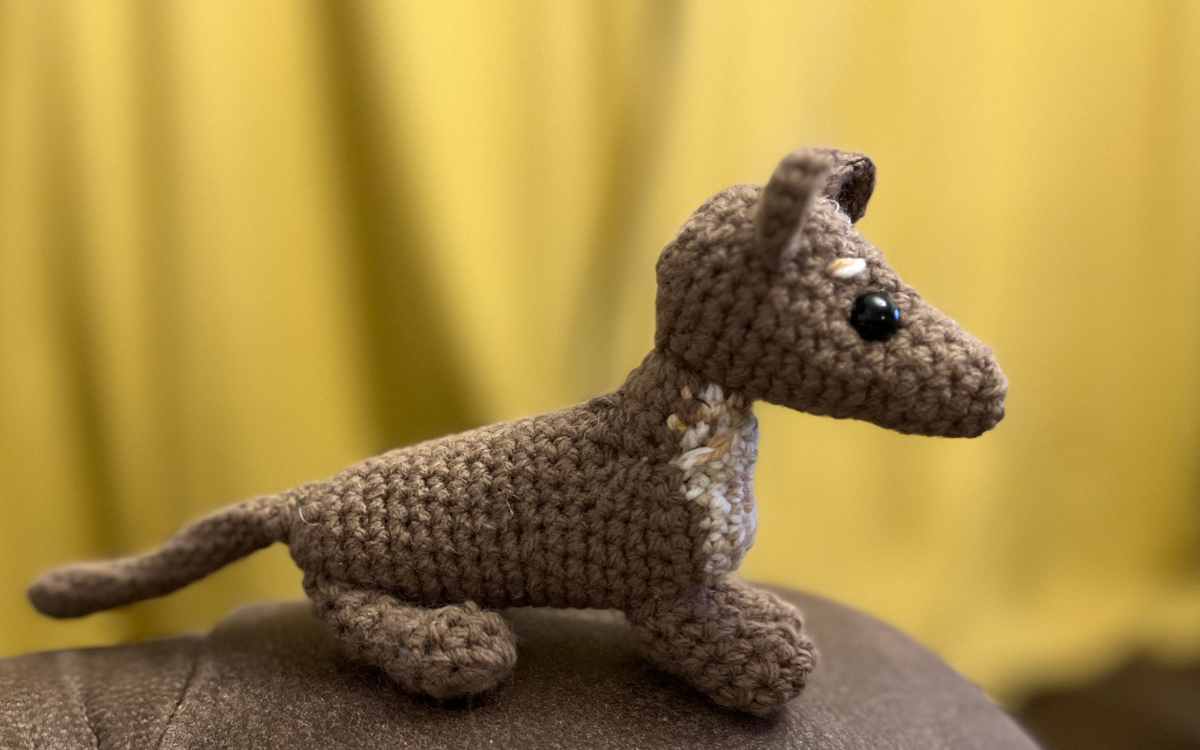
Crochet Pine Marten’s Body
You’ll begin working the body in orange yarn, and switch to brown during the pattern. The starting end will be started from the magic circle, then you’ll open it up for a while, before closing back again to create a space to insert the pine marten’s neck later.

Round 1
Make a magic circle of eight stitches (8)
Round 2
2sc x 8 (16)
Round 3
(1sc, 2sc) x 8 (24)
Round 4
1sc x 24, cc brown
Mark the last stitch you worked, then count eight stitches back and mark this stitch too. Work the next rounds just into the marked area. This will involve turning your work over

Round 5
1sc x 16, chain 1.
Round 6 – 7
Turn your body section over, then 1sc x 16, chain 8, slip stitch into the top of the previous chain 1.
Round 8 – 12
You are now working back in a standard round.
1sc x 24 (24)
Round 13
(1sc, sc2tog, 1sc x 3) x 4 (20)
Round 14 – 21
1sc x 20 (20)
Round 22
(1sc x 4, sc2tog) x 4 (16)
Round 23
sc2tog x 12, then hand sew closed.

You can now stuff the body, using the neck opening.
Leave space to insert the neck into the gap, then carefully hand sew so that the orange and brown sections of the neck line up with the body.
You can post the head slightly downwards, tilting the head to give a more natural pine marten pose.
Crochet Pine Marten’s Feet and Legs
Use your brown yarn and 4mm crochet hook.
Round 1
Make a magic circle of eight stitches. (8)
Round 2
1sc x 8 (8)
Round 3
sc2tog x 2, 1sc x 4 (6)
Round 4 – 7
1sc x 6 (6)
Carefully fill using small pieces of toy stuffing.
The Tail
Use the 4mm crochet hook and brown yarn.
Round 1
Make a magic circle of six stitches (6)
Round 2 – 16
2sc x 6 (12)
Leave unstuffed, and sew onto your crochet pine marten’s back end.
Your Crochet Pine Marten
This was a different pattern to design for me, and one that you can really make your own if you want to. Pose your pine marten however you like, upright on their back paws is quite a classic one if you’d like to give that a go!
I hope you enjoy making this one as much as I loved designing it.
Happy Crocheting!
Lucy Kate, x

*The products linked in this pattern were carefully selected by Lucy Kate Crochet. If you decide to purchase using the links provided, we may earn a small commission on that sale. This is at no extra cost to you.
Hi this is Kaylyn and I am 77 years old
I download the sugar glider pattern and crochet it. Wow I think it turned out great.
How do I go about sending you a photo so you can let me know what you think
Hi Kaylyn, congratulations on making a successful sugar glider! You are very welcome to paste your photo on my Facebook page