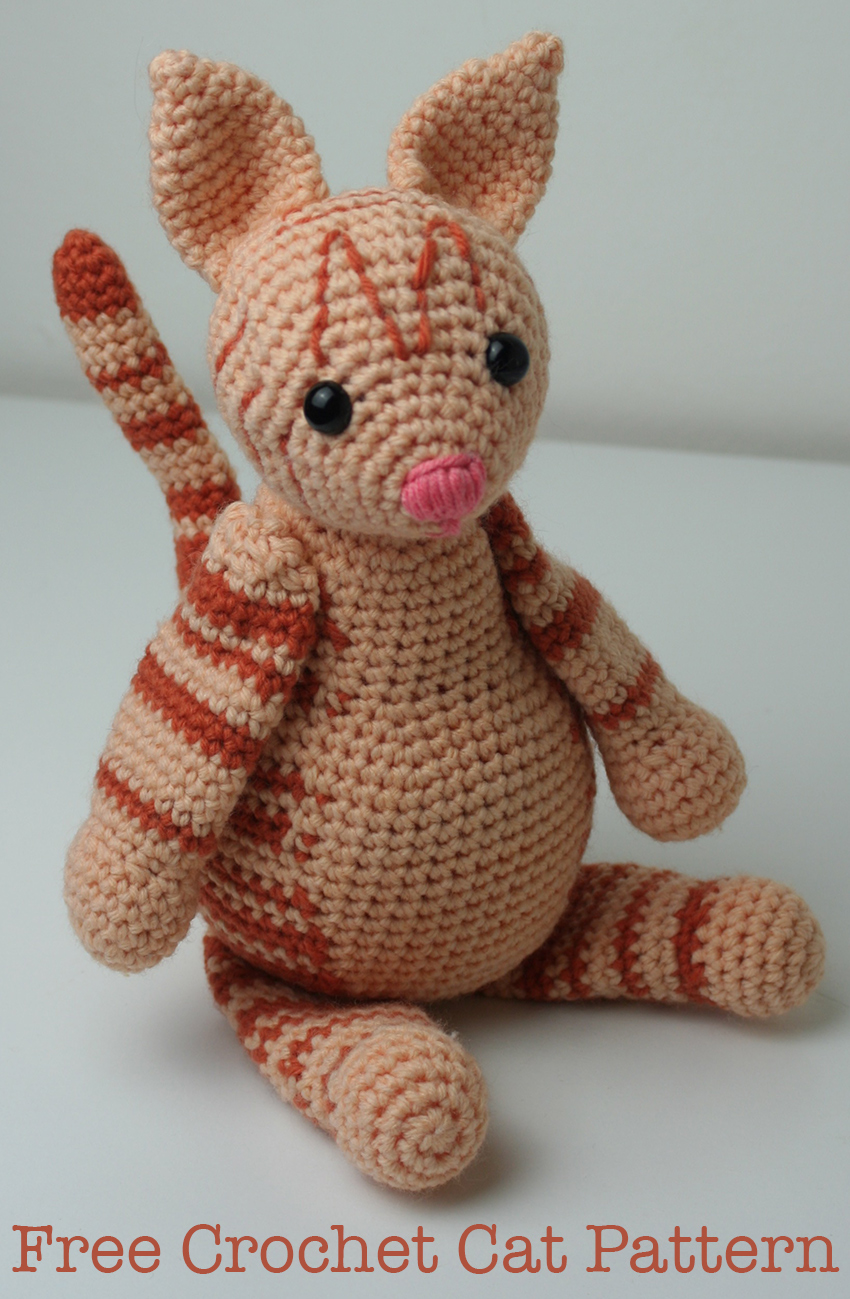
Free Crochet Cat Pattern
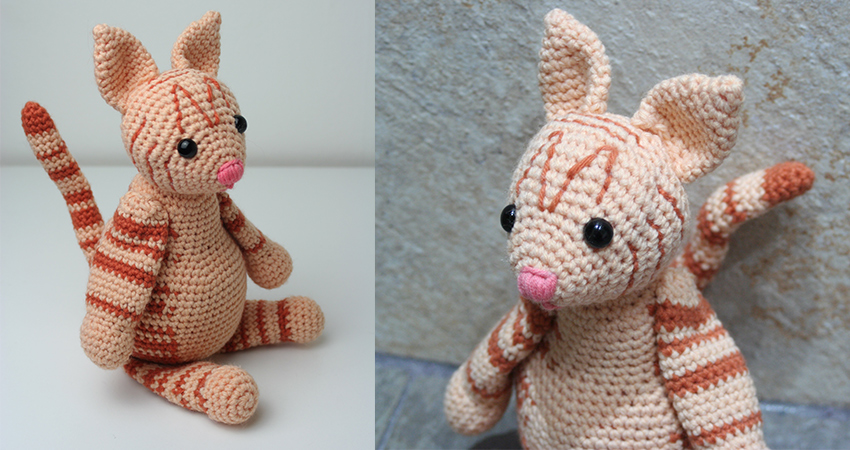
The ginger crochet cat pattern might have a few color color changes, but it’s still beginner friendly. I’ve designed the instructions to be accessible for even novice crocheters, and the realistic finish of the amigurumi cat makes it a project well worthy of your hooking, whatever your skill level.
Did you know that ginger cats are all tabbies? So you can easily convert this pattern into a traditional amigurumi tabby cat just by swapping in some brown yarn!
New to crochet toys? If you want an easier amigurumi cat, then check this one out instead.

What You’ll Need
To follow along with this crochet cat pattern, you will need the following equipment:
- 50g Sirdar Snuggly in Pumpkin PatchPaid Link* (Dark Orange)
- 100g Sirdar Snuggly in MoussePaid Link* (Pale Orange)
- 10g Pale Pink Yarn (I used Sirdar Cotton ClamshellPaid Link*)
- Safety EyesPaid Link*
- Toy stuffingPaid Link*
- Size G / 4mm Crochet Hook Paid Link*
- Steel Yarn NeedlePaid Link*
- Pipe cleanersPaid Link *(not essential, for tail support)
- Stitch MarkersPaid Link *(highly recommended)
- Sharp scissors / Yarn Cutter Paid Link*
Pattern Instructions
To follow this crochet cat pattern you will need to be familiar with a few basic crochet stitches. Each body part is begun with a magic circle, and crocheted in a circular round. The only stitches you will need are single crochets (US), and standard increase/decreases.
Crocheting Color Changes
This ginger crochet cat has stripes. When you need to change color I will write “cc to light/dark” at the end of the round. I recommend color changing within the final single crochet.
- To do this put your hook through the stitch, yarn over with your starting color and pull through.
- You will now have two loops on your hook.
- Yarn over hook using your new color.
- Holding both the old and new strands in your fingers to keep the stitch tight, pull the new strand through both loops on your hook.
Carry on crocheting in the new color. Do not cut the old strand off, instead leave it loose to pick up again for the next color change.
Abbreviations
The pattern below will be written using words to start off, with abbreviations given in brackets. It will then follow along using abbreviations alone once they have been clarified.
The total number of stitches in each round will be given in brackets at the end of the instructions, to help you stay on track. I highly recommend using a stitch marker when working in circles, to let you keep track of where each round began.
Free Crochet Cat Pattern
Your crochet kitten is going to be created in sections and joined together at the very end. Following each step along below, make all of the composite parts before you sew together.
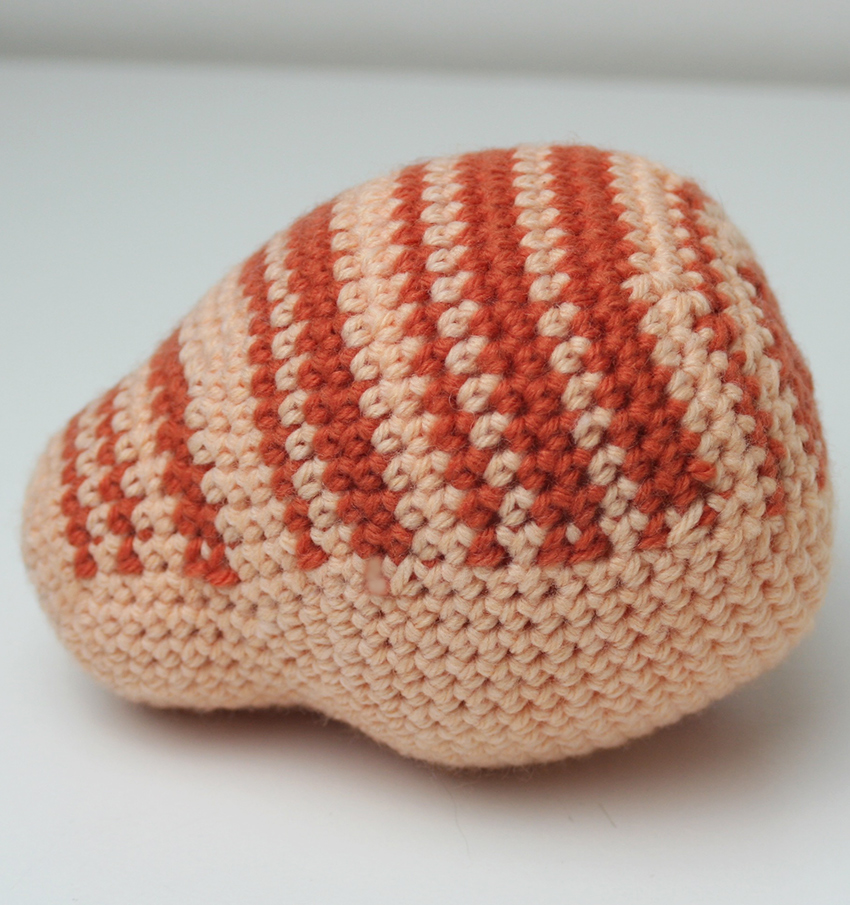
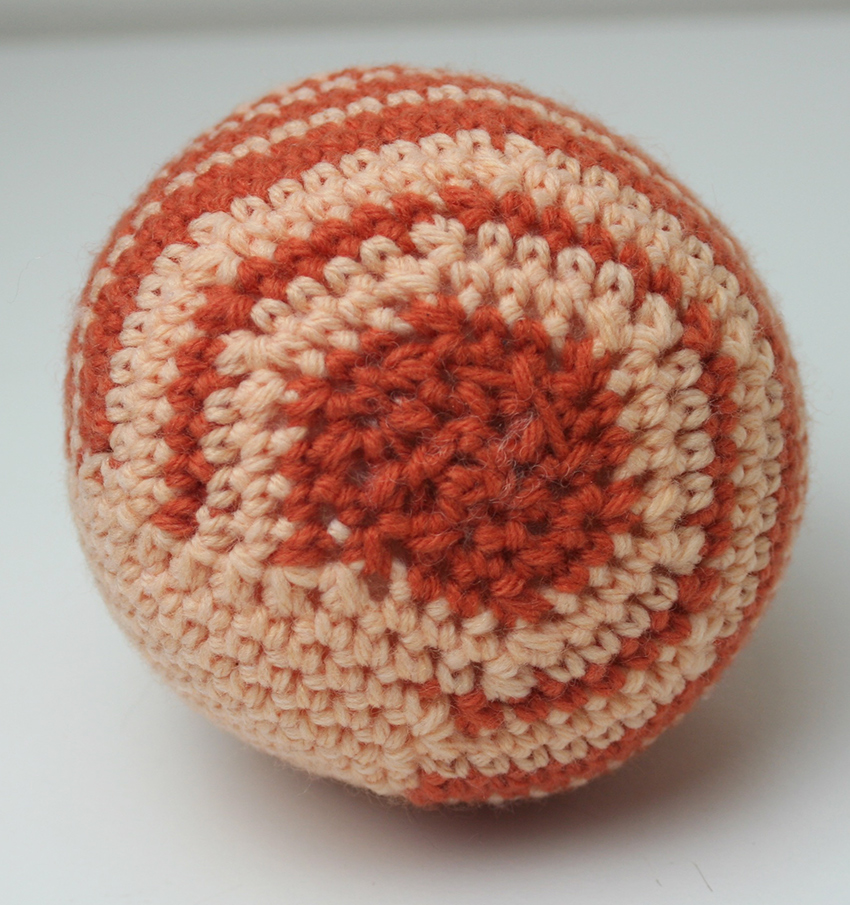
How To Crochet Your Cat’s Body
To make your crochet cat’s body, begin with your pale orange yarn.

Round 1
Make a magic circle of 6 stitches. (6)
Round 2
Put two single crochets (2sc) into each stitch. (12)
Round 3
Put 1sc in the first stitch, then 2sc into the next. Repeat six times.
(1sc, 2sc) x 6 (18)
Round 4
Put 1sc in each of the first two stitches, then 2sc in the next. Repeat six times.
(1sc x 2, 2sc) x 6 (24)
Round 5
(1sc x 3, 2sc) x 6 (30)
Round 6
Put 1sc in each stitch (30)
At the end of the round, color change to dark orange (cc to dark)
Round 7
1sc x 20, cc to light, 1sc x 10 (30)
Round 8
1sc x 30. cc to dark. (30)
Round 9
1sc x 20, cc to light, 1sc x 10 (30)
Round 10 – 11
1sc x 30, cc to dark. (30)
Round 12
1sc x 20, cc to light, 1sc x 10, cc to dark. (30)
This step is a little more complicated.
Round 13
Remember, make a single crochet where it says ‘1sc’ and two single crochets into the same stitch where it says ‘2sc’. I have broken down the sections to make it more clear:
- (1sc x 2, 2sc) x 4,
- 1sc x 2,
- cc to light
- 1sc x 2,
- 2sc,
- 1sc x 4,
- 2sc (36)
Round 14
(1sc x 5, 2sc) x 6 (42)
Round 15
(1sc x 6, 2sc) x 6 (48)
Round 16
(1sc x 7, 2sc)x 6, cc to dark. (54)
Round 17
1sc x 39, cc to light, 1sc x 15 (54)
Round 18
1sc x 54 (54)
Round 19
1 sc x 54, cc to dark. (54)
Round 20 – 21
1sc x 39, cc to light, 1sc x 15 (54)
Round 22
1sc x 54 (54)

Round 23
1sc x 39, cc to light, 1sc x 15 (54)
Round 24
1sc x 54 (54)
Round 25 – 26
1sc x 39, cc to light, 1sc x 15 (54)
Round 27
1sc x 54 (54)
Round 28 – 29
1sc x 39, cc to light, 1sc x 15 (54)
Round 30
Put 1sc in the first seven stitches, then crochet the next two stitches together
(1sc x 7, sc2tog) x 6 (48)
Round 31
(1sc x 6, sc2tog) x 6, cc to dark (42)
Round 32
(1sc x 5, sc2tog) x 5, cc to light, 1sc x 5, sc2tog (36)
Round 33
(1sc x 4, sc2tog) x 6 (30)
Round 34
(1sc x 3, sc2tog) x 6, cc to dark. (24)
Round 35
(1sc x 2, sc2tog) x 6 (18)
Fill body with toy stuffing
Round 36
(1sc, sc2tog) x 6 (12)
Round 37
Sc2tog to close.
When complete, cut off a long tail of yarn and sew the crochet cat’s body close.
Place is safety to one side whilst you make up the other components.
Crochet Cat Head
Your crochet cat’s head will be entirely made in your light orange yarn. The dark orange will be added later to make stripes in the face section.
Round 1
Make a magic circle of 6 stitches. (6)
Round 2
Put two single crochets (2sc) into each stitch. (12)
Round 3
(1sc, 2sc) x 6 (18)
Round 4 – 5
1sc x 18 (18)
Round 6
(1sc x 2, 2sc) x 6 (24)
Round 7
(1sc x 3, 2sc) x 6 (30)
Round 8
(1sc x 4, 2sc) x 6 (36)
Round 9
(1sc x 5, 2sc) x 6 (42)
Round 10
(1sc x 6, 2sc) x 6 (48)
Round 11 – 13
1sc x 48 (48)
Round 14
(1sc x 6, sc2tog) x 6 (42)
Round 15
(1sc x 5, sc2tog) x 6 (36)
Round 16
(1sc x 4, sc2tog) x 6 (30)
Round 17
(1sc x 3, sc2tog) x 6 (24)
Round 18
(1sc x 2, sc2tog) x 6 (18)
Attach two safety eyes just above your cat’s muzzle
Round 19
(1sc, sc2tog) x 6 (12)
Fill the head with toy stuffing
Round 20
Sc2tog to close.
When complete, cut off a long tail of yarn and sew the crochet cat’s head close.
You will now add the facial features using your yarn needle.
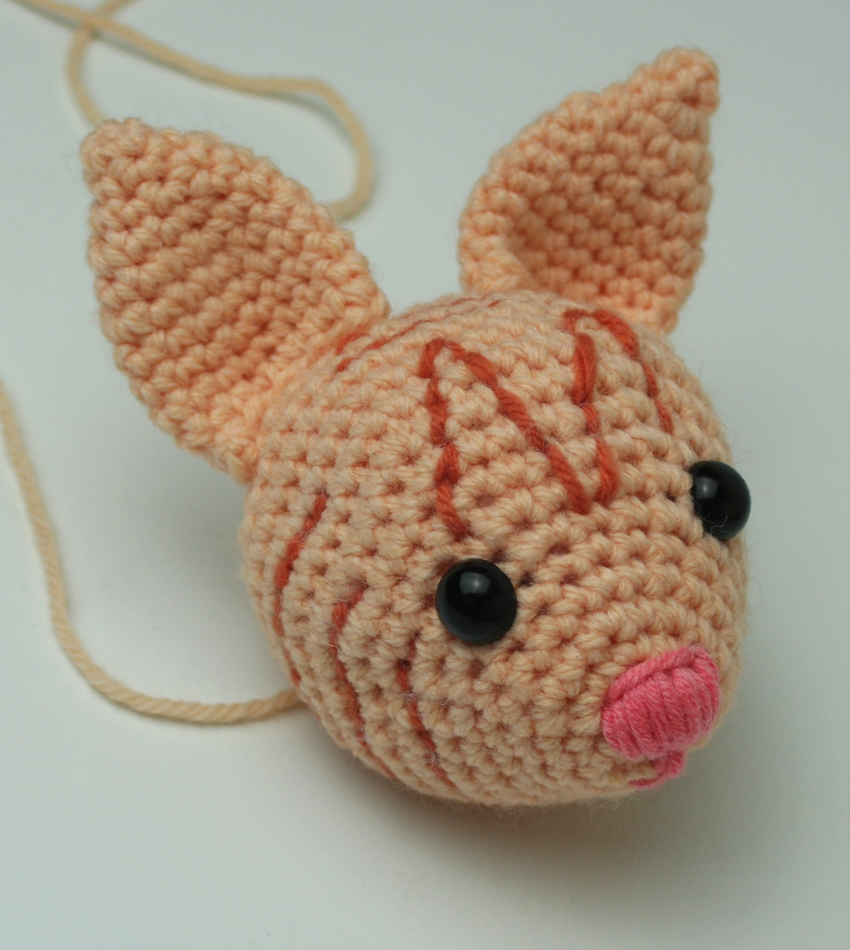
Amigurumi Cat Face
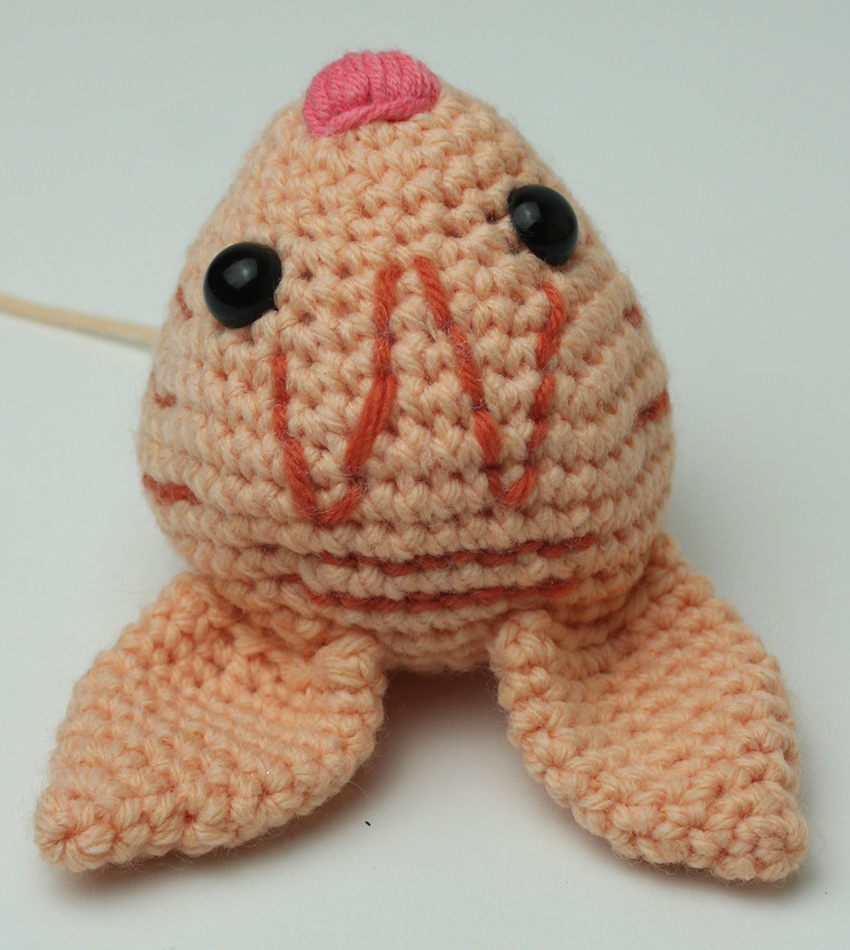
Your crochet cat needs to have ginger stripes on his cheeks and forehead, a ginger ‘M’ above his eyes and a pink nose.
Using your yarn needle and pink yarn, begin by sewing the nose. Make a triangle around the point of the starting magic circle and sewing back and forth fill it in with lines of stitches.
Make the ‘M’ in your dark orange yarn. Sew back and forth through each stitch to make a vertical line above the centre of each eye, then join them in a deep ‘V’ between.
For the stripes simple follow around the stitch lines twice just above the ‘M’ (below the point that you will attach the ears, and twice on each cheek as shown.
When you have finished, but your crochet cat head safety to the side with your body and move onto the next segments.
Crochet Cat Ears
Your crochet cat ears will be made using your light orange yarn only.
Make two ears following the instructions below.
Round 1
Make a magic circle of four stitches. (4)
Round 2
1sc x 4 (4)
Round 3
2sc x 4 (8)
Round 4
(1sc, 2sc) x 4 (12)
Round 5
1sc x 12 (12)
Round 6
(1sc x 2, 2sc) x 4 (16)
Round 7 – 10
1sc x 16 (16)
Round 11
(1sc x 3, 2sc) x 4 (20)
At the end of the round, cut a long tail of yarn and press your shape flat. Using your needle sew the ear closed along the bottom edge.
You can then position them on your cats head just above the ginger forehead stripes and sew them in place.
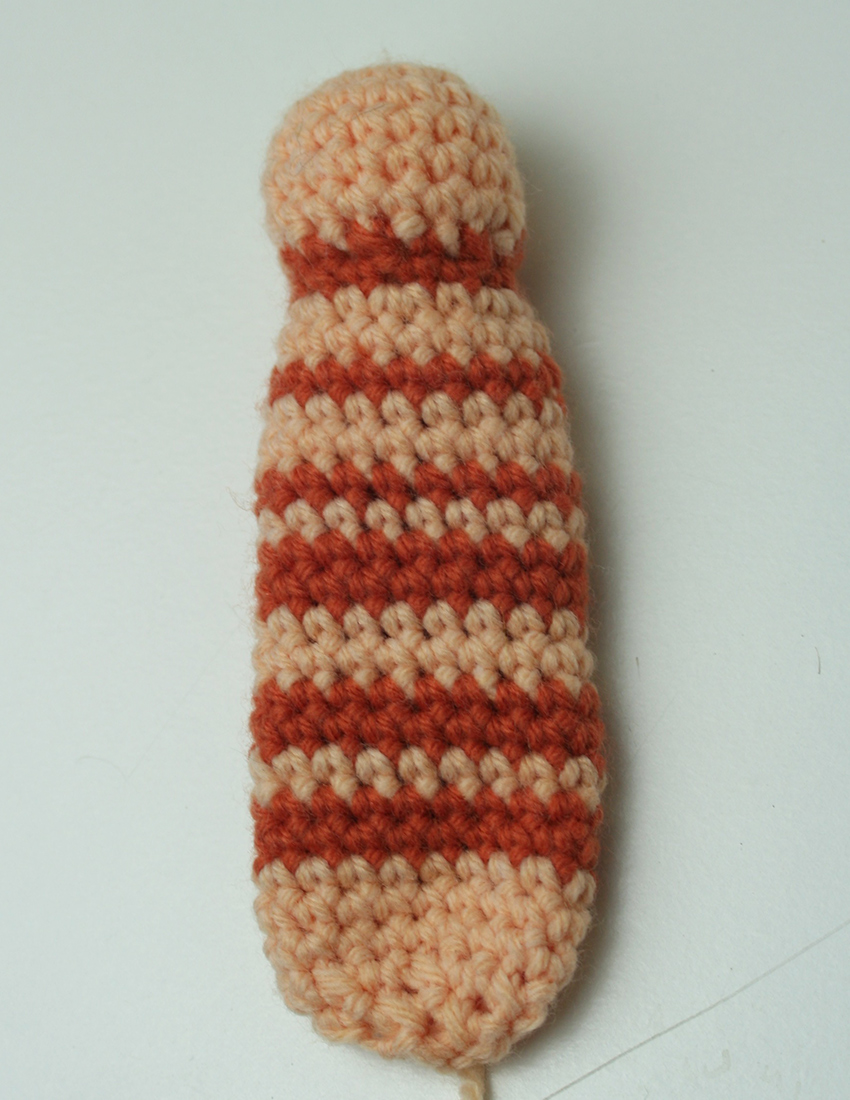
Crochet Cat Arms
The pattern for your crochet cat’s ‘arms’ and legs are different. Make two of the following, beginning in your pale orange yarn.
Round 1
Make a magic circle of 6 stitches. (6)
Round 2
Put two single crochets (2sc) into each stitch. (12)
Round 3
(1sc, 2sc) x 6 (18)
Round 4 – 6
1sc x 18 (18)
Round 7
(1sc, sc2tog) x 6 (12)
Round 8
1sc x 12 (12)
Round 9
(1sc, 2sc) x 6, cc to dark. (18)
Round 10
1sc x 18, cc to light (18)
Round 11 – 13
1sc x 18, cc to dark. (18)
Round 14 – 15
1sc x 18, cc to light. (18)
Round 16 – 17
1sc x 18, cc to dark. (18)
Round 18
1sc x 18, cc to light. (18)
Round 19
1sc x 18, cc to dark. (18)
Round 20 – 21
1sc x 18, cc to light. (18)
Round 22
1sc x 18 (18)
Stuff the hand only
Round 23
(1sc, sc2tog) x 6 (12)
Round 24
Sc2tog to close.
When complete, cut off a long tail of yarn and sew the crochet cat’s arms closed.
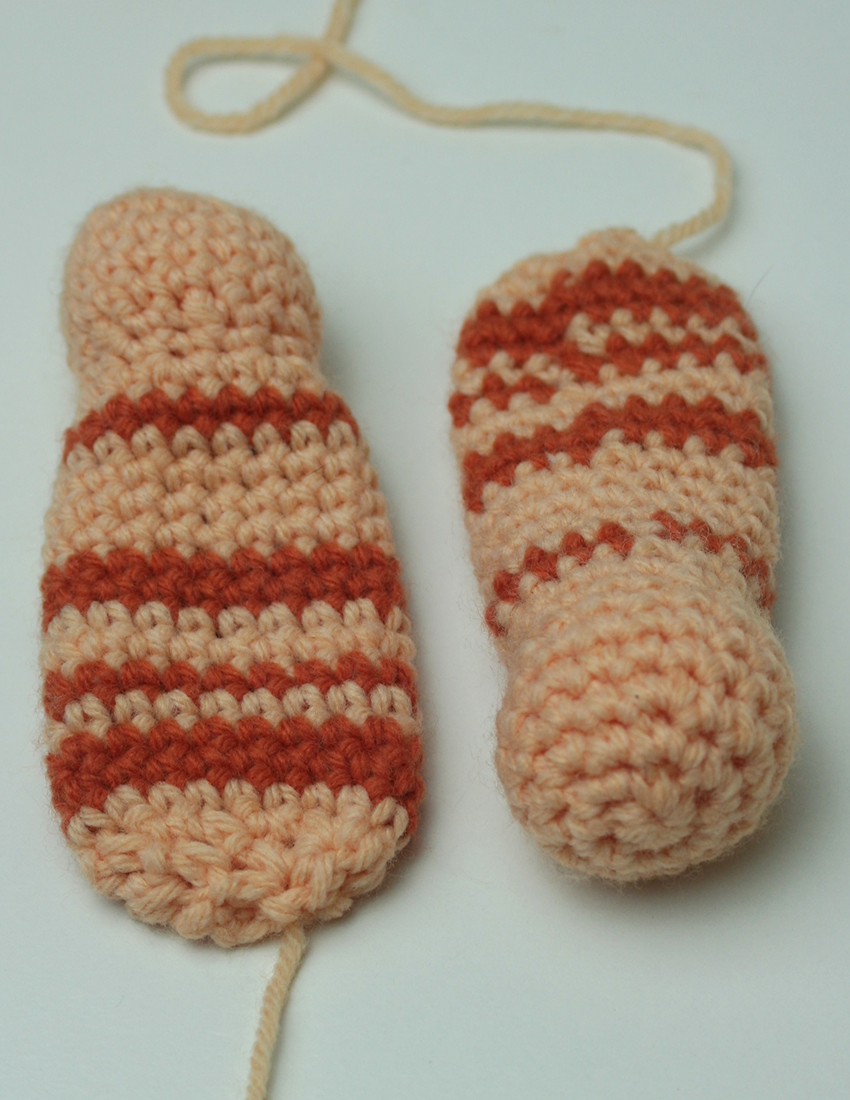
Crochet Cat Legs
Begin making your two crochet cat legs in pale orange yarn.
Round 1
Make a magic circle of 6 stitches. (6)
Round 2
Put two single crochets (2sc) into each stitch. (12)
Round 3
(1sc, 2sc) x 6 (18)
Round 4 – 6
1sc x 18, cc to dark. (18)
Round 7
(1sc, sc2tog) x 6 (12)
Round 8
1sc x 12, cc to light. (12)
Round 9
(1sc, 2sc) x 6 (18)
Round 10
1sc x 18, cc to dark (18)
Round 11
1sc x 18, cc to light. (18)
Round 12 -13
1sc x 18, cc to dark. (18)
Round 14
1sc x 18, cc to light. (18)
Round 15
1sc x 18, cc to dark. (18)
Round 16 – 17
1sc x 18, cc to light. (18)
Round 18 -19
1sc x 18, cc to dark. (18)
Round 20 – 22
1sc x 18, cc to light. (18)
Round 23
1sc x 18, cc to dark (18)
Round 24 – 25
1sc x 18, cc to light. (18)
Round 26 -28
1sc x 18. (18)
Stuff the foot only
Round 29
(1sc, sc2tog) x 6 (12)
Round 30
Sc2tog to close.
When complete, cut off a long tail of yarn and sew the crochet cat’s legs closed.
Crocheting Your Cat’s Tail
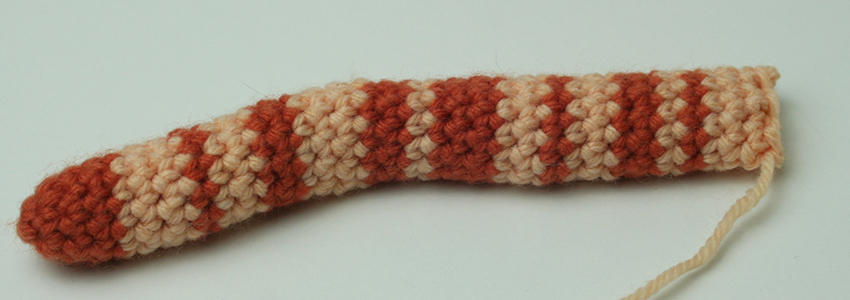
Your crochet cat tail will begin with your dark orange yarn.
Round 1
Make a magic circle of five stitches. (5)
Round 2
2sc x 5 (10)
Round 3 – 4
1sc x 10 (10)
Round 5
1sc x 10, cc to light. (10)
Round 6 – 7
1sc x 10, cc to dark. (10)
Round 8 – 9
1sc x 10, cc to light. (10)
Round 10 – 12
1sc x 10, cc to dark. (10)
Round 13 – 14
1sc x 10, cc to light. (10)
Round 15
1sc x 10, cc to dark. (10)
Round 16 – 18
1sc x 10, cc to light. (10)
Round 19 -20
1sc x 10, cc to dark. (10)
Round 21
1sc x 10, cc to light. (10)
Round 22 – 23
1sc x 10, cc to dark. (10)
Round 24 – 25
1sc x 10, cc to light. (10)
Round 26
1sc x 10, cc to dark. (10)
Round 27
1sc x 10, cc to light. (10)
Round 28 – 30
1sc x 10 (10)
Tie off and cut a long tail of yarn for sewing in later. Insert a pipe cleaner through the tail, twisting the ends together to avoid a sharp point. (If you don’t have a pipe cleaner, then simply fill with toy stuffing, using the end of your hook to push it right in to the tip.) Sew the end closed along a flat line.
Sewing Your Crochet Cat Together
You are now ready to join your crochet cat together! Lay out all the pieces of your crochet cat.
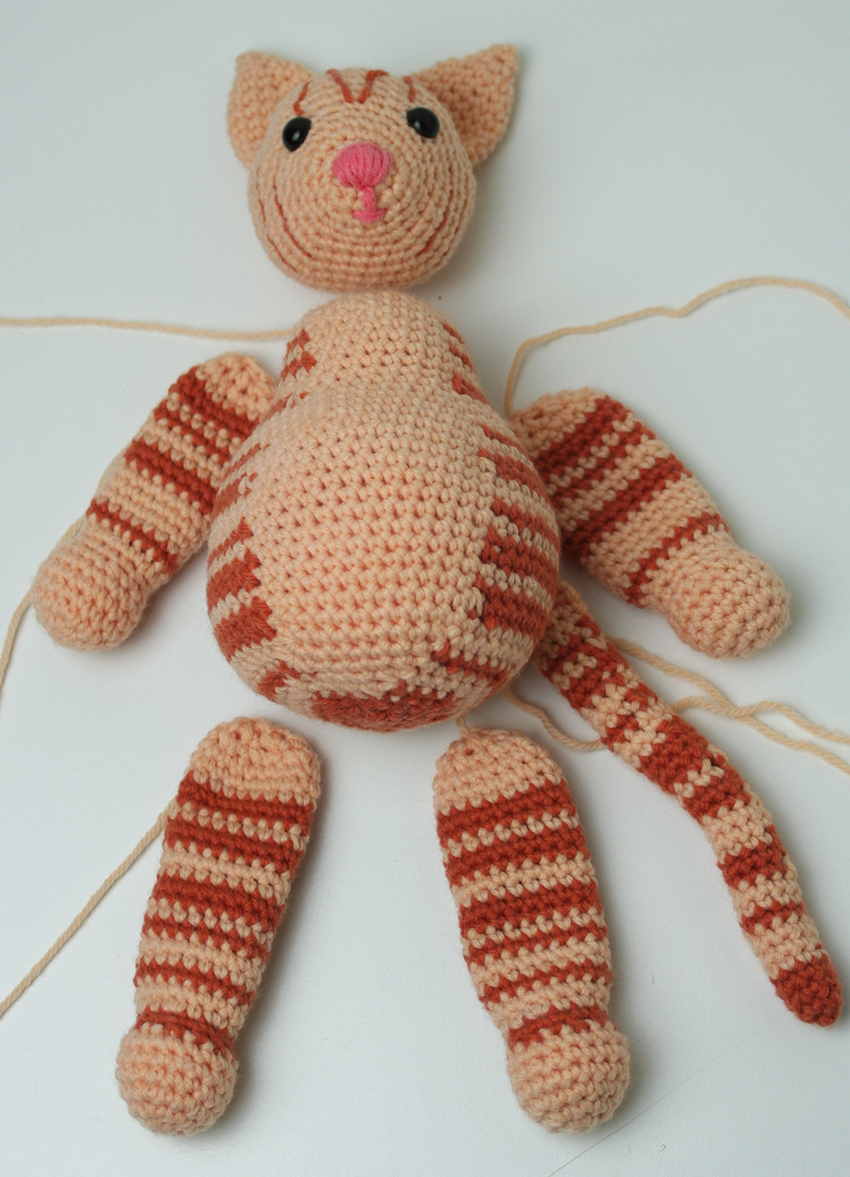
You should have:
- 1 head (with ears attached and features sewn)
- 1 body
- 2 legs
- 2 arms
- 1 tail
Begin by attaching the head to the body. Thread the yarn needle with the yarn tail that is coming out the back of his head, and sew through the head to the bottom, where the neck would join. From this point sew in tight increasing circles from the magic circle point of the body outwards.
Sew each arm onto the top of the body, near the head. Sew around the shoulder joint only, and sew through stitches of the corresponding color to disguise the join.
Tilt them slightly so that the arms are pointing forwards. Attach the legs under the bottom of the body, where you finished this piece.
Point each one out at an angle to correspond with the pale chest of the crochet kitten.
Finally sit your cat up, and join the tail at the back. Sew only around the bottom, to allow your bendy pipe cleaner tail to be positioned how you would like.
Lose your excess yarn tails in the body when you are done!
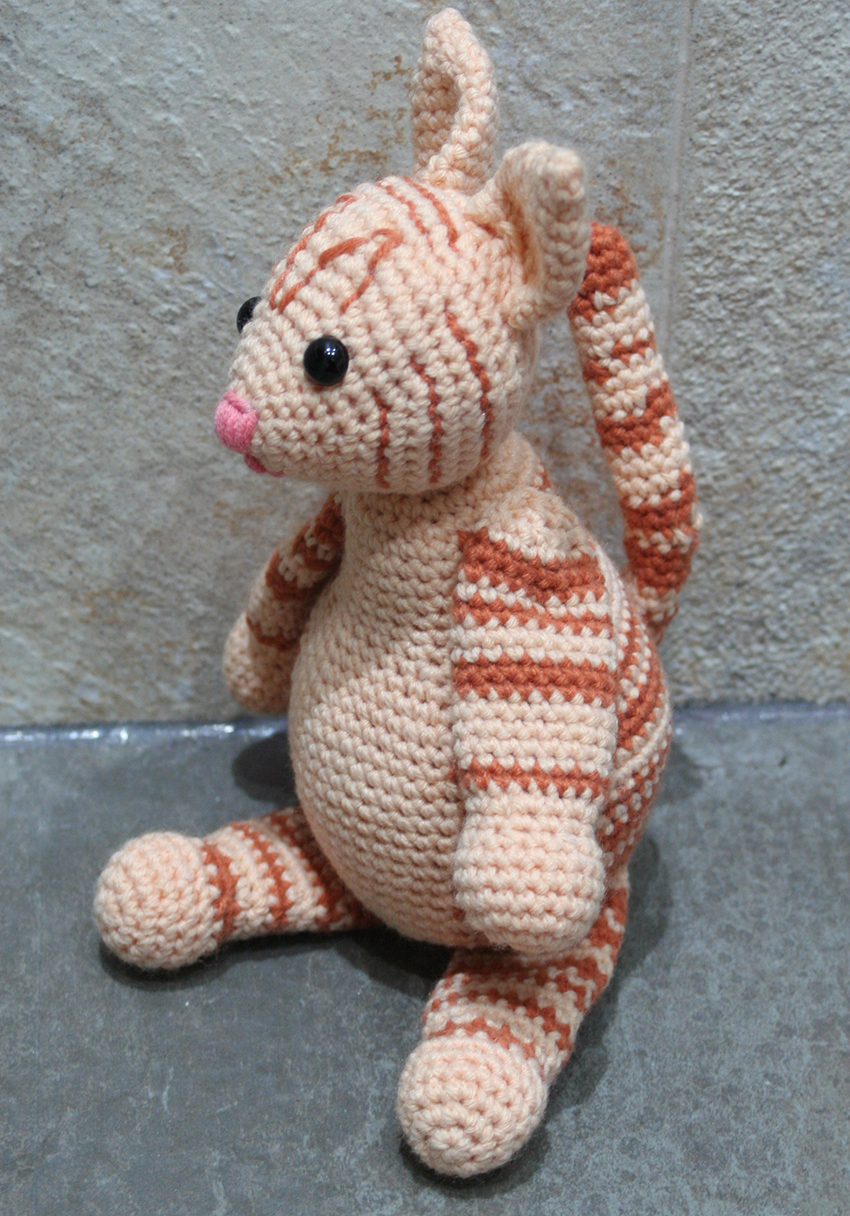
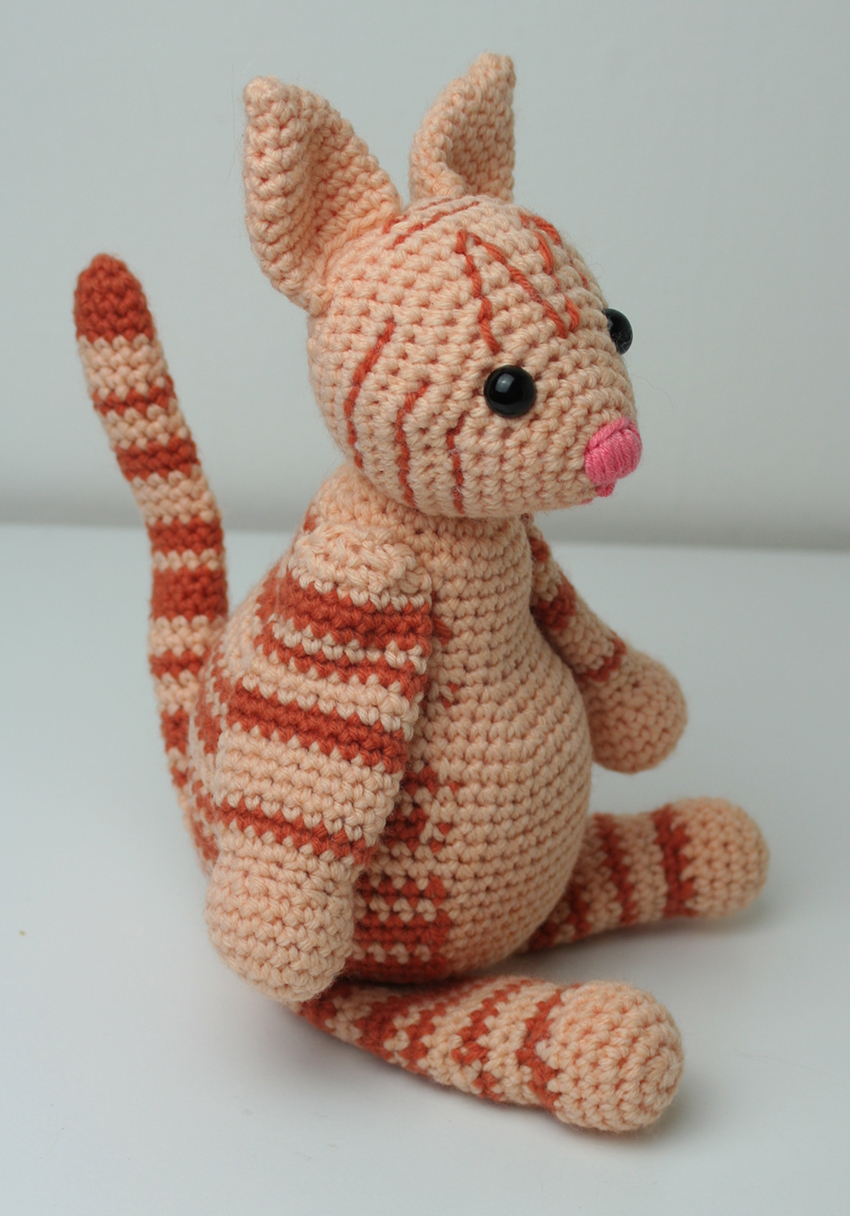
Your Amigurumi Ginger Cat
I really hope you enjoy making this crochet cat as much as I did. When you have finished, why not share a picture of him on my Facebook page here, or let me know how you got along in the comments section below.
Happy Crocheting!
Lucy Kate, x
*The products linked in this pattern were carefully selected by Lucy Kate Crochet. If you decide to purchase using the links provided, we may earn a small commission on that sale. This is at no extra cost to you.
Thank you for the cat instructions. I appreciate the pattern.