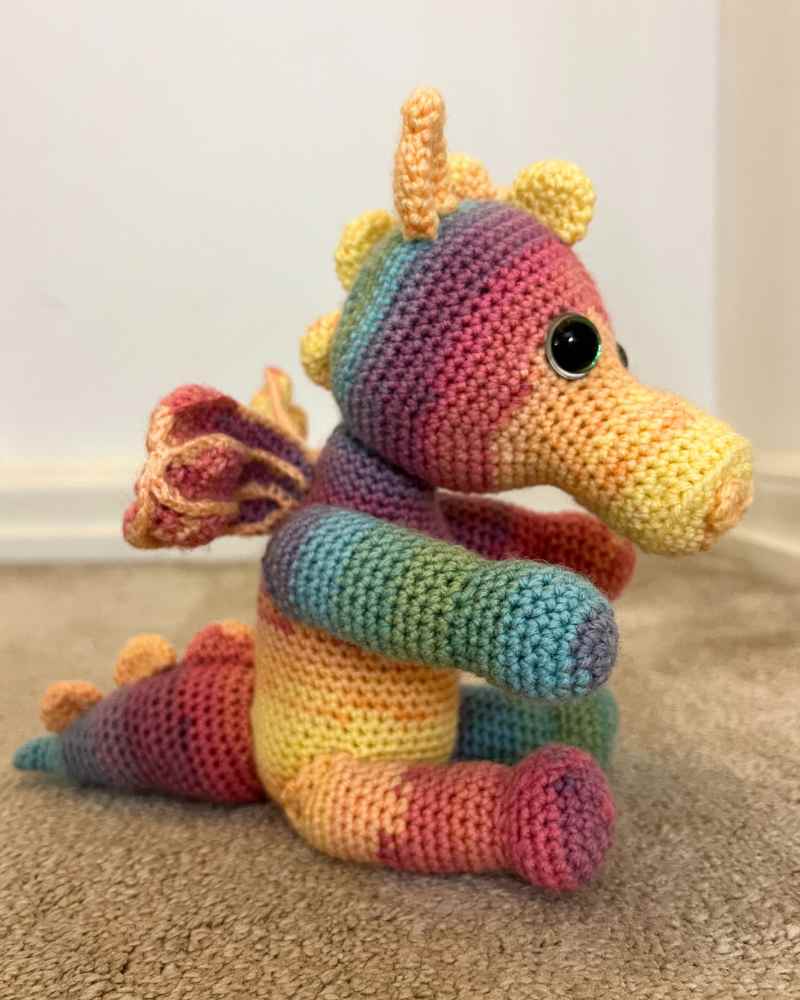
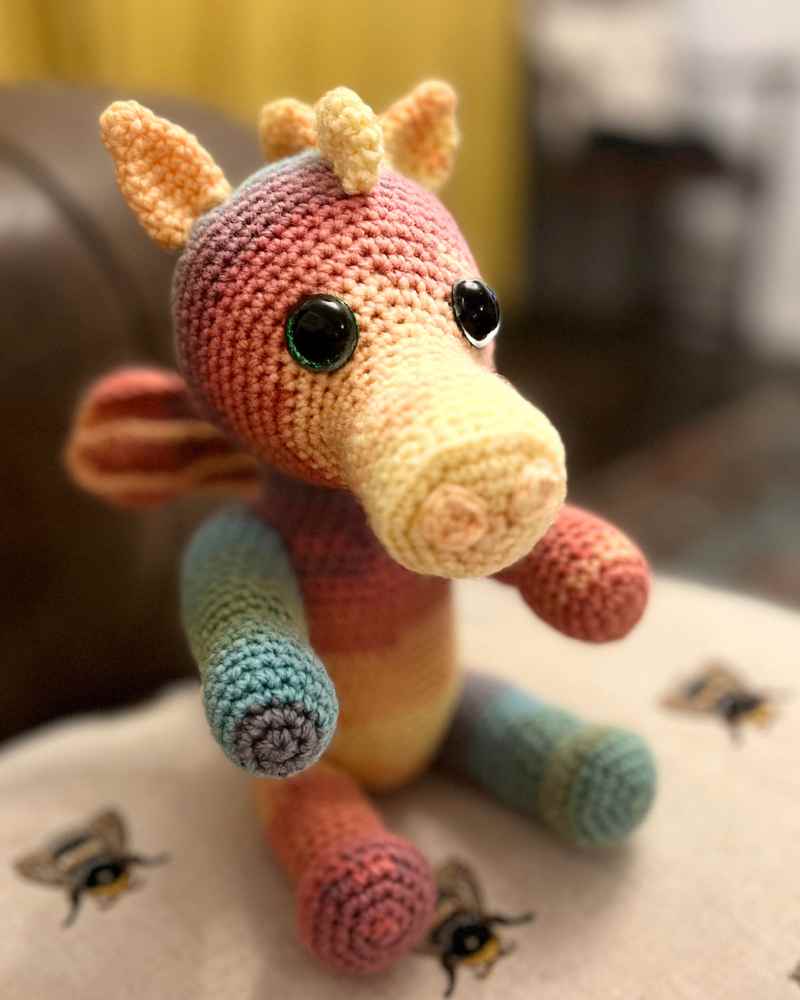
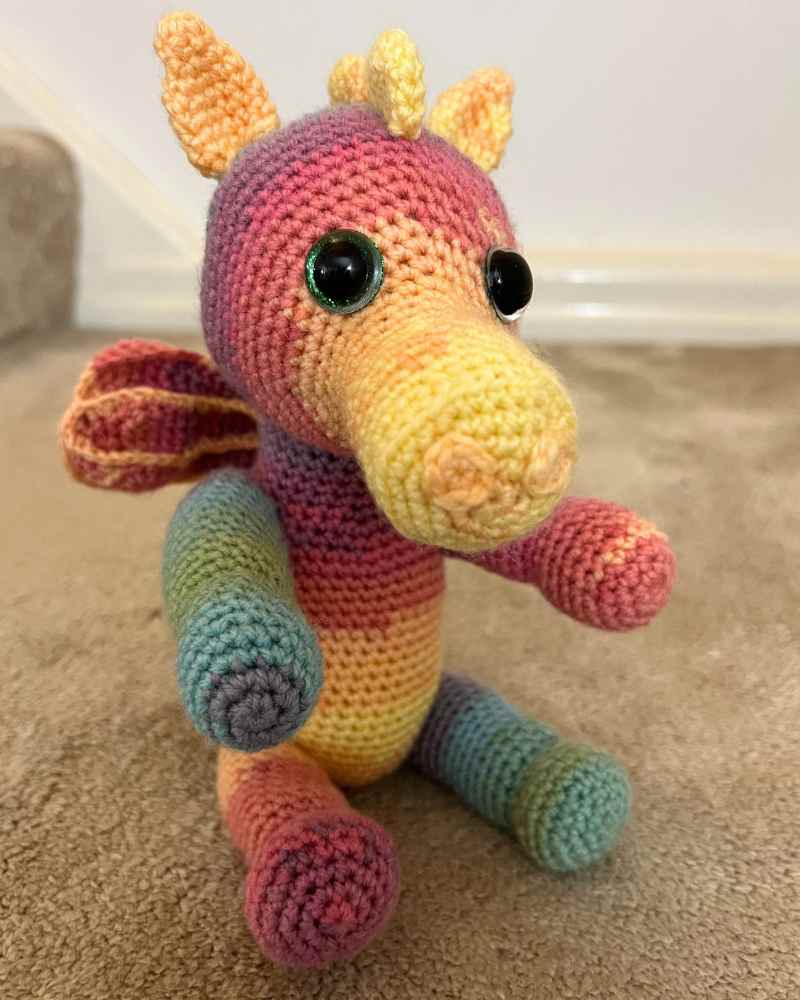
Crochet Rainbow Dragon – Free Pattern
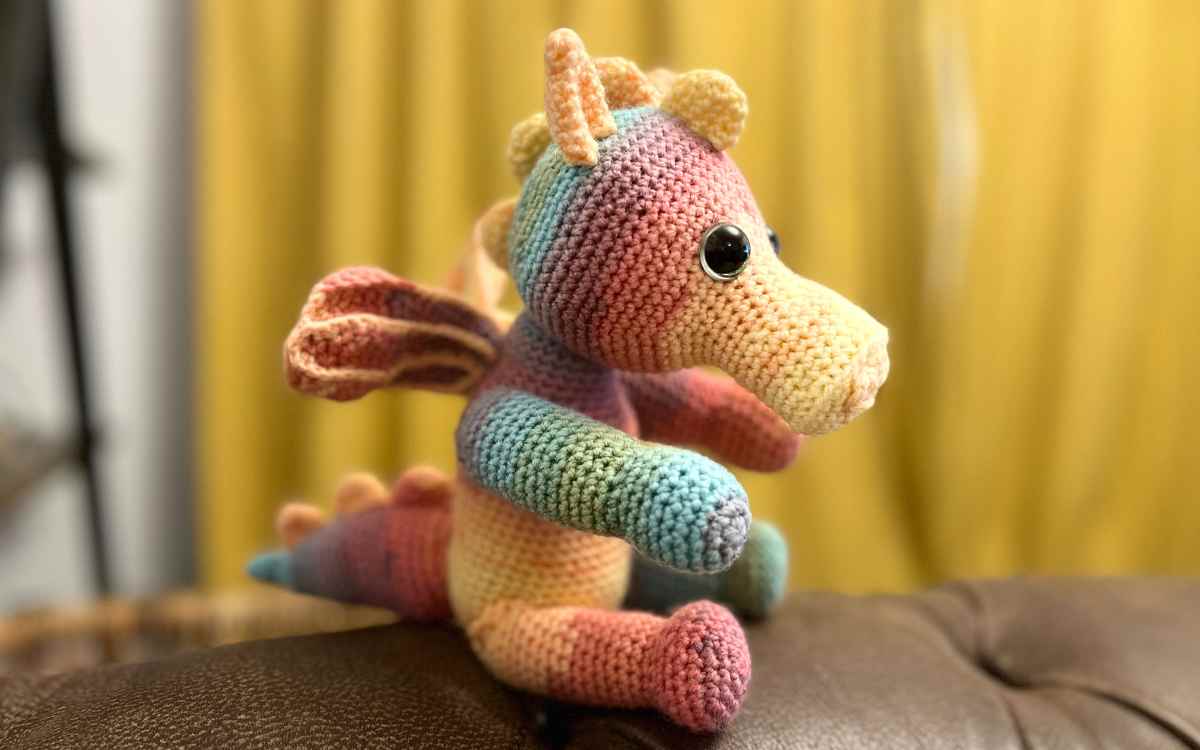
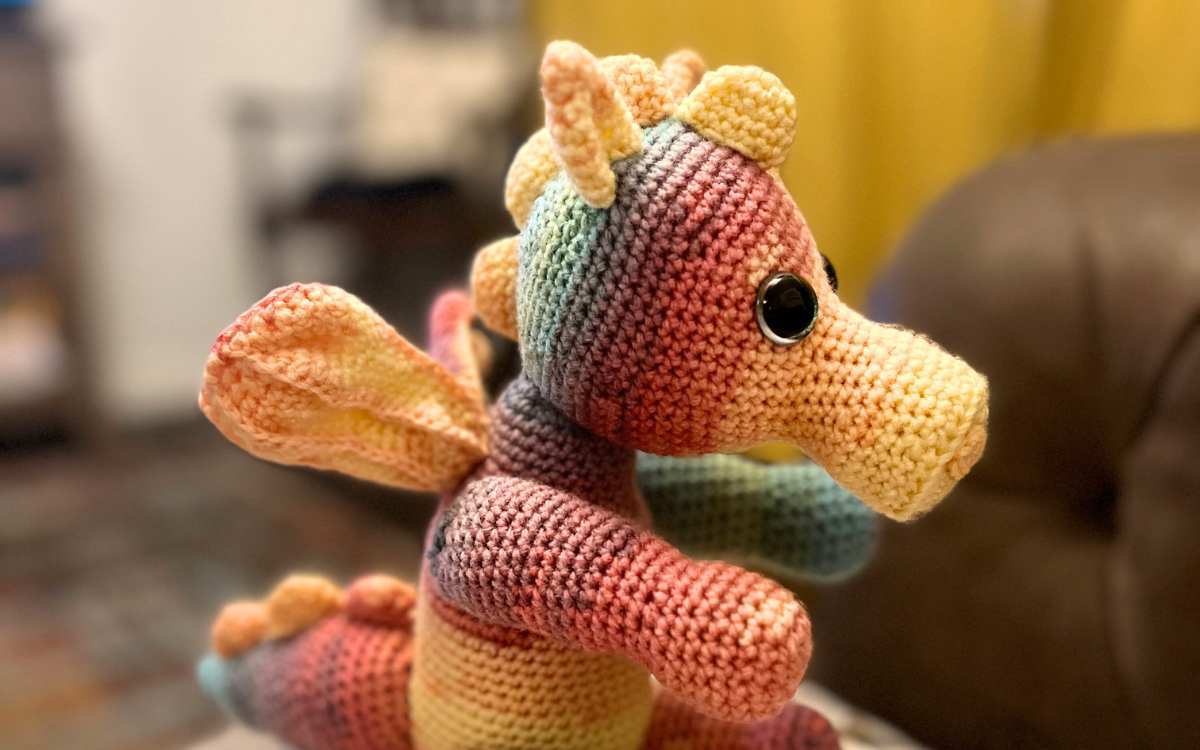
My free crochet rainbow dragon pattern is cute, quirky and comes with clear instructions that any level of crocheting experience can happily work with. There are no color changes in this rainbow crochet pattern, it’s just made up using a fun, brightly colored variegated yarn.
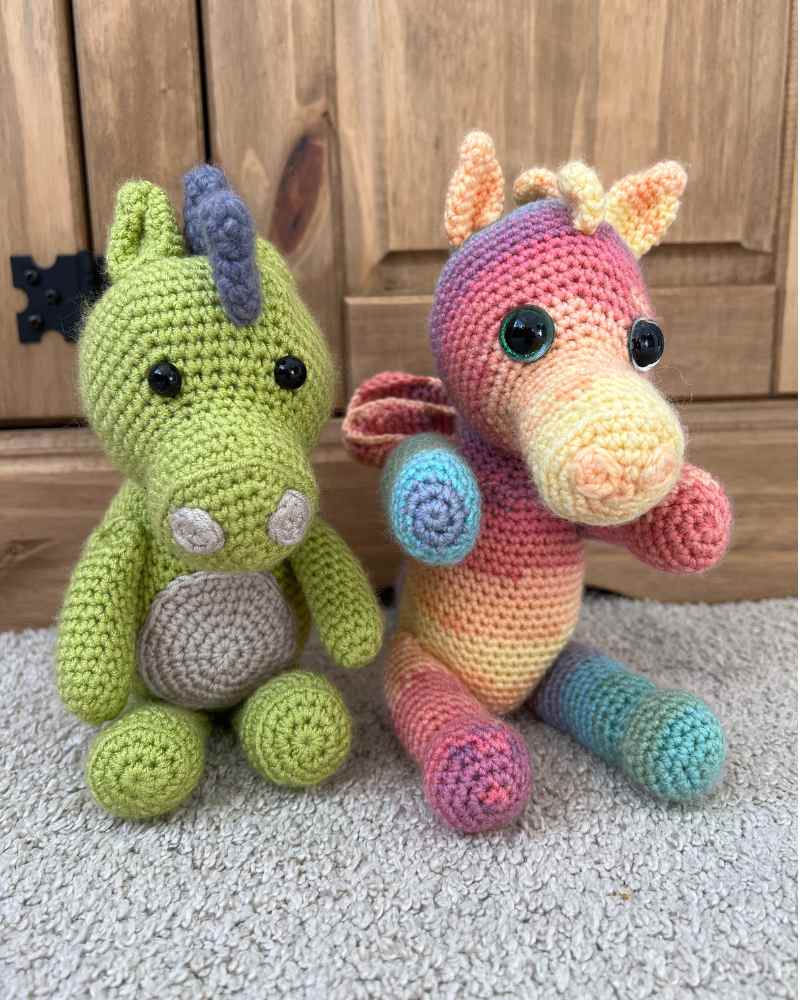
I have designed a crochet dragon previously, but it was a long time ago and a rather different design. This photo shows the rainbow dragon I made for my son this week, and the green crochet dragon I made for my daughter several years ago. I’ve got to say, it’s stood the test of time though!
Your Equipment List
Here’s what you’ll need to make your own crochet rainbow dragon:
- 100g Hayfield Spirit DK yarn in rainbow* (0408)
- 3.75mm crochet hook
- Safety eyes*
- Toy safe stuffing*
- 2.25mm crochet hook (for surface crocheting)
I only used one type of yarn for this pattern, and it was Hayfield Spirit DK yarn in the rainbow variegated shades. I highly recommend picking the same one for this pattern if you can, because it was so nice to work with. It didn’t split at all, and the dye dipping is done in such a way that it gives lovely gradual transitions in colors.
Helpful Pattern Notes
My crochet rainbow dragon pattern is worked in rounds from magic circles. You’ll find crochet abbreviations used in the pattern, but I’ll explain each one the first time it comes up for those who aren’t familiar with the terms.
I also used the surface crocheting technique to give detail to the wings. The amigurumi dragon is hand sewn together to finish.
Free Crochet Rainbow Dragon Pattern
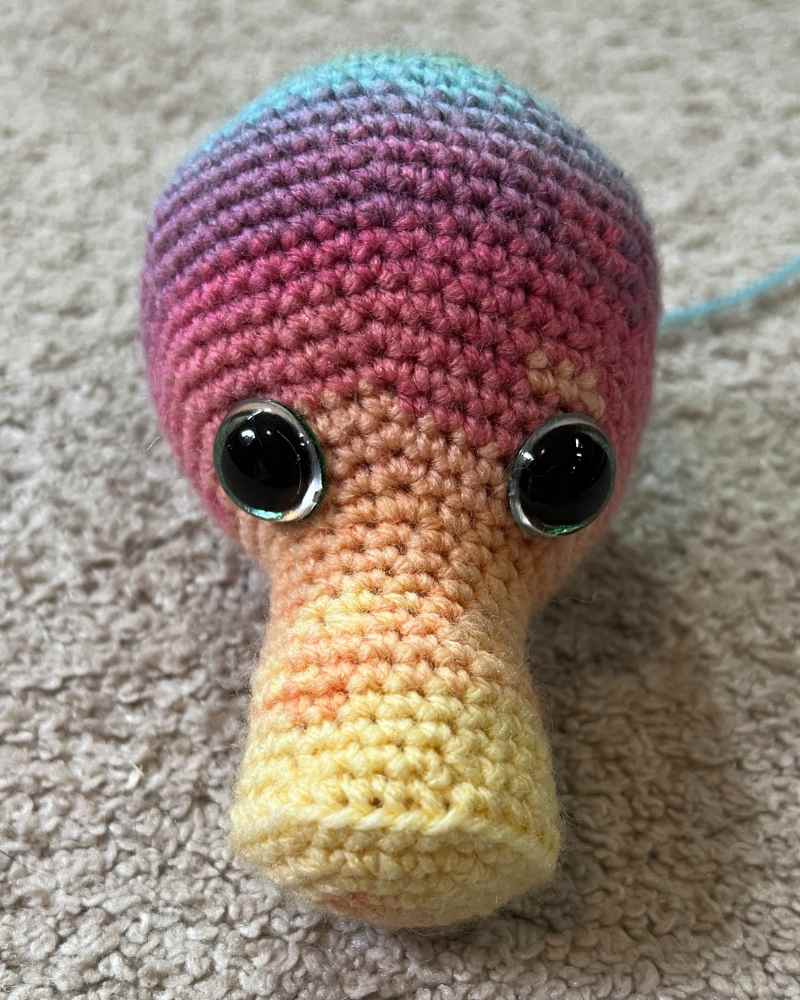
We’ll start this pattern with the head. Have your safety eyes and toy stuffing ready.
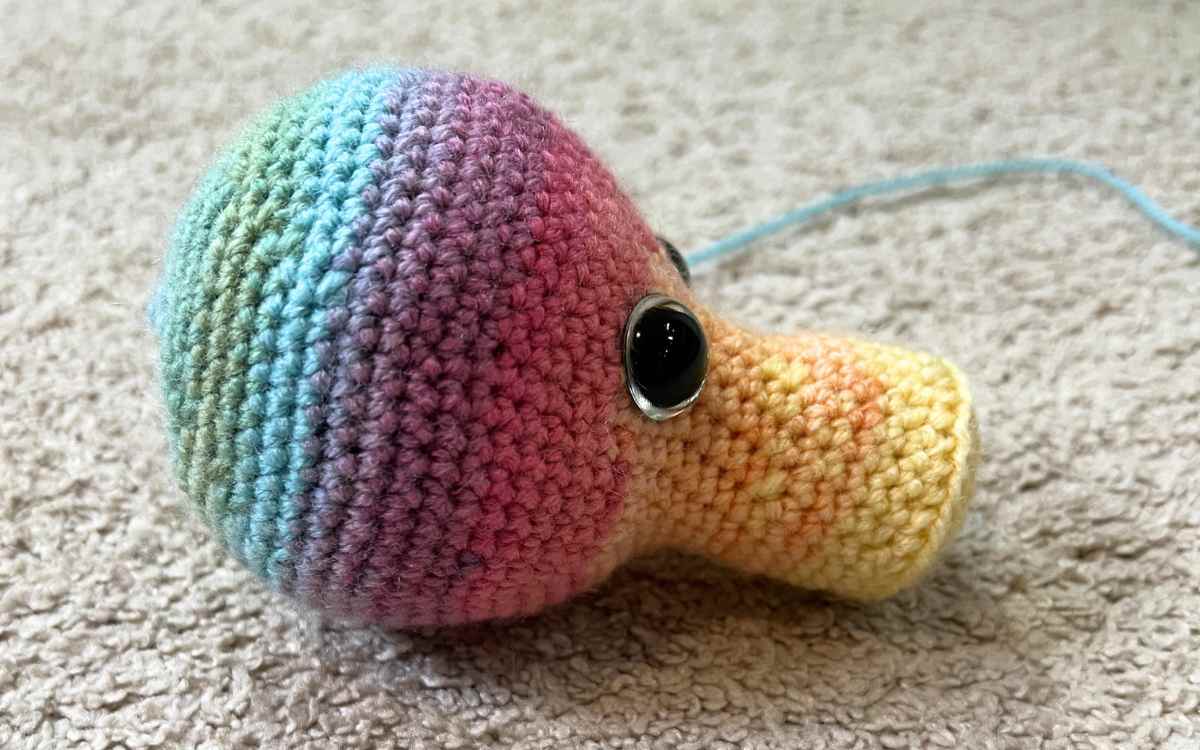
Crochet Rainbow Dragon’s Head
Begin with your 3.75mm crochet hook and rainbow DK yarn.
Round 1
Make a magic circle of six stitches (6)
Round 2
Make two single crochets into each stitch of the round, doubling the total.
2sc x 6 (12)
Round 3
Put one single crochet into the first stitch, and two single crochets into the next one. Repeat for the duration of the round.
(1sc, 2sc) x 6 (18)
Round 4
(1sc x 2, 2sc) x 6 (24)
Round 5
(1sc x 3, 2sc) x 6 (30)
Round 6
1sc into the back loop only (BLO) of each stitch. (30)
Round 7
Make one single crochet into the first three stitches, then crochet the next two stitches together. Repeat for the length of the round.
(1sc x 3, sc2tog) x 6 (24)
Round 8 – 11
1sc x 24 (24)
Round 12
(1sc x 2, sc2tog) x 6 (18)
Round 13 – 16
1sc x 18 (18)
Round 17
(1sc x 2, 2sc) x 6 (24)
Round 18
(1sc x 3, 2sc) x 6 (30)
Round 19
(1sc x 4, 2sc) x 6 (36)
Round 20
1sc x 36 (36)
Round 21
(1sc x 5, 2sc) x 6 (42)
Round 22
(1sc x 6, 2sc) x 6 (48)
Round 23 – 25
1sc x 48 (48)
Round 26
(1sc x 7, 2sc) x 6 (54)
Round 27
(1sc x 8, 2sc) x 6 (60)
Round 28 – 30
1sc x 60 (60)
Round 31
(1sc x 8, sc2tog) x 6 (54)
Round 32
1sc x 54 (54)
Round 33
(1sc x 7, sc2tog) x 6 (48)
Round 34
(1sc x 6, sc2tog) x 6 (42)
Round 35
1sc x 42 (42)
Round 36
(1sc x 5, sc2tog) x 6 (36)
Round 37
(1sc x 4, sc2tog) x 6 (30)
Round 38
1sc x 30 (30)
Round 39
(1sc x 3, sc2tog) x 6 (24)
Round 40
(1sc x 2, sc2tog) x 6 (18)
Insert the safety eyes above the muzzle, and fill the head with toy stuffing.
Round 41
(1sc, sc2tog) x 6 (12)
Round 42
sc2tog to close. Weave the tail of the yarn back into the body to disguise it.
Crochet Rainbow Dragon’s Body
You’ll be working this section with your rainbow yarn and 3.75mm crochet hook.

Round 1
Make a magic circle of six stitches (6)
Round 2
2sc x 6 (12)
Round 3
(1sc, 2sc) x 6 (18)
Round 4
(1sc x 2, 2sc) x 6 (24)
Round 5 – 11
1sc x 24 (24)
Round 12
(1sc x 3, 2sc) x 6 (30)
Round 13
(1sc x 4, 2sc) x 6 (36)
Round 14
1sc x 36 (36)
Round 15
(1sc x 5, 2sc) x 6 (42)
Round 16 – 35
1sc x 42 (42)
Round 36
(1sc x 5, sc2tog) x 6 (36)
Round 37
(1sc x 4, sc2tog) x 6 (30)
Round 38
(1sc x 3, sc2tog) x 6 (24)
Round 39
(1sc x 2, sc2tog) x 6 (18)
Fill the body with toy safe stuffing.
Round 40
(1sc, sc2tog) x 6 (12)
Round 41
sc2tog to close. Tie off and weave the long tail into the body to hide it.
Crocheting The Rainbow Dragon Tail
Again you’ll be using the 3.75mm crochet hook and rainbow yarn.
Round 1
Make a magic circle of eight stitches (8)
Round 2
2sc x 8 (16)
Round 3
(1sc, 2sc) x 8 (24)
Round 4
(1sc x 2, 2sc) x 8 (32)
Round 5 – 10
1sc x 32 (32)
Round 11
(1sc x 2, sc2tog) x 8 (24)
Round 12 – 16
1sc x 24 (24)
Round 17
(1sc, sc2tog) x 8 (16)
Round 18 – 22
1sc x 16 (16)
Round 23
sc2tog x 6 (8)
Fill with toy safe stuffing.
Round 24 – 26
1sc x 8 (8)
Round 27
sc2tog to close. Leave a long tail of yarn, to sew the tail onto the back of your dragon.
Crochet Rainbow Dragon’s Legs
The dragon’s legs and arms are slightly different, so in this section just make two back legs.

Round 1
Make a magic circle of six stitches (6)
Round 2
2sc x 6 (12)
Round 3
(1sc, 2sc) x 6 (18)
Round 4
(1sc x 2, 2sc) x 6 (24)
Round 5 – 6
1sc x 24 (24)
Round 7
(1sc x 2, sc2tog) x 6 (18)
Round 8
1sc x 18 (18)
Round 9
(1sc, sc2tog) x 6 (12)
Round 10
(1sc, 2sc) x 6 (18)
Round 11 – 25
1sc x 18 (18)
Fill with toy safe stuffing, leaving the end couple of rounds empty.
Round 26
(1sc, sc2tog) x 6 (12)
Round 27
sc2tog to close.
Crocheting Your Rainbow Dragon’s Arms
Your crochet rainbow dragon’s arms will be similar to the legs, but with a longer hand section.
Round 1
Make a magic circle of six stitches (6)
Round 2
2sc x 6 (12)
Round 3
(1sc, 2sc) x 6 (18)
Round 4 – 7
1sc x 18 (18)
Round 8
(1sc, sc2tog) x 6 (12)
Round 9
(1sc, 2sc) x 6 (18)
Round 10 – 25
1sc x 18 (18)
Fill with toy safe stuffing, leaving the end couple of rounds empty.
Round 26
(1sc, sc2tog) x 6 (12)
Round 27
sc2tog to close.
Crocheting The Dragon’s Ears
Use your rainbow yarn and 3.75mm crochet hook.
Round 1
Make a magic circle of six stitches (6)
Round 2
1sc x 6 (6)
Round 3
2sc x 6 (12)
Round 4 – 6
1sc x 12 (12)
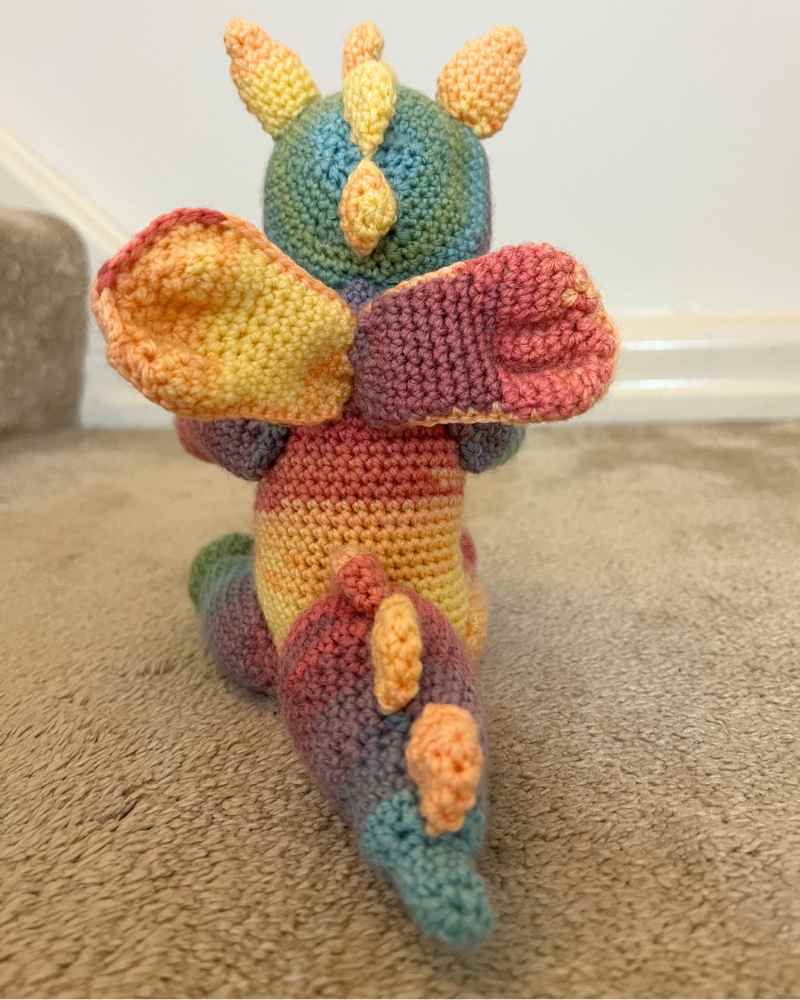
Rainbow Dragon Wings
Your dragon’s wings will be crocheted as a round, flattened out, and then the detail added with surface crocheting. Begin with the rainbow yarn and 3.75mm crochet hook.
Round 1
Make a magic circle of eight stitches (8)
Round 2
2sc x 8 (16)
Round 3 – 13
1sc x 16 (16)
Round 14
(1sc, 2sc) x 8 (24)
Round 15
(1sc x 2, 2sc) x 8 (32)
Round 16
(1sc x 3, 2sc) x 8 (40)
Round 17
1sc x 40 (40)
Round 18
(1sc x 3, sc2tog) x 8 (32)
Round 19
(1sc x 2, sc2tog) x 8 (24)
Round 20
(1sc, sc2tog) x 8 (16)
Round 21
sc2tog to close. Tie off and hide the loose thread within the wing.
Adding The Details
Flatten the wing in your hand, and cast onto your 2.25mm crochet hook. I use tiny hooks for surface crocheting as it’s easier to get into the existing stitches, but it can be more fiddly to work the yarn so if you want to size up slightly for this bit that’s fine too.
You are now going to first surface single crochet around the circumference of the wing, and then make two surface crocheted lines down the mid center. Tie off and hide the remaining train of thread within the wing.
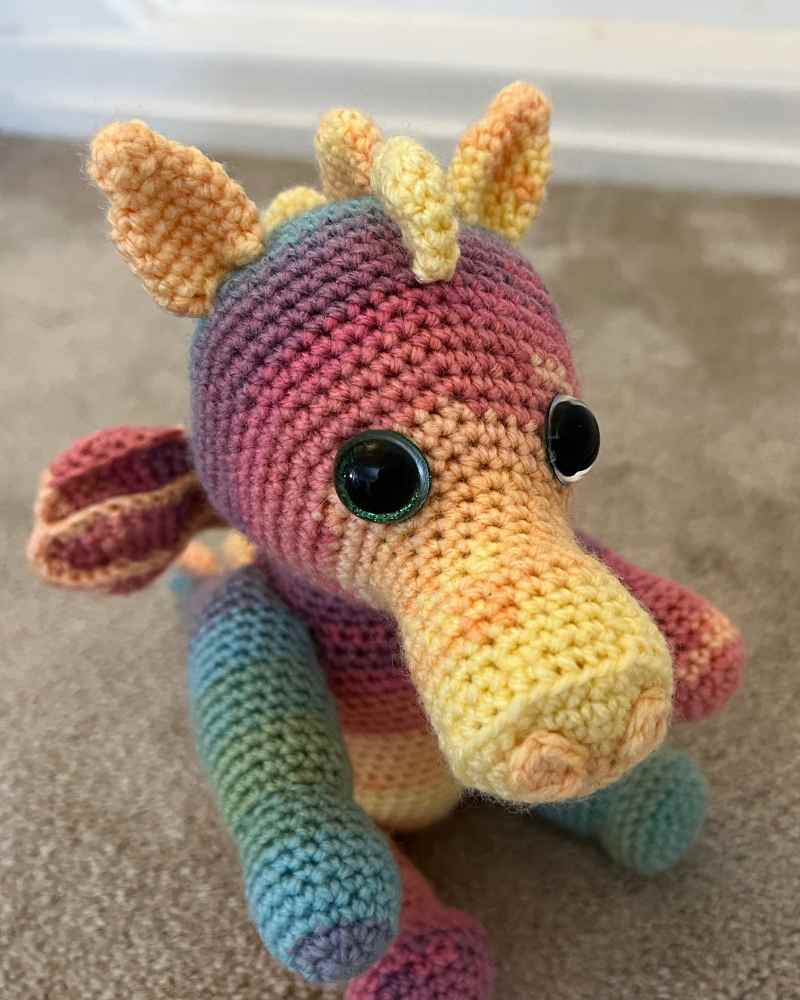
Crocheting Dragon Head Scales
You will need to make four scales for your dragon’s head.
Round 1
Make a magic circle of six stitches (6)
Round 2
2sc x 6 (12)
Round 3 – 5
1sc x 12 (12)
Creating The Tail Scales
We’ll add three scales to your dragon’s tail.
Round 1
Make a magic circle of six stitches (6)
Round 2
2sc x 6 (12)
Round 3 – 4
1sc x 12 (12)
The Nostrils
For the nostrils simply make magic circles of six stitches, and close them off. Use the tail yarn to sew them onto the front of the nose.
Sewing Your Rainbow Dragon Together
Set out the finished pieces on a flat surface in front of you. There should be the head, body, nostrils, ears, scales, arms, legs, wings and tail.
I usually begin sewing crochet plushies together from the top. So I’d start by attaching a long tail of yarn onto my yarn needle, and weaving in and out of the nostrils, placing them symmetrically on the flat end of the dragon’s nose.
Now weave the needle in and out of the base of the ears. Try to put them near the top of the head, and use the eye positions to help line them up. If you imagine the ears are a tall triangle, slightly pinch the base of the triangle to give that more ear-like slant.
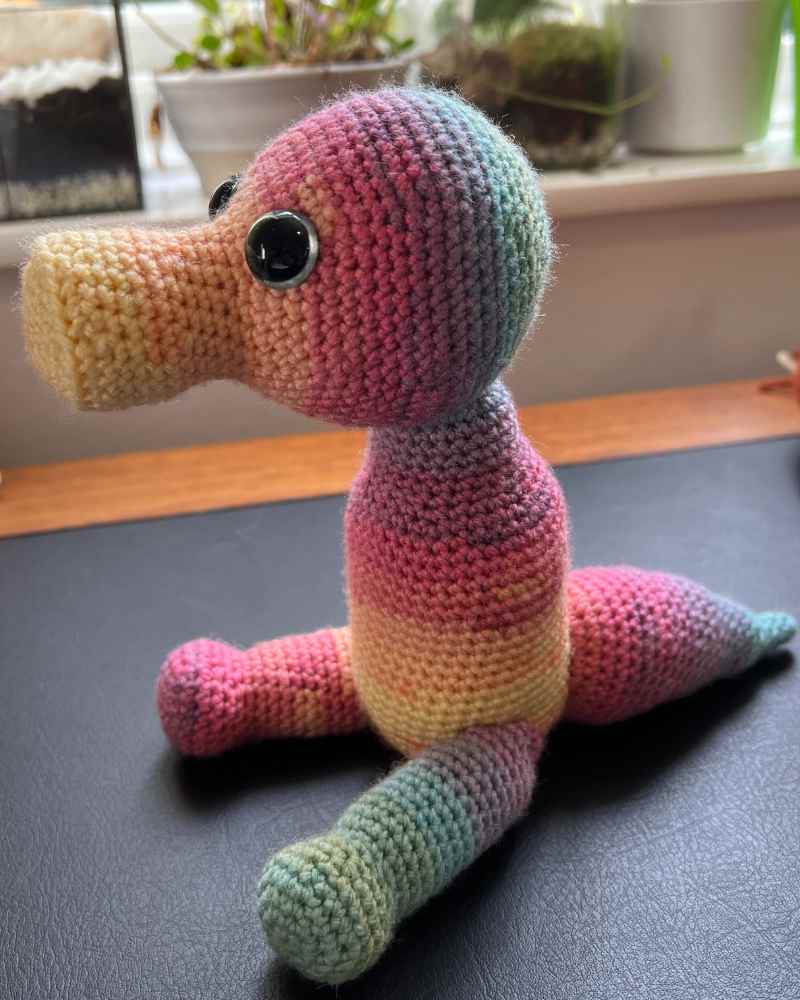
You can now use the same weaving stitches, to firmly attach the dragon’s head to the body. I like the look with the nose slightly tilted upwards, and the legs and arms are placed at the sides. Finally for the main part of the plushie, attach the tail at the back, securely sewing it on to enable the rainbow dragon to sit upright.
Finish off by sewing the scales down the middle of the head and tail.
My Crochet Rainbow Dragon Pattern
I made this crocheted dragon for my son’s birthday, which is in a few days time, but ended up giving it to him straight away. The perils of making something for someone in front of them, so that they see when it’s done.
I am glad I took some photos for this straight away, as it’s spent the last few nights sleeping underneath him in his bed. Whilst it’s still in one gorgeous piece, it’s rather flatter than it was to begin with.
Do remember if you are crocheting a toy for a young kid that under 3’s are really best supervised with handmade toys, as they can be a choke hazard and aren’t safety tested. I give my crochet toys to my children, but when giving them away to other families I do make a mental assessment of suitability before handing them over.
I hope you enjoyed making this cute crocheted dragon. Let me know what you think in the comments section below.
Happy Crocheting!
Lucy Kate, x