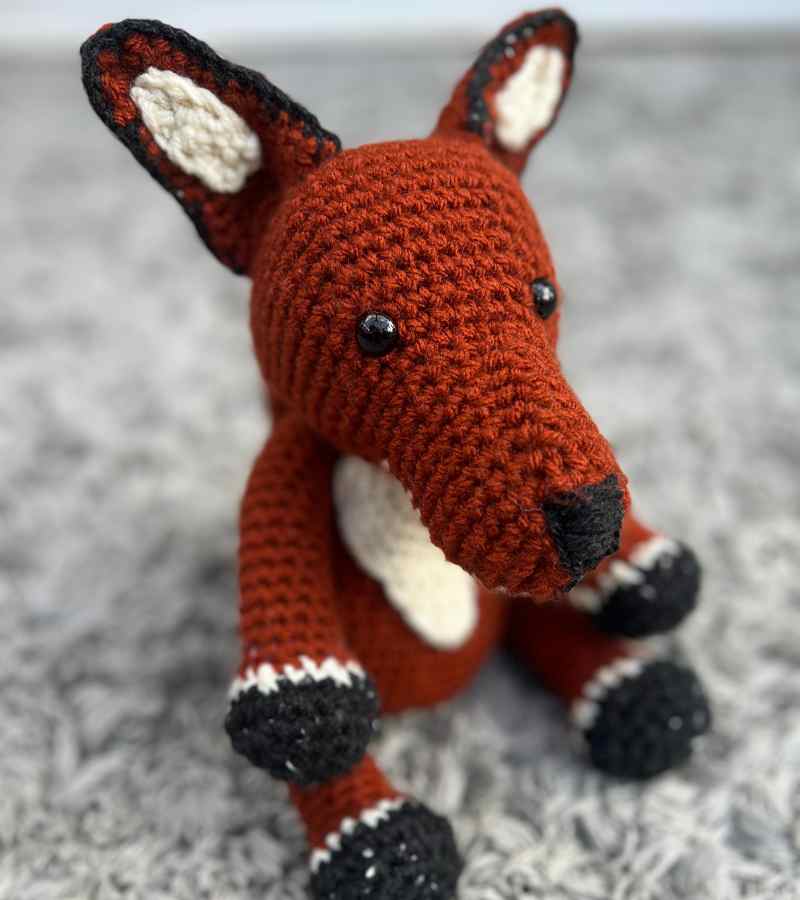
How To Crochet A Red Fox
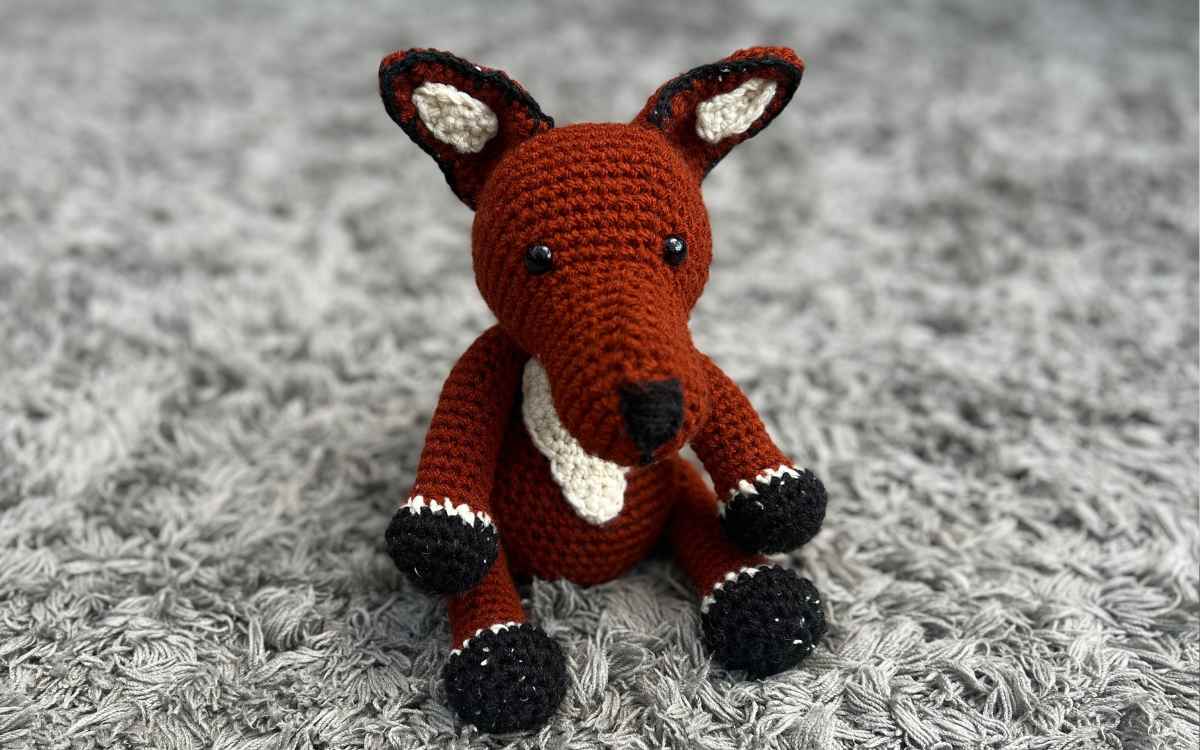
My free crochet fox pattern is suitable for beginners. I’ll give you simple instructions for hand sewing, color changes, surface crocheting and working some inconsistent increases from the magic circle.

I’ll walk you through each step, and explain each abbreviation the first time it comes up.
Crochet Fox Kit List
You’ll notice that this pattern uses two different weights of yarn. The bulk of the body’s red/orange yarn is chunky yarn that needs a 6mm hook. The white and black details are DK yarn, so you’ll need to work with two strands at a time if you want to use the same yarn types as me. Otherwise, grab yourself chunky white and black yarns too, and you’re good to go!
- 6mm crochet hook
- 3.5mm crochet hook
- 20g black DK yarn
- 200g chunky orange yarn
- 100g cream merino wool DK yarn – use in double strands
- Yarn needle
- Stitch markers
- Toy stuffing
- Safety eyes
The yarns I used were red Knitcraft by Hobbycraft Everyday Chunky yarn, cream Sublime Yarns Extra Fine Merino Wool DK yarn, and Patons UK Fab DK yarn in Charcoal.
Pattern Notes
The majority of my fox crochet pattern will be written using standard crochet abbreviations. However, I do try to put the plain English explanations first each time an abbreviation is used to help you out if it’s something you’ve not come across before. But here’s a quick list for you in the meantime:
- sc – single crochet
- 2sc – put to single crochets into the same stitch
- sc2tog – use one single crochet to join two stitches together
- ch – chain

Free Crochet Fox Pattern
Make sure you’ve got all the yarn types you’ll need ready before you begin. The small crochet hook will only be used for surface crocheting the details on the ears.
How To Crochet A Fox Head
You are going to start your crochet fox head in the red yarn using your 6mm crochet hook.

Round 1
Make a magic circle of six stitches (6)
Round 2
Make two single crochets into each stitch of the round
2sc x 6 (12)
Round 3
You are now going to make repeated color changes as we progress. These will make the white markings under your crochet fox’s chin.
Make one single crochet into the first stitch and two into the next. After each pair of these stitches, you’ll be swapping colors. I recommend not cutting off the yarn in between, just leave a loop that will be hidden within the finished crochet fox toy.
(1sc, 2sc) x 2, cc white (1sc, 2sc) x 2, cc red (1sc, 2sc) x 2 (18)
Slip stitch to close the circle
Round 4
Chain 2 as the first single crochet. Then repeat your previous pattern of color changes, but with an extra single crochet per set.
Ch2, (1sc, 2sc) x 2, cc white (1sc x 2, 2sc) x 2, cc red (1sc x 2, 2sc) x 2. Slip stitch to close. (24)
Round 5 – 11
Ch2, 1sc x 7, cc white, 1sc x 8, cc red, 1sc x 8. Slip stitch to close (24)
Round 12
Ch2, 1sc x 7, cc white, 1sc x 8, cc red, 1sc x 8 (24)
You’ll now work just in your red yarn in a continuous round, with intermittent increases to allow for a flattened foxy chin and arched brow.
Round 13
(1sc x 3, 2sc) x 2, 1sc x 8, (1sc x 3, 2sc) x 2 (28)
Round 14
(1sc x 4, 2sc) x 2, 1sc x 8, (1sc x 4, 2sc) x 2 (32)
Round 15
1sc x 32 (32)
Round 16
(1sc x 5, 2sc) x 2, 1sc x 8, (1sc x 5, 2sc) x 2 (36)
Round 17
(1sc x 6, 2sc) x 2, 1sc x 8, (1sc x 6, 2sc) x 2 (40)
Round 18
1sc x 40 (40)
Round 19
(1sc x 7, 2sc) x 2, 1sc x 8, (1sc x 7, 2sc) x 2 (44)
Round 20 – 22
1sc x 44 (44)
Round 23
Make a single crochet in the first seven stitches, then single crochet the next pair of stitches together. Then make a single crochet in the next eight stitches. Then repeat your initial seven single crochets and crochet two stitches together.
(1sc x 7, sc2tog) x 2, 1sc x 8, (1sc x 7, sc2tog) x 2 (40)
Round 24
(1sc x 6, sc2tog) x 2, 1sc x 8, (1sc x 6, sc2tog) x 2 (36)
Round 25
(1sc x 5, sc2tog) x 2, 1sc x 8, (1sc x 5, sc2tog) x 2 (32)
Round 26
(1sc x 4, sc2tog) x 2, 1sc x 8, (1sc x 4, sc2tog) x 2 (28)
Round 27
(1sc x 3, sc2tog) x 2, 1sc x 8, (1sc x 3, sc2tog) x 2 (24)
Round 28
(1sc x 2, sc2tog) x 6 (18)
Round 29
(1sc, sc2tog) x 6 (12)
Add safety eyes to the broad end of the muzzle, and fill with toy stuffing.
Round 30
sc2tog to close.
You can now hand sew the nose and a small mouth.
Crochet Fox Ears Pattern
Your crochet fox’s ears will use a combination of crocheting, surface crocheting and hand sewing. We’ll start by making the bulk of the ear in your red yarn with the 6mm crochet hook.

Round 1
Make a magic circle of six stitches (6)
Round 2
2sc x 6 (12)
Round 3 – 7
1sc x 12 (12)
Round 8
(1sc, 2sc) x 3, 1sc x 6 (15)
Round 9
(1sc x 2, 2sc) x 3, 1sc x 6 (18)
Round 10 – 12
1sc x 18
White Fox Ear Markings
Now you’ll be working on your ear with two separate pieces for the finer details. Let’s start with the white panel. You’ll need your 6mm crochet hook and two strands of your white yarn.
Row 1
Make a chain of six stitches. (6)
Row 2
Make a single crochet into the second stitch from the hook. Put one single crochet in each remaining stitch of the chain. (5)
Row 3 – 4
Chain 2, then make one single crochet in each stitch of the row. (5)
Slip stitch and tie off with a long train of yarn. Use the thread of yarn to sew this section onto the top half of each ear.
Ear Edging Definition
To give a defined black outline to your crochet fox ears, fold into the shape you want and surface crochet around the edge.
Crochet Fox Body Pattern
You’ll make your crochet fox a body in two separate sections, with the main body in red and the marking patch in white. Begin in the red yarn with your 6mm crochet hook.

Round 1
Magic circle of six stitches (6)
Round 2
2sc x 6 (12)
Round 3
1sc x 12 (12)
Round 4
(1sc, 2sc) x 6 (18)
Round 5
(1sc x 2, 2sc) x 6 (24)
Round 6
1sc x 24 (24)
Round 7
(1sc x 3, 2sc) x 6 (30)
Round 8 – 11
1sc x 30 (30)
Round 12
(1sc x 4, 2sc) x 6 (36)
Round 13
1sc x 36 (36)
Round 14
(1sc x 5, 2sc) x 6 (42)
Round 15 – 20
1sc x 42 (42)
Round 21
(1sc x 5, sc2tog) x 6 (36)
Round 22
(1sc x 4, sc2tog) x 6 (30)
Round 23
(1sc x 3, sc2tog) x 6 (24)
Round 24
(1sc x 2, sc2tog) x 6 (18)
Round 25
(1sc, sc2tog) x 6 (12)
Round 26
sc2tog to close
The White Patch
You are now going to create a small patch to sew onto your crochet fox’s chest. Use the white yarn, two strands with the 6mm crochet hook.

Round 1
Magic circe of eight stitches (8)
Round 1
2sc x 8 (16)
Round 2
(1sc, 2sc) x 8 (24)
Round 3
(1sc x 2, 2sc) x 8 (32)
Round 4
(1sc x 3, 2sc) x 8 (40)
Round 5
1sc x 6 (40)
Round 6 – 7
Ch2, 1 sc x 5 back into the previous stitches
Round 8
Ch2, 1 sc x 5 back into the previous stitches, slip stitch to finish row
Round 9
Ch2, 1 sc x 4 back into the previous stitches, slip stitch to finish row
Round 10 – 11
Ch2, 1sc x 4. Slip stitch to close and sew onto your fox crochet body.
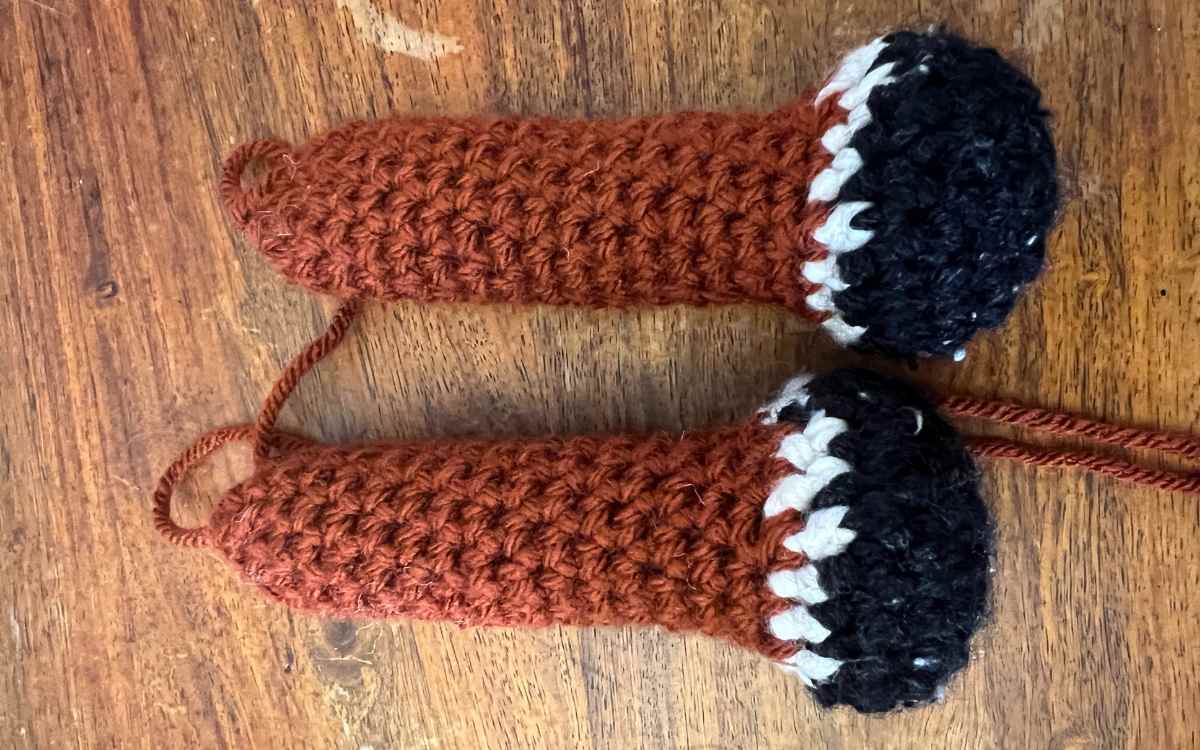
Crocheting Your Fox’s Feet and Legs
Begin working in your black yarn, use two strands if it’s DK with your 6mm crochet hook. You’ll want to double up strands on the white as well, but then you can swap to one strand for the red colored chunky yarn.
Round 1
Magic circle of six stitches (6)
Round 2
2sc x 6 (12)
Round 3
(1sc, 2sc) x 6 (18)
Round 4
(1sc x 2, 2sc) x 6 (24)
Round 5
1sc x 24 cc to white
Round 6
(1sc x 2, sc2tog) x 6 cc to red (18)
Round 7
(1sc, sc2tog) x 6 (12)
Round 8 – 22
1sc x 12
How To Crochet A Fox Tail
Begin working with two strands of your white DK yarn with your 6mm crochet hook.
Round 1
Magic circle of six stitches
Round 2 – 4
1sc x 6 (6)
Round 5
2sc x 6 then slip stitch to close (12)
Round 6
Chain two, then 1sc x 11
Round 7 – 26
1sc x 12
Round 27
Sc2tog to close, leave a long train of thread and attach your yarn needle to sew onto the fox’s body section.
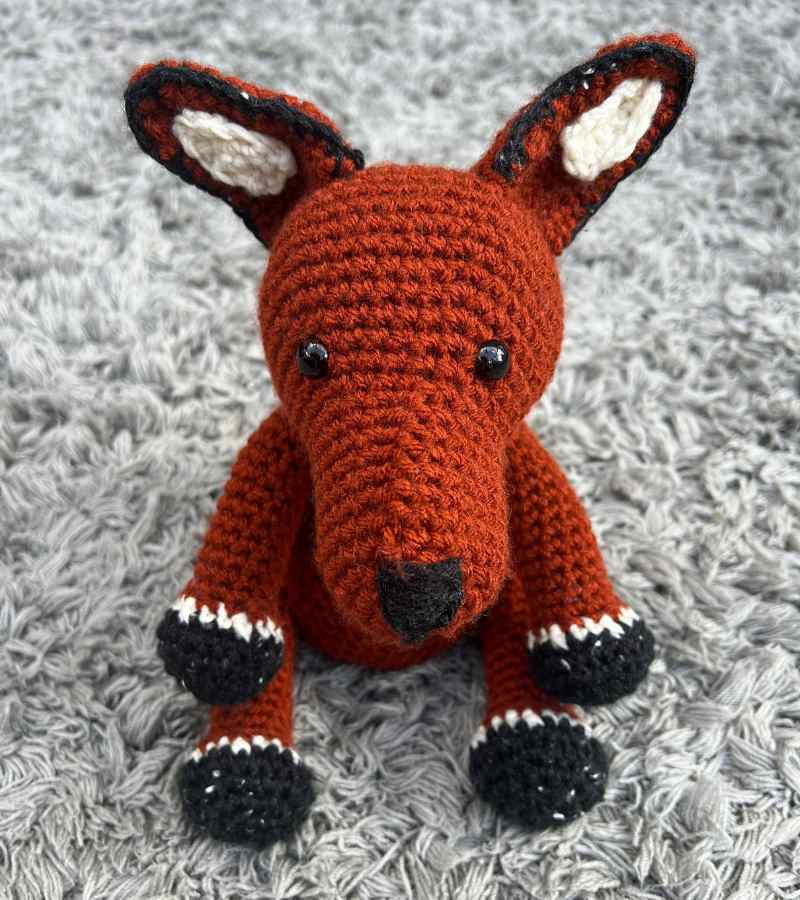
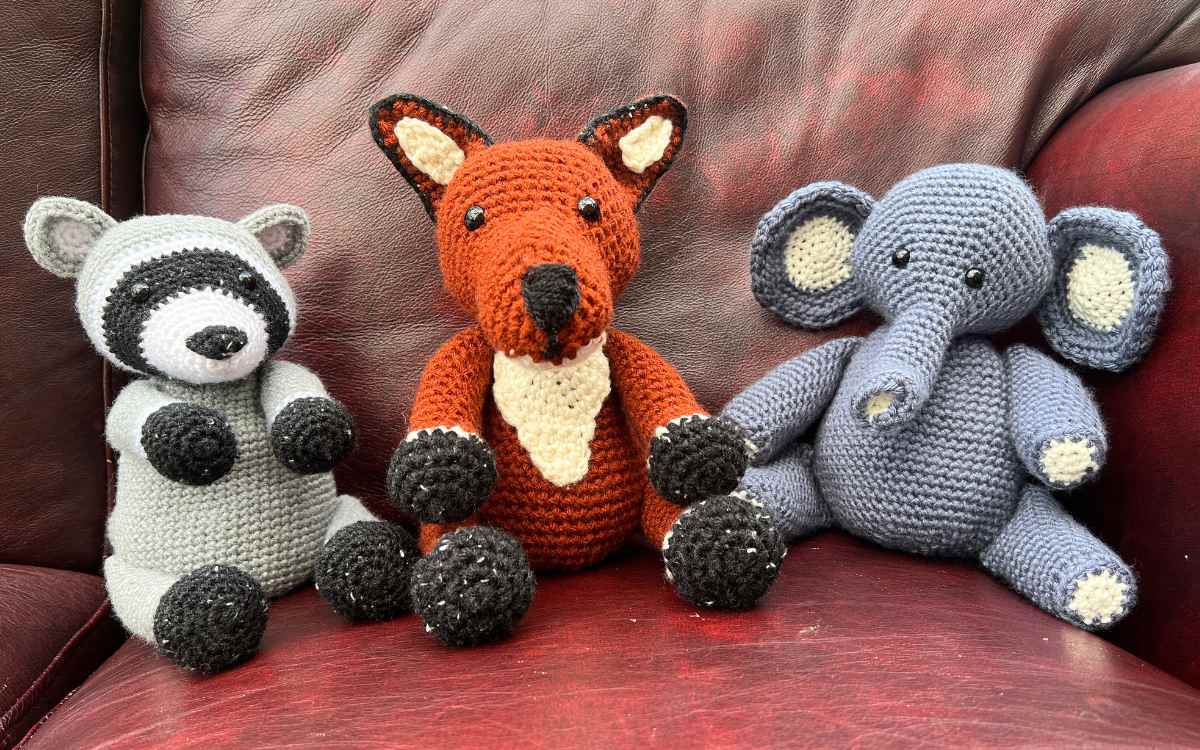
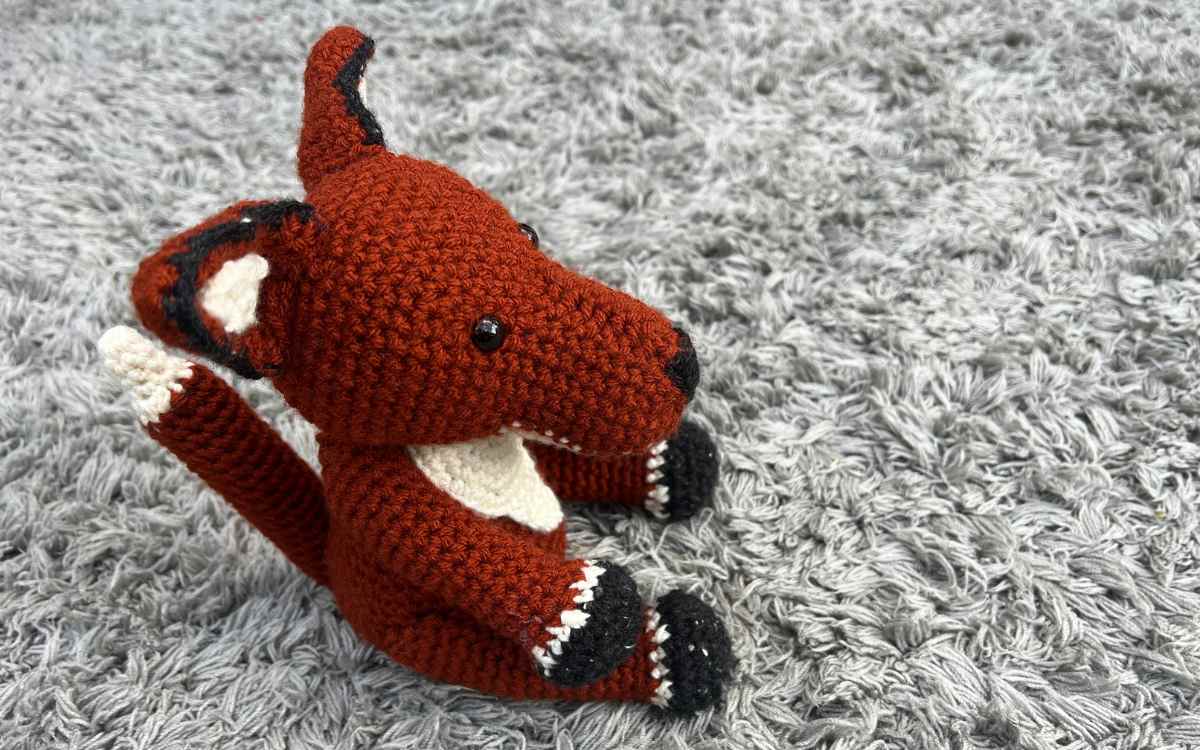
My Crochet Fox Free Pattern
I love red foxes, despite the grief they give to our chickens. They are uniquely beautiful creatures, and I hope that this toy displays something of their distinctive cool personality as well as their adorable look.
As always, if you’ve got any questions shoot me a message on my Facebook page or in the comments section below. I love seeing your finished toys too if you’d like to share a picture.

Happy Crocheting!
Lucy Kate, x