How To Crochet Your Pet Fish
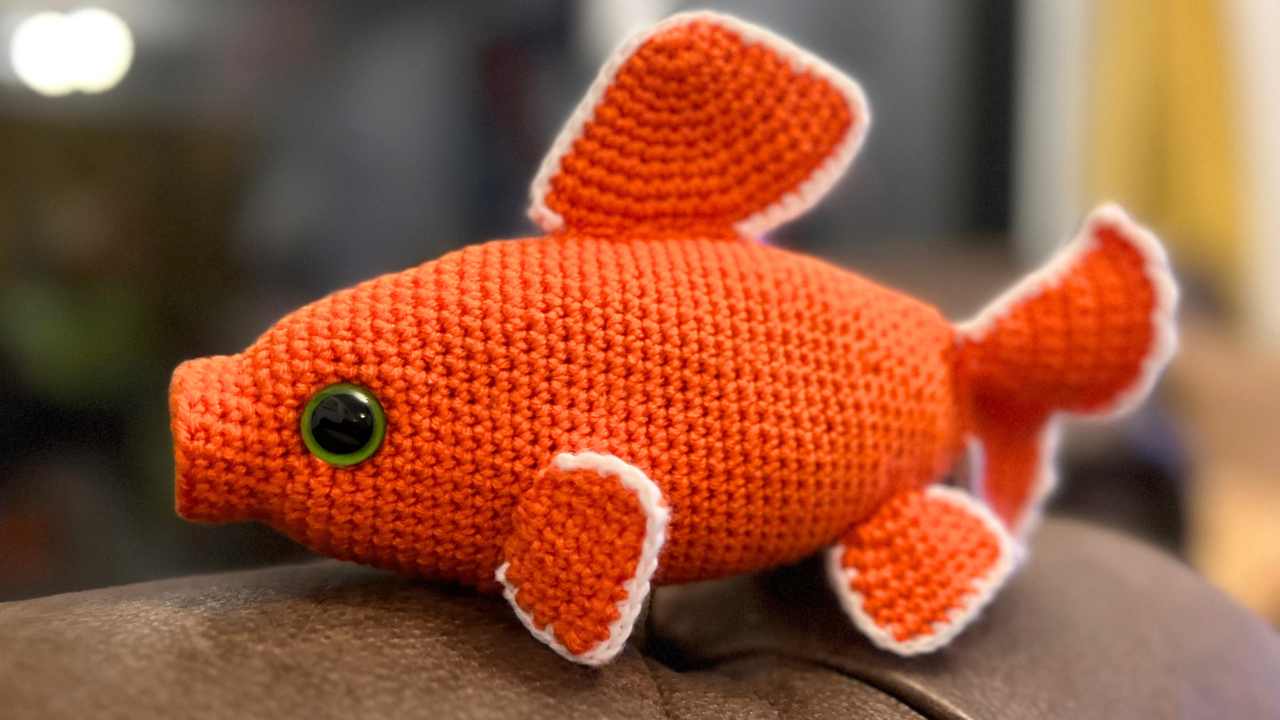
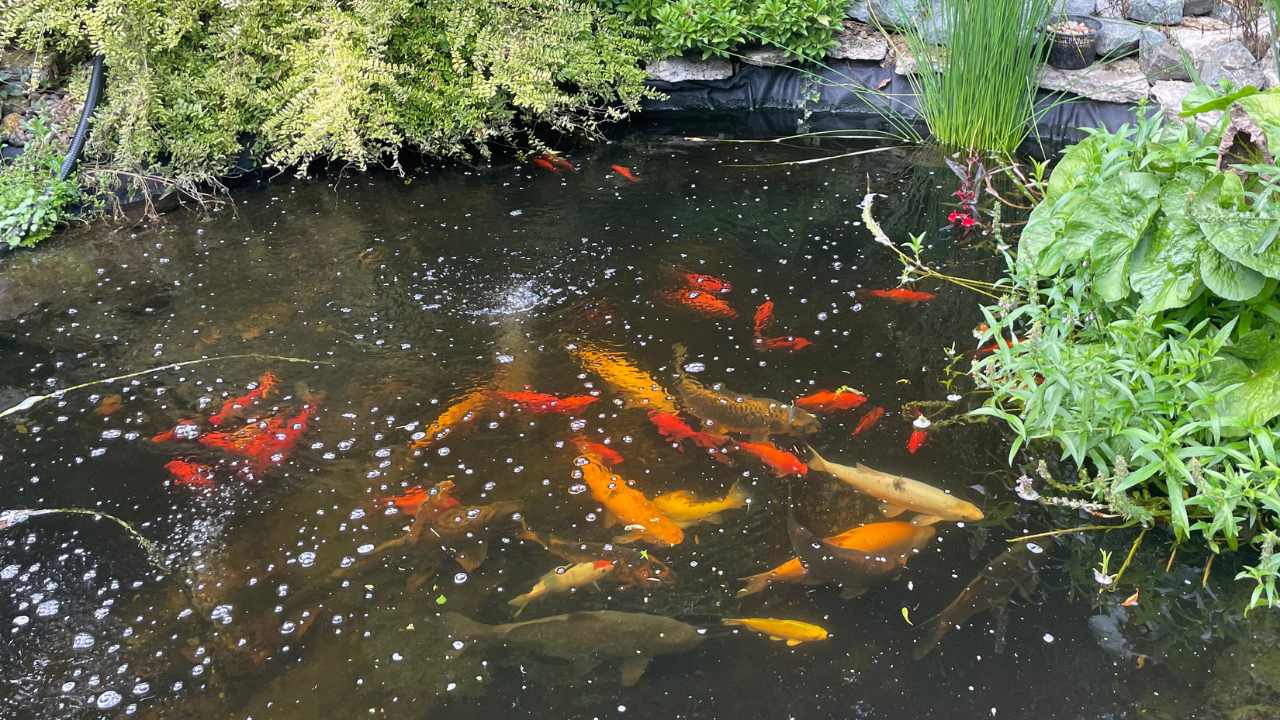
My free crochet fish pattern is a tribute to our pets that passed away recently. We lost seven huge, old fish from our pond, including some golden orfes and koi, due to a power cut at our home. The smaller fish survived, but we were truly gutted about the loss of those gentle friends, so this amigurumi fish is my special nod to them.
If you’d like to go for a whole sea creature theme with your crafting, then you’ll love the manatee, puffer fish and seahorse patterns too.
The equipment you’ll need
Here’s what I used to crochet my fish. Feel free to use different yarn brands, and colors to match your own pet.
- 3.5mm crochet hook
- Deramores Studio baby lux DK orange yarn
- King Cole Prize DK white yarn
- Toy safe stuffing
- 18mm safety eyes
Terms and techniques
- magic circle
- sc – single crochet
- 2sc – two single crochets into one stitch
- sc2tog – single crochet two stitches together
- ch – chain
- FLO – crochet into the front loop only
- BLO – crochet into the back loop only
How to crochet your fish
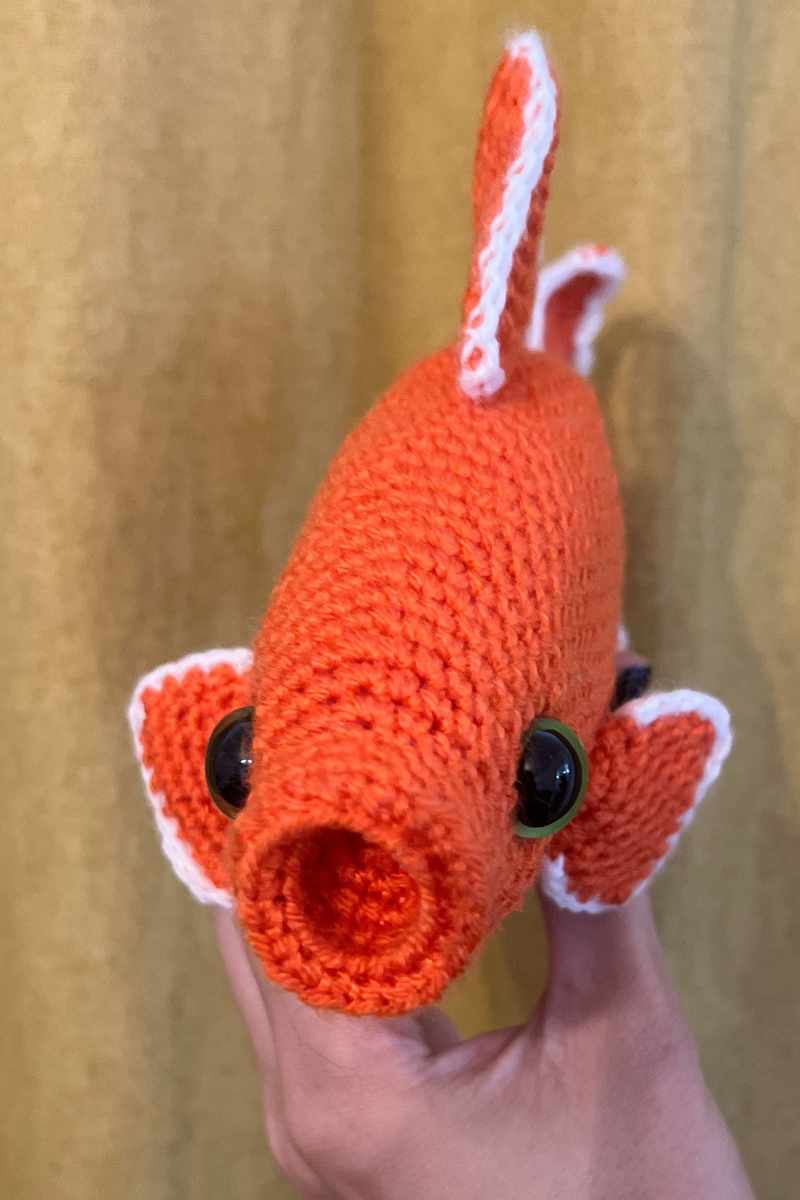
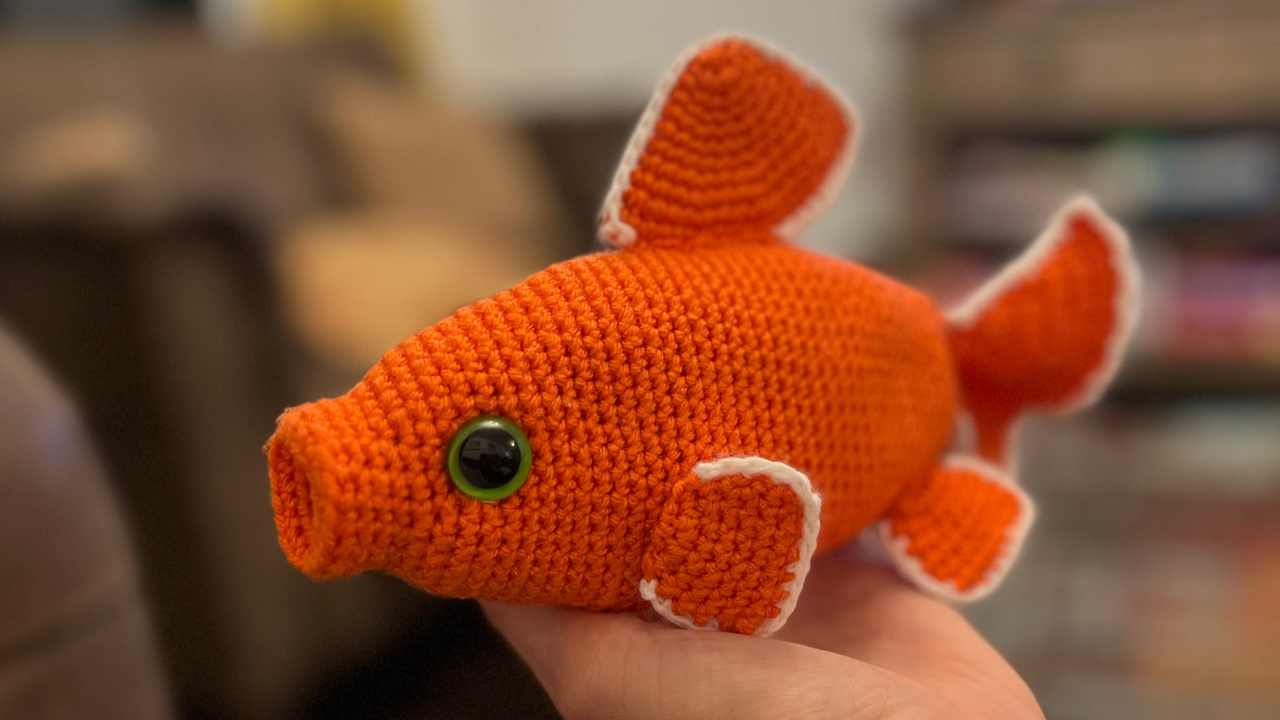
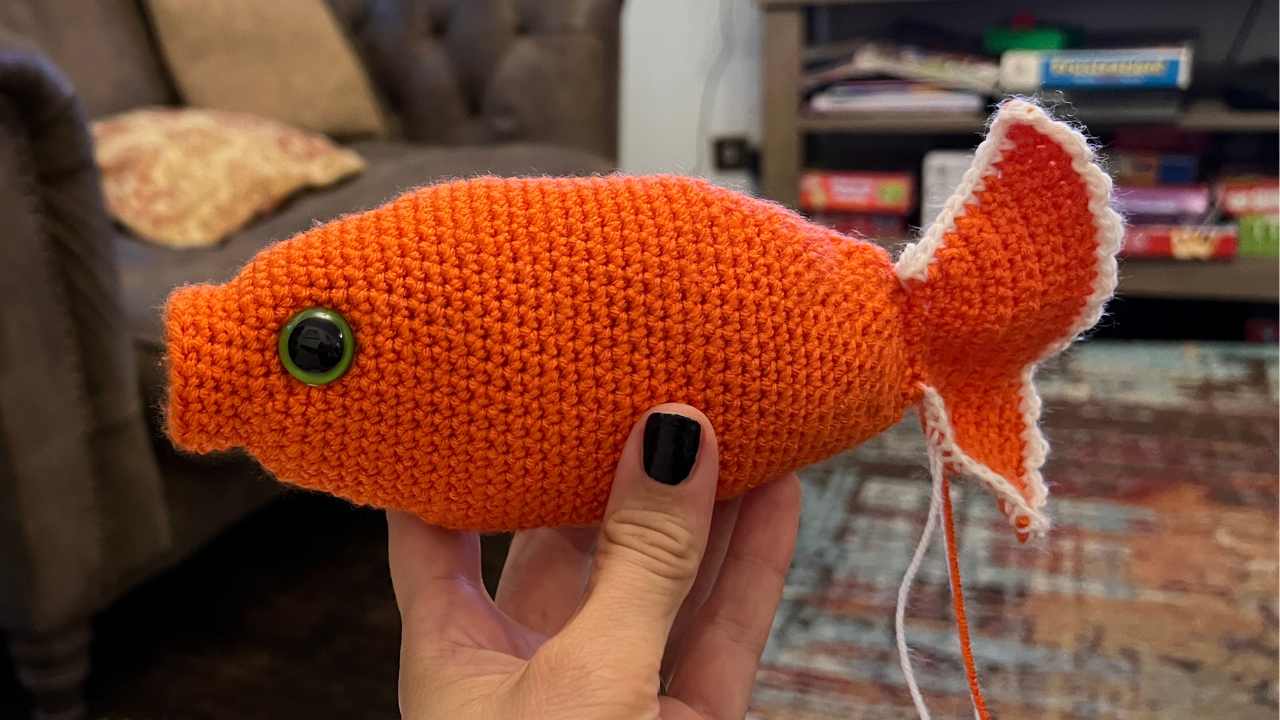
I made this fish in separate sections, which were then hand sewn together.
The head and body
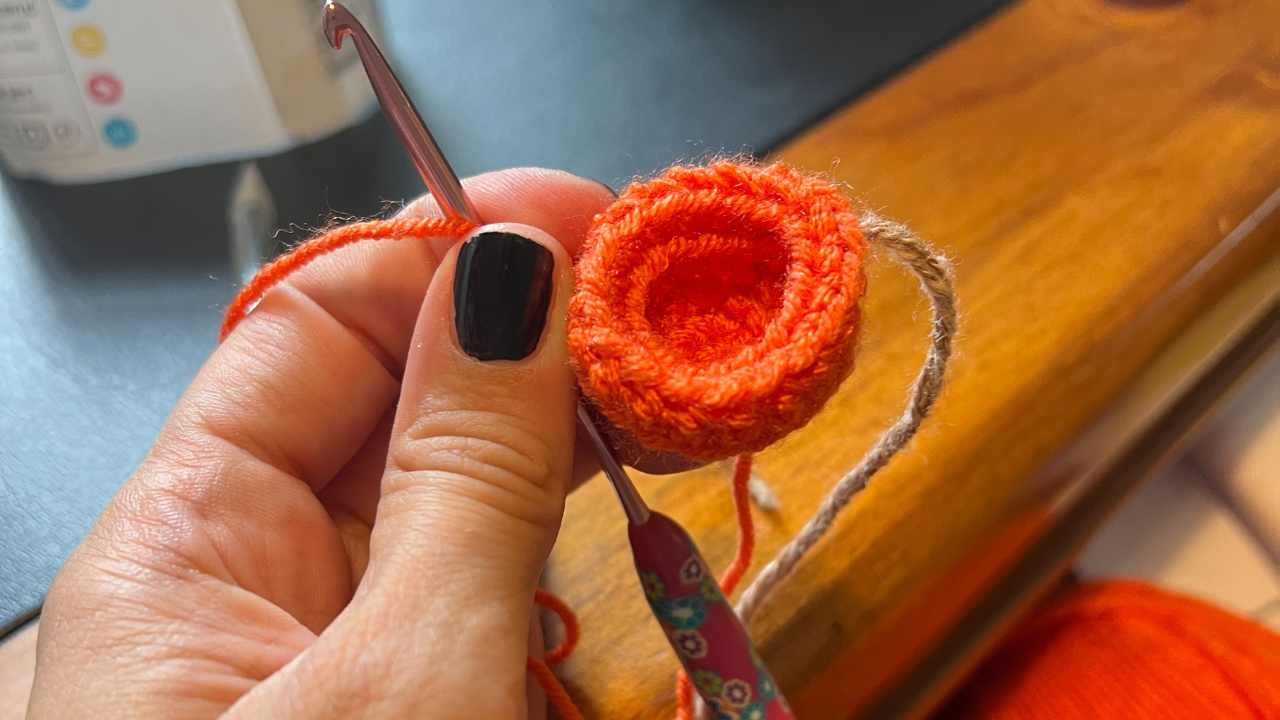
You’re going to work this section in orange yarn using your 3.5mm crochet hook. You’ll begin inside the mouth, working down the head, along the body and ending in the tail. We’ll add the white detail later on.
Round 1
Make a magic circle of six stitches (6)
Round 2
2sc x 6 (12)
Round 3
(1sc, 2sc) x 6 (18)
Round 4
FLO 1sc x 18
Round 5
1sc x 18
Round 6 – 7
BLO 1sc x 18
Allow the mouth to sit so that the two BLO rounds are the lips, and the rest is inside your fish.
Round 8 – 10
1sc x 18
Round 11
(1sc x 2, 2sc) x 6 (24)
Round 12
((1sc x 3, 2sc) x 2, 1sc x 4) x 2 (28)
Round 13
((1sc x 4, 2sc) x 2, 1sc x 4) x 2 (32)
Round 14 – 15
1sc x 32
Round 16
(1sc x 5, 2sc, 1sc x 10) x 2 (34)
Round 17
(1sc x 6, 2sc, 1sc x 10) x 2 (36)
Round 18 – 19
1sc x 36
Round 20
(1sc x 7, 2sc, 1sc x 10) x 2 (38)
Round 21
(1sc x 7, 2sc x 3, 1sc x 9) x 2 (44)
Round 22 – 37
1sc x 44
Round 38
(1sc x 7, sc2tog x 3, 1sc x 9) x 2 (38)
Round 39 – 41
1sc x 38
Round 42
(1sc x 7, sc2tog, 1sc x 10) x 2 (36)
Round 43
(1sc x 4, sc2tog) x 6 (30)
Round 44 – 45
1sc x 30
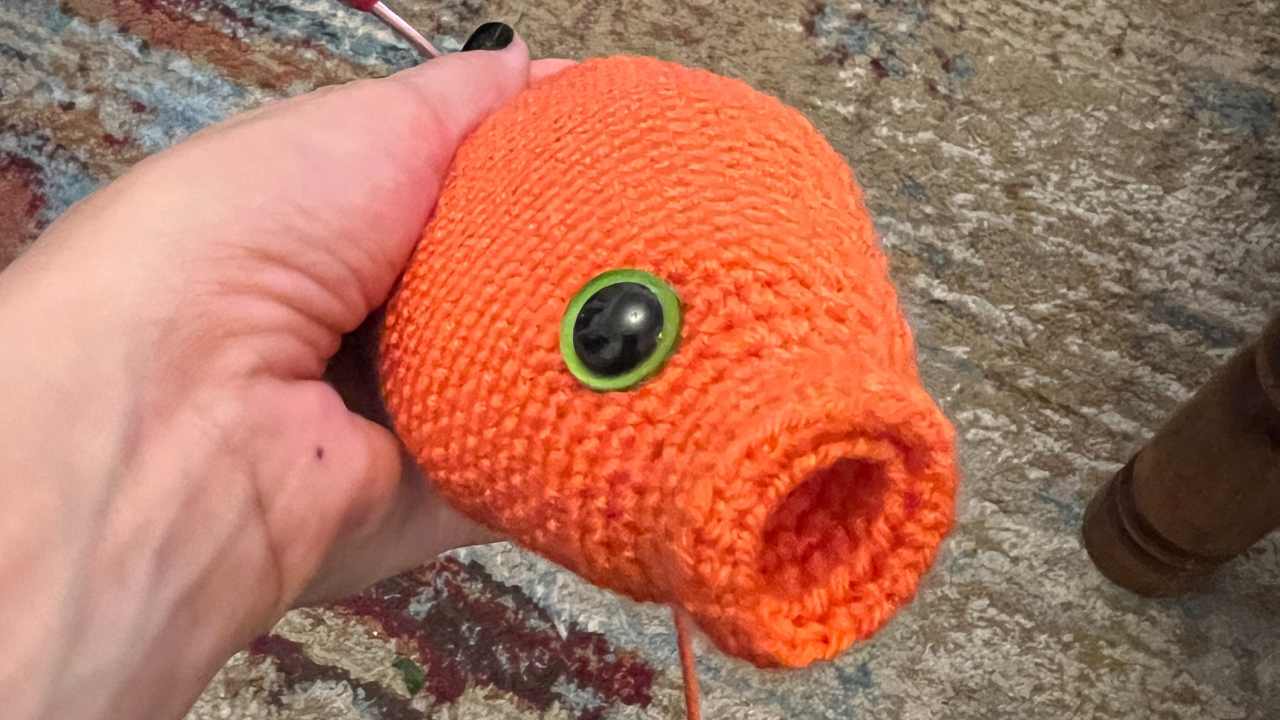
Insert your safety eyes 9 rows down from the BLO round of the mouth. Use the 3 x 2sc point to guide your top and bottom edges, and place the eyes midway down the flat side of the fish.
Round 46
(1sc x 3, sc2tog) x 6 (24)
Round 47 – 48
1sc x 24
Round 49
(1sc x 2, sc2tog) x 6 (18)
Stuff your fish so far, being careful not to push the mouth outwards.
Round 50
(1sc, sc2tog) x 6 (12)
Round 51
Crochet the two sides together with single crochets (6)
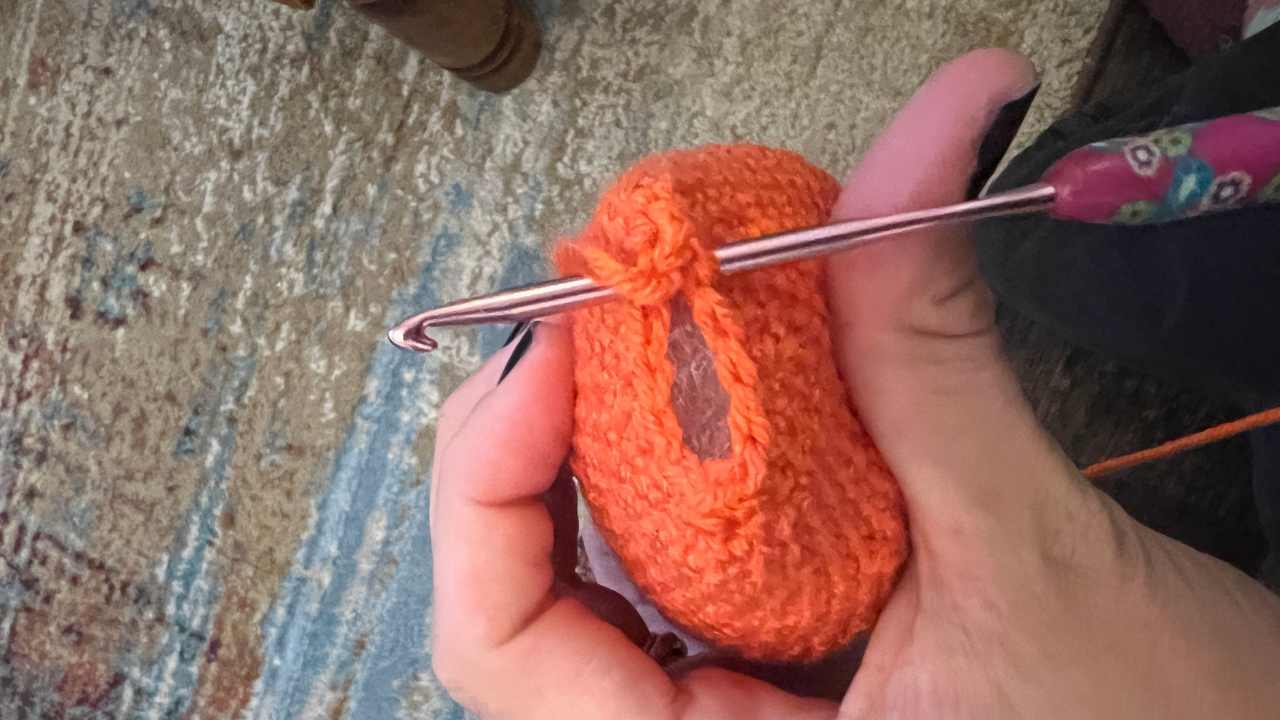
Round 52 – 53
Ch1, 1sc x 5 (6)
Round 54
Ch1, 1sc into the same stitch, 2sc, 1sc x 2, 2sc x 2 (8)
Round 55
Ch1, 1sc into the same stitch, 2sc, 1sc x 4, 2sc x 2 (12)
Round 56
Ch1, 1sc into the same stitch, 2sc, 1sc x 8, 2sc x 2 (16)
Round 57
Ch1, 1sc in the same stitch, 1sc x 14, 2sc (18)
Round 58
Ch1, 1sc x 16, 2sc (19)
Round 59
Ch1, 1sc x 17, 2sc (20)
Round 60
Ch1, 1sc x 18, 2sc (21)
Round 61
Ch1, 1sc x 19, 2sc (22)
Round 62
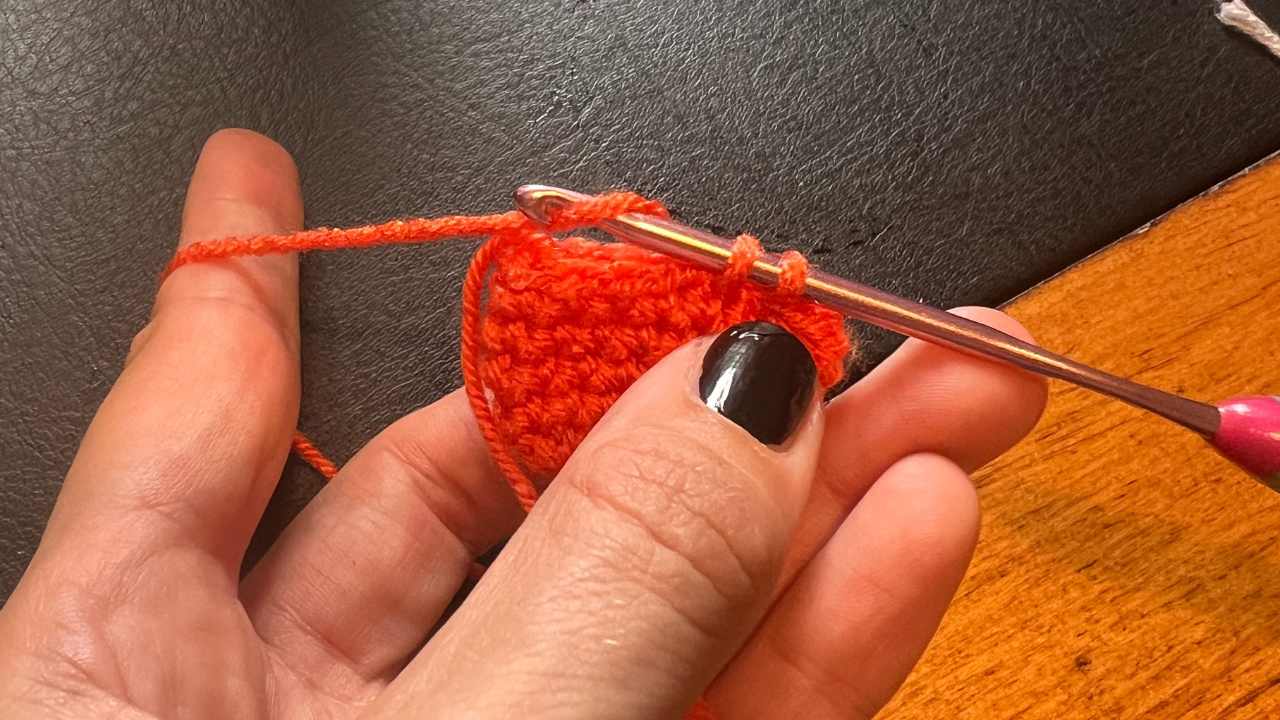
Ch1, 1sc in same stitch, (slst, 2sc) x 11. Tie off and hide the yarn tail inside the fish.
Edging the Tail
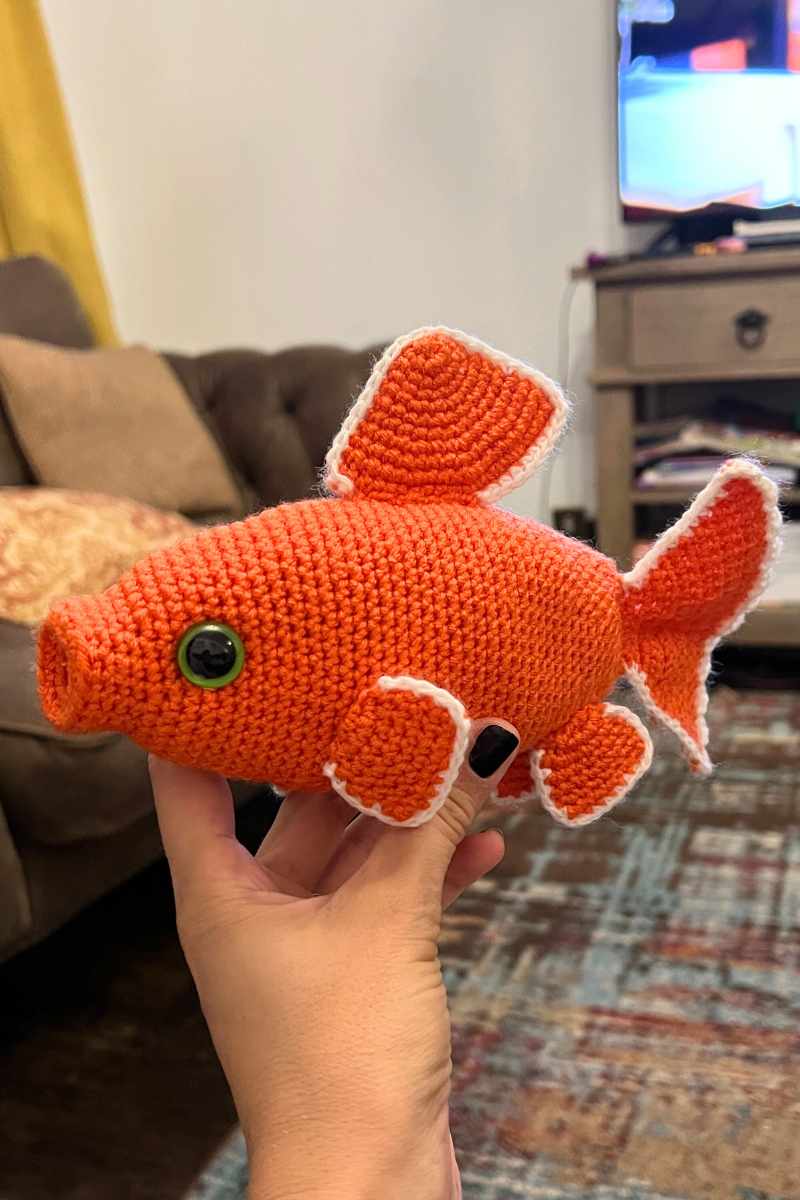
Swap to your white yarn and beginning at the joining round 51, work around the edge of the tail. You’ll make 11 x sc up the side, then 3sc into the corner. Now along the tail edge make 2sc, 1sc, slst. At the far corner make 3sc again, then another 11 single crochets down the other side.
Four small fins
Begin your fins in the orange yarn, you’ll need your white for the edges again.
Round 1
Make a magic circle of eight stitches (8)
Round 2
2sc x 8 (16)
Round 3 – 6
1sc x 16
Round 7
Flatten the fin without stuffing, and single crochet the sides together (8)
Edging and attaching the fins
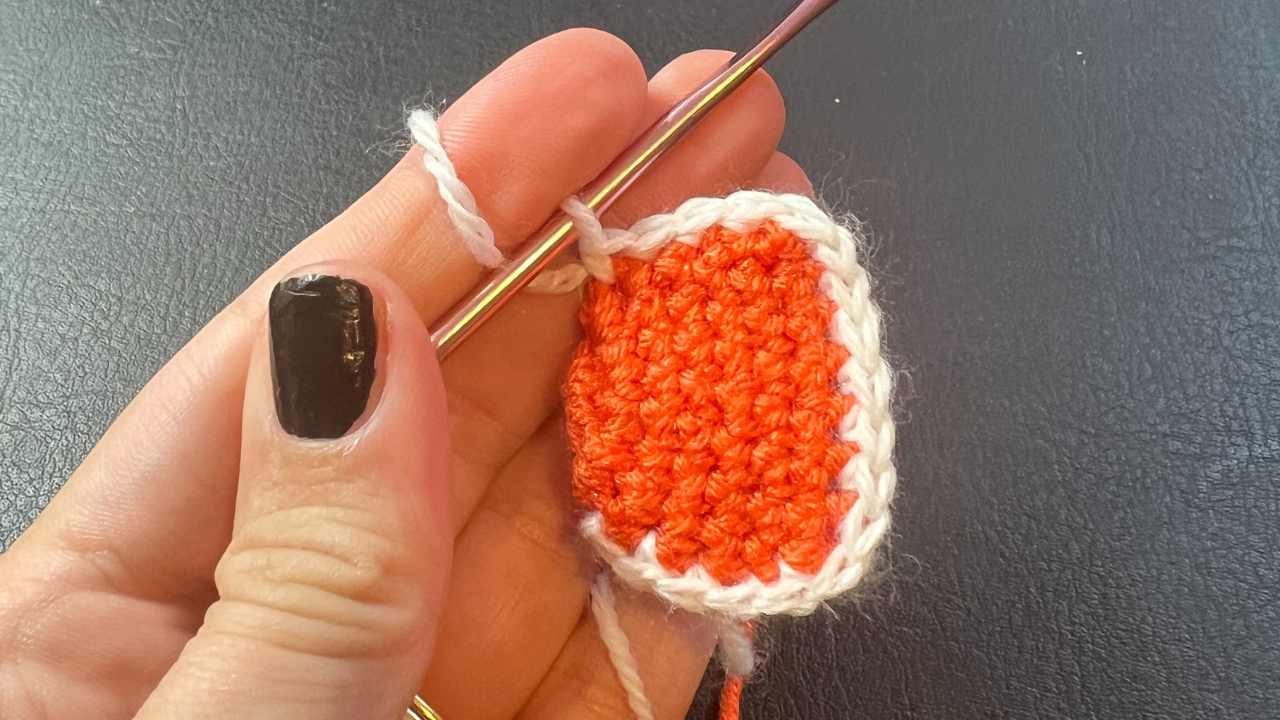
You are now going to edge the fins in the same way that you did the tail. Switch to your white yarn and put a single crochet into each stitch around the perimeter, leaving just the final closing round orange. This is the side that you are now going to sew onto the body.
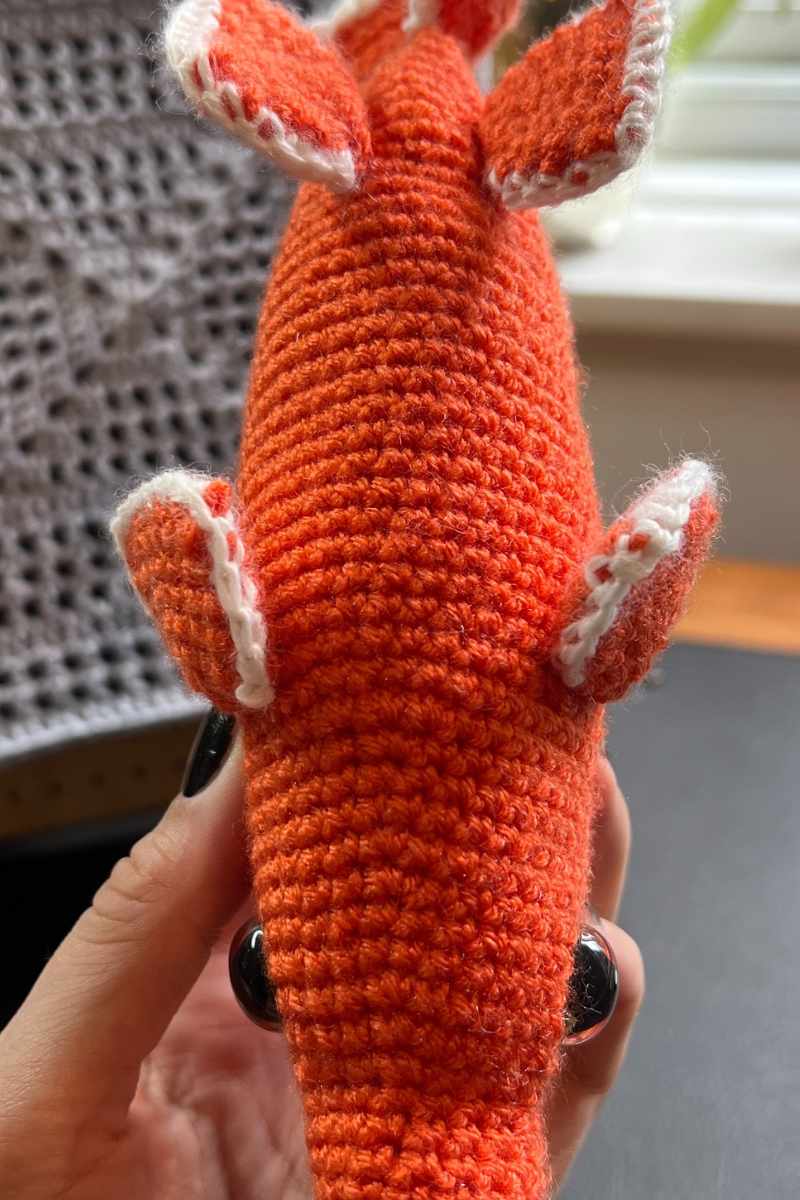
Sew the front fins around round 24 of the body, tilted backward at a slight angle. The back fins sit six rounds from the start of the tail, but more in line with the bottom of the fish.
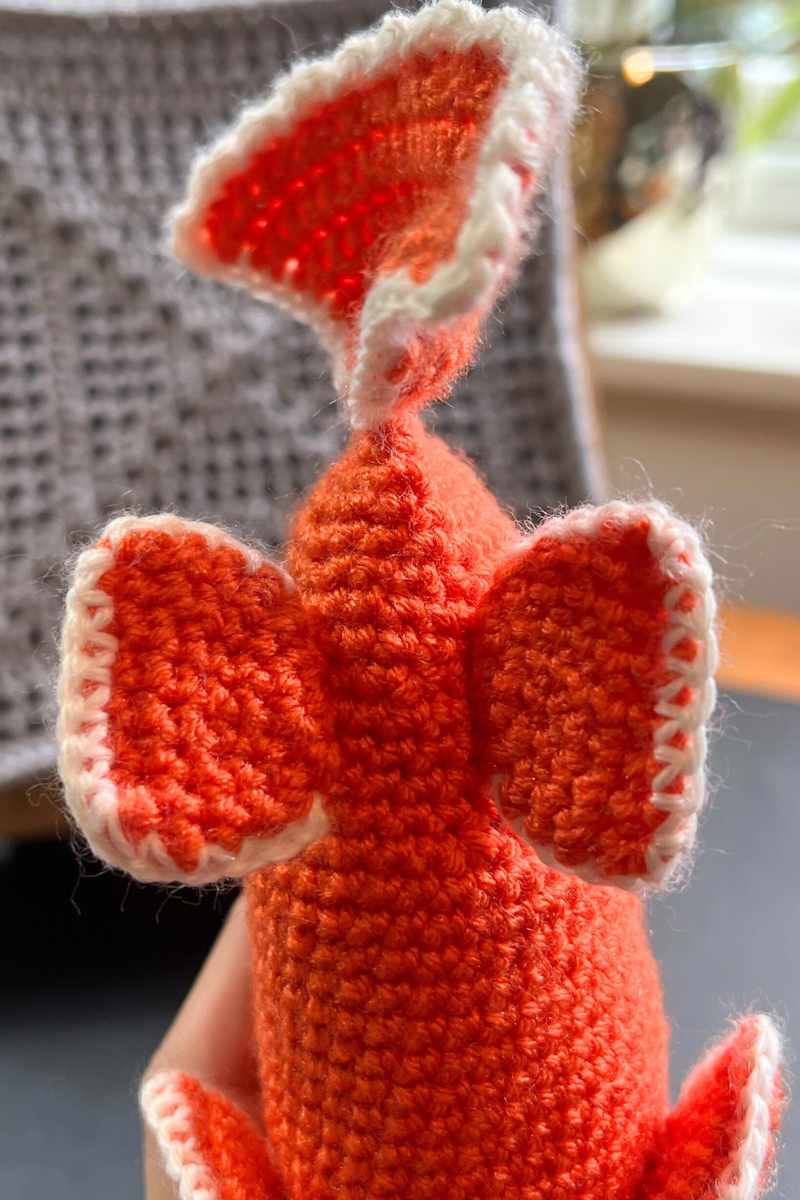
Back Fin
Your back fin will be created in orange yarn and edged in white again.

Round 1
Make a magic circle of eight stitches (8)
Round 2
2sc x 8 (16)
Round 3 – 4
1sc x 16
Round 5
(1sc, 2sc) x 8 (24)
Round 6 – 7
1sc x 24
Round 8
(1sc x 2, 2sc) x 8 (32)
Round 9
1sc x 32
Round 10
(1sc x 3, 2sc) x 8 (40)
Round 11
Single crochet the two sides together (20)
Flatten your fin and starting from the longest bottom edge, leave 10 stitches empty then single crochet with white yarn around the circumference of the remainder of the fin.
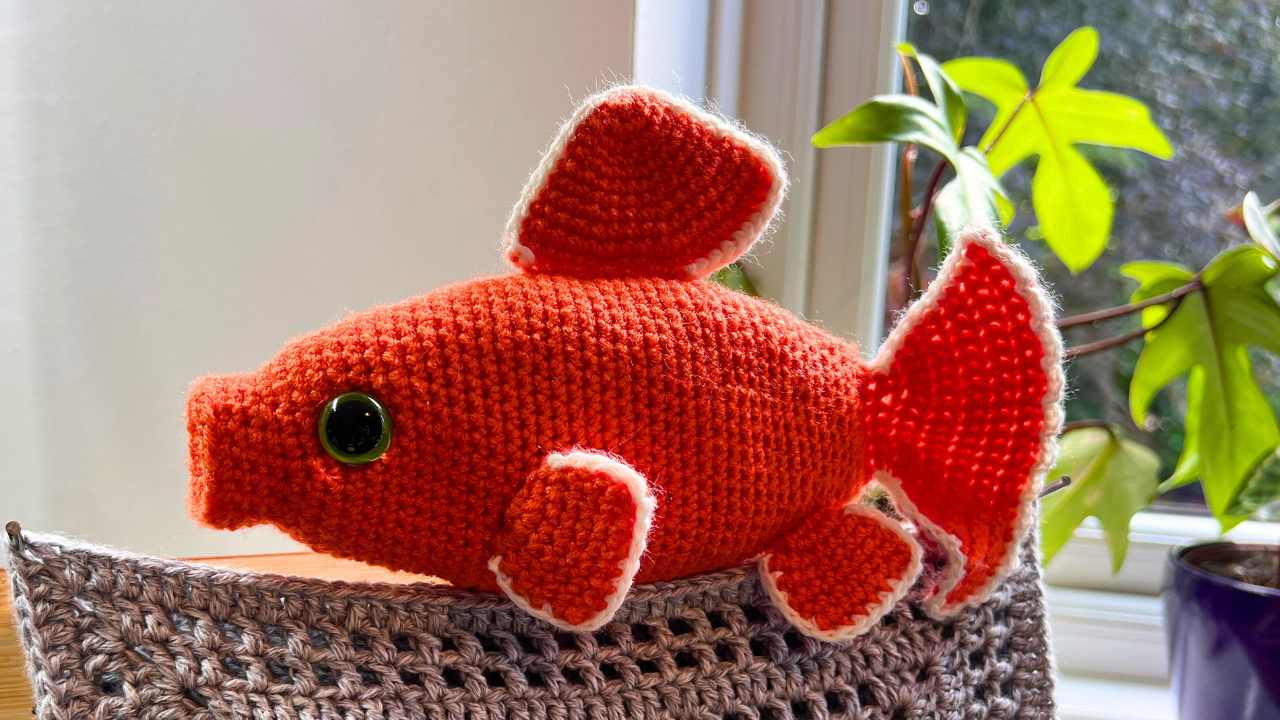
You can now hand sew the fin to the top of the fish. I placed mine on the exact top between the eyes, around 26 rounds in.
Let me know what colors you chose for your fish, and you’re welcome to email me a picture if you’d like to share it too!
Happy Crocheting,
Lucy Kate, x