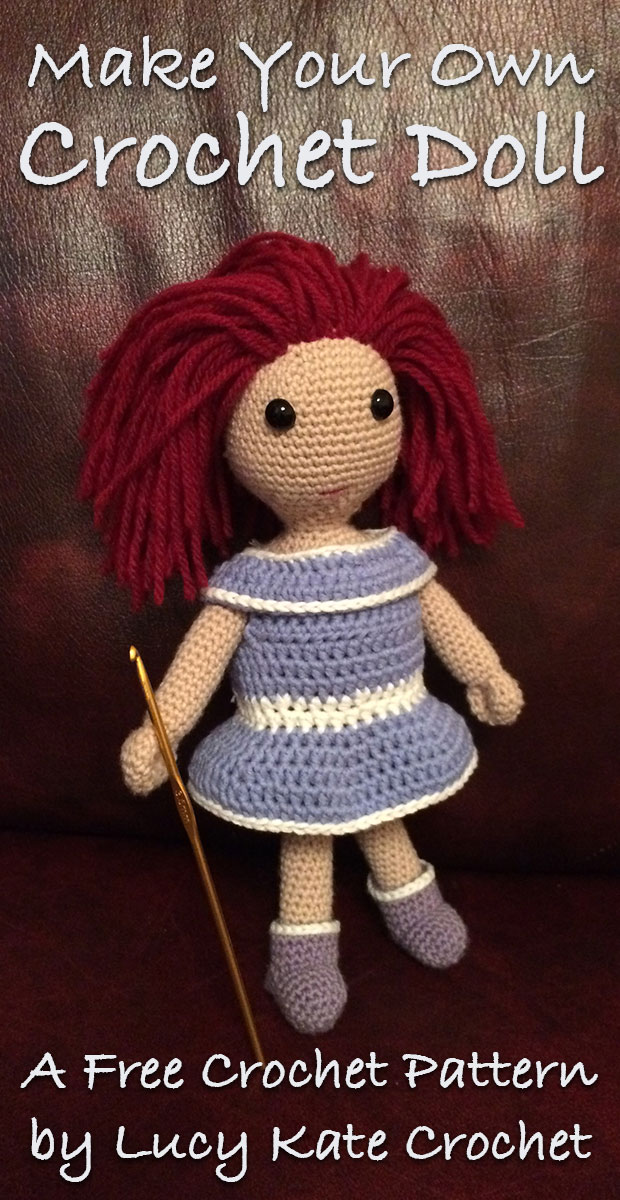
How To Crochet Your Own Doll
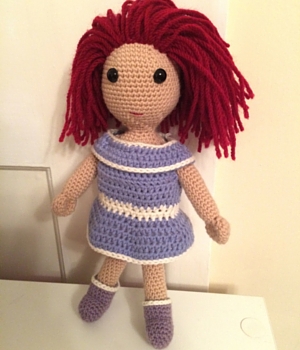
I love my crochet doll pattern, because it’s simple but still has removable clothes and detailed parts. This crochet doll and her outfit are made entirely using basic crochet techniques.
If you are an experienced, fast crocheter you should be able to complete this beginner friendly pattern over the course of a few evenings.

- What do I need to make a crochet doll?
- Crochet doll stitch guide
- How to crochet your doll
- Crochet doll shoes and clothes
Crochet dolls are classic and beautiful toys. They make wonderful gifts, kids toys and even decorative vintage style pieces for an adult bedroom.
Crochet Doll Equipment
To make this crochet doll you will need the following:
- 50g white aran 100% cotton yarnPaid Link
- 50g blue aran 100% cotton yarnPaid Link
- 100g neutral merino wool yarnPaid Link
- 50g light purple merino wool yarnPaid Link
- 3.5mm crochet hookPaid Link
- Safety eyesPaid Link
- Yarn cutterPaid Link
- Toy stuffingPaid Link
- Yarn needlePaid Link
- Stitch markersPaid Link
Stitch markers will make a big difference to how easily you can follow this crochet doll pattern. If you don’t have any stitch markers, then you can improvise using small cut pieces of thread. I used Sirdar 100% cotton aran yarn, but you can choose any brand you like. Just make sure it’s the same weight if you are using the same crochet hook sizes.
How To Crochet Doll Arms and Body
To make your crochet doll you will need to be confident using a few basic crochet techniques. The main technique used is working in a spiral of increases and decreases from a central magic circle. Check out my magic circle tutorial here if you need a bit of a hand.
This crochet doll pattern is made using US terms for crochet stitches. If you would like help converting them from UK crochet terms, check out my crochet conversion charts here.
You will also need to know how to make single crochets and half double crochets.
Your Crochet Doll Pattern
This crochet doll pattern is made up of separate sections for the body parts and the dress. Several sections are made up using the spiral from a magic circle method, so make sure that you have stitch markers to hand before you begin. This will help you to keep track of the stitches in each row.
Crochet Doll Head, Neck & Body
The crochet dolls head, neck and body are all comprised of one piece in this crochet doll pattern. Follow the instructions carefully, as you will need to pause your crocheting periodically to add in her features, like the hair and eyes.
Crochet Doll Head
Beginning with your 3.5mm crochet hook, using your light orange yarn. The numbers refer to the row you are working on currently.
- 1. Make a magic circle of 6 stitches (6)
- 2. Put two single crochets (2sc) into each stitch (12)
- 3. Make 1sc in the first stitch, 2sc in the next stitch. (1sc, 2sc) Repeat for the length of the round. (18)
- 4. (1sc x 2, 2sc) Repeat for the length of the round. (24)
- 5. (1sc x 3, 2sc) Repeat for the length of the round. (30)
- 6. (1sc x 4, 2sc) Repeat for the length of the round. (36)
- 7. (1sc x 5, 2sc) Repeat for the length of the round. (42)
- 8. (1sc x 6, 2sc) Repeat for the length of the round. (48)
- 9 to 23. Put 1sc into each stitch (48)
- 24. Make 1sc in the next 6 stitches, then single crochet two stitches together (1sc x 6, sc2tog). Repeat for the length of the round (42)
- 25. (1sc x 5, sc2tog) Repeat for the length of the round (36)
Decide which part of the dolls head is going to be the front and attached two safety eyes.
- 26. (1sc x 4, sc2tog) Repeat for the length of the round (30)
- 27. (1sc x 3, sc2tog) Repeat for the length of the round (24)
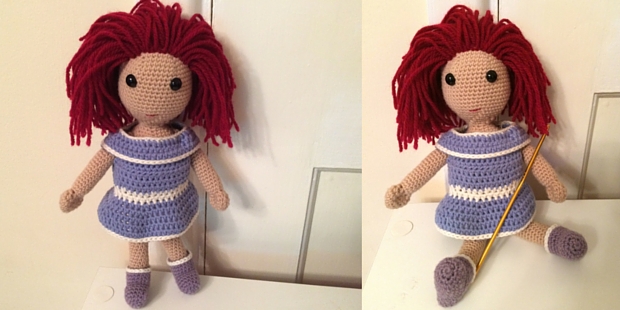
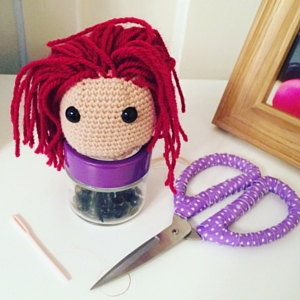
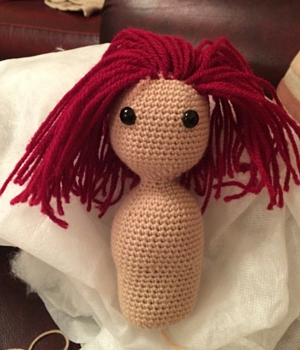
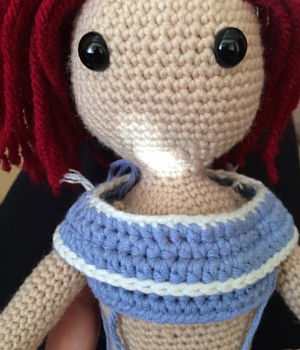
You can now attach your crochet doll’s hair. Take your yarn needle and red yarn, and weave it through the scalp starting at the centre.Pull the strand so that it’s the equivalent to shoulder length. With each strand you pull through, tie the yarn to the previous one to strengthen it. You will be left with a series of loops, which you can cut through periodically as you go.

This is a good point to make her a mouth as well. Separate half of the strands from your red yarn to make a thin line. Using this thread, sew along three consecutive stitches a couple of rows below the eyes.
- 28. (1sc x 2, sc2tog) Repeat for the length of the round (18)
Fill the head with toy stuffing, leaving just enough space to continue the crochet rounds.
The Crochet Doll Body
- 29. (1sc, sc2tog) Repeat for the length of the round (12)
- 30 to 31. Make 1sc into each stitch.
The neck is now complete, you will be widening into another spiral pattern for the shoulders and body.
- 32. (1sc, 2sc) Repeat for the length of the round. (18)
- 33. (1sc x 2, 2sc) Repeat for the length of the round. (24)
- 34. (1sc x 3, 2sc) Repeat for the length of the round. (30)
- 35. (1sc x 4, 2sc) Repeat for the length of the round. (36)
- 36. (1sc x 5, 2sc) Repeat for the length of the round. (42)
- 37 to 47. Put 1sc into each stitch for the round (42)
- 48. (1sc x 5, sc2tog) Repeat for the length of the round (36)
- 49 to 58. Put 1sc into each stitch for the round (36)
- 59. (1sc x 4, sc2tog) Repeat for the length of the round (30)
- 60. (1sc x 3, sc2tog) Repeat for the length of the round (24)
- 61. (1sc x 2, sc2tog) Repeat for the length of the round (18)
Fill the neck and body with toy stuffing, leaving just enough space to continue the crochet rounds.
- 62. (1sc x 1, sc2tog) Repeat for the length of the round (12)
- 63. (sc2tog) Repeat for the length of the round (6)
Repeat sc2tog until the body is closed. Leave a long tail to help with adding legs, and move on to making the limbs.
How To Crochet Doll Arms
The crochet doll arms begin from the hand. The hand and arm are worked in a continuous spiral, from a central magic circle. You will need to make 2 of these. Using your light orange yarn, work with the 3.5mm crochet hook.

- 1. Make a magic circle of 6 stitches (6)
- 2. Put two single crochets (2sc) into each stitch (12)
- 3. Make 1sc in the first stitch, 2sc in the next stitch. (1sc, 2sc) Repeat for the length of the round. (18)
- 4. Put 1sc in each stitch for the length of the round. (24)
- 5. Make 1sc in the first stitch, then single crochet the next two stitches together (sc2tog). Repeat for the length of the round, 1sc, sc2tog. (18)
This has formed your hand up to the wrist. The hand will not be stuffed, instead with your finger push into the palm of the hand to make a flatten circle. You will now continue onward with the spiral to form the arm.
- 6 to 25. Make 1sc in each stitch. (18)
At the end of row 25, tie off and cut a long tail of yarn for sewing in later. Using the back end of your crochet hook, push the toy stuffing down the length of the arm. Leave the hand without stuffing.
Crochet Doll Shoes
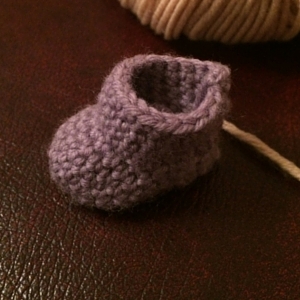
You will need to make two boots. Make your crochet doll boots with the 3.5mm crochet hook, and start in the purple yarn. They will also be worked from a spiral to begin with from the toe of the boot.
- 1. Make a magic circle of 6 stitches (6)
- 2. Put 2sc into each stitch in the round (12)
- 3. Make 1sc in the first stitch, 2sc in the next stitch. (1sc, 2sc) Repeat for the length of the round. (18)
- 4 to 7. Make 1sc into each stitch (18)
- 8. Slip stitch into the next 9 stitches, then make 1sc into the following 9 stitches. (18)
- 9. *Chain (ch) 2, turn the boot, then make 1sc into each of the remaining 8 single crochets.
- 10 to 11. Repeat from *.
Slip stitch one side of the row to the other, to make the back part of the boot. You will now be building up the levels of the boot.
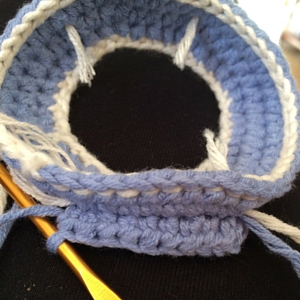
- 12. Ch2, then make 1sc four times along the first edge. Follow around the top making 14 stitches in total.
- 13. *Ch2, put 1sc into each stitch in the round. At the end of the round slip stitch to join.
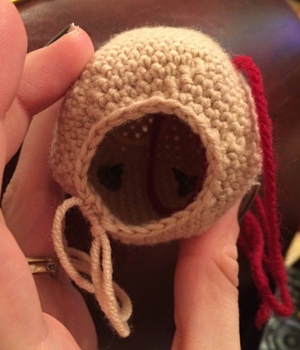
- 14 to 16. Repeat from *. At the end of row 16, colour change to white.
- 17. Slip stitch into each stitch in the round, tie off and sew in the loose ends when complete.
The boots will slip onto the legs, so you don’t need to leave a tail of yarn for sewing in later.
Crochet Doll Legs
You will need to make crochet doll legs. Using your 3.5mm crochet hook and the light orange yarn, work in a spiral.
- 1. Make a magic circle of 6 stitches (12)
- 2. Put two single crochets (2sc) into each stitch (18)
- 3 to 28. Put 1sc in each stitch for the length of the round (18)
At the end of row 28, attach the yarn and cut off leaving a long tail of yarn. Fill the leg to the top with toy stuffing, and insert into boots.
How To Crochet Your Doll Together
You will need to join your crochet doll together before you make her clothes, as the size will need to be adjusted slightly depending upon the brand of yarn you decided to use and how tight you make your stitches.
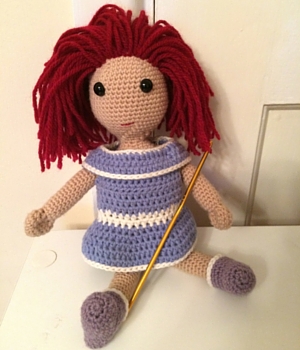
To attach the arms first sew them closed, then sew them to the body at the shoulder level. Leave the indented palms of the hands facing to the front, and angle the arms forward. This gives the impression that the crochet doll is reaching slightly forward, as though to give you a hug.
To attach the legs keep them round and in place. Make sure they are filled right to the top with stuffing, if you want to be able to prop the crochet doll in a standing position.
Crochet Doll’s Dress
Using your 3.5mm crochet hook at white cotton yarn, begin putting together your crochet doll’s dress.

- 1. Make a chain of 40 stitches, and slip stitch to join in a ring, colour changing to blue.
- 2. Ch2, put 1hdc in each stitch around the ring. Slip stitch to join.
- 3. Ch2, put 1hdc in the first 9 stitches, 2hdc in the next 2 stitches, 1hdc in the next 19 stitches, 2hdc in the next two stitches, then 1hdc per stitch to the row’s end.
At the end of the row, slip stitch to join. - 4. Ch2, put 1hdc in the first 10 stitches, 2hdc in the next 2, 1hdc in the next 21 stitches, 2hdc in the next two, then 1hdc per stitch to the row’s end. Slip stitch to join and colour change to white.
- 5. Chain 1, sl st into each stitch around the row. Join in a circle by slip stitching into the final stitch.
Tie and cut off the loose end, sewing into the body of the dress.
The collar of the dress is now complete, you will now be making the rest of the dress. Starting in two separate sections for the front and back panels, then joining them together.
Put the collar onto your crochet doll and mark the points at the front and back where the arms join the shoulders. For my crochet doll this makes 16 stitches along at the front and 13 stitches along at the back. Check this count on your own crochet doll before you continue.
Tension and Color Changes
The tensioning of your stitches and brand of yarns you have chosen may have given you a slightly different sizing. Continuing in the blue yarn and using your 3.5mm crochet hook, remove the collar and turn it inside out. Join your yarn onto the existing collar by hooking through the back of the stitches.
- 6. Put your crochet hook into the back loop of a stitch next to an armpit marker. Chain 2, and hdc into each back loop to the next marker point.
- 7. Chain 2, make 1hdc into each stitch along the row you have just created.
- 8. Chain 2, make 1hdc into each stitch along the row.
At the end of the row, tie the yarn off to secure your place. Repeat rows 6, 7 and 8 on the opposite side, so that you have a small front and back panel attached. From the end of row 8 of the back panel, attach the yarn and chain 5, slip stitching to the edge of the front panel. Join the other sides with a chain 5 too.
- 9. Slip stitch into any stitch to join, and chain 2. Put 1hdc into each stitch and chain loop to form a continuous circle around the dress.
- 10. Chain 2, put 1hdc into each stitch. Slip stitch to join.
- 11. Chain 2, put 1hdc into each stitch. Slip stitch to join, colour changing to white as you finish the row.
- 12. Chain 2. *1hdc in the next four stitches, then hdc two together (hdc2tog), repeat for the length of the round. Slip stitch to join.
- 13. Chain 2, 1hdc into each stitch, slip stitch to join, colour changing to blue.
- 14. Chain 2, *1hdc into the next four stitches, then 2hdc in the next. Repeat from * for the rest of the round, slip stitching to join at the end of the row.
- 15. Chain 2, *1hdc into the next five stitches, then 2hdc in the next. Repeat from * for the rest of the round, slip stitching to join at the end of the row.
- 16. Chain 2, *1hdc into the next six stitches, then 2hdc in the next. Repeat from * for the rest of the round, slip stitching to join at the end of the row.
- 17. Chain 2, *1hdc into the next seven stitches, then 2hdc in the next. Repeat from * for the rest of the round, slip stitching to join at the end of the row.
- 18. Make 1hdc into each stitch, colour changing to white at the end of the row.
- 19. Slip stitch into each stitch and join at the end of the round.
To finish make sure all of the ends are sew in to a matching coloured row.
Your Crochet Doll
This crochet doll pattern can be followed directly, or adapted to suit the crochet doll you want. The easiest way to adapt it is to change the colours of yarn you use. Alternatively you can make her different clothing, either through simple changes like crocheting a longer length of dress, or by using fabric and sewing her a set of clothing instead.
More Crochet Toy Patterns
- Crochet teddy bear pattern
- Stick Man crochet pattern
- Crochet dragon toy
- How to crochet a unicorn
Happy Crocheting! x


Hi there….I’m trying to figure out your pattern. First on row 28 to 29 on the head portion, it says 1 sc, 1 sc2tog. But you can’t get from 18 to 9 without doing, sc2tog on all stitches.
Then on row 31 to 32, you go from 9 to 24 doing 2 sc stitches and 2 sc in one stitch?
Hi Jan, It looks like I had counted a round incorrectly, due to a missed step. Thanks for pointing this out, you should find that the pattern now makes sense from row 28 onwards! Best wishes, Lucy Kate.
Thanks for that….now on the arms is another missing row. I think row 4 should be st 2, then 2sc in next to get to 24?
Then row 5 should be the 24 around?
row 6 will then be the decrease round?