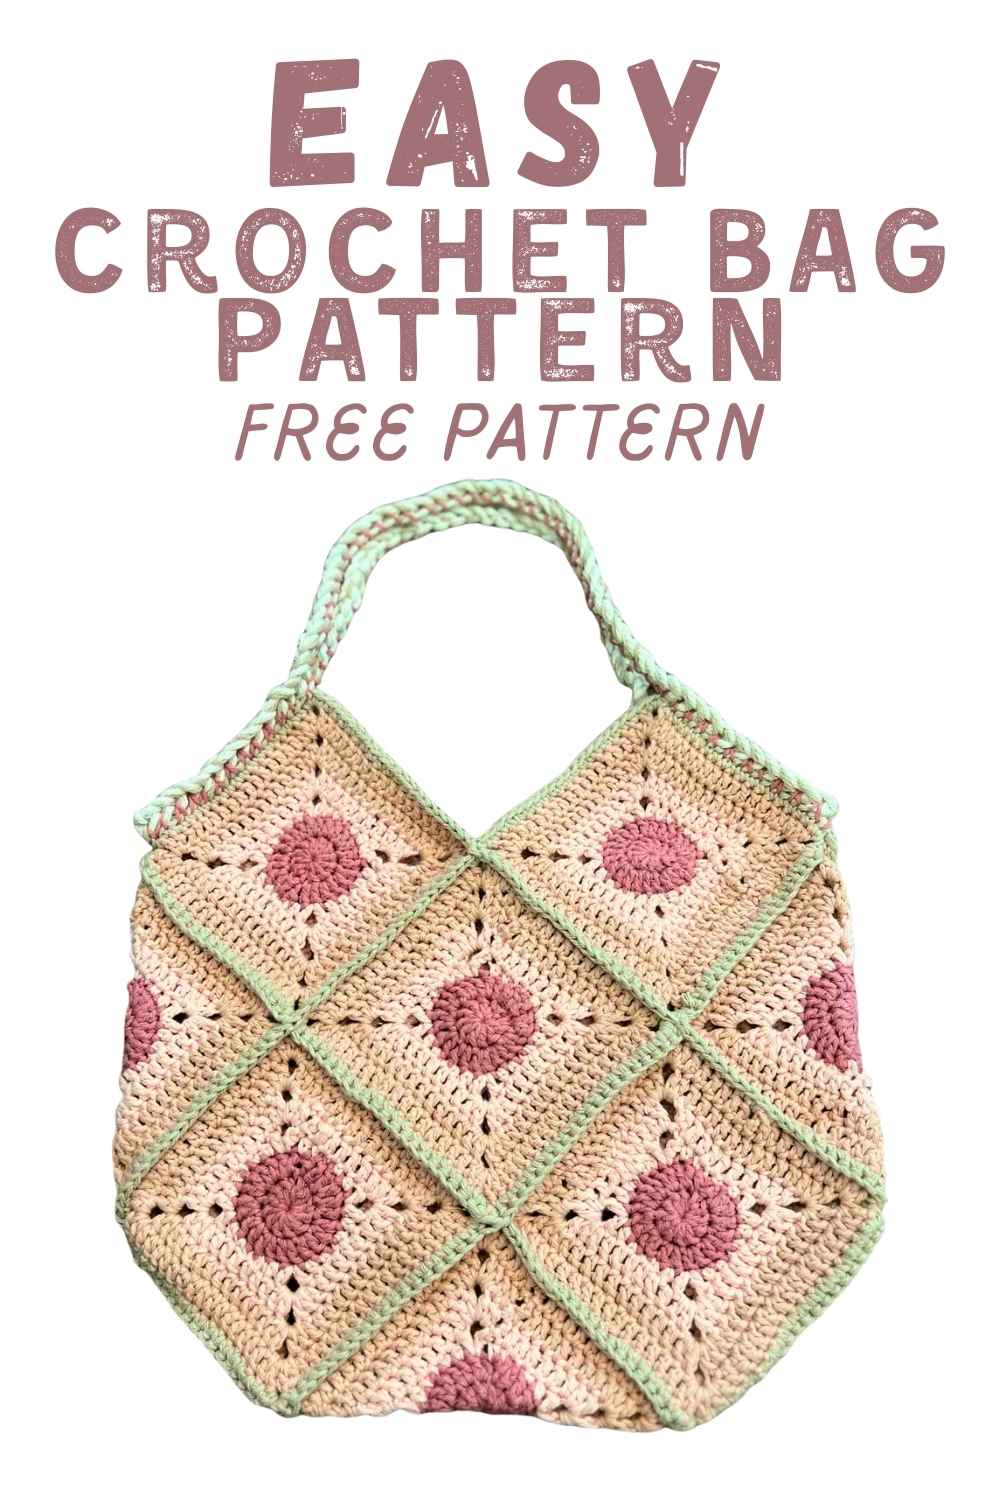
Easy Spotty Crochet Bag Pattern
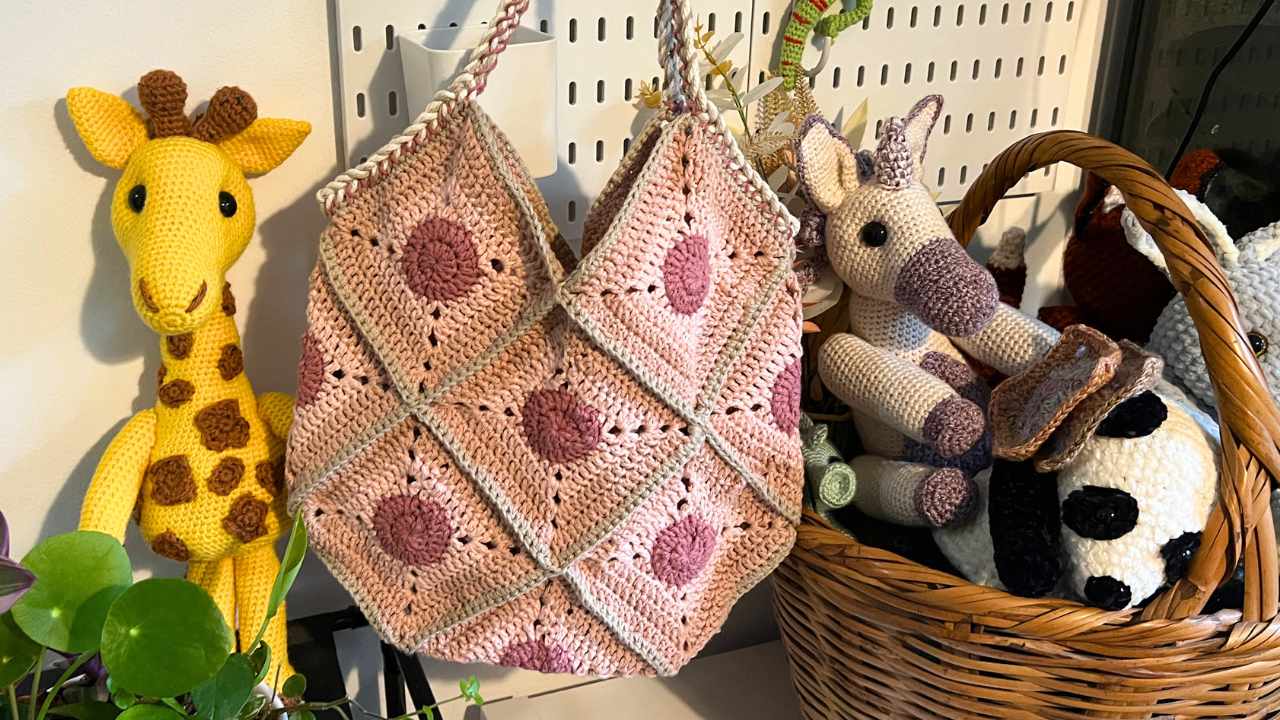
It’s been a tough week! My mother in law has been taken into hospital, and I wanted to make her something to cheer her up a bit. She recently admired the bag I made for my daughter, so I’ve made her a similar one, but with a twist!
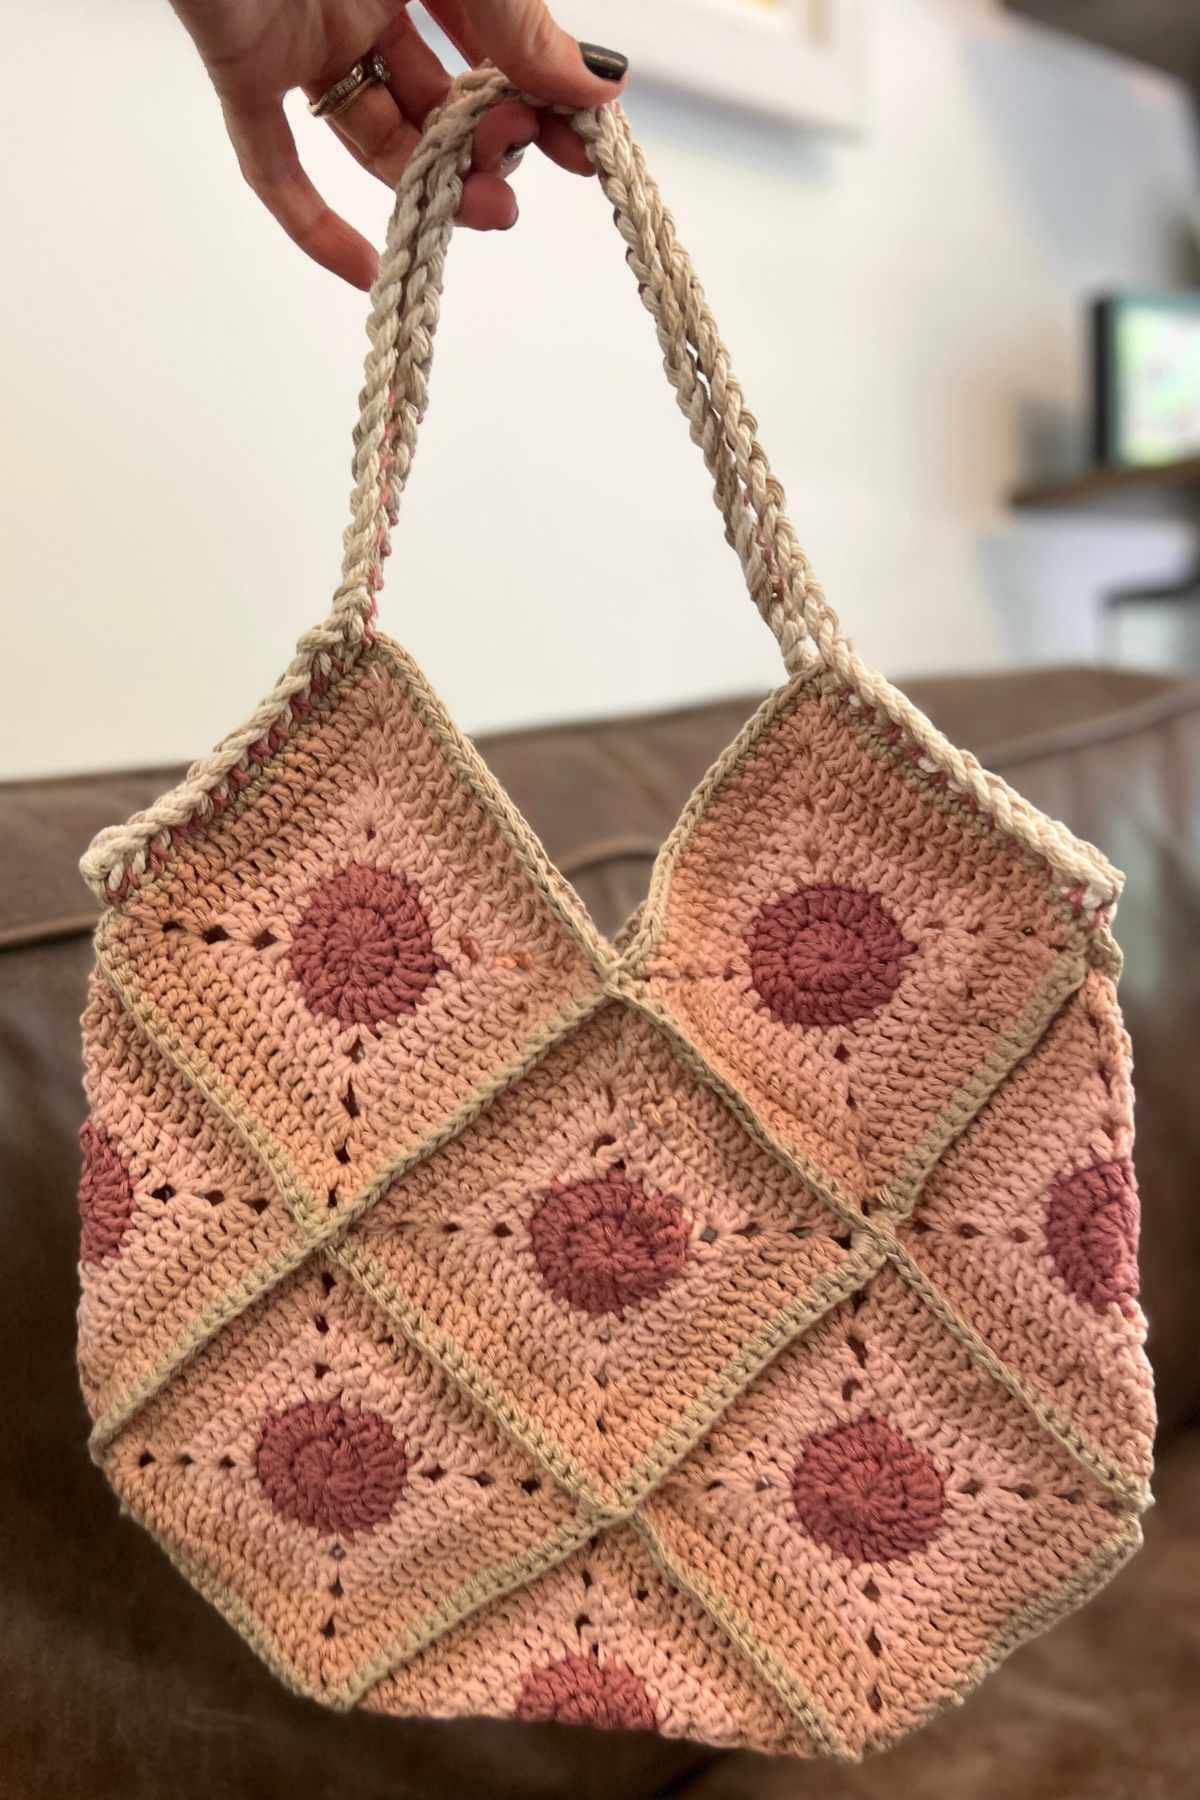
This easy spotty crochet bag pattern uses 13 circle granny squares, with a simple joining method and a little bit of detailing on the handles. It took me a couple of afternoons to make up, and should be a great quick project for an experienced crocheter or a fun introduction to crochet if you’re a beginner.
Your Equipment List
Here’s what I used to make this bag. You can substitute any of the yarns for different brands, but I recommend sticking with a high cotton content as they hold up well to use.
- Dark pink aran yarn – Rico Creative Cotton*
- Pale pink aran yarn – Rico Creative Cotton*
- Beige aran yarn – Rico Creative Cotton*
- Cream aran yarn – Lily Sugar n’ Cream*
- White macrame cord
- 10mm crochet hook
- 4mm crochet hook
- Yarn needle
- 14 stitch markers or safety pins
Terms and Stitches
- magic circle
- tr – treble/triple crochet
- dc – double crochet (US)
- hdc – half double crochet
- sc – single crochet
- slst – slip stitch
- ch – chain
- 2dc – increase by making two single double into one stitch
- cc – color change
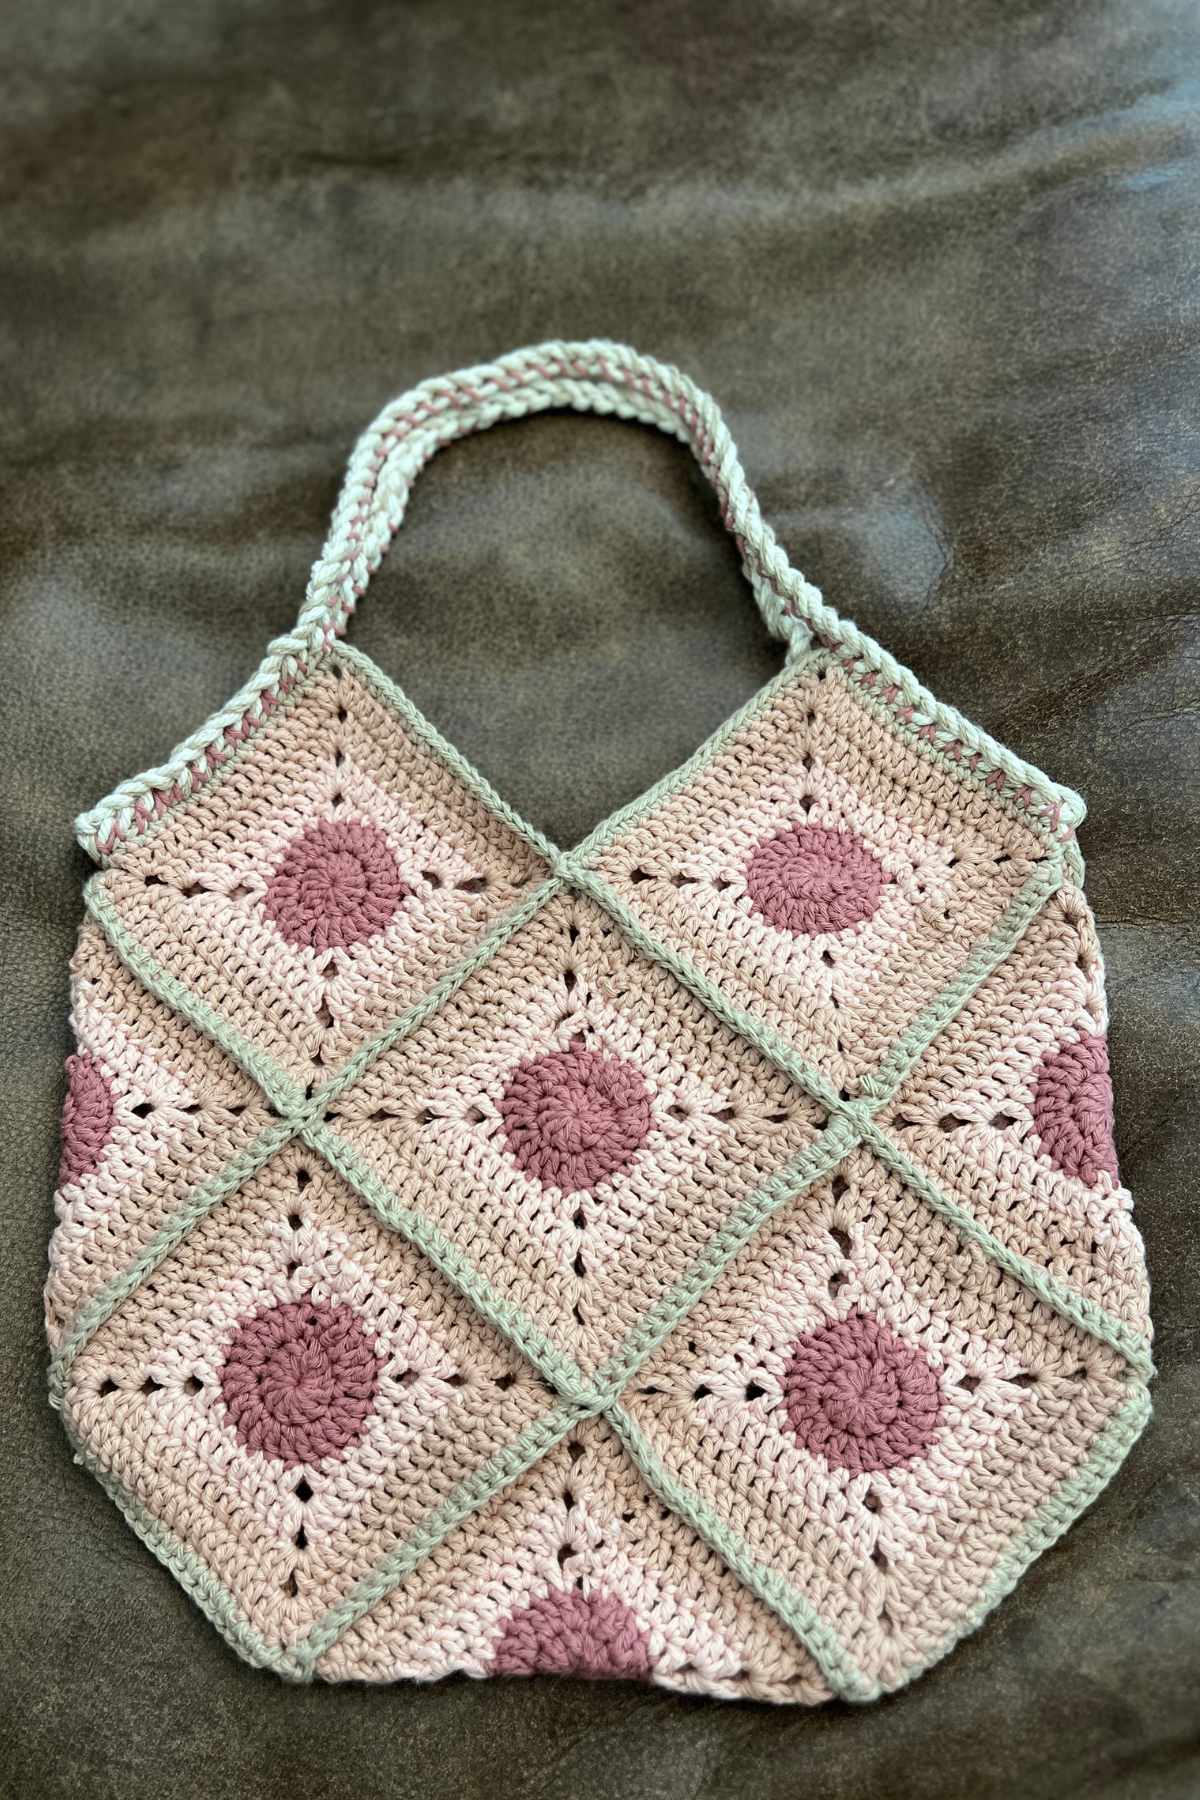
Easy Spotty Crochet Bag Pattern
I made this bag in sections, so I have separated them out for you to keep things simple.
The Granny Squares
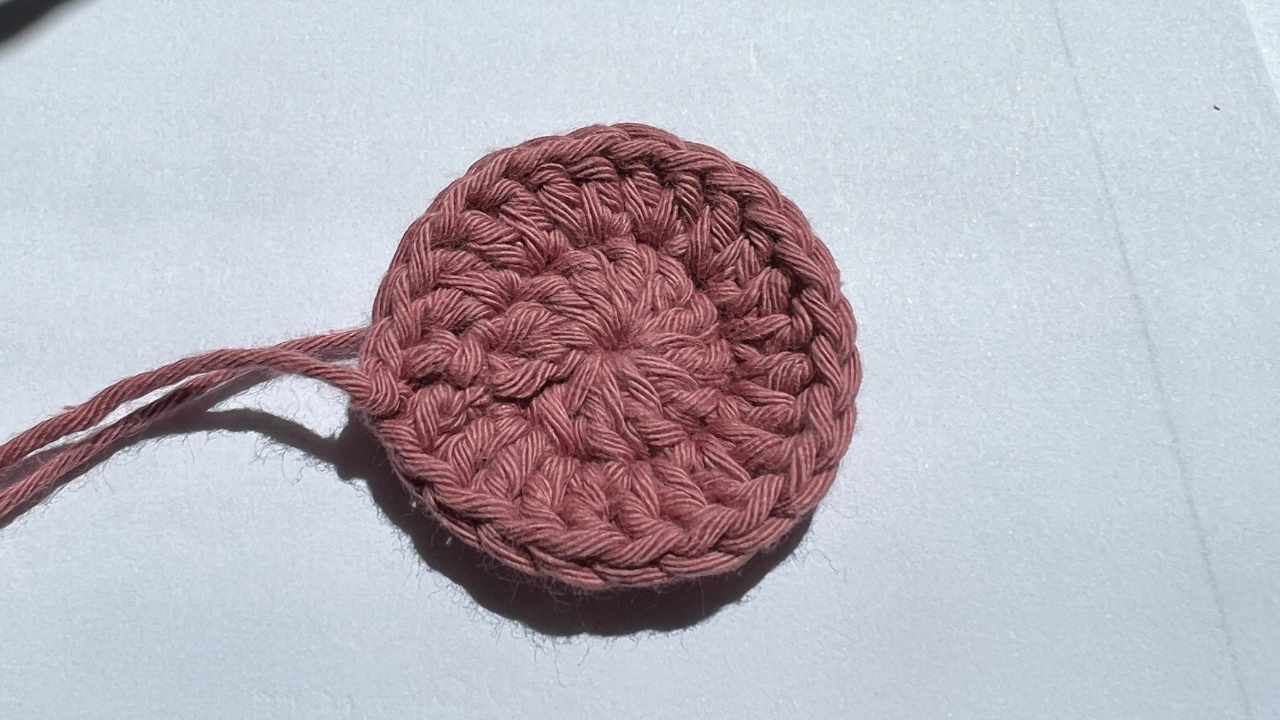
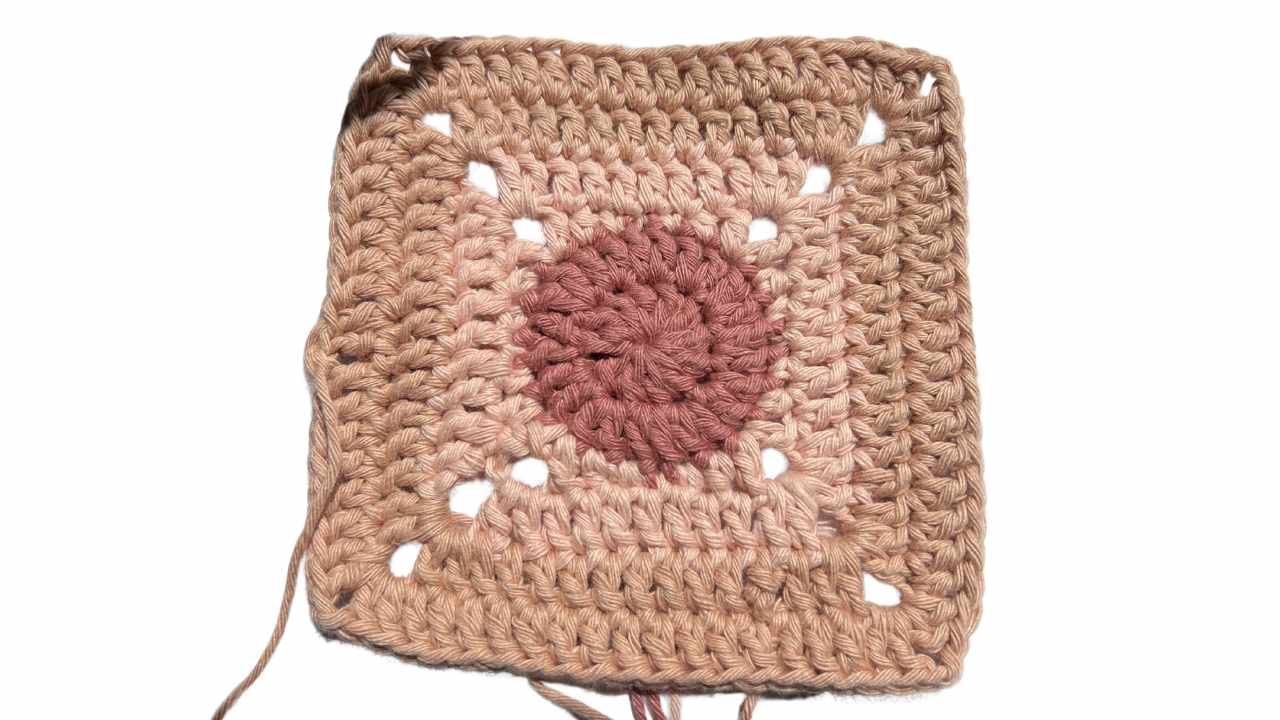
Begin in your darkest pink shade, and make 13 of the following circle granny squares.
Round 1
Make a magic circle.
Ch3 (counts as 1dc), dc x 11 into the magic circle. Slst into the top of ch3 to close. (12)
Round 2
Ch3 (counts as 1dc), 1dc into the same stitch, 2dc x 11. Slst into the top of the ch3. (24)
Cut yarn and weave in ends. cc pale pink
Round 3
Ch5 (counts as ch2 + *1dc), 1dc into the same stitch, 1hdc, 1sc, slst, 1sc, 1hdc, (1dc, ch2, dc into the same space)* repeat 3 times. 1hdc, 1sc, slst, 1sc, 1hdc, slst into third ch.
Round 4
Ch5 (counts as 2ch and 1dc), 2dc into corner space, *1dc x 7, (2dc, ch2, 2dc) into next corner* 3 times. 1dc x 7, 1dc into corner space, slst into third ch.
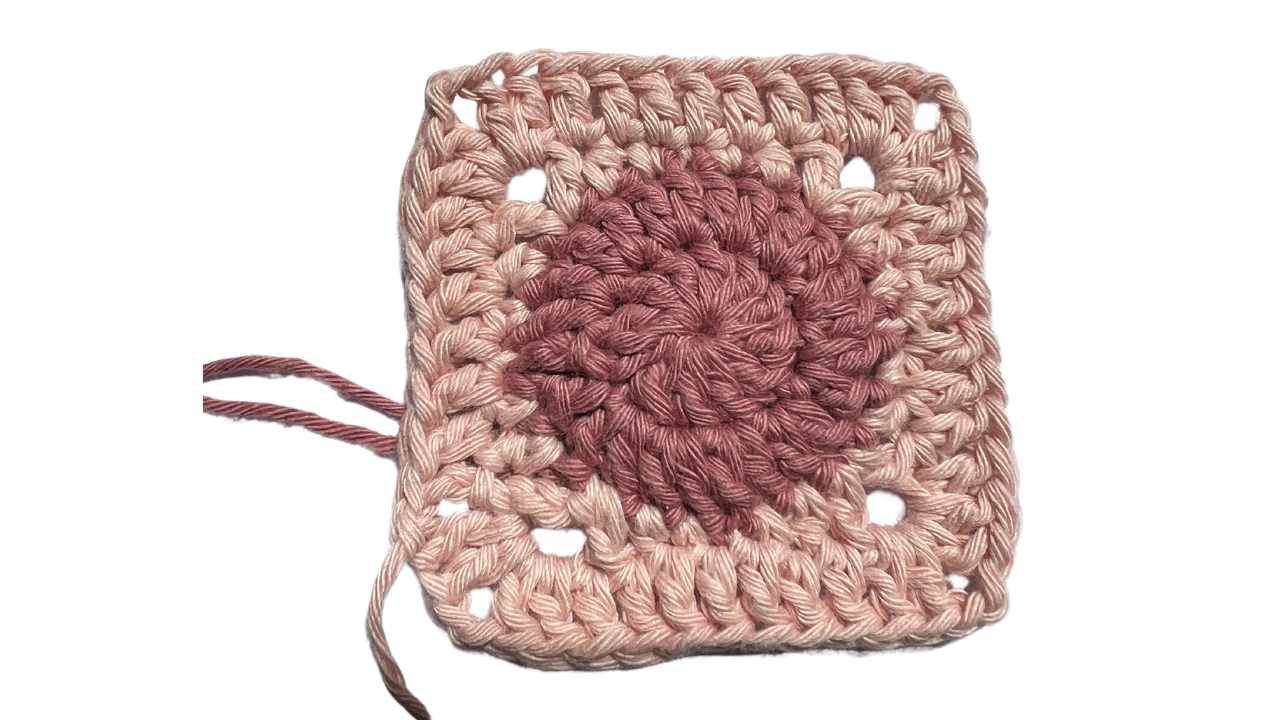
Cut yarn and weave in ends. cc beige
Round 5
Ch5 (counts as 2ch and 1dc), 2dc into corner space, *1dc x 11, (2dc, ch2, 2dc) into next corner* 3 times. 1dc x 11, 1dc into corner space, slst into third ch.
Round 6
Ch5 (counts as 2ch and 1dc), 2dc into corner space, *1dc x 11, (2dc, ch2, 2dc) into next corner* 3 times. 1dc x 11, 1dc into corner space, slst into third ch.
Cut yarn and weave in ends.
Blocking time
This is the point at which I recommend stacking up those squares on a blocking board, and leaving them overnight.

Creating the Shape
Once your ends are weaved in, you’re going to create the shape and pin it in place with stitch markers or safety pins.
Lay five squares right side down, then five more directly on top of them right side up. Take the remaining three squares and fold them in half along the diagonal. Place two at each side, and one at the bottom.
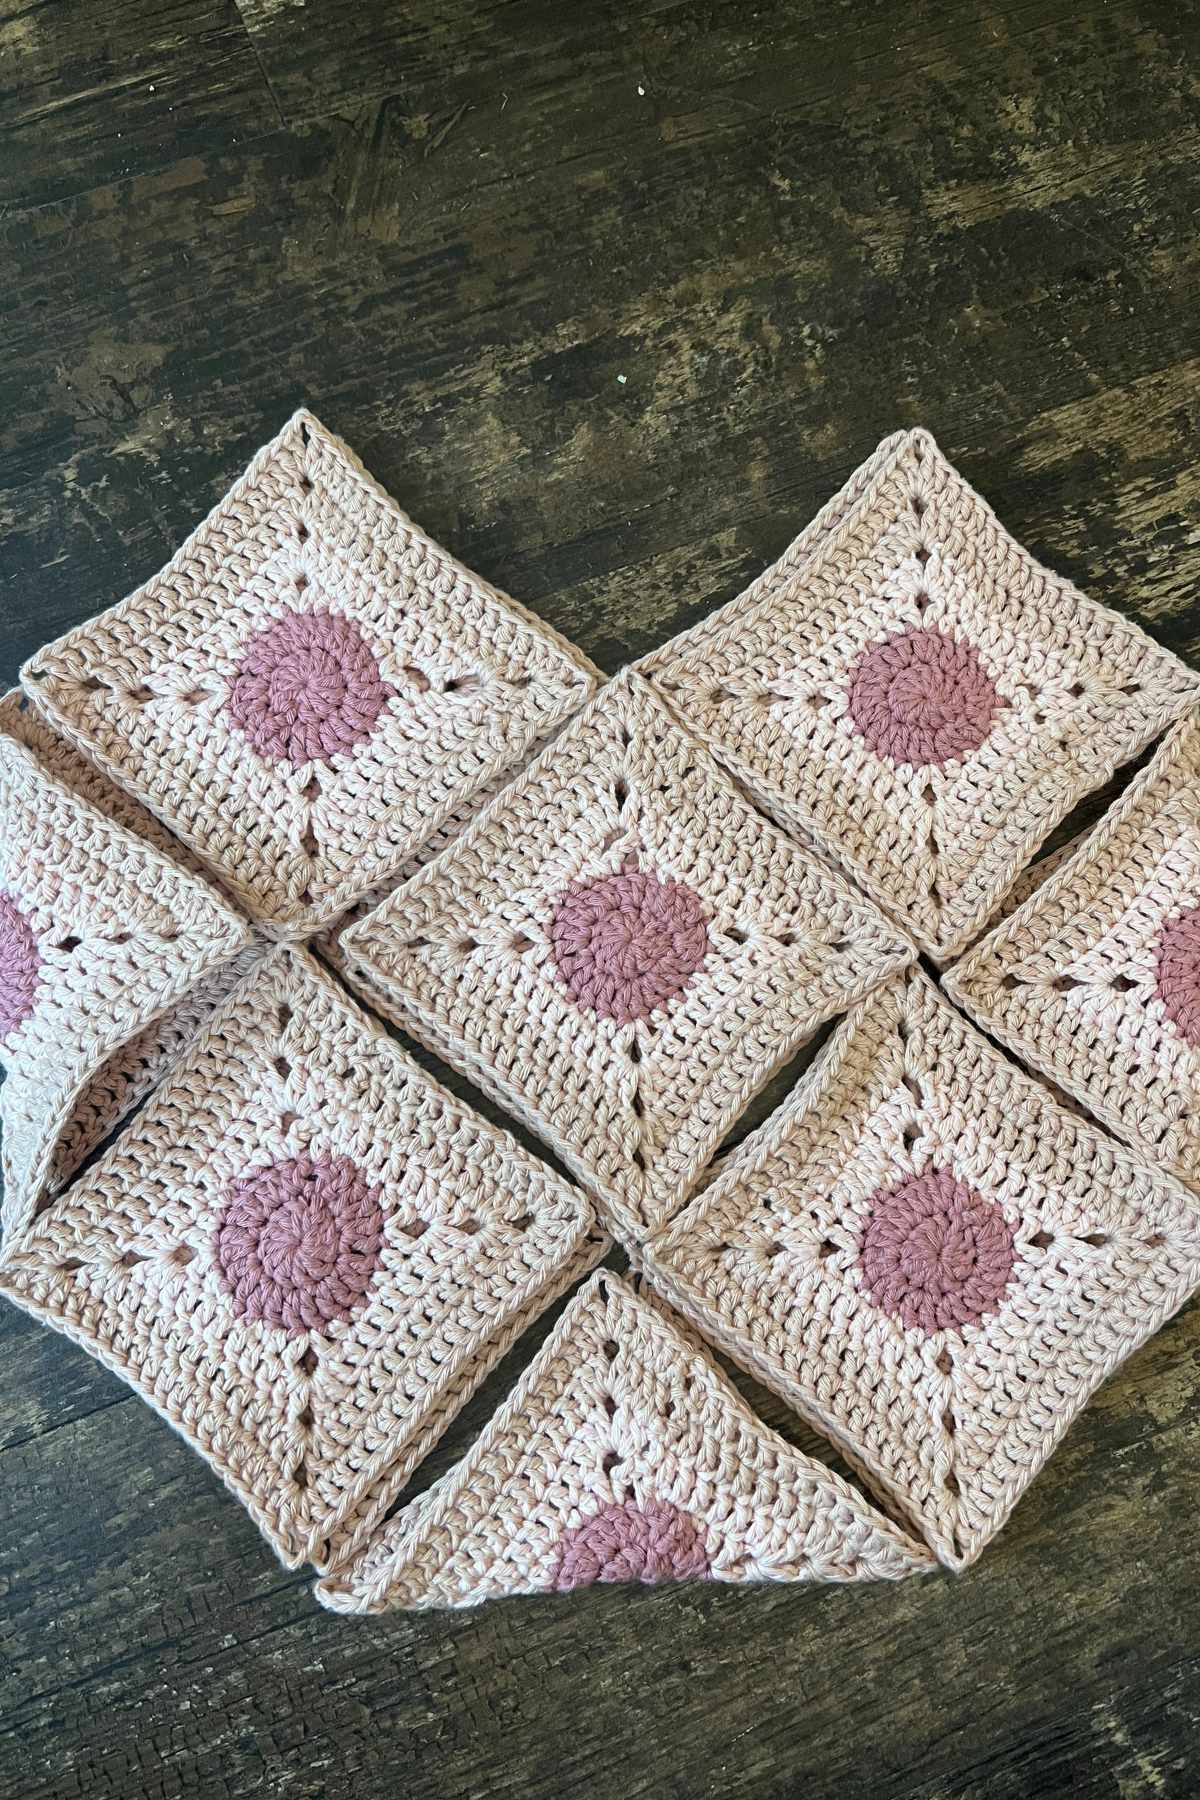
Now take a stack of stitch markers, and use one to join each of the corners that meets another. You should be able to pick the bag up at the end of this process and have it retain its shape.

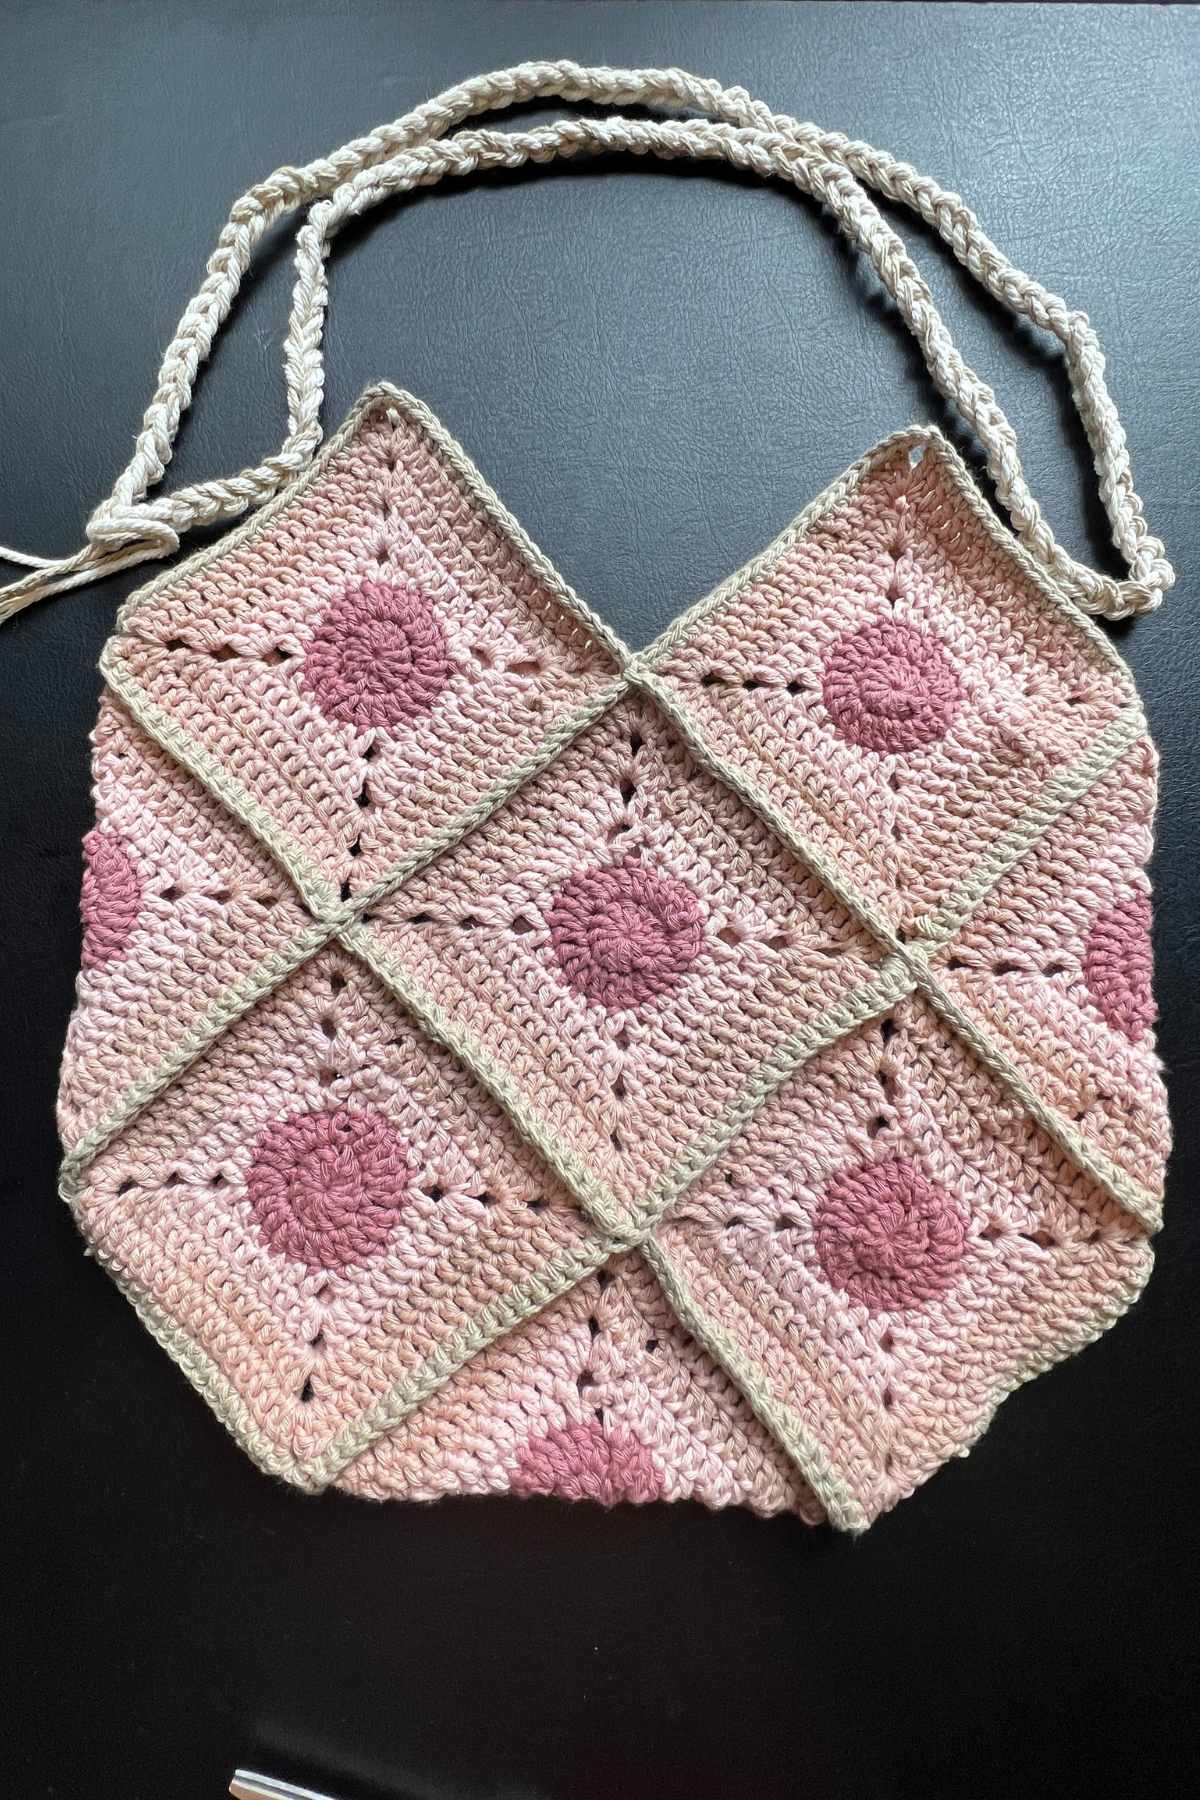
Edging the Opening
I decided to make an exposed join for my bag, so if you want the same you’ll need your right sides to stay on the outside.
You’re going to take your 4mm crochet hook and cream yarn, and work around the opening of the bag. Starting at the top of one of the places that will hold a handle, join into the corner space with a slip stitch, and make a chain of one stitch. Now work your way around the opening making a single crochet into each stitch. When you read your starting point, slip stitch into the ch1.
Weave in the end.
Joining the Granny Squares Together
Continue with your cream yarn to join the squares together.
You’ll be working along each diagonal line between the squares, up and around the bag as you go. Start each section at a corner, and use single crochets to join the two squares edge stitches together.

If you’ve not joined granny squares together before, you’ll find a more detailed explanation here.
Crocheting the Handle
To create my handle I teamed up a strand of the cream yarn and a strand of white macrame cord. I then used the 10mm crochet hook to ch 100.
Slst the last to the first chain loop and tie off.
Attaching the Handle
Hold the loop of chains between your hands so that it’s got an even length at each side. Then place it so that the end of each side of the handles sits at each side of the bag’s opening.
Thread your needle with the dark pink yarn, and you are now going to attach the strap along the edges of the bag as shown in the image below. You will sew, weaving in and out through each of the main bag’s adjacent stitches once, with the handle strap stitches being looped through twice as they are twice as long.
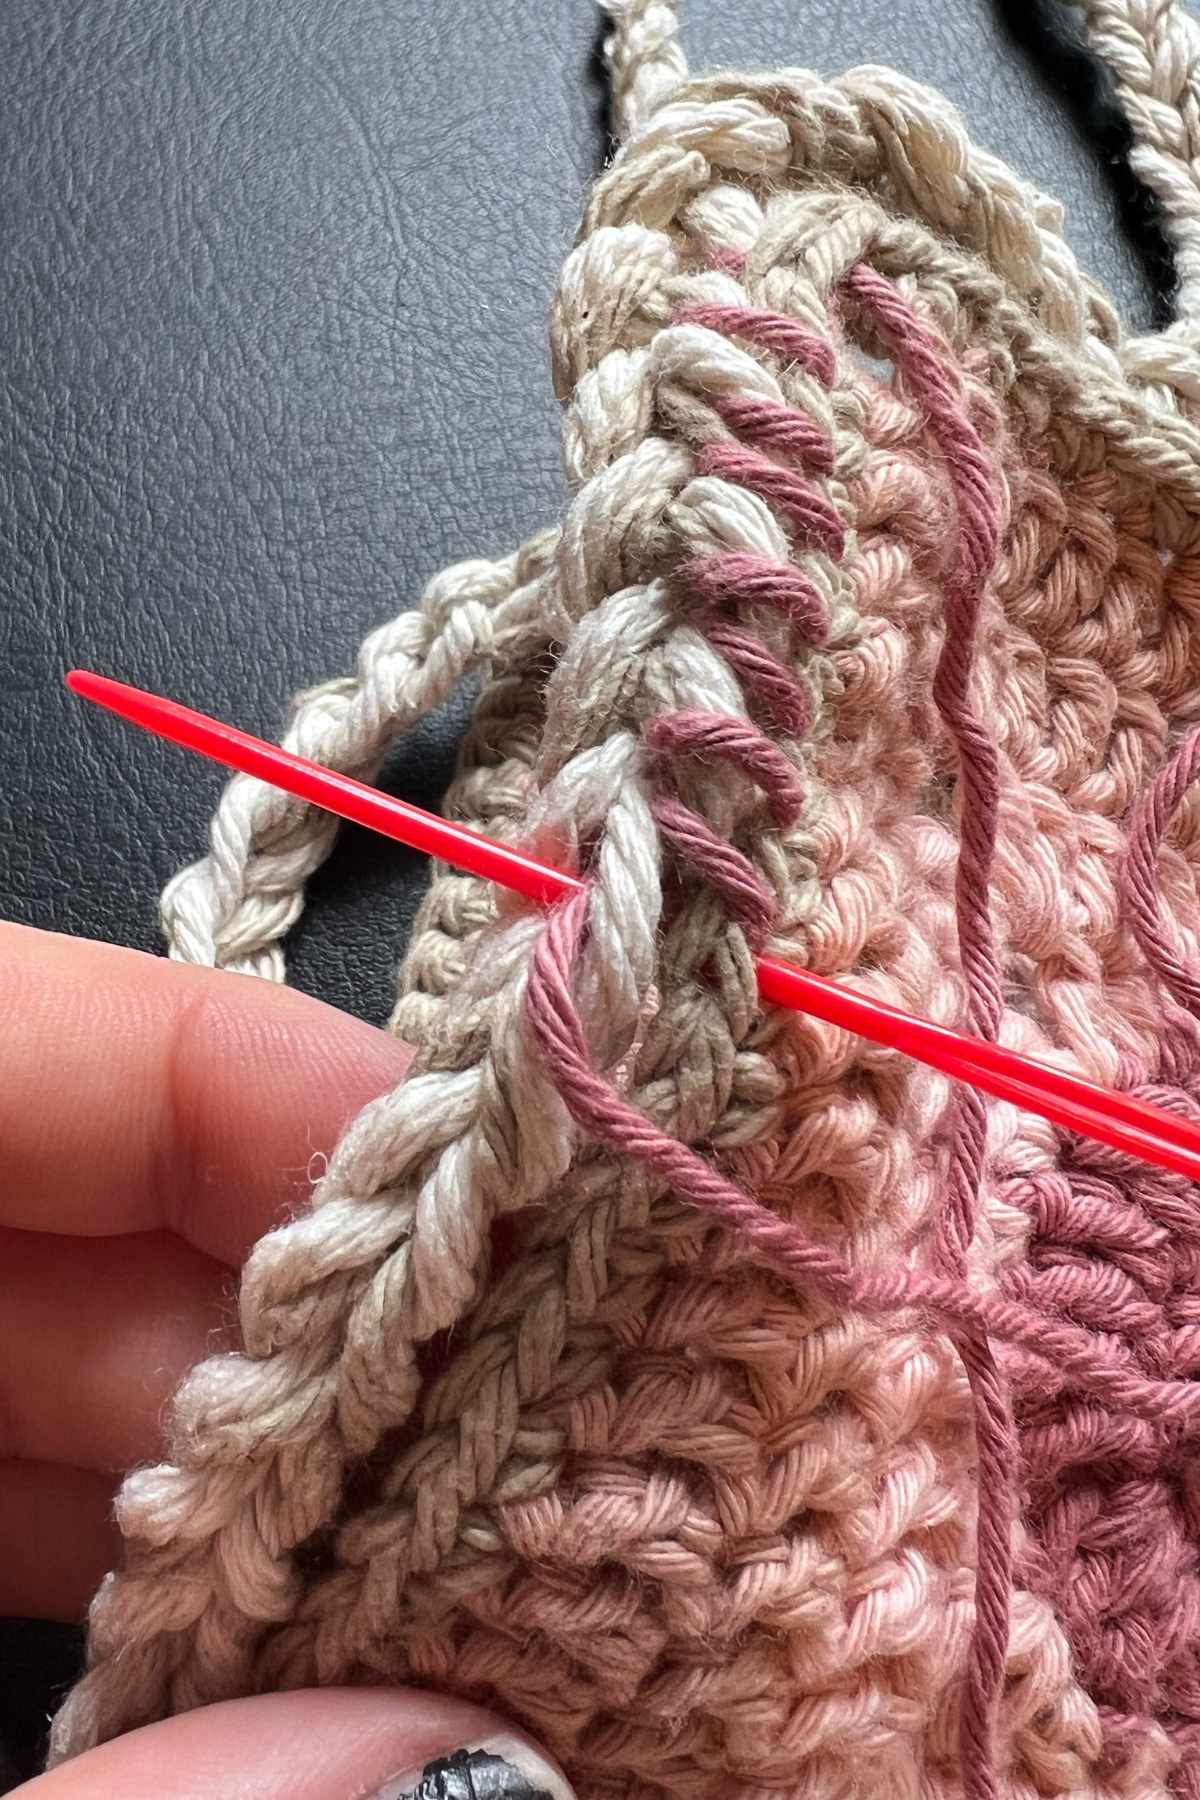
Once you’ve attached the handles along each side, take the same colored yarn and weave in and out one side of the loops of the handle’s chain, to tie it in with the join to the bag.
Sew in all of your remaining loose ends, and you’re done!


What are the dimensions of this bag? Thanks
Hi Lisa,
The exact dimensions will depend on the yarn and hook you use, and your tension. The pattern is designed to work with any yarn and the correct sized hook, but if you use the same materials as Lucy it will be about 12″ wide and 12″ from the base to where the strap joins.
I hope that helps!
Sarah
Lucy Kate Crochet HQ