How To Make A Crochet Elbow Patch
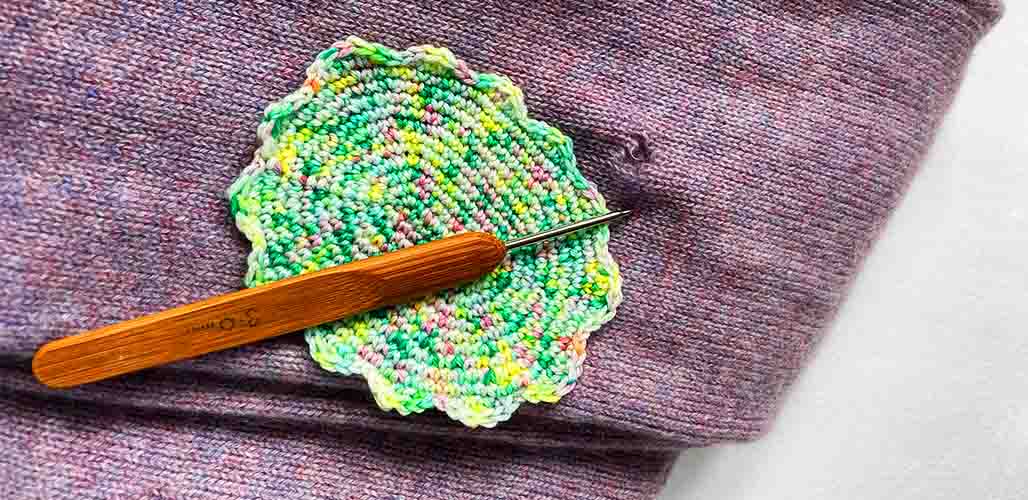
Last week, I pulled out one of my favorite sweaters and realized it had worn through at the elbows. Since it was a present from my mom, and the rest of it was still going strong, I decided to have a go at making some crochet elbow patches to repair the sleeves. And to say I’m pleased with the results is an understatement – I love how they’ve turned out!

I think they’re a great example of how repairs on clothes can be beautiful as well as functional, and tell a story about the lifetime of the garment. So I want to show you how to crochet oval elbow patches with either a smooth or wavy edge to adorn your sleeves too!
Contents
- Crocheting elbow patches
- Notes on the pattern
- Choosing your materials
- How to crochet an oval shape
- The pattern!
- Making bigger or smaller patches

Crocheting elbow patches
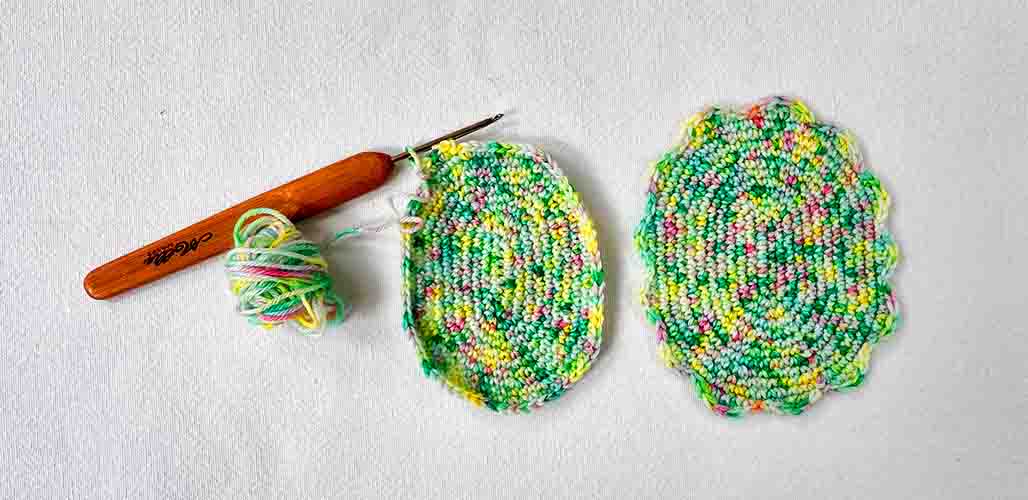
Crocheting elbow patches is reasonably straightforward, and a good activity for a quiet afternoon or rainy weekend. They’re the perfect project if you want a quick hit of creative satisfaction. Really you just need to know how to crochet an oval shape, and I’m going to share a perfect pattern for that in a moment. Of course, you could make your elbow patches in any two dimensional shape, and that’s why I’ve experimented with an unusual wavy border inspired by visible mending traditions on mine. But if you’re a purist, I’ve got details of how to finish with a smooth edge too.
Notes on the pattern
A couple of house-keeping points before I dive into the details!
- This elbow patch pattern is made in single crochet. I wanted them patches to be dense and robust, not just ornamental. Working in single crochet means more rows and a bit more effort than working in double crochet, but I think it pays off.
- The pattern is written using American crochet terms. If you’re more familiar with English crochet terminology, check out these conversion guides.
- My patches measure 3 inches by 4 inches, but you could achieve larger or small patches by using a different yarn or adding/removing rows. I’ve included more notes on both approaches as I go.
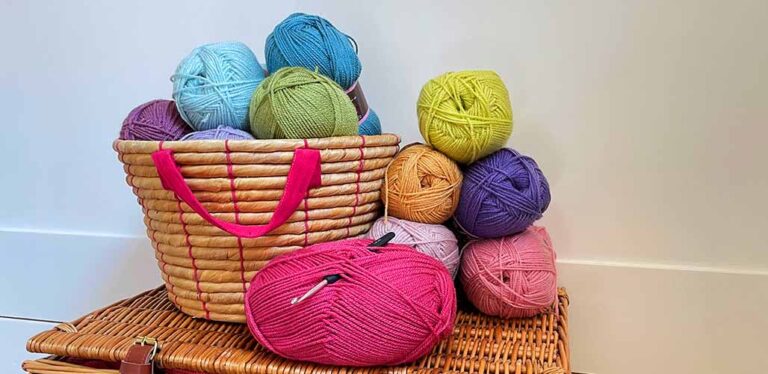
Choosing your materials
Since my sweater is made from quite fine, narrow fibers, I made my elbow patches using 4 ply (sports weight) yarn, and a 3mm (size D) hook. You could use any yarn that complements the weight of your own sweater though, and an appropriately sized hook. For example, a chunky knit sweater will look good with elbow patches made in DK or worsted weight yarn.

You can use any fiber you like, but it’s a good idea to choose one with the same laundry requirements as your sweater. I chose one which is mostly wool, blended with 15% nylon. The wool content complements my sweater, which is 100% wool, but the added nylon should make my patches a bit more durable. Yarns with this mix of wool and nylon are often described as ‘sock yarns’ because they’re warm and soft, but more hardwearing than pure wool.
How to crochet an oval shape
If you’ve crocheted a circle before, then the technique for crocheting an oval isn’t going to surprise you much. Rather than a magic circle though, we start with a foundation chain, and all our increases happen at the two ends. Each row increases by 6 stitches, and the position of the increases is staggered on alternate rows, so that you end up with a lovely smooth curve, rather than a hexagon with two long sides!
By the time you get to row 4 and beyond, the pattern in the pattern (so to speak) should start to become apparent, so just trust the process at first!
The pattern
| Abbreviations | |
| ch | chain |
| st/sts | stitch/stitches |
| sl st | slip stich |
| sc | single crochet |
| dc | double crochet |

Start by making a foundation chain of 9.
Row 1
Starting at the 2nd chain from the hook, sc into next 7 ch. 3 sc into remaining foundation chain. Then, working back along the other side of your foundation chain, sc into the next 6 sts. Make 2 sc into the back of the last stitch. Slip stitch into your first sc. (18 sts).
Row 2
Ch 1 (this does not count as a stitch, in this or any of the following rounds). 2 sc into first st (the same one you put your slip stitch into at the end of row 1). Sc into next 6 sts. 2 sc into next 3 sts. 1 sc into next 6 sts. 2 sc into next 2 sts. Sl st into the first sc. (24 sts).
Row 3
Ch1. 2 sc into first st. 1 sc into next 7 sts. (2 sc into next st, 1 sc into the following st) 3 times. 1 sc into next 6 sts. (2 sc into next st, 1 sc into the following st) 2 times. Sl st into first sc. (30 sts).
Row 4
Ch 1. Sc into first 2 sts. 2 sc into next st. Sc into next 8 sts. (2 sc into next st, 1 sc into following 2 sts) 3 times. Sc into next 6 sts. 2 sc into next st, 1 sc into following 2 sts. 2 sc into remaining st. Sl st into the first sc. (36 sts).
Row 5
Ch1. Sc into first st. 2 sc into next st. Sc into next 9 sts. (2 sc into next st, 1 sc into following 3 sts) 3 times. Sc into next 6 sts. 2 sc into next st, 1 sc into following 3 sts. 2 sc into next st. 1 sc into remaining 2 sts. Sl st into the first sc. (42 sts).
Row 6
Ch1. Sc into first 4 sts. 2 sc into next st. Sc into next 10 sts. (2 sc into next st, 1 sc into following 4 sts) three times. Sc into next 6 sts. 2 sc into next st, 1 sc into following 4 sts. 2 sc into remaining st. Sl st into the first sc. (48 sts).
Row 7
Ch1. Sc into first st. 2 sc into next st. Sc into next 11 sts. (2 sc into next st, 1 sc into following 5 sts) 3 times. Sc into next 6 sts. 2 sc into next st, 1 sc into following 5 sts. 2 sc into next st. 1 sc into remaining 4 sts. Sl st into the first sc. (54 sts).
Row 8
Ch1. Sc into first 6 sts. 2 sc into next st. Sc into next 12 sts. (2 sc into next st, 1 sc into following 6 sts) three times. Sc into next 6 sts. 2 sc into next st, 1 sc into following 6 sts. 2 sc into remaining st. Sl st into the first sc. (60 sts).
Row 9
Ch1. Sc into first st. 2 sc into next st. Sc into next 13 sts. (2 sc into next st, 1 sc into following 7 sts) 3 times. Sc into next 6 sts. 2 sc into next st, 1 sc into following 7 sts. 2 sc into next st. 1 sc into remaining 6 sts. Sl st into the first sc. (66 sts).
Row 10
Ch1. Sc into first 8 sts. 2 sc into next st. Sc into next 14 sts. (2 sc into next st, 1 sc into following 8 sts) three times. Sc into next 6 sts. 2 sc into next st, 1 sc into following 8 sts. 2 sc into remaining st. Sl st into the first sc. (72 sts).
Row 11
Ch1. Sc into first st. 2 sc into next st. Sc into next 15 sts. (2 sc into next st, 1 sc into following 9 sts) 3 times. Sc into next 6 sts. 2 sc into next st, 1 sc into following 9 sts. 2 sc into next st. 1 sc into remaining 8 sts. Sl st into the first sc. (78 sts).
Row 12 for a smooth oval outline
Ch1. Sc into first 10 sts. 2 sc into next st. Sc into next 16 sts. (2 sc into next st, 1 sc into following 10 sts) three times. Sc into next 6 sts. 2 sc into next st, 1 sc into following 10 sts. 2 sc into remaining st. Sl st into the first sc. (84 sts).
Row 13 for a smooth oval outline
Ch1. Sc into first st. 2 sc into next st. Sc into next 17 sts. (2 sc into next st, 1 sc into following 11 sts) 3 times. Sc into next 6 sts. 2 sc into next st, 1 sc into following 11 sts. 2 sc into next st. 1 sc into remaining 10 sts. Sl st into the first sc. (90 sts). Tie off and weave in loose ends.
Alternative row 12 for a wavy outline
Ch1. Sc in first st, dc in next 2 sts, sc in next st, sl st in next 2 sts. (Sc in next st, dc in next 2 sts, sc in next st, sl st in next 2 sts) 12 times. Tie off and weave in loose ends.
Finally, block your ovals (or squiggly ovals) to make their shape nice and even and flat, before sewing them onto your sweater using a simple whip stitch. Remember to measure the position of the patch on each sleeve to make sure they’re even!
How to crochet oval shapes in different sizes
For larger or smaller sweaters, it’s easy to modify this pattern to make larger or smaller patches. For smaller patches, just work fewer rows and stop when your patches are the desired size. To make larger patches, add extra rows using the following formula:
Even numbered rows
Ch1. Sc into first [row number – 2] sts. 2 sc into next st. Sc into next [row number + 4] sts. (2 sc into next st, 1 sc into following [row number – 2] sts) three times. Sc into next 6 sts. 2 sc into next st, 1 sc into following [row number – 2] sts. 2 sc into remaining st. Sl st into the first sc.
Odd numbered rows
Ch1. Sc into first st. 2 sc into next st. Sc into next [row number + 4] sts. (2 sc into next st, 1 sc into following [row number – 2] sts) 3 times. Sc into next 6 sts. 2 sc into next st, 1 sc into following [row number – 2] sts. 2 sc into next st. 1 sc into remaining [row number – 1] sts. Sl st into the first sc.
Adding the wavy border
Since the waves are worked in a sequence of six repeating stitches, and the basic oval shape increases 6 stitches at a time, the wave pattern should fit in a whole number of times, regardless of how many rows you add.
Let us know how you get on!
I hope this simple pattern has inspired to to mend or personalize some of your own sweaters. I’d love to see the results – please share your photos over on Instagram! And as ever, whilst this pattern has been checked and tested for errors, let us know if you spot any which snuck through using the comments box down below.