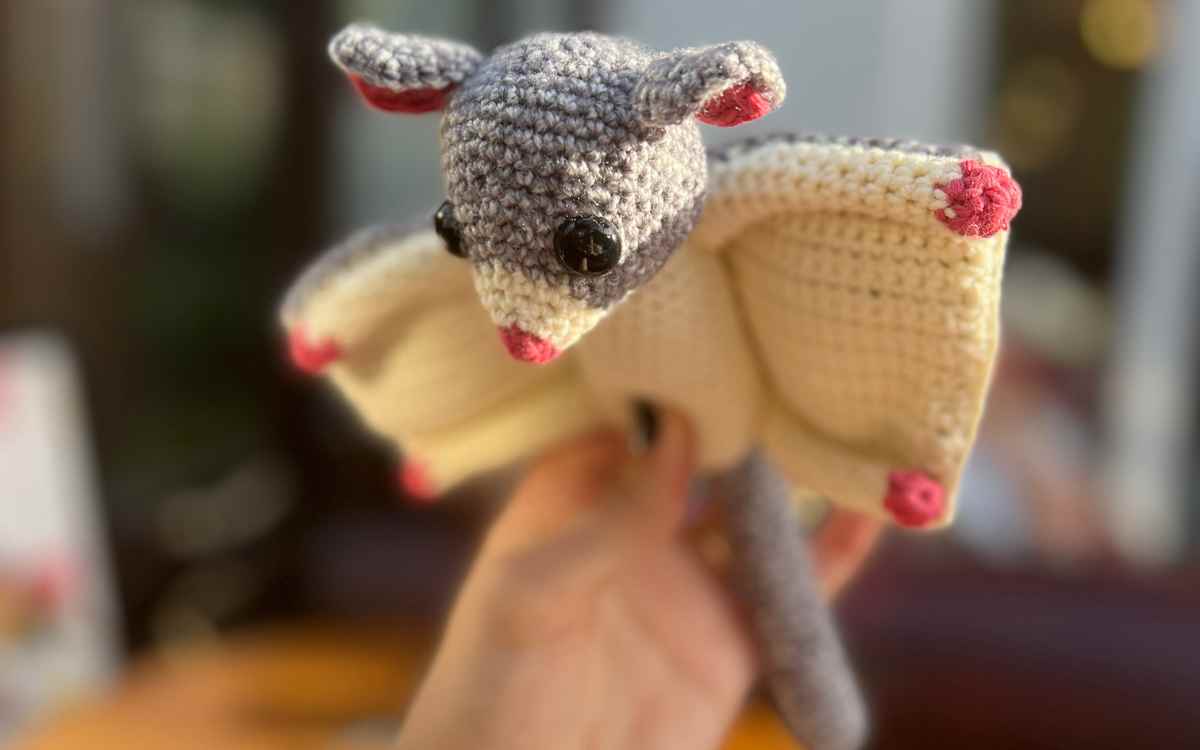
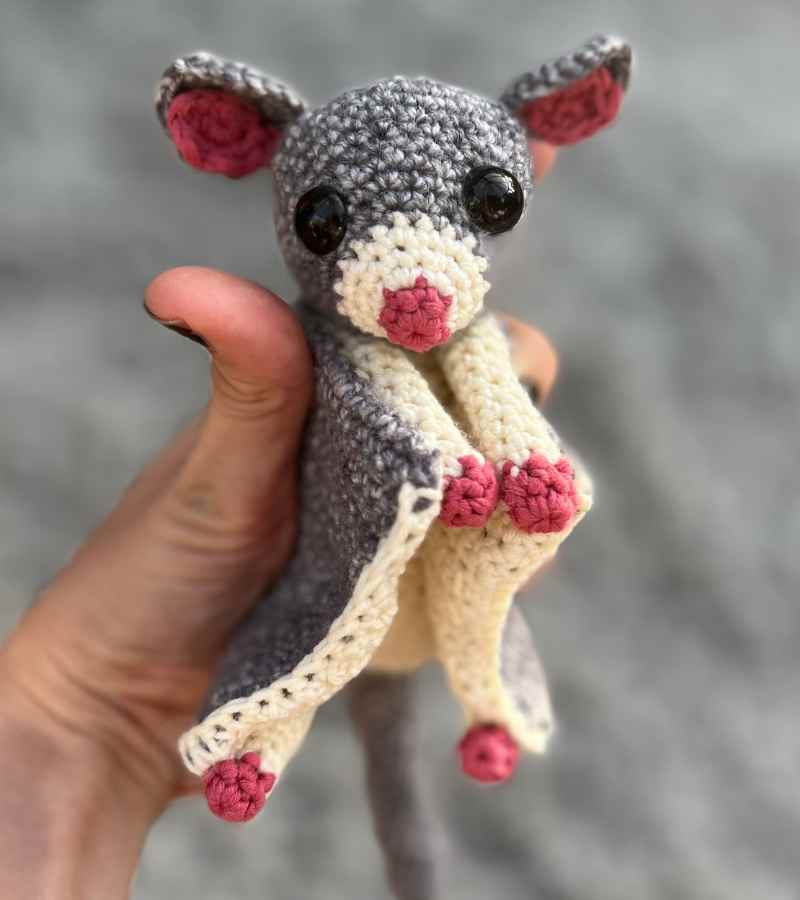
Cute Crochet Sugar Glider Pattern

My crochet sugar glider pattern is beginner friendly, and I’ll take you step by step through the pattern, so that even brand new amigurumi makers can hook up their own sugar glider toy. It’s a fun design, that you’ll find works up surprisingly quickly.

*The products linked in this pattern were carefully selected by Lucy Kate Crochet. If you decide to purchase using the links provided, we may earn a small commission on that sale. This is at no extra cost to you.
Crochet Sugar Glider Yarns and Other Kit
Here’s what you will need to crochet a sugar glider like mine:
- Gray variegated yarn
- Pink DK yarn
- Black DK yarn*
- White DK yarn
- 3.75mm crochet hook
- Steel yarn needle
- Stitch markers
- Toy stuffing
- Large safety eyes
For the main body I used Stylecraft’s Batik yarn in the Graphite color tones. The black markings were Paton’s Charcoal DK yarn*, and the white and pink areas were from my old yarn stash. However, I’m confident the pink was a Women’s Institute DK yarn and the white was merino wool textured. Any DK yarn* will work for this pattern with a 3.75mm crochet hook. If you use a different weighted yarn make sure all the colors are the same type, and that you choose your crochet hook based on the notes on the packaging.
I want to tell you there is a technical crocheting reason for the use of the 3.75mm crochet hook. However, the reality is I didn’t have a 4mm within reaching distance. But fortunately, it turned out okay!

Pattern Notes
Most segments of the toy are created from simple magic circles and built in rounds. You have a few color changes, but nothing too complicated. And you’ll need to be happy crocheting in straight line, repeating rows too. There is some hand sewing for the facial features and to join the toy together, but nothing too taxing. You will however definitely need a metal rather than a plastic yarn needle for this one, as it’s a fairly small toy and quite fine work.
You’ll find crochet abbreviations used in my toy crochet patterns, but I’ll explain each one in the first incidence so that you don’t lose track!
Free Sugar Glider Pattern
This free sugar glider pattern is designed to be followed in separate sections. You can assemble as you go, or attach everything together when you’ve finished.
Sugar Glider Head
Start the pattern with your pink yarn and 3.75mm crochet hook. Your first couple of rounds will be forming the crochet sugar glider’s nose.
Round 1
Make a magic circle of six stitches. (6)
Round 2
Put one single crochet into each stitch of the round, then in the last stitch of the round color change to your white yarn.
1sc x 6 cc to white (6)
Round 3
Make two single crochets into each stitch of the round.
2sc x 6 (12)
Round 4
1sc x 12 (12)
Round 5
(1sc, 2sc) x 6 cc to gray (18)
Round 6
1sc x 18
Round 7
(1sc x 2, 2sc) x 6 (24)
Round 8
(1sc x 3, 2sc) x 6 (30)
Round 9 – 10
1sc x 30
Round 11
(1sc x 4, 2sc) x 6 (36)
Round 12
(1sc x 5, 2sc) x 6 (42)
Round 13 – 14
1sc x 42 (42)
Insert safety eyes two rounds into the gray section of the fur, towards the sides of the head.
Round 15
1sc x 42 (42)
Round 16
(1sc x 5, sc2tog) x 6 (36)
Round 17
(1sc x 4, sc2tog) x 6 (30)
Round 18
1sc x 30 (30)
Round 19
(1sc x 3, sc2tog) x 6 (24)
Round 20
(1sc x 2, sc2tog) x 6 (18)
Round 21
(1sc, sc2tog) x 6 (12)
Fill with toy stuffing. Use the end of your crochet hook to gently push the filler in if needed.
Round 22
sc2tog to close
Crocheting your Sugar Glider Body
You will be working entirely with your cream yarn using the 3.75mm crochet hook.
Round 1
Magic circle of six stitches (6)
Round 2
2sc x 6 (12)
Round 3
(1sc, 2sc) x 6 (18)
Round 4
1sc x 18
Round 5
(1sc x 2, 2sc) x 6 (24)
Round 6 – 26
1sc x 24
Round 27
(1sc x 2, sc2tog) x 6 (18)
Round 28
(1sc, sc2tog) x 6 (12)
Fill your sugar glider’s body with toy stuffing. It should be fairly firm but not visible between the stitches.
Round 29
sc2tog to close. Leave a tail of yarn and sew it back into the body.
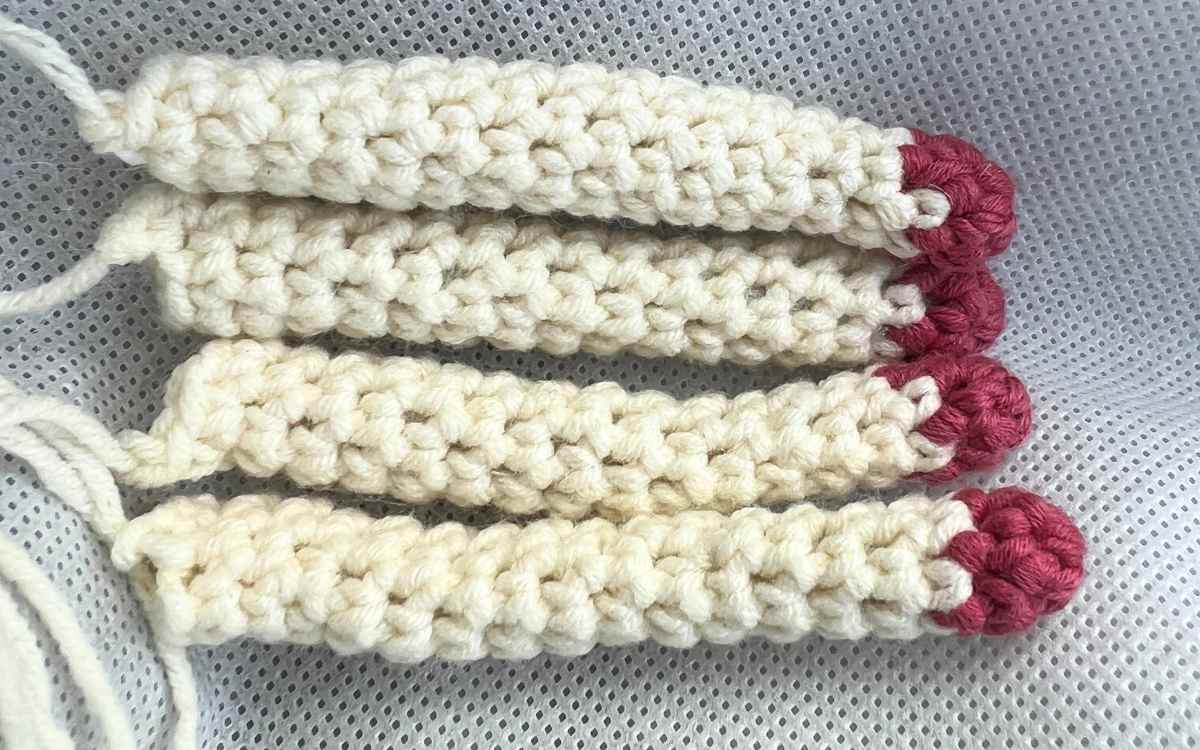
Crochet Sugar Glider Arms and Legs
Your crocheted sugar glider is going to have four equal arms/legs. You’ll begin working in your pink yarn to form the hands and feet, then swap to the gray.
Round 1
Make a magic circle of six stitches (6)
Round 2
1sc x 6 then cc to gray(6)
Round 3 – 22
1sc x 6 (6)
Round 23
1sc x 6, then slip stitch to close. Leave a long thread of yarn to sew the limbs to the body.
Crochet Sugar Glider Tail
Your sugar glider’s tail will all be crocheted using the gray yarn.
Round 1
Make a magic circle of eight stitches (6)
Round 2
2sc x 8 (16)
Round 3 – 23
1sc x 16 (16)
Fill your tail with yarn, slip stitch to finish and leave a long thread of yarn.
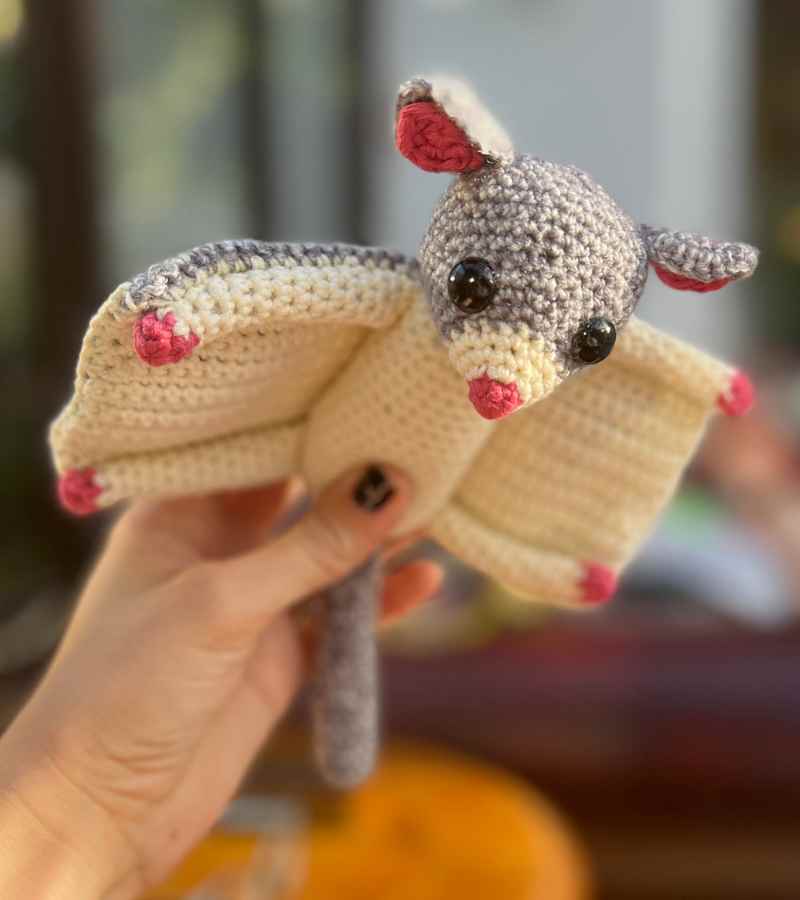
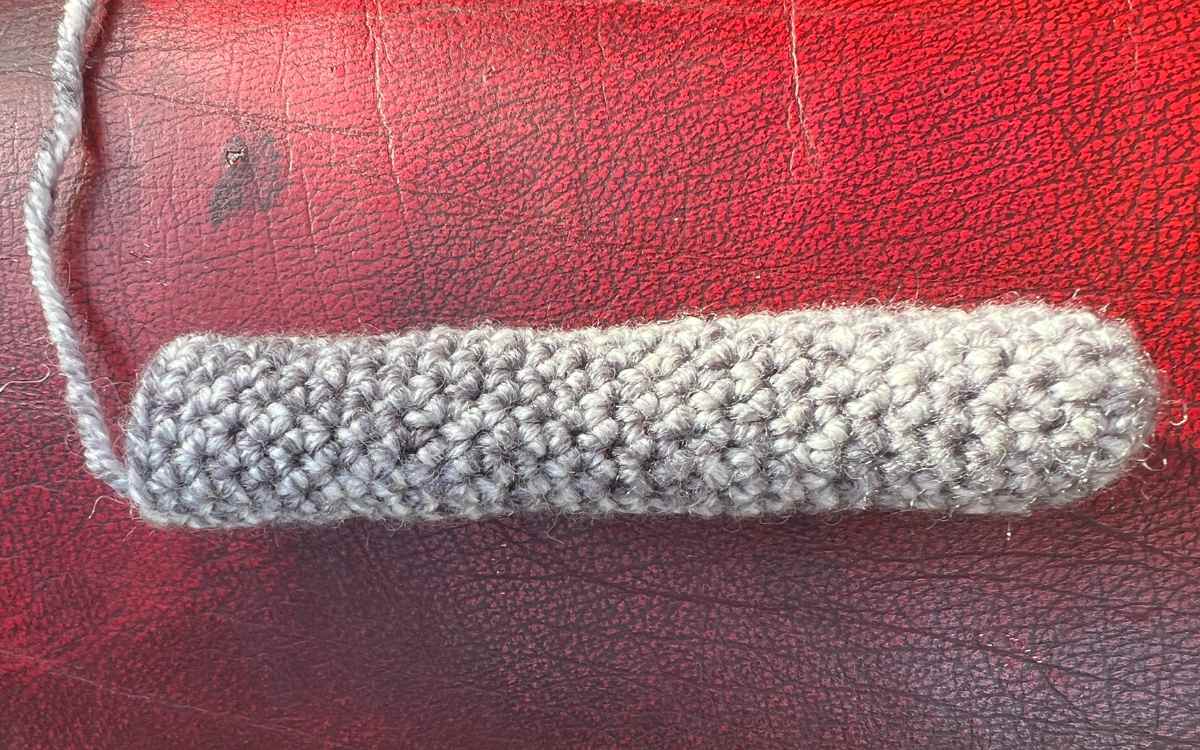
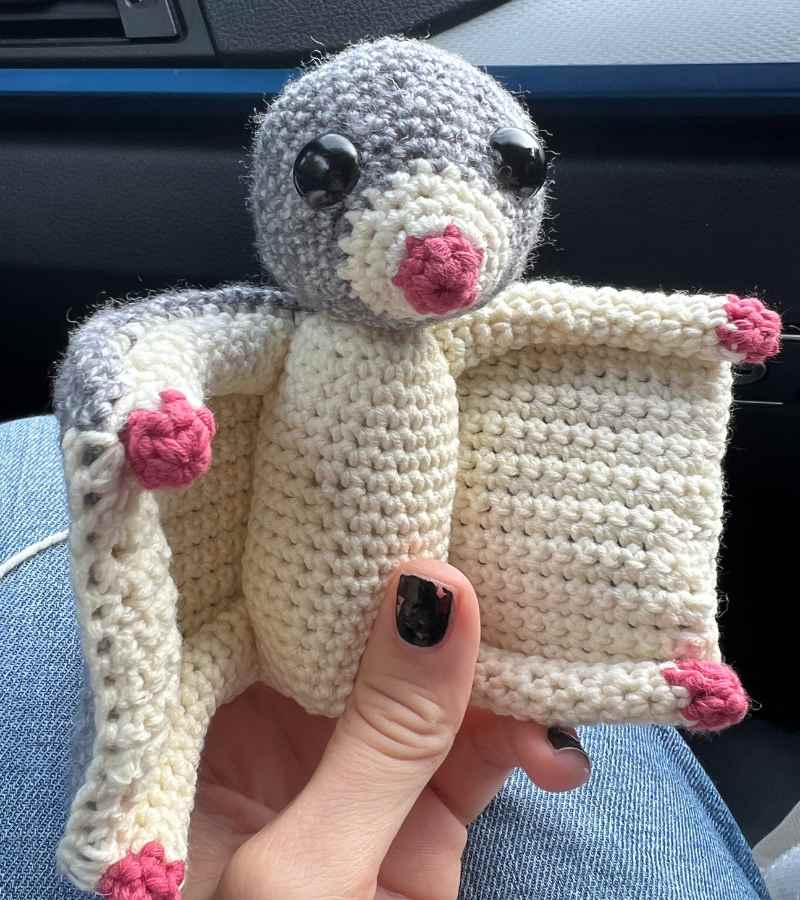
How To Crochet Sugar Glider Wings
The wings of a sugar glider is essentially a large piece of skin that spreads between their limbs. This is what we want to emulate in the crochet toy version. You’ll need to begin with your gray yarn.
Row 1
Make a chain of 41 stitches. (41)
Row 2
Skip the first stitch on the chain, then make a single crochet into each stitch of the row. (40)
Row 3 – 23
Chain 2 as the first single crochet, then skip the first stitch of the row and put one single crochet into each stitch in the row. (40)
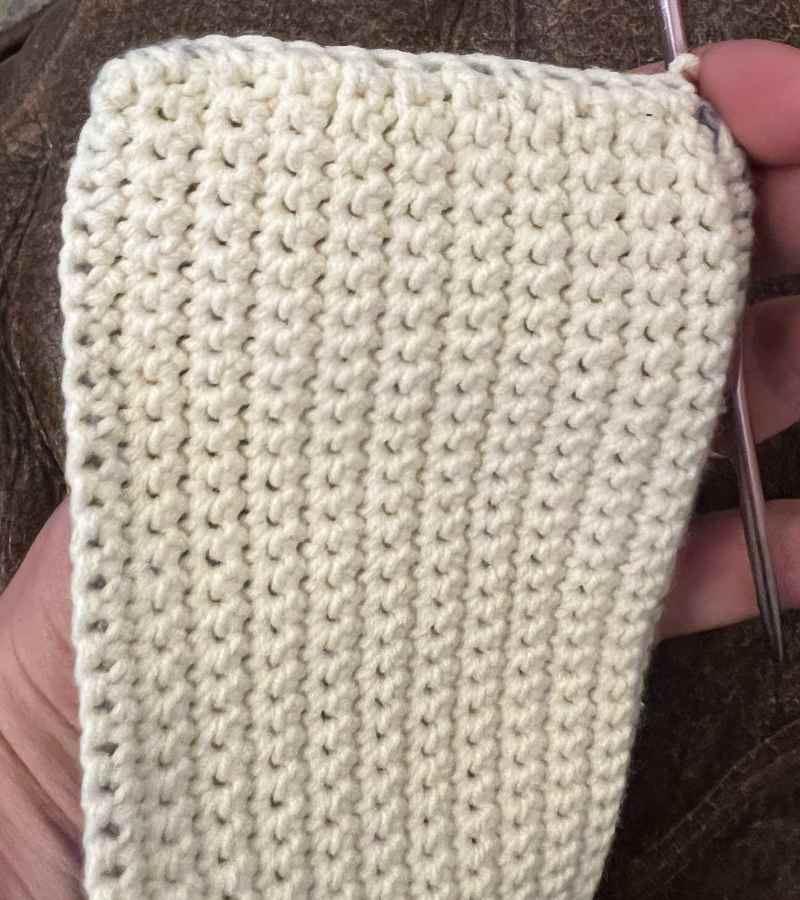
Row 24
Ch2, 1sc x 39 cc to white (40)
Row 25 – 45
Ch2, 1sc x 39 (40)
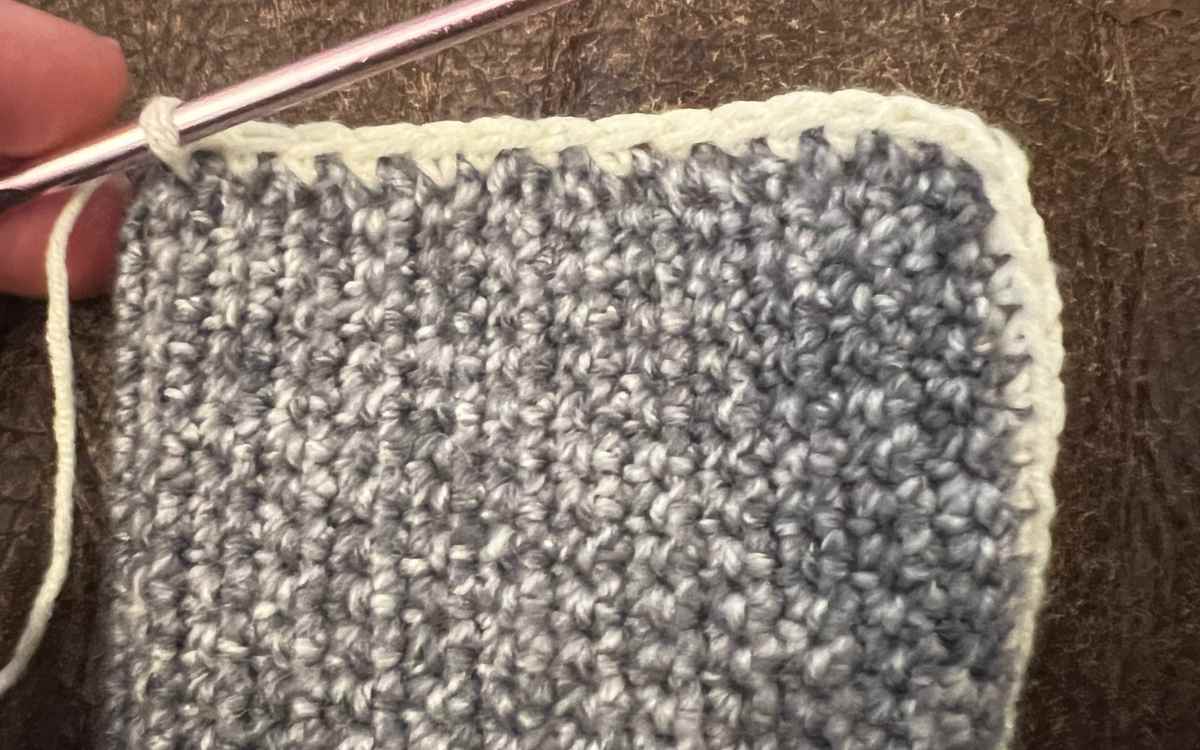
Row 46
Single crochet your most recent white row to the original gray chain row. Then single crochet up the edges to join them together. You should now have a complete empty pouch, which will act as the sugar glider’s wings.
Crochet Sugar Glider Ears
Begin with your pink yarn. Your ear will be made in two parts.
Inner ear section
Round 1
Make a magic circle of six stitches in pink yarn (6)
Round 2
2sc x 4, slip stitch and tie off (10)
Outer ear section
Round 1
Using your gray yarn, make a magic circle of eight stitches (8)
Round 2
2sc x 8 (16)
Round 3
(1sc, 2sc) x 8 (24)
Slip stitch, tie off and sew together. Line the inner section up as shown in the photos.
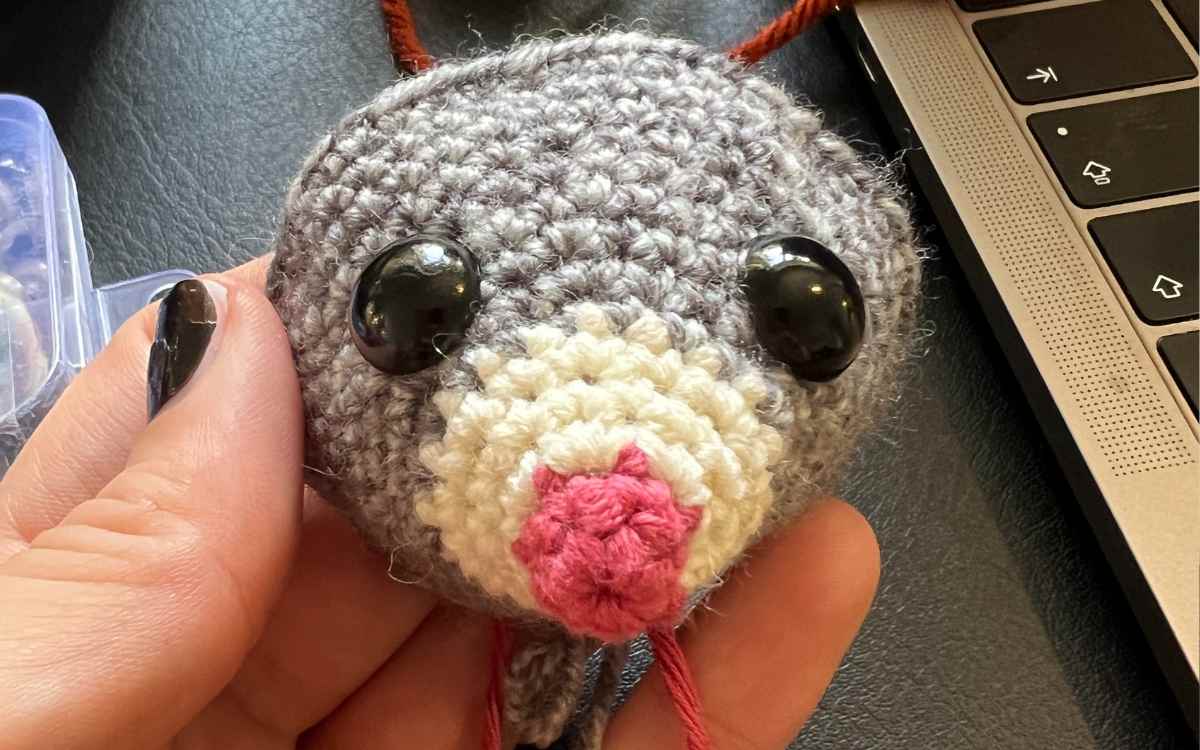
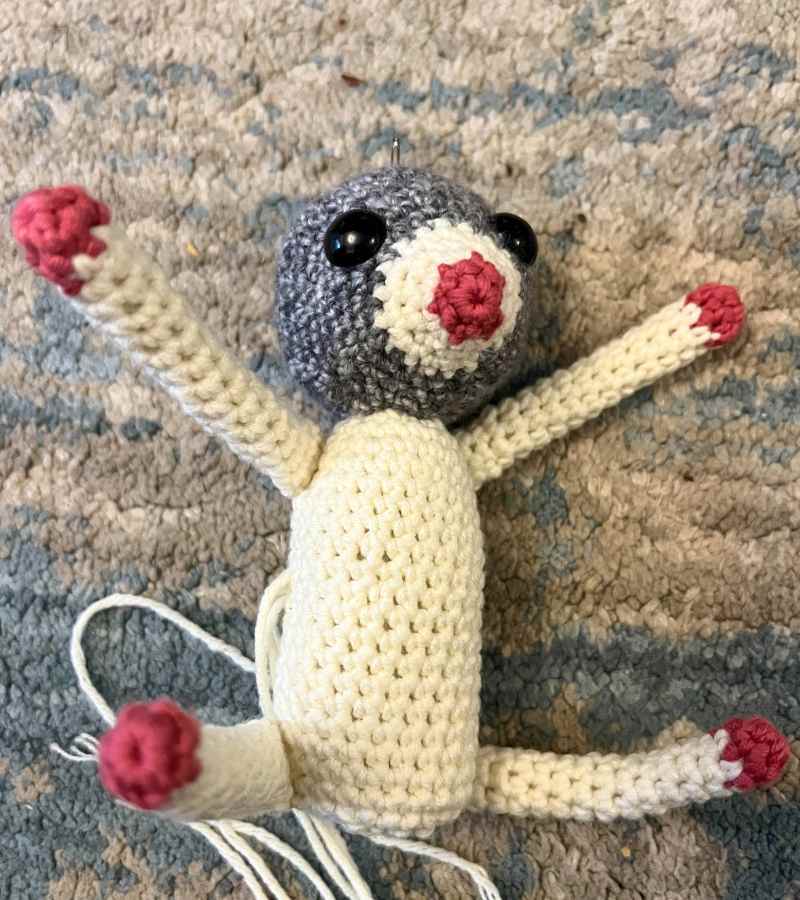
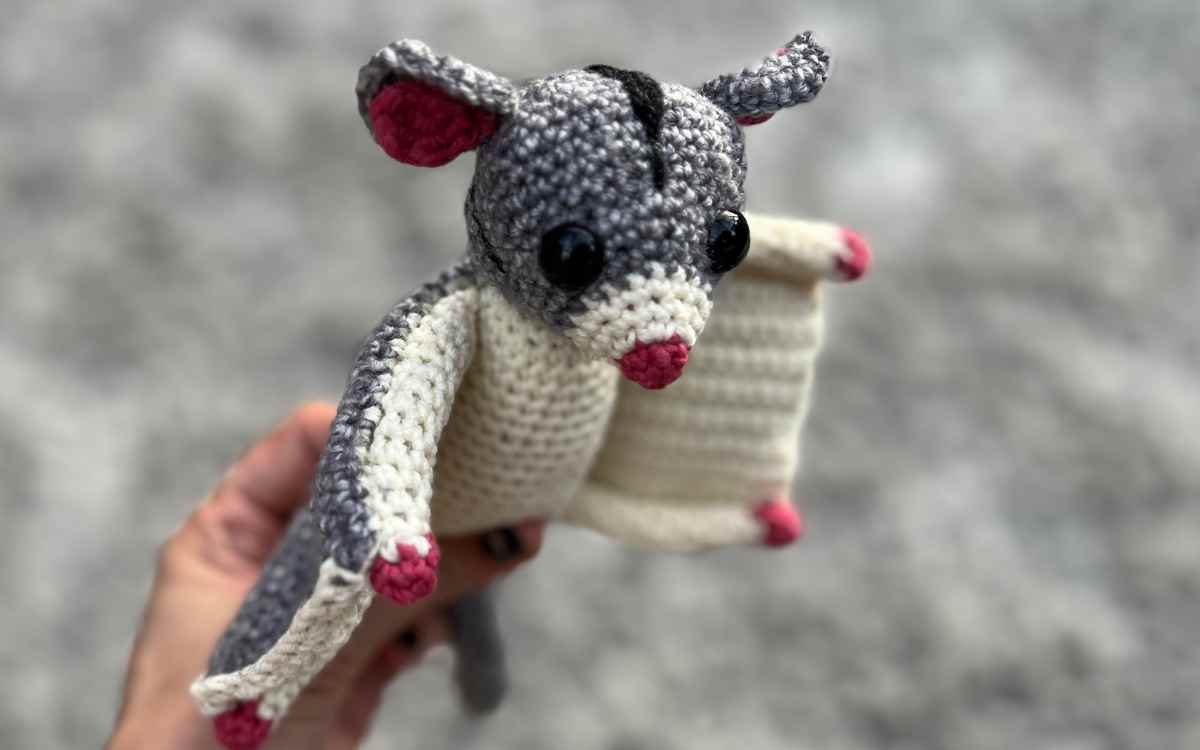
Sewing The Sugar Glider’s Face Markings
I attempted to make the face markings for the sugar glider with surface crocheting, and it looked too raised. I then made a thick patch, but it overpowered the look of the toy. So I settled with the hand sewn stripe that you can see pictured.
Thread a long strand of black yarn, and weave in and out of the fabric of the sugar glider toy.
Sewing Your Crocheted Sugar Glider Together
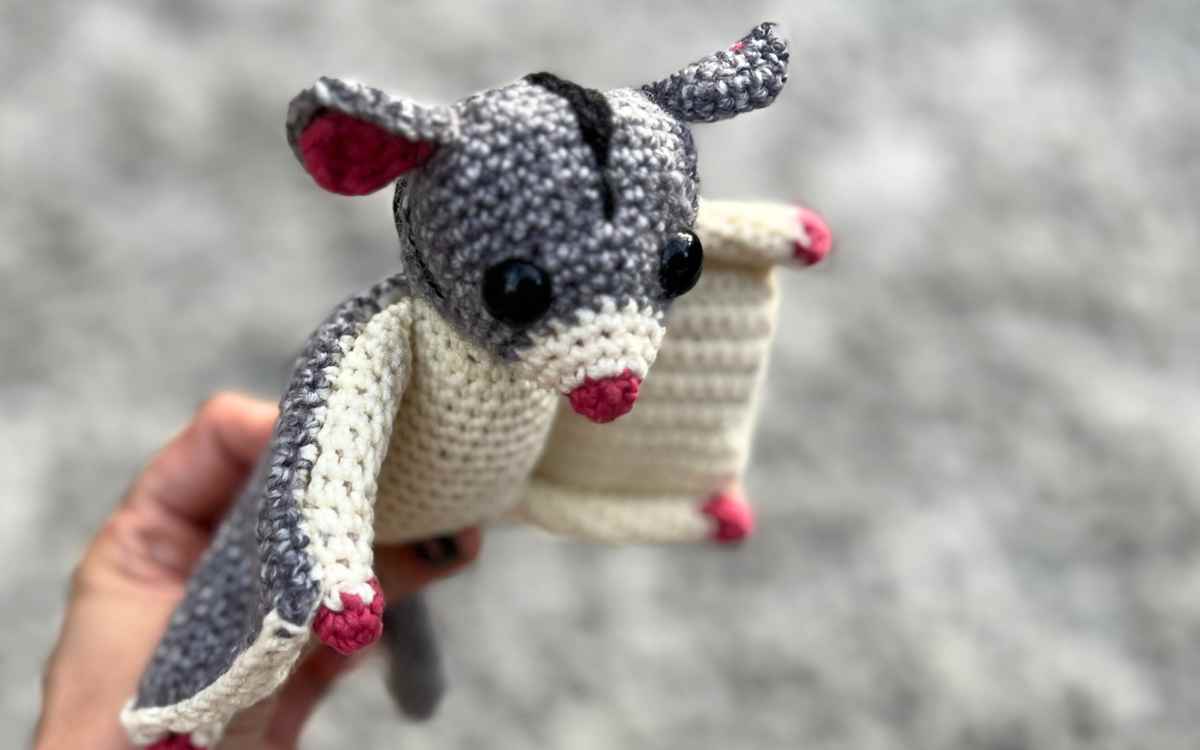
You will want to sew your crochet sugar glider arms and legs on before you attach the wings. Put the shoulders high on the body, and sew firmly at the very end of the limb only. The legs need to be attached at a right angle to the body, as do the arms.
Sew the white side of the wings along the arms, using a yarn needle to weave in and out of each stitch that sits along that line. You will then want to attach the wings at the ankle points only.
Take your yarn needle and reattach it at the base of the tail, and sew it directly between the wings and the base of the body. Tuck the leftover tail of yarn inside your toy.
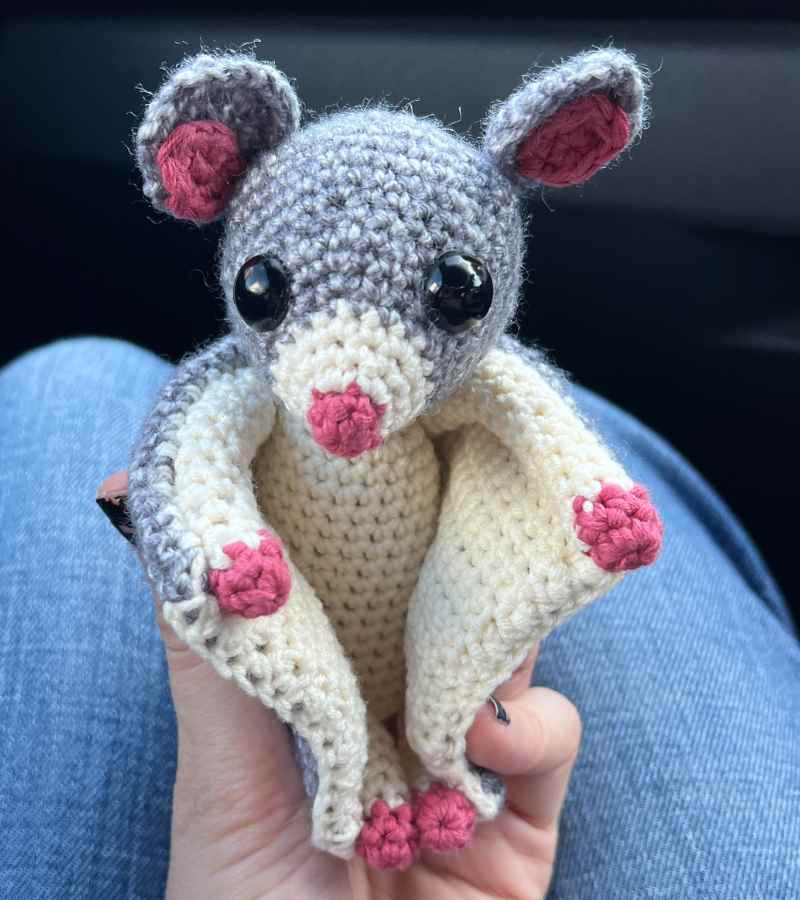
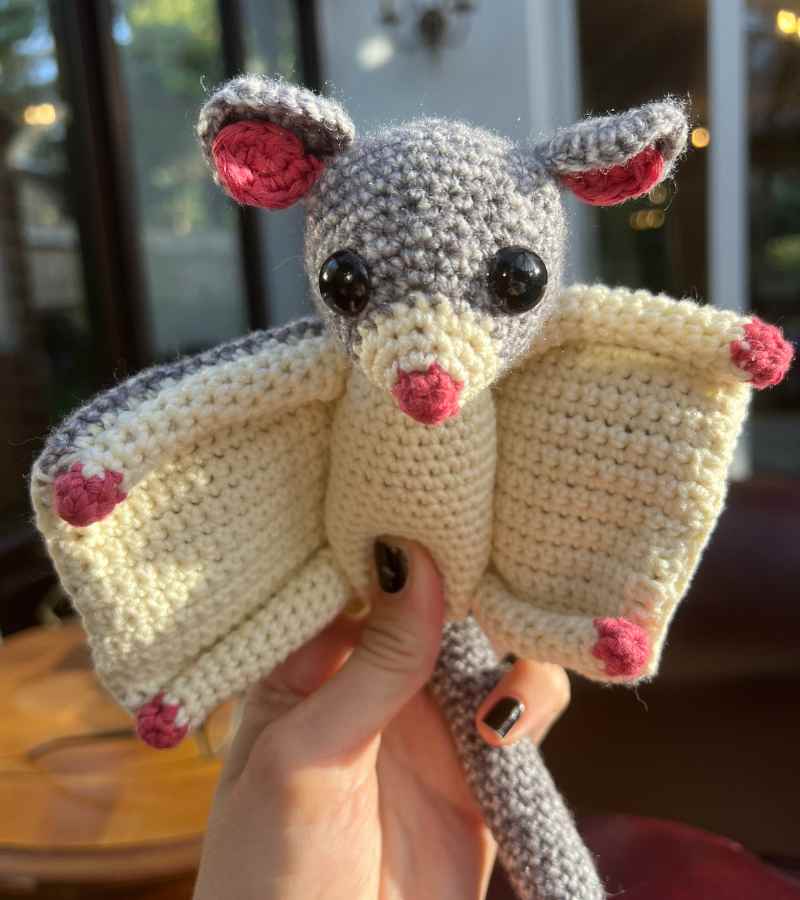
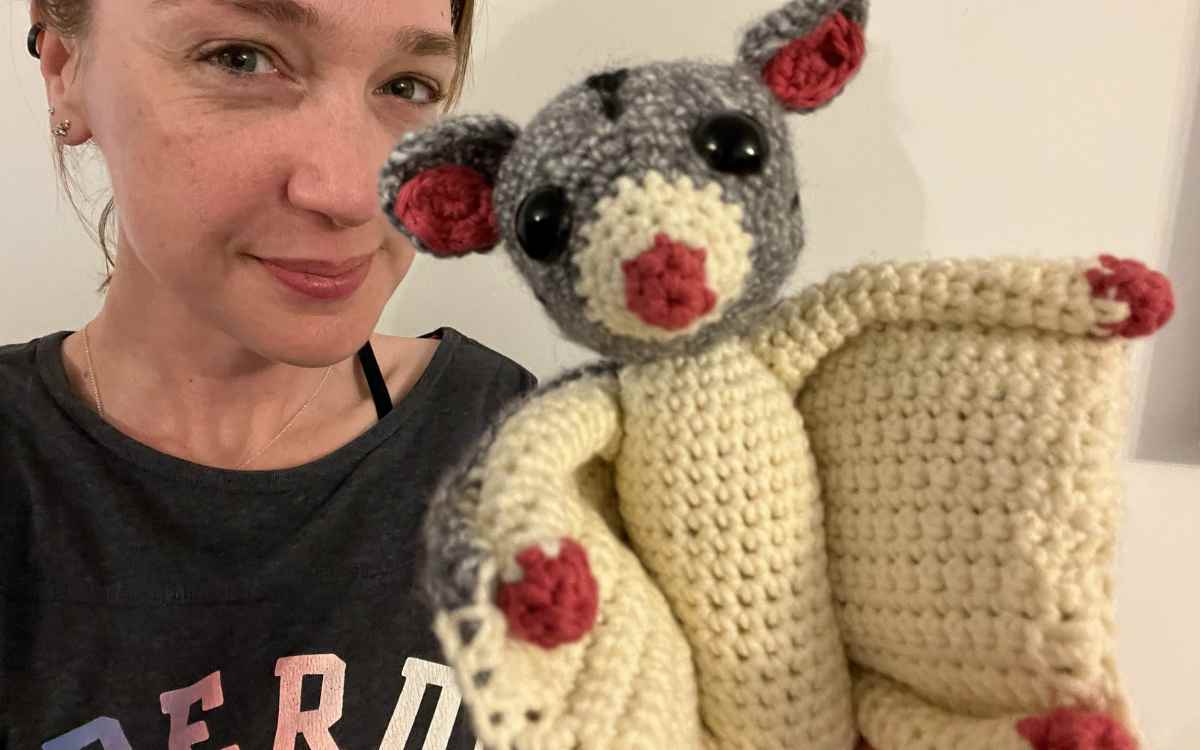
My Crochet Sugar Glider Pattern
This pattern means quite a lot to me, for a pretty silly reason. It’s the first thing I’ve ever made that my husband has asked to have, for himself. I crochet a lot for kids, family members, friends. And he’s always my biggest fan, don’t get me wrong. But he’s never asked to keep something before. I am really enjoying adding a bit more realism to my crochet toy designs, and I think it might just be paying off. What do you think?
I’d love to hear your thoughts in the comments section below, and please do share the photos of your finished crochet sugar glider with me on Facebook. Why not consider crocheting my biggest pattern, the Highland Cow, now you’ve had a go with the smallest! Or taking a look at the similarly styled opossum crochet pattern?
Happy Crocheting!
Lucy Kate, x