Pink Crochet Blanket
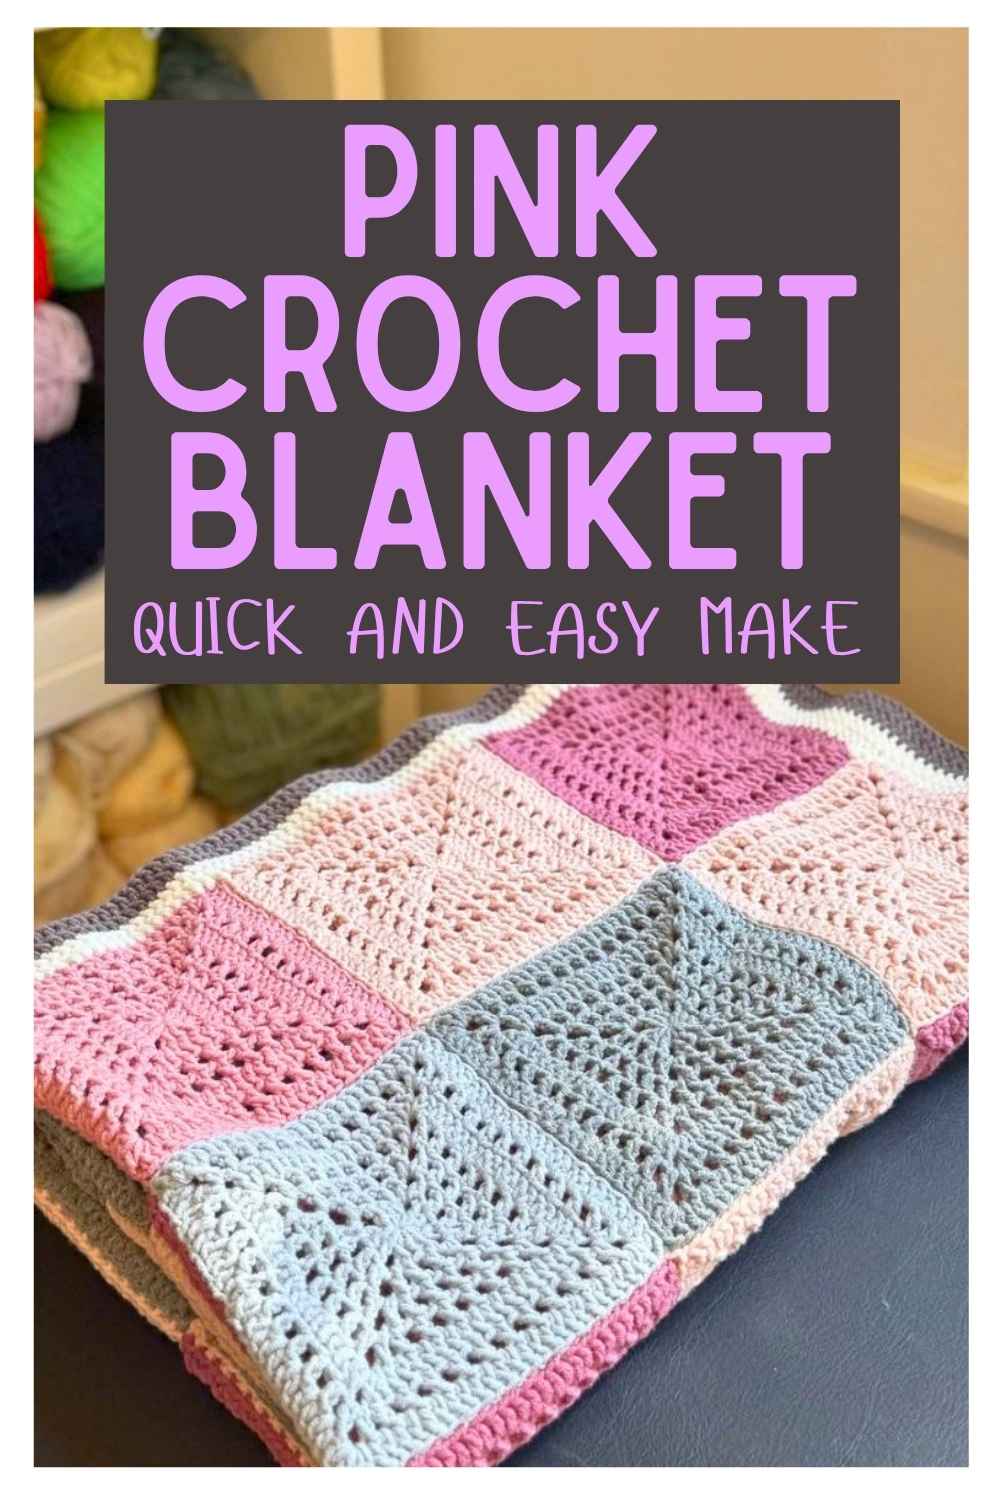
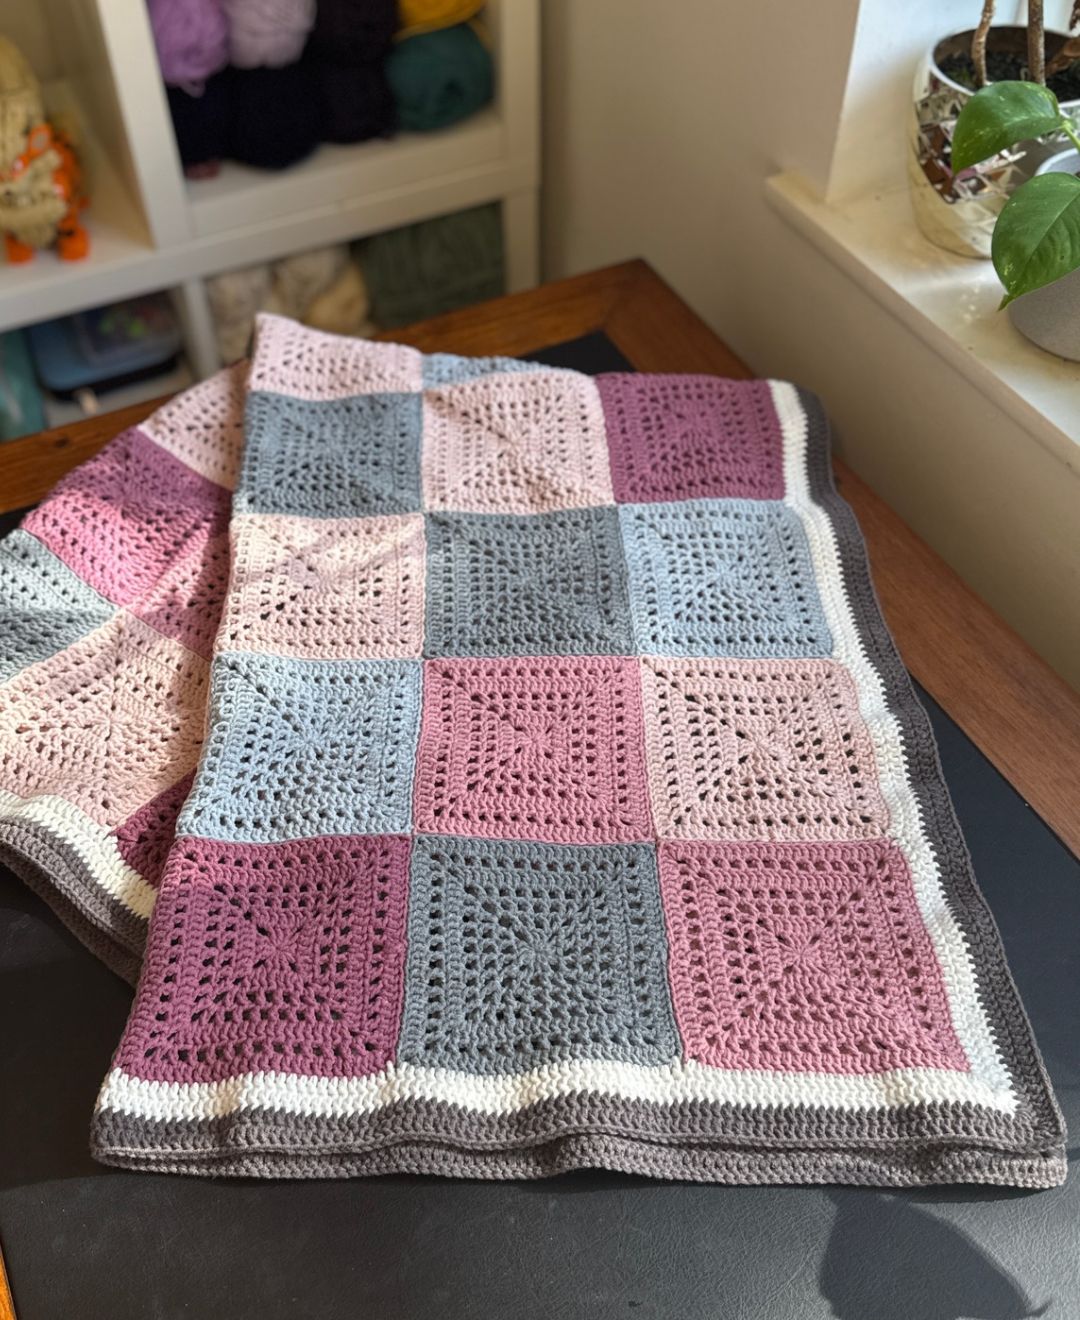
I love taking a standard crochet technique and making it into more than the sum of it’s parts. A great example of this is my pink crochet blanket pattern, which I created as a way to play around with the classic and solid granny square formats, giving them a bit of a twist by including some single chain gap rounds. I am so excited to share it with you because not only am I delighted with the finished project, but it was surprisingly quick and easy to hook up.
What You’ll Need
- 4 skeins of light pink worsted weight yarn
- 2 skeins of medium pink worsted weight yarn
- 3 skeins of dark pink worsted weight yarn
- 3 skeins dark grey worsted weight yarn
- 3 skeins light grey worsted weight yarn
- 2 skeins of brown yarn
- 2 skeins of white yarn
- 3.5mm crochet hook
I used Hobbi’s Cosy range of yarn, which is 60% cotton, 40% acrylic. Each skein is 50g. I really like this line of yarn, it has a great texture, it’s pretty strong, not prone to fraying and it has lasted really well in the projects I’ve used it for.
Techniques and Terms
This blanket might look complicated with it’s varying rounds, but it’s really surprising simple and a confident beginner with a few techniques under their hook should do just fine. I’ll give you simple steps and explanations for all the terms both at the beginning and in clarifications as we go along, so hopefully whatever your level you’ll be able to give it a go.
This pattern is written in American crochet terms, and is worked in the round.
- Magic loop
- Chain (ch)
- Double Crochet (dc)
- Color Change (cc)
- Slip Stitch (slst)
- Skip (sk)
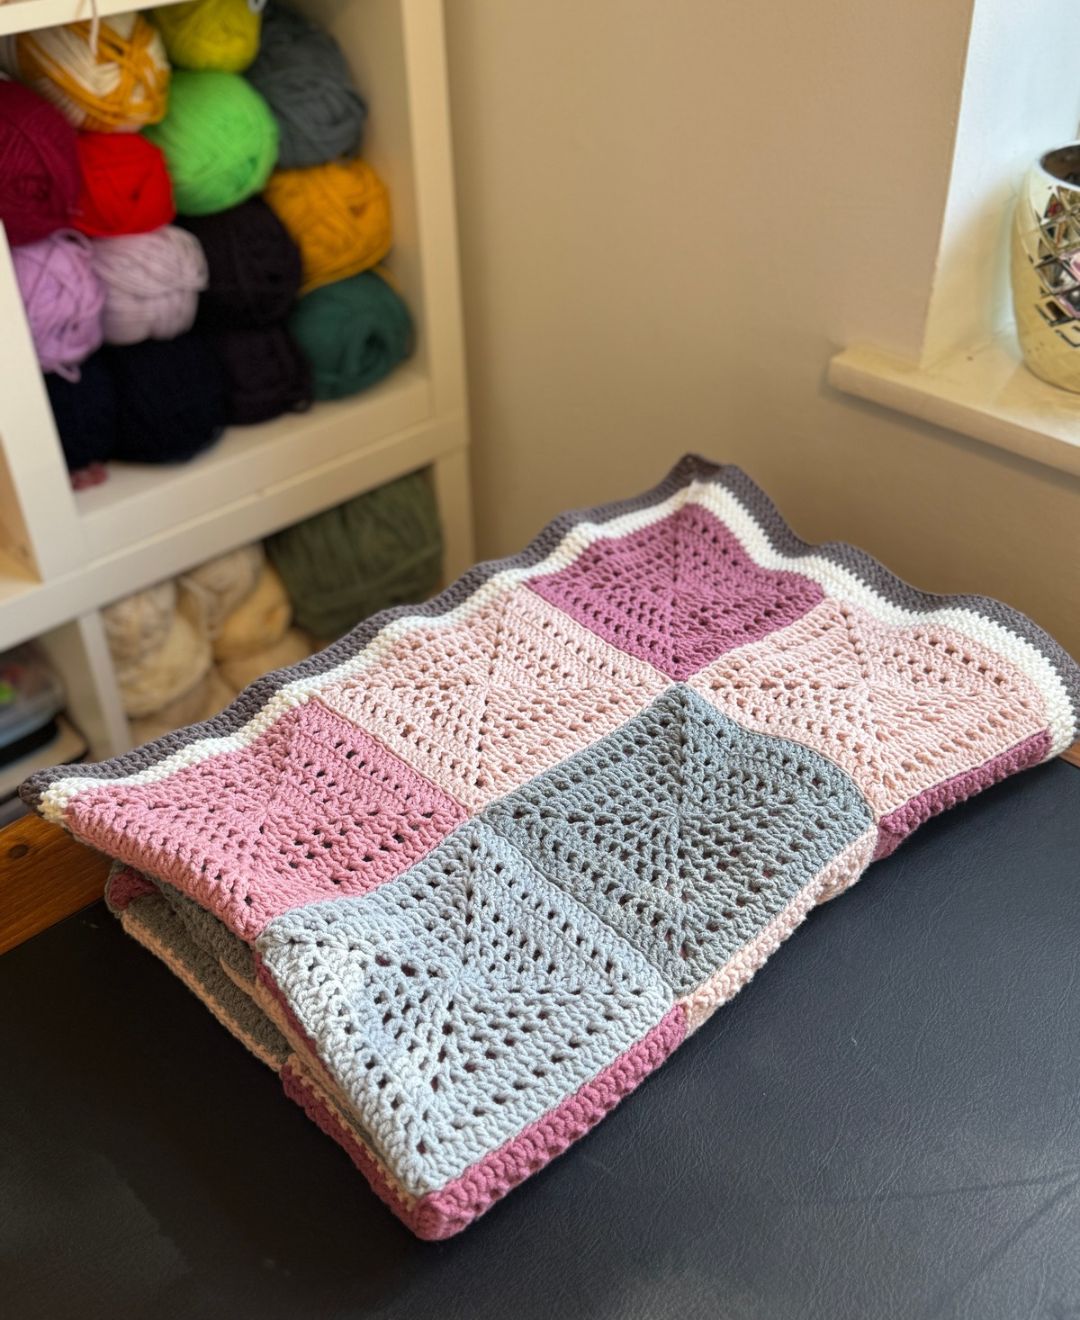
My Pink Crochet Blanket Pattern
Begin by making a magic loop, but do not close it. Your first round of stitches will be worked into this loop, which you will close upon completion of the first round.
Make your squares in the following quantities:
- 10 dark pink
- 5 medium pink
- 16 light pink
- 11 dark grey
- 10 light grey
There are two styles of granny square, one for the pinks and the other for the greys. The border will be where you use your white and brown yarns.
The Light, Medium and Dark Pink Pattern
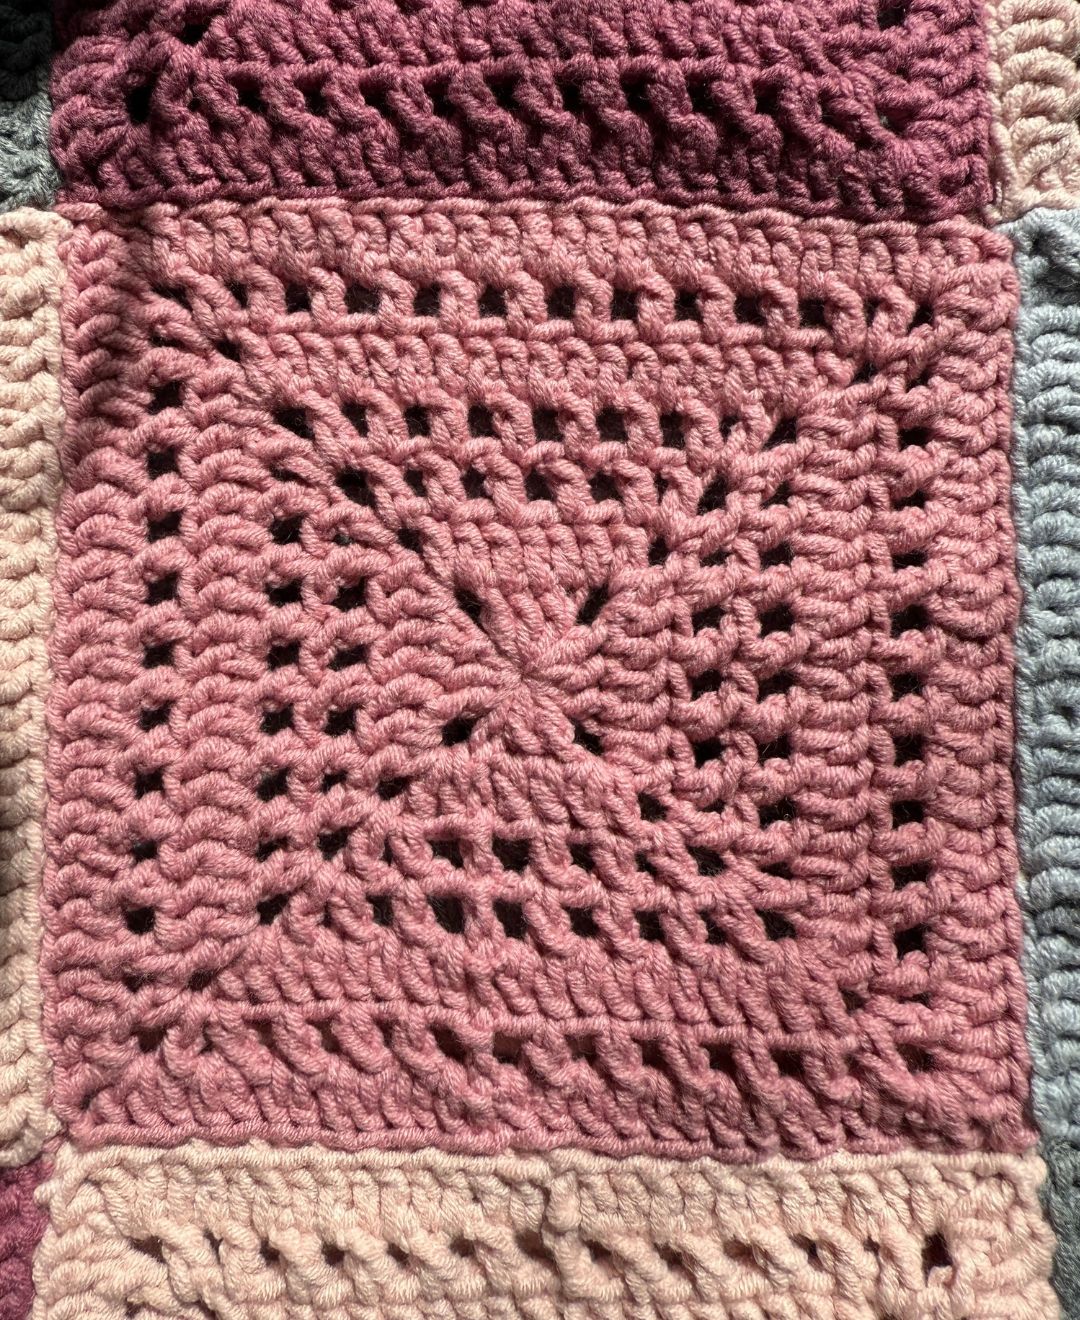
Round 1
Make a magic loop, but don’t close it just yet
Working into the circle, ch2, 2dc, ch3, (3dc, ch3) x 3. slst into the top of ch2.
Round 2
ch2, dc x 2, * into the corner (2dc, ch2, 2dc), dc x 3. Repeat from * around the square, then slst into top of ch2.
Round 3
ch3, sk, (dc, ch1, sk) x 2, * into the corner (dc, ch2, dc, ch1), then (1dc, ch1, sk) x 4. Repeat from * around the square, then slst into the second chain of the ch3.
Round 4
ch3, sk, (dc, ch1, sk) x 3, * into the corner (dc, ch2, dc, ch1), then (dc, ch1, sk) x 6. Repeat from * around the square, then slst into the second chain of the ch3.
Round 5
ch2, dc x 8, * into the corner (2dc, ch2, 2dc), then dc x 15. Repeat from * then slst into the top of ch2.
Round 6
ch3, sk, (dc, ch1, sk) x 5. * into the corner (dc, ch2, dc, ch1), then (dc, ch1, sk) x 10. Repeat from * then slst into the top of ch2.
Round 7
ch2, dc x 12, * into the corner (2dc, ch2, 2dc) then dc x 23. Repeat from * then slst into the top of the ch2.
The Light and Dark Grey Pattern
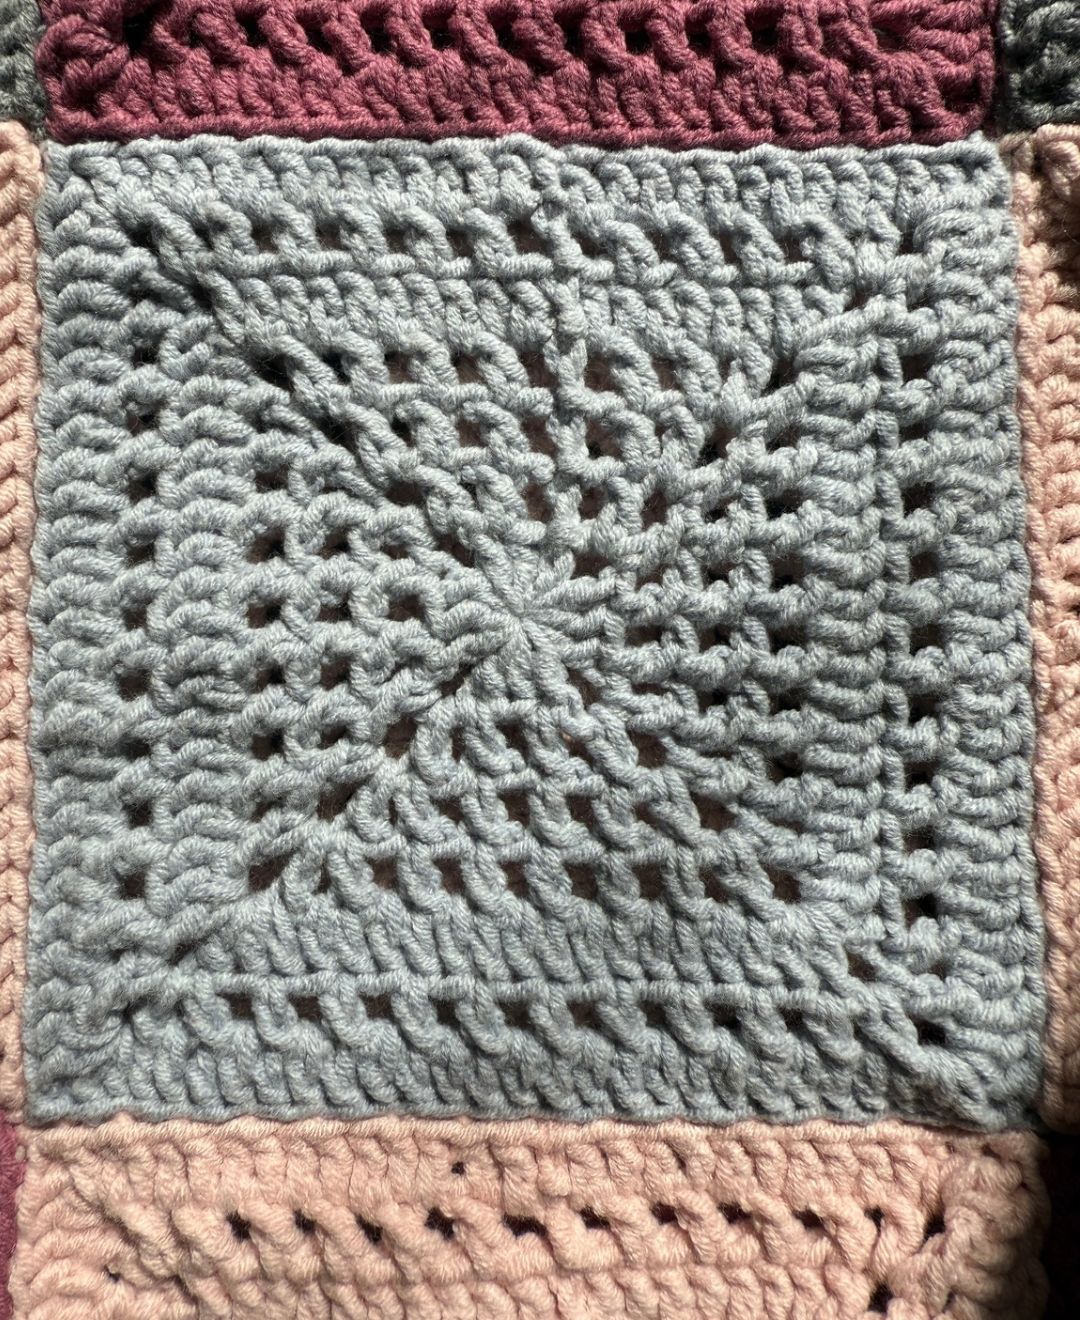
Round 1
Make a magic loop, but don’t close it just yet
Working into the circle, ch2, 2dc, ch3, (3dc, ch3) x 3. slst into the top of ch2.
Round 2
ch3, sk, dc, ch1, * into the corner (dc, ch2, dc, ch1), dc, ch1, sk, dc, ch1. Repeat from * around the square, then slst into the second chain of the ch3.
Round 3
ch3, sk, (dc, ch1, sk) x 2, * into the corner (dc, ch2, dc, ch1), then (1dc, ch1, sk) x 4. Repeat from * around the square, then slst into the second chain of the ch3.
Round 4
ch3, sk, (dc, ch1, sk) x 3, * into the corner (dc, ch2, dc, ch1), then (dc, ch1, sk) x 6. Repeat from * around the square, then slst into the second chain of the ch3.
Round 5
ch2, dc x 8, * into the corner (2dc, ch2, 2dc), then dc x 15. Repeat from * then slst into the top of ch2.
Round 6
ch3, sk, (dc, ch1, sk) x 5. * into the corner (dc, ch2, dc, ch1), then (dc, ch1, sk) x 10. Repeat from * then slst into the top of ch2.
Round 7
ch2, dc x 12, * into the corner (2dc, ch2, 2dc) then dc x 23. Repeat from * then slst into the top of the ch2.
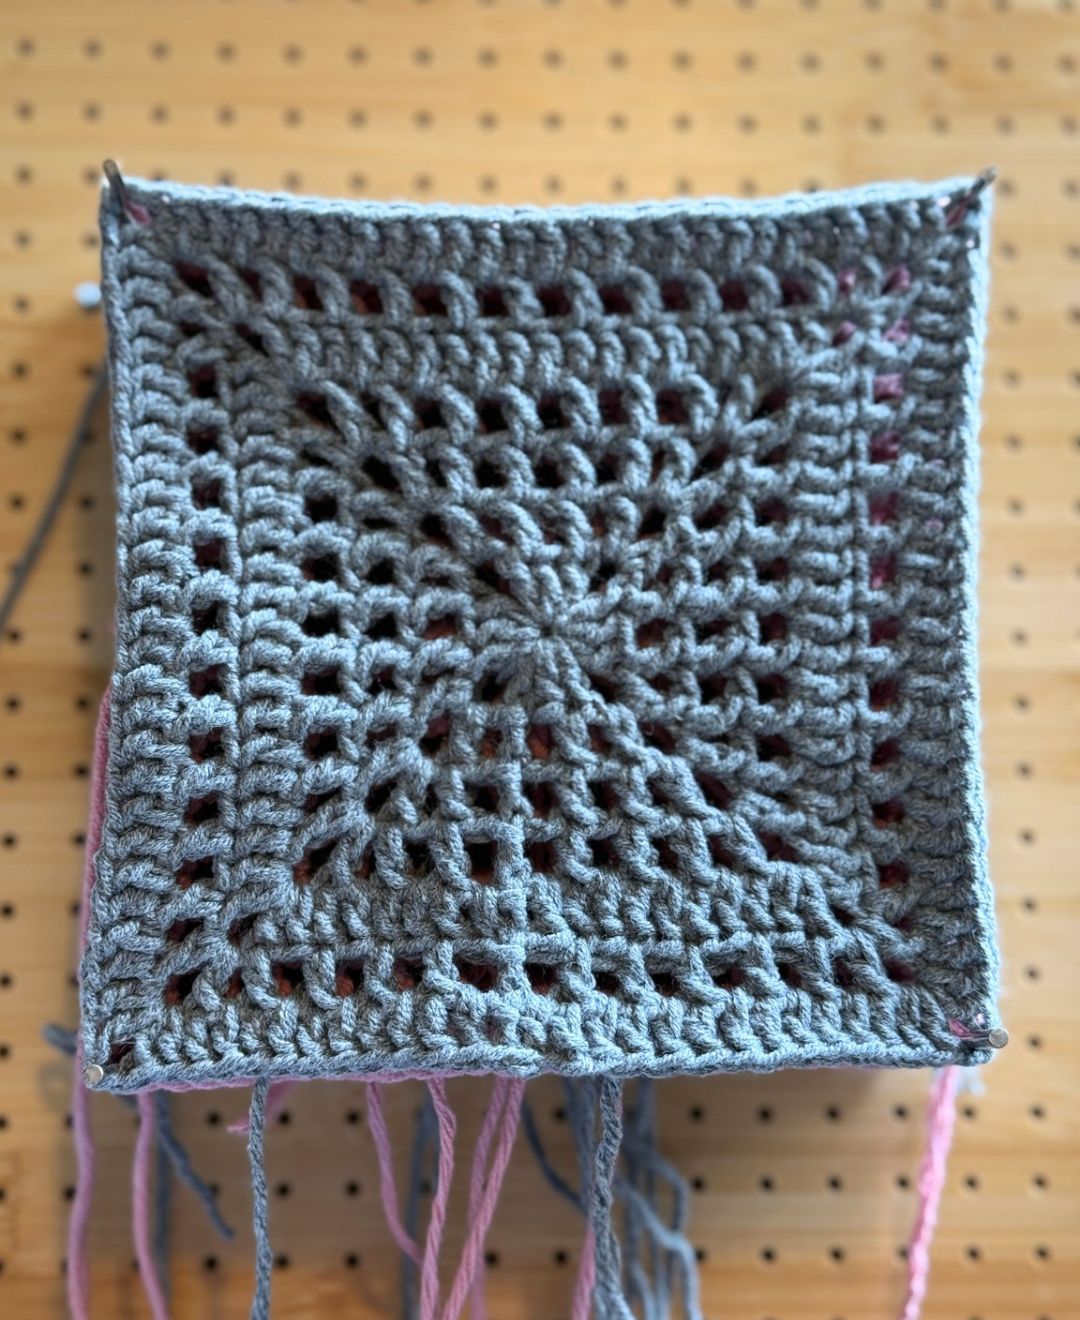
Blocking
I am not a perpetual blocker of all things crochet, but I do highly recommend blocking when you are making a blanket. Particularly one made up of multiple granny squares.
Joining The Squares
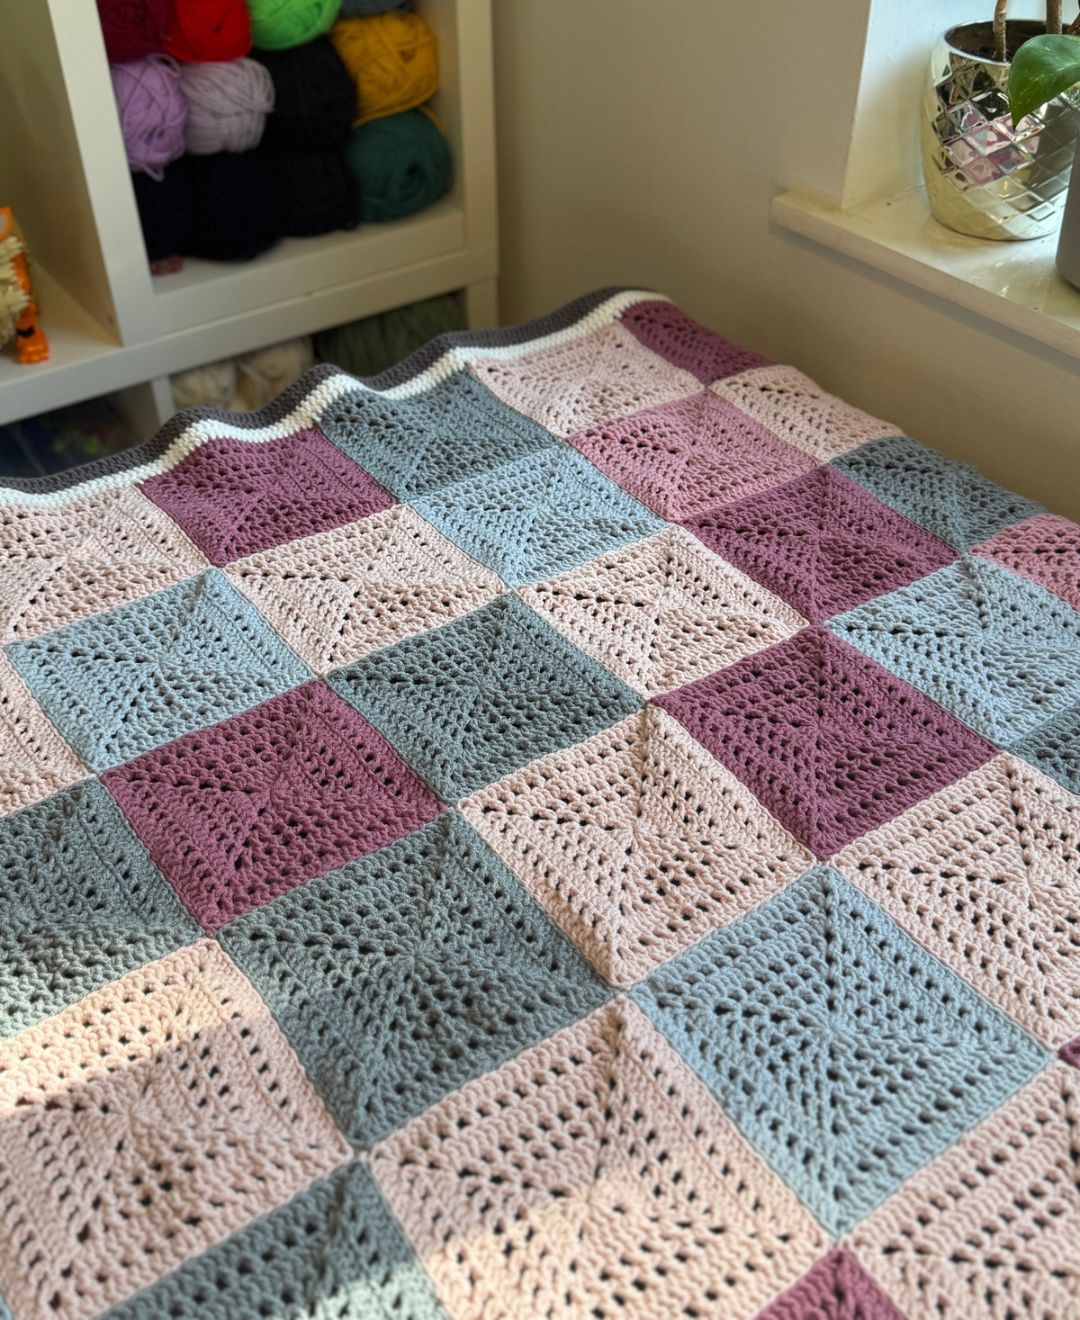
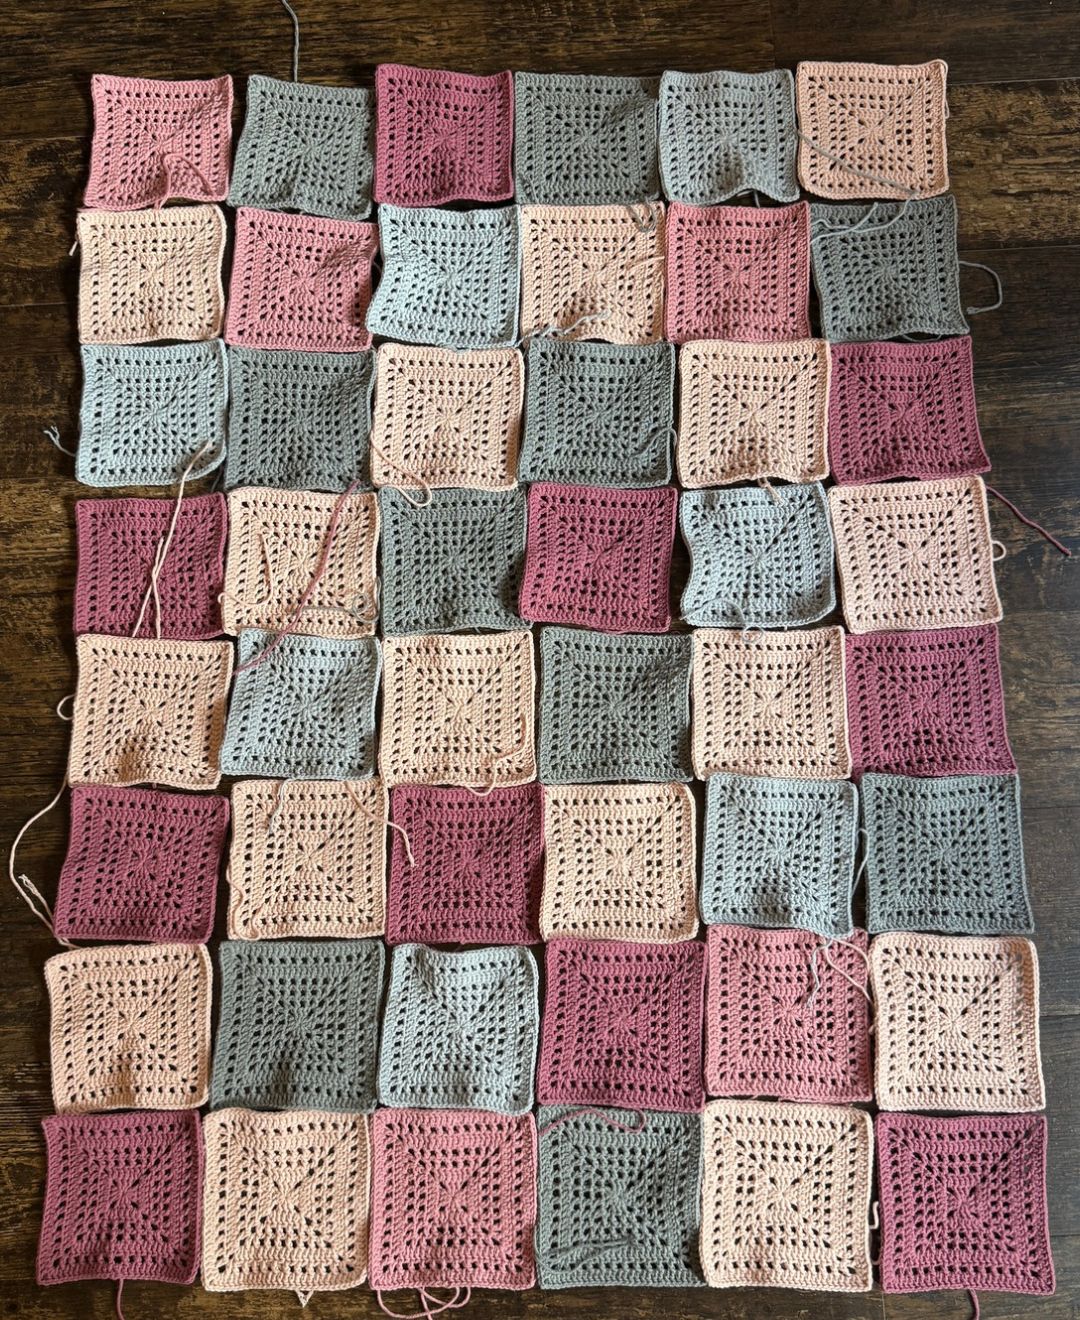
Arrange the squares on a clean area of floor (or a rather large table!) in front of you. You can use the arrangement I have put together, or mix them up to make your own unique order!
I hand sewed the squares together, working in and out of the adjacent squares using just the front loops when the wrong side of the squares are facing outwards, as shown in this picture:
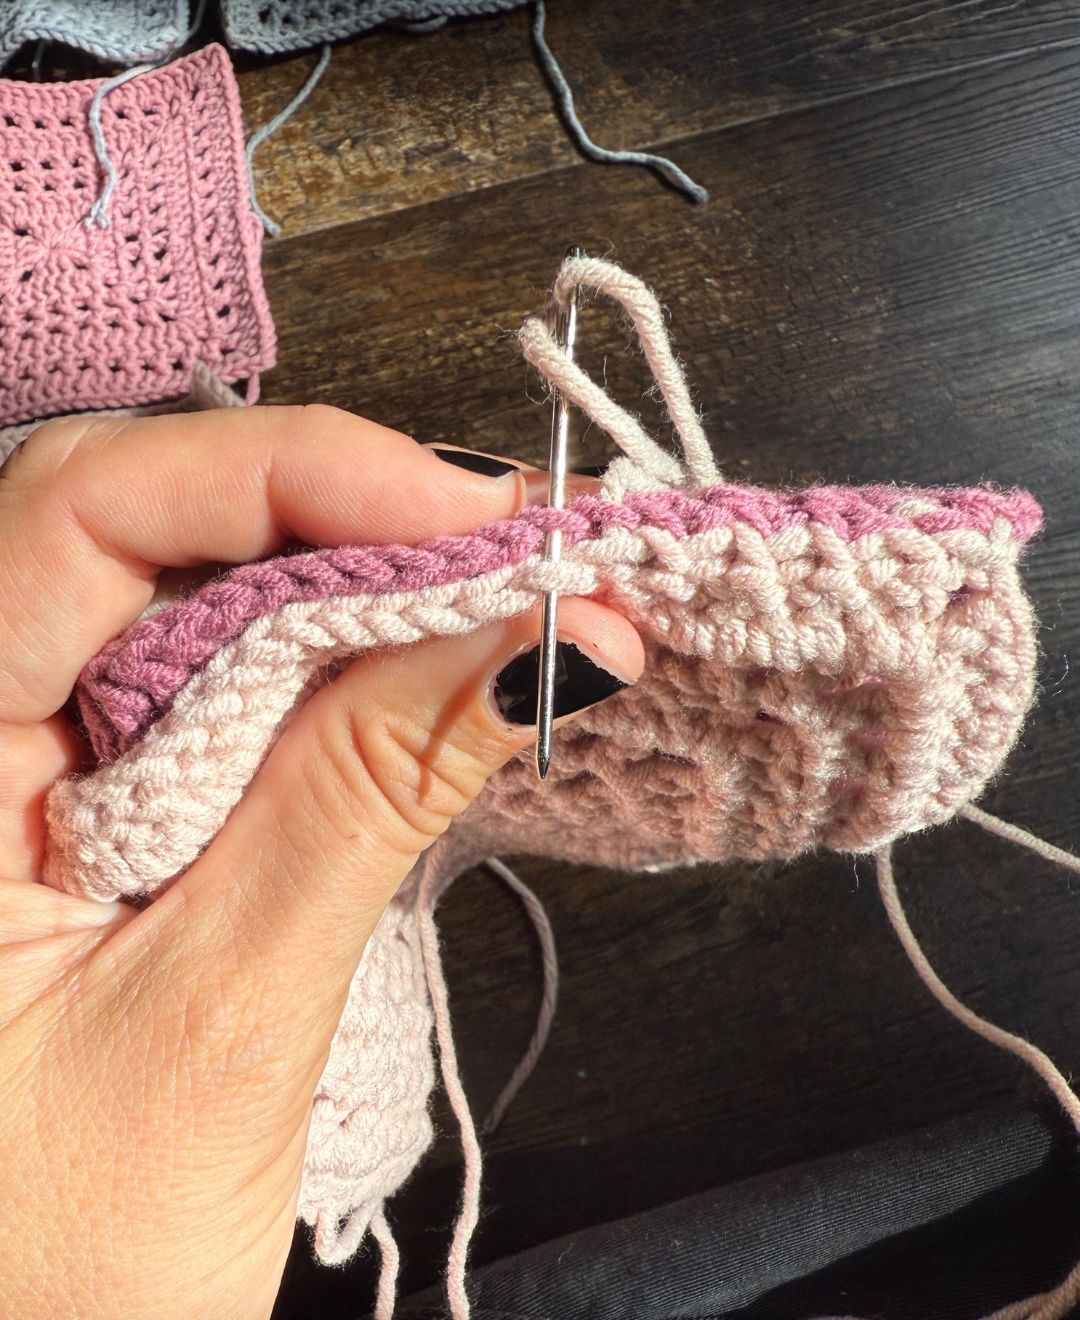
There are several ways to join granny squares together, and there is no right or wrong here. But if you use a different method to the one I’ve used, just keep in mind that the finished blanket will look a little different. Not worse, just different!
The Border
Begin in your white yarn
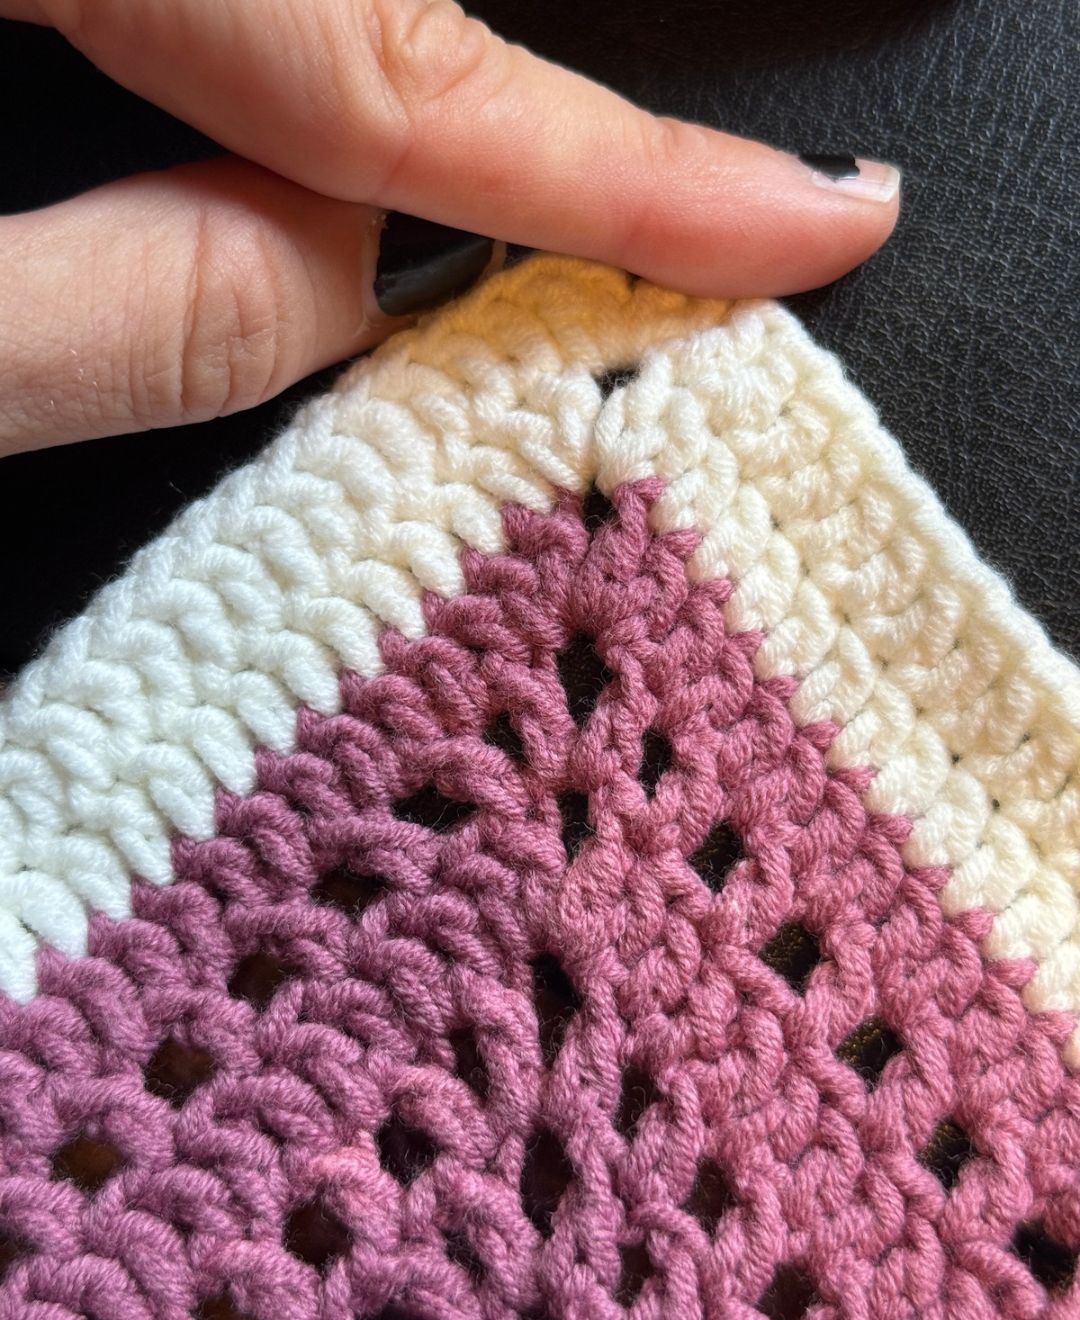
Row 1 – 2
Starting at a corner, chain two.
Make 1dc into each edge stitch, and 2dc, ch2, 2dc into each corner.
At the end of the round slst into the top of the ch2 to join.
cc to brown yarn
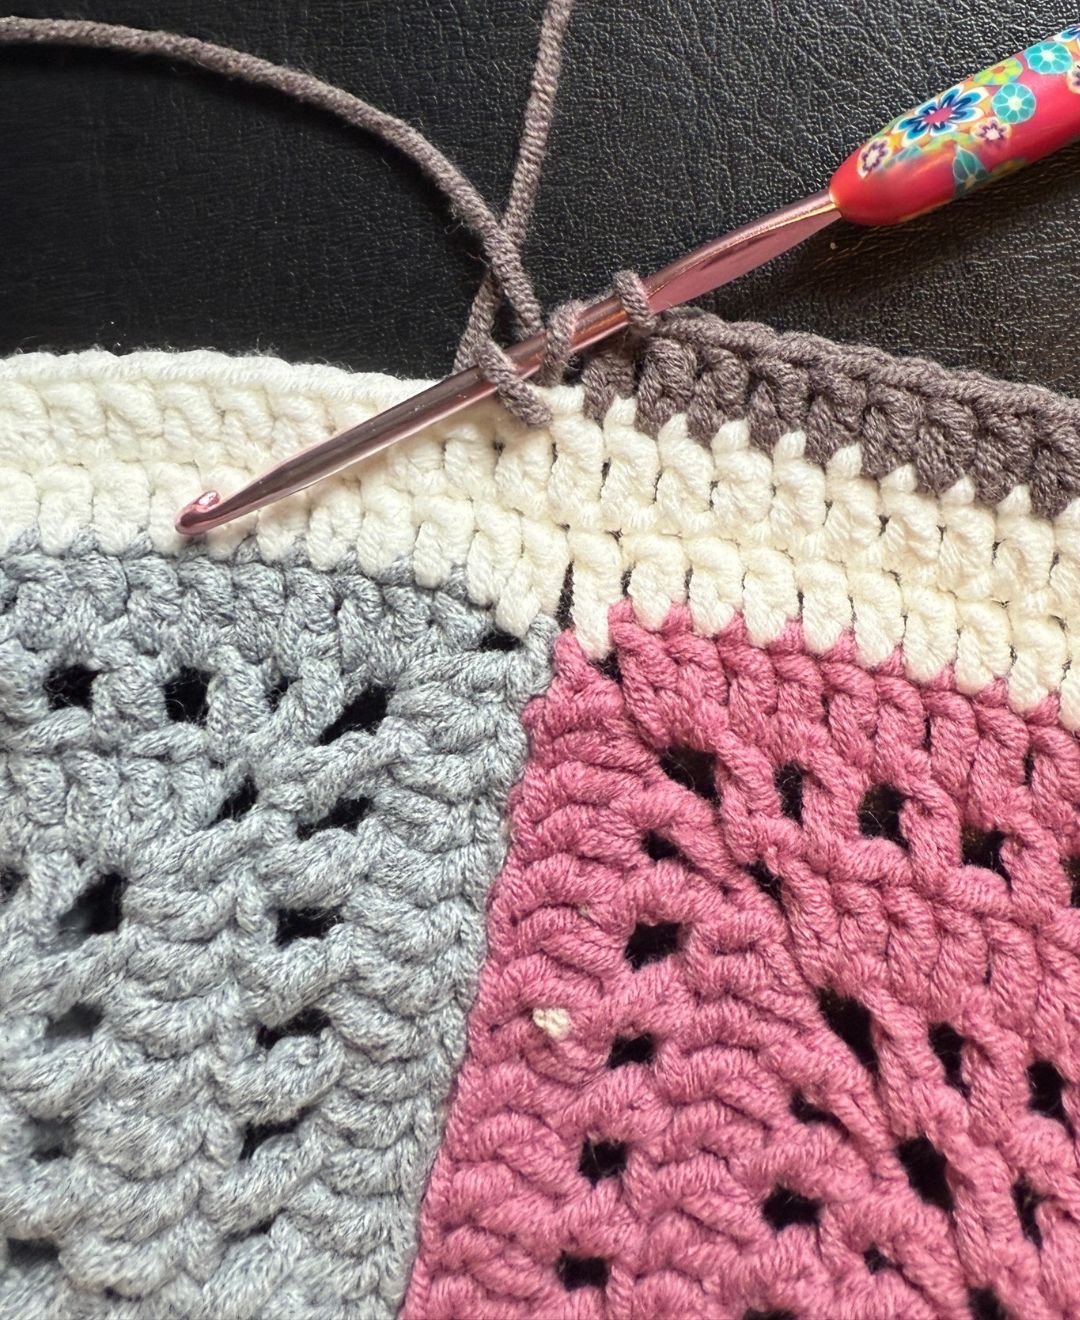
Row 3 to 4
Starting at a corner, chain two.
Make 1dc into each edge stitch, and 2dc, ch2, 2dc into each corner.
At the end of the round slst into the top of the ch2 to join.
Finishing Off
If you haven’t sewn or crocheted in your ends as you went along, now is the time to tidy them up. Make sure that you leave as much of each strand sewn into the blanket as possible, this will make it more secure and easier to repair if things come undone in the future.
To complete your blanket I recommend ironing it. Pop a clean sheet over the top to iron onto, just in case your yarn doesn’t take too kindly to the process. But I guarantee, it will finish it off really nicely.
Let me know how it goes, and please do share pictures to our social media if you’d like to show it off.