Crochet Hot Water Bottle Cover
I don’t know about you, but I love a hot water bottle. Not only do I frequently like to stick one behind my back when I’m sore from martial arts training, but there is just something so comforting about the warmth of them in the cold weather. And my kids love them too.
The downside of shop bought hot water bottles is that the covers can often be a texture that you don’t want next to your skin, or that just rapidly looks tired. Either way, once again, we’ve got a great excuse for a bit of crocheting.

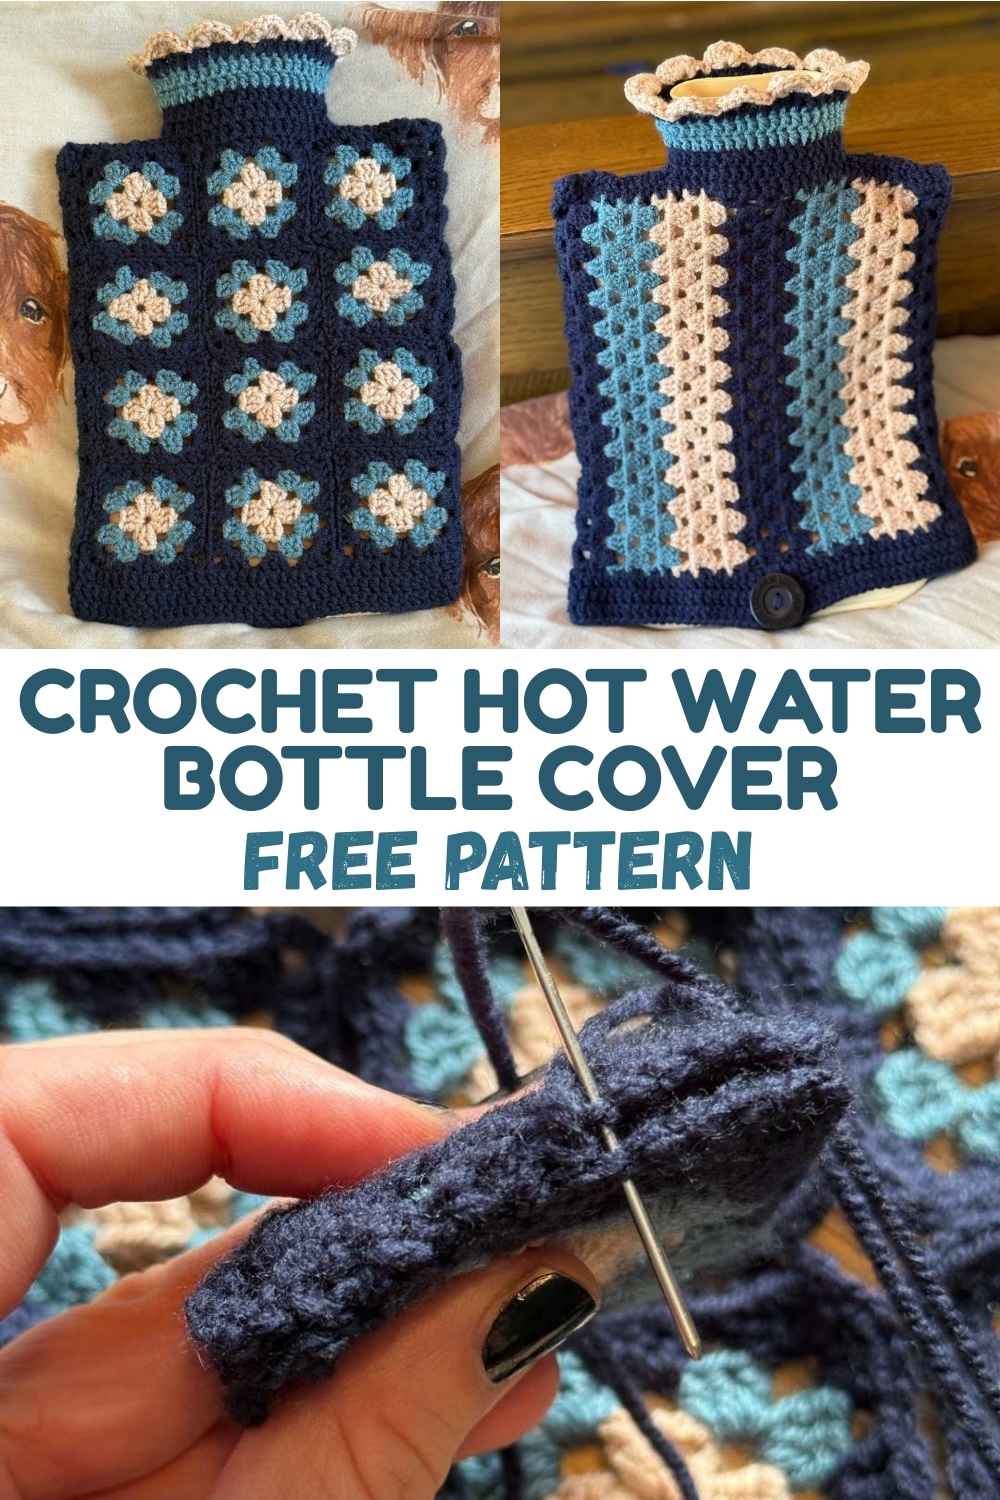
My latest crochet hot water bottle cover design is made up of little granny squares, with a simple border and neck. I’m confident that any level of crocheting experience can have fun with this one, and make something that you are going to get a lot of use out of.
What You’ll Need
- A hot water bottle
- DK yarn – cream, pale blue and dark blue – 50g of each
- 3.5mm crochet hook
- A button (mine has a 3cm diameter)
- Steel yarn needle

The Stitches
- ch – chain
- dc – double crochet
- slst – slip stitch
- cc – color change
My Crochet Hot Water Bottle Cover Pattern
I crocheted my hot water bottle cover in a few separate parts, which I joined together and then bordered
12 Mini Granny Squares
You are going to begin by making twelve mini granny squares, which will form the front side of the hot water bottle.
Work in your cream yarn to start with.

Round 1
ch4, slst into the first loop of the chain
Ch3 (as the first double crochet), then make two further double crochets into the center of the chain loop. ch3, *3dc, ch3. Repeat from * two more times, then slst into the top of the ch3 to join. Tie off, leaving a long til for weaving in later.
cc to pale blue
Round 2
Start in a corner gap.
ch3 (as the first dc) then make 2dc, ch3, 3dc into the same corner. ch1 then (3dc, ch3, 3dc) into each corner, then ch1 and slst into the top of your starting ch3.
Tie off, leaving a long tail of yarn to sew in later.
cc to dark blue

Round 3
Start in a corner gap.
ch3 (as the first dc) then make 2dc, ch3, 3dc into the same corner. *ch1, then make 3dc into the middle gap, ch1 then (3dc, ch3, 3dc) into the next corner. Repeat from * until the end of the round, where you will slst into the top of the starting chain.
Joining
I used the sewing method to join my twelve granny squares together, in a shape that was four tall by three wide. You can hide your loose ends so far at this point too.

Working Around the Bottle
You’re now going to use granny rows to create the back panel. Start working from the top corner of your rectangle of granny squares, stitching along the longer side.
Begin working in the dark blue yarn.

Row 1
The entire row will be worked in granny rows as follows, working clusters into the gaps:
ch3, 1dc, ch1, 3dc, ch1, 3dc, ch1, 2dc, *2dc, ch1, 3dc, ch1, 3dc, ch1, 2dc. Repeat from * until the end of the row.
Row 2
ch4, *3dc, ch1, 3dc, ch1, 3dc, ch2. Repeat from * twice, then 3dc, ch1, 3dc, ch1, 3dc, then 1dc into final stitch of the round.
Row 3
ch3, 1dc, ch1, *3dc, ch1. Repeat from * ten time, then make 2dc into the end gap.
Row 4
ch4, *3dc, ch1. Repeat from * until the end of the row, then make 1dc into the final stitch
cc to pale blue
Row 5 – 8
Repeat rows 3 to 4
cc to cream
Row 9 – 12
Repeat rows 3 to 4
cc to dark blue
Row 13 – 16
Repeat rows 3 to 4
cc to pale blue
Row 17 – 20
Repeat rows 3 to 4
cc to cream
Row 21 – 24
Repeat rows 3 to 4
cc to dark blue
Row 25 – 28
Repeat rows 3 to 4
The Bottom Section
Work around the bottom edge of your cover.

Row 1
Begin by making a chain of three stitches, then make 1dc into each stitch, or two dc into each gap, around the base of the cover. At the end of the round slst into the top of the starting chain to join.
Row 2
ch3, then make 1dc into each stitch until you reach level with the centre of the middle dark blue strip on the back of the cover. ch3, sk3, then work 1dc into each stitch for the remainder of the round. This will create a gap for your button.
Base the size of the gap you make on the size of your button. Make sure it can fit through the gap, but not too easily.
At the end of the round, slst into the top of the starting chain to join.
Row 3
ch3, then work 1dc into every stitch of the round. slst into the top of the ch3 to close.
Tab
You are going to make a tab five stitches wide, placed centrally in the middle of the front of your hot water bottle cover.

Row 1
Ch2, then make 1dc into the next four stitches.
Row 2 – 4
Turn. ch2, 1dc x 4.
When your tab is complete, take your button and sew it to the end of the tab, in a position that will join up to the gap you created earlier.
The Neck
Begin this section by sewing each side, along the top of the mini granny squares. Leave the central mini granny open, as this is where you are going to build up the neck.

To raise the neck level you are now going to work into each stitch around the circumference of the opening. My opening is 40 stitches around, which is slightly larger than the width of one granny square.
Start in your dark blue yarn
Row 1 – 2
ch3, then make 1dc into each stitch. At the end of the round, slst to the top of the chain to join.
cc to pale blue
Row 3
ch3, make 1dc into the same stitch, 2dc into the next stitch, then 1dc x 16, 2dc x 2, then 1dc x 16. At the end of the round, slst to the top of the chain to join.
Row 4
ch3, then make 1dc into each stitch. At the end of the round, slst to the top of the chain to join.
cc to dark blue
Row 5
ch3, then make 1dc into each stitch. At the end of the round, slst to the top of the chain to join.
Row 6
This final round is going to be made up of shell stitches.
Join your yarn with a slst, then *sk1 and make 7dc into the next stitch, sk1, then slst. Repeat for the length of the round. At the end of the round, tie off and leave a yarn tail.

Sewing In Ends
If you haven’t weaved as you went along, now turn your crochet hot water bottle cover inside out and use a yarn needle to hide the loose ends. Remember to make sure you don’t cut the ends too short, just in case you need to repair it later on as this will hopefully get a fair amount of use.