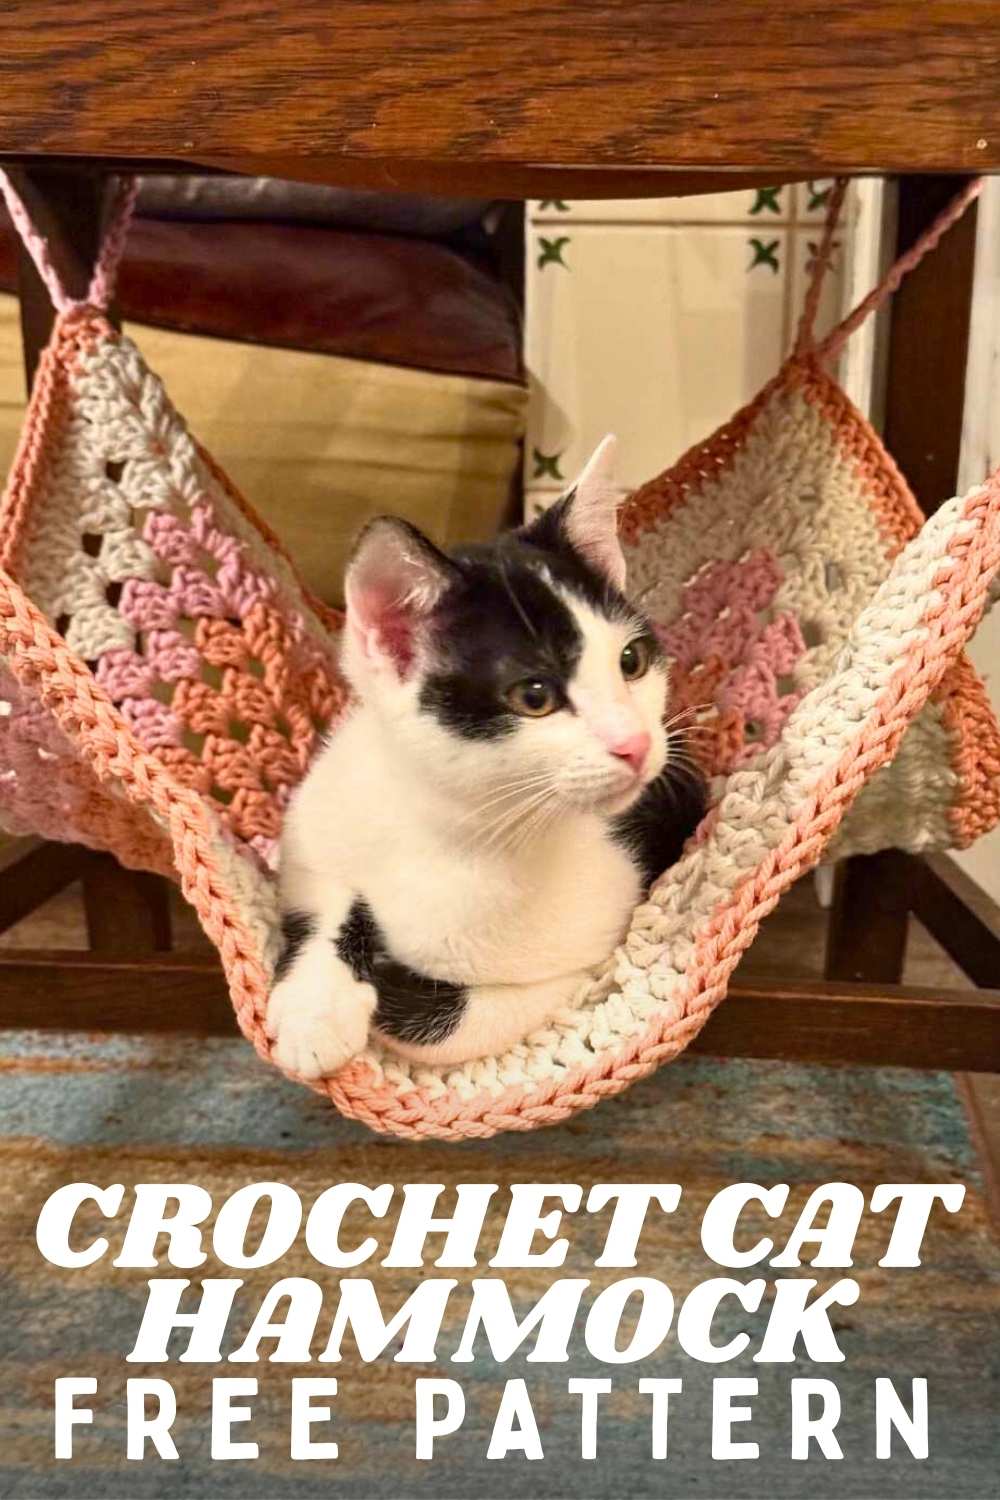
Crochet Cat Hammock
What’s better than crochet? Crocheting your new kittens an adorable new hammock, of course!

A few weeks ago Tango and Arlo joined our home, and very quickly got their paws into every part of our lives. They are utterly adorable, friendly, confident, and, let’s face it, incredibly lively too.
So when making a hammock for them, one of my main priorities was to make sure it was going to be safe. It needed to not fall apart in the first five minutes when subjected to their sharp teeth and claws.
It’s been up and in use for a few days now, so I’m confident that if you follow the pattern and materials that I used that yours should hold up to cat levels of enthusiasm too! And I’ve even made a cat bed for them too.

What You’ll Need
- 6mm crochet hook
- Cotton macrame cord, 3mm wide. I used nearly three reels, cream, pale pink and dark pink. I recommend buying around 300m of cord, so three 100m reels.
- Scissors

The Stitches
- ch – chain
- dc – double crochet
- 2dc – make two double crochets into the same stitch
- cc – color change
Before You Begin
Decide where you want to hang your cat’s hammock, as this will effect how big you are going to make your central granny square.
It’s important to use a chair that is sturdy, and not likely to fall when your cats enthusiastically play around in their fabulous new hammock.

This pattern is worked initially as a large granny square. The size of square you make should be approximately the same width as the seat of the chair you’re going to attach it beneath.
Crochet Cat Hammock Pattern
Begin working in your white macrame cord.

Round 1
ch6, then slst into the first chain to join as a loop
Round 2
ch3, 2dc, then (ch3, 3dc) x 3, ch3, then slst into the top of the starting ch3

Round 3
ch4, *working into the corner gap (3dc, ch3, 3dc) then ch1. Repeat from *, until the final corner where you will make 3dc, ch3, 2dc, then slst into the third loop of the starting chain 4.
Tie off and leave a tail of cord, which you will work into your next round to hide or weave in later.
cc to pale pink
Round 4
Start in a corner, (ch3 (as the first dc), 2dc, ch3, 3dc). ch1, 3dc into the central gap, ch1. Then *(3dc, ch3, 3dc) into the next corner, then ch1.
Repeat from * until the end of the round, where you will slst into the top of the starting ch3.

Round 5
ch4, *(3dc, ch3, 3dc) ch1, 3dc, ch1, 3dc, ch1. Repeat from * until the end of the round, then make 2dc into the final space and slst into the third chain of the starting chain.
cc to dark pink

Continuing your hammock to the correct size
Follow this pattern of increasing the size of your granny square, until you have a square that is roughly the same diameter as your chosen chair.
Now you’re going to build up the edges of the square a little, before creating the attachment points.
The Border
Working around the edge of the granny square, make 1dc into each stitch, and 2dc into each gap. Into the corners make 3dc.
The final round will be simply making 1dc into each of the stitches created in the initial border round.

The Attachments
I’ve attached my cat hammock using eight chains. Into each corner of the hammock, create two chains of 25 stitches.
Firmly tie each end of the chair, attaching one end to the square, and the other ends are going to be used to tie it to the chair you’ve chosen.
If your kitties are as lively as mine, then I recommend checking your attachment points and knots once a day to ensure they are holding up to their busy use.
The hammock pictured has been up for a few days now, and I’m pleased to confirm that it’s doing really well and not showing any signs of the already heavy use they’ve given it!