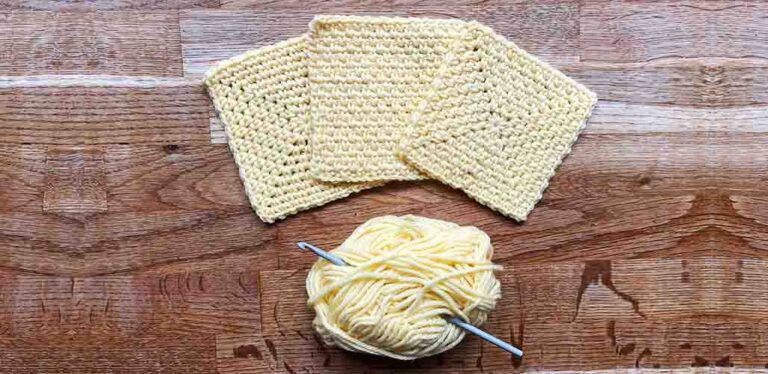
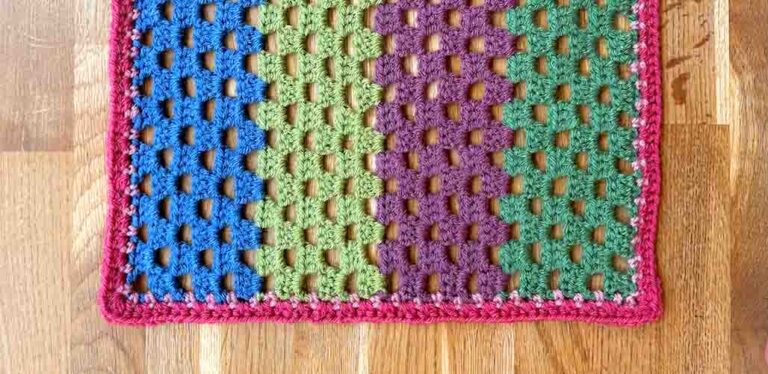
Classic Granny Square Instructions in Super Simple Steps
The classic granny square isn’t just a pretty way to make a variety of crochet blankets, it’s also still my favorite way to relax with a hook.
As this traditional granny square is so many people’s introduction to crochet, I wanted to share some instructions for you that even the newest crocheter can easily follow.

The Stitches
You will need just a few stitches, and if they are unfamiliar you’ll find their detailed descriptions linked here:
Casting on – the method by which you attach the hook to the yarn
Chain – making a simple loop
Slip stitch – joining to a stitch without forming a new stitch
Double crochet (US) – a simple stitch

The Steps
1. Make a chain of four stitches
2. Slip stitch into the first stitch

3. Chain 3 (as the first double crochet)
4. Make two further double crochets into the center of the chain loop

5. Chain two (this will form the first corner)

6. Make three double crochets into the chain loop
7. Chain two (this is your second corner)

8. Make three double crochets into the chain loop
9. Chain two (this is your third corner)

10. Make three double crochets into the chain loop
11. Chain two, then slip stitch into the third chain of your chain 3 (from instruction 3).

Cut off a long tail of yarn, and weave the yarn in and out of the tops of the next two stitches.
Begin in a new color or the same color as you prefer, working from the corner you left the loose end in.
Round Two
Cast on, being sure to leave the loose end tail through the stitch, as well as the corner chain.
12. Chain 3 (as the first double crochet), then make 2 double crochets next to it

13. Chain 2 (your first corner of this round)

14. Make three double crochets into the same corner gap
15. Chain 1

16. Into the next corner make three double crochets, then chain two, then make three further double crochets

17. Chain 1

18. Into the next corner make three double crochets, then chain two, then make three further double crochets
19. Chain 1
20. Into the next corner make three double crochets, then chain two, then make three further double crochets
21. Chain 1 then slip stitch into the top of your chain 3 from instruction 12.

Cut off a long tail of yarn, and weave the yarn in and out of the tops of the next two stitches.
Round Three
Begin in a new color or the same color as you prefer, working from the corner you left the loose end in.
Cast on, being sure to leave the loose end tail through the stitch, as well as the corner chain.

22. Chain 3 (as the first double crochet), then make 2 double crochets next to it
23. Chain 2
24. Make three double crochets into the same corner gap
25. Chain 1
26. Make three double crochets into the edge gap

27. Chain 1
28. Into the next corner make three double crochets, then chain two, then make three further double crochets
29. Chain 1
30. Make three double crochets into the edge gap

31. Chain 1
32. Into the next corner make three double crochets, then chain two, then make three further double crochets
33. Chain 1
34. Make three double crochets into the edge gap
35. Chain 1

36. Into the next corner make three double crochets, then chain two, then make three further double crochets
37. Chain 1
38. Make three double crochets into the edge gap
39. Chain 1 then then slip stitch into the top of your chain 3 from instruction 22.

Cut off a long tail of yarn, and weave the yarn in and out of the tops of the next two stitches.
Round Four
Begin in a new color or the same color as you prefer, working from the corner you left the loose end in.
Cast on, being sure to leave the loose end tail through the stitch, as well as the corner chain.
40. Chain 3 (as the first double crochet), then make 2 double crochets next to it
41. Chain 2
42. Make three double crochets into the same corner gap
43. Chain 1
44. Make three double crochets into the edge gap
45. Chain 1
46. Make three double crochets into the edge gap
47. Chain 1

48. Into the next corner make three double crochets, then chain two, then make three further double crochets
49. Chain 1
50. Make three double crochets into the edge gap
51. Chain 1
52. Make three double crochets into the edge gap
53. Chain 1
54. Into the next corner make three double crochets, then chain two, then make three further double crochets

55. Chain 1
56. Make three double crochets into the edge gap
57. Chain 1
58. Make three double crochets into the edge gap
59. Chain 1
60. Into the next corner make three double crochets, then chain two, then make three further double crochets

61. Chain 1
62. Make three double crochets into the edge gap
63. Chain 1
64. Make three double crochets into the edge gap
65. Chain 1 then slip stitch into the top of the chain three from instruction 40.
Continue Onwards
Now you’ve got the pattern going, all you need to do is continue it as your granny square expands. Each time you’ll have an extra edge gap to fill, but otherwise the pattern will be identical as it grows.
Or you can continue to make multiple smaller granny squares to join together in one big beautiful blanket.