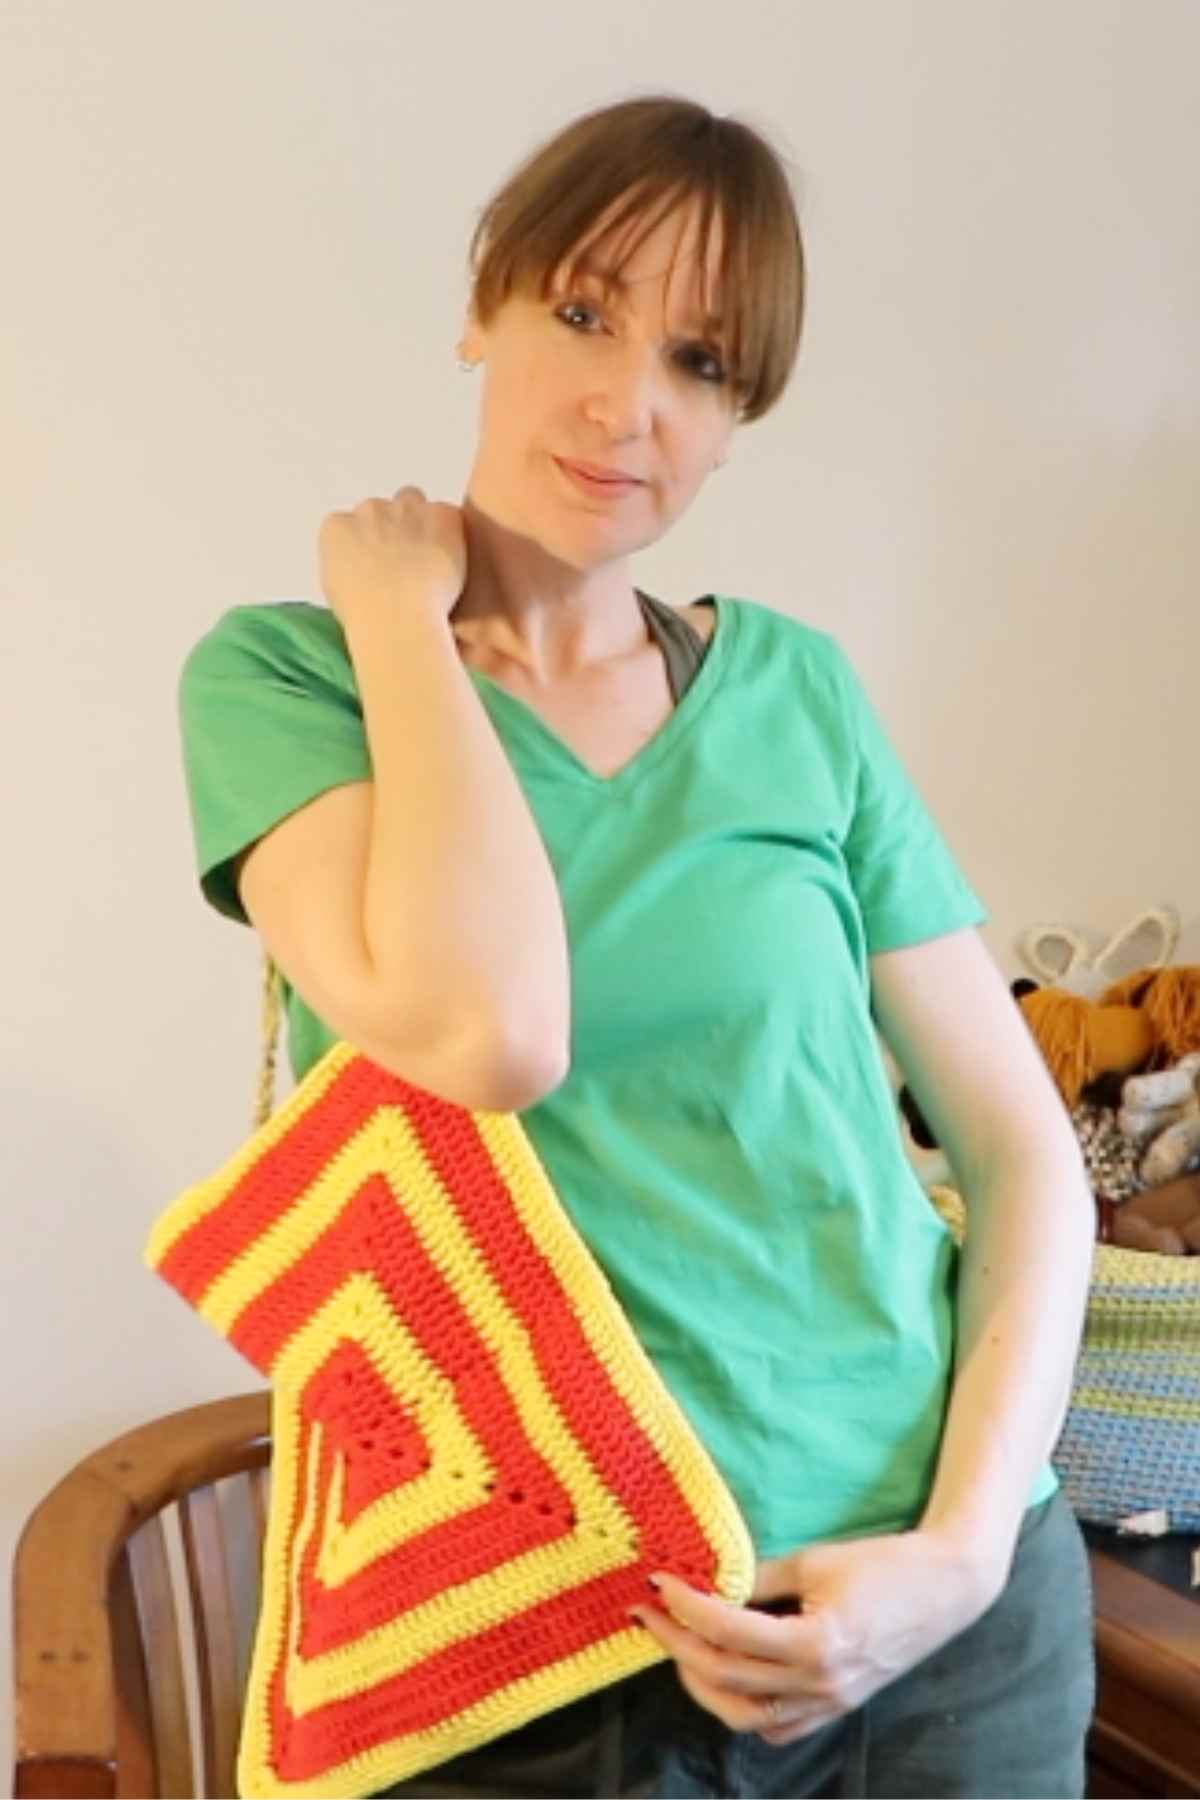
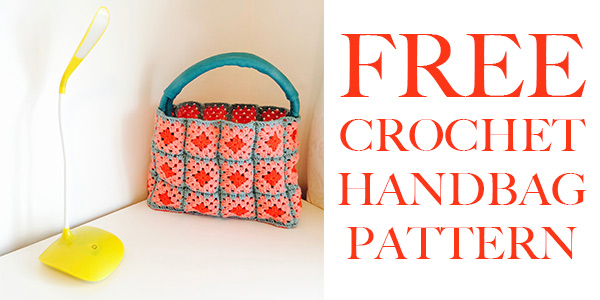
How To Crochet My Simplest Granny Square Tote Bag
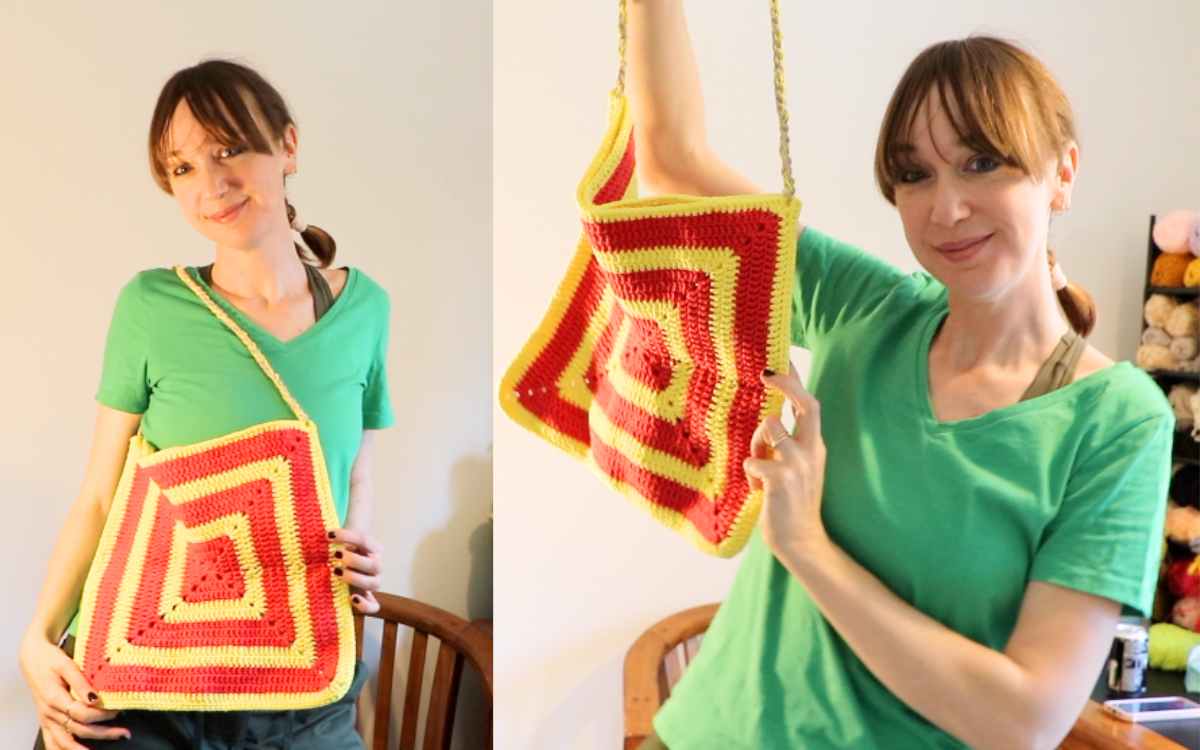
My easiest granny square tote bag pattern is the perfect practical beginner friendly project. It’s quick to make, uses only simple stitches, and works up in just a few hours. This will make a great beach bag, or just a fun way to carry home your groceries!
- What you’ll need to make your tote bag.
- Tips and techniques.
- Tutorial – how to crochet a simple granny square tote bag.
My son uses this bag to bring to the shops when we go out, and it’s held up well to four year old levels of enthusiasm!
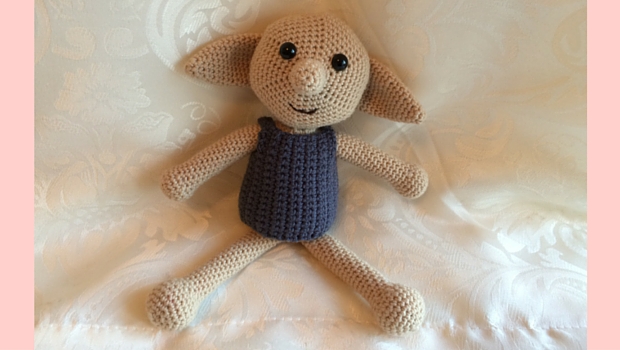
For a bag with a more feminine look, check out my easy spotty granny square bag pattern!
Granny Square Tote Equipment List
I highly recommend using a high percentage cotton blend for crochet totes. They are strong, easy to clean, won’t stretch and retain their shape well.
- 2 skeins Lily Sugar n’ Cream* in red
- 2 skeins Lily Sugar n’ Cream* in yellow
- 4mm crochet hook
- 1 skein chunky macrame cord*
- 6mm crochet hook
- Wide eyed yarn needle*
Pattern Techniques
Granny squares are incredibly versatile things, but in this pattern we’re going to use them in one of their most basic forms to produce a practical tote bag. Here are the stitches you’ll be using:
- ch – chain
- sc – single crochet
- dc – double crochet
- 2dc – make two double crochets into the same stitch gap
- slst – slip stitch
- cc – color change
Quick and Easy Granny Square Tote Pattern
You’re going to make your granny square tote bag in three simple steps. First we’ll produce two large granny squares, then we’ll join them together and finally we’ll create the straps.
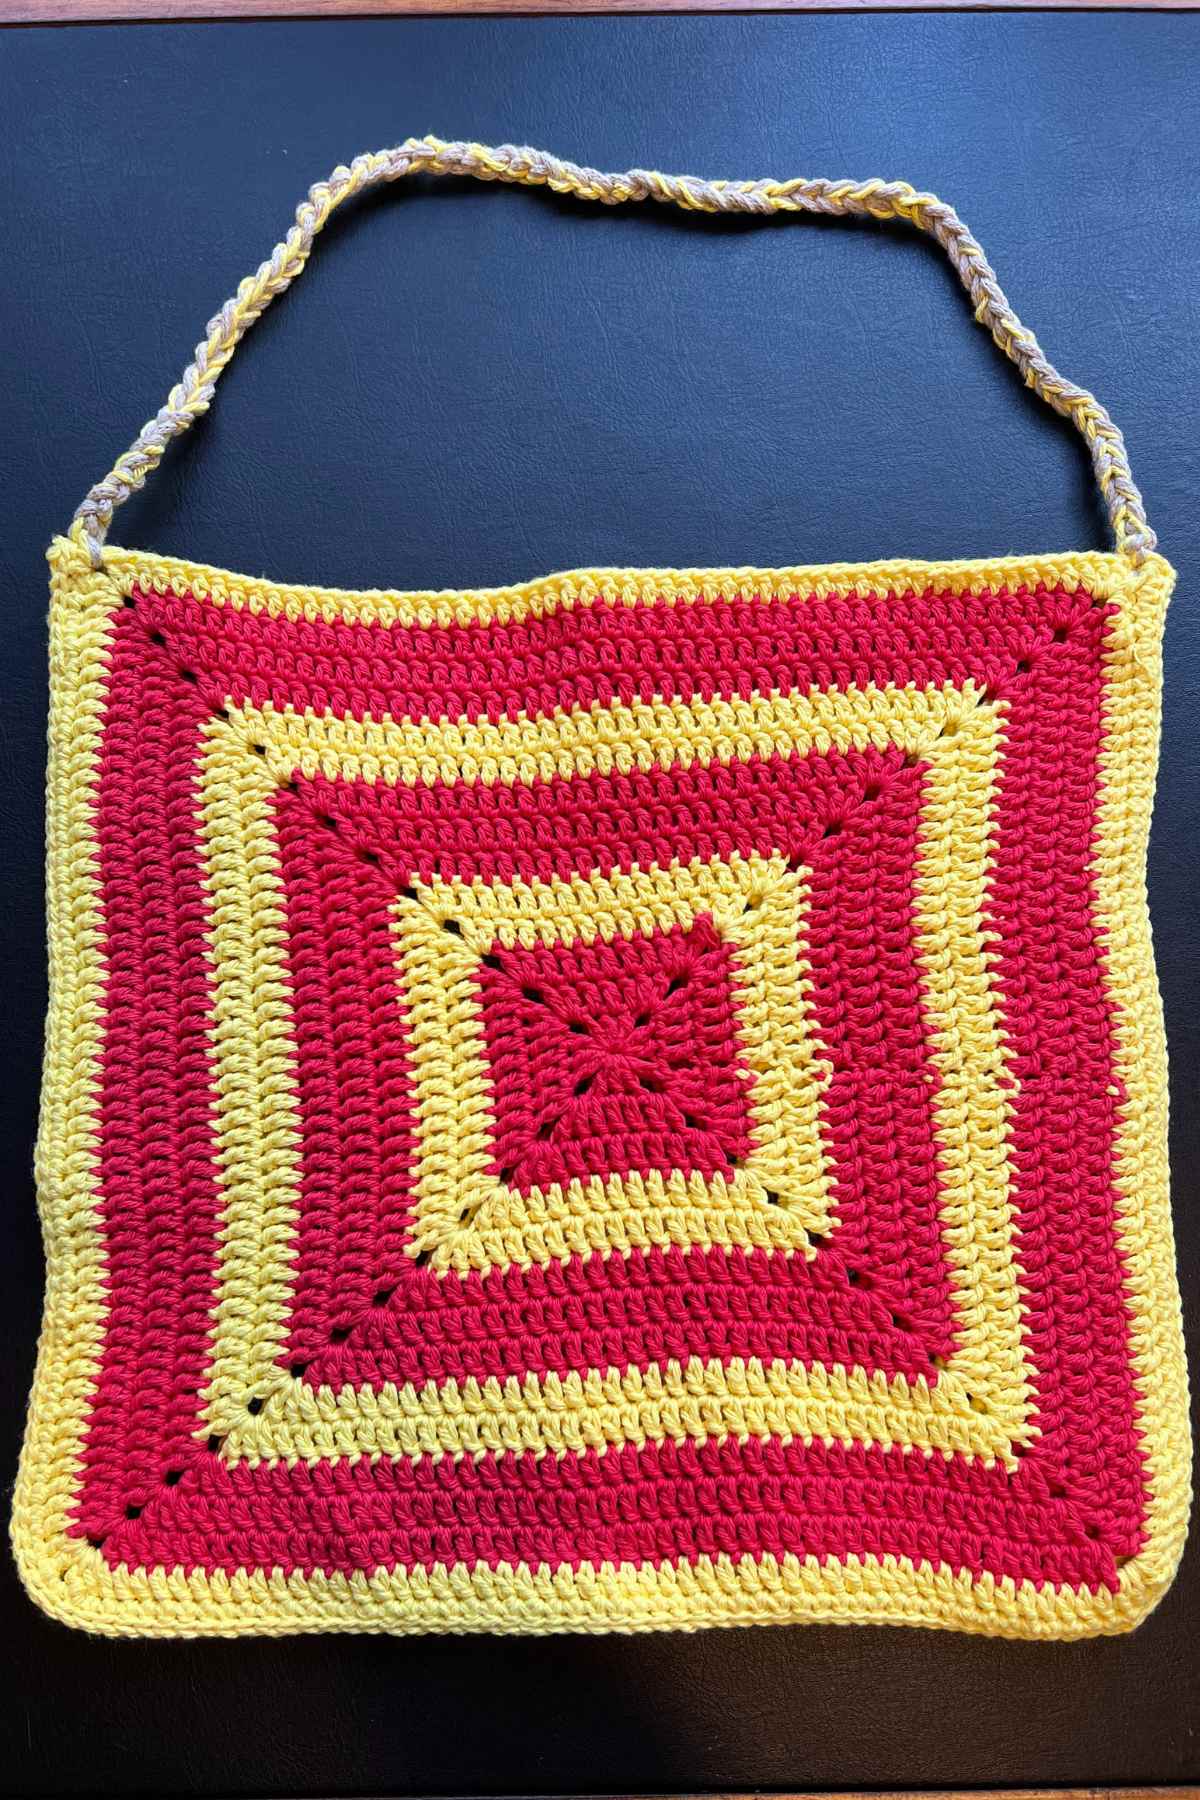
Making Two Large Granny Squares
You’re going to begin by crocheting two big solid granny squares. Work with your 4mm crochet hook and start with your red yarn.
Round 1
Make a magic circle.
Chain 3 (as the first dc), 2dc, ch2, (3dc, ch2) x 3.
Round 2 – 3
Ch3, and then make 1dc into the top of each double crochet stitch from the previous round until you reach the edge of the square. Into the corner chain two section, make 2dc, ch2, 2dc. Repeat in this pattern around the edge of your granny square.
Once you’ve worked your way around the granny square, slip stitch into the top of the chain 3 to close.
At the end of round 3, color change to yellow.
Round 4 – 5
Ch3, 1dc into the top of each double crochet stitch of the previous round until you reach the corner. Into the ch2 gap make 2dc, ch2, 2dc. Repeat for the round.
At the end of the round slst to close, and cc red
Round 6 – 8
Ch3, 1dc into the top of each double crochet stitch of the previous round until you reach the corner. Into the ch2 gap make 2dc, ch2, 2dc. Repeat for the round.
At the end of the round slst to close, and cc yellow
Round 9 – 10
Ch3, 1dc into the top of each double crochet stitch of the previous round until you reach the corner. Into the ch2 gap make 2dc, ch2, 2dc. Repeat for the round.
At the end of the round slst to close, and cc red
Round 11 – 13
Ch3, 1dc into the top of each double crochet stitch of the previous round until you reach the corner. Into the ch2 gap make 2dc, ch2, 2dc. Repeat for the round.
At the end of the round slst to close, and cc yellow
Round 14
Ch3, 1dc into the top of each double crochet stitch of the previous round until you reach the corner. Into the ch2 gap make 2dc, ch2, 2dc. Repeat for the round.
At the end of the round slst to close, and at the end of round 5 tie off and sew in the loose ends with your hook or a yarn needle.
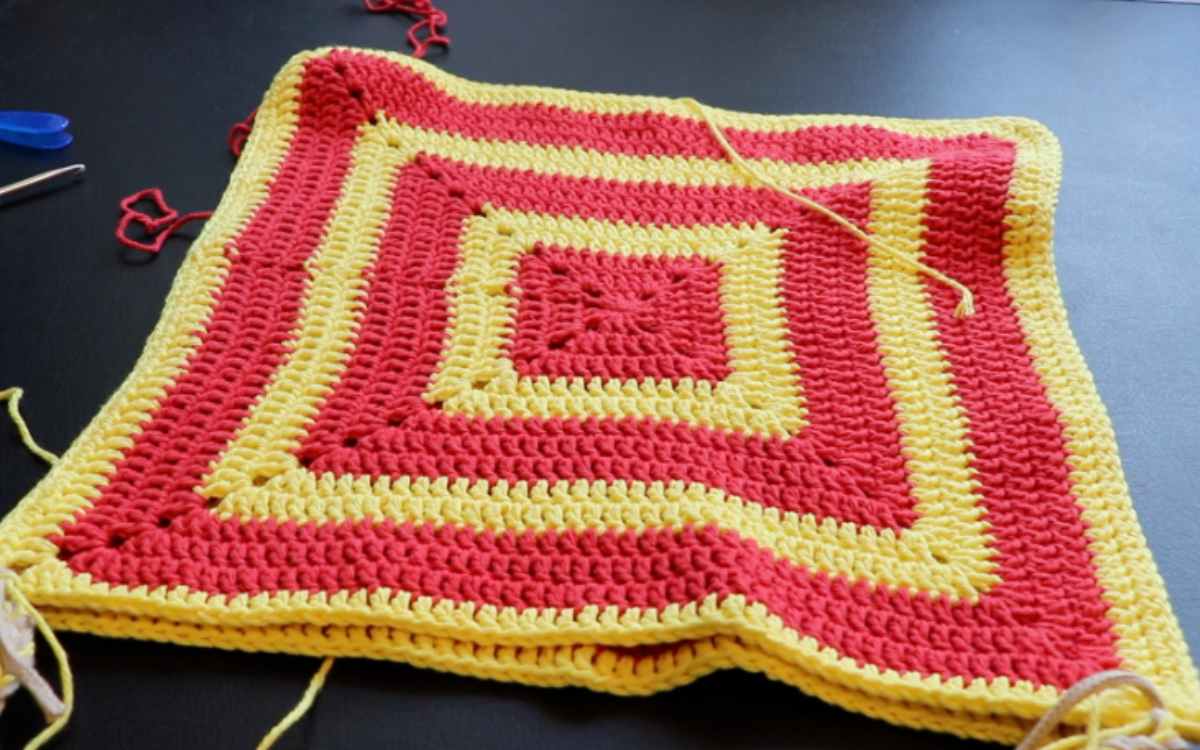
Optional Blocking
When you have made two large granny squares, you might like to block them. It’s not essential for this design, but it will help you to have a more defined shape to your bag if you dampen them and either peg taut overnight, or pop them under a big heavy book!
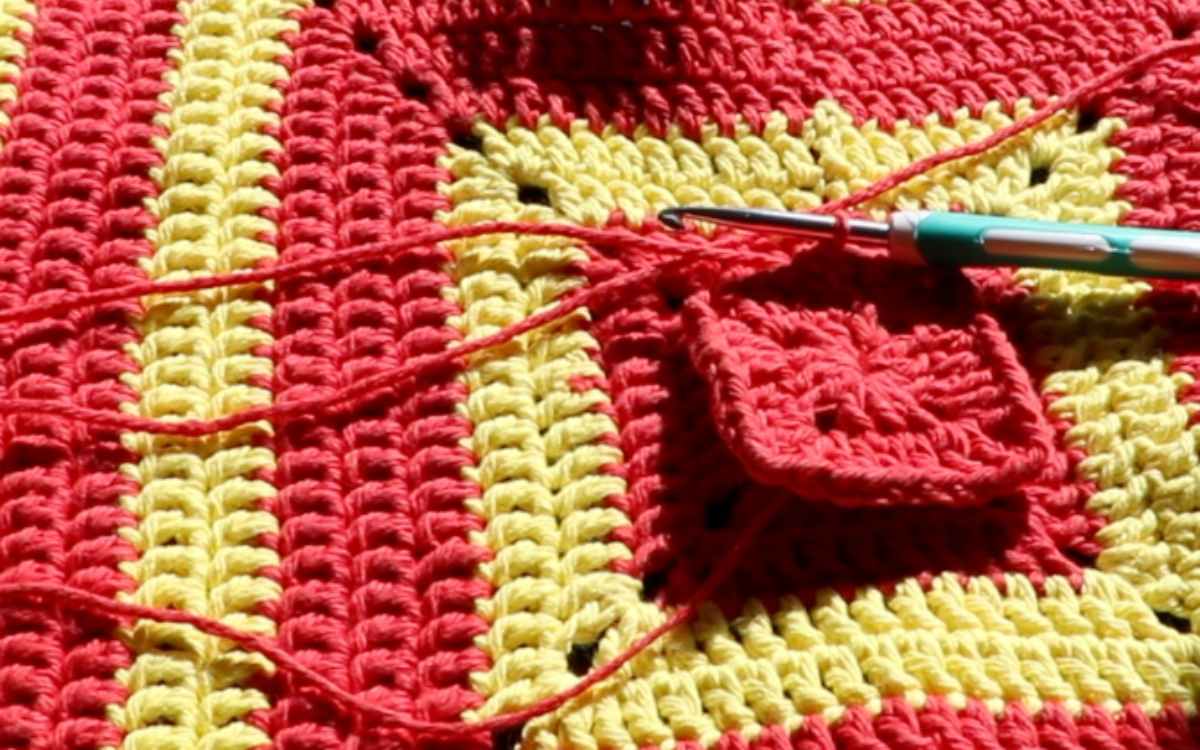
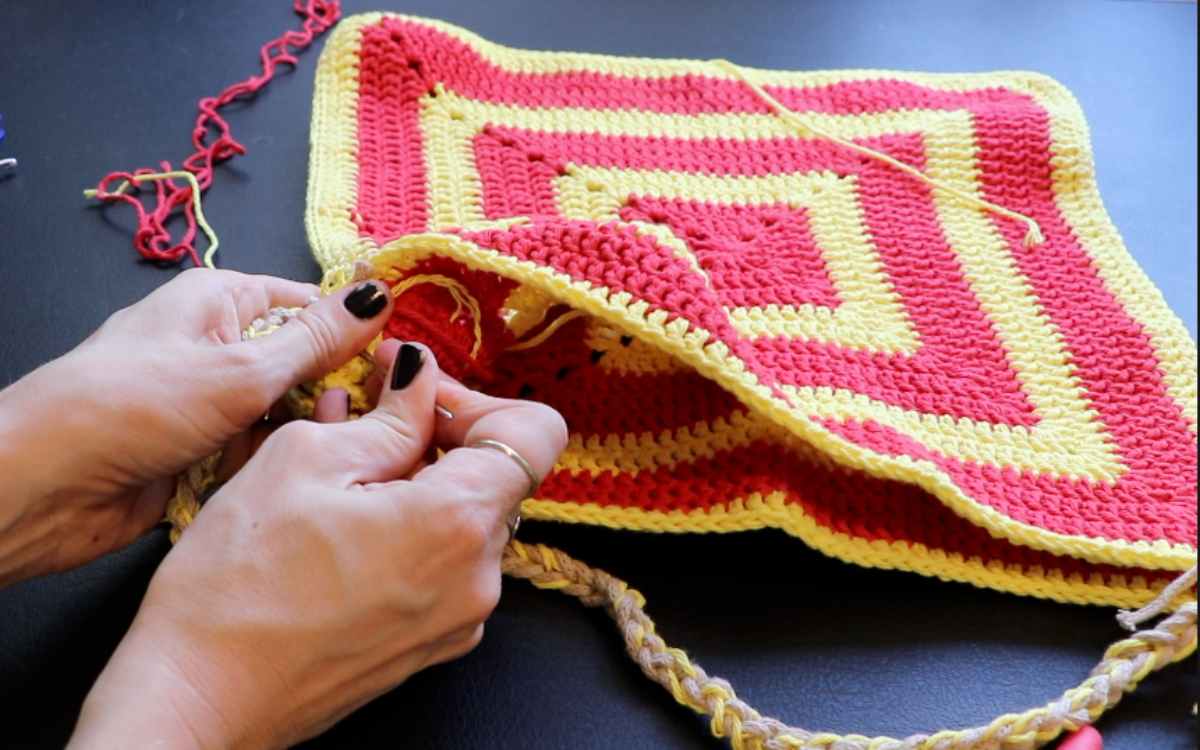
Crocheting the Sides Together
Around the edge of each granny square, work in your yellow yarn and make a single crochet into each stitch of three of the four sides of the square.
When you have crocheted around them, line them up so that the exposed sides are at the top. Face the wrong sides of the squares together and single crochet those single crochet stitches together to join three of the four edges. It will make a seam of single crochet stitches around the edge.
Crocheting Your Bag’s Strap
I used chunky macrame cord with a bit of an elastic stretch for my bag strap, together with a single strand of the yellow cotton yarn.
You’ll need a 6mm crochet hook, and to make a chain of 70 stitches beginning from each outer corner for each side of the bag. Slst to join into the opposite corner, and then make one single crochet into each chain all the way back along it. Slst into the starting corner to join, and leave a long tail.
Using a wide eyed yarn needle, weave the loose end up the strap to hide it.
*The products linked in this pattern were carefully selected by Lucy Kate Crochet. If you decide to purchase using the links provided, we may earn a small commission on that sale. This is at no extra cost to you.