Cute Crochet Tote Bag Pattern
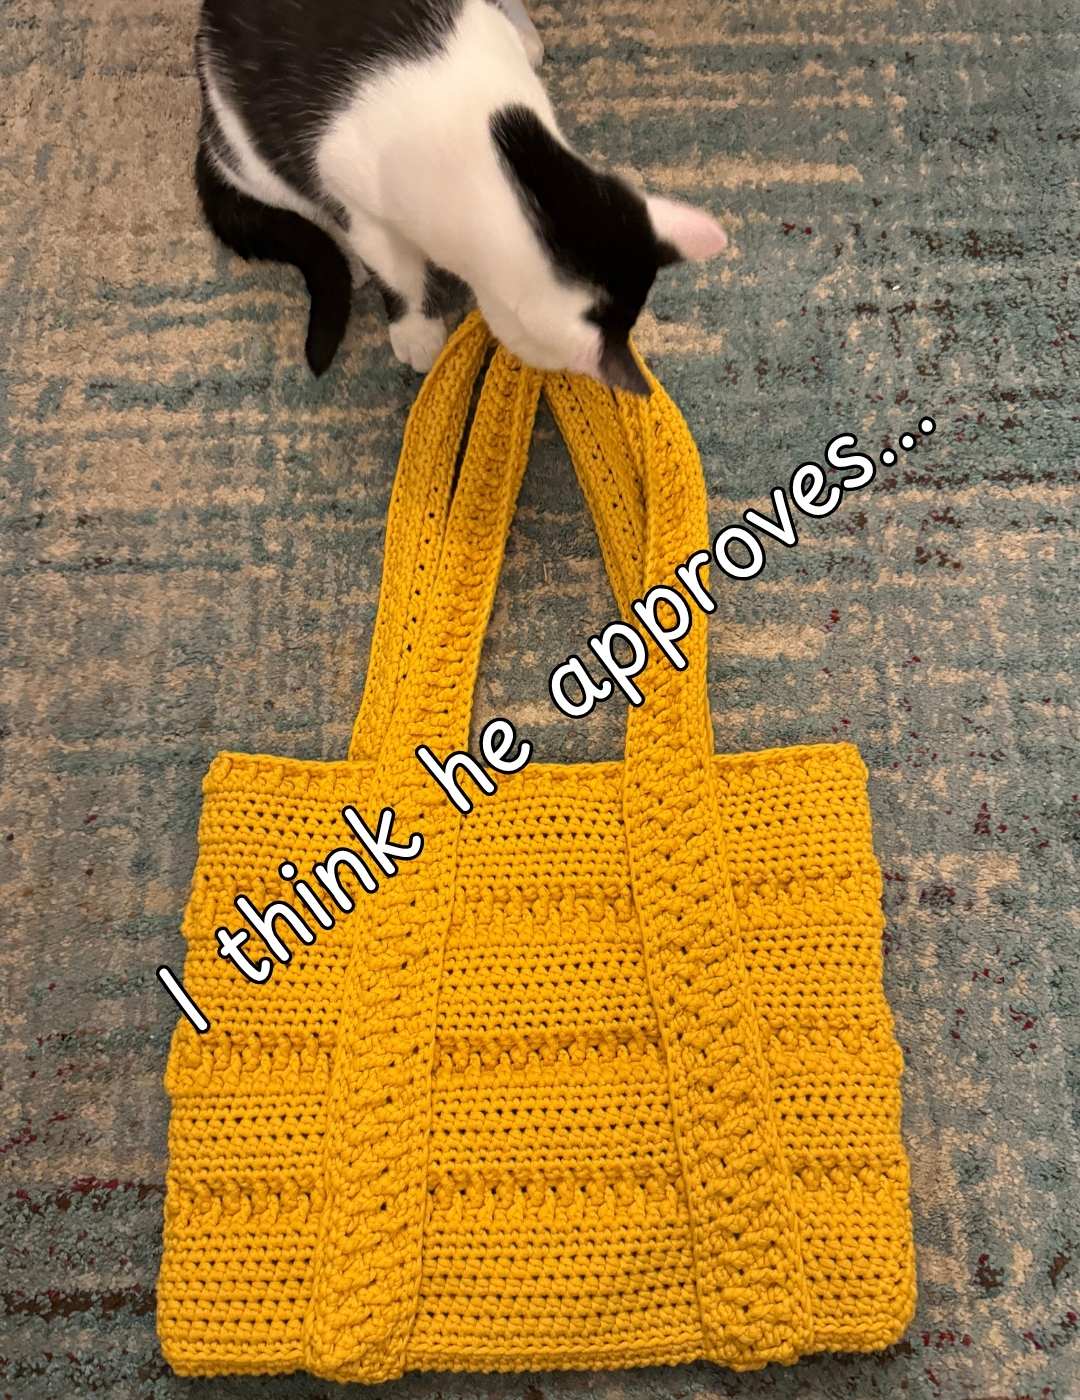
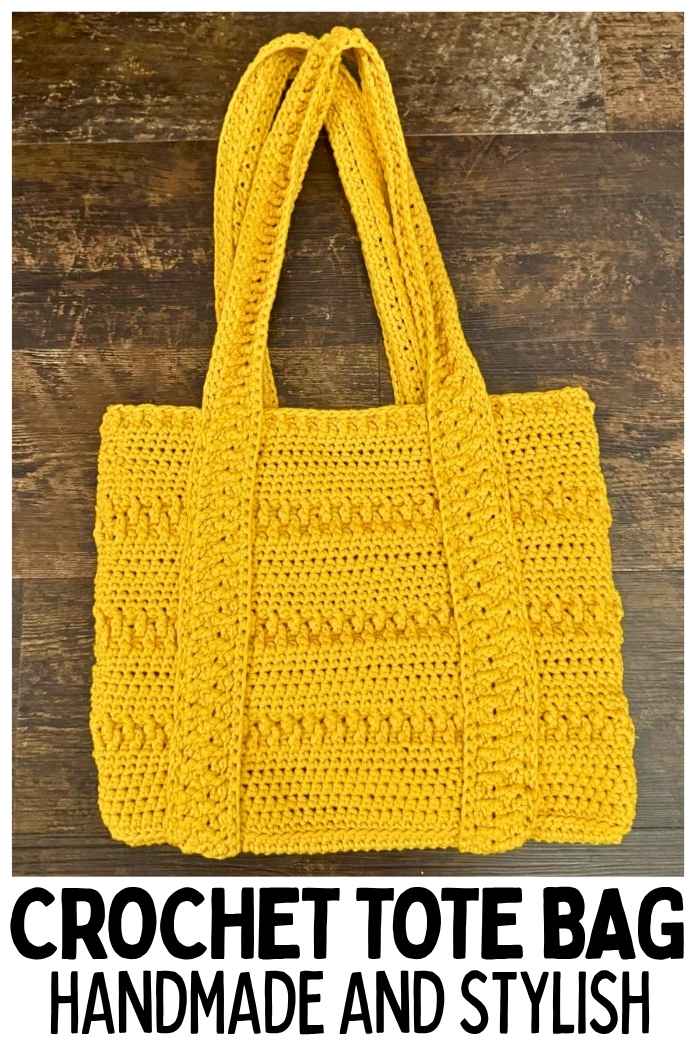
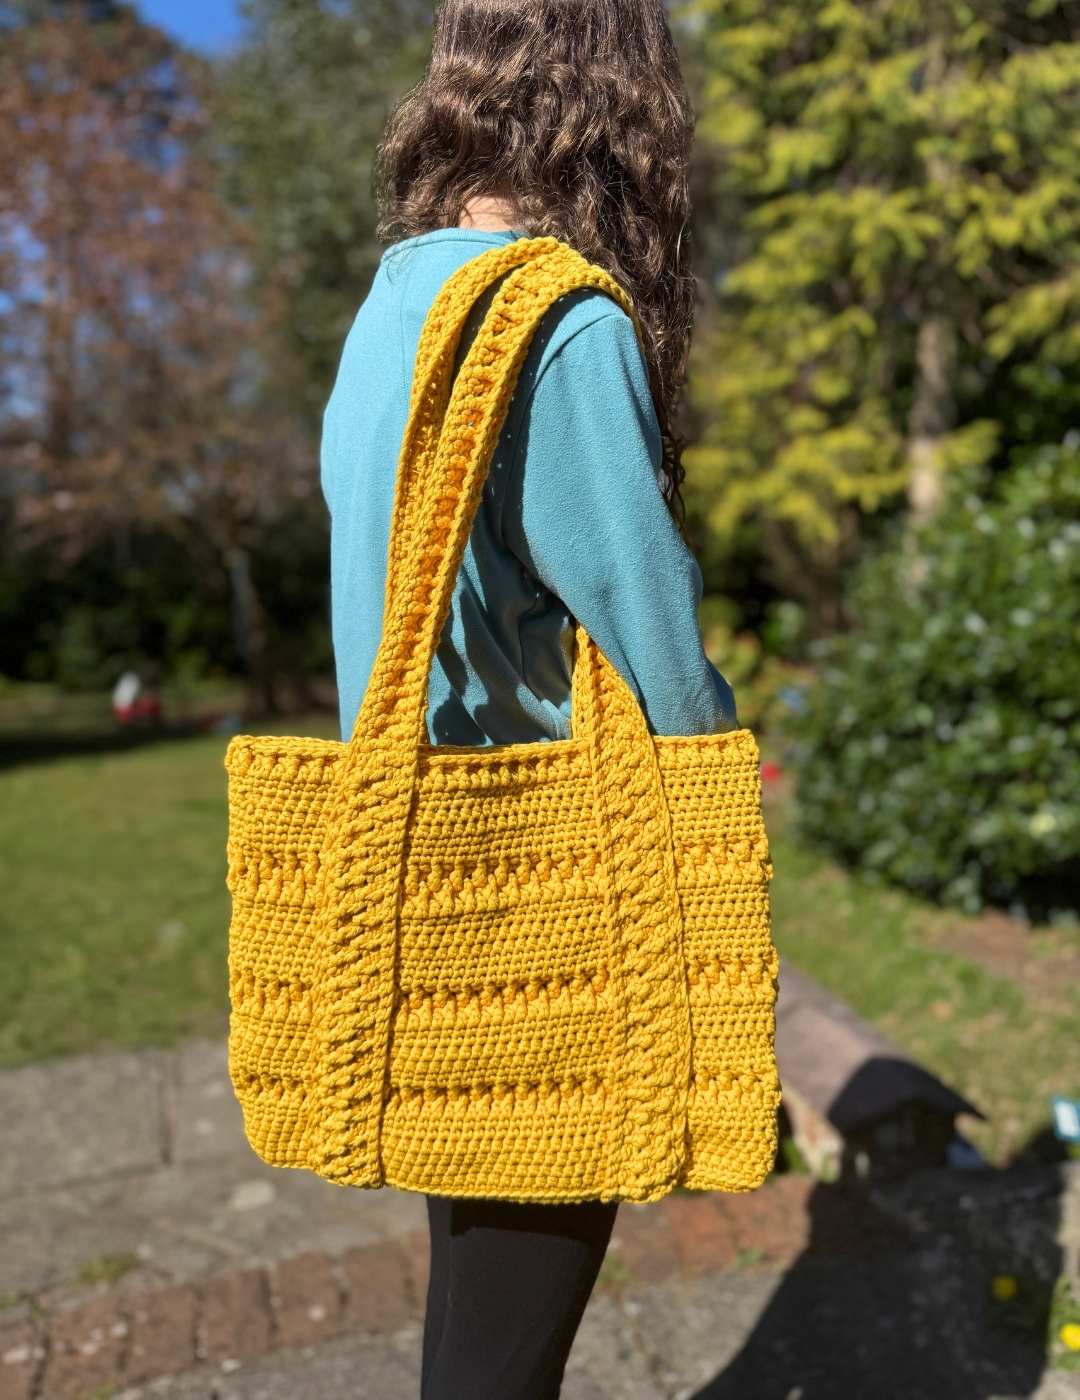
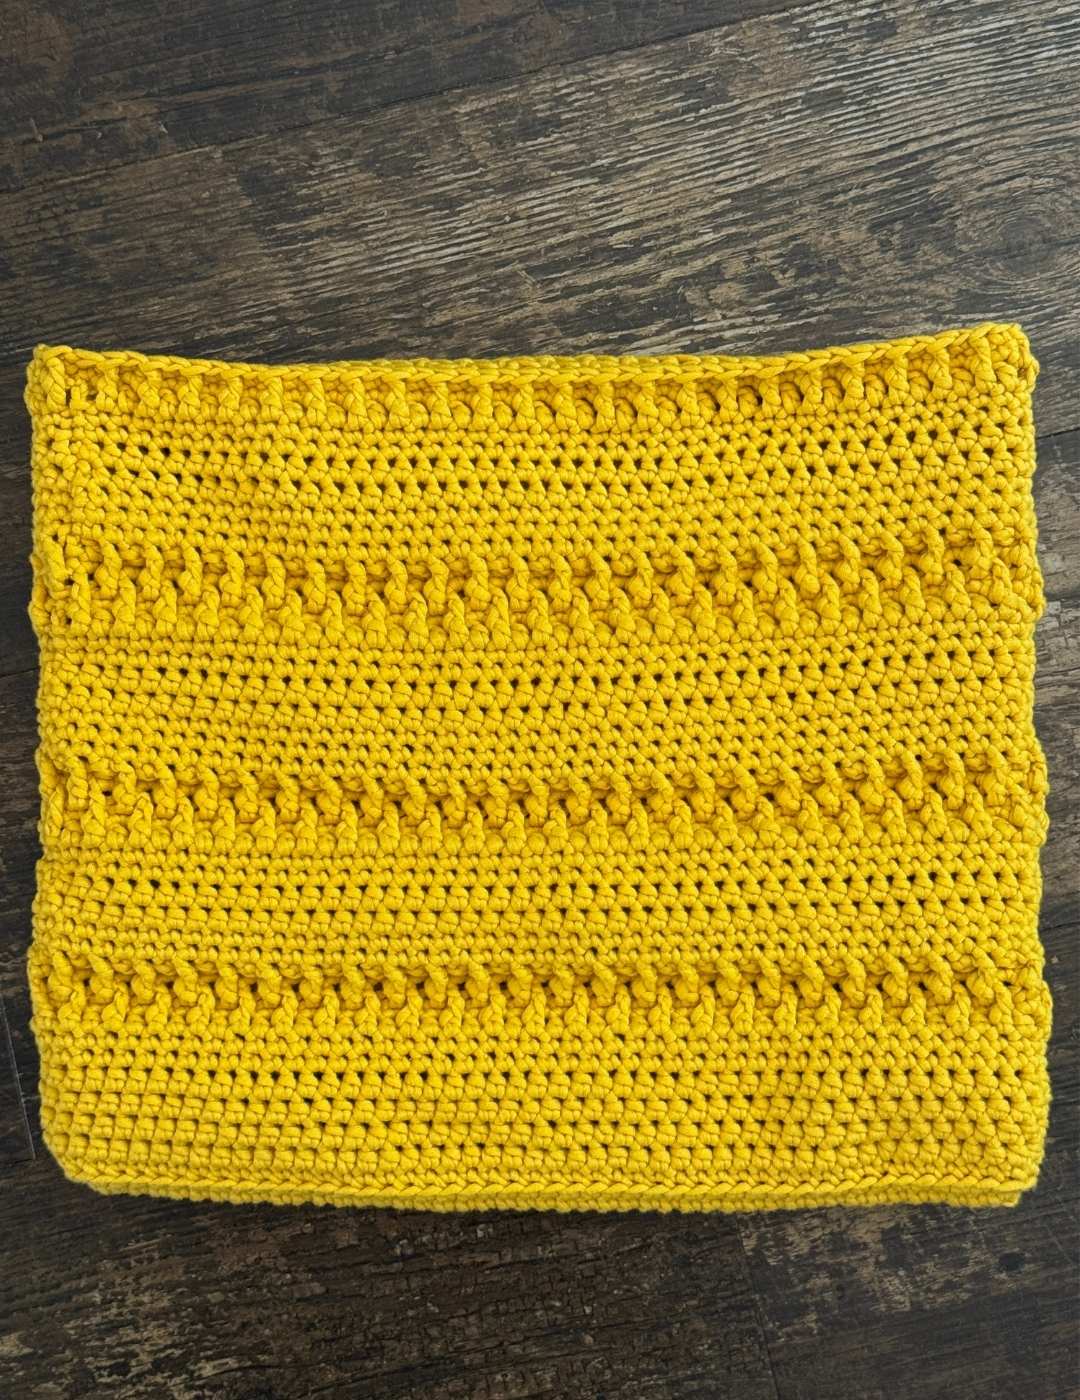
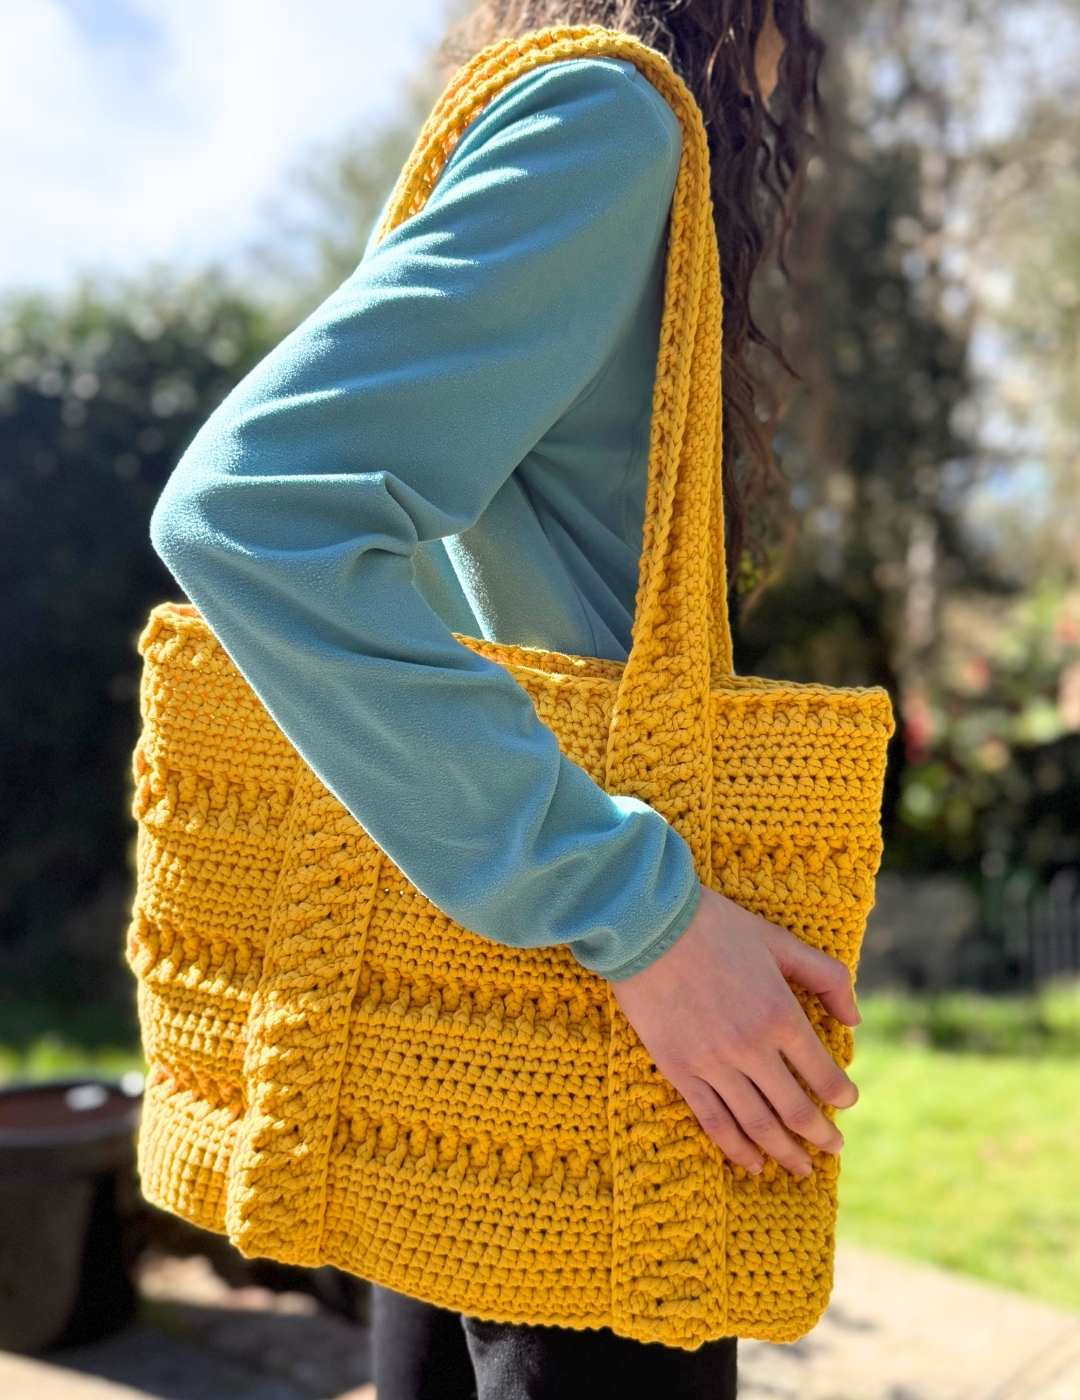
I’m so excited to share my crochet tote bag pattern with you, I genuinely think it’s one of the nicest and most practical designs I’ve come up with. It’s worked on a fairly traditional tote bag theme, but I’ve gone with a strong single color look and given it that extra dimension and texture by adding in some fun alpine stitch rows.
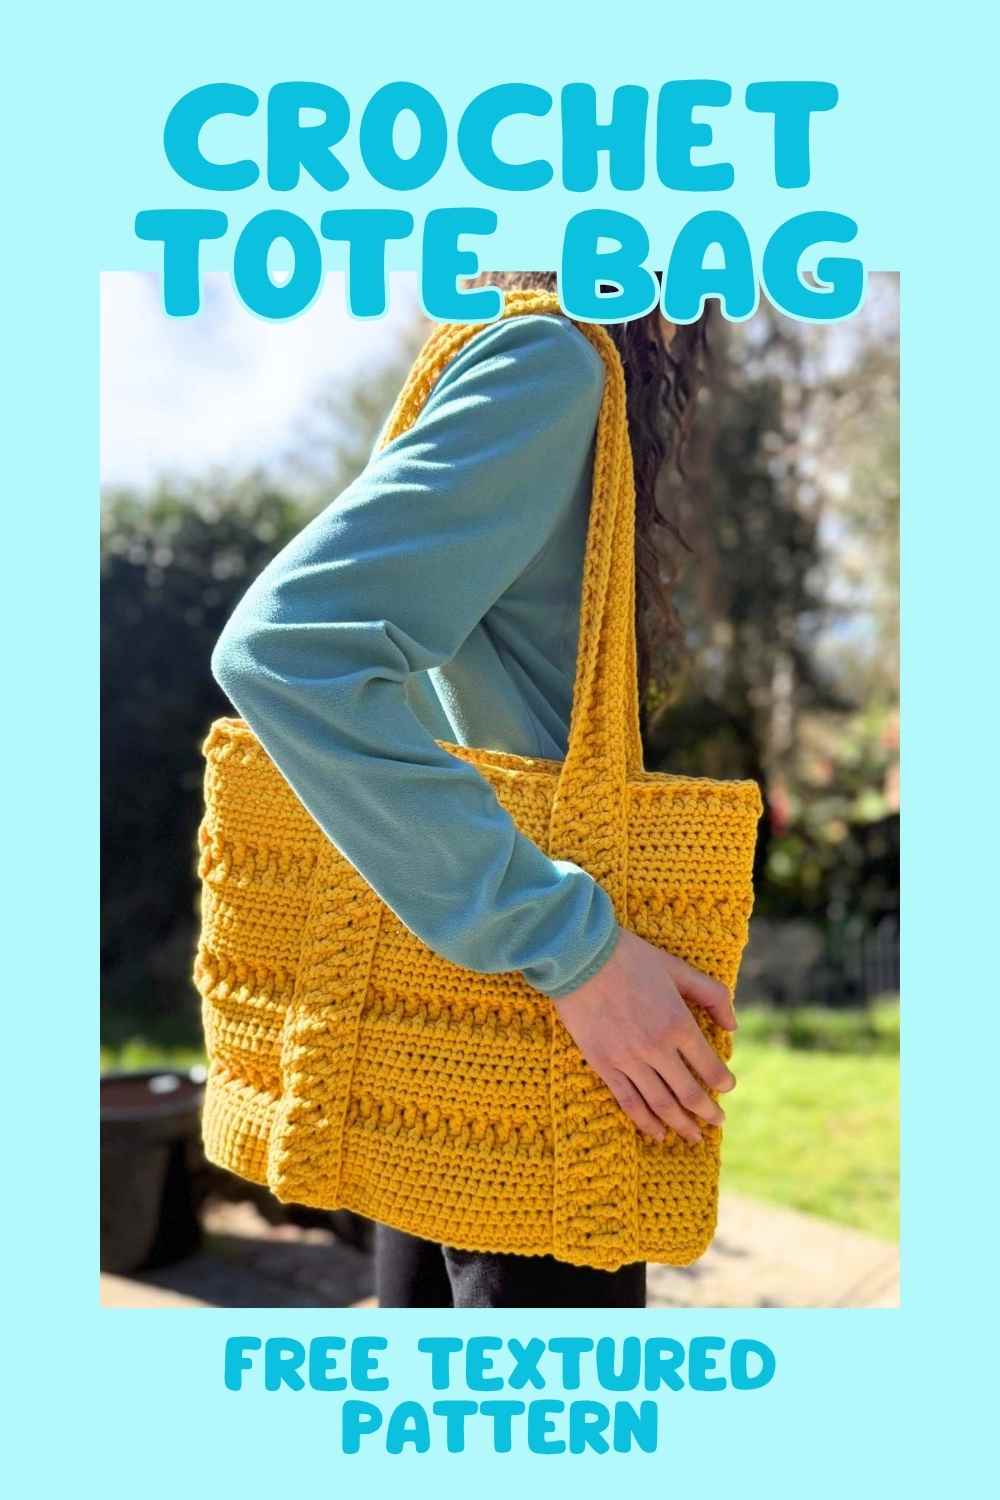
The massive benefit of single color projects is that you don’t have to think (or over think) about color matching, but you can still get something that’s got quite a bold design.
And funnily enough, this pattern came about somewhat accidentally. I recently decided I wanted to crochet my own bag to use at the store, and created a mesh grocery pattern which worked up really nicely. The problem is, I immediately started using it as my ‘crochet on the go’ bag and not for the purpose I’d made it for at all. So I found myself a few days ago starting the project again, with a very different feel. I decided what I wanted was something a bit bigger, and with much sturdier handles. And I have to tell you, I’m really happy with how it turned out.
What I Used
I used two skeins of Bernat maker yarn for this pattern, which wasn’t perhaps a yarn you’d naturally go to for a bag. It’s got a little bit of stretch, but this actually makes it ideal for a shopping bag that is going to need a little bit of give to easily accomodate the weird and wonderful purchases you’ll make from the store.
- 6.5mm crochet hook
- 2 skeins of Bernat Maker yarn*
- Large yarn needle
*If you don’t want to use Bernat maker than select 500g of another similar fiber – this is 72% Cotton to 28% Nylon, in the same chunky/bulky weight.
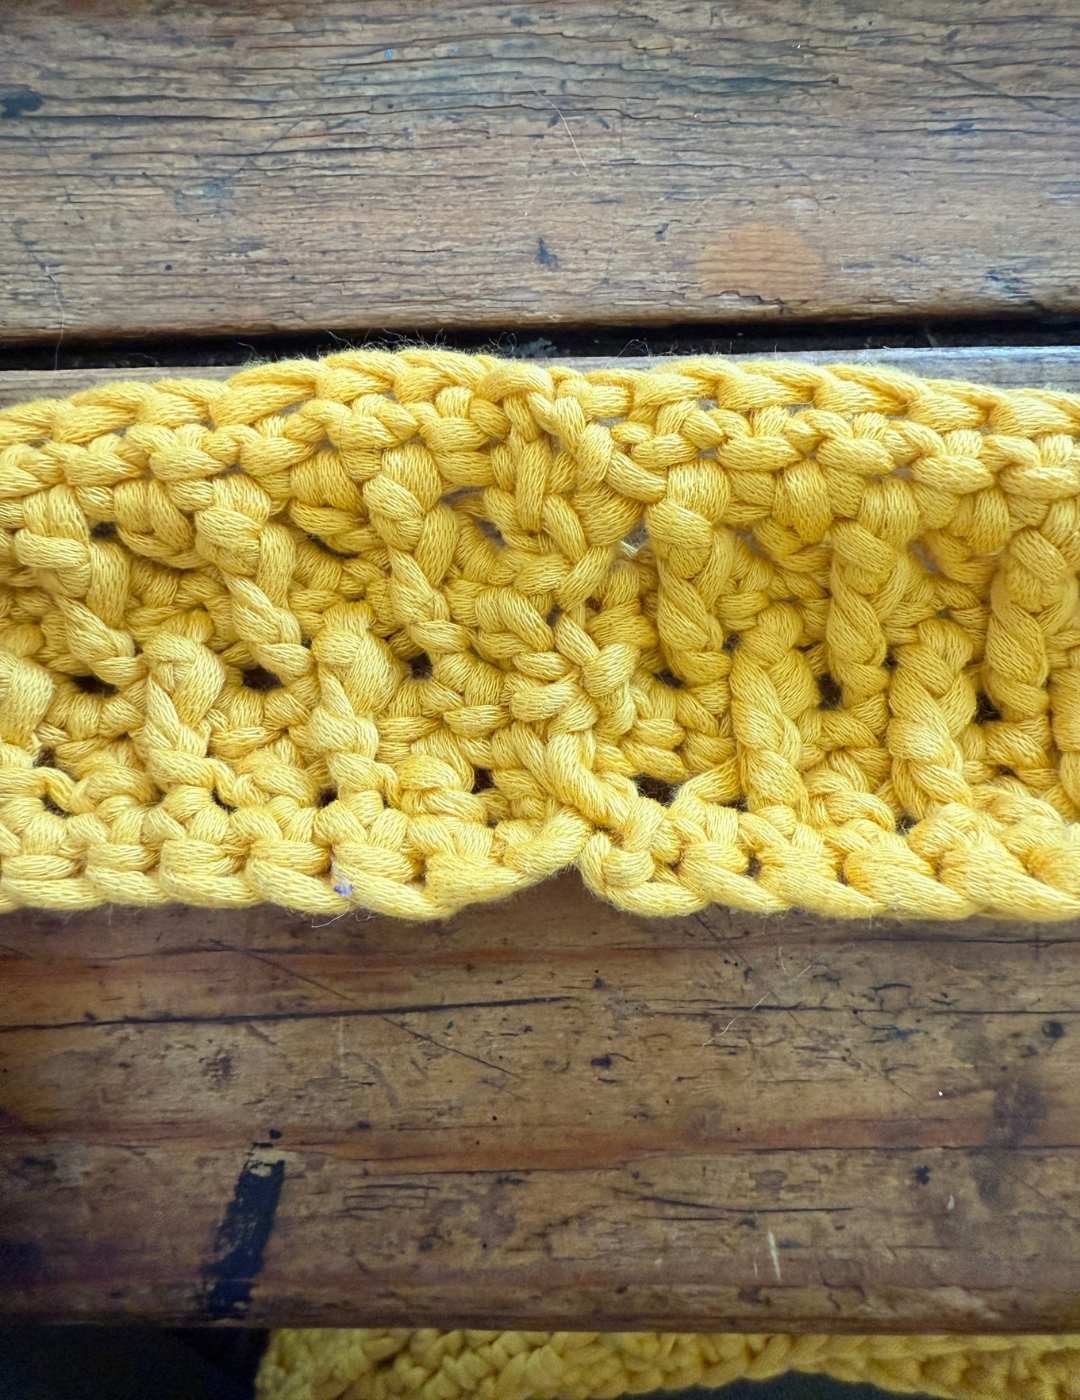
The Stitches
You’ll need to be familiar with the following stitches and their abbreviations. And do be aware that these front post crochets are made dropped (in the style of alpine stitches), so you will work them two rows below your current round, not one.
- ch – chain
- sk – skip
- sc – single crochet
- slst – slip stitch
- BLO – back loop only
- hdc – half double crochet
- dc – double crochet
- fpdc – front post double crochet
Crochet Tote Bag Pattern
This pattern is worked from the base in rounds, starting with a chain. You’ll work your second row into both sides of the chain, following it around to create the continuous pattern.
Round 1
ch46
Round 2
sk1, 1sc x 44, 3sc (made into the end chain), 1sc x 44, 3sc, slst to top of starting skipped stitch.
Round 3
ch1, 1sc x 45, 3sc, 1sc x 45, 3sc, slst
Round 4
ch1, 1sc BLO x 96, slst
Round 5 – 8
ch2, 1hdc x 96, slst
Round 9 – 10
ch1, 1sc x 96, slst
Round 11
ch2, 1dc x 96, slst
Round 12
ch1, 1sc x 96, slst
Round 13
ch2, dc into the first stitch, then (fpdc into the dc two rows down. sk the next stitch, then dc into the following). Repeat for the length of the round from *, then slst to join
Round 14
ch1, 1sc x 96, slst
Round 15
ch2, *(fpdc into the dc two rounds down, then dc into the next stitch (skipping the stitch above the fpdc again)). Repeat from * for the length of the round, then slst to join.
Round 16 – 17
ch1, 1sc x 96, slst
Round 18 – 19
ch2, 1hdc x 96, slst
Round 20-21
ch1, 1sc x 96, slst
Round 22 – 41
Repeat from round 11 onwards twice
Round 42
ch2, 1dc x 96, slst
Round 43
ch1, 1sc x 96, slst
Round 44
ch2, dc into the first stitch, then (fpdc into the dc two rows down. sk the next stitch, then dc into the following). Repeat for the length of the round from *, then slst to join
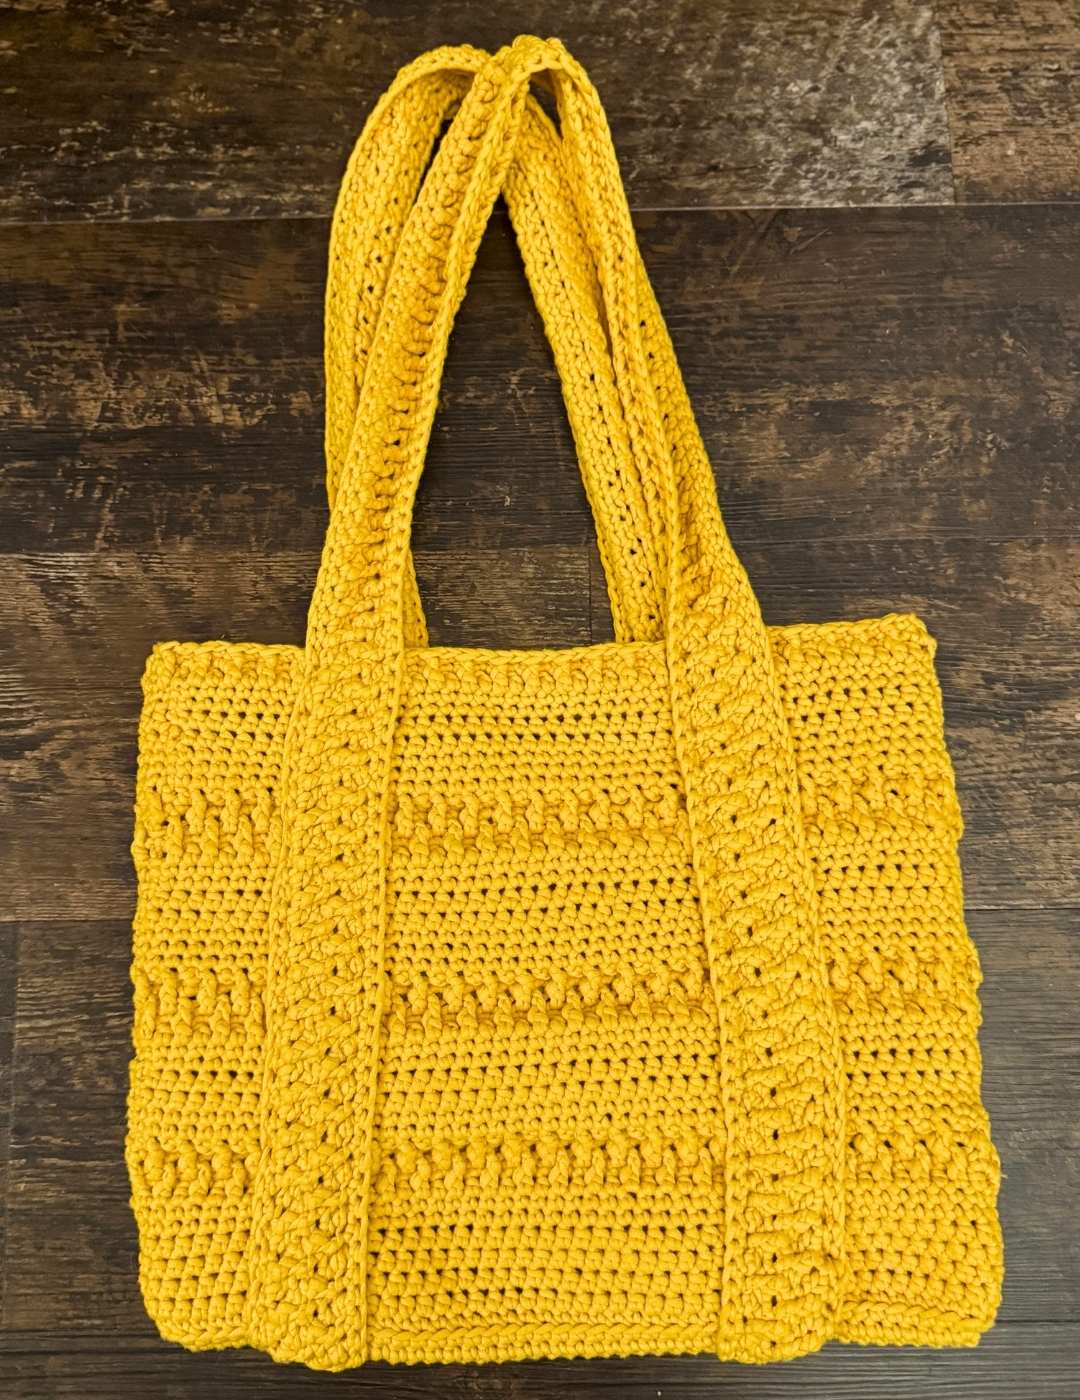
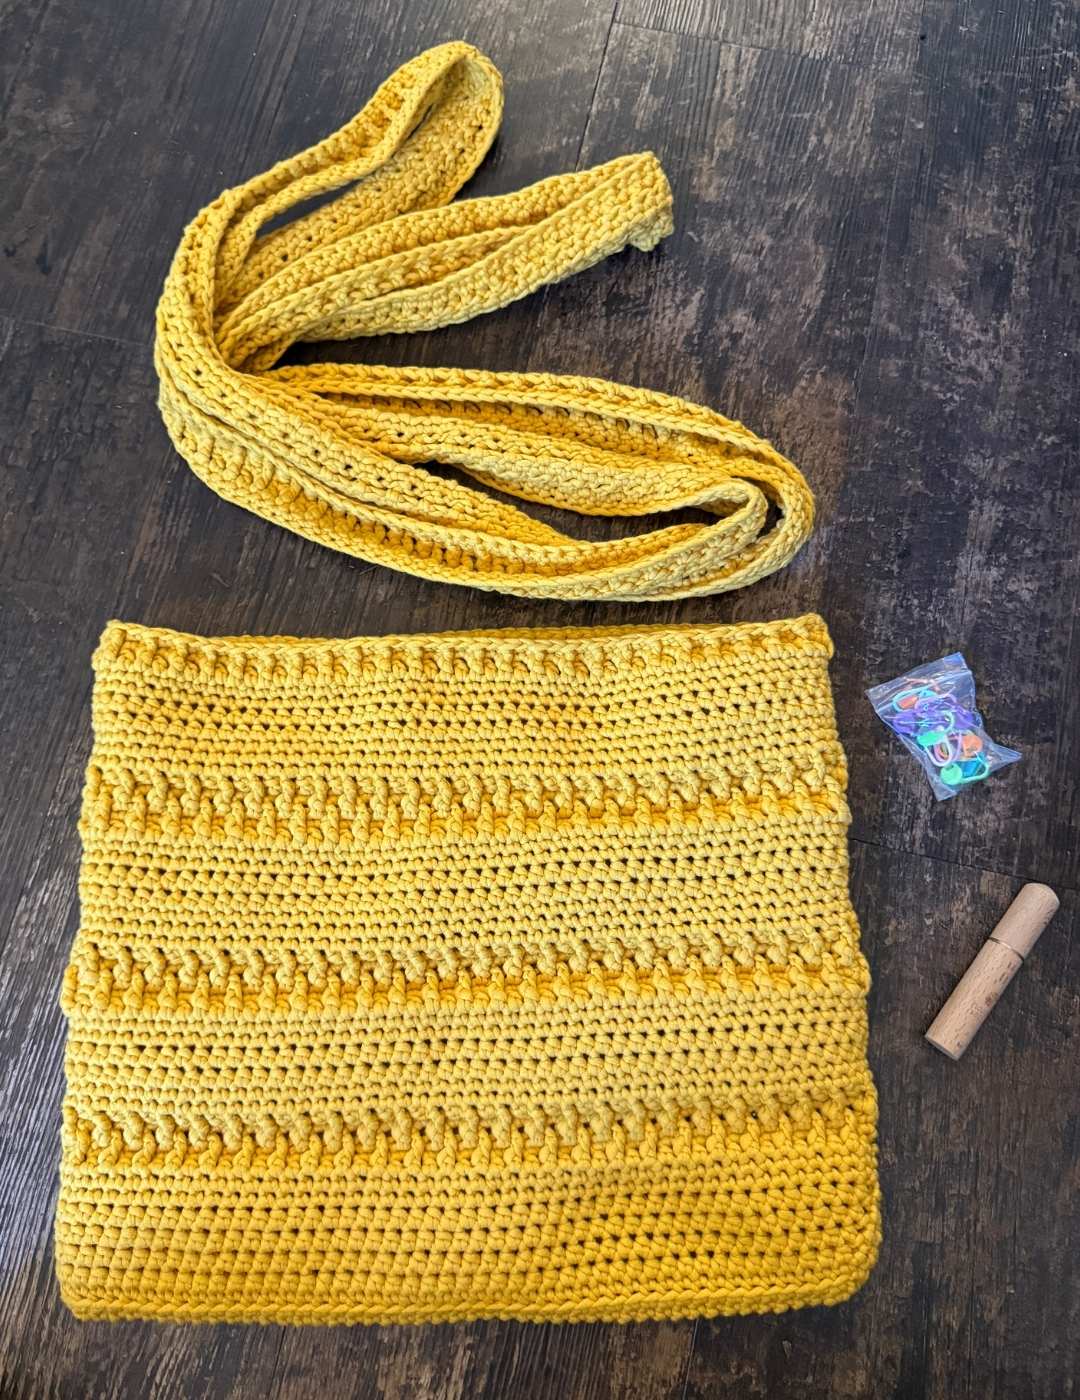
Crocheting the Handle
You are going to make the handle in the exact same way, using a section of the pattern for the main body, just a lot longer and worked in rows instead of rounds.
Round 1
ch300
Round 2
ch1, 1sc x 96, slst
Round 3
ch2, 1dc x 96, slst
Round 4
ch1, 1sc x 96, slst
Round 5
ch2, dc into the first stitch, then (fpdc into the dc two rows down. sk the next stitch, then dc into the following). Repeat for the length of the round from *, then slst to join
Round 6
ch1, 1sc x 96, slst
Round 7
ch2, *(fpdc into the dc two rounds down, then dc into the next stitch (skipping the stitch above the fpdc again)). Repeat from * for the length of the round, then slst to join.
Round 8
ch1, 1sc x 96, slst
Joining Your Bag Together
You’ve now got a seriously long strap on your hands, but don’t worry, this makes more sense than it might initially appear. first things first, let’s sew those ends together.
The most important thing here is to make sure there aren’t any twists in your strap, or else it won’t sit as nicely on the bag. This doesn’t need to be your best sewing ever because this is going to be hidden underneath your tote bag, but do make sure the ends line up together.
I’d suggest ironing the strap at this point. High cotton yarns usually iron nicely even if you’ve chosen a different brand than the one I’ve used, and blocking does a fine job of getting the same finish if you aren’t confident ironing your strap.
Sewing on the Strap
Hold your strap in half, with the join section placed by the base of the bag. Lay half under and half on top of the bag, and fiddle around with it until the straps at even at both sides. Now use stitch markers or safety pins to hold it in place.

You can now, using a large yarn needle and the same yarn, sew your handle to the bag. It’s worth taking your time to get the handle placement just how you want it, and make sure to use your stitches to line it up nicely too. It’ll be worth that bit of extra effort for a perfect finish.