Crochet Grocery Bag
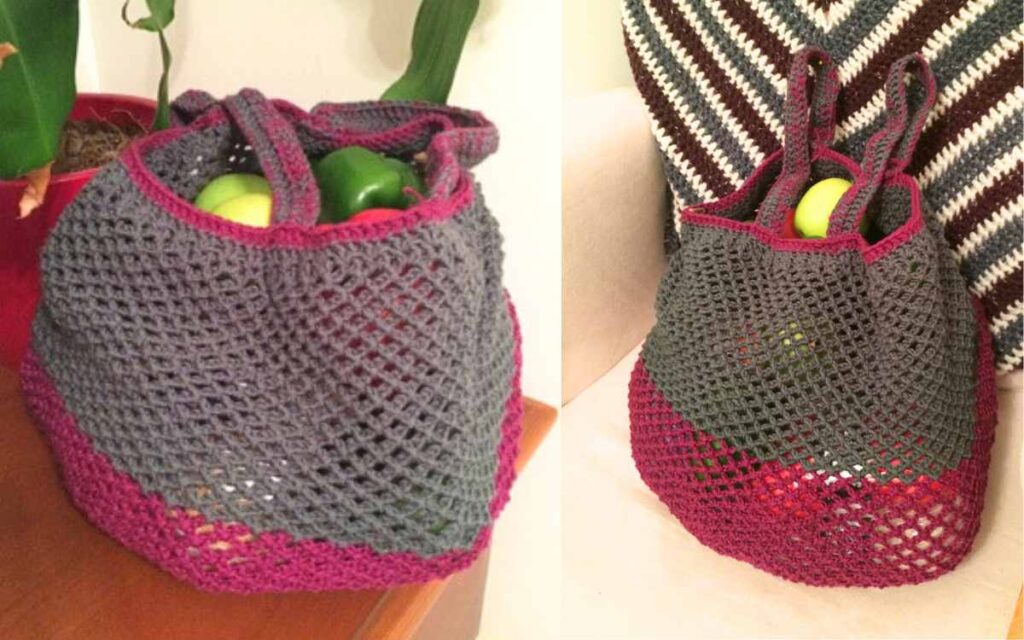
My simple crochet grocery bag pattern isn’t just cute, it’s very practical. The handles are designed to be comfortable in your hand, even when the bag is full. It’s made with strong yarn, so can hold pretty much any grocery item you’d care to fit in it. And it’s easy to fold down into your coat pocket on the way to the shops too.
Not your style? You might like my solid or dotty granny square bag patterns more!
Crochet Grocery Bag Equipment
To make this crochet grocery bag you will need the following:
- 100g grey 100% acrylic yarn
- 100g purple 100% acrylic yarn (I used Patons in the bag pictured)
- 4.5mm crochet hook (with soft grip recommended)
- Yarn needle
- 8 stitch markers
Although you don’t need to use the same brand of yarn as I did, I do recommend that you use a 100% acrylic variety to retain the same structure and practicality.
Crochet Grocery Bag Pattern
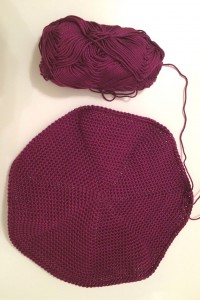
This pattern is begun by working in a continuous spiral. Begin with a 4.5mm hook and your purple yarn.
Row 1
Make a magic circle of 8 single crochet stitches (8)
Row 2
Make 2sc into each stitch (16)
Row 3
1sc into the first stitch, 2sc into the next. Repeat 1sc, 2sc for the round. (24)
Row 4
Make 1sc in the first two stitches, then 2sc into the following. Repeat in this pattern for the length of the round (1sc x 2, 2sc) x 8 (32)
Row 5
(1sc x 3, 2sc) x 8 (40)
Row 6
(1sc x 4, 2sc) x 8 (48)
Row 7
(1sc x 5, 2sc) x 8 (56)
Row 8
(1sc x 6, 2sc) x 8 (64)
Row 9
(1sc x 7, 2sc) x 8 (72)
Row 10
(1sc x 8, 2sc) x 8 (80)
Row 11
(1sc x 9, 2sc) x 8 (88)
Row 12
(1sc x 10, 2sc) x 8 (96)
Row 13
(1sc x 11, 2sc) x 8 (104)
Row 14
(1sc x 12, 2sc) x 8 (112)
Row 15
(1sc x 13, 2sc) x 8 (120)
Row 16
(1sc x 14, 2sc) x 8 (128)
Row 17
(1sc x 15, 2sc) x 8 (136)
Row 18
(1sc x 16, 2sc) x 8 (144)
Row 19
(1sc x 17, 2sc) x 8 (152)
Row 20
(1sc x 18, 2sc) x 8 (160)
Row 21
(1sc x 19, 2sc) x 8 (168)
Row 22
(1sc x 20, 2sc) x 8 (176)
Row 23 to 27
Put 1sc in each stitch, building up sides for the base of the bottom of the bag. (176)
Row 28
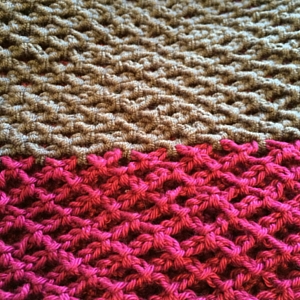
*Chain 4, skip 2 stitches, sc into the next stitch. Repeat from for one round.
The end of the round should finish in the stitch next to your first chain.
At the end of the round chain 4.
Row 29 to 39
Slip stitch (sl st) into the first chain loop of your previous round. *Ch4, then sl st into the top of the next chained loop. Repeat from * for the length of the round.
At the last stitch colour change to grey.
Row 40 to 53
*Ch4, then sl st into the top of the next chained loop. Repeat from * for the length of the round.
Row 54
Ch3, 2dc into the centre of the next chained loop. 2dc into each loop (forming a ‘v stitch’) until the row’s end.
Finish the row by slip stitching into the top of the round’s starting chain.
Row 55
Ch3, 2dc into the middle of the first v-stitch of the previous round. Repeat, putting 2dc into the middle of each v for the length of the round.
At the end of the row slip stitch to join, colour changing back to purple.
Row 56
Ch3, make 1dc into each stitch in the row. Slip stitch into the top of the initial chain to join.
The main body of the bag is now complete. The handles will be made separately and attached later.
Crochet Grocery Bag Handles
Your finished crochet grocery bag will have two handles. They are sized to fit either so that the bag hangs snuggly over your arm, or can be held comfortably in one hand.
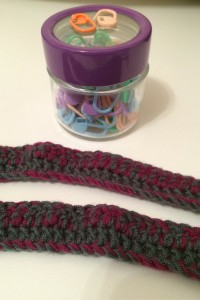
You will need to make 2 of the following handles using this pattern:
Row 1
Take a strange of both the purple and grey yarn. Make a chain of 50 stitches using this double thickness yarn.
Drop the purple strand of yarn, and continue using only the grey.
Chain another 3 stitches, and then put a double crochet into the fourth chain from the hook.
Continue putting 1dc in each stitch to the end of the row.
Row 2
Pick up your purple yarn again and proceed using a grey and purple strange as you did for the initial chain.
Chain 3 and put a double crochet into the top of the final dc from the previous row. Dc in each stitch to the end of the row.
At the end of the row slip stitch into the final stitch.
Attaching the crochet grocery bag handles to the bag
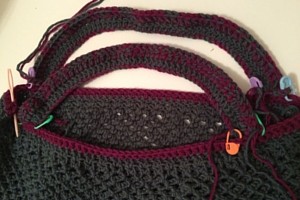
You will first need to decide where you would like your handles to go. To do this I recommend that you lay your bag flat, and use stitch markers to temporarily fasten your handles in place.
Make sure the edge with the more raised stitches face outwards, as this will make the handles slightly easier to hold and grin when you are using your bag.
When you are happy that the bag will be symmetrical, leaving the stitch markers for the time being, use the purple yarn to sew the handles in place with a blanket stitch.
Make sure you pass through the handle base a multitude of times, to ensure that it is very securely fastened. It’s one of those rare occasions when it’s better to be very securely attached than beautifully neat.
When you have attached the handles you can remove your stitch markers, and sew in the rest of the loose ends on the bag.
Personalising your crochet grocery bag
The great thing about hand made items, is that regardless of whether you have followed a set pattern or not, they will always be personal.
But if you want something truly unique, this pattern is simply adaptable.
I recommend using the same type of yarn as I have, as it is reliably strong and won’t be compromised by slight moisture from packaging.
It will also be less likely to have it’s threads shredded by rough edges on the items you put inside.
But colour pattern changes will look fab. You can have a set of uniform crochet grocery bags to take with you on the big supermarket shop, those which match your coat, or just a few randomly designed unique pieces.
You can also try adapting the handle too.
This one works well for me, but you can make both straps longer (say with a chain 200 for the initial row) to wear them as a loose shoulder bag. Or shorten them (around 30ch) to make it a hand held only sack.
Have fun creating your own crochet grocery bag.
Happy Crocheting, x
