Squishy Crochet Puppy Pattern
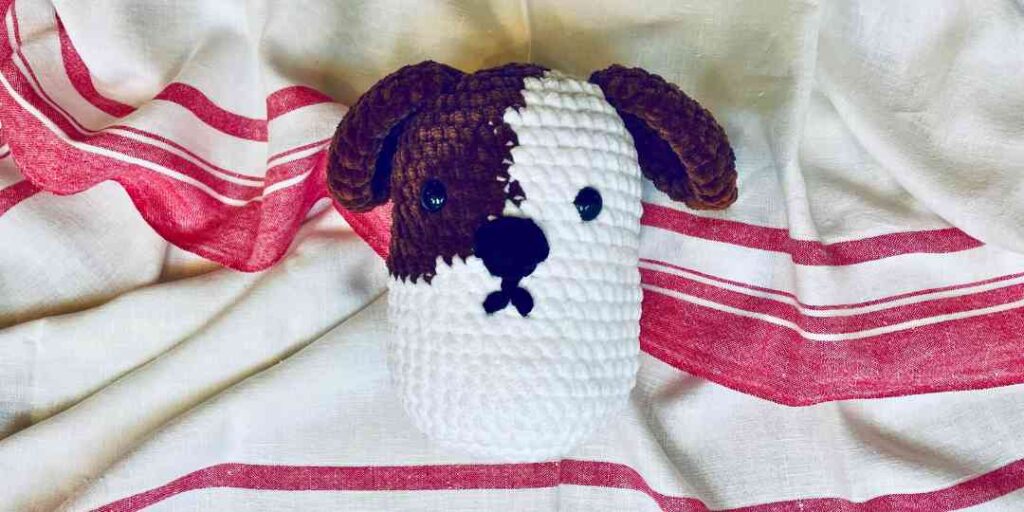
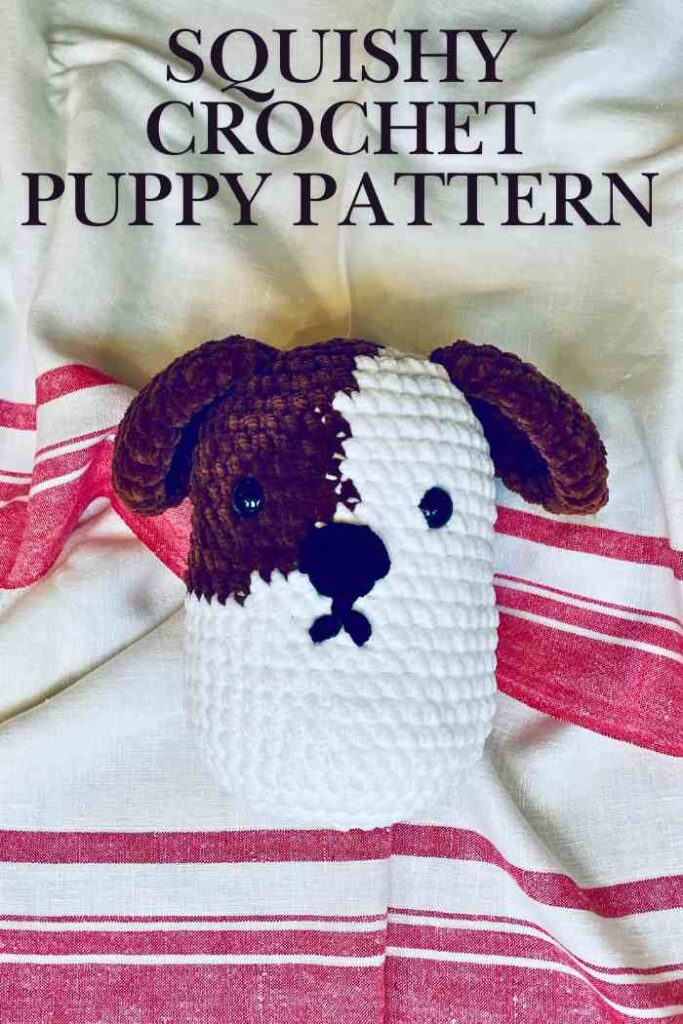
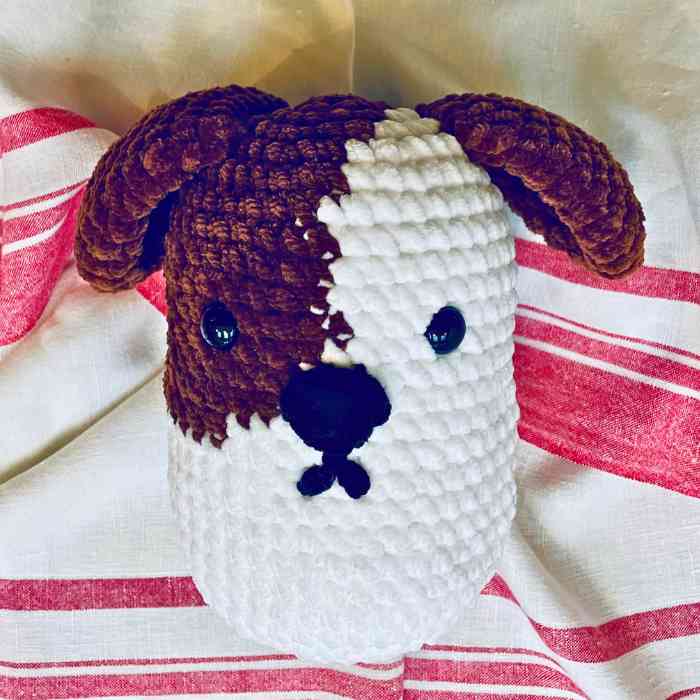
How cute is this squishy crochet puppy? He’s a fun, beginner-friendly alternative to making a puppy pattern with separate head, body and leg parts. But he’s just as appealing and cuddly! I’ve made him with bulky chenille yarn to really make him as squashy and irresistible as possible. But the pattern is just as effective in lighter weight and/or smoother yarns, and I’ve got tips for making him in different sizes, as well as lots of photos of the techniques involved.
You’ll need
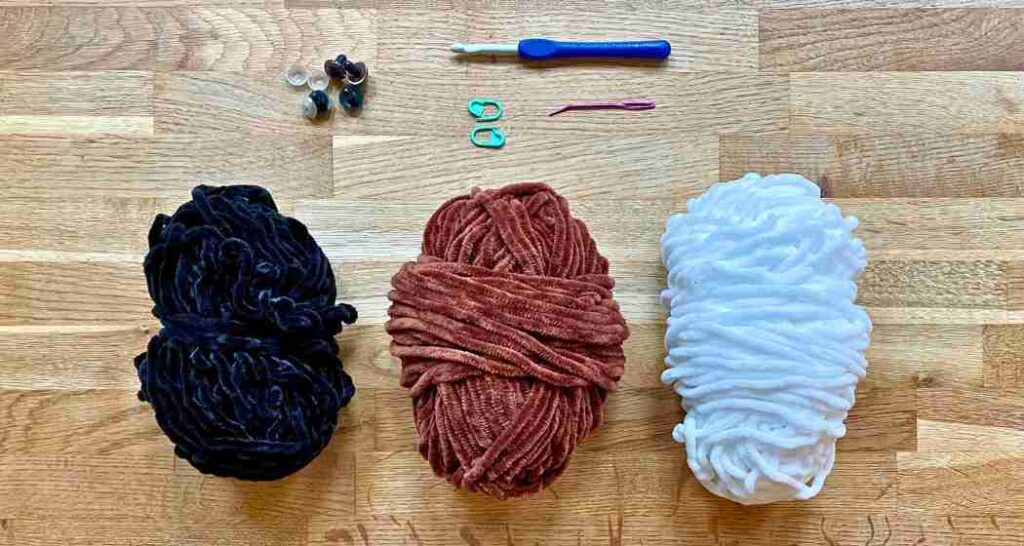
The materials I used to make this puppy are:
- Super bulky chenille yarn in white and brown. I used Cygnet Jellybaby yarn in the shades white and moose.
- A small quantity of black yarn for the nose and mouth.
- Size J (6mm) crochet hook.
- Stitch markers (or scraps of yarn will do)
- ⅝” (16mm) safety eyes.
- Toy safe stuffing (approx 2oz, or 55g).
My plushy is about 7” tall. If you want to use a lighter weight yarn, you’ll need to choose a smaller crochet hook to match, and your puppy will turn out smaller. I recommend using a hook one size smaller than the yarn wrapper recommends, to create a dense fabric that doesn’t allow the stuffing to peep through.
You’ll also need to use smaller safety eyes with some yarns, to keep the proportions right:
- With dk, aran and worsted yarns, use 12mm eyes. You plushy will turn out 4-5” tall.
- For bulky yarns, 16mm eyes will still work. Your plushy will turn out about 6″ tall.
Squishy crochet puppy pattern
This pattern is written in standard U.S. crochet terms. You’ll only need to know a small number of very basic stitches:
Ch chain
Sl st slip stitch
Sc single crochet
Inc increase (make 2 sc in the same space)
Dec decrease
Round 1
To start, grab your brown yarn and either make a magic circle, or chain 4 and slip stitch into the furthest stitch from the hook to make a loop. If you’re using a fluffy yarn like me, I find a 4-chain loop is easier to tighten later without snapping the yarn.
1st round: Ch 1, and sc 8 into your magic circle or 4-ch loop (8 sts).
Round 2
2nd round: 8 inc (16 sts).
Rounds 3 – 14
Rounds 3 – 15 are worked in a combination of brown and white yarn. You can approach this in a couple of different ways:
- Cut the yarn every time you change color, then tie the yarn ends together later.
- Carry the yarn you’re not using behind the yarn you are using. If you choose this option, you’ll need to catch the floating strand of the yarn you’re not using every 4 or 5 stitches. If that’s a technique you haven’t used before, there’s a description of it (with photos) in this article.
I find it’s pretty easy to get away with the first option when I’m using chenille yarns. Their texture holds the stitches in place, so you don’t have to worry about areas of loose tension where the yarn breaks are. But for smooth yarns I’d use the second option.
To change color, insert your hook into the next stitch and draw through a loop of the color you’ve been using (in this case brown – see the left hand photo below). Then loop your new yarn over the hook from back to front, and draw it through both loops on your hook (right hand photo below).
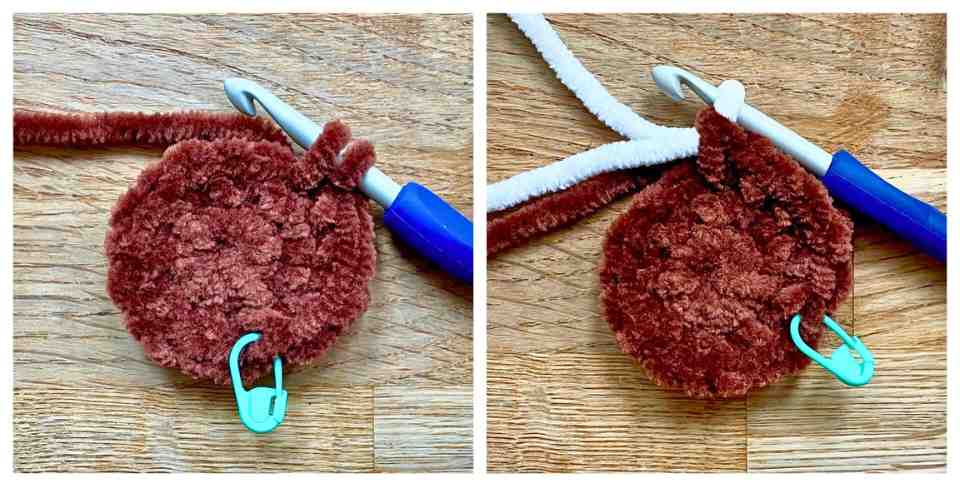
3rd round: With the brown yarn *sc, inc* twice, color change to white yarn, *sc, inc* three times, color change to brown yarn, *sc, inc* three times. (24 sts)
4th round: 2 sc, inc, 2 sc, color change to white yarn, inc, *2 sc, inc* three times, color change to brown yarn, *2 sc, inc* three times. (32 sts)
5th round: 3 sc, inc, sc, color change to white yarn, 2 sc, inc, *3 sc, inc* 3 times, sc, color change to brown yarn, 2 sc, inc, *3 sc, inc* twice. (40 sts)
That’s the last of the increasing rows, so I’m going to layout the pattern for rounds 6 – 15 a little differently, to make it easier for you to keep track of the color changes.
Rounds 6 – 15
Rather than set out this next section in rounds, I’m just going to tell you how many stitches to make before changing color again. Since we’re going round and round in spirals, the point where one round finishes and the next begins isn’t all that important anyway.
Make all the stitches using single crochet. The gaps in the list don’t mean anything – they’re just to break it up and help you keep track of progress!
- 6 brown
- 21 white
- 18 brown
- 22 white
- 19 brown
- 22 white
- 18 brown
- 22 white
- 18 brown
- 23 white
- 18 brown
- 23 white
- 16 brown
- 24 white
- 16 brown
- 25 white
- 14 brown
- 27 white
- 11 brown
- 37 white
You’ve just finished round 15, and your puppy’s brown patch is finished. We’re going back to counting rounds now, so pop a stitch marker or scrap of yarn through the stitch you’ve just made to mark where the rounds end.
Rounds 16 – 23
Rounds 16 – 23: Sc 40 (40 sts)
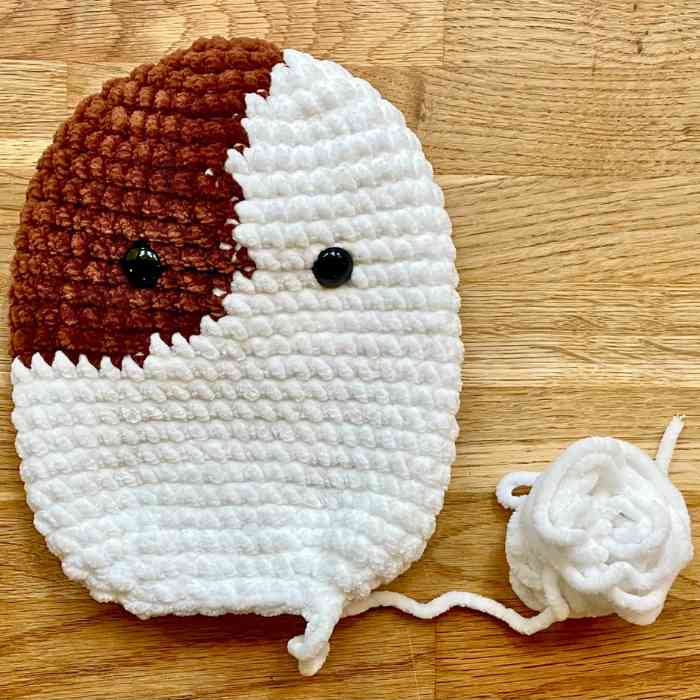
At the end of round 23 is a good time to add the eyes. Spread the body out on a flat work surface, and position the safety eyes. I placed mine between rows 10 and 11, and 8 stitches apart – but you can experiment with moving them around to change your puppy’s expression!
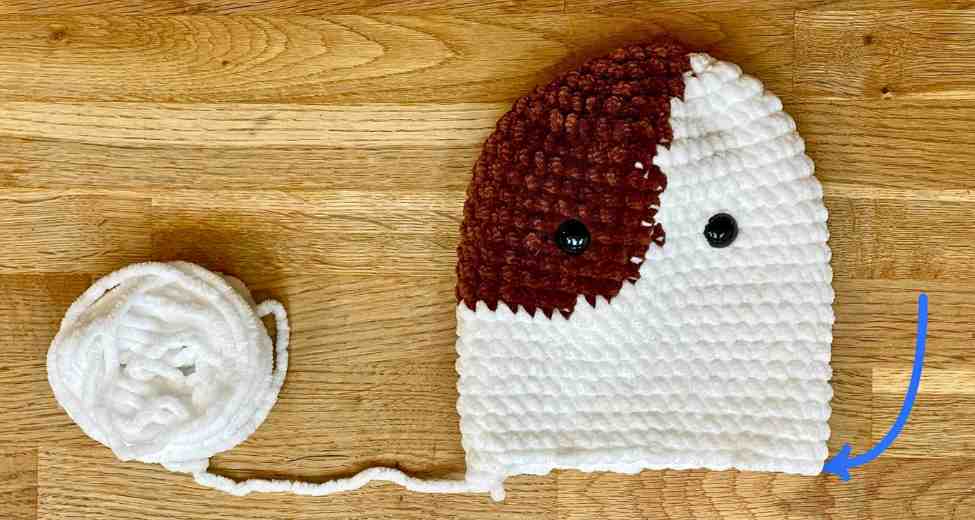
Press the backs onto the safety eyes, then spread the body out flat again, making sure the eyes are central. The next step is to make single crochets until you reach the spot marked by the blue arrow in the photo above. For me it’s 18 sc, but for you it might be slightly more or less. Ending up in that corner is more important than how many stitches it takes to get there!
Put a stitch marker into your last stitch – this is the new beginning and end point for the final few rounds. Now you’re ready to close the body.
Closing the body
The base of your plushy is going to be elliptical, and we’re going to achieve that by bunching the decreases up at the sides. I recommend using invisible decreases for amigurumi projects, because they’re just that – practically invisible on the right side of your work. If you haven’t tried the invisible decrease before, here’s how it’s done:
- Insert your hook through the front loop only of the next two stitches (fig. 1).
- Yarn over and draw through a loop (two loops remaining on the hook).
- Yarn over and draw through both loops (fig. 2).
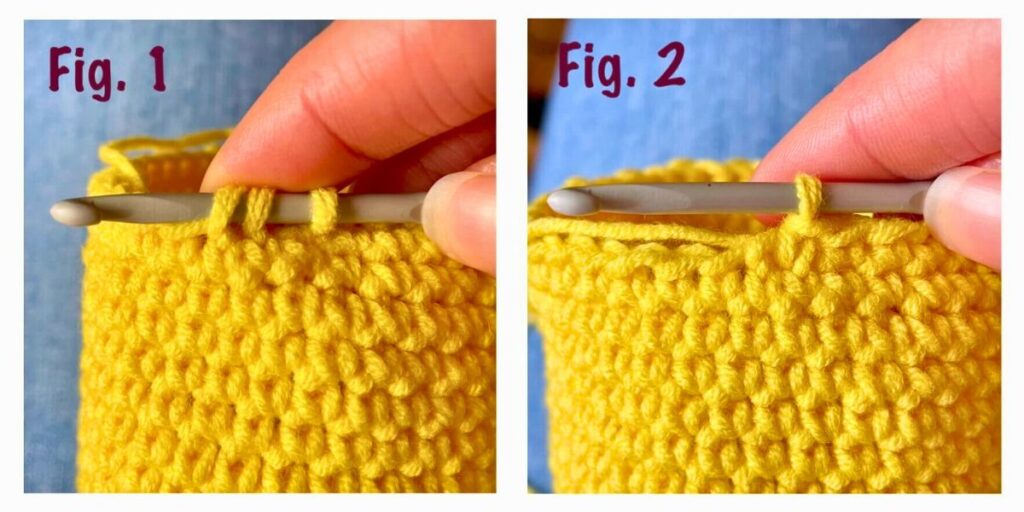
Let’s put that to use, and make rounds 24 and 25:
24th round: 3 dec, sc 8, 6 dec, 8 sc, 3 dec (28 sts)
25th round: 3 dec, sc 2, 6 dec, 2 sc, 3 dec (16 sts)
Put a stitch marker through the loop on your hook to hold it, then measure a 24” tail and cut your yarn. Stuff your plushy firmly with toy-safe stuffing, keeping back a little (about half a cup) for the tail later. Then pick up the loop from the stitch marker and make one more round:
26th round: 8 dec, sl st (8 sts)
Poke in a little more stuffing if it will fit, then use the remaining yarn tail to sew the opening shut. The body is done!
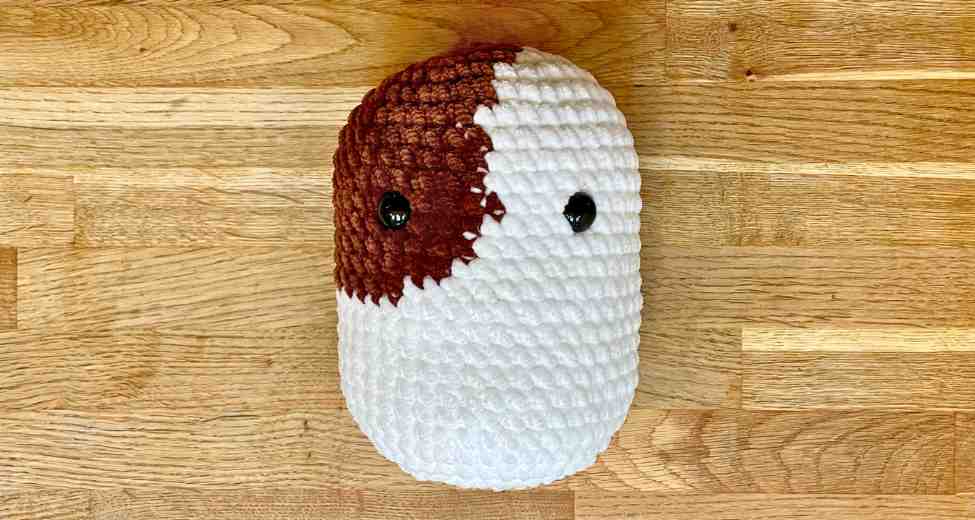
Ears
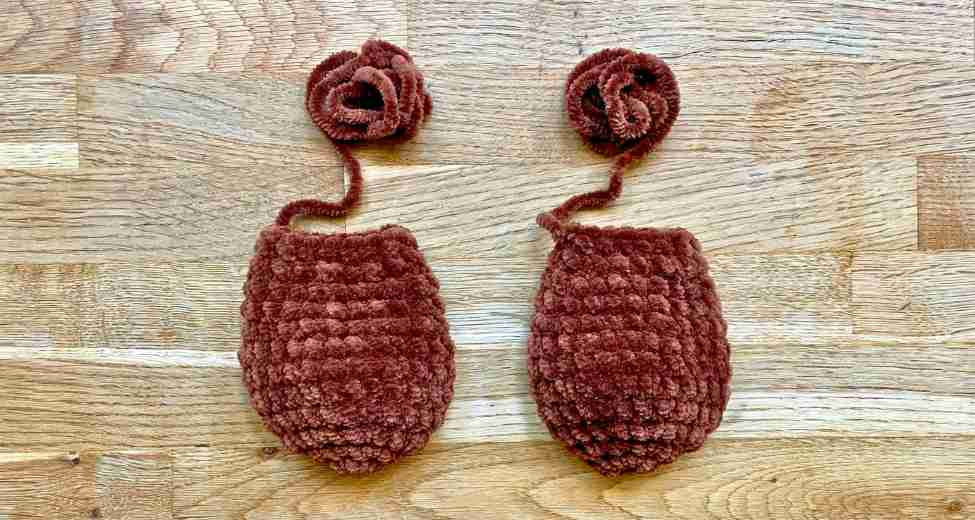
Your puppy’s soft and floppy over-sized ears are going to be his cutest feature. I’ve made both in brown, but one brown and one white or black would be a sweet way of personalizing your project.
- Start with a magic circle or a 4-chain loop.
- 1st round: Ch, 8 sc (8 sts)
- 2nd round: 8 inc (16 sts)
- 3rd round: *Sc, inc* 8 times (24 sts)
- Rounds 4 – 7: Sc all the way round (24 sts)
- 8th round: *4 sc, dec* 4 times (20 sts)
- Rounds 9 & 10: Sc all the way round (20 sts)
- 11th round: *3 sc, dec* 4 times (16 sts)
- 12th round: Sc 16, sl st.
Cut the yarn leaving a long tail for sewing later.
Tail
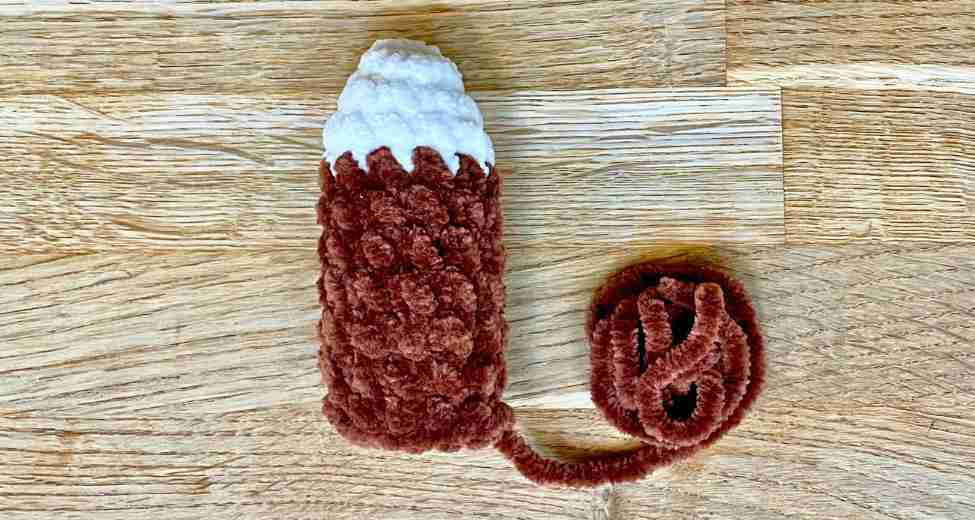
Start the tail with white yarn, and a magic circle or 4-chain loop.
- 1st round: Ch, 8 sc (8 sts)
- 2nd round: *3 sc, inc* twice (10 sts)
- 3rd round: *4 sc, inc* twice (12 sts)
Change color to brown.
- Rounds 4 – 9: Sc all the way round (12 sts)
- 10th round: *4 sc, dec* twice, sl st (10 sts)
Cut the yarn leaving a long tail for sewing later. Lightly stuff the tail up to about round 7.
Nose
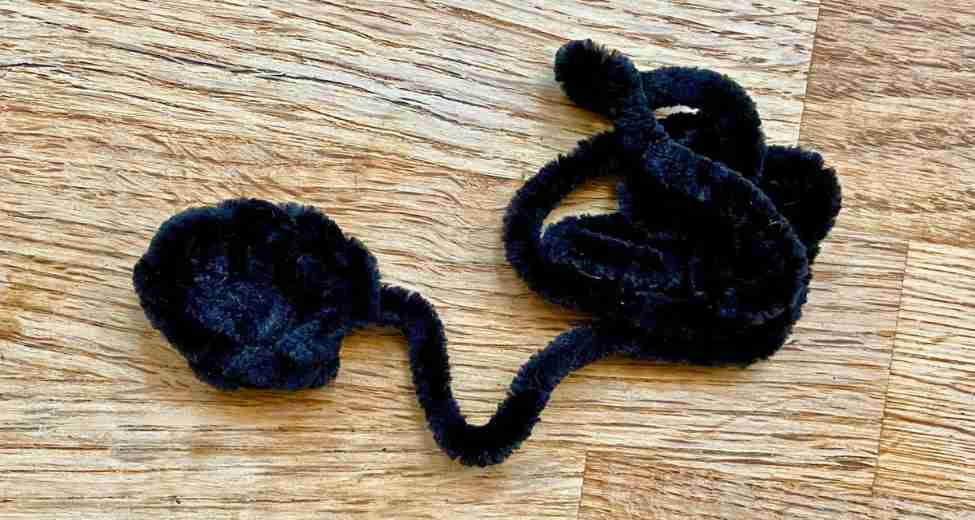
The last crochet detail for your puppy is their sweet schnozz. Using your black yarn:
- Ch 3, sl st into the furthest st from the hook to make a loop.
- Ch 1, 3 sc into the 3-ch loop.
- Ch 1, turn your work, 3 sc (into the tops of the single crochets from step 2).
- Sl st into the ch 1 at the beginning of step 2.
Cut the yarn leaving, you’ve guessed it, a long tail for sewing.
Assembling your puppy
There’s just a few easy steps between you and a finished cuddly puppy now!
Sew the ears onto the sides of the head, level with round 4. They hang more naturally if you just pick up the front loops around the top of the ear rather than the front and back loops.
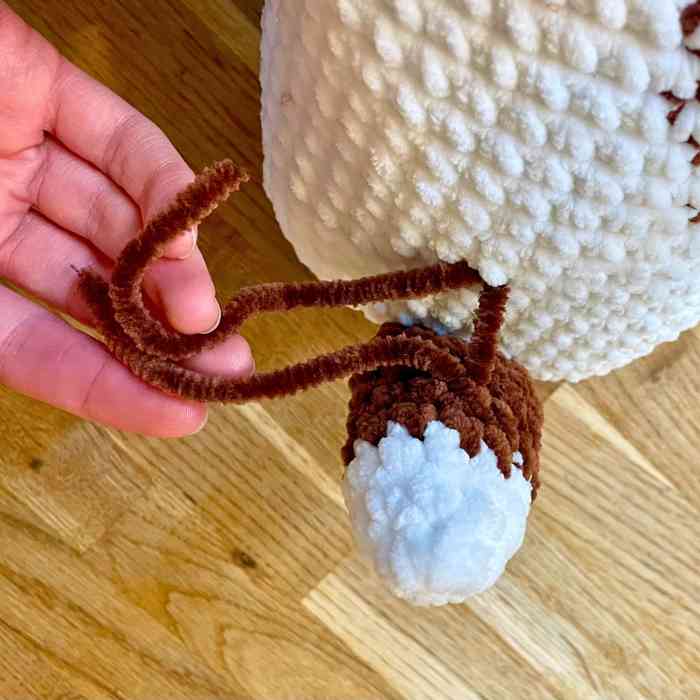
Next hold your puppy upright on a flat surface to get the position of the tail right. Before you join it to the body, you’ve got a choice to make:
- You can leave the tail to wag freely, in which case you want the color change in the tail facing outwards, so it’s on the underside of the tail when the tail drops down.
- Or you can tie the tail flush to the body like me, in which case you want the color change facing inwards towards the body.
Now sew the base of the tail to the body. If you’re tying the tail flush to the body, thread a 6” piece of yarn onto a darning needle and pass it behind a stitch facing the body on round 5 of the tail. Find the stitch it touches on the body and thread the yarn behind that one too. Tie the ends in a knot, and tuck them inside the body.
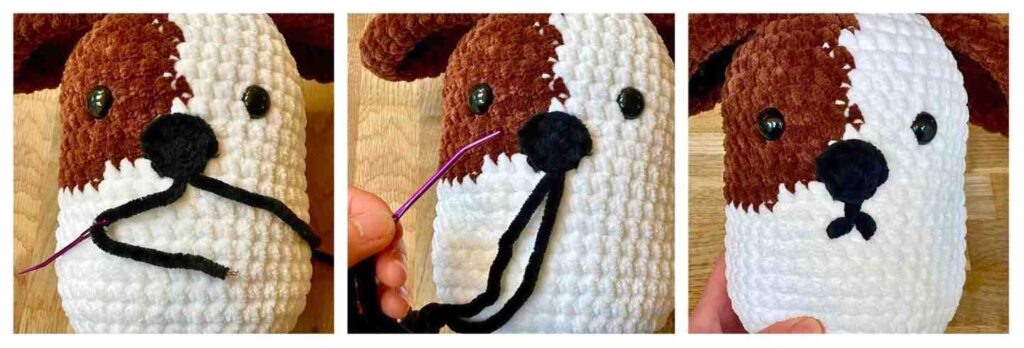
Last but not least, sew the nose in place. Then thread 12” of black yarn onto a needle, and run it behind a stitch at the base of the nose (it could be one of the stitches holding the nose in place, or one of the stitches on the body – see left hand photo below). Thread the other end of the black yarn through the eye of the needle too, so you’re working with two strands at once (center photo). Embroider a little mouth, using the stitch-grid in the body as a guide (right hand photo). I can never resist making my amigurumi toys look a little grumpy, but you could give your puppy a smile or a neutral expression.
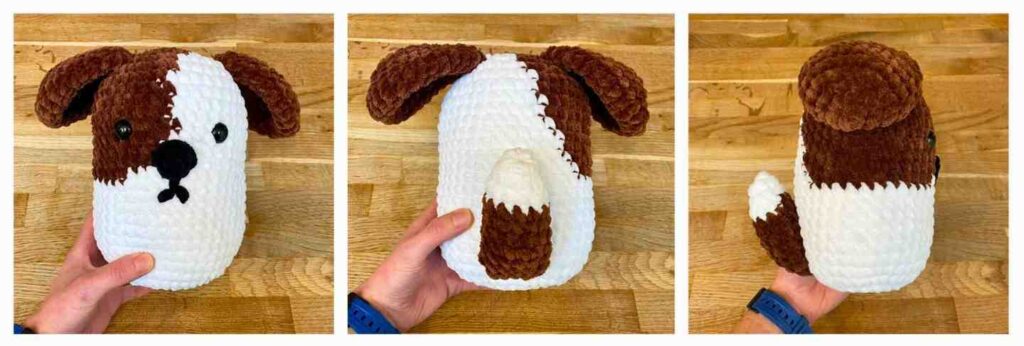
Squishy Puppy Complete
My daughter has called this one Sandwich! I hope you enjoy making this project as much as I enjoyed developing it, and that whoever receives your plushy loves it as much as my daughter loves Sandwich. If it’s given you the confidence to try a more life-like amigurumi pattern next, you’ll love Lucy’s Poodle and Labrador patterns. Happy crocheting!
