
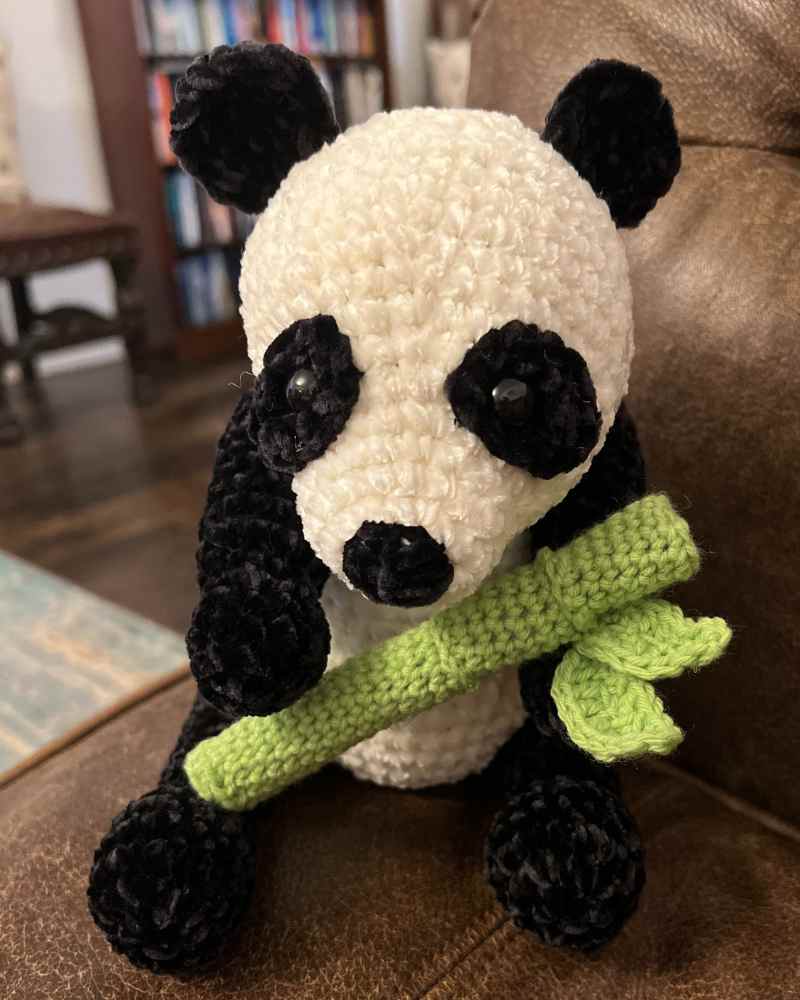
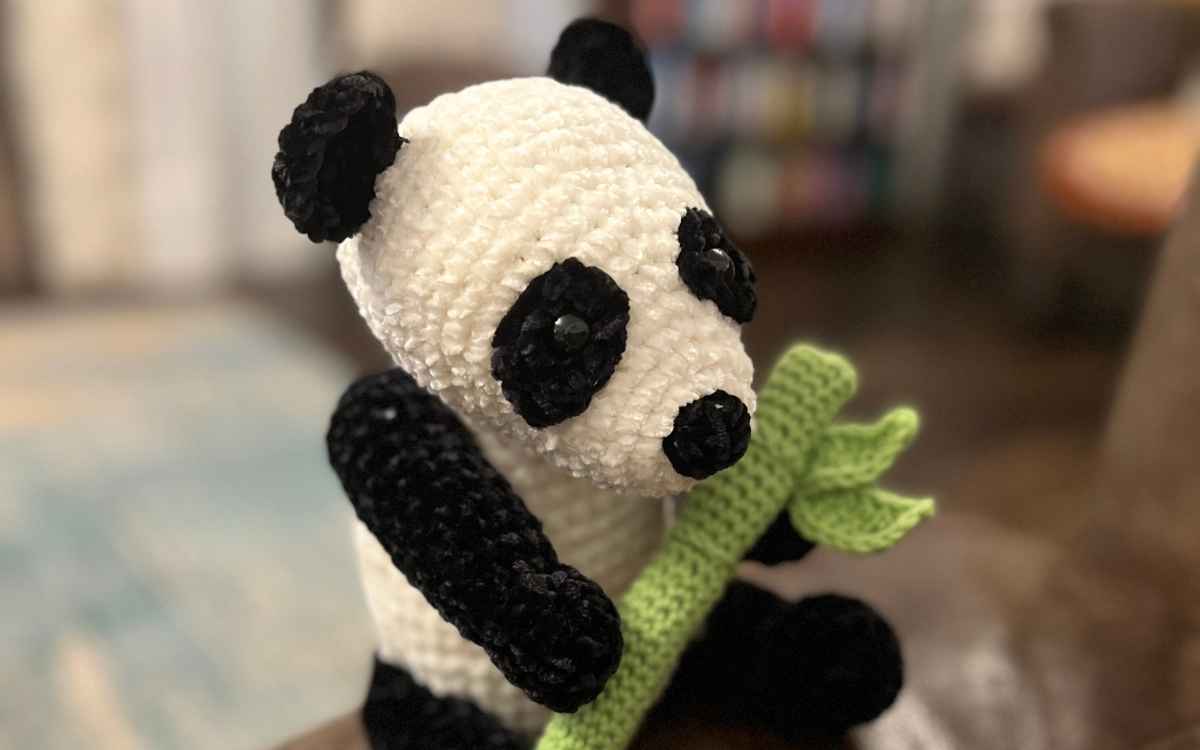
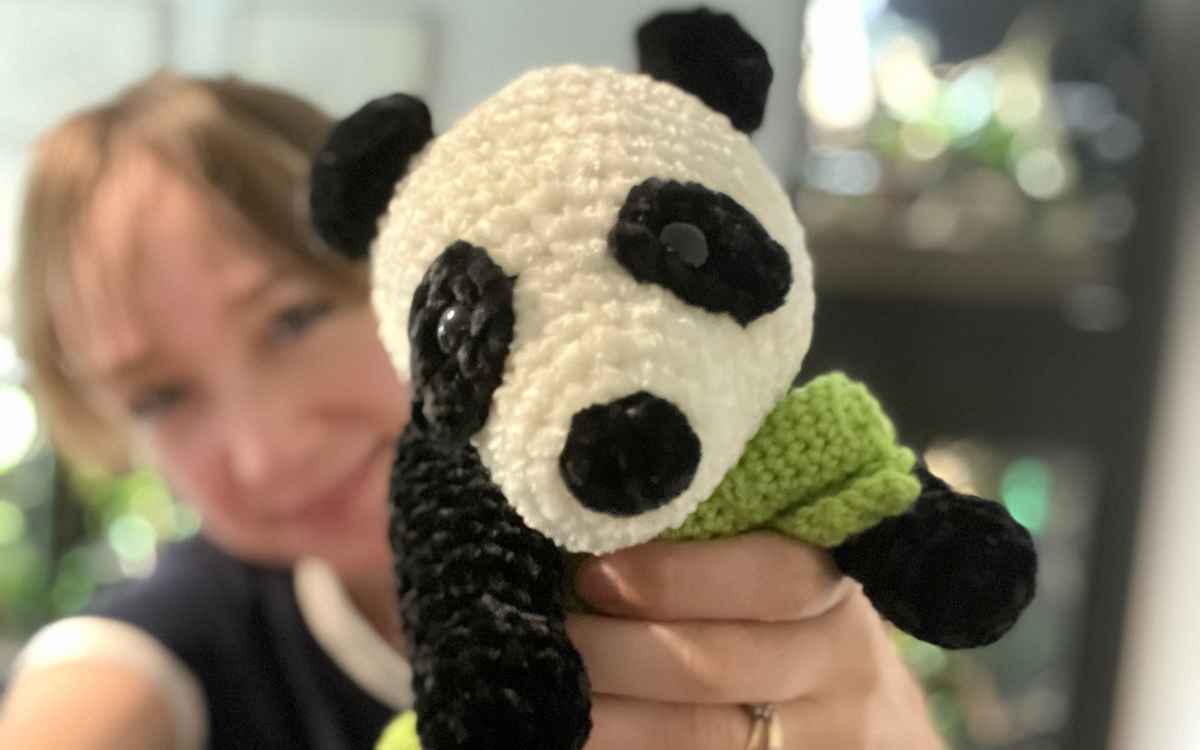
My chenille crochet panda pattern is soft to the touch, but still rigid enough in its form to sit in that classic panda bear pose. The crochet bamboo stick that she’s munching on is made using tighter, firmer yarn and with a smaller crochet hook, for a more defined finish. I hope that this gives a distinctive and unique look to the crocheted panda, and makes him all the more adorable!
What You’ll Need To Crochet Your Panda and Bamboo Stick
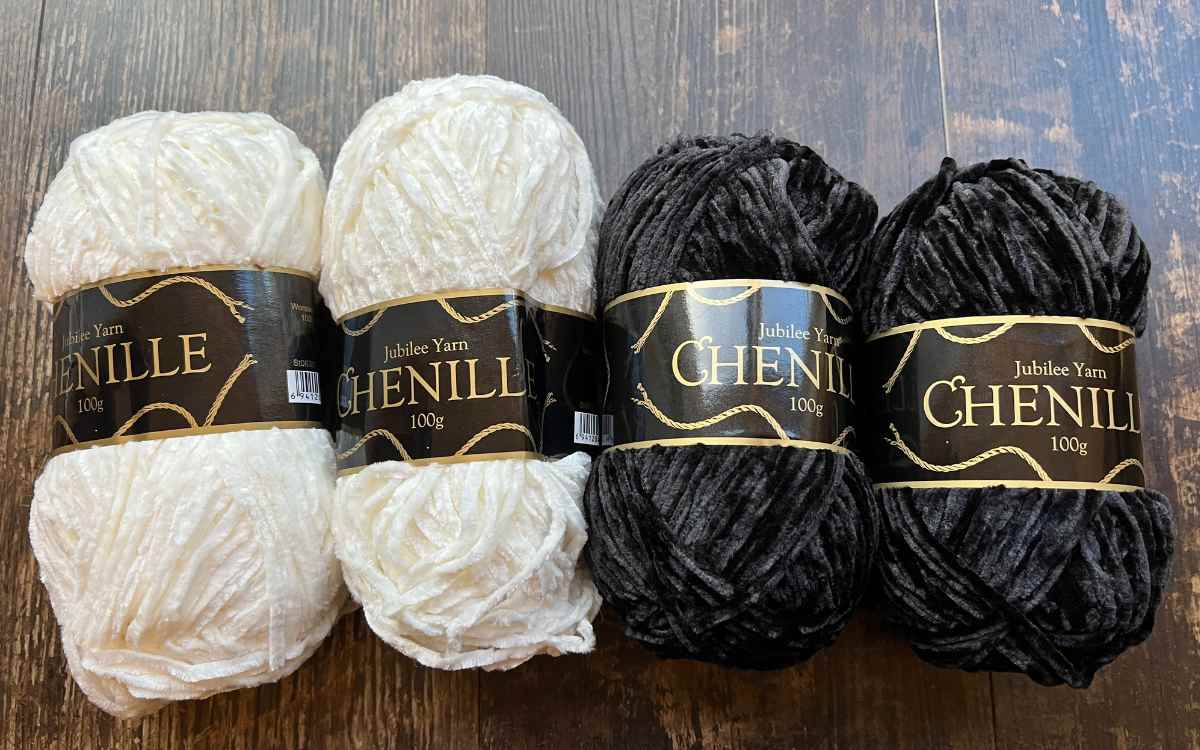
The yarns I used for this chenille crochet panda pattern were Jubilee Yarn Chenille in Obsidian and Zen. For the bamboo I used the very differently textured Sirdar Snuggly cotton blend DK in Hide-Out green.
- 100g black chenille worsted weight yarn
- 100g white chenille worsted weight yarn
- 50g bright green DK yarn
- 5mm crochet hook
- 4mm crochet hook
- Steel yarn needle
- 2 plastic yarn needles (optional)
- Stitch markers (optional – I often use yarn offcuts instead!)
- Safety eyes
- Toy safe stuffing
Pattern Notes and Chenille Tips
The majority of the chenille crochet panda pattern builds up in a round from a central magic ring.
There are a number of basic increases and decreases, along with some partial ones. I will write full instructions out the first time I use each crochet abbreviation, and they are all standard US terms.
There are no color change overs in this pattern, each piece requires just one color of yarn. You’ll attach them together by sewing.
You will also need to make a chain and crochet back into it to form the panda’s eye patches.
And use surface crocheting techniques to give detail to the bamboo stick.

Chenille Yarn Crocheting Tips
Working with chenille yarn is not like crocheting with wool, acrylic or cotton yarn. It is delicate. You can strip the yarn if you are too rough with it and get the tension wrong. It is also easier to snap the strands, which has its obvious cons, but also its pros if you can’t find the scissors!
Be very careful when using a yarn needle to sew or weave in, pull gently and watch that it doesn’t get caught on the inner toy stuffing.
This yarn leaves fluff everywhere, including on the other color of yarn. Avoid contacting the white yarn with the black unless you have to, as you can end up with a fluffy gray mess.
If you’ve not used chenille yarn before, I recommend making a small swatch before you begin to get your eye in for working with it. It’s not hard, just different, and with a little practice you’ll be just fine.
Free Crochet Panda Pattern
We are going to begin the pattern with the eye patches, because you’ll need to attach them to the head before it’s closed. This will both help you to align the patches nicely, but also to make sure you can secure the safety eyes which go through the eye patches and it’s the head section.
Chenille Panda Eye Patches
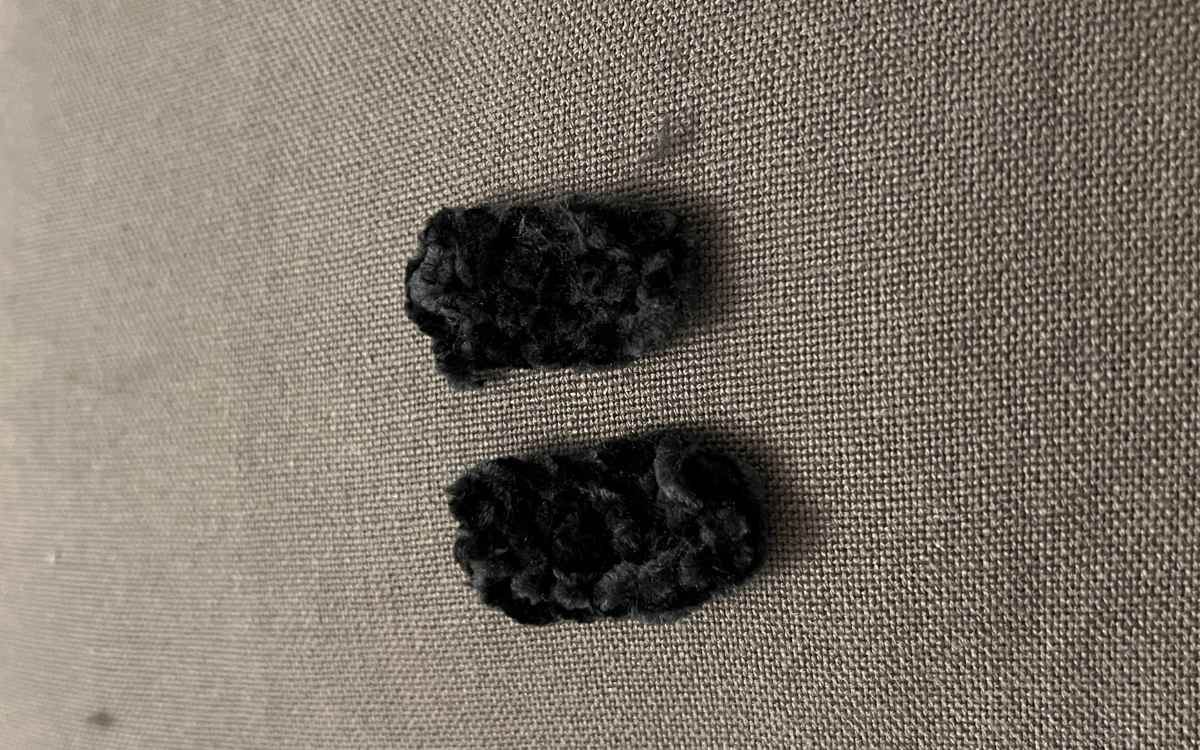
The eye patches are made in your black chenille yarn, using the 5mm crochet hook.
Row 1
Make a chain of six stitches
Row 2
Skipping the first chain, single crochet into each stitch of the row.
Row 3
Chain two, miss the first stitch and single crochet into each other stitch of the row.
Sew the yarn ends back into the body of the pieces and set them to one side.
Panda Head
Work in your white chenille yarn using the 5mm crochet hook.
Round 1
Make a magic circle of six stitches (6)
Round 2
Put two single crochets into each stitch of the round.
2sc x 6 (12)
Round 3
Make one single crochet into the first stitch, then two into the next. Repeat this pattern for the length of the round, increasing the size but six stitches.
(1sc, 2sc) x 6 (18)
Round 4
This time you will only make a partial increase in the round. The first four times you repeat singles then a double, but after that it’ll just be a single crochet into each stitch.
(1sc x 2, 2sc) x 4, 1sc x 6 (22)
Round 5
(1sc x 3, 2sc) x 4, 1sc x 6 (26)
Round 6
(1sc x 4, 2sc) x 4, 1sc x 6 (30)
Round 7
(1sc x 5, 2sc) x 4, 1sc x 6 (34)
Round 8
1sc x 34 (34)
Round 9
(1sc x 6, 2sc) x 4, 1sc x 6 (38)
Round 10 – 13
1sc x 38 (38)
Attach the safety eyes and panda patches
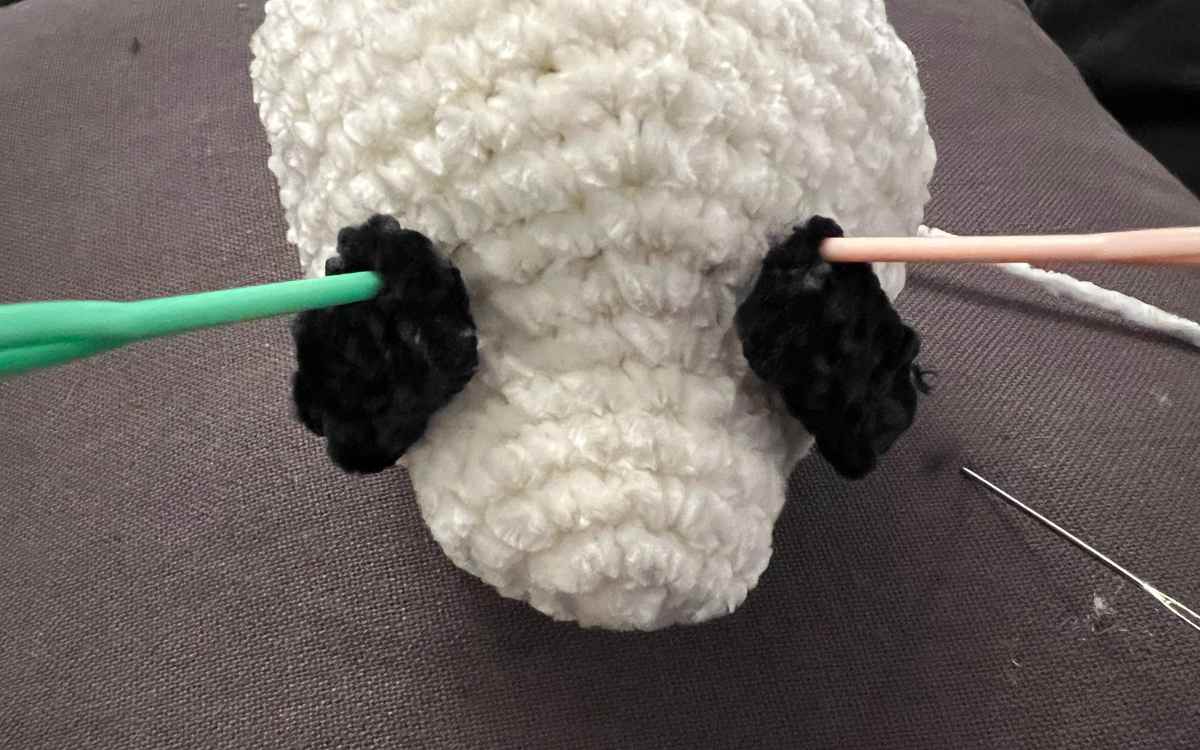
It’s time to sew the eye patches on the front of the face. Set it down with the flat side on a surface, and mark where you want them to go. I use plastic yarn needles for placement.
With the patches tacked in place add the safety eyes to hold them securely. Then cut a length of black chenille yarn and using a steel yarn needle weave in and out the edge of the patch.
If there are any uneven areas, use sewing to even out the areas.
Round 14
Make one single crochet into the next six stitches, then single crochet the following two stitches together. Repeat this pattern for the length of the round, and at the end your current round should be six stitches smaller than the previous one.
(1sc x 6, sc2tog) x 4, 1sc x 6 (34)
Round 15
1sc x 34 (34)
Round 16
(1sc x 5, sc2tog) x 4, 1sc x 6 (30)
Round 17
(1sc x 4, sc2tog) x 4, 1sc x 6 (26)
Round 18
(1sc x 3, sc2tog) x 4, 1sc x 6 (22)
Round 19
(1sc x 2, sc2tog) x 4, 1sc x 6 (18)
Round 20
(1sc, sc2tog) x 6 (12)
Fill with toy stuffing.
Round 21
sc2tog to close.
Weave the long tail end of the yarn back into the head.
Crochet Panda Ears

You will be crocheting your panda’s ears in black yarn using the 5mm crochet hook.
Round 1
Make a magic circle of eight stitches (8)
Round 2
2sc x 8 (16)
Round 3
(1sc, 2sc) x 8 (24)
Leave a long tail of yarn and sew into the top of the head with your yarn needle.
Crochet Panda Nose
The crochet panda’s nose will also be hooked with the black chenille yarn and 5mm crochet hook.
Round 1
Make a magic circle of eight stitches. (8)
Round 2
2sc x 6 (11)
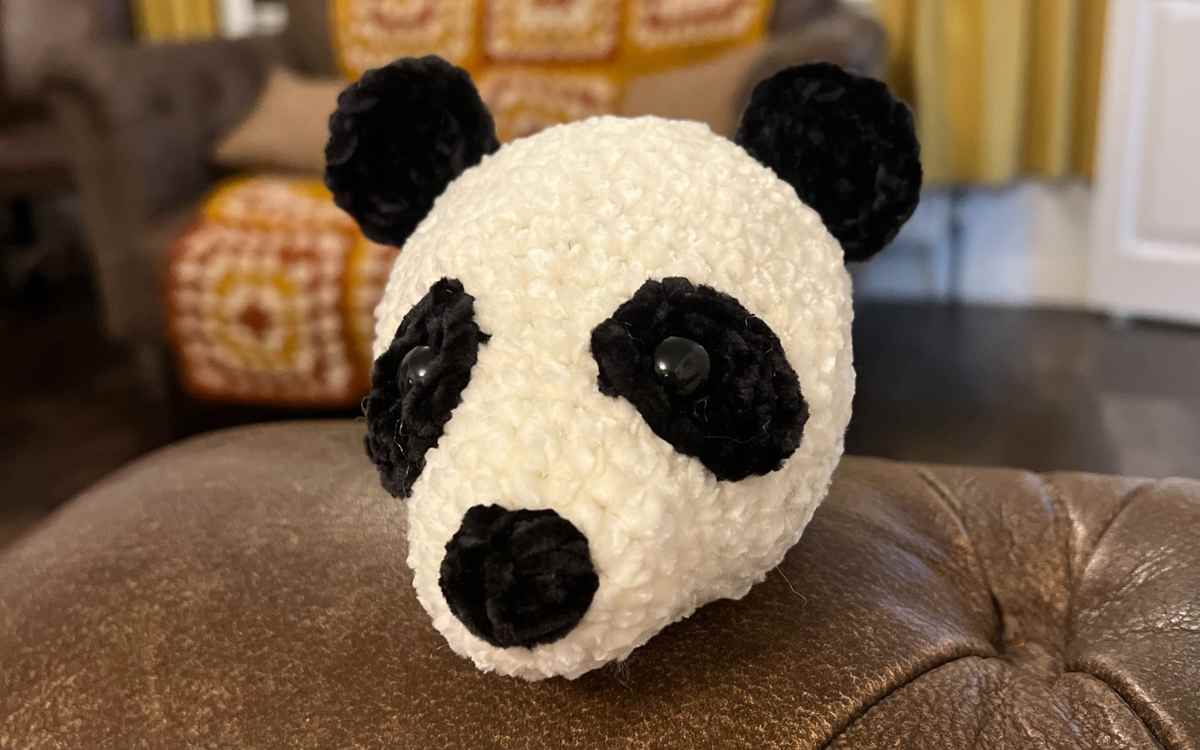
Leave a long tail of yarn, and sew the nose onto the end of your crochet panda’s face. The base of the nose should be level with the center of the face’s magic circle.
Crochet Panda Body
We’re going to switch over to the white chenille yarn for this part of your panda crochet pattern. You’ll still need the 5mm crochet hook.
Round 1
Make a magic circle of eight stitches (8)
Round 2
2sc x 8 (16)
Round 3
(1sc, 2sc) x 8 (24)
Round 4 – 7
1sc x 24 (24)
Round 8
(1sc x 2, 2sc) x 8 (32)
Round 9
(1sc x 3, 2sc) x 8 (40)
Round 10 – 23
1sc x 40 (40)
Round 24
(1sc x 3, sc2tog) x 8 (32)
Round 25
(1sc x 2, sc2tog) x 8 (24)
Round 26
(1sc, sc2tog) x 8 (16)
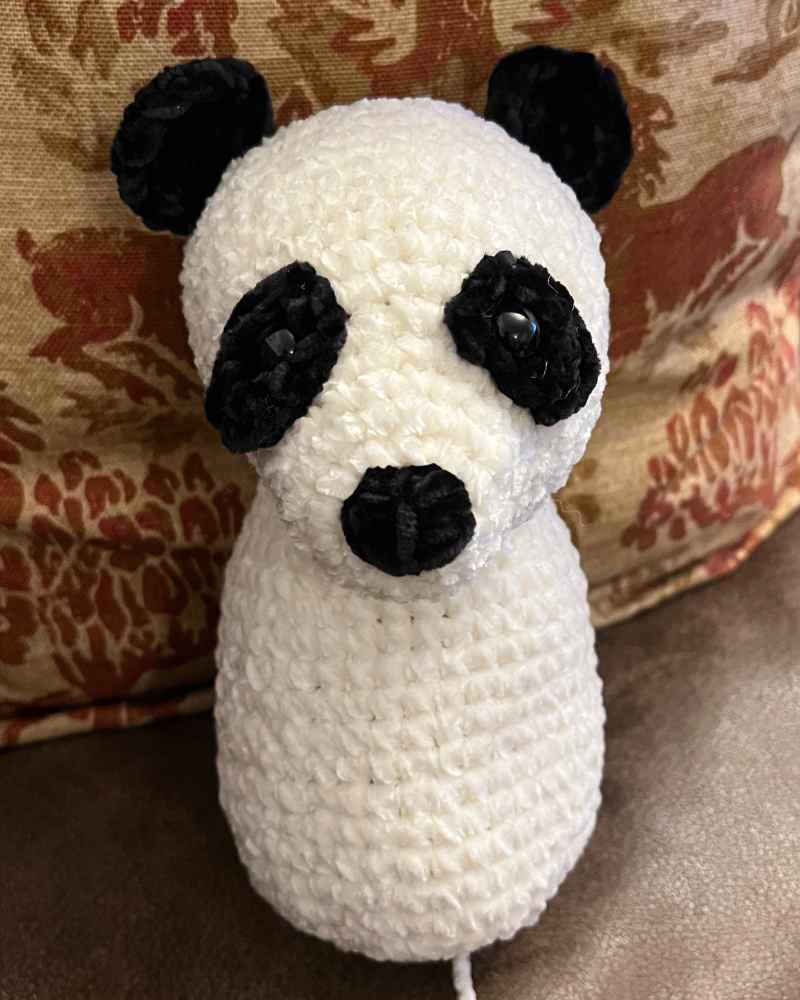
Fill with toy stuffing, so that the body is firm but the stitches aren’t stretched.
Round 27
sc2tog to close, and weave the yarn end back into the body to hide it.
Panda Arms
Panda arms and legs are all black, and you’ll be swapping over to the black chenille yarn again for this section. Still using your 5mm crochet hook.
Round 1
Make a magic circle of six stitches (6)
Round 2
2sc x 6 (12)
Round 3 – 5
1sc x 12
Round 6
Sc2tog (6)
Round 7
2sc x 6 (12)
Round 8 – 18
1sc x 12 (12)
Fill with toy stuffing and set to one side for sewing later.
Panda Legs

The panda’s crochet legs will be a little bigger at the feet, but otherwise very similar to the arms. You’ll want to use your 5mm crochet hook and black yarn.
Round 1
Make a magic circle of six stitches (6)
Round 2
2sc x 6 (12)
Round 3
(1sc, 2sc) x 6 (18)
Round 4 – 5
1sc x 18 (18)
Round 6
(1sc, sc2tog) x 6 (12)
Round 7
sc2tog x 6 (6)
Round 8
2sc x 6 (12)
Round 9 – 18
1sc x 12 (12)
Fill with toy stuffing and set to one side for sewing.
Sewing Your Amigurumi Panda Together
To join your amigurumi panda toy together, lay out all of the pieces in front of you. Attach a long train of yarn to your steel yarn needle. I begin with the ears. Make sure they are symmetrical by counting rows up from the inner corners of the eye patches. Weave in and out with your yarn needle to firmly secure them in place.
The nose will be sewn onto the upper part of the original magic circle for the face. Be gentle when weaving the chenille yarn in and out, as it can fray. Fortunately because it’s wide it’s also very forgiving when you are attaching one piece to another, and instantly hides any slightly botched stitches!
The limbs will need to be tacked in place with a couple of stitches before you sew them on tightly, so that you can make sure you are happy with their positions. Then weave the needle in and out through the limb and the body to attach them. Make sure you keep the stitches underneath the limb as much as you can, so they don’t show up against the white chenille yarn of the body.
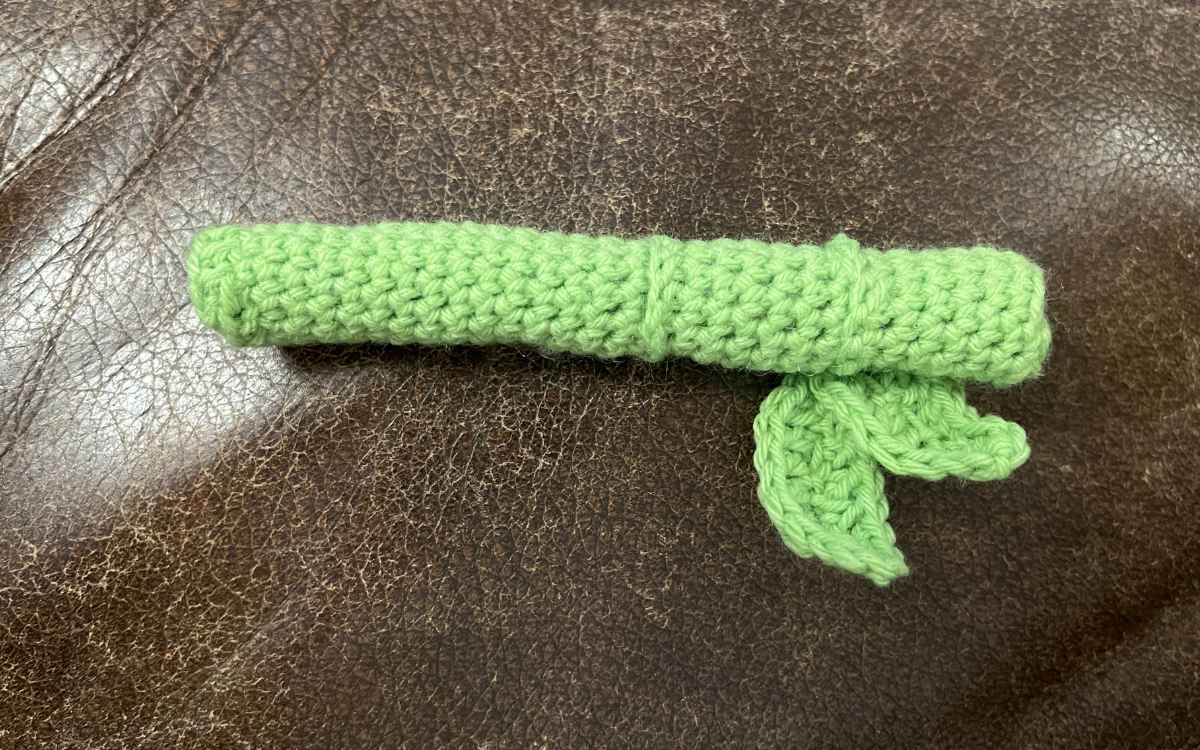
How To Crochet Bamboo For Your Panda
You don’t need to make this part, but I recommend that you do because it adds a little something to the amigurumi panda’s character. Especially because we’re going to use quite a different type of yarn.
The bamboo is produced using Sirdar Snuggly’s cotton blend DK yarn in hide-out green, but any similar bright green DK yarn will be fine. You’ll need a 4mm crochet hook for this section.
Round 1
Make a magic circle of six stitches (6)
Round 2
2sc x 6 (12)
Round 3
1sc x 12 in the Back Loop Only
Round 4 – 23
1sc x 12
Round 24
1sc in the Front Loop Only (12)
Round 25
sc2tog to close. Sew the thread of the yarn back into the bamboo cane.
Giving the Bamboo Texture
Add the natural ridges of the bamboo by surface crocheting around the cane at a couple of points.
Crocheted bamboo leaves
Make a chain of ten stitches.
Skipping the first stitch, make the following into the chain:
1sc x 3, 1dc x 3, 1sc x 2. Slip stitch into the final stitch, and move onto the other side of the chain.
Slip stitch into the first stitch then repeat the pattern:
1sc x 2, 1dc x 3, 1sc x 3.
Make two of these leaves, by repeating the pattern above as a continued chain from your last stitch.
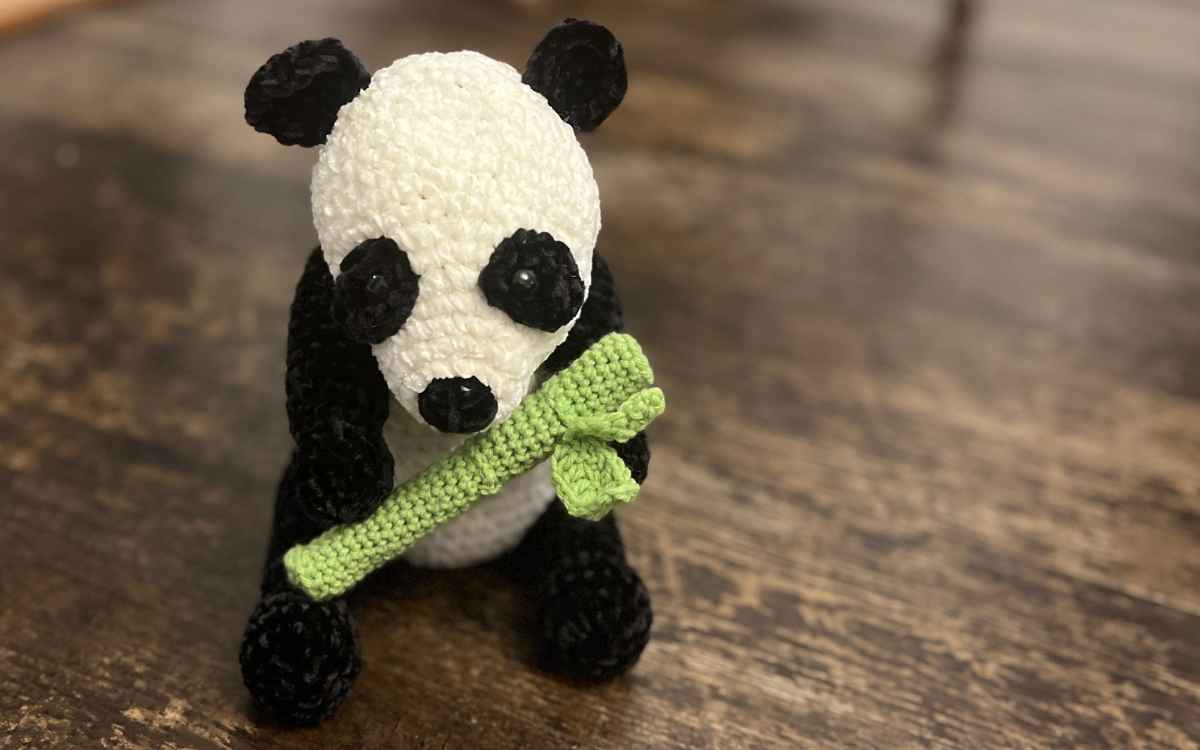
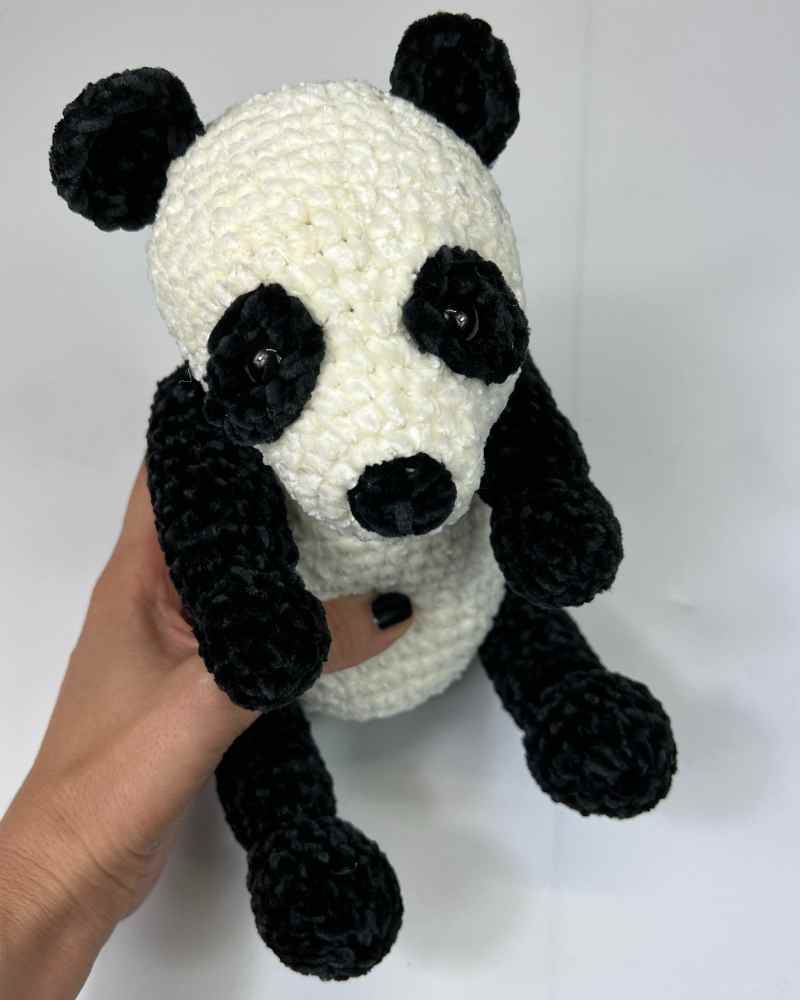
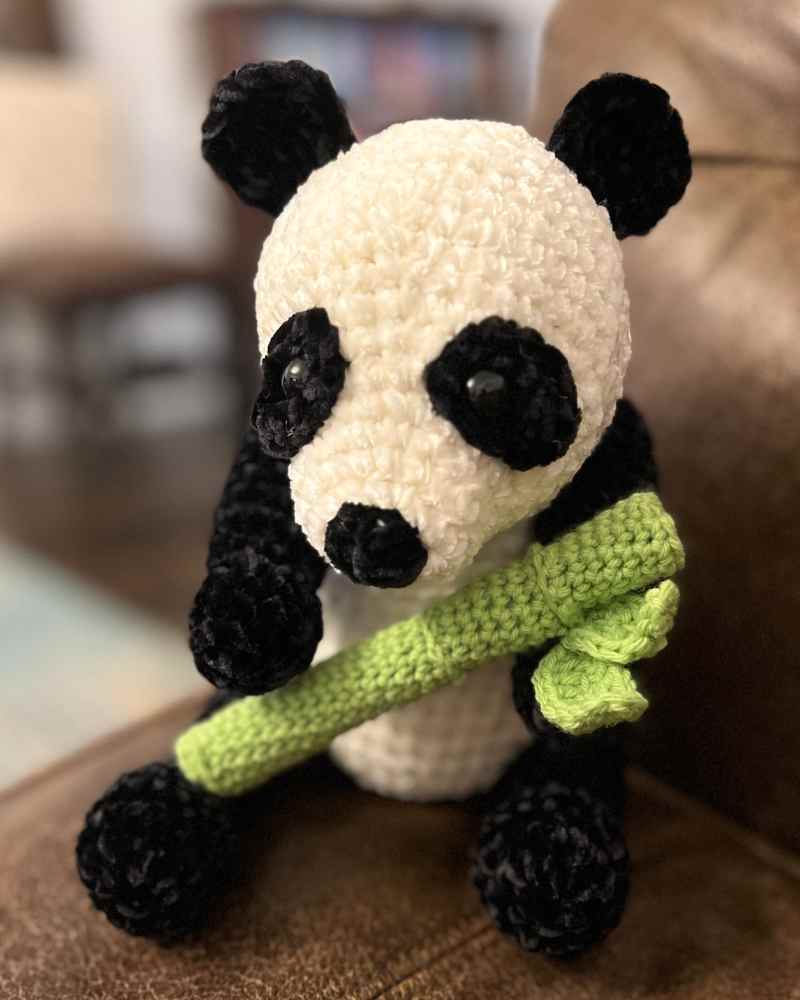
My Chenille Crochet Panda Pattern
This panda is very much a project of two halves. Although obviously one is a much smaller part in terms of size and time taken. I like the juxtaposition of the cotton blend tight yarn and the soft and floaty chenille yarn.
I can’t wait to hear what you think! Join me in our friendly Facebook group, or head over to Ravelry to share pictures of your adorable panda stuffies!
Happy Crocheting!
Lucy Kate, x
Tus are perfectin every stitch. I like your style thank you for sharing
Every single part of the body was exactly written. I would’ve love having more instructions putting all together, this was needed in detail. Like the head, how to attach it to the body. Not all of us are expert in amigurumi. Thank you for sharing
Hi Dyane, I have a video tutorial on sewing the sections together that you might find helpful: https://youtu.be/s6KsnSWmZM0?si=5eiYC6TDQM3fn5_V
This pattern is absolutely adorable!
I make small stuffed animals mostly for charity, but occasionally I sell a few. May I sell items made from this pattern?
Thank you.
Hi Roberta, I’m so pleased to hear you like it. You’re very welcome to use the pattern to make toys to sell, and it would be lovely if you could give us a link or note the name of the pattern designer when you do. Lucy Kate, x